A salad to dress and impress

I have come to realize a couple things regarding a group get together around here…

For one thing pot lucks are so popular. Maybe it’s because they can make entertaining easier and promote a warm feeling of collaboration. I don’t remember many pot luck meals growing up in Mexico. It was generally assumed that the host was in charge of the whole meal and guests arrived with a box of chocolates, a bunch of flowers, or maybe a bottle of wine or tequila too. So that pot luck pitching in element, has been such a nice surprise.

Secondly, no potluck seems to be complete without a salad, which seems to represent the wholeness of a meal and that higher degree of healthfulness.  They aren’t always that fat-free. But in any case, they help reduce the guilt we all may feel after indulging in a couple of servings of whatever decadent dish may happen to be there too.Now I just can’t remember having a salad growing up, come what may, in every gathering either. There were vegetable sides, but not always salads. When there were, they either had a welcome exotic twist,  or a to die for “secret” house vinaigrette. And yes! The host would spell out the “secret” with any given opportunity.

As much as pot lucks are based on great principles, they can be damaged if participants think that whatever they bring works out well, just because they are bringing “something.” But here’s the thing, you are not helping much if the main dish is an Indian curry and the salad you walk in with has a creamy, garlicky and heavily parmesanned dressing.

Two ideas come to mind to try make that next pot luck a success. One, someone can be in charge of informing everyone of what others are planning to bring with a bit of detail. If that seems like a hassle, then pick a theme. Just to make sure there are no guns and roses on the table. Another idea, goes to the salad bearer. Instead of a premixed salad bag splashed with a random bottled vinaigrette, why not make a flavorful, exotic and wholesome salad? This will pump up the quality of the meal, make the health-minded happier and give the salad maker a ton more satisfaction.

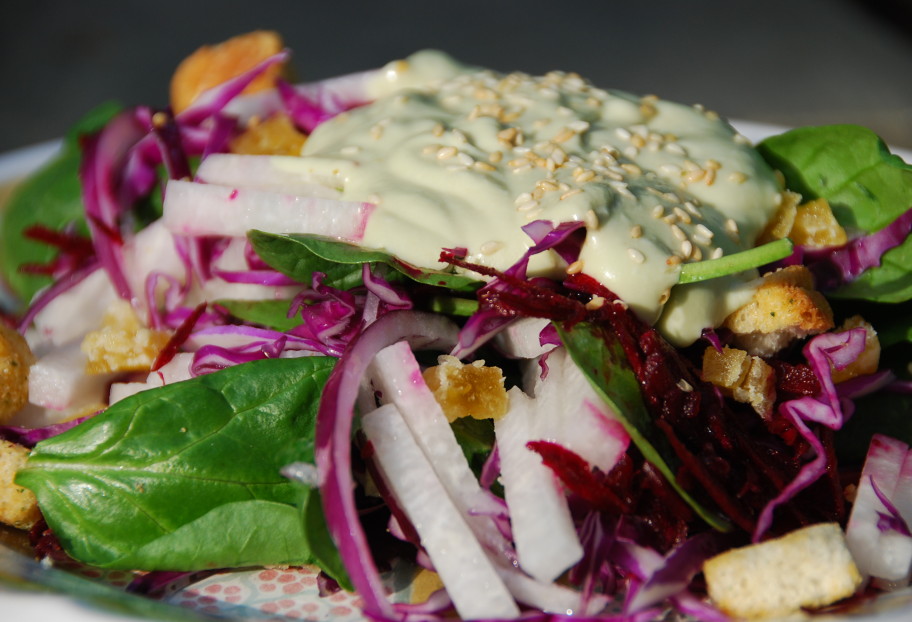
Here, let me give you a salad that you can brag about and then happily devour. One of the most popular salads I have shared in class, it has also prompted a next day email to ask for the recipe whenever we have served it to friends at home. If you bring it to your next pot luck, it will make that table where you set it on, wish it had a mouth to eat it all up.

The original recipe comes from Marí­a Dolores Torres Izabal, one of the leading ladies of the Mexican culinary world and a woman I admire so. As the years have passed, I have adapted it.

jicama

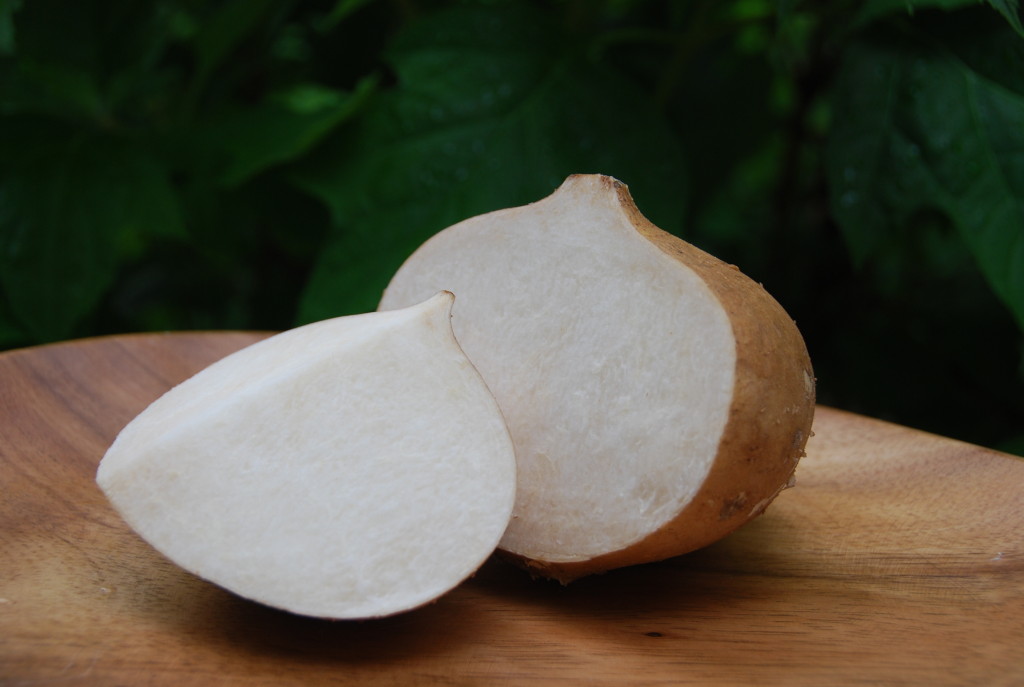
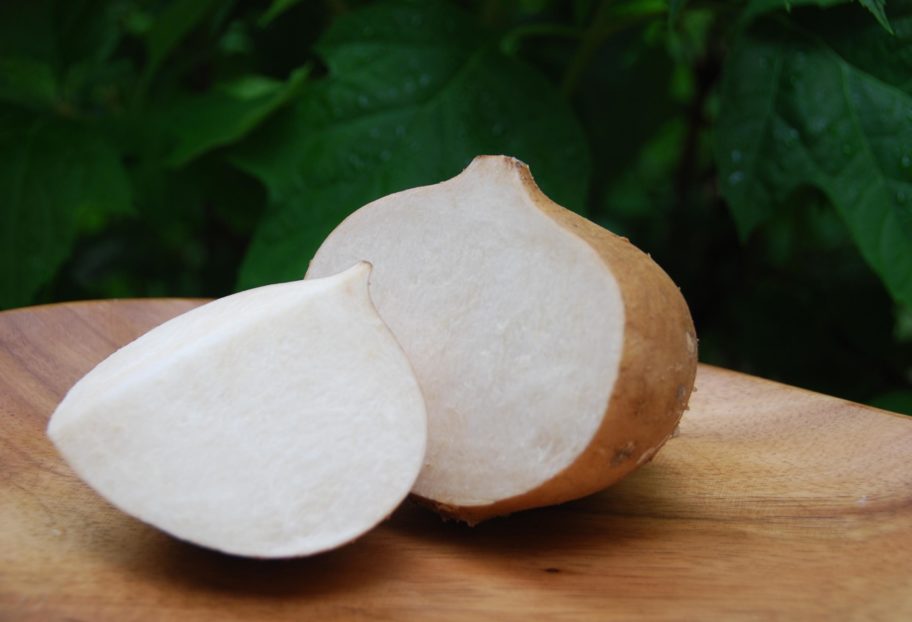
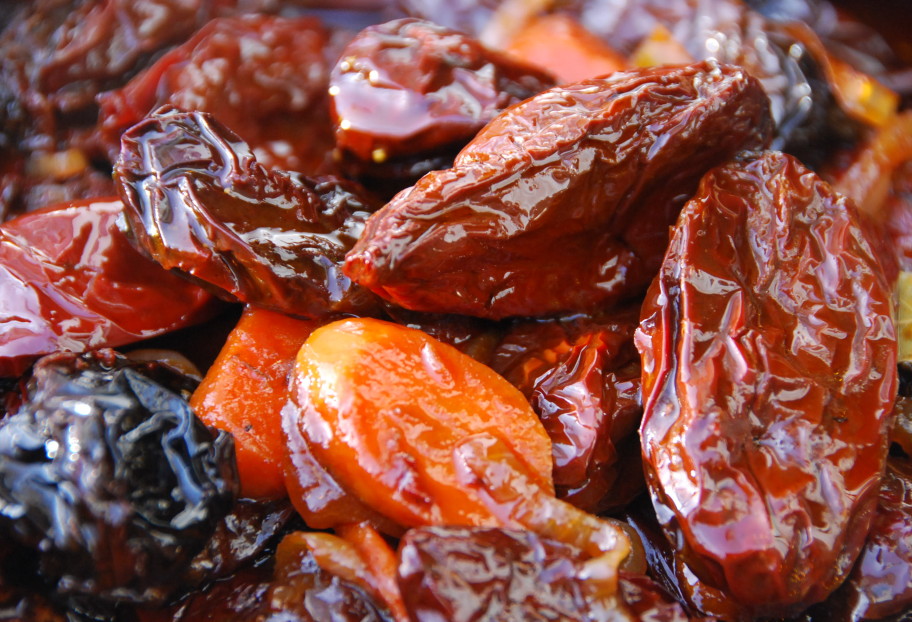
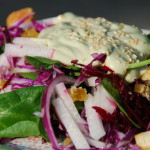
Just the combination of ingredients is exciting enough. It has the depth of the spinach, the tanginess and strong color of the raw beets, the crispness of the typically ignored cabbage, the sharpness of the red onion, the sweetness and chewiness of the dried pineapple or acitrón, and the wonderful crunch, and clean and fresh feel of the jí­camas.

I found the freshest jí­camas today, as you can see in the picture above…though the weather didn’t help much for a good picture (I need a lot more help than a sunny day for that…)

This mix of ingredients is first lightly covered in a light oil and vinegar dressing, just to get ready for a luxurious embrace from the creamy Mexican avocado sauce. Now add the flavor of toasted sesame seeds and the satisfying bite you get out of the croutons…. Just can’t go wrong.

Oh… and it is practical too, since everything can be prepped at least a day ahead, refrigerated and assembled before serving.

rosura salad
Print Recipe
4.50 from 2 votes

Rosura Salad

This award winning recipe, adapted from caterer Marí­a Dolores Torres Izabal is festive and colorful. You can prepare all the ingredients ahead of time and assemble right before serving.
Prep Time45 minutes
Cook Time0 minutes
Total Time45 minutes
Course: Salad
Cuisine: Mexican
Keyword: Avocado, beets, Jicama, red cabbage, Rosura, salad, Spinach, vinaigrette
Servings: 12 servings
Author: Pati Jinich

Ingredients

Vinaigrette:

  • 1/4 cup tarragon vinegar
  • 1 garlic clove pressed or finely chopped
  • 2 tablespoons finely chopped white onion
  • 1 tablespoon kosher or sea salt
  • 1 teaspoon sugar
  • 1/4 cup olive oil
  • 1/4 cup vegetable oil

Avocado dressing:

  • 1 cup milk
  • 1 garlic clove
  • 2 tablespoons fresh lime juice
  • 1 cup Mexican crema
  • 2 ripe avocados
  • 1 tablespoon kosher or sea salt or to taste
  • 1 tablespoon finely chopped chives

To serve:

  • 5 cups (or about 1 pound) thinly sliced red cabbage
  • 3 cups peeled and shredded raw beets from about 2 beets
  • 5 cups (or about 8 ounces) spinach rinsed and thinly sliced
  • 5 cups jícama peeled and cut into small sticks (from about 1 jícama)
  • 1/4 of a white onion thinly sliced
  • 3 ounces candied pineapple or other candied fruit
  • 1 cup croutons
  • 1/2 cup lightly toasted sesame seeds

Instructions

For the vinaigrette:

  • Add the vinegar, garlic, chopped onion, salt, and sugar to a small bowl, then whisk in the oils to emulsify.

For the avocado dressing:

  • Place milk and garlic in a blender and puree. Add the lime juice, crema, avocados and salt to taste and blend until smooth. Pour avocado dressing in a bowl and stir in the chives. 

To serve:

  • Combine the cabbage, beets, spinach, jícama, onion and dried pineapple or dried fruit in a salad bowl. 
  • Lightly dress the salad with some of the vinaigrette. Place the salad on the table and leave the avocado dressing, croutons and toasted sesame seeds on the side for people to add as they please.  

Notes

Adapted from Marí­a Dolores Torres Izabal

Jí­cama

Jí­camas are one of the many Mexican ingredients that luckily, have become readily available outside of the country. Also known as Mexican yams or turnips, they are also a root vegetable. But they are far from the latter in flavor, texture or cooking uses.

They are mostly (and as far as I know also successfully) eaten raw. No need to try to cook them, for many of the qualities they are loved for would be lost. They have a similar taste and crunch as the water chestnuts, but in my view, jí­camas are more refreshing, crispy, sweet and watery.

Their size varies, and that has little to do with how good they are. You can find very cute baby jí­camas in Mexico, but I haven’t seen them here. From the outside they look like a coconut once the hard green cover has been removed. Their light brown peel is very fibrous and should be removed before eating. Be sure to peel it well or a very thin white layer that is also fibrous and uncomfortable to eat remains there. Inside they are white and appear to be moist, given how watery they are.

In Mexico they are an incredibly popular snack, which is very convenient since they are low fat, filled with proteins, filling and easy to digest. They are eaten by themselves or combined with other vegetables or fruits, drizzled with fresh lime juice, salt and dried ground chile, such as Piquí­n, or a chile sauce, such as Bufalo or Valentina, to name a few. They are also a favorite ingredient for salads. Lately, when we have visited Mexico, I have seen sophisticated twists such as vegetarian versions of enchiladas and tacos, in which they are sliced incredibly thin and used as a wrap.

When you go look for Jí­camas, choose those hard to the touch and with no signs of moisture on their peel. Once you bring them home, refrigerate them until ready to use. But don’t let many days go by or they will age and become mushy and acquire an unappealing flavor. You know they have passed their time if once you peel and slice them, instead of white, the flesh has become light brown. After they are peeled and sliced, keep them covered in the refrigerator or they will dry considerably.

Tostada Buzz: To infinity, and beyond!

I am so surprised tostadas haven’t become wildly popular in the US. Here are some reasons for my surprise…

They can be assembled in a couple minutes, as ingredients can be prepared beforehand or store-bought. They can be eaten anytime of day, depending on what you layer on them. They are a wholesome one stop meal, for proteins, vegetables and carbohydrates happily mingle in there. They are accommodating, you can decide how much to add of each topping. They are forgiving, choices can vary from one tostada to the next. Moreover, they are fun to prepare, eat and share.

In a sense, they are the perfect dish for casual entertaining. So much of Mexican food just lends itself to being in a Fiesta mood.

What can you layer on a tostada? Well, almost anything! There are regional specialties, traditional favorites, modern twists and family staples. Yet, after the hundreds of variations there is a lot of room to play and create your own. But for a memorable tostada, you need to know some simple basics.

First of all, start with a good tostada. A tostada is a corn tortilla that is either toasted (that is what the word tostada translates to in English) or deep fried until golden and crisp.

Now, you can go as hands on as you want. You can make your own tortillas or buy the already made tortillas and make your own tostadas. But there are pretty good ready to eat tostadas at the stores. If that’s the way you want to go, try a couple brands to see which you like best. They do taste different. Once you have the tostadas, you already have a filling, crunchy and sturdy base for your creation.

The most common tostadas add a layer of smooth and tasty refried beans, home made or store bought. From there, you can go many ways.

My sister Karen likes to host tostada parties. She places a basket with tostadas, a bowl of refried beans and different hearty toppings (which shouldn’t be too saucy, just nice and moist, as tostadas are somewhat flat), such as chicken tinga and shredded beef in a chile sauce. She plates fresh garnishes, like Mexican avocado, tomatoes, lettuce, onion, cream and crumbled cheese. Her guests just go around the table adding whatever they feel like on top.

I will leave you with the ones I make most often at home. My kids are happy adding crumbled cheese and Mexican cream on top of the refried beans. I am more satisfied throwing in some shredded chicken, tomato, lettuce, ripe avocado and a salsa verde, made with tomatillos, to drizzle on top.

Don’t let any version stop you though. You may start with the tostadas and the refried beans. From there… it is up to your imagination. It can go to infinity, and beyond.

Print Recipe
5 from 1 vote

Basic Tostadas

I am so surprised tostadas haven’t become wildly popular in the US. Here are some reasons for my surprise…They can be assembled in a couple minutes, as ingredients can be prepared beforehand or store-bought. They can be eaten anytime of day, depending on what you layer on them. They are a wholesome one stop meal, for proteins, vegetables and carbohydrates happily mingle in there. They are accommodating, you can decide how much to add of each topping. They are forgiving, choices can vary from one tostada to the next. Moreover, they are fun to prepare, eat and share.
Prep Time5 minutes
Cook Time5 minutes
Course: Antojos
Cuisine: Mexican
Keyword: Antojo, Avocado, beans, chicken, corn tortillas, cotija, mexican crema, pati's mexican table, queso fresco, Recipe, refried beans, salsa verde, Tomatoes, tortilla
Servings: 12 tostadas
Author: Pati Jinich

Ingredients

  • 12 corn tostadas
  • 2 cups refried beans warmed up
  • 2 cups shredded chicken
  • 1 cup finely sliced iceberg or romaine lettuce
  • 1 ripe Mexican avocado pitted, peeled and sliced
  • 1 cup tomato sliced
  • 1/2 cup Mexican or Latin style cream
  • 1 cup green tomatillo salsa or your salsa of choice
  • 1 cup Cotija, Fresco or Farmers Cheese crumbled

Instructions

  • Place the tostadas on a large platter and all of the toppings and garnishes in separate bowls.
  • For a complete basic tostada: Layer a couple tablespoons of refried beans on the tostada. Spread a couple tablespoons of shredded chicken, lettuce, and one or two slices each of avocado and tomato. Top it all with a tablespoon or so of crumbled cheese and cream. Drizzle some green salsa, if you wish, to your liking.

Notes

Tostadas

Tostadas and Chips: Make them at Home

Tostadas and chips are very versatile ingredients to have in the kitchen. If you don’t want to make them at home, you can buy good quality already made tostadas and chips in the stores these days.

You can make your own tostadas and chips with homemade corn tortillas or store bought corn tortillas. In either case, spread the tortillas outside of the refrigerator, in your counter, baking sheet or tray for a half hour and up to a couple hours, so they will dry out a bit before baking, toasting or frying. This helps achieve a nicer crispness as they bake, toast or fry.

If you are going to make chips, cut them into 6 triangles before letting them dry.

TOSTADAS
There a couple options:

Fry: Add enough corn, safflower or vegetable oil to a skillet to have about 1/2″ and place over medium heat for about 4 to 6 minutes. Once the oil is hot but not smoking, fry each tortilla for about 45 seconds to 1 minute per side until it achieves a nice golden tanned color (not overwhelmingly brown or it will taste bitter) and crisp texture. To drain, place vertically on a tall metal strainer or lay flat on paper towels.

Toast or Bake: Either let the tortillas toast over a hot comal or dry skillet over medium heat, turning occasionally until they toast and crisp; or place them on a baking sheet in a 350 degree oven for about 25 to 30 minutes, turning them once halfway through, until tanned and crisp.

CHIPS
Different from tostadas, chips typically have a nice sprinkling of kosher or sea salt.

Once you cut the tortillas into triangles and let them dry, you have a couple options as well. They do taste very different, so try and see which method you like best:

Fry: Add enough corn, safflower or vegetable oil to a skillet to have about 1/2 inch and place over medium high heat for about 4 to 6 minutes. Once the oil is hot but not smoking, add enough tortilla triangles (depending on how large your skillet is) to have them in a single layer. It doesn’t matter if some triangles get cozy with others, but you don’t want to add so many that there is more than a cozy single layer.

Let them fry for about 45 seconds to 1 minute on one side, before flipping them over. Let them fry and crisp on the other side for another 30 seconds to 1 minute or until they have achieved a nice golden tanned color (but not overly browned) and are crispy. Remove them from oil and place them in a baking sheet covered with paper towels. Some cooks like to drain them in large and tall metal colanders. Sprinkle with salt to taste.

Toast or Bake: Spray or brush a very light coat of vegetable or corn oil on the tortilla triangles. Either toast over a hot comal or dry skillet over medium heat, turning occasionally until they toast and crisp anywhere from 10 to 15 minutes, flipping every once in a while; or place them on a baking sheet in a 375 degree oven turning them once along the way for about 15 minutes per side, or until tanned and crisp. Remove from oven, sprinkle with salt and let them cool.

Juju’s Chocolate Birthday Cake

“Bandido!” My late grandfather would scream, with his wide smile and the most endearing eyes, to my youngest son, if he were here to see how Julian messes up the kitchen.

As soon as a thought of cooking appears in my head, he drags a chair, climbs on top, asks  what are WE going to make, and without waiting for an answer announces that it is “yo, yo, YO…,” who will cook and experiment. I shall be of assistance.

Needless to say, it takes much longer than needed and the kitchen looks messier than my husband likes to see it. But if you ask me, it is worth every extra second and extra spoonful of crumbs on the floor.

Well then, what cake to make for his birthday? Of course chocolate! His brothers tell me with a tone of disbelief. However, I know it has to be spongy, fluffy, gooey, sticky, moist, extra messy, sweet and truly decadent to be worthy of the three candles in its middle.

Since I will count with not only one, but probably three, enthusiastic sous chefs, the cake should have a fun and simple preparation process.

After playing around with a couple ideas, a cross between my oldest sons’ favorite camp cake and what I remember from my growing up birthday cakes from Sanborns (a Mexican store famous for making incredible cakes) is what creates: Juju’s birthday cake!

Thank the heavens and the seas for the wonderful surprises one can encounter while playing in the kitchen. It just never stops! This one is definitely worth a try.

jujus birthday cake main
Print Recipe
4.50 from 4 votes

Juju’s Birthday Cake

After playing around with a couple ideas, a cross between my oldest sons’ favorite camp cake and what I remember from my growing up birthday cakes from Sanborns (a Mexican store famous for making incredible cakes) is what creates: Juju’s birthday cake! Thank the heavens and the seas for the wonderful surprises one can encounter while playing in the kitchen. It just never stops! This one is definitely worth a try.
Prep Time15 minutes
Cook Time25 minutes
Course: Dessert
Cuisine: Mexican
Keyword: cake, Chocolate, Dessert, pati's mexican table, vanilla
Servings: 10 to 12 people
Author: Pati Jinich

Ingredients

For the cake:

  • 1 cup water
  • 2/3 cup cocoa
  • 1/2 cup unsalted butter
  • 2 cups all-purpose flour
  • 1 3/4 cups sugar
  • Pinch of salt
  • 1 teaspoon baking soda
  • 1 teaspoon baking powder
  • 1/2 cup sour cream
  • 2 large eggs preferably at room temperature

For the frosting:

  • 1/4 cup milk
  • 1 tablespoon vanilla
  • 1/2 cup cocoa
  • 1/2 cup unsalted butter
  • 2 cups confectioners' sugar
  • 1/4 cup sprinkles optional

Instructions

To prepare the cake:

  • Grease a 9x13-inch cake pan with butter. Cover the bottom of the pan with parchment paper. Preheat the oven to 350 degrees.
  • In a large pot, over medium heat, pour the water, stir in the cocoa and add the butter. Let it heat for a few minutes, stirring now and then, until it all dissolves. Remove the pot from the heat.
  • In another bowl, combine the flour, sugar, salt, baking soda and baking powder. In another, beat the eggs and combine them with the sour cream.
  • In turns, add a quarter of the flour mix and then a quarter of the sour cream mix at a time into the pot with the cocoa mixture; stir with a spatula, mixing all of the ingredients as you move along. Pour onto the greased cake pan and place in the oven for 25 to 30 minutes, or until a toothpick inserted in the center comes out barely moist but not wet.
  • Take the cake out of the oven and let it cool a bit while you prepare the frosting.

To prepare the frosting:

  • In a saucepan, over medium heat, pour in the milk and the vanilla. Stir in the cocoa and add the butter. Heat and stir until everything is all dissolved and combined. Remove from the heat and stir in the confectioners' sugar. Thoroughly mix with a spatula and set aside.

To assemble:

  • Run the tip of a knife around the edges of the cake. Turn the cake onto a platter and gently remove the parchment paper. Pour the still-warm frosting over the cake and gently spread it out with a spatula. If you wish, you may add sprinkles of your choice before the frosting hardens (NOTE: The cake is soft and moist the first couple days, then hardens like a brownie afterwards if left uncovered-- perfect for packing in school lunches).

Notes

Pastel de chocolate de Juju

Charring: How to Char Ingredients

One way to add a nice rustic feel to a dish is to char, or roast, a few of the ingredients. Charring concentrates and deepens the flavor of an ingredient and brings out a subtle sweetness.

It is one of the signature cooking techniques in Mexico where, traditionally, ingredients like chiles, onion, garlic, spices, herbs, tomatillos and tomatoes are charred on comales or directly over the flame. If you don’t have a comal, or don’t want to cook directly over the burner, you can just as easily char ingredients on a grill or in a skillet.

OR, the way I find to be the easiest and fastest: in a pan under the broiler in your oven. Put the ingredients on a large sheet pan leaving plenty of space between them so they roast, not steam, and broil until they are nicely browned on one side. Carefully flip and repeat on the other side.

You want the outside to darken until almost black, and the inside cooked and transformed, but not burnt.

Below are the specific techniques for a couple of the ingredients most often charred in Mexican recipes: tomatoes and garlic.

Charring tomatoes
Charring tomatoes, aside from concentrating and deepening their flavor, brings out their sweetness and juices.

To char or roast tomatoes, you can either place them directly on a grill,  or on an already hot comal or griddle over medium heat, for about 10 minutes, turning them around a couple times. However, for me the easiest method is to place them in a single layer in a baking sheet or shallow pan under the broiler for 7 to 10 minutes. Turn them once in the process.

You know tomatoes are ready once they are completely cooked through and mushy, their skin is charred, blistered and wrinkled, and juices have started to come out.

Charring Garlic
Place unpeeled and pricked cloves (so they don’t make popping sounds) on the already hot comal over medium heat. Turn form time to time until it is charred on the outside and soft but not burnt on the inside, about 6 minutes. You can also place under the broiler for 3 to 4 minutes.

Molcajete

The molcajete is a cooking tool that although not absolutely necessary this day in age, it does have its uses, benefits and looks. Mexico’s version of the mortar and pestle (the pestle being called tejolote) it has been used for thousands of years to pound, smash, grind and mix ingredients such as herbs, spices and chiles, create rubs, pastes and sauces.

It is traditionally made of basalt volcanic rock, which is very porous and rough and it makes it very heavy. There are however, newer versions of lighter material, that I am not so fond off. When new, there are many takes of how to “cure” them, so they can begin to be used. Some people grind white rice, while others grind peeled garlic cloves.  I like to do both. So just take either one or the other, or both, and grind them with the pestle. Then just wash with a soapy sponge and rinse under cold water.

Molcajetes stand on three short legs.

They are sometimes carved in the shape of an animal, most typically pigs, which can look friendly or quite scary.

piggy molcajete

A wonderful thing about molcajetes, is that since they are so porous they have a remarkable memory. They store within them, the essences, oils, smells and flavors of all that has been served or made in them. Maybe that’s why it is said that molcajetes season with time and use. Maybe that’s also why it is said that making a sauce or rub or paste in a molcajete makes it taste better…

While it is not an essential cooking tool in most homes, some people are adamant about their use for Mexican food, as it does make a difference in taste. Also, it is used as a serving dish for salsas and guacamoles both in homes and restaurants as well as hot sauces and dishes because it keeps food warm for a long time.

Tortillas: Make Corn Tortillas at Home

Yes, you can buy them already made at the store… but there are few things that can compare to the nurturing and filling sensation of homemade corn tortillas.

And the great thing is: We can buy the premade corn tortilla flour of extraordinary quality in the US these days. So you don’t have to nixtamalize the corn kernels (dry in the sun, cook and soak in hot water with lime, peel and grind to a paste) through a process of more than 36 hours to make your own fresh corn tortilla dough. Here is how you make them:

Print Recipe
4.80 from 5 votes

Corn Tortillas

Yes, you can buy them already made at the store… but there are few things that can compare to the nurturing and filling sensation of homemade corn tortillas.
Prep Time15 minutes
Cook Time10 minutes
Course: Antojos, Side Dish
Cuisine: Mexican
Keyword: corn tortillas, dough, masa, pati's mexican table, Recipe, tortilla
Servings: 10 to 12 tortillas
Author: Pati Jinich

Ingredients

  • 2 cups corn tortilla flour such as MASECA
  • 1 3/4 cup water or enough to achieve a play dough consistency dough! varies with climate
  • Pinch of salt optional

Instructions

  • Set a comal or ungreased dry skillet over medium heat, for at least 5 to 8 minutes, until thoroughly heated. (If your pan isn’t hot enough, the tortillas will stick.)

To make masa or dough:

  • Mix together the flour, salt, and water in a large mixing bowl and knead the masa in a circular motion. Do so for a couple minutes, until the dough feels smooth and has no lumps. If it feels too dry, add a bit more water. Masa dries out fast, so if you leave it unattended, cover it with a clean moist kitchen towel or cloth.

To make the tortillas:

  • Cut out 2 plastic circles from a thin plastic bag, like ones you get at grocery stores. (Don’t use plastic wrap.) Roll a piece of the masa in your palm into a ball about 1 1/2″ in diameter. Place one plastic circle on the bottom of the tortilla press and place the masa ball on top. Place the other plastic circle on top of the ball and press down the press to make a flat disk, jiggling the press a little as you get to the bottom (this makes a rounder tortilla). Open the press and check the tortilla for dryness and, if needed, add water to the remaining masa (the masa should be as soft and smooth as Play-Doh). Take the top plastic off, lift the bottom plastic with the tortilla in one hand and peel the tortilla from the plastic with the other hand.
  • Alternatively, you can place a ball between plastic sheets or parchment paper and roll the tortillas out with a rolling pin. They should be about 5″ in diameter and about 1/8″ thick.
  • Place the tortilla on the hot comal or skillet. Let it cook for at least 30 seconds (resist the urge to touch or adjust it). As soon as it can be flipped without sticking to the comal – it should be opaque on the side that it was cooking on. Flip with a spatula and cook for about a minute, until opaque and starting to freckle on the other side. If it is opaque but it has white-ish areas, you need to leave it a bit more, until those white-ish shadows become freckled with brown spots. Turn over once more, and now, after a couple seconds, tortilla should puff up like pita bread, if not all over tortilla, at least in an area of it. Let the tortilla cook still, for about 10 seconds, so that it cooks in between the area that puffed up.
  • If eaten that same day, tortillas may be kept wrapped in a clean kitchen towel or cloth. If not, wrap in a kitchen towel, inside a closed plastic bag and place in the refrigerator. They will keep for up to 3 days, afterwards they will turn too hard. Reheat in hot comal for 30 seconds or so on each side before eating. They can also be frozen and kept for months.

Chipotle chiles in adobo sauce

Chipotles in adobo sauce are one of my favorite Mexican ingredients. They are ready to be spooned on top or inside of almost anything: quesadillas, tacos, sandwiches, grilled meats… Yet, they are also a wonderful cooking ingredient to use for making a wide range of dishes, from soups to moles, from salsas to stews and even mashed potatoes.  Chipotles have truly unique layers of flavor that come together in a most wonderful way: smoky, sweet, deep, rich and pleasantly spicy.

Chipotle Chiles in Adobo 1

The chipotles in adobo are Jalapeño chiles that have been ripened to a deep red, dried, smoked and pickled in a combination of vinegar, spices and tomato puree.

Yes! If you want to make your own, follow my recipe. However, ready to buy chipotles in adobo sauce in cans and glass jars are a staple in Mexican pantries and stores have a wide array of brands to choose from, each with their own peculiar spin.  Should you opt for buying them (as most people do…), try a couple different brands, they do vary in flavor.