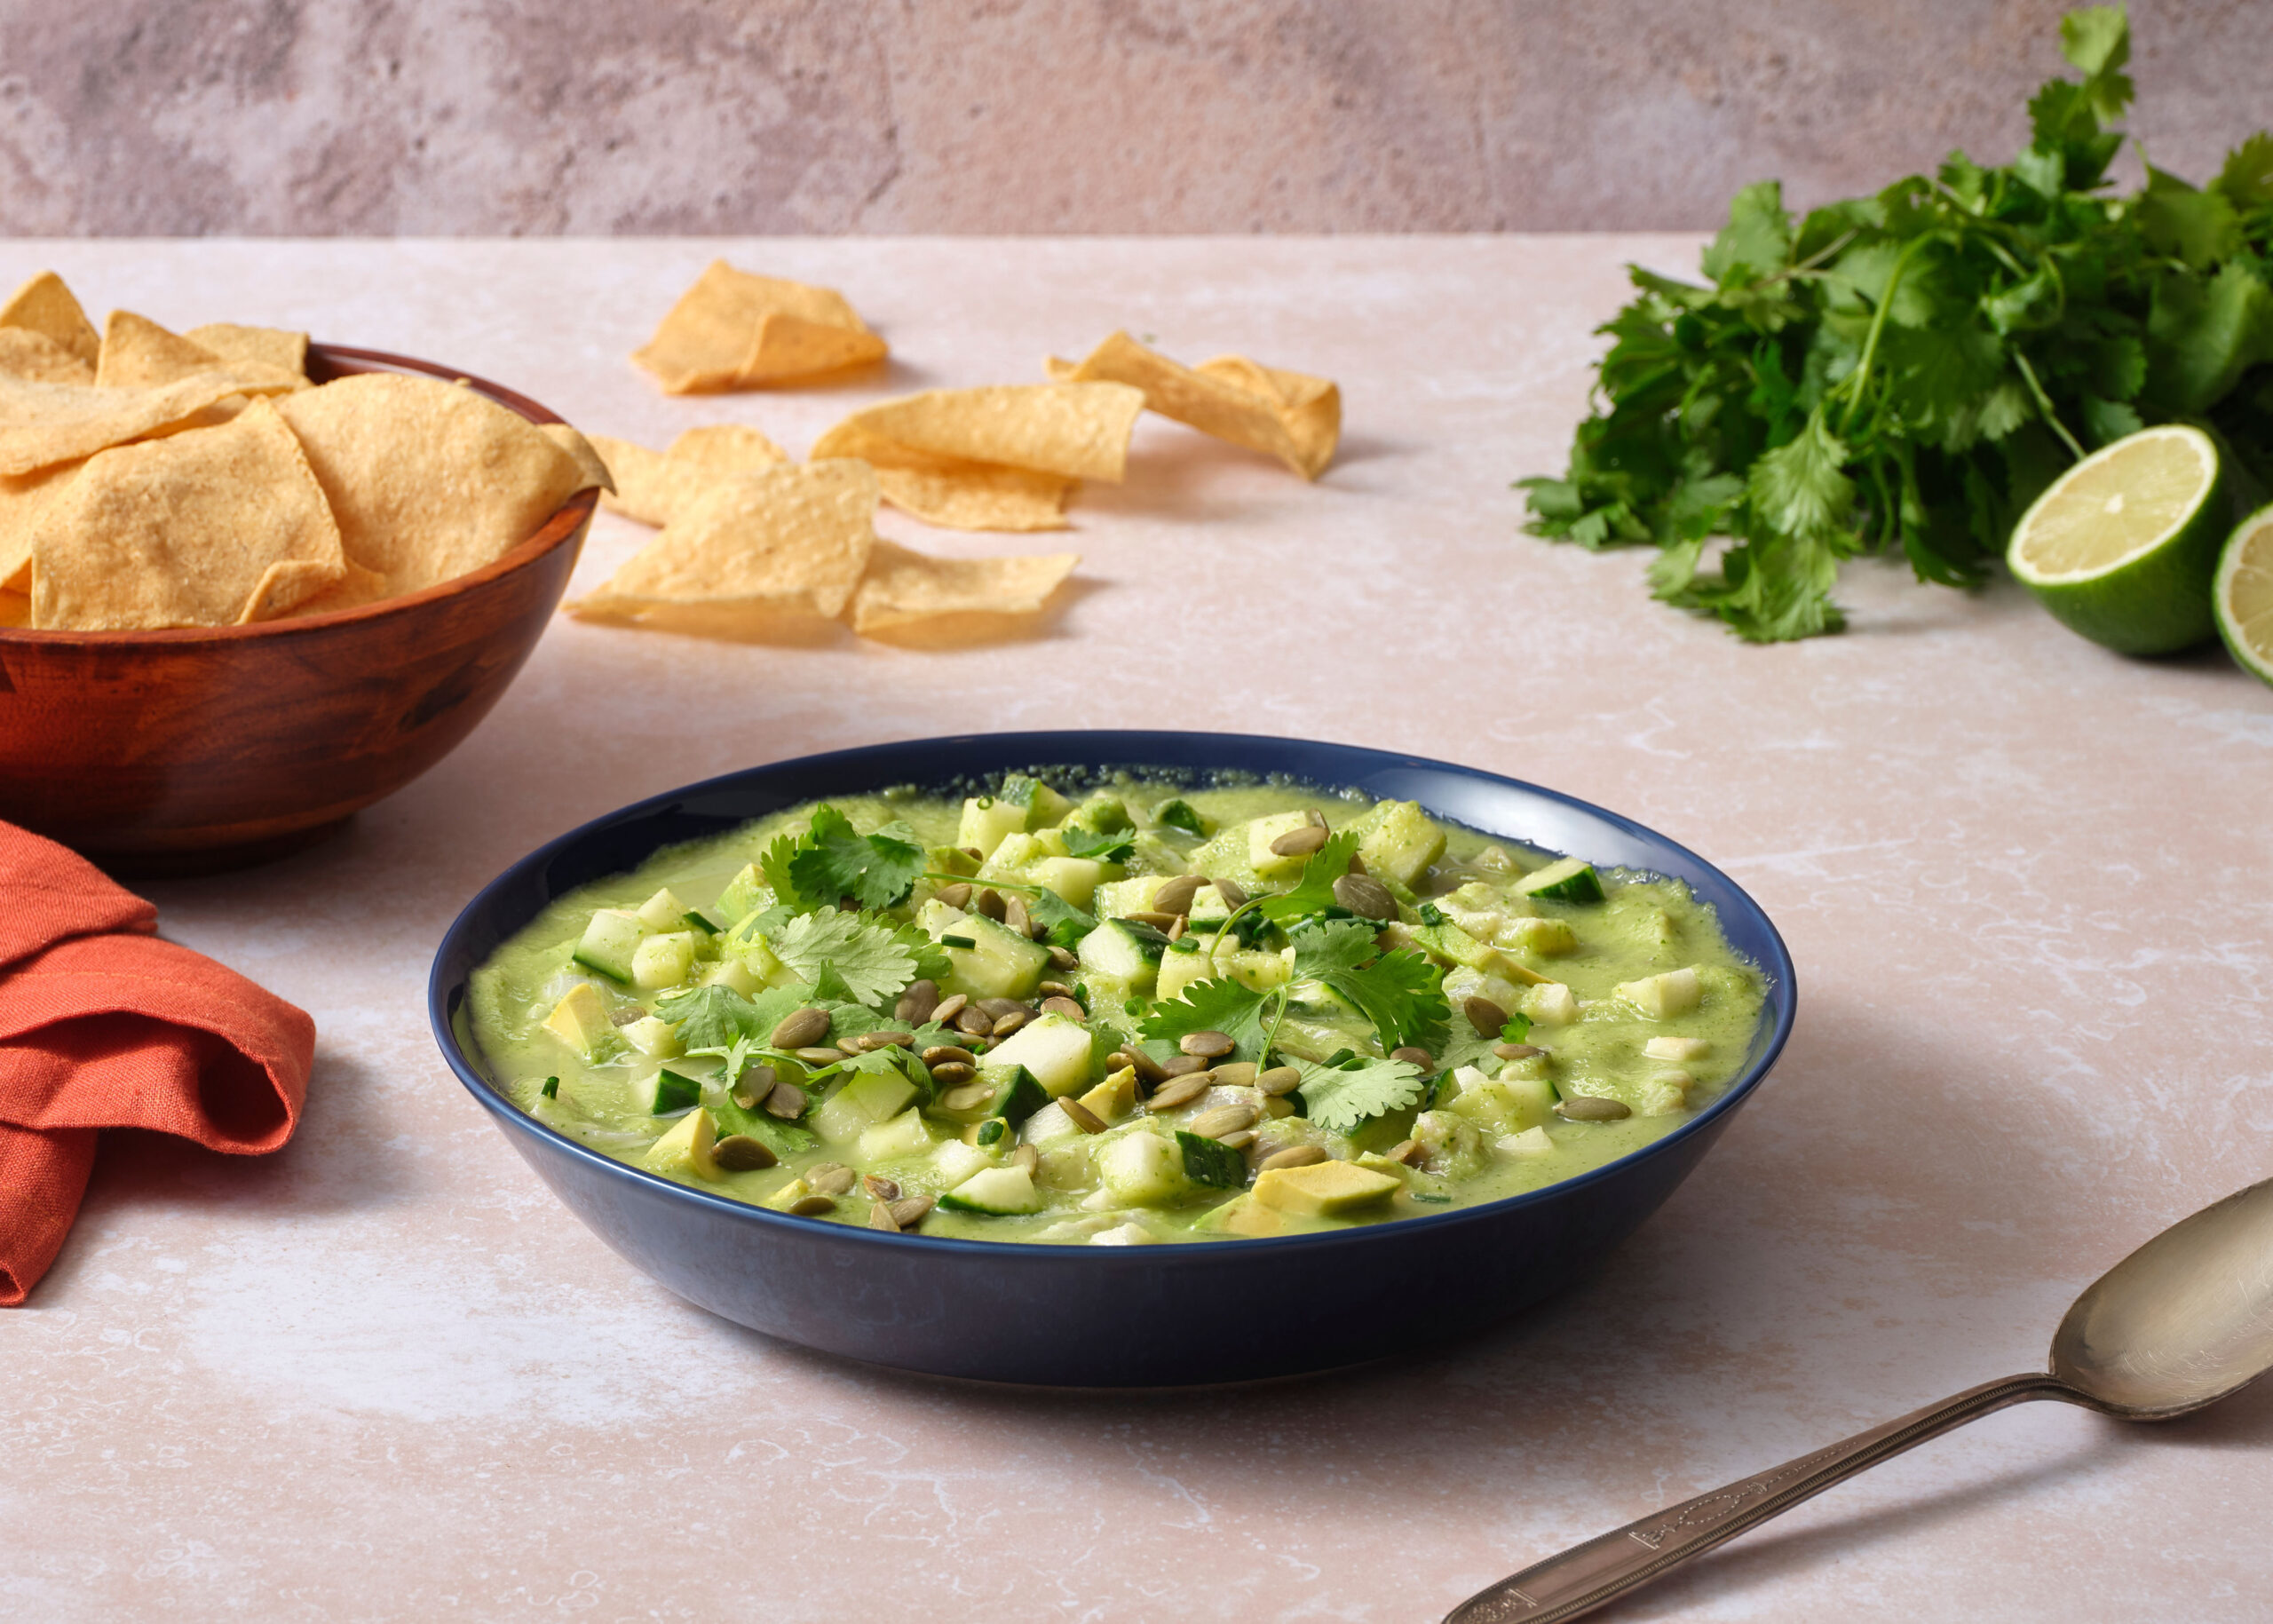
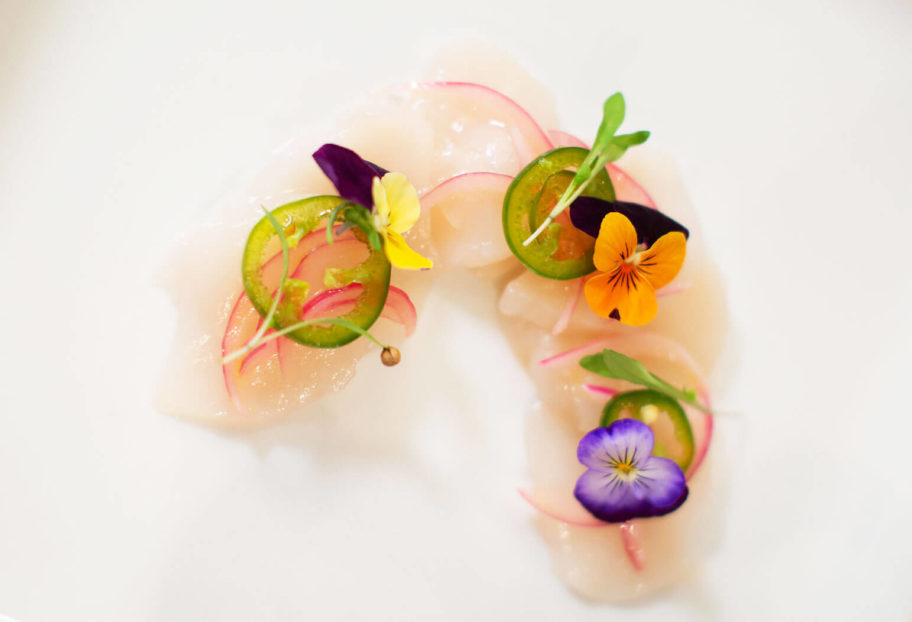
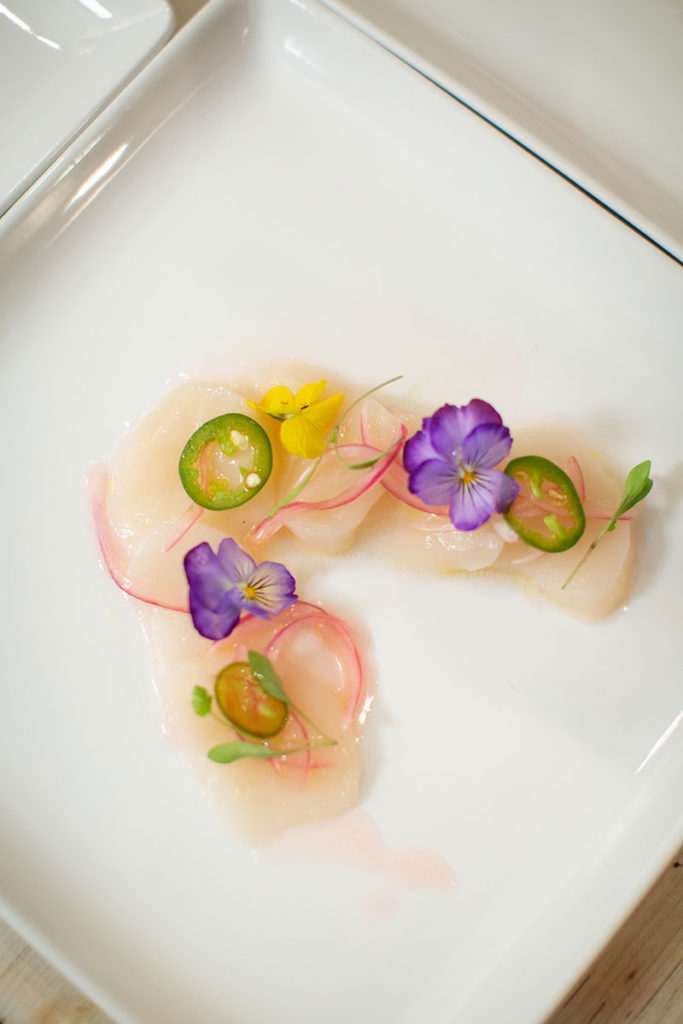
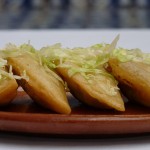
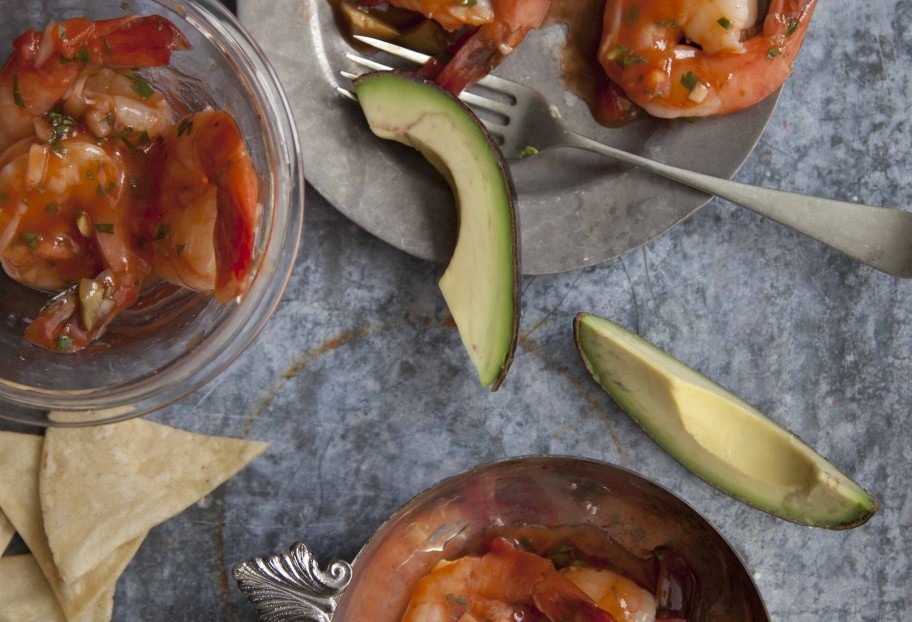
Appetizers

Green Ceviche

Green Ceviche
Print Recipe
4.60 from 5 votes

Green Ceviche

Green Ceviche recipe from Pati’s Mexican Table Season 12, Episode 9 “Pink”
Cook Time0 minutes
Course: Appetizer
Cuisine: Mexican
Keyword: Avocado, cucumber, fish
Servings: 4 servings
Author: Pati Jinich

Ingredients

For the sauce:

  • 1 habanero
  • 1/2 red onion quartered
  • 2 garlic cloves unpeeled
  • 1 1/2 cups bitter orange juice or sub for 1/2 cup each lime, lemon and orange juice
  • 1/4 cup olive oil
  • 1 teaspoon kosher or coarse sea salt or to taste
  • 1/2 cup cilantro leaves and upper part of stems chopped
  • 1 large cucumber peeled and seeded, coarsely chopped
  • 1 celery stalk coarsely chopped

For the ceviche:

  • 1 pound red snapper filet or mild fish like grouper, trout, flounder, sole or rockfish, cut into 1/2“ dice
  • 1 cup (about 1 large) cucumber finely diced and seeded
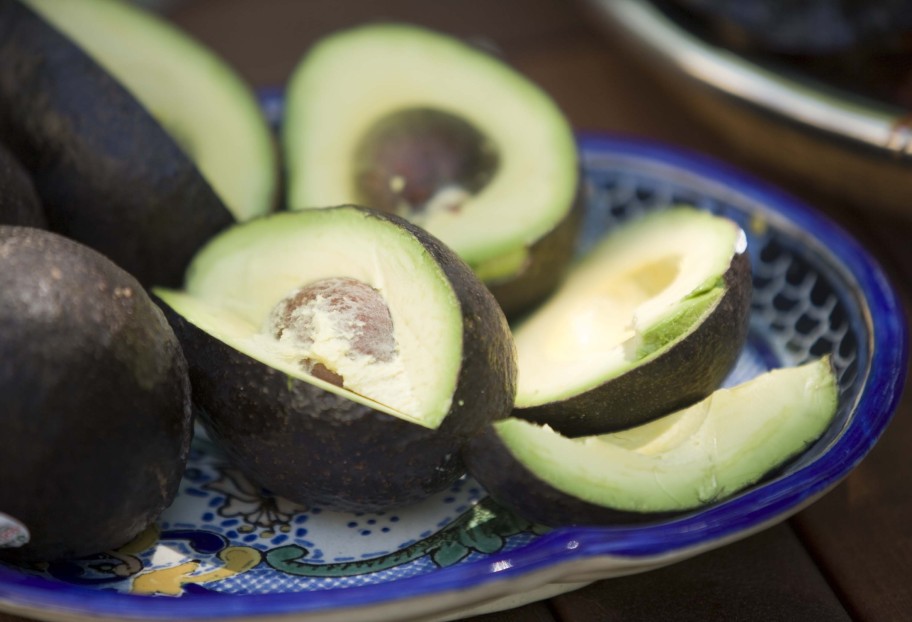
  • 1 cup (about 1 large) avocado finely diced
  • 1/2 cup peeled and finely diced green apple

For garnish:

  • 1/4 cup fresh chives
  • 1/4 cup cilantro leaves
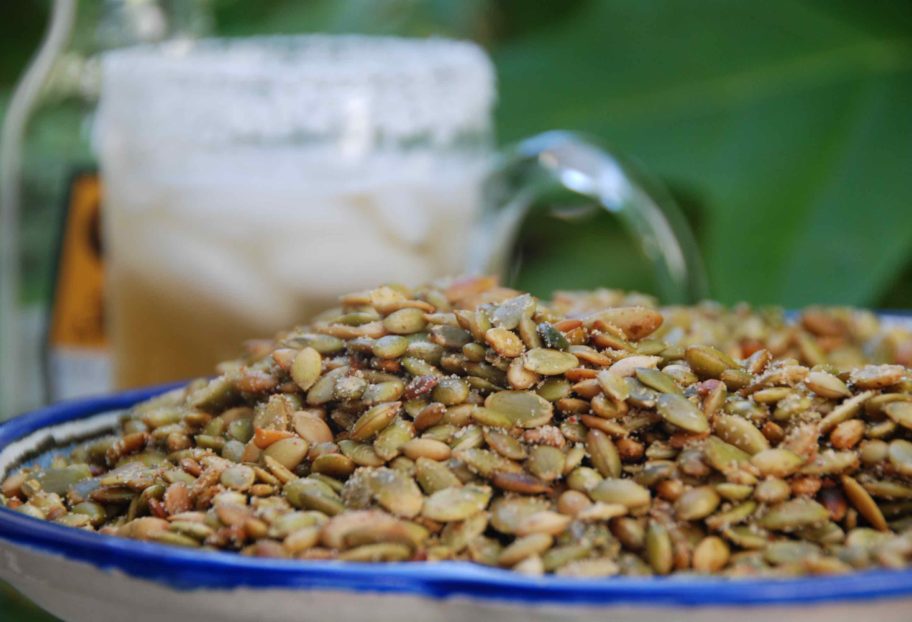
  • 1/2 cup raw shelled pepitas lightly toasted and coarsely chopped
  • Tortilla chips or tostadas to serve

Instructions

To make the sauce:

  • On a preheated comal set over medium heat, toast the habanero, onion and unpeeled garlic for about 6 to 8 minutes, or until charred on the outside and soft inside. Remove from the heat.
  • Peel the garlic cloves, stem the chile, and add to the jar of a blender along with the toasted onion, bitter orange juice, olive oil, salt, cilantro, cucumber and celery. Puree until completely smooth.

To make the ceviche:

  • Place fish in a medium bowl. Pour bitter orange sauce over it. Let it sit for at least 15 minutes outside the refrigerator, or up to 24 hours covered in the refrigerator. When ready to eat. Add the diced cucumber, avocado and apple. Garnish with chives, cilantro and pepitas. Eat with tostadas or tortilla chips.

Notes

Ceviche Verde

Jicama and Greens Salad with a Creamy Honey Citrus Vinaigrette

Jicama and Greens Salad with a Honey Citrus Vinaigrette
Print Recipe
5 from 2 votes

Jicama and Greens Salad with a Creamy Honey Citrus Vinaigrette

Jicama and Greens Salad with a Creamy Honey Citrus Vinaigrette recipe from Pati’s Mexican Table Season 12, Episode 6 “Yucatán Meats”
Cook Time0 minutes
Course: Salad, Side Dish
Cuisine: Mexican
Keyword: salad, Vegetarian
Servings: 4 to 5 servings
Author: Pati Jinich

Ingredients

For the vinaigrette:

  • 1 fresh xcatic, güero, or banana chile
  • 1 fresh habanero optional
  • 2 tablespoons lime juice
  • 4 tablespoons lemon juice
  • 2 tablespoons white distilled vinegar
  • 4 tablespoons olive oil
  • 1 tablespoon honey
  • 1 ripe avocado halved, pitted, chopped
  • 1 teaspoon kosher or coarse sea salt
  • 1/2 teaspoon freshly ground black pepper

For the salad:

  • 2 tender lettuces such as Boston and baby romaine, washed and torn into pieces (4 to 6 cups)
  • 1 jicama about 1 pound, peeled and cut into matchsticks (about 2 cups)
  • 1 grapefruit peeled and cut into supremes (about 1 cup)
  • 1 orange peeled and cut into supremes (about 1 cup)

Instructions

To make the vinaigrette:

  • On a preheated comal, skillet, or griddle set over medium heat, toast the güero chile and habanero, if using, for 6 to 8 minutes, flipping as needed, until skin is charred and chile is softened. Remove from the heat and remove stem and seeds, if desired.
  • In the jar of a blender, add the roasted chiles (making sure you add a piece of habanero at a time, to taste, for desired heat level), lime and lemon juices, vinegar, olive oil, honey, avocado, salt and pepper. Puree until completely smooth. Scrape into a bowl.

To assemble the salad:

  • In a salad bowl, add the lettuce, jicama, and half of the grapefruit and orange supremes. Toss with some of the dressing until completely covered but not soaked. Add the remaining grapefruit and orange supremes on top. Add more dressing as needed.

Notes

Ensalada de Jícama y Lechugas con Vinagreta de Cítricos y Miel

Pumpkin Seed, Roasted Tomato and Habanero Dip

Pumpkin Seed, Roasted Tomato and Habanero Dip
Print Recipe
4 from 4 votes

Pumpkin Seed, Roasted Tomato and Habanero Dip

Pumpkin Seed, Roasted Tomato and Habanero Dip recipe from Pati’s Mexican Table Season 12, Episode 8 “Maya Today”
Cook Time10 minutes
Course: Antojos, Appetizer, Dip, Salsa
Cuisine: Mexican
Keyword: habanero, pumpkin seeds, Tomato, Yucatán Peninsula
Servings: 1 2/3 cups
Author: Pati Jinich

Ingredients

  • 1 pound ripe Roma tomatoes
  • 1 fresh habanero
  • 2 ounces or 3/4 cup pumpkin seeds with their shells
  • 1 teaspoon kosher or coarse sea salt or to taste
  • 1/4 cup coarsely chopped cilantro leaves and top of the stems
  • 1/4 cup coarsely chopped fresh chives
  • Serve with tortilla chips or vegetable sticks such as raw zucchini, cucumber, carrots, jicama

Instructions

  • Preheat a comal, skillet, or griddle over medium heat. Once hot, add the tomatoes, habanero and pumpkin seeds. Toss and flip the pumpkin seeds as they toast, for a couple of minutes, just until they seem to puff up with a bit of air, about 2 to 3 minutes. They should be crunchy and taste toasty. Don’t let them brown too much or burn. Scrape them into a bowl and set aside.
  • Let the tomatoes and habanero continue to char and toast, for a total of about 8 minutes, flipping as needed, until completely softened and the skin is completely charred and blistered. Remove from the heat.
  • Using a food processor or spice or coffee grinder, grind the toasted pumpkin seeds with a teaspoon of salt until finely ground. If using the food processor, you can add the tomatoes, half of the habanero at a time, the cilantro and chives, and continue pulsing until everything is mashed together into a paste. Or, you can transfer the ground pumpkin seeds to a molcajete and mash the tomatoes and habaneros there, tasting as you go, then adding and mashing the cilantro and chives. Serve with tortilla chips or vegetable sticks.
  • Note: In west Yucatán they make it with cilantro, and in east Yucatán they make it with chives. Some people mix the two. Some people add the habanero raw, some roasted or charred.

Notes

Sikil Pak

Melted Cheese with Guajillo and Garlic Mushrooms

Print Recipe
3.60 from 5 votes

Melted Cheese with Guajillo and Garlic Mushrooms

This queso fundido with mushrooms has the craziest cheese pull in the middle and an irresistible crunchy, cheesy crust all around.
Cook Time30 minutes
Course: Dip, Snack
Cuisine: Mexican
Keyword: cheese, Guajillo, Mushroom, queso, Queso Fundido
Servings: 4 to 6 servings
Author: Pati Jinich

Ingredients

  • 1/4 cup olive oil
  • 6 cloves garlic peeled, plus 2 tablespoons finely chopped garlic
  • 3/4 cup finely chopped white onion
  • 2 dried guajillo chiles stemmed, seeded and finely chopped or snipped with scissors
  • 1 lb mixed mushrooms such as white button, baby bella, and wild mushrooms, thinly sliced
  • 3/4 tsp kosher salt or more to taste
  • 1/4 tsp freshly ground black pepper or to taste
  • 4 cups grated mixed melting cheeses such as asadero, Oaxaca, Monterey Jack, or mozzarella
  • 8 to 10 flour and/or corn tortillas
  • Guacamole or 1 ripe avocado halved, pitted, and sliced (optional)
  • Salsa of your choice for serving (optional)

Instructions

  • Preheat the oven to 450 degrees F, with a rack in the upper third. Lightly oil a large shallow baking dish.
  • Heat the oil in a medium saucepan over medium heat. Add the whole garlic cloves and cook, stirring occasionally, until they soften and brown, 7 to 8 minutes. Remove with a slotted spoon and discard, leaving the flavored oil behind.
  • Add the onion and guajillo chiles and cook, stirring, for 1 to 2 minutes, just until the onion begins to soften. Add the chopped garlic, stir, and cook for a minute, until fragrant. Stir in the mushrooms, salt, and black pepper and cook, stirring occasionally, until all the mushroom juices have been released and begun to evaporate and the mushrooms have begun to color, 8 to 10 minutes. Remove from the heat, taste, and adjust the salt.
  • Combine the cheeses thoroughly and arrange in the baking dish. Bake for 12 to 15 minutes, or until the cheese is completely melted. Top with the mushrooms, return to the oven, and bake for another 7 to 8 minutes, until the cheese is bubbling, the edges are crusty, and the top is lightly browned.
  • Meanwhile, heat a comal or large skillet over medium-low heat for at least 5 minutes. One or two at a time, depending on the size of your comal or pan, heat the tortillas, making sure they are not overlapping, until warm, puffed, and browned in spots, about a minute per side. Place in a tortilla warmer or wrap in a clean cloth or kitchen towel.
  • Serve the queso bubbling hot from the oven, with the warm tortillas and guacamole or avocado slices and salsa, if desired. Let everyone assemble their own tacos at the table.

Notes

Queso Fundido con Hongos al Ajillo con Guajillo

Ginger and Pistachio Guacamole

Ginger and Pistachio Guacamole
Print Recipe
4.67 from 6 votes

Ginger and Pistachio Guacamole

Ginger and Pistachio Guacamole from Pati’s Mexican Table Season 11, Episode 10 “Top Chefs and Ancient Cliffs”
Cook Time0 minutes
Course: Side Dish
Cuisine: Mexican
Keyword: guacamole
Servings: 4 to 6 servings
Author: Pati Jinich

Ingredients

  • 1 tablespoon finely chopped peeled fresh ginger
  • 1 tablespoon honey
  • 2 tablespoons fresh squeezed lime juice
  • 1 to 2 teaspoons dried piquín chiles crushed or chopped
  • 1 teaspoon kosher or coarse sea salt
  • 3 large ripe avocados halved, pitted and diced
  • ¼ cup coarsely chopped pistachios plus a couple tablespoons for garnish
  • 1 to 2 tablespoons chopped fresh chives

Instructions

  • In a medium bowl, mix the ginger with the honey, lime juice, dried piquín, and salt until thoroughly combined. Add the diced avocado, mash and mix. Add the pistachios and mix until well combined. Pass to serving bowl and garnish with the remaining pistachios and fresh chives.

Notes

Guacamole con Pistaches y Gengibre

Birriadillas

Birriadillas
Print Recipe
4.15 from 7 votes

Birriadillas

Birriadillas recipe from Pati’s Mexican Table Season 10, Episode 5 “Escaramuza”
Cook Time5 minutes
Course: Antojos, Side Dish
Cuisine: Mexican
Keyword: Ancho, corn tortillas, Guajillo, lamb, lime
Servings: 2 birriadillas
Author: Pati Jinich

Ingredients

Instructions

  • Heat a large non-stick sauté pan or comal over medium heat. Add two tortillas and top with shredded cheese and a generous scoop of shredded birria. Cover with the remaining two tortillas.
  • Heat until the tortillas on the bottom become lightly toasted and cheese starts melting. With the help of a spatula, flip to the other side and let it heat and crisp a bit. I like to wait until the cheese oozes out, browns and crisps a little! Transfer to a plate and slice in half or quarters. Serve with salsita tapatía or salsa of your choice.

Three Chiles Guacamole

Tres Chiles Guacamole
Print Recipe
4.58 from 7 votes

Three Chiles Guacamole

Three Chiles Guacamole recipe from Pati’s Mexican Table Season 10, Episode 4 “Los Mariachis”
Cook Time0 minutes
Course: Antojos, Snack
Cuisine: Mexican
Keyword: Avocado, cilantro, jalapeno, lime, serrano
Servings: 6 servings
Author: Pati Jinich

Ingredients

  • 1 jalapeño minced
  • 1 dried chile de árbol minced
  • 1 serrano minced
  • Juice and zest of 1 lime
  • ¼ cup roughly chopped cilantro
  • 2 teaspoons kosher salt
  • 4 large ripe Mexican avocados pitted and diced
  • 5 ounces (1 cup) multi-colored cherry tomatoes halved

Instructions

  • Place all ingredients, except for the avocado and tomatoes, in a molcajete and mash or mix until pasty. Add the avocado and mash until you reach your desired consistency. Fold in the tomatoes, taste and adjust seasoning as needed.

Notes

Guacamole con Tres Chiles

My Favorite Queso Fundido paired with Gran Centenario Añejo Tequila

Jaw-dropping. As soon as you set it on a table it will fly off. Guaranteed. Especially if I am around!

Queso fundido is the epitome of an antojo. What we Mexicans call a food craving that can be eaten anytime of day as a quick snack, or a full meal if eaten in a big enough amount. Antojo literally translates to craving, and I don’t know a single Mexican that doesn’t drool over the thought of a queso fundido.

Queso fundido is not a cheese dip. Queso fundido is not a cheese sauce. Queso fundido is the real deal. It is real cheese. Tons of it. You throw a combination of deliciously flavorful melty cheeses onto a baking dish or a traditional earthenware cazuela. Then place it on a heat source — it can be on a burner, in the oven, under the broiler — until the cheese not only melts, but becomes super bubbly on top and starts making a crust all around the edges.

Wait. Then come the toppings. The most typical and popular toppings in restaurants in Mexico City, where I grew up, are poblano rajas, chorizo and mushrooms. They are separate offerings, so you choose if you want your queso with chorizo or with rajas or mushrooms. Different restaurants have their variations, for example, it can be rajas with caramelized onions, different kinds of chorizo, cultivated or wild mushrooms cooked with epazote or dried chiles, to name some.

When I make queso at home, I like to make a combo of my favorite toppings. No one can stop me and no one should stop you! My take combines caramelized onions and poblano chiles, throws in a bit of seeded and diced tomato for an added juicy bite and tons of crisp chunks of flavorful chorizo.

Most people I know like their queso fundido on flour tortillas. But it is you and your guests’ choice if they want corn tortillas, too. If you have some some salsas and guacamole, place them on the table for optional add ons.

Whichever way, have your Gran Centenario Añejo Tequila out to chase your queso fundido tacos and to wash down that queso fundido. I like to serve it neat or on the rocks as it has such a smooth taste.

Once everything is on the table, all bets are off. Run for it, if you want a chance to make a queso fundido taco before it disappears.

Poblano Rajas Chorizo Queso Fundido

poblano rajas chorizo queso fundido
Print Recipe
4.29 from 7 votes

Poblano Rajas and Chorizo Queso Fundido

The popular Mexican antojo, or craving, Queso Fundido topped with chorizo, onion, poblano rajas, and tomato. 
Prep Time15 minutes
Cook Time35 minutes
Total Time50 minutes
Course: Appetizer, Side Dish, Snack
Cuisine: Mexican
Keyword: Antojo, Chorizo, Queso Fundido
Servings: 4 servings
Author: Pati Jinich

Ingredients

  • 1 tablespoon vegetable oil plus more to grease the baking dish
  • 1/3 pound Mexican chorizo casings removed, coarsely chopped
  • 1 tablespoon unsalted butter
  • 1/4 white onion halved and thinly sliced (about 1 cup)
  • 1 poblano chile roasted, sweated, peeled, cut into strips
  • 1 ripe Roma tomato cored, seeded, cut into small dice
  • 1/4 teaspoon kosher or sea salt or to taste
  • 1 pound (or 4 cups) combination of shredded Mexican-style melty cheeses such as Asadero, quesadilla and Oaxaca (can sub with mozzarella, Muenster and Monterey Jack)
  • 8 to 10 flour or corn tortillas
  • 1 ripe avocado sliced
  • Serve with salsa of your choice optional
  • Pair with Gran Centenario Añejo Tequila neat or on the rocks

Instructions

  • Heat the oil in a medium skillet over medium-high heat. Once hot, add the chorizo, cook for 4 to 5 minutes, breaking it into smaller pieces with a couple of spatulas or wooden spoons until crisp and brown. Remove from the heat and scrape into a bowl.
  • Set a rack on upper third tier of the oven and preheat to 450 degrees Fahrenheit.
  • Return the skillet to medium heat, add the butter and once it melts, add the onions. Cook, stirring occasionally and scraping the bottom of the pan, for 6 to 7 minutes, until they have wilted and begun to brown around the edges. Add the poblano pepper strips, tomato, and salt, and cook for another 3 to 4 minutes. Remove from the heat and transfer to a bowl.
  • Place shredded cheese in a gently oiled shallow baking dish that can comfortably hold it. Bake for 12 to 15 minutes, or until completely melted. Remove from the oven. Top with the crispy chorizo and poblano rajas mixture. Place back in the oven and bake for another 7 to 8 minutes, until cheese is oozing and browned along the edges and part of the top.
  • Meanwhile, preheat a comal or large skillet over medium-low heat. Heat the tortillas, making sure they are not on top of each other, until completely warmed, puffed and slightly browned. Place in a tortilla warmer or wrap in a clean cloth or kitchen towel.
  • Remove the queso from the oven and place on the table along with the warm tortillas, ripe avocado slices, and salsa of choice, if desired. Let everyone assemble their tacos!

Notes

Queso Fundido

Chilorio Sincronizadas

Chilorio Sincronizadas
Print Recipe
4.17 from 6 votes

Chilorio Sincronizadas

Chilorio Sincronizadas recipe from Pati's Mexican Table Season 8, Episode 9 "Mocorito, The Land of ChilorioMocorito, The Land of Chilorio"
Prep Time0 minutes
Cook Time5 minutes
Course: Antojos
Cuisine: Mexican
Keyword: Avocado, cheese, chilorio, flour tortillas, Quesadilla, sincronizada, tortillas
Servings: 2 servings
Author: Pati Jinich

Ingredients

  • 4 flour tortillas homemade or store-bought
  • 1/2 cup shredded melty cheese like Asadero, quesadilla, Oaxaca, or Monterey Jack
  • 1/2 cup Sinaloa Style Chilorio
  • 1 teaspoon chilorio fat or vegetable oil
  • Ripe avocado slices to serve
  • Guacamole or salsa of your choice to serve

Instructions

  • Preheat large skillet or comal over medium-low heat for at least 5 minutes. Place two of the flour tortillas on the heated skillet or comal and top each with a 1/4 cup of the cheese and 1/4 cup of the chilorio. Place the other two flour tortillas on top, and let them heat until the cheese starts to melt and the bottom tortillas begin to gently brown. Spread chilorio fat or vegetable oil on top of each, then flip and cook for another minute.
  • Transfer to plates and serve with slices of ripe avocado and the guacamole or salsa of your choice.

Notes

Sincronizadas de Chilorio

Sardine Empanadas

Sardine Empanadas
Print Recipe
4.34 from 12 votes

Sardine Empanadas

Sardine Empanadas from Pati's Mexican Table, Season 7, Episode 7 "La Paz: The Heart of Baja Sur"
Prep Time30 minutes
Cook Time30 minutes
Total Time1 hour
Course: Snack
Cuisine: Mexican
Keyword: Empanadas, fish, pati's mexican table, sardines
Servings: 20 Empanadas
Author: Pati Jinich

Ingredients

  • 1 pound frozen puff pastry
  • 2 tablespoons vegetable oil
  • 1/2 cup white onion chopped
  • 2 cups white button mushrooms cleaned and diced 8 ounces
  • 1/2 teaspoon kosher or sea salt
  • 1/4 teaspoon ground black pepper
  • 1 cup ripe Roma tomatoes chopped about 1/2 pound
  • 1/2 cup manzanilla olives stuffed with pimientos chopped
  • 1/4 cup pickled jalapeños chopped
  • 2 cans (3-4 ounces) of sardines in oil broken into chunks
  • 2 eggs separated
  • All-purpose flour for rolling out puff pastry

Instructions

  • Remove the puff pastry from the freezer and let it thaw on your countertop.
  • Heat the oil in a medium casserole or a sauté pan set over medium heat. Once hot, cook the onion for 3 to 4 minutes until it softens. Incorporate the mushrooms, sprinkle in the salt and pepper, and cook for another 5 to 6 minutes, until the juices come out and they begin to dry out, and the mushrooms start browning a bit. Add the tomatoes and cook for 6 to 7 minutes, until they start breaking down and becoming mushy and soft. Add the olives and jalapeños, mix well, and cook for another minute.
  • Remove from the heat, add the sardines, combine well and set aside.
  • Separate the egg whites from the egg yolks in two small bowls. Use a fork or a whisk to beat them separately.
  • Place the racks in the lower and upper thirds of the oven. Preheat the oven to 400 degrees Fahrenheit. Line a couple of baking sheets with parchment paper.
  • Lightly sprinkle flour on the countertop and rub some on the rolling pin. Roll out the puff pastry to thinner than 1/4-inch and use a 4-to-5-inch round mold to cut circles. Add a generous tablespoon of the sardine filling in the middle of each round. Brush a bit of the beaten egg white around the edges each round. Fold each one into a half moon shape and press the sides.
  • Using a fork, press the side of the empanada to help seal and decorate it. Brush the egg yolk on top of the empanadas and place them on the prepared baking sheets. Place the empanadas in the oven. Bake anywhere from 20 to 22 minutes, until the tops of the empanadas have puffed and are a shiny golden brown.

Notes

Empanadas de Sardina 

Mary-Mex Crab Dip

Mary-Mex Crab Dip
Print Recipe
5 from 4 votes

Mary-Mex Crab Dip

Mary-Mex Crab Dip, from Pati’s Mexican Table Season 7, Episode 13 "Mex’d Up American Regional Favorites"
Prep Time5 minutes
Cook Time35 minutes
Total Time40 minutes
Course: Appetizer, Snack
Cuisine: American, Mexican
Keyword: Antojo, chiles toreados, cotija cheese, crab, dip, Recipe, seafood
Servings: 6 Servings
Author: Pati Jinich

Ingredients

  • 1/4 cup Mexican crema
  • 1/4 cup mayonnaise
  • 1/2 cup crumbled Cotija cheese divided
  • 1/2 cup shredded Muenster cheese
  • 2 tablespoons freshly squeezed lime juice
  • 1 teaspoon Worcestershire sauce
  • 1 teaspoon cayenne pepper
  • 3 tablespoons chiles toreados chopped and drained
  • 1 pound jumbo lump crab meat picked through to remove any shells
  • 4 scallions, thinly sliced
  • Crackers, crostini, or chips for serving

Instructions

  • Preheat the oven to 350 degrees Fahrenheit.
  • In a medium bowl, stir together the crema, mayonnaise, ¼ cup of Cotija cheese, Muenster cheese, lime juice, Worcestershire and cayenne until combined.
  • Fold in the chiles, crab meat, and the white and light green parts of the scallions (reserve the rest for garnish), being careful not to break the crab up too much.
  • Transfer the mixture to an oven safe dish. Sprinkle remaining Cotija cheese on the top. Bake for 30 to 35 minutes, or until it is bubbly and golden brown. Sprinkle on the reserved scallions. Serve with crostini, crackers or chips.

Notes

Dip de Cangrejo Mary-Mex

Scallop Aguachile at the James Beard House

Mexican cuisine is riding such a high wave these days.

Compared to when I first moved to the US, 20 years ago, you can now find all the ingredients you need to prepare Mexican food. People are not only eating Mexican food out, but are bringing it into their home kitchens. There’s the #tacotuesday and the #taconight. Wherever you travel to in the US, there’s Mexican food to be found in airports, restaurants, hotels, fast food chains, and the offerings continue to increase and get better. It seems like the more people get to know Mexican cuisine, the more they want to taste it, to cook it, to explore its depth.

It is such a thrill to be part of this movement. I particularly enjoy traveling through the US to cook whenever I get an invitation. And I was beyond ecstatic when I got the request from the James Beard House in New York City to whip up their Cinco de Mayo dinner. What an honor! But of course, the pressure was on. What theme, which menu, what drinks? So much to share!

To be sure, Cinco de Mayo is not a big celebration in Mexico. It is a somber occasion honored in the state of Puebla, where the Cinco de Mayo Battle took place in 1862. It was a battle between a small Mexican militia against a big French army, and while the Mexicans won, with the odds stacked against them, the French won right back. Yet, move the clock forward a few years and Mexico regained its Independence.

Now, for whatever reason, which many have unsuccessfully tried to explain, Cinco has become the biggest Mexican-themed party abroad. I was bewildered at first when I started getting invites to Cinco de Mayo parties from our American friends. But then, of course, happily joined the excitement of the Cinco train. Listen, if there is an open door to celebrate anything and everything that we love and are proud of about Mexico, and share our food, cuisine and culture: count me in!

menu from the dinner at the James Beard House

Photo courtesy Clay Williams (@ultraclay)

As a Mexican immigrant, to be invited to the James Beard House, such a prestigious place and institution, made me feel proud and like my food is worth it. But, it also made me feel like Mexican food has really started to earn its rightful place in the eyes of the culinary world of the US.

You can see the menu above. Because I really couldn’t choose a Mexican region to focus on, I opted for what I called a Mexican culinary compass: different foods from different places from Mexico, a few childhood favorites, and a couple new dishes from my kitchen. Carnitas from Michoacán, caldo de camarón from Acapulco, gorditas from Oaxaca…

The first course of the formal sit-down dinner menu, after the cocktail hour, was a scallop aguachile inspired by the coastal region of the Sea of Cortez.

The team from the James Beard House is a joy to work with. We prepped the day before, as it was a long menu! Then my production team and I got so excited with the occasion that we decided to make it part of an episode of the next season of Pati’s Mexican Table, which will premiere in September 2018.

Pati Jinich plating her classic scallop aguachile at the James Beard House

Photo courtesy Clay Williams (@ultraclay)

But meanwhile, I leave you with the scallop aguachile recipe. It is SO GOOD. And it could not be simpler. It helps break so many myths about Mexican food. Not all Mexican food is fried, or laborious, or covered in cheese, or severely spiced up, or takes forever to prepare. In fact, most Mexican food is healthy, soulful, delicious, nutritious. It gives beautiful ingredients, like the plump, silky and sweet fresh sea scallops a chance to shine by just dressing them beautifully, lightly and kindly.

scallop aguachile

Photo courtesy Clay Williams (@ultraclay)

Mexican cuisine is indeed riding such a high wave today. And I can see the high tide ahead, with the wave getting even bigger and higher. So excited and honored to have the possibility to continue to ride it and bring the fruits of this journey to your shore.

Print Recipe
4.80 from 5 votes

Scallop Aguachile

The first course from Pati's Cinco de Mayo dinner at the James Beard House in New York was a scallop aguachile inspired by the Mexican coastal region of the Sea of Cortez.
Prep Time15 minutes
Resting Time15 minutes
Course: Appetizer
Cuisine: Mexican
Keyword: Aguachile, Ceviche, jalapeno, lime, Scallops
Servings: 4 servings
Author: Pati Jinich

Ingredients

  • 1 pound large fresh scallops
  • 1/4 cup lime juice freshly squeezed
  • 2 tablespoons extra virgin olive oil
  • 1/4 cup red onion slivered
  • 1 serrano or jalapeño chile thinly sliced
  • 1/2 teaspoon kosher or sea salt or more to taste

Instructions

  • In a bowl, combine the lime juice, olive oil, onion, serrano and salt. Whisk and let sit for at least 15 minutes, or cover and refrigerate up to 12 hours.
  • When ready to serve, remove lime juice mix from the refrigerator. Slice the fresh scallops thinly and horizontally, up to 1/8” width. Spread on a platter. Whisk the lime juice sauce and pour in its entirety over the scallops, arranging so that the onion and chile are spread evenly throughout. Serve immediately.

Notes

Aguachile de Callo de Hacha

Chaya Empanadas

chaya empanadas
Print Recipe
4.29 from 7 votes

Chaya Empanadas

Chaya Empanadas recipe from Pati's Mexican Table Season 5, Episode 2 “Mérida: Exploring with the Locals”
Prep Time15 minutes
Cook Time12 minutes
Total Time27 minutes
Course: Antojos, Main Course
Cuisine: Mexican
Keyword: chaya, edam cheese, Empanadas, masa, pati's mexican table, salsa roja, Yucatán Peninsula
Servings: 8 empanadas
Author: Pati Jinich

Ingredients

  • 2 cups fresh corn masa
  • 1/2 cup chopped chaya leaves (may substitute spinach or watercress)
  • 1 teaspoon kosher or coarse sea salt
  • 4 cups grated Dutch edam cheese (may substitute Gouda or Muenster)
  • Vegetable oil for frying
  • Salsa roja of your choice, warmed, optional

Instructions

  • In a large bowl, combine the masa, chaya, and salt by kneading with your hands.
  • Pinch off a large, golf-ball sized piece of masa and roll it into a ball, then gently flatten with your palms. Place the flattened masa on a piece of plastic wrap and use your fingers to press it into a flat round tortilla about 1/8" thick (alternatively, use a tortilla press). Repeat until all of the remaining masa has been used up.
  • Place 1/2 cup of the grated cheese on one side of the masa round, then fold over to make a half-moon shape. Press around the edges with your fingers to close, using the plastic to help you out. Repeat with all the masa rounds.
  • In a large casserole or heavy bottomed pan, heat ½” of oil to 325 degrees Fahrenheit. If you don't have a fry thermometer, test by dropping a small ball of masa in the oil; if the oil actively bubbles around it, it's ready.
  • Working in batches, fry the empanadas in the oil until crisp, about 2 to 3 minutes per side. Place the fried empanadas on a paper towel lined plate to drain off the excess oil. You may serve them with a side of warm salsa roja or salsa of your choice.

Notes

Empanadas de Chaya, recipe courtesy Chef David Cetina

Plantain and Refried Bean Quesadillas

Pati Jinich Plantain and Refried Bean Quesadillas
Print Recipe
4.20 from 5 votes

Plantain and Refried Bean Quesadillas

Plantain and Refried Bean Quesadillas recipe from Pati's Mexican Table Season 1, Episode 1 “Quesadillas”
Prep Time5 minutes
Cook Time45 minutes
Total Time50 minutes
Course: Antojos, Main Course
Cuisine: Mexican
Keyword: pati's mexican table, Plantains, Quesadilla, refried beans
Servings: 6 to 8 quesadillas
Author: Pati Jinich

Ingredients

  • 1 pound yellow mature plantains
  • 3 1/2 teaspoons sugar
  • 2/3 cup refried beans store bought or home-made
  • Safflower or corn oil to fry

Instructions

  • Place the whole plantains in a large pot filled with boiling water. Simmer, partially covered, for 20 to 30 minutes, until they are thoroughly cooked. Remove from the water and let cool. Peel the plantains, slice, and place in a food processor along with the sugar. Process until smooth. If the dough seems to soft and runny, you may add some all purpose flour to thicken it a bit. You may also let it sit in the refrigerator, covered, for a half an hour so it will harden too.
  • Make round balls of about 1 to 2″. Press in between plastic rounds in a tortilla press or roll with a roller until you get a flat disk of about ¼”. Place about a tablespoon of refried beans right in the center and fold like a turnover. Press down along the edges so they will be tightly sealed.
  • In a large deep skillet set over medium heat, heat enough oil to have about an inch high. About 3 to 4 minutes later, when it is hot but not smoking, insert the quesadillas a few at a time. The oil should be bubbling around the quesadillas as you do. Let them fry, about 2 minutes on each side until nicely tanned and lightly crisped. Don’t let them brown too much. Remove them and place on a paper towel to drain excess of oil.
  • Serve with your favorite salsa.

Notes

Quesadillas de Plátano Macho con Frijolitos Refritos

Oaxacan Mushroom and Cheese Quesadillas

Print Recipe
4.80 from 5 votes

Oaxacan Mushroom and Cheese Quesadillas

Oaxacan Mushroom and Cheese Quesadillas recipe from Pati's Mexican Table Season 1, Episode 1 “Quesadillas”
Prep Time10 minutes
Cook Time25 minutes
Total Time35 minutes
Course: Antojos, Main Course
Cuisine: Mexican
Keyword: corn tortillas, epazote, jalapeno, Monterrey Jack cheese, mozzarella, Muenster cheese, Mushroom, Oaxaca cheese, onion, pati's mexican table, Quesadilla, serrano chiles
Servings: 12 quesadillas
Author: Pati Jinich

Ingredients

  • 1 tbsp safflower or corn oil
  • 1 tbsp unsalted butter
  • 1/2 cup white onion chopped
  • 1 chile serrano or jalapeño, finely chopped (seeding optional)
  • 2 garlic cloves finely chopped
  • 1 lb fresh mushrooms white or baby bello or any that you prefer, cleaned and thinly sliced
  • 2 tbsp fresh epazote leaves chopped, optional
  • 2 tsp kosher or sea salt or to taste
  • 1 cup Oaxaca cheese shredded (also good with mozzarella, muenster or monterey jack)
  • Corn tortillas store bought or homemade
  • Salsa of your choice

Instructions

  • Heat the oil and butter in a large sauté pan, set over medium-high heat. When butter starts to sizzle, add white onion and cook until soft and translucent, about 3 to 4 minutes. Add the serrano chile and chopped garlic and cook until fragrant, for about a minute.
  • Incorporate the thinly sliced mushrooms and cook them for about 5 minutes, stirring often. Their juices will begin to come out and after a couple minutes they will begin to dry out. When they do, mix in the epazote leaves if using, and salt, stir and cook for another minute. The mushroom mix should be moist, not wet or too dry, which will be perfect for filling the quesadillas.
  • Heat the tortillas on a hot comal or dry skillet over medium heat for about 20 seconds. Place a tablespoon or two of the mushroom mix and a tablespoon or two of the shredded cheese (depending on how chubby you want them!) on the center of each tortilla. Fold it as if it were a turnover and press down. Cook for about 2 minutes per side, until cheese is completely melted and tortillas have begun to crisp a bit on the outside.
  • Serve with a side of a salsa of your choice.

Notes

Quesadillas Oaxaqueñas de Hongos con Queso

Ham and Cheese Sincronizadas with Flour Tortillas

Ham and Cheese Sincronizadas with Flour Tortillas
Print Recipe
5 from 1 vote

Ham and Cheese Sincronizadas with Flour Tortillas

Ham and Cheese Sincronizadas with Flour Tortillas recipe from Pati's Mexican Table Season 1, Episode 1 “Quesadillas”
Prep Time5 minutes
Cook Time10 minutes
Course: Main Course
Cuisine: Mexican
Keyword: Avocado, Chihuahua cheese, flour tortillas, ham, Monterrey Jack cheese, Muenster cheese, Oaxaca cheese, pati's mexican table, Quesadilla, sincronizadas, turkey
Servings: 6 sincronizadas
Author: Pati Jinich

Ingredients

  • 12 Flour tortillas
  • safflower or corn oil optional
  • 8 oz Chihuahua Oaxaca, Monterey Jack, Muenster, or melty cheese of your choice
  • 6 to 12 thin slices ham or turkey
  • Mexican avocado slices optional
  • Salsa of your choice

Instructions

  • Heat a non-stick sauté pan or a comal over medium heat. Place a couple flour tortillas, many as will fit in the pan or comal, top with a generous amount of shredded cheese and one or two slices of ham or turkey. Cover with a second flour tortilla.
  • Heat until the flour tortillas in the bottom become lightly toasted and cheese starts melting. With the help of a spatula, flip them to the other side and let it heat and crisp a bit. I like to wait until the cheese oozes out, browns and crisps a little! Transfer to a plate and slice in half or quarters.
  • Serve with a salsa of your choice and slices of ripe avocado on the side.

Notes

Sincronizadas de Jamon con Queso

Squash Blossom Quesadillas

squash blossom quesadillas
Print Recipe
4.50 from 4 votes

Squash Blossom Quesadillas

Squash Blossom Quesadillas recipe from Pati's Mexican Table Season 2, Episode 9 "Xochimilco: Cooking with Flowers"
Prep Time1 hour
Cook Time30 minutes
Total Time1 hour 30 minutes
Course: Antojos, Appetizer, Main Course
Cuisine: Mexican
Keyword: cheese, Chiles, Mexico City, Oaxaca, Poblano, Quesadilla, queso, squash blossom
Servings: 12 quesadillas
Author: Pati Jinich

Ingredients

  • 2 poblano chiles charred, peeled, seeded and diced
  • 1 tablespoon unsalted butter
  • 1 tablespoon safflower or corn oil
  • 1/4 cup white onion chopped
  • 1 teaspoon garlic finely chopped
  • 12 ounces fresh squash blossoms rinsed, dried and chopped (about 8 cups)
  • 1 teaspoon kosher or sea salt or to taste
  • 8 ounces Oaxaca or mozzarella cheese shredded
  • 2 cups instant Maseca corn masa flour if making fresh masa tortillas, or substitute 1 package store-bought corn tortillas
  • 1 3/4 cups water for the masa, if making fresh masa tortillas

Instructions

To Prepare Filling:

  • Place the poblano chiles on a tray under the broiler, directly on the grill, or directly on the open flame or on a comal or skillet set over medium heat. Turn them every 2 to 3 minutes for a total of 6 to 9 minutes, until they are charred and blistered all over. Transfer them to a plastic bag, close it tightly and let them sweat for 10 to 20 minutes. Working under a thin stream of cold water, peel off their skin; make a slit down the sides to remove and discard the seeds and veins, then remove and discard the stem. Cut them into 1/2-inch-wide strips or squares.
  • Add butter and oil in a medium sauté pan over medium heat. When the butter is bubbling, add the onion and garlic and cook until softened and fragrant, for about 3 to 4 minutes. Add the prepared poblano chiles, then the squash blossoms and salt. Cook for about 5 minutes, stirring often, until the blossoms exude their juices and the mixture begins to dry out. Remove from the heat.

If Using Fresh Corn Masa:

  • Mix Maseca or instant corn dough masa with the water and knead for a few minutes until soft. Make 1-inch balls and flatten between plastic rounds on a tortilla press.
  • Place 1 tablespoon of the cheese and 2 tablespoons of the filling at the center of the dough disk and, leaving it on the plastic round of the tortilla press, fold it over and press to seal the edges. Repeat to form the rest of the quesadillas, using all the dough and filling.
  • In a deep and large skillet, add enough oil so that it’s at least ¾-inch deep; heat over medium heat. Once the oil is hot, about 3 to 4 minutes later, add a few quesadillas at a time to the hot oil, making sure not to crowd the skillet. Cook for 2 to 4 minutes per side, or until golden brown and crisp. Transfer, with a slotted spoon, to a paper towel-lined platter to drain. Serve hot, with the salsa of your choice.

If Using Store-Bought Tortillas:

  • If using pre-made corn tortillas, add the cheese and filling to the center of the tortilla. Place on an already hot comal, griddle or skillet, and let them cook until the cheese has melted and the tortilla has begun to lightly crisp, about 2 to 3 minutes per side.

Notes

Quesadillas de Flor de Calabaza

Crazy Corn

crazy corn or elotes
Print Recipe
4.50 from 6 votes

Crazy Corn

Crazy Corn recipe from Pati's Mexican Table Season 2, Episode 5 “Mexican-Style Kids’ Party”
Prep Time5 minutes
Cook Time10 minutes
Total Time15 minutes
Course: Side Dish
Cuisine: Mexican
Keyword: Corn, cotija cheese, elotes, lime, mayo, pati's mexican table, piquí­n chiles, queso fresco
Servings: 6 servings
Author: Pati Jinich

Ingredients

  • 6 fresh ears of corn husked and rinsed
  • unsalted butter to taste
  • mayonnaise to taste
  • 1 cup crumbled queso cotija or queso fresco or to taste
  • 1 lime or to taste
  • kosher or sea salt to taste
  • Dried ground chile like piquí­n or a mix

Instructions

  • To cook the corn, you can grill it or boil it. To grill, brush the ears of corn with a bit of oil. Place them over a grill or grill pan, set over medium heat, and let the corn cook and char slightly, turning every 3 minutes until all the corn is done, anywhere from 9 to 12 minutes total. Remove from the heat. You can also cook the corn it in boiling water until soft and cooked, less than ten minutes.
  • Once cooked, stick the corn on corn holders or a wooden stick. Choose your toppings! Traditionally in Mexico, we: spread butter, then a layer of mayonnaise, coat thoroughly with crumbled cheese, sprinkle with salt and ground chile and finally, drizzle with freshly-squeezed lime juice.

Notes

Elotes Callejeros

Beef Barbacoa Sliders

beef barbacoa sliders
Print Recipe
4.63 from 8 votes

Beef Barbacoa Sliders

Beef Barbacoa Sliders recipe from Pati's Mexican Table Season 3, Episode 9 “Pot Luck Party”
Prep Time30 minutes
Cook Time3 hours
Total Time3 hours 30 minutes
Course: Main Course
Cuisine: Mexican
Keyword: ancho chiles, apple cider vinegar, banana leaves, beef, beer, burger, cinnamon, cloves, guajillo chiles, onion, pati's mexican table, Pickled Jalapeños, Tomatoes
Servings: 24 sliders
Author: Pati Jinich

Ingredients

  • 10 guajillo chiles stemmed and seeded
  • 10 ancho chiles stemmed and seeded
  • 5 cups water
  • 1/3 cup apple cider vinegar
  • 1 medium Roma tomato quartered
  • 1/2 medium white onion coarsely chopped (about 1/2 cup)
  • 3 medium cloves garlic
  • 1 tablespoon dried oregano
  • 1/2 teaspoon ground cinnamon
  • 1/2 teaspoon ground allspice
  • 1/2 teaspoon freshly ground black pepper
  • 5 whole cloves stems removed
  • 2 1/2 teaspoons kosher or coarse sea salt
  • 3 tablespoons safflower or vegetable oil
  • 4 pounds beef round roast or brisket cut into 4-inch chunks
  • 1 pound Banana leaves or aluminum foil
  • 12 ounces light beer 1 bottle
  • 24 small slider buns brioche or challah buns are specially good with this!
  • Pickled jalapeños optional

Instructions

For the marinade:

  • Heat a large skillet or comal over medium heat. Add the dried guajillo and ancho chiles and toast them for no more than 20 seconds per side, taking care not to burn them. Transfer the toasted chiles to a medium saucepan and add the water, place over medium heat and cook for 12 to 15 minutes, until the chiles have softened and rehydrated.
  • Transfer the chiles to a blender, and add 2 cups of their cooking liquid (discard the remaining liquid), the vinegar, tomato, onion, garlic, oregano, cinnamon, allspice, black pepper, cloves and salt. Puree until smooth.
  • Wipe out the medium saucepan and add the oil. Place over medium heat for 1 to 2 minutes, then add the pureed chile mixture, being careful to avoid any splatters. Partially cover and cook for 10 to 12 minutes, stirring once or twice, until the color darkens and the mixture thickens to a paste-like consistency.

For the meat:

  • Place the beef in a large bowl and cover it with the marinade. If you will not cook it that day, cover and place in the refrigerator for up to 48 hours. Wrap the individual meat chunks in pieces of banana leaf or aluminum foil as you would wrap burritos or tamales - making sure to add a generous amount of marinade in each packet.
  • Preheat the oven to 350°F. Place the meat packets inside a large, heavy ovenproof French oven or casserole, pour in the beer and cover with a tight-fitting lid. Roast for about 3 hours, until the meat is succulent and comes apart when pulled with a fork. Transfer to the stovetop (off of the heat), and let everything rest for 10 to 15 minutes before opening the meat packets.
  • Serve on slider buns with drunken salsa and/or pickled jalapeños.

Notes

Hamburguesitas de Barbacoa

Shrimp Cocktail Pacifico

shrimp cocktail pacifico
Print Recipe
4.25 from 8 votes

Shrimp Cocktail Pacifico

Shrimp Cocktail Pacifico recipe from Pati's Mexican Table Season 3, Episode 7 “Sugar for Hubby”
Prep Time10 minutes
Cook Time30 minutes
Total Time40 minutes
Course: Antojos
Cuisine: Mexican
Keyword: jalapeno, ketchup, lime, Maggi sauce, olives, pati's mexican table, serrano chiles, Shrimp, soy sauce, Tomatoes, tortilla chips, Worcestershire sauce
Servings: 6 servings
Author: Pati Jinich

Ingredients

  • 1 pound medium shrimp peeled
  • 1 cup Ketchup
  • 3/4 cup freshly squeezed lime juice
  • 1 tablespoon Worcestershire sauce
  • 1 teaspoon Maggi sauce or soy sauce
  • 2 tablespoons olive oil
  • 1/4 cup finely chopped white onion
  • 1 jalapeño or serrano chile finely chopped, or to taste
  • 1/2 cup pimiento-stuffed olives coarsely chopped
  • 1/2 cup ripe tomato seeded and chopped
  • 2 tablespoons fresh Italian parsley chopped
  • 2 tablespoons cilantro leaves chopped
  • 1 teaspoon dried oregano preferably Mexican, or 1/4 teaspoon finely chopped fresh
  • 1/4 teaspoon kosher or coarse sea salt or to taste
  • 1 ripe Mexican avocado halved, pitted, meat scooped out and cubed
  • Tortilla chips store-bought or homemade, or saltines

Instructions

  • Bring a large pot of salted water to a rolling boil over high heat. Add the shrimp and cook for 1 minute. Immediately drain the shrimp and let cool.
  • In a large bowl, combine the ketchup, lime juice, Worcestershire sauce, Maggi sauce and olive oil. Add the shrimp and toss to combine. Add the onion, chile, olives, tomato, parsley, cilantro, oregano and salt, and mix gently until well blended. Cover and refrigerate for at least 30 minutes or up to 12 hours.
  • When ready to serve, stir the avocado into the shrimp cocktail. Serve with tortilla chips or saltines.

Notes

Coctel de Camarones del Pacífico

Chipotle Agave Chicken Wings

Print Recipe
4.13 from 8 votes

Chipotle Agave Chicken Wings

Chipotle Agave Chicken Wings recipe from Pati's Mexican Table Season 3, Episode 6 “American Classics, My Way”
Prep Time2 hours
Cook Time40 minutes
Total Time2 hours 40 minutes
Course: Antojos, Side Dish
Cuisine: American, Mexican
Keyword: agave syrup, apple cider vinegar, chicken, chicken wings, chipotles in adobo, feta, mexican crema, orange juice, pati's mexican table, queso fresco
Servings: 6 servings
Author: Pati Jinich

Ingredients

To make the marinade for the wings:

  • 2 cups buttermilk
  • 3 cloves garlic minced or pressed
  • 2 chipotle chiles from chipotles chiles in adobo sauce seeded and minced
  • 1 tablespoon sauce from chipotle chiles in adobo sauce
  • 1/4 cup orange juice
  • Zest of an orange
  • 1 tablespoon kosher or coarse sea salt
  • 1 teaspoon freshly ground black pepper
  • 3 pounds chicken wings

To make the chicken wing sauce:

  • 4 tablespoons agave syrup or maple syrup
  • 1 garlic clove minced
  • 1 teaspoon Tabasco sauce
  • 2 tablespoons sauce from chipotle chiles in adobo sauce
  • 1 1/2 teaspoon apple cider vinegar
  • 3 tablespoons olive oil
  • 1/4 teaspoon kosher or coarse sea salt or to taste

To make the dipping sauce:

  • 1 cup Mexican crema crème fraiche or sour cream
  • 1/2 cup crumbled queso fresco or a mild feta cheese
  • 2 tablespoons freshly squeezed lime juice
  • 2 tablespoons chopped cilantro leaves and upper parts of stems
  • 2 tablespoons chopped chives
  • kosher or coarse sea salt to taste
  • freshly ground black pepper to taste
  • Carrot and celery sticks to eat along with the wings and dip in the dipping sauce

Instructions

  • In a large bowl or baking dish, add all the ingredients for the wing marinade: buttermilk, garlic, chipotle chiles, sauce from chipotles in adobo, orange juice, orange zest, salt and pepper, mix to combine. Add the chicken wings and mix well to make sure all of the wings are coated. Cover tightly with plastic wrap and refrigerate for a couple hours or overnight.
  • Preheat oven to 450°F. Place a cooling rack onto a lined (with aluminum foil or parchment paper) rimmed baking sheet and brush the cooling rack with vegetable oil. Remove the wings from the marinade and place them directly onto the cooling rack. Bake for 40 to 45 minutes, flipping once after 25 minutes, until crisp and browned on all sides.
  • While the wings are baking, place a small saucepan over medium heat and add all of the ingredients for the chicken wing sauce: agave syrup, garlic, Tabasco sauce, sauce from chipotles in adobo, vinegar, olive oil and salt, bring to a simmer. Whisk to emulsify and combine. Turn off the heat and set aside.
  • In a small bowl, combine the crema, queso fresco, lime juice, cilantro, chives and salt and pepper to taste. Stir well and set aside.
  • Once the wings are ready, place them in a large bowl. Whisk the agave wing sauce once more with a fork or whisk, then pour it over the wings and toss well so that all the wings are coated. Serve with the crema dipping sauce on the side.

Notes

Alitas de Pollo con Chipotle y Agave

Tuna Minilla Empanadas

Insanely practical, that’s what these empanadas are. Perfect to make ahead for gatherings, as you can eat them hot or not. And they are oh, so, comforting: think of a tuna casserole in the good old style, but revamped with great Mexican flair and then flipped and turned into individual size. They withstand hours of travel and will remain delicious until you are ready to take a bite.

With that in mind, I made a full batch last Saturday to bring to a friend’s house. So thrilled were the boys, and I, with the packets as they came out of the oven (crispy on top, soft layers of barely sweet dough as you get close to the middle and a rich tasting filling) that by the time we put our jackets on, and I went back to the kitchen to transfer the empanadas from the baking sheet to a platter, I gasped at the sight of the only two remaining…

Tuna Minilla Empanadas 1

Lessons learned:

1. Make a double batch.

2. If you don’t, refrain from telling your friends about the fabulous thing you prepared but couldn’t bring because you finished it before hopping in the car. They won’t like it.

A simple way to describe an empanada is a turnover-looking packet stuffed with one or another kind of filling. The story goes that they’ve existed since the Spanish Crusades as they were perfect travel food. It was the Spaniards who brought them to Mexico.

From the Spanish word “empanar,” which can translate as “the act of covering something with bread or bread dough,” aside from practical, they are also versatile. They can go from mini to giant, from savory to sweet, from a tasty appetizer or funky main meal to a sweet bite, depending on the fillings.

Tuna Minilla Empanadas 2

I can think of three things that distinguish empanadas from quesadillas. First, whereas quesadillas are made with flour or corn dough (or flour or corn tortillas) empanadas are made with flour dough. That doesn’t make empanada variations limited. Oh no. There are as many fillings and as many flour doughs as one can think of. One of the fluffiest ones are made with puff pastry, called hojaldre in Spanish.

Delightful, because as it bakes, the seemingly flat dough develops its multilayered structure: paper-thin layers of dough puff up with air, and delicious butter, in between them.

You can make your own puff pastry or simply buy it at the frozen section at the store. Just be sure to thaw before you roll out.

Then make rounds. You can make them as big or as little as you like. Here I am cutting 5” rounds. Brush with egg wash (just a beaten mix of egg and water) around the edges. Then add the filling.

Tuna Minilla Empanadas 3

A second difference between empanadas and quesadillas is that it is pretty hard to find a quesadilla that is sweet, for a good reason. Whereas not only are there plenty of sweet empanadas but even when they are savory, they have a sweet element to them, like the Tuna Minilla that is going in here….

Tuna Minilla Empanadas 4

Minilla is a very popular way of cooking fresh fish and also canned tuna along the Mexican Gulf Coast, especially in Veracruz.

It is so tasty and its flavor shows the impact that kitchens in Veracruz received from it being a port of entry to the Spaniards. It has a base of cooked onion, garlic, plenty of tomatoes, pickled jalapeños, along with the capers, olives, raisins and herbs the Spaniards brought. Pretty much like the Fish a la Veracruzana style. The sauce gets cooked until moist and the flavors have been completely absorbed and combined.

You can eat Minilla as a main dish on top of rice. You can use it to make sandwiches or tortas. But my favorite way to use it is inside of empanadas. And I like to add generous amounts…

Tuna Minilla Empanadas 5

Then seal the empanadas by folding the circle over the filling. Then use a fork to not only decorate the edges but to seal them even better. In Mexico, many cooks know a fancy technique of decorating and sealing the edges of the empanadas so they look like encaje or embroidery. I go with the good old fork….

Tuna Minilla Empanadas 6

The third thing that distinguishes empanadas from quesadillas, is that empanadas are mostly baked. Not fried or cooked over the stovetop on a comal or skillet.

Once in the oven, the puff pastry layers do what they must… puff and puff and puff, the top crisps, the middle gets moist, and the filling bonds with the packet.

Tuna Minilla Empanadas 7

Off you go!

Tuna Minilla Empanadas main
Print Recipe
4.67 from 6 votes

Tuna Minilla Empanadas

Minilla is a very popular way of cooking fresh fish and also canned tuna along the Mexican Gulf Coast, especially in Veracruz. It is so tasty and its flavor shows the impact that kitchens in Veracruz received from it being a port of entry to the Spaniards. It has a base of cooked onion, garlic, plenty of tomatoes, pickled jalapeños, along with the capers, olives, raisins and herbs the Spaniards brought. Pretty much like the Fish a la Veracruzana style. The sauce gets cooked until moist and the flavors have been completely absorbed and combined.
Prep Time10 minutes
Cook Time1 hour
Course: Antojos
Cuisine: Mexican
Keyword: capers, Empanadas, olives, onion, pati's mexican table, Pickled Jalapeños, puff pastry, raisins, Tomatoes, tuna
Servings: 16 empanadas
Author: Pati Jinich

Ingredients

For the filling:

  • 1/4 cup vegetable oil
  • 3/4 cup chopped white onion
  • 1 clove garlic finely chopped
  • 1 1/2 pounds chopped ripe tomatoes or about 6 roma tomatoes
  • 2 7-ounce cans tuna drained and shredded
  • 2 bay leaves
  • 1 teaspoon brown sugar
  • 1/2 teaspoon dried oregano
  • 1/2 teaspoon dried thyme
  • 1/2 teaspoon kosher or sea salt or to taste
  • 1/4 cup roughly chopped raisins
  • 1/4 cup roughly chopped manzanilla olives stuffed with pimientos
  • 1/4 cup seeded and roughly chopped pickled jalapeño chiles store bought or make your own, more to taste
  • 1 tablespoon capers
  • 3 tablespoons chopped Italian or flat-leaf parsley

To form the empanadas:

  • 1 egg
  • 2 tablespoons water
  • 1 1.2 pound package frozen puff pastry thawed, or homemade puff pastry

Instructions

  • In a large skillet, heat the oil over medium heat. Once hot, but not smoking, stir in the onion and cook until it is soft and translucent, about 5 minutes. Add the garlic, stir, and cook until fragrant, about 1 minute. Stir in the chopped tomatoes and cook, stirring often, until completely cooked, softened and mashed up and pasty looking, about 15 minutes.
  • Toss in the tuna and with a spatula or fork, mix it well with the tomato mix, making sure there are no big chunks. Add the bay leaves, sugar, oregano, thyme, salt and mix well. Add the raisins, olives, pickled jalapenos, capers, fresh parsley and mix well. Cover the skillet and reduce the heat to medium-low. Cook for about 10 minutes, the mixture should be very moist but not too watery. Taste for salt and add more if needed. Remove the bay leaves and set aside.
  • Line two baking sheets with parchment paper. Preheat oven to 350. In a small mixing bowl beat the egg along with the water.
  • Gently flour your countertop and rolling pin and roll out one thawed sheet of pastry to about 1/8” thick. Cut out 5” to 6” rounds with a cookie cutter or anything that can act as a mold. With a pastry brush, brush the edges of the rounds with the egg wash. Spoon about 2 tablespoons of tuna in the center of each round, fold as a turnover or quesadilla to make a half moon, pushing the tuna inside of the empanada at the same time as you press the edges of the dough to seal it. Gently press the edge with the tip of a fork, this will act as decoration but also help seal the edges. Place the empanada on a lined baking sheet and repeat with the rest of the rounds and the second sheet of puff pastry. When all empanadas are formed, brush their tops with the remaining egg wash.
  • Place them in the oven and bake for about 30 minutes, until crisp, puffed up and golden brown.

Notes

Empanadas de Minilla de Atún

Go Wild, Munch On Your Crazy Corn!

The Mexican way to wildly dress simply cooked corn drives me wild:

Crunchy sweet corn on a stick, brushed with butter and mayo, coated in tangy and salty crumbled queso fresco, sprinkled with chile powder, typically chile piquí­n, coarse salt and a liberal squeeze of lime juice…

It doesn’t matter if I am hungry. The mere site of a street food corn stand makes me stop dead in my tracks and zoom over for one. Like a wild woman. I need one. Well, the truth is one is not enough, ever.

In Mexico you find corn stands all over, in little towns and big cities. Locals know what day of the week and at what times they show up. If you are not from there, it takes a while to figure it out.

Crazy Corn 1
Last time we went to Chihuahua, after asking around for a while, we found the 3 Hermanos cart with Mauro in charge.

And does that man know how to dress that corn! He spoiled me and added an extra squeeze of lime juice.

Crazy Corn 2
Corn can be simmered in water, many times with fresh Epazote. Or it can be grilled on a griddle or comal. If the kernels are shaved off, then the dish is called Esquites. But the traditional trimmings are the same for all.

Yet, some people can get even wilder… You won’t believe this, when Mauro was dressing our corn, a pregnant lady asked for her Esquites with all the trimmings to be poured inside a bag of Doritos. Yes she did. But if you ask me, about to have a baby, she was entitled to whatever kind of craving she felt like…


Crazy Corn 3

Last week, thinking of the many things to do with summer corn for an appearance on the Today Show, I included Crazy Corn. But I opted for the grilled take, because as the corn chars, its natural sugar comes out and caramelizes, giving it an extra layer of rustic and sweet flavor.

Crazy Corn 4
Thanks to the most professional, talented and fabulous food prep styling team, that of the Today Show, the Mexican street style corn that Mexicans love so much, looked so beautiful on the set.

Crazy Corn 5
They had all the trimmings with alternatives and options. Different kinds of dried ground chiles: Ancho, Chipotle and a smoky mix. They also had the queso fresco and its seamless substitutes: Queso Cotija and its Mediterranean cousin, the Mild Feta.

Crazy Corn 6
Crazy Corn is Mexican street food at its best, and it happens to be perfect for summer barbecues.

Crazy Corn 7
Here goes one for you! Messy goodness, conveniently placed on a stick ready for you to munch on.


Print Recipe
5 from 2 votes

Crazy Corn

The Mexican way to wildly dress simply cooked corn drives me wild: Crunchy sweet corn on a stick, brushed with butter and mayo, coated in tangy and salty crumbled queso fresco, sprinkled with chile powder, typically chile piquí­n, coarse salt and a liberal squeeze of lime juice…
Prep Time1 minute
Cook Time9 minutes
Course: Antojos, Side Dish
Cuisine: Mexican
Keyword: Antojo, chile piquín, Corn, cotija, elotes, lime, mayonnaise, queso fresco, Recipe
Servings: 6 servings
Author: Pati Jinich

Ingredients

  • 6 ears of fresh corn husked and rinsed
  • 1 tablespoon vegetable oil
  • unsalted butter
  • mayonnaise
  • 1 cup crumbled cotija or queso fresco farmers cheese or a mild Feta
  • 3 limes halved to squeeze on top
  • Salt to taste
  • Dried ground chile piquin or a Mexican mix or to taste

Instructions

  • Brush the ears of corn with a bit of oil. Place over a grill or grill pan, set over medium heat, and let the corn cook and char slightly, turning them every 3 minutes or until the corn is down, anywhere from 9 to 12 minutes. Remove from the heat. Alternatively, you can simmer the corn in water until tender.
  • Let everyone decide what they want on their crazy corn. You can stick the corn on corn holders or a wooden stick.
  • The traditional way is to spread butter and a layer of mayonnaise. Then the corn is thoroughly "breaded" with the crumbled cheese, sprinkled with salt and ground chile and finally, drizzled with freshly squeezed lime juice.

Notes

Elotes

Ham and Cheese Quesadillas

Ham and Cheese Sincronizadas with Flour Tortillas
Print Recipe
4 from 7 votes

Ham and Cheese Quesadillas

Ham and Cheese Quesadillas recipe from Pati's Mexican Table Season 1, Episode 1 “Quesadillas”
Prep Time5 minutes
Cook Time10 minutes
Total Time15 minutes
Course: Antojos, Main Course
Cuisine: Mexican
Keyword: Avocado, Chihuahua cheese, flour tortillas, ham, Monterrey Jack cheese, Muenster cheese, Oaxaca cheese, pati's mexican table, Quesadilla, turkey
Servings: 6 sincronizadas
Author: Pati Jinich

Ingredients

  • 12 flour tortillas
  • Safflower or corn oil optional
  • 8 ounces Chihuahua, Oaxaca, Monterey Jack, Muenster or melty cheese of your choice
  • 6 to 12 thin slices ham or turkey
  • Mexican avocado slices optional
  • Salsa of your choice

Instructions

  • Heat a non-stick sauté pan or a comal over medium heat. Place a couple flour tortillas, many as will fit in the pan or comal, top with a generous amount of shredded cheese and one or two slices of ham or turkey. Cover with a second flour tortilla.
  • Heat until the flour tortillas in the bottom become lightly toasted and cheese starts melting. With the help of a spatula, flip them to the other side and let it heat and crisp a bit. I like to wait until the cheese oozes out, browns and crisps a little! Transfer to a plate and slice in half or quarters.
  • Serve with a salsa of your choice and slices of ripe avocado on the side.

Notes

Sincronizadas de Jamón con Queso

Picadillo Empanadas

With a soft, crumbly and almost sweet dough that embraces a moist, tasty and meaty filling, it is hard not to eat one after the other. These Empanadas do have a curious name though. Especially when you consider their addicting nature.

I didn’t choose their name. No.The nuns from the Mexican Convent of our Lady of the Immaculate Conception are to blame.It all began with Beatriz da Silva, the Portuguese woman who founded the order in Toledo, Spain.

Known to be shockingly beautiful, although destined to be the companion to Queen Isabel from Spain, she was locked up because of the Queen’s jealousy and alleged admiration from the King. Legend goes, that when Beatriz managed to flee, she was more beautiful and had a new found strength she used to establish a new Conceptionist order.The three Conceptionist nuns who arrived in Mexico City around the 1540’s, were also known to be strong. If not as pretty.

Aside from trying to evangelize the population, they combined Spanish and Mexican ingredients in their kitchens, as most Spanish nuns, with an intense passion and a ton of imagination. As most Spanish nuns, as well, their cooking instincts were led by an insatiable sweet tooth. That may explain the sweet elements both in the dough and the filling of these Empanadas, that were served time and again to entertain guests in this convent.And now you know, where the name comes from…


The dough can be used both for sweet or savory Empanadas. As its sweetness is so mild, it enhances the flavors in savory fillings, such as the Meat Picadillo in this one, and it dances along sweet dessert ones.

It can be made in a snap by mixing cream cheese, butter, all purpose flour and a pinch of salt in the mixer. Or by hand.


It was originally made with Nata instead of Cream Cheese. Nata, which is a thin layer formed after boiling fresh raw milk, and found throughout Mexico in Haciendas and Ranchos, is sweet, extremely white and thick.

And oh so irresistible.

If you have access to Nata, use it instead of Cream Cheese, as those pioneer Conceptionist nuns did. But truth is, many nuns use Cream Cheese these days too…

The dough is malleable and soft. Juju made one batch with his hands. Proud monster.


It is easy to roll out as it is elastic, soft and not so sticky. But do sprinkle some flour as you roll…


To cut the rounds, you can use a pastry cutter. I found the size I wanted, a 4 inch round, in a Tupperware. Which was also easy for Juju to use.


As you separate the rounds…


…brush the edges with a lightly beaten egg.


Spoon the filling right down the center.

The Meat Picadillo is included in the recipe below. Picadillo, has many variations, but it typically has as a base of ground meat seasoned with garlic, onion, tomato puree, spices and sometimes nuts, olives and sweet ingredients like raisins or dried fruits. A complex version of Picadillo is used in the legendary Chiles en Nogada.


This is a simpler version, that can be made a couple days ahead of time. Just take it out of the refrigerator when you are ready to fill those Empanadas (If you have leftover Picadillo, you can make tacos, stuff chiles, tamales… or eat it with a side of rice or tortillas!)

Close up the bundle in the shape of a turnover.


Seal the edges pressing your fingers.


To really seal the deal, go around with a fork, gently, so as not to make many holes in the dough…


Give the Empanada a final egg wash.


Here we go, one after the other…


Sprinkle with sesame seeds. It makes them look beautiful. I think Beatriz da Silva would approve.

The sesame seeds also give the Empanadas a light nutty and toasty accent.


And in the oven they go. You can also make them ahead of time and place them in the refrigerator (for a couple of days) or freezer (for weeks!) before baking them.

Take them out as you need them and eat them freshly baked. As they should.

Pati Jinich picadillo empanadas
I think that you do taste all of the flavor, all of it, behind the history of these Empanadas, in each single bite.

picadillo empanadas
Print Recipe
4 from 25 votes

Picadillo Empanadas

Picadillo Empanadas recipe from Pati's Mexican Table Season 1, Episode 5 “Convent Food”
Prep Time45 minutes
Cook Time20 minutes
Total Time1 hour 5 minutes
Course: Antojos, Main Course
Cuisine: Mexican
Keyword: almonds, cinnamon, cloves, cream cheese, cumin, Empanadas, nata, olives, onion, pati’s mexican table, Picadillo, pork, raisins
Servings: 15 medium empanadas
Author: Pati Jinich

Ingredients

For the dough:

  • 1 cup unsalted butter at room temperature
  • 8 oz, about 185 g cream cheese or fresh nata at room temperature
  • 2 1/3 cups all-purpose flour
  • 1/2 tsp salt
  • 1 egg lightly beaten
  • 1/2 cup sesame seeds

For the picadillo (makes about 4 cups):

  • 3 tbsp olive oil
  • 1/4 cup white onion chopped
  • 1 garlic clove finely chopped
  • 1 lb pork shoulder or butt or combination of pork, beef and veal, ground
  • 3/4 tsp kosher or sea salt
  • 1 lb ripe tomatoes pureed, or about 2 cups tomato puree
  • 2 cups chicken broth or water
  • Pinch of cumin
  • Pinch of ground cloves
  • 1/2 tsp cinnamon ground
  • 1/4 cup slivered almonds lightly toasted
  • 1/4 cup raisins
  • 1/4 cup Manzilla olives chopped

Instructions

To make the dough:

  • Beat the cream cheese with the butter in a mixer at medium speed, until it is creamy. Gently add the flour and salt and continue mixing for a minute more. Turn dough onto a lightly floured surface and knead for a minute. Form the dough into a ball, wrap in plastic wrap and refrigerate from 15 minutes up to 24 hours.
  • After refrigerating, sprinkle flour over the countertop and roll out half the dough until its about 1/4 inch thick. For medium sized empanadas, cut out rounds of 4 to 5 inches in diameter. Continue until all of the dough is used.
  • Grease a baking sheet with butter. Preheat the oven to 375 degrees.
  • Spoon about 1 1/2 tablespoons of the picadillo filling into the center of each round. Brush the edges of the round with the beaten egg. Fold a side of the circle over the filling across the other side. Press with your fingers as you close. Without breaking the dough, press with a fork over the edges to seal and make a design.
  • Place the empanadas on the baking sheet. When you fill the baking sheet, lightly brush their tops with the lightly beaten egg and sprinkle with sesame seeds.
  • Bake the empanadas anywhere from 20 to 25 minutes, until the tops have a golden tan and dough is cooked through. Serve hot.

To make the picadillo:

  • Heat olive oil in a large saute pan set over medium-high heat. Add onion and saute for a couple of minutes, until it becomes translucent and soft. Incorporate chopped garlic and saute for about a minute until it becomes fragrant. Incorporate the meat and the salt and let it cook for about 8 minutes, until cooked and lightly browned.
  • Pour in tomato puree and let it season, stirring often, for 5 to 6 minutes, until it has deepened its color, thickened in consistency and lost the raw flavor. Pour in the chicken broth or water, cumin, cloves and cinnamon. Stir well and let it cook 15 minutes more.
  • Add the raisins, almond and olives, mix well and taste for seasoning. Cook for 5 more minutes. If needed, add more salt. The filling should be nice and moist.
  • Just remember, once it cools, it will dry a little more as it will absorb the juices. Turn off the heat. You can make the filling up to two days ahead of time, let it cool, cover and refrigerate.

Notes

Empanadas de Picadillo

Bossed Around at El Bají­o: Plantain Quesadillas

Each time I go back to Mexico City, even before the plane lands, I know there are some formal plans that can never, ever, be messed around with. They are all with my father and they all involve eating in the same places. Each single time.

One of the places is El Bají­o. If you know my father, you know he doesn’t let me order. You also know that he knows the Restaurant manager, waiters, bar servers and valet parking attendants by name. And they all know him too.

Continue reading “Bossed Around at El Bají­o: Plantain Quesadillas”

Quesadillas at the Mexico City Fair

The last time I was at the Mexico City Chapultepec Fair was 20 years ago, with my high school friends. Going back last weekend with my own growing monsters, confirmed that it is not an ordinary Fair experience, ever, regardless of one’s age.

Yes, you find the balloons, with a mix of Mexican and American characters, right at the main entrance.

Squash Blossom Quesadillas 1

You will always find Mrs. Bird Lady, somber as can be, with her clairvoyant birds. As soon as she looks you up and down, she knows which of her birds can tell your future more accurately. Maybe…

Squash Blossom Quesadillas 2

For 20 pesos, the cute little bird steps out of the wooden cage, fully concentrated, knowing you think it holds the surprises of your future in its beak.

Squash Blossom Quesadillas 3
It elegantly chooses the three cards that will reveal it to you.

Squash Blossom Quesadillas 4

After being completely clueless with the shocking differences from what the three cards said, you go in for the rides.

And wow man, does that Fair have rides. From beastly roller coasters…

Squash Blossom Quesadillas 5

To the dizzying Nao de China. History tells us that the Naos were really Galleons from the Philippines, that traveled the Manila-Acapulco trade route since the XVI century, bringing so many ingredients into Mexico’s kitchens. But who knows why the name has been popularly changed, for centuries now, to the Nao from China. I guess it sounds more exotic.

Oh well, the monsters couldn’t care less about the accurate food history, all they wanted to do was ride that boat again and again.

Squash Blossom Quesadillas 6

As well as that crazy ride that goes up and down, which I refused to ride.

Squash Blossom Quesadillas 7

There’s my oldest monster, happy with two of his cousins, after dozens of  rides.

Squash Blossom Quesadillas 8

And there is absolutely no Mexican Fair without a Mexican clown. I took a FLIP video, so you can get into the mood.

I had to stop there. If you know Spanish, you heard the clown inviting kids to come up the stage. Some of mine wanted to try. Nope. They didn’t get a turn.

But what is most amazing about the Fair, is the amount and diversity of finger licking foods to be found.

Say, even before you walk in, there is Mr. Cotton Candy Man.

Squash Blossom Quesadillas 9

That was some light, fluffy, spongy and delicious cotton candy, we ate first, before anything else.

Squash Blossom Quesadillas 10

There are countless stands selling Mexican style hamburgers and hot dogs, which do drive me crazy. In such a good way.

Squash Blossom Quesadillas 11

Garnished with raw or cooked onion, tomatoes and Jalapeños. Topped with ketchup and mustard until you say stop. As well as melted – until crisp – Cheddar cheese and crispy bacon, if you like.

Squash Blossom Quesadillas 12

There are exotically flavored popsicles: Jamaica flowers, Horchata, Tamarind, Mango with Chile, Pecans, Strawberries and Cream, Zapote, Mamey, Coconut, Tangerine, amongst some… And they can all be drizzled with a healthy dose of Chamoy on top.

Squash Blossom Quesadillas 13

There is a grand place to find all sorts of candies…

Squash Blossom Quesadillas 14

…that tend to be spiced up, with different levels of heat. Not for the faint-hearted.

Squash Blossom Quesadillas 15

As well as different kinds of crunchy snacks like potato chips and chicharrones, which MUST be squirted with Chile sauce, freshly squeezed lime juice and salt. Really, they MUST.

Squash Blossom Quesadillas 16

Popcorn freshly popped, MUST also be squirted with a chile sauce.

Squash Blossom Quesadillas 17

There are taco and torta stands.

Squash Blossom Quesadillas 18

The best torta, this time, was the Torta de Pastor.

Mr. Torta de Pastor was kindly showing me how he prepared the Torta that was about to be all mine. He takes a telera -Mexican style French baguette – and heats it on the grill. He places juicy thin layers of that carne in adobo he is slicing below, crunchy onion and savory cilantro.

Squash Blossom Quesadillas 19

Then you can add the salsa of your choice, from many that he lets you choose from.

You know you want to take a bite into it. I should have taken a FLIP video of that, but I was too eager to sink my teeth into it. Sorry.

Squash Blossom Quesadillas 20

There were also Tlayudas. 

Squash Blossom Quesadillas 21

Tlayudas are very large, thin, toasted and crisp corn tortillas. Here they were covered with refried beans, seasoned cactus paddles, shredded aged cheese, onion, cilantro and topped with both, a red and a green sauce.

Squash Blossom Quesadillas 22

You will also find Nachos. Always. But that is Always, a no thank you from me. Not Here, not There, no Nachos for me Anywhere.

Squash Blossom Quesadillas 23

But the best, by far, were the quesadillas. Freshly made.

Squash Blossom Quesadillas 24

There are countless fillings for you to choose from. Right there, on the spot: seasoned cactus paddles, huitlacoche or mushrooms, chicken Tinga, shredded beef, potato and chorizo

Squash Blossom Quesadillas 25

But my favorites are quesadillas with Squash Blossoms, Poblano Chile and Oaxaca cheese.

I like them so, I featured them in last year’s session at the Mexican Cultural Institute focused on Mexican Street Foods.

There are many ways that you can make them. You can make the corn dough from scratch, which is simple these days. Flatten in a tortilla press, add the filling and fry. As below.

Squash Blossom Quesadillas 26

Or you can use pre-made corn tortillas, add the filling, heat on a comal or griddle until the cheese melts, and if you want until it crisps a little too.

Squash Blossom Quesadillas 27

Whichever way you decide to make them, with fresh corn masa or already cooked tortillas, the wholesome and tasty filling full of personality is bound to make you happy. I am sure the clairvoyant bird would agree…

squash blossom quesadillas
Print Recipe
4.50 from 4 votes

Squash Blossom Quesadillas

Squash Blossom Quesadillas recipe from Pati's Mexican Table Season 2, Episode 9 "Xochimilco: Cooking with Flowers"
Prep Time1 hour
Cook Time30 minutes
Total Time1 hour 30 minutes
Course: Antojos, Appetizer, Main Course
Cuisine: Mexican
Keyword: cheese, Chiles, Mexico City, Oaxaca, Poblano, Quesadilla, queso, squash blossom
Servings: 12 quesadillas
Author: Pati Jinich

Ingredients

  • 2 poblano chiles charred, peeled, seeded and diced
  • 1 tablespoon unsalted butter
  • 1 tablespoon safflower or corn oil
  • 1/4 cup white onion chopped
  • 1 teaspoon garlic finely chopped
  • 12 ounces fresh squash blossoms rinsed, dried and chopped (about 8 cups)
  • 1 teaspoon kosher or sea salt or to taste
  • 8 ounces Oaxaca or mozzarella cheese shredded
  • 2 cups instant Maseca corn masa flour if making fresh masa tortillas, or substitute 1 package store-bought corn tortillas
  • 1 3/4 cups water for the masa, if making fresh masa tortillas

Instructions

To Prepare Filling:

  • Place the poblano chiles on a tray under the broiler, directly on the grill, or directly on the open flame or on a comal or skillet set over medium heat. Turn them every 2 to 3 minutes for a total of 6 to 9 minutes, until they are charred and blistered all over. Transfer them to a plastic bag, close it tightly and let them sweat for 10 to 20 minutes. Working under a thin stream of cold water, peel off their skin; make a slit down the sides to remove and discard the seeds and veins, then remove and discard the stem. Cut them into 1/2-inch-wide strips or squares.
  • Add butter and oil in a medium sauté pan over medium heat. When the butter is bubbling, add the onion and garlic and cook until softened and fragrant, for about 3 to 4 minutes. Add the prepared poblano chiles, then the squash blossoms and salt. Cook for about 5 minutes, stirring often, until the blossoms exude their juices and the mixture begins to dry out. Remove from the heat.

If Using Fresh Corn Masa:

  • Mix Maseca or instant corn dough masa with the water and knead for a few minutes until soft. Make 1-inch balls and flatten between plastic rounds on a tortilla press.
  • Place 1 tablespoon of the cheese and 2 tablespoons of the filling at the center of the dough disk and, leaving it on the plastic round of the tortilla press, fold it over and press to seal the edges. Repeat to form the rest of the quesadillas, using all the dough and filling.
  • In a deep and large skillet, add enough oil so that it’s at least ¾-inch deep; heat over medium heat. Once the oil is hot, about 3 to 4 minutes later, add a few quesadillas at a time to the hot oil, making sure not to crowd the skillet. Cook for 2 to 4 minutes per side, or until golden brown and crisp. Transfer, with a slotted spoon, to a paper towel-lined platter to drain. Serve hot, with the salsa of your choice.

If Using Store-Bought Tortillas:

  • If using pre-made corn tortillas, add the cheese and filling to the center of the tortilla. Place on an already hot comal, griddle or skillet, and let them cook until the cheese has melted and the tortilla has begun to lightly crisp, about 2 to 3 minutes per side.

Notes

Quesadillas de Flor de Calabaza

Running to Catch the Fresh Fruit Cart!

Every year, just as summer peeks its warm face in Washington DC, I begin to crave fresh fruits and vegetables Mexican street cart style. One of the times when I have enjoyed it the most was last April.  We were traveling through the Copper Canyon route, on a week long trip, from Chihuahua to Sinaloa. We had been waiting at the station in the town of Creel to catch the Chepe train to go to the next town.

As the station officer let out a scream that the train was approaching, out of the corner of my eye, I saw the fruit and vegetable cart. It was hot, we were tired and thirsty, and I saw Mr. Fruit Cart Man peeling some ripe and juicy mangoes. I grew weak in my knees.

Just that second, I saw Daniel’s face panic. He knew I was going to make a run for it.  Along with his camera.

Fresh Fruit Cart 1

Although I could hear him scream: “NO PATI!!! You are going to be left behind!” I ran for it.

Fresh Fruit Cart 2
The fruit cups had watermelon, jí­cama, canteloupe and mangoes. Since Mr. Fruit Cart Man watched me run, he politely suggested I take one fruit cup just like that. But I was dying for one of those mangoes. Plus…, please! If you have tried a Mexican cart style fruit or vegetable, you must know, that without the salt, ground chile and freshly squeezed lime juice, there is no reason to run for it.

I filmed Mr. Fruit Cart Man with the FLIP (sorry friends, took me a year to learn how to upload it, and hopefully my videos will get better too… ) so you can see how beautifully he cuts and shapes the mango… As he was almost done, we heard the train come…

There are many ground chiles you can use. They all add that something that makes the flavor of the fruit come out and pop. There is the typical chile piquí­n.

There are also some liquid chile sauces you can use, and are found in many Fruit Carts. Such as La Valentina, Bufalo, or Cholula. These days, it is incredible, but one can find all of these chile mixes and sauces throughout the US.

That day Mr Fruit Cart Man added a ton of the chile, a bit of the salt and a giant squeeze of the fresh lime juice. By the time he was done, all the travelers had hopped on…

Fresh Fruit Cart 3

I am so lucky, because my monsters waited for me. It was a close call, but we made it.

See, Juju is licking his fingers from that last piece of mango…

Fresh Fruit Cart 4

And we did make it to our next stop…

Fresh Fruit Cart 5

Now that the summer is pumping up, you can make some too…

You will have made a wonder to run home for.

Fresh Fruit Cart main
Print Recipe
5 from 1 vote

Fresh Fruits and Vegetables from the Cart

Every year, just as summer peeks its warm face in Washington DC, I begin to crave fresh fruits and vegetables Mexican street cart style. One of the times when I have enjoyed it the most was last April.  We were traveling through the Copper Canyon route, on a week long trip, from Chihuahua to Sinaloa. We had been waiting at the station in the town of Creel to catch the Chepe train to go to the next town.
Prep Time10 minutes
Cook Time1 minute
Course: Antojos
Cuisine: Mexican
Keyword: Antojo, carrots, Chiles, cucumber, Dessert, Jicama, lime, mango, pineapple, Recipe, tajin, Vegetable, Vegetarian, watermelon
Author: Pati Jinich

Ingredients

  • Any fruits or vegetables that you are craving!
  • Pineapple watermelon, mango, jicama, cucumber, carrots or any of your choice, peeled and sliced or diced
  • Salt to sprinkle throughout
  • Ground spiced up chile such as Tajín, or a sauce like Valentina, Buffalo or Cholula
  • Fresh squeezed lime juice

Instructions

  • Peel and slice the fruits and vegetables. Sprinkle salt and chile to taste. Bathe with fresh squeezed lime juice. Eat up!

Notes

Frutas y Verduras de Carrito

Micheladas and Spiced Up Pepitas: You Are Invited!

For Labor Day, our friends Jeannie and Bill invited us to their farm on the Eastern shore. Jeannie said snacks and grown up drinks are welcome. We can’t wait! Since we are going to be a large crowd, meals there are so leisurely and her family likes to try new things, I want to bring an interesting and friendly snack. Since I’ve been experimenting with pumpkin seeds, spiced up pumpkin seeds came to mind. Micheladas are a great pairing for them, especially since this may be one of the last weekends with enough heat for such drink.

Pumpkin seeds, Pepitas in Spanish, are one of the things I used to stuff in my suitcase when visiting Mexico. That’s because they have a mellow, somewhat nutty, almost sweet, barely chewy and nutritious nature, but also because of its multiple uses in Mexican cooking. They are used hulled and un-hulled, toasted or fried, to make salsas, moles, soups and drinks. There is more to Pepitas than being used for an unnoticeable role as a salad topping. So you can imagine my happiness when I began noticing their appearance in not just one, but many grocery stores here in the US.

pepitas 1
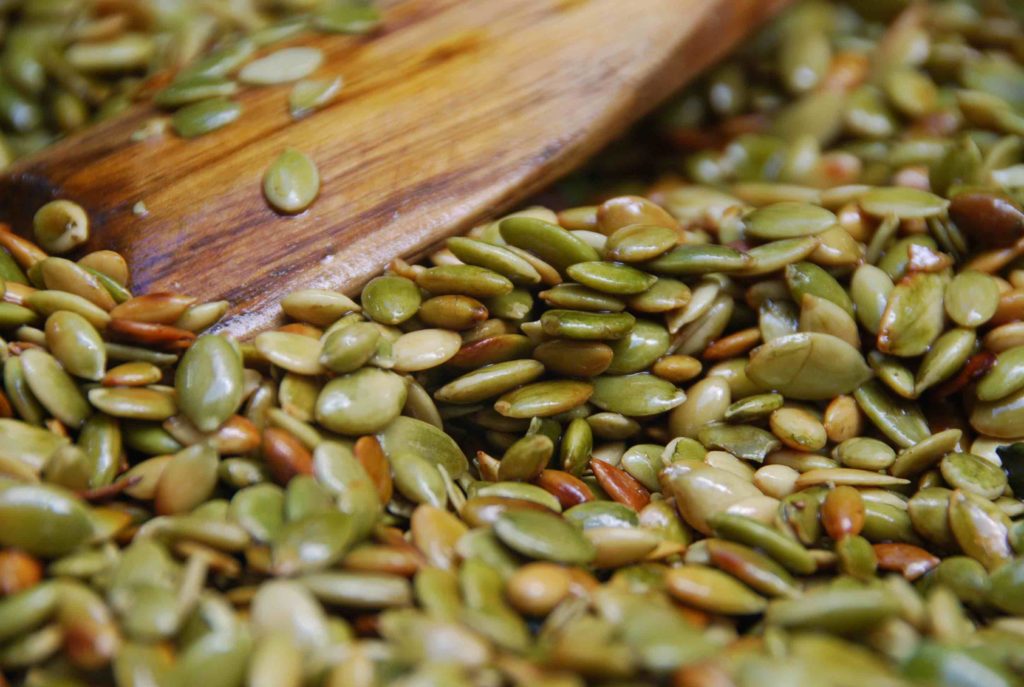
(Pepitas gently frying in my pan, popping and changing from an olive green to a light brown toasted color)
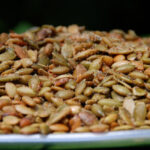
Pepitas are also a craved for snack for many Mexicans, including myself, when going to the movies. Un-hulled, soaked in salted water, dried and toasted, they are sold in little packages in street stands and bring long-lasting entertainment. It takes a couple hours to go through a small bag, as you place one by one between your teeth to crack the salted shell open and then triumphantly pop the hidden and gentle tasting Pepita into your mouth. You get the pleasure of repeating that again and again throughout the ups and downs of the film.

However, one of my favorite ways to eat Pepitas is hulled, toasted or lightly fried and tossed with ground dried Chile Piquí­n (which can be bought ready to use), salt and sugar. It takes five minutes to make this tasty crunchy nibble. If you make plenty, there is extra to use, not for an unnoticeable role but for a stellar one, on top of salads or fish. The mix of chile, salt and sugar makes them come alive in your mouth.

As for the Michelada, it is the ultimate Mexican way to drink beer. Beer purists: do not fear, you will like what you try. Non-beer drinkers: You will love beer this way.

Classic Michelada is made by pouring beer onto a cold or frozen glass mug with a salted rim (previously rubbed with lime) and freshly squeezed lime juice at the bottom. Some people add ice, some people don’t. For the more playful Michelada, a combination of salty ingredients (such as Maggi and Worcestershire sauces) and spicy ones (Tabasco, Valentina, Cholula, or any spicy sauce) are added before pouring the beer.

There is no agreement as to how to pour the beer. I make mine with lime juice, some dashes of Maggi, Worcestershire and Valentina, and pour the beer up to the salted rim. That way I can taste a bit of the salt around the rim with each sip. Some people pour the beer quickly so it goes over the rim and bubbles up with the salt so that the volcano explodes over their hands, and then they drink the top of the delicious disaster and everything is already mixed up (!)

Here are the super easy recipes for the Pepitas and the Micheladas… why work hard on Labor Day?

Spiced Up Pumpkin Seeds
Print Recipe
4.75 from 4 votes

Spiced Up Pumpkin Seeds

One of my favorite ways to eat Pepitas is hulled, toasted or lightly fried and tossed with ground dried chile piquín, salt and sugar. It takes five minutes to make this tasty crunchy nibble.
Prep Time0 minutes
Cook Time5 minutes
Total Time5 minutes
Course: Appetizer, Snack
Cuisine: Mexican
Keyword: chile piquín, pepitas, pumpkin seeds, snack, spiced
Servings: 1 1/2 cups of pepitas
Author: Pati Jinich

Ingredients

  • 1 1/2 cup hulled raw pumpkin seeds
  • 1 tablespoon corn, safflower or vegetable oil
  • 1 teaspoon ground chile piquín or ground Mexican chile, more or less to taste
  • 1 1/2 teaspoon kosher or coarse sea salt more or less to taste
  • 1 1/2 teaspoon sugar more or less to taste

Instructions

  • Heat the oil in a saute pan over medium heat. Once it is hot but not smoking add the pumpkin seeds. Saute, stirring often, for about 4 to 5 minutes, they will have begun making popping sounds and some of them will begin gaining a nice tanned brown color.
  • Transfer to a mixing bowl with a slotted spoon, leaving the remains of the oil behind in the pan. Sprinkle with the ground chile, salt and sugar and toss to coat. As they cool down, they will dry up and become crunchier. Eat or store covered with a lid. They will keep for about a week, if you don’t finish them before then.

Notes

Pepitas
dressed up Mexican beer or michelada
Print Recipe
5 from 4 votes

Dressed Up Mexican Beer

Dressed Up Mexican Beer recipe from Pati's Mexican Table Season 3, Episode 9 “Pot Luck Party”
Prep Time1 minute
Cook Time2 minutes
Total Time3 minutes
Course: Drinks
Cuisine: Mexican
Keyword: beer, hot sauce, lime, Maggi sauce, pati’s mexican table, soy sauce, Worcestershire sauce
Servings: 1 beer
Author: Pati Jinich

Ingredients

  • 1 beer mug chilled
  • Kosher or sea salt for coating the rim
  • 1 lime wedge
  • Ice cubes (optional)
  • 2 to 3 tablespoons freshly squeezed lime juice
  • 1 beer preferably Mexican, chilled
  • Dash of hot sauce like Tabasco Cholula or Valentina (optional)
  • Dash of a salty sauce like soy sauce Worcestershire or Maggi Sauce (optional)
  • Pinch of freshly ground black pepper (optional)
  • Pinch of kosher or coarse sea salt (optional)

Instructions

  • Pour a layer of salt onto a small plate. Rub the rim of a chilled beer mug with the lime wedge and dip the rim gently into the salt to coat. Place the ice cubes, if using, into the mug. If making a basic michelada, add the lime juice on top of the ice, then pour in the beer.
  • If making a michelada especial, salt the rim of a chilled beer mug as directed above, then place the optional ingredients, to taste, into the mug. Stir the mixture lightly then pour in the beer.

Notes

Michelada

Corn: In a bowl or on a stick

In Mexican cooking, corn is eaten and drank, in just about every possible way… Esquites, freshly shaved corn usually cooked in a buttery broth with epazote leaves and Serrano chile, is one of the most popular takes. So much so, that my boys counted eight Esquite street carts in the small down town square of Chihuahua, when we were there last month.

It is very common to walk through the streets in a Mexican city or village, no matter how tiny it may be, and find a wide array of street food stands boasting the dishes that Mexicans abroad hanker for the most: Antojitos, or little cravings. Each one being a Universe compounded with layers of flavors, in its own right.

Corn in a bowl or on a stick 2a-thumb-510x342-2014
Esquites, as most of the Antojitos, is a very versatile dish. You may eat the whole cooked corn on a stick, or shaved off the cob, cooked and seasoned and served in a cup. Then, you can dress it up or dress it down according to your mood, with the traditional and complementing garnishes of mayonnaise or Mexican cream, crumbled salty Cotija or aged cheese, lime juice, salt and ground dried piquí­n chile.

I just shared it last week with the Fox midday news team.

My boys, of course, prefer the more hands on way of eating it, on a stick. They each have their personal spins. My middle one likes it with just butter, mayo and crumbled salty cheese. On top of that, my little one adds salt and some drops of limejuice. My oldest one proudly eats it, “with a lot of absolutely everything”… Which just means adding ground chile piquin to the later mix… but heavily loaded on all fronts.

It is a good time to try it now that we start to see the beautiful fresh corn in the markets. It is up to you to decide if you want it nice and neat in a cup or deliciously messy on a stick.

Print Recipe
4.34 from 3 votes

Cooked and Seasoned Corn

In Mexican cooking, corn is eaten and drank, in just about every possible way… Esquites, freshly shaved corn usually cooked in a buttery broth with epazote leaves and Serrano chile, is one of the most popular takes. So much so, that my boys counted eight Esquite street carts in the small down town square of Chihuahua, when we were there last month.
Prep Time5 minutes
Cook Time13 minutes
Course: Antojos, Side Dish
Cuisine: Mexican
Keyword: Antojo, chile, Corn, cotija, epazote, lime, mayonnaise, mexican crema, piquí­n chiles, queso anejo, Recipe, serrano chiles, Vegetarian
Author: Pati Jinich

Ingredients

  • 2 tablespoons unsalted butter
  • 1 tablespoon safflower or corn oil
  • 1 serrano chile or more to taste, chopped (seeding optional for less heat)
  • 8 cups fresh corn kernels from about 12 ears of corn
  • 2 cups water
  • 2 tablespoons fresh epazote leaves chopped, or 1 whole leave dried, optional
  • 1 teaspoon kosher or sea salt or more to taste
  • 2 limes or about 4 tablespoons of fresh lime juice
  • 1/4 cup mayonnaise or Mexican cream
  • 1/2 cup crumbled Cotija fresco or añejo cheese
  • Dried ground Piquí­n chile to taste

Instructions

  • Melt the butter together with the oil on a cooking pot over medium-high heat. Add the chopped chiles and let them cook for about 20 to 30 seconds, moving them around.
  • Incorporate the corn, chopped fresh epazote leaves or dried epazote leaf, water and salt. Stir it all up and bring to a simmer. Cover with a lid, bring heat to medium-low and cook for 12 to 14 minutes, until the corn is cooked but still tender. Turn off the heat. You may leave the corn in the pot for a couple hours.
  • Serve corn in cups or small bowls. Let your guests add to their liking the fresh limejuice, mayonnaise or Mexican cream, crumbled cheese, powdered chile piquí­n and salt.
  • You may also cook the whole corn in salted water with the epazote leaves. Once it is cooked and ready, garnish with the same ingredients.

Notes

Esquites

The double life of an avocado

My friend Vered walked into my house carrying a pound of French feta cheese and some freshly baked pitas she found at a Middle Eastern store. It was the kind she used to cook with in her Israeli home. Just a taste made us realize how hungry we were, though we were not near any mealtime. Nonetheless, we had 20 minutes before we had to run, so that’s a great excuse for a snack.

The last beautifully ripe Mexican avocado I had in the basket was staring at me. So I offered to make a Mexican Farolada out of her pita, of course to top with some fresh Guacamole.

The Farolada, named after the Farolito chain of taco restaurants, consists of pita bread stuffed with Mexican Manchego cheese (similar to Monterey Jack), thrown on the grill until the cheese oozes out. If let to sit there per your request, it will become crispy too.

I turned around to start chopping some Serrano chile for the guacamole when Vered said she had another plan for my avocado and her pita: the Israeli way. Which, she said in a challenging fashion, was incredibly tasty.

Now, you can’t just walk into my kitchen and tempt me with something I have never eaten before.

We split that creamy, perfect avocado in half.

She mixed hers with feta cheese, green olives, lime juice (much to her dismay since she never uses limes, but it is very strange to find a lemon in my kitchen) olive oil and salt. She didn’t fill her pita with anything, just heated it up.

While the Farolada was getting nice and crunchy, I prepared my favorite guacamole version: smashed avocado with rivers of lime juice, generous amounts of serrano chile and cilantro and a healthy sprinkling of salt. No chopped tomatoes in there, thank you.

She ate my Mexican version and nodded in approval; I ate her Mediterranean one and loved it. In fact, I think I liked hers more. It seemed more exotic, plus I really enjoy the tangy taste of French feta.

Nonetheless, I finished with a piece of mine, if only because it tasted like home.

Here, you can try them both! See what you think.

Avocados main
Print Recipe
5 from 1 vote

Vered’s Avocado Salad with Toasted Pita Bread

My friend Vered's avocado salad the Israeli way. She mixes the avocado with feta cheese, green olives, lemon juice, olive oil and salt.
Prep Time15 minutes
Cook Time0 minutes
Total Time15 minutes
Course: Appetizer, Snack
Cuisine: Israeli, Mexican
Keyword: Avocado, cheese, Eggs, feta, lemon, olives, pita, Recipe
Servings: 6 servings
Author: Pati Jinich

Ingredients

  • 2 ripe Mexican avocados halved, pitted and peeled
  • 1/2 cup pitted green olives chopped (preferably the cracked bitter ones)
  • 3 scallions chopped
  • 2 to 3 tablespoons fresh lemon juice (she asked me to point out that she meant lemon and never lime)
  • Salt to taste
  • Ground black pepper to taste
  • 2 hard boiled eggs peeled and chopped (optional)
  • 1/2 cup Israeli or French feta cheese crumbled (optional)
  • Hot or toasted pita breads

Instructions

  • In a mixing bowl, mash the avocados with a fork to a chunky paste. Add the olives, scallions, lemon juice, salt and pepper and mix well. Add chopped egg and/or crumbled feta if you are going to use.
  • Spread the avocado salad over toasted pita bread or a slice of bread. For the perfect Israeli dinner – eat with a side of an Israeli salad and scrambled eggs (she pointed out I should add that too…)

Notes

Ensalada de Aguacate con Pita Arabe
avocado
Print Recipe
5 from 1 vote

Pati’s Guacamole Ranchero with Faroladas

The Farolada, named after the Farolito chain of taco restaurants, consists of pita bread stuffed with Mexican Manchego cheese (similar to Monterey Jack), thrown on the grill until the cheese oozes out. If let to sit there per your request, it will become crispy too.
Prep Time15 minutes
Cook Time5 minutes
Total Time20 minutes
Course: Antojos, Appetizer, Main Course, Snack
Cuisine: Mexican
Keyword: Avocado, cheese, Farolada, guacamole, Mexican Manchego, pita, Ranchero, Recipe, serrano chiles
Servings: 4 servings
Author: Pati Jinich

Ingredients

Guacamole:

  • 2 ripe Mexican avocados halved, pitted, peeled and diced
  • 1 tablespoon chopped white onion
  • 1 serrano chile or to taste, minced (seeding is optional and may substitute with jalapeño)
  • 1 tablespoon roughly chopped cilantro leaves
  • 3 tablespoons fresh lime juice
  • 1 teaspoon kosher salt or to taste

Faroladas:

  • 4 whole pita breads
  • 1 cup shredded Mexican Manchego cheese or Monterey Jack

Instructions

To make the guacamole:

  • Gently mix ingredients in a bowl and serve. It can be prepared a couple of hours in advance if covered and stored in the refrigerator.

To make the faroladas:

  • Heat a comal or heavy dry skillet over medium-low heat for about 5 minutes. Gently heat the pita breads over the comal or skillet for about 15 seconds per side. Remove and make a horizontal slice halfway through, making a long and wide pocket.
  • Stuff each pita with about 1/4 cup shredded cheese. Place them back on the hot comal or skillet and heat for about 3 to 4 minutes on each side, to your liking, until cheese is melted and depending how crunchy or soft you want the pita bread. For crunchier, leave longer. Remove from heat, cut into 4 pieces and eat with the guacamole.

Notes

Guacamole Ranchero con Faroladas