Tortillas & Breads

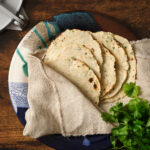
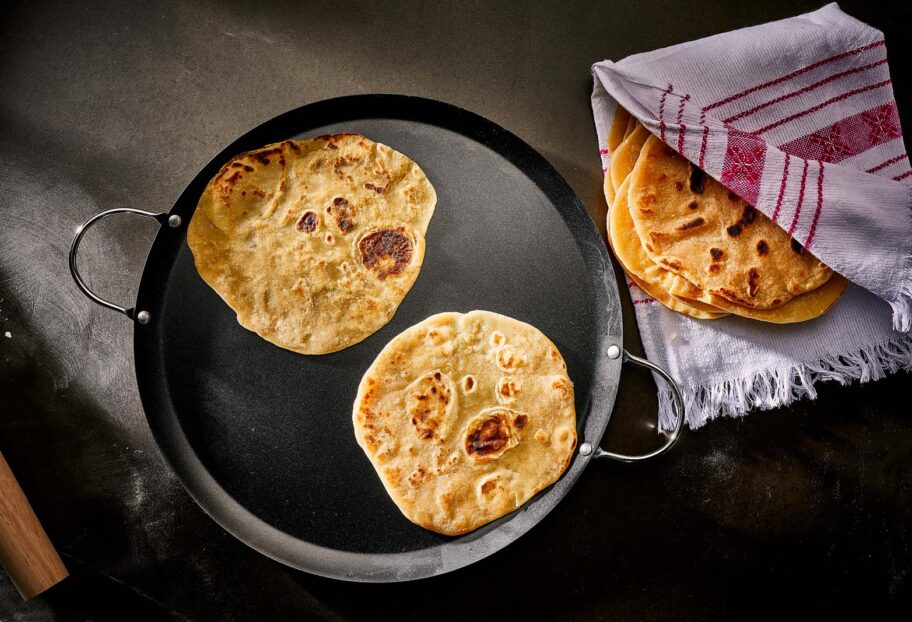
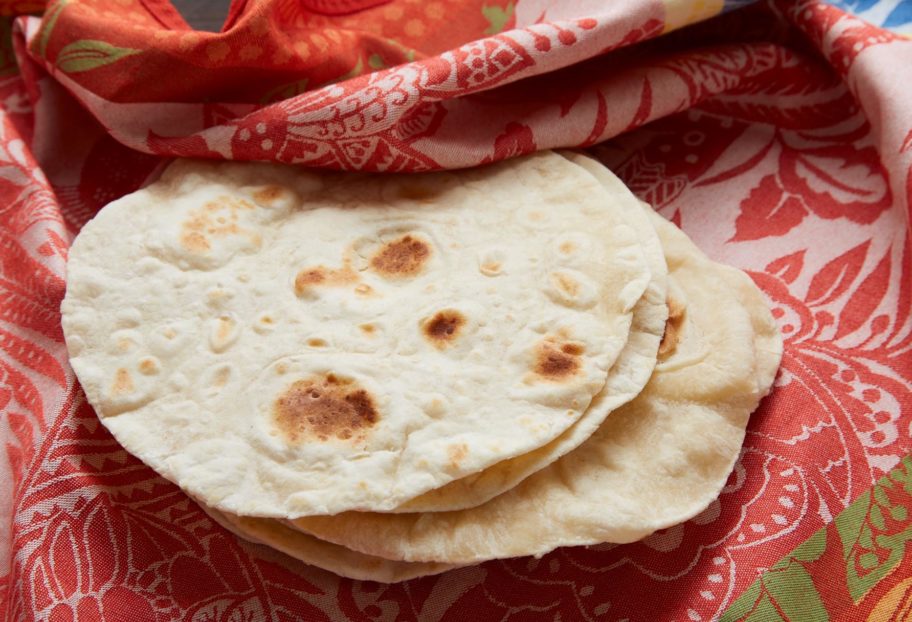
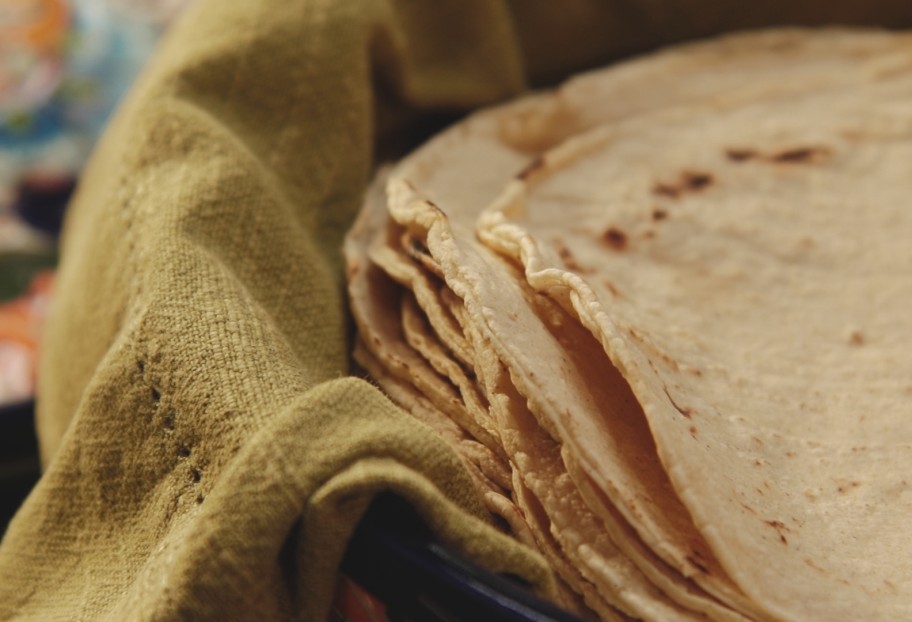
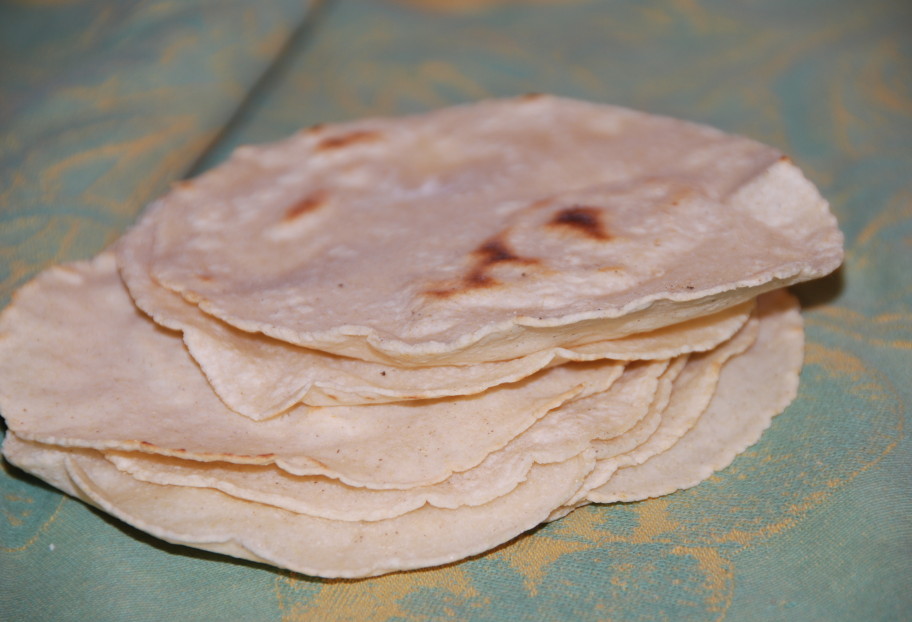
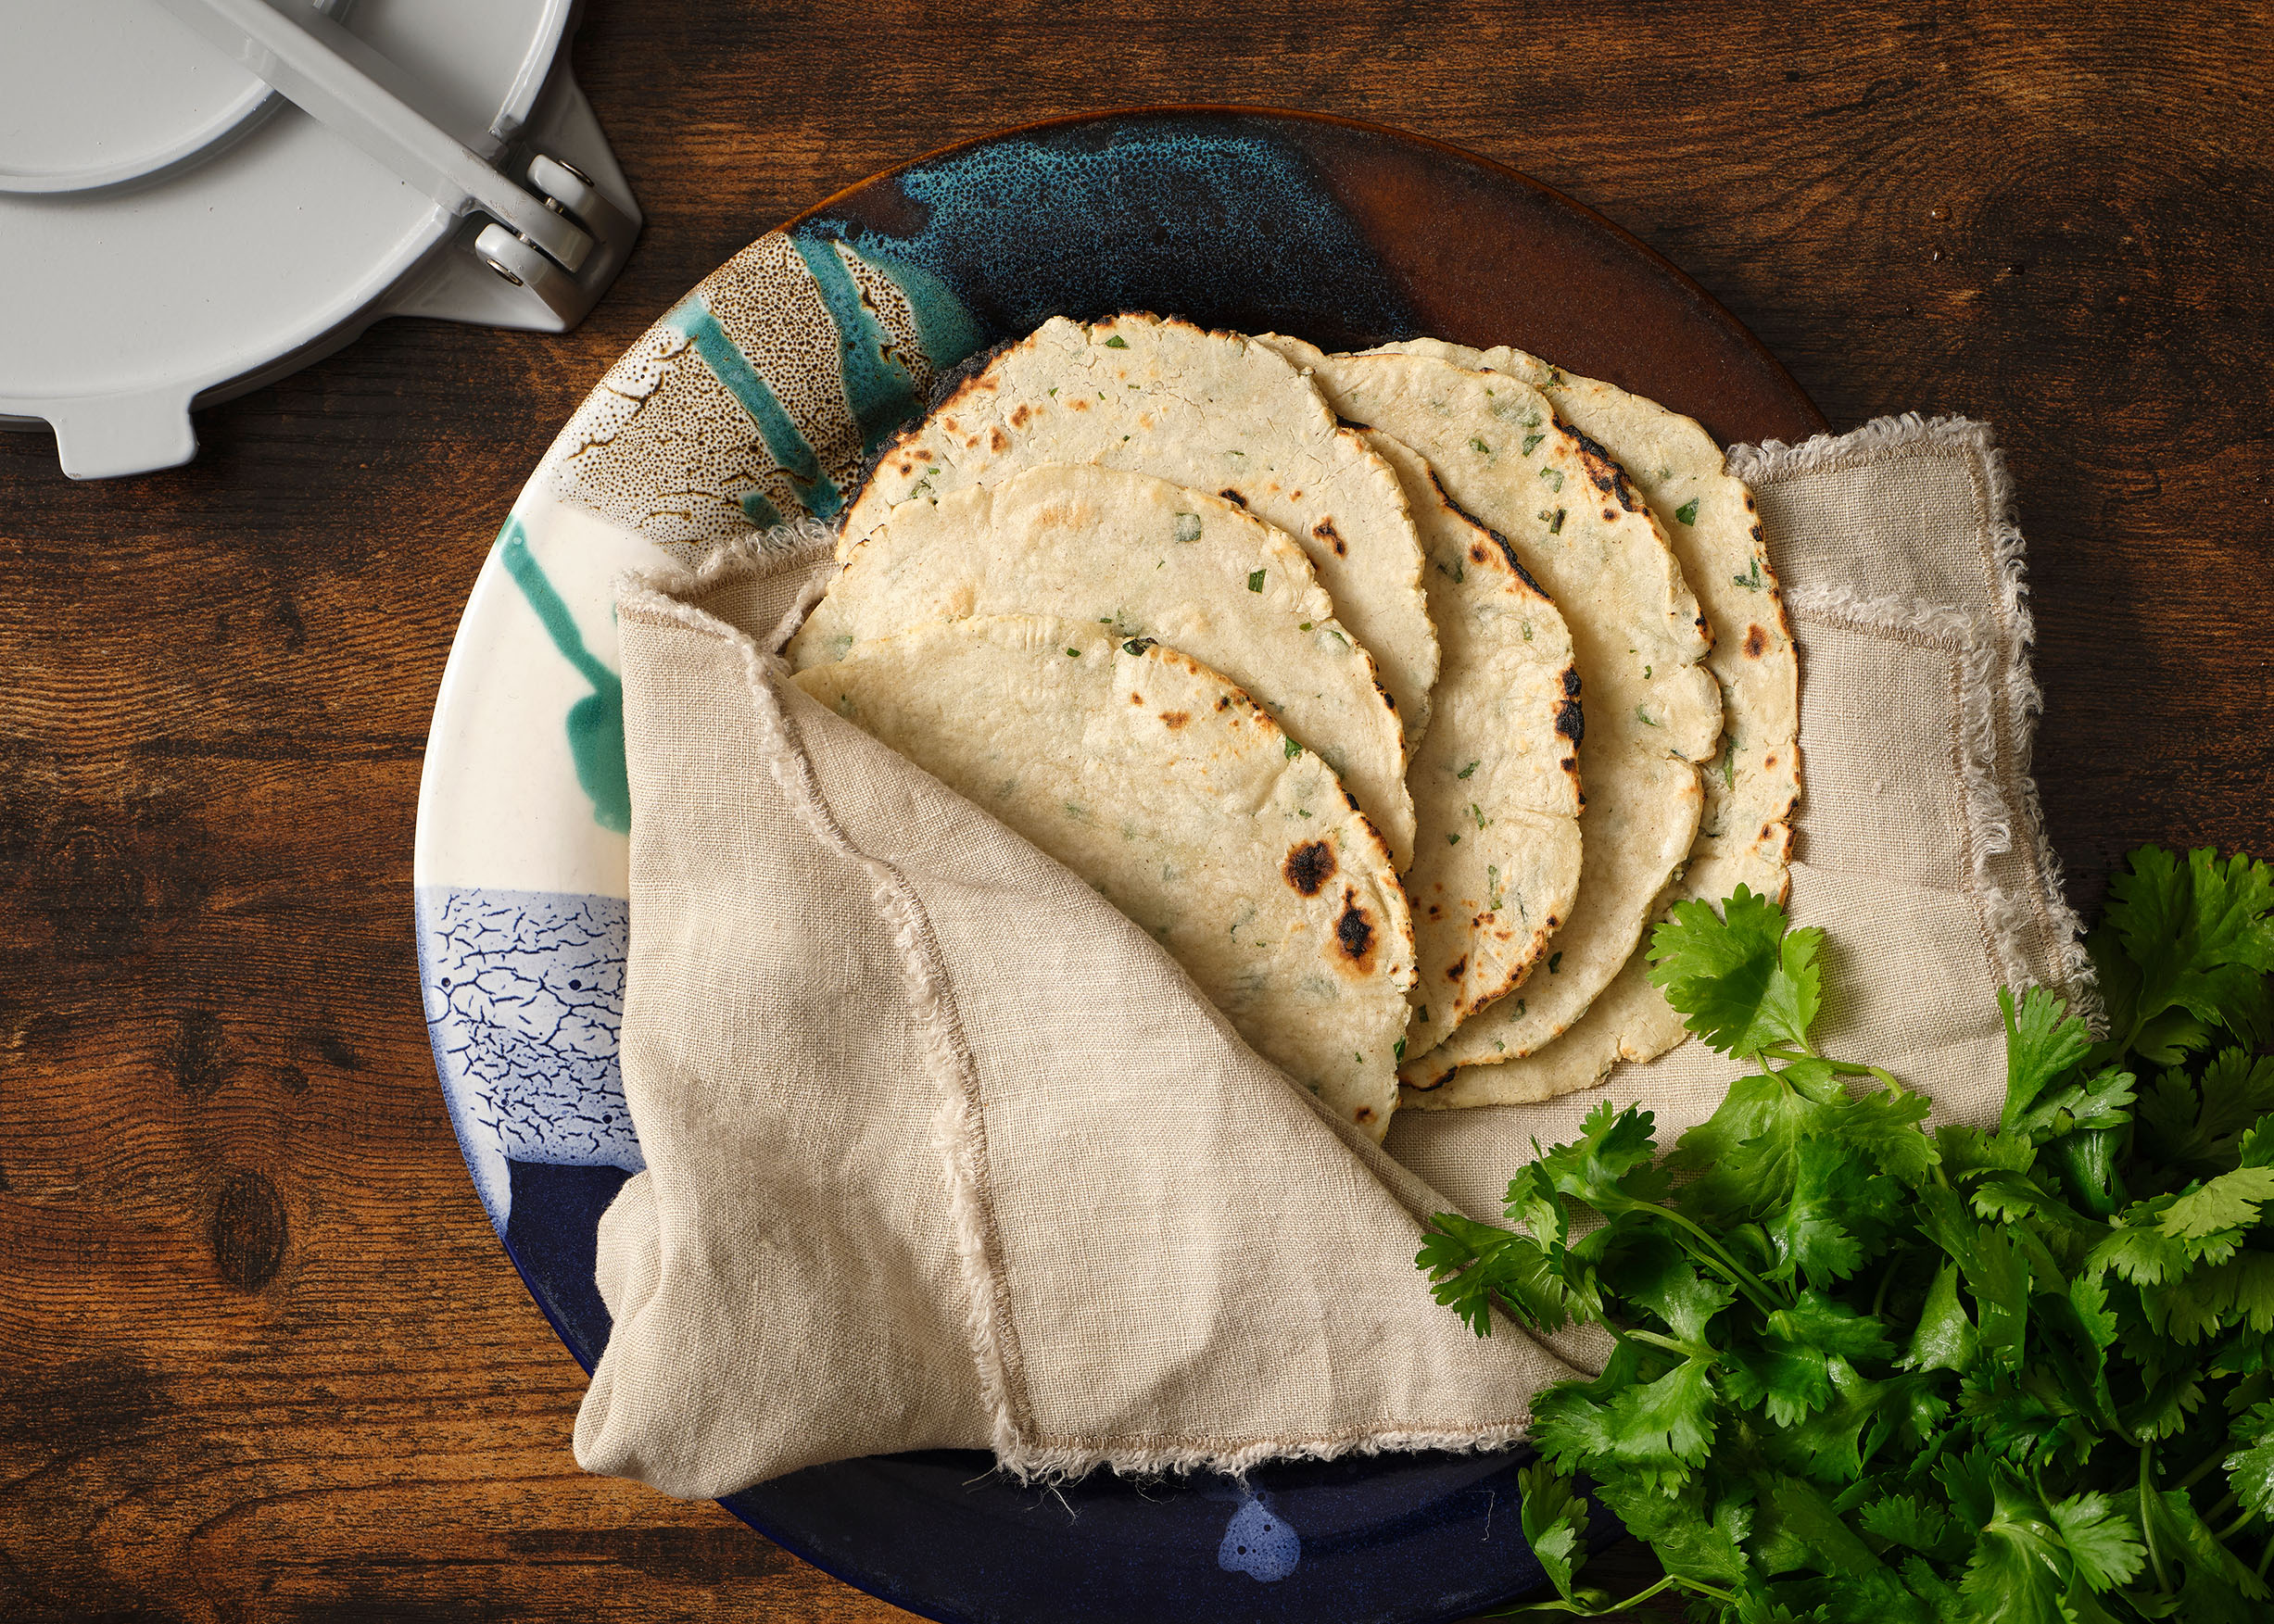
Fresh Herb Corn Tortillas

Fresh Herb Corn Tortillas
Print Recipe
4 from 3 votes

Fresh Herb Corn Tortillas

Fresh Herb Corn Tortillas recipe from Pati’s Mexican Table Season 12, Episode 8 “Maya Today”
Cook Time30 minutes
Course: Antojos
Cuisine: Mexican
Keyword: tortillas, Vegetarian, Yucatán Peninsula
Servings: 16 corn tortillas
Author: Pati Jinich

Ingredients

  • 2 1/2 cups (231g) masa harina
  • 1/4 teaspoon kosher or coarse sea salt
  • 1 2/3 cups warm water plus more as needed
  • 1/2 cup finely chopped cilantro, epazote or chives or a mix of any of them
  • Grated melty cheese such as Oaxaca, Monterey Jack, Muenster or mozzarella, optional, if making quesadillas

Instructions

To make the dough:

  • In a large mixing bowl, combine the masa harina and salt. Gradually add the warm water, stirring with your hands to make a cohesive dough. Add the finely chopped herbs. Using your hands, knead the dough in the bowl until it’s smooth, about a minute or so. If the dough sticks to your hands and feels wet, add more masa harina a teaspoon at a time. If it crumbles when you roll a piece into a ball, add more water a teaspoon at a time.

To shape the tortillas:

  • Preheat a comal, a cast iron or nonstick pan, or a griddle, over medium heat for 5 minutes, or until evenly hot. Cut two round or square pieces of plastic – from a plastic produce or zip-top bag – to a size about 1/2″ larger than the diameter of your press. Set aside.
  • Divide the dough into 16 pieces and roll each piece into a ball. Cover them with a kitchen towel to keep them moist.
  • Working with one ball of dough at a time, place one piece of plastic on the bottom of the tortilla press, place the ball of dough, and top it with the second piece of plastic. Gently, squeeze the handle of the press until the dough is about 1/16” to 1/8” thick and about 5” in diameter. To achieve a nicely round tortilla, jiggle the handle of your press just as you near the bottom. You may need to press it a couple of times to get the desired thinness.

To cook the tortillas:

  • Open the tortilla press, peel off the top piece of plastic, and then take the tortilla on the bottom piece of plastic next to the comal, so that you can pass the tortilla to one hand as you remove the bottom plastic with the other hand and quickly but gently lay the tortilla on the hot pan. Don’t worry if it isn’t perfectly flat (you’ll get better as you practice), and don’t try to move it, which will cause it to tear. Return the piece of plastic to the bottom of the tortilla press.
  • Cook the tortilla until it releases easily from the pan and its color has lightened and become opaque, 40 to 45 seconds; you don’t want the tortilla to brown or become freckled at this point.
  • Using a spatula or your fingers, flip the tortilla and cook it until the bottom starts to brown and freckle, 70 to 90 seconds more. Flip the tortilla one more time and cook it until it puffs, 10 to 15 seconds. If the tortilla doesn’t puff on its own, gently poke it a few times near the center. Once it puffs, let the tortilla cook for 15 seconds longer, until fully set and soft. Remove the tortilla from the heat and wrap it in a clean kitchen towel, or transfer it to a cloth-lined tortillero.
  • Repeat the pressing and cooking process with the remaining dough.
  • If making quesadillas, add melty cheese, and if you want, a fresh leaf of epazote, to the center of a freshly made tortilla. Either fold in half or cover with a second tortilla and heat on the comal until the cheese is completely melted, flipping in between.

Notes

Tortillas con Hierbas Frescas

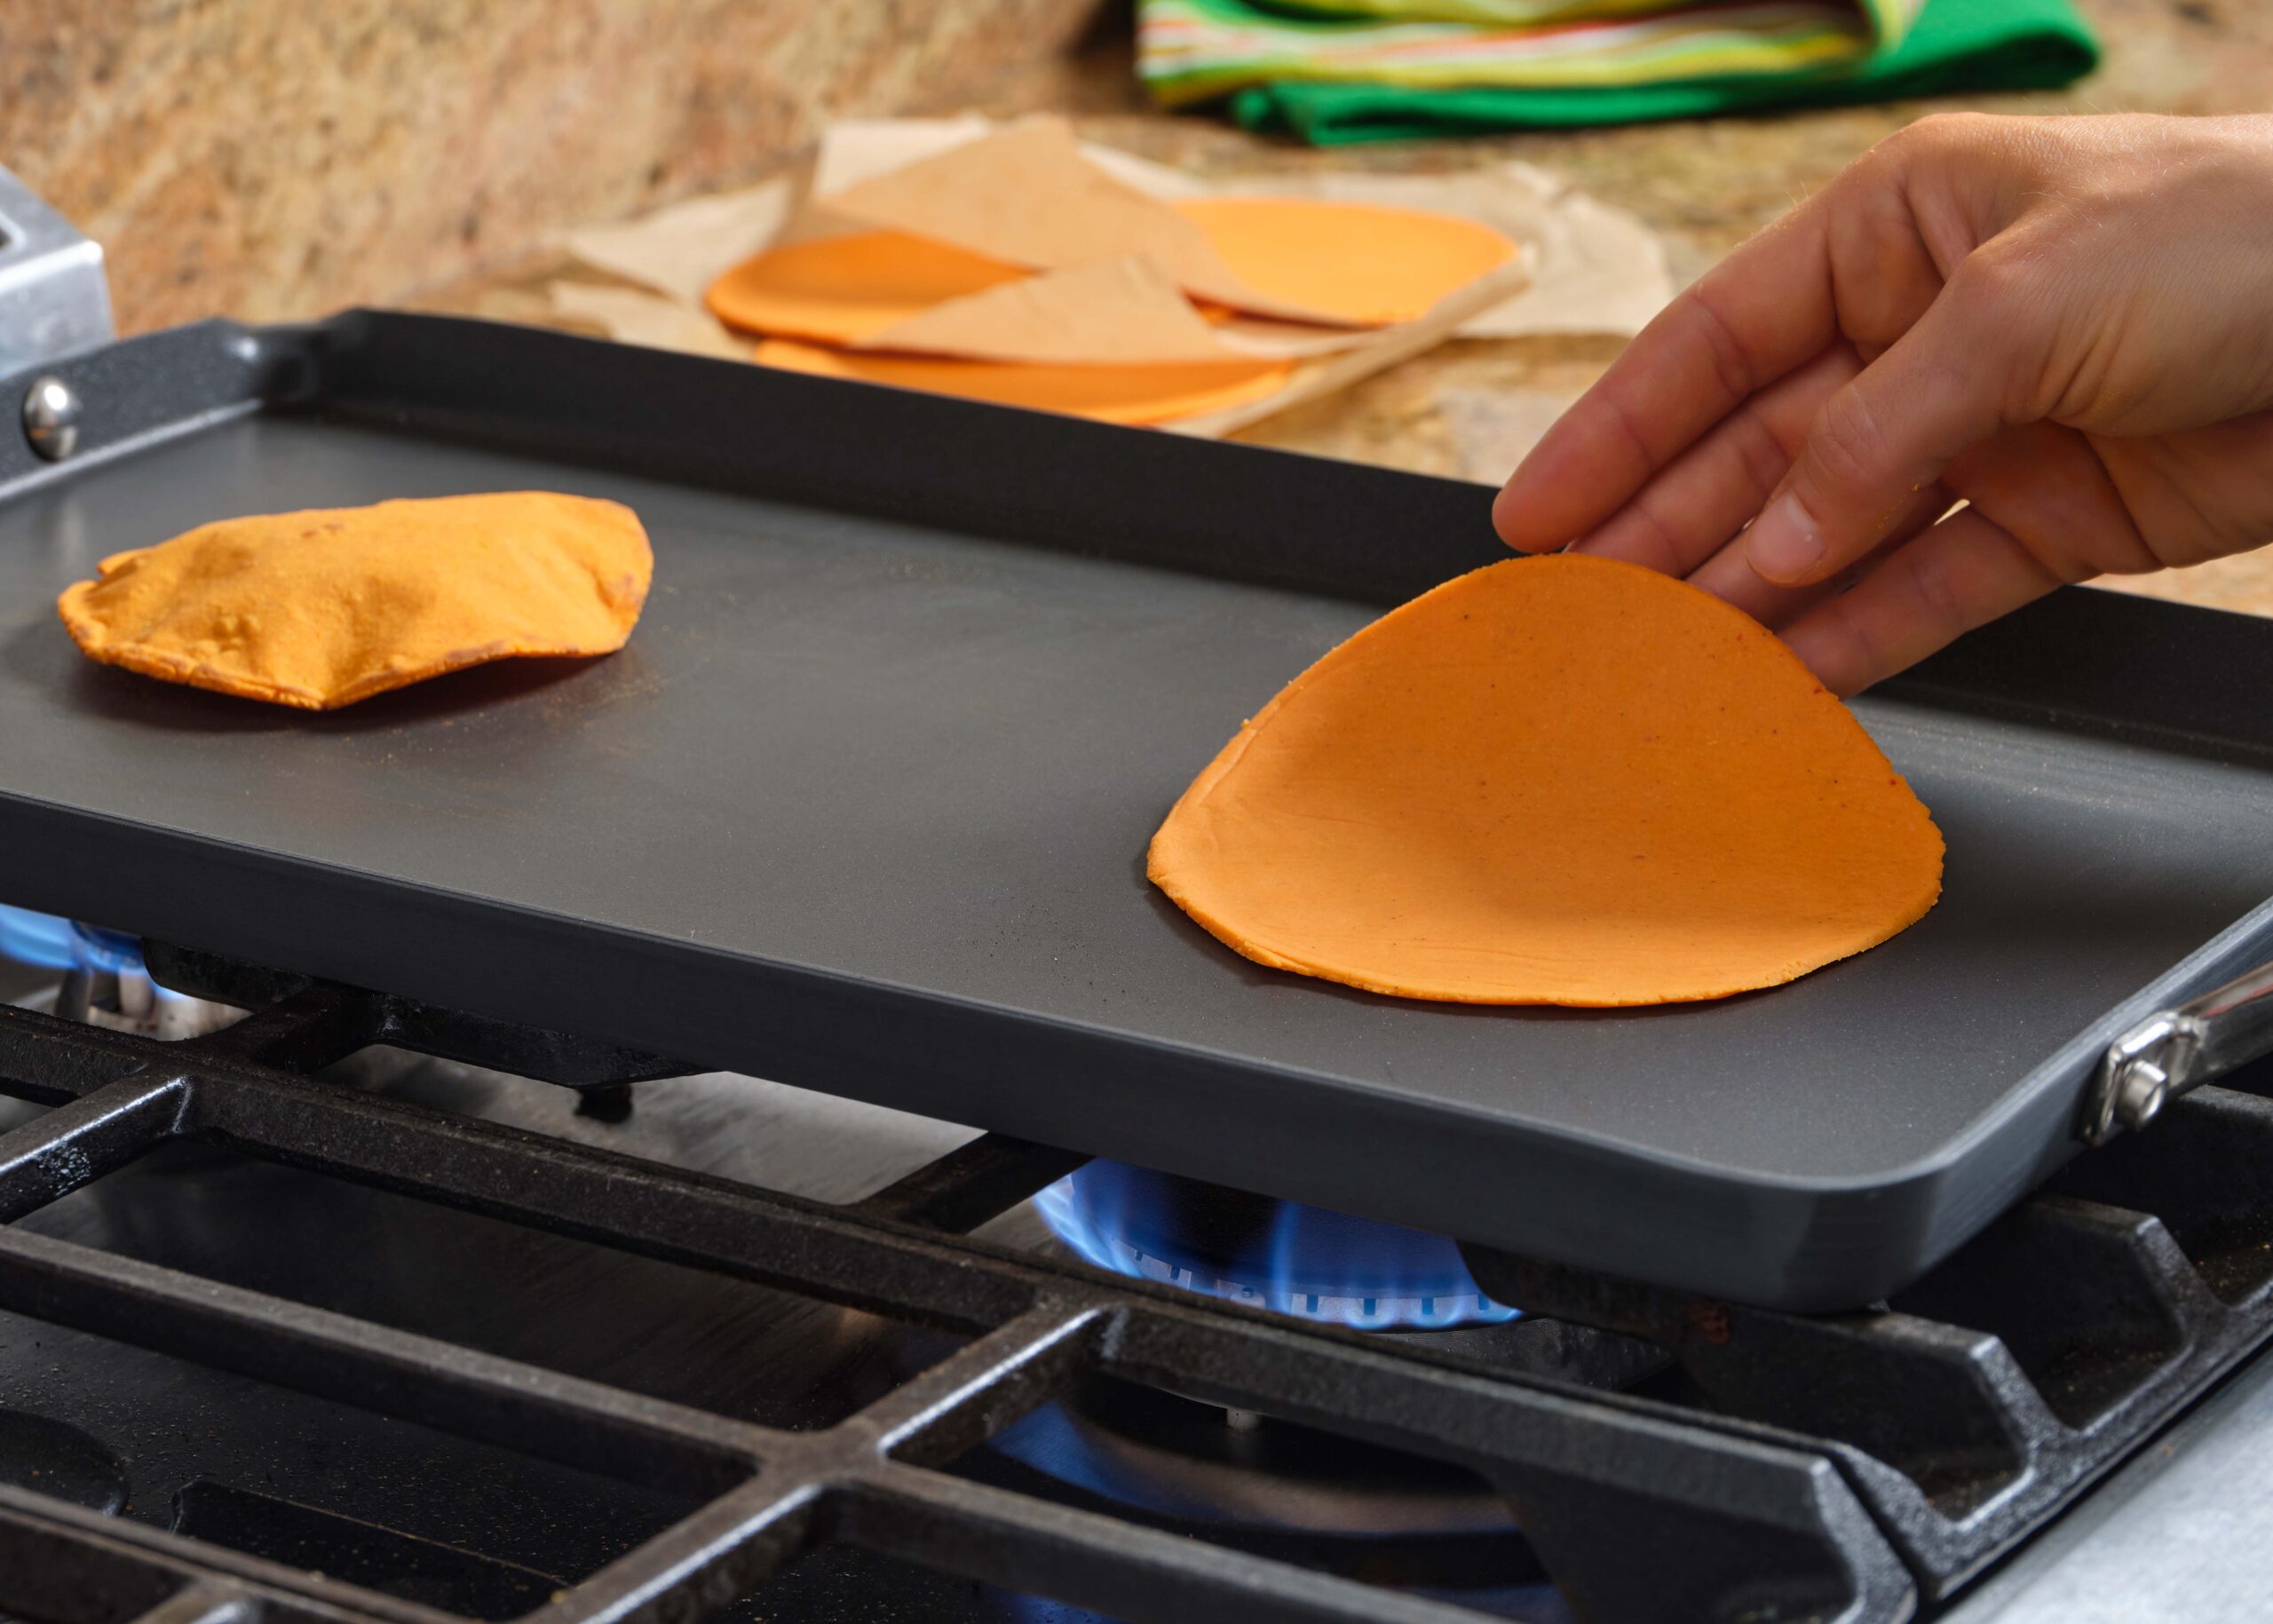
Red Tortillas

Red Tortillas
Print Recipe
4.67 from 9 votes

Red Tortillas

Red Tortillas from Pati's Mexican Table Season 11, Episode 7 "Cantina Culture"
Cook Time15 minutes
Cuisine: Mexican
Keyword: corn tortillas
Servings: 16 tortillas
Author: Pati Jinich

Ingredients

  • 3 guajillo chiles stemmed and seeded
  • 2 garlic cloves
  • 1 ripe Roma tomato
  • 2 cups masa harina
  • 1/2 teaspoon kosher or coarse sea salt

Instructions

  • In a small saucepan, add the guajillos, garlic and tomato. Cover with water. Bring to a boil over medium-high heat and cook for about 10 minutes, until the tomato has softened and become mushy and chiles have rehydrated. Place the tomato, chiles, and garlic along with a cup of the cooking liquid in the jar of a blender and puree until completely smooth. Pass through a strainer into a 2 cup measuring cup. You will use 1½ cups, if there isn't enough, add a bit more of the cooking liquid.
  • In a medium bowl, combine the masa harina and salt. Gradually stir in the 1½ cups guajillo sauce as you knead it all in. Continue to knead, until completely incorporated and smooth, about 2 to 3 minutes. Set aside and cover with a kitchen towel.
  • Preheat a comal, cast iron, or nonstick skillet over medium-high heat. Line your tortilla press with a couple plastic pieces cut into rounds (produce bags from the grocery bags are perfect candidates for this). Place a small bowl with water next to you.
  • Divide the masa balls into 16 pieces, keep in the bowl and keep covered. One by one, roll each piece of dough into a ball, use water to moisten your hands if you need to. Open the tortilla press, set a piece of plastic on the base. Top with a ball of dough and cover the ball with the second piece of plastic. Gently press down, one or two times, until you get a thin tortilla of about ⅛-inch thick and 5 to 6-inches round.
  • Let it cook without moving for about 40 to 60 seconds on the first side, until you see a change in the color of the bottom of the tortilla and it begins to speckle as if making sand dunes, but not dark brown specks. Flip the tortilla and cook for about 60 to 90 seconds, until beginning to freckle and brown. Flip again, and on this second flip, after 15 to 20 seconds, the tortilla should puff. If it doesn't, you can gently poke with your fingers. Let it cook for another 20 to 30 seconds more, until it is fully cooked and place it in a clean kitchen towel or tortilla holder. Repeat with the rest of the masa balls.

Notes

Tortillas Rojas

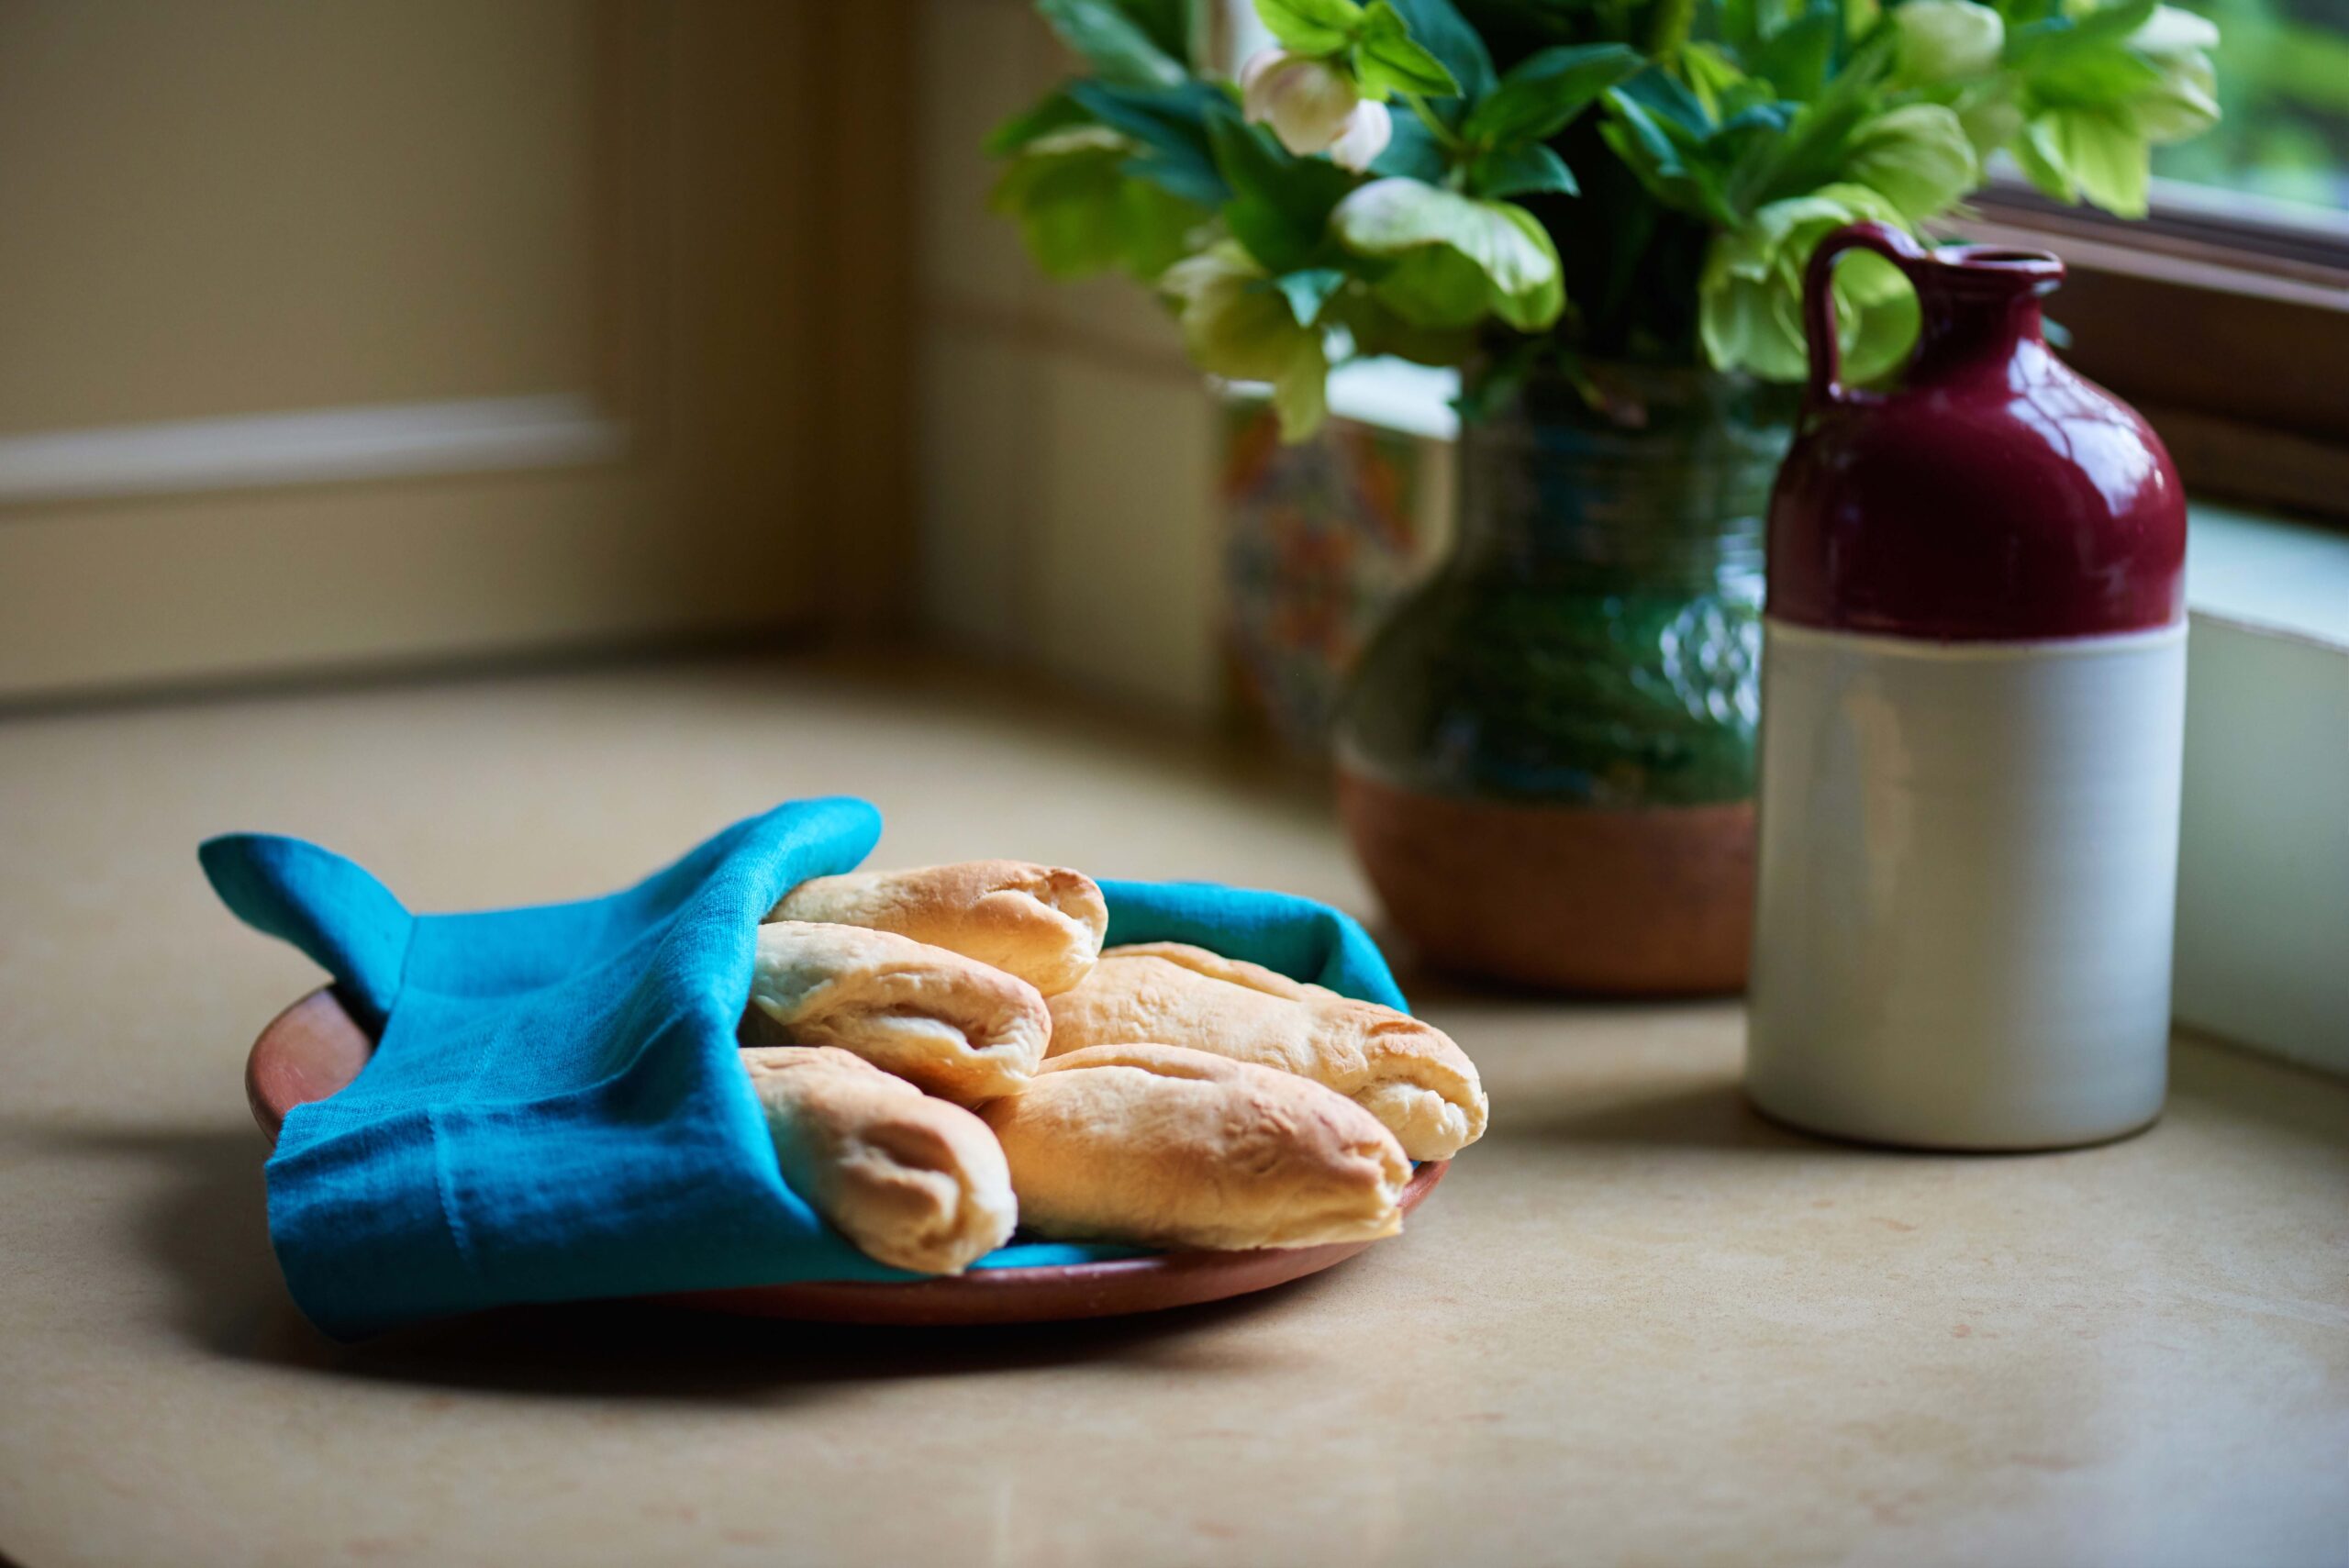
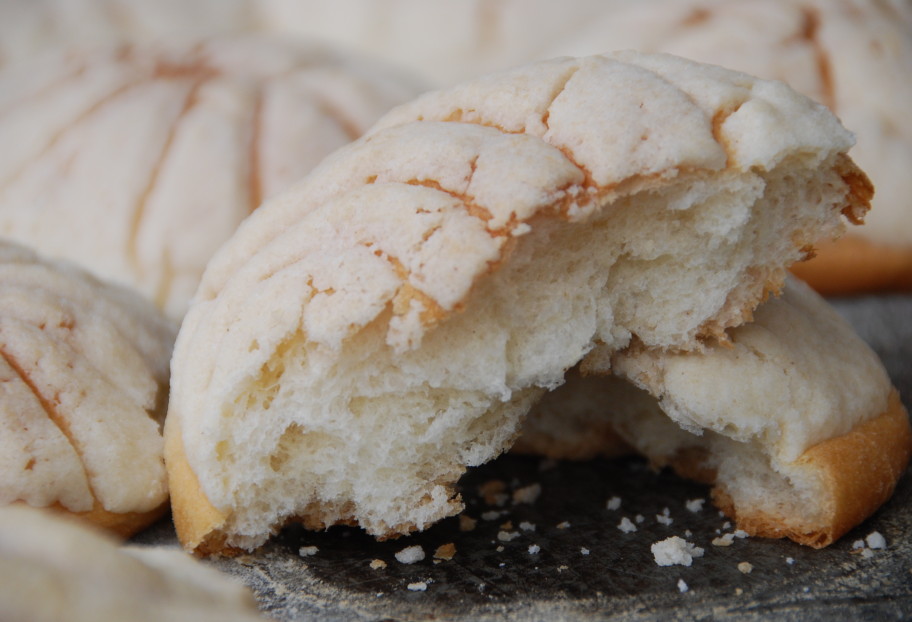
Mexican Bread Rolls

Bolillos
Print Recipe
4.34 from 6 votes

Mexican Bread Rolls

Mexican Bread Rolls recipe from Pati’s Mexican Table Season 10, Episode 1 “Welcome to Guadalajara”
Cook Time20 minutes
Cuisine: Mexican
Keyword: bread
Servings: 8 rolls
Author: Pati Jinich

Ingredients

  • 3 1/4 cups (340g) all-purpose flour
  • 3 leveled teaspoons instant yeast
  • 2 1/2 teaspoons sugar
  • 2 teaspoons salt
  • 1 1/4 cups (284g) lukewarm water

Instructions

  • Mix and knead all of the ingredients — by hand, stand mixer with dough hook, or bread machine — to make a smooth, elastic dough.
  • Cover the dough and let it rise until doubled in bulk, about 45 to 60 minutes.
  • Gently deflate the dough and turn out onto a lightly floured surface, shape into a ball and divide it into 8 equal pieces (about 85g each).
  • One by one, gently flatten each piece a little by pressing it with your fingers against the surface. Bring all the edges inwards, pinching it into a ball shape and pressing to seal. Flip it to have the sealed part on the bottom and roll it a little bit over the top to make it round, then place onto a parchment-lined baking sheet keeping the sealed part on the bottom. Continue with the rest of the dough. Once you are done, brush or spray the 8 balls with water so they will not dry out, cover, and let rest for 10 minutes.
  • Preheat the oven to 400°F. Lightly grease (or line with parchment) one baking sheet.
  • Working with one piece of dough at a time, use your hands to flatten it into a 4” to 4 1/2″ round. Starting at the bottom edge, lift the two “corners” and fold inward, as if making a folded triangle. Press lightly to seal, then roll up and over again and repeat by folding the bottom edge inward, continuing as if you are making a folded triangle. When finished, you will have a somewhat oval piece of dough that is chubbier in the center.
  • Use the palms of your hands to roll out the ends of the oval further, making the ends much thinner than the center.
  • Place the bolillos on the prepared baking sheet as you shape them. Repeat with the remaining pieces of dough.
  • Brush or spray the 8 shaped bolillo balls with water so they will not dry out, cover and let rise until puffy, 30 to 45 minutes.
  • When ready to bake, brush or spray the bolillos with water one more time and take a sharp knife, or lame, and score the bolillos with one long slash from end to end, about 1/4” deep. The bread may deflate a bit; that’s OK, it’ll pick right up in the hot oven.
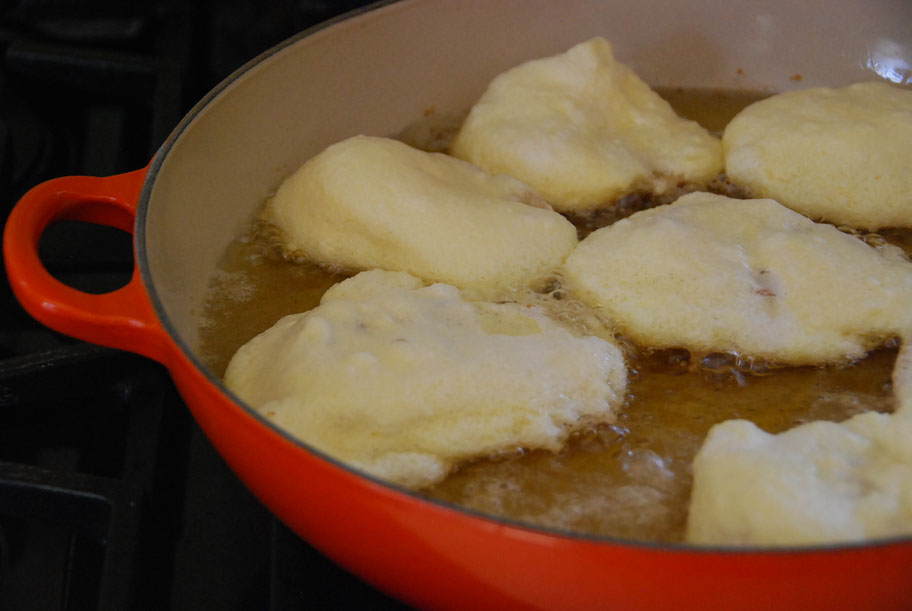
  • Bake until golden, about 20 to 22 minutes.
  • Remove the bread from the oven and cool on a rack.
  • Store bread, securely wrapped, at room temperature for a couple days or so; freeze for longer storage.

Notes

Bolillos

Chubby Flour Tortillas

Campechano Tacos with Street Style Salsa
Print Recipe
4.75 from 8 votes

Chubby Flour Tortillas

Chubby Flour Tortillas recipe from Pati's Mexican Table Season 9, Episode 901 "Tucson: Gateway to Sonora"
Prep Time20 minutes
Cook Time20 minutes
Course: Basic Recipe
Cuisine: Mexican
Keyword: basic recipe, chubby, corn tortillas, flour tortillas, gorditas, harina, Sonora, Sonoran, tortilla, tortillas
Servings: 16 tortillas
Author: Pati Jinich

Ingredients

  • 1 pound all purpose flour about 3 2/3 cups, plus 1/4 cup for finishing the tortillas
  • 1 1/2 teaspoons kosher or sea salt
  • 1 cup vegetable shortening plus 2 tablespoons for rolling the pieces of dough
  • 1 12-ounce can evaporated milk

Instructions

  • Combine 1 pound of all purpose flour and the salt in a large bowl, or in the bowl of a stand mixer fitted with the paddle attachment. Add 1 cup plus 2 tablespoons of the vegetable shortening by spoonfuls or chunks. Start mixing with your fingertips, or with the mixer on low speed, until the fat has been broken into very small pieces and evenly distributed through the flour.
  • In 4 to 5 additions, add the evaporated milk, each time folding it through the flour in a circular motion scraping from the bottom and folding the dough from the center out to the edges of the bowl, or beating continually on low speed in the mixer. If using a mixer, turn the speed to medium and beat for 7 to 8 minutes, until the dough is elastic and no longer sticky. If kneading by hand, at first it will be very sticky and lumpy, but as you continue to knead, it will become more elastic and less wet, with fewer and fewer lumps. After 8 to 10 minutes the dough should be completely smooth and springy to the touch, though it will still be a bit sticky. Gather it into a ball, place back in the bowl and cover the bowl with a clean kitchen towel. Let it rest for 20 to 30 minutes.
  • Divide the dough in half. Grab one piece and squeeze out 1 1/2-inch balls of dough between your thumb and index fingers, as if you were making biscuits. Repeat with the other half of the dough. Alternatively, divide the dough in half, then in half again, and repeat until you have 16 pieces. Set them on the counter as you move along.
  • Sprinkle 1/4 cup flour on the countertop and grease the palms of your hands with one of the remaining tablespoons of vegetable shortening. Roll the balls in your hands to grease them, then roll them generously in the flour and place back in the bowl or on a sheet pan. Repeat with the remaining dough and shortening. Cover the balls with a kitchen towel and set aside to rest for 20 to 30 minutes.
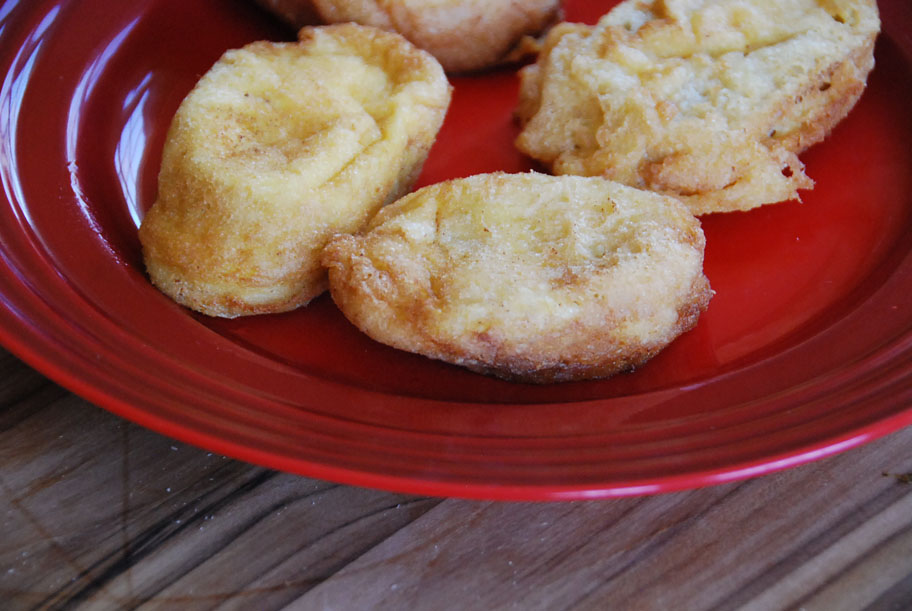
  • Preheat your comal, griddle or nonstick skillet over medium-low heat for at least 5 minutes.
  • Lightly flour your work surface and your rolling pin and one at a time, roll out each ball into a 1/8-inch thick tortilla. Rotate the tortilla on your work surface about 5 or 6 times as you roll it out. Do not worry if you don’t get perfect circles. As soon as you are done rolling out a tortilla, throw it on the comal and cook for about a minute, until you begin to see bubbles forming on top. Check to see if the bottom has become a little freckled and if so, flip the tortilla and cook on the other side until it puffs way up and the side that is now on the bottom begins to freckle. Remove and place in a clean kitchen towel. Continue to roll out and cook the tortillas one by one, placing them in the towel as you move along. Serve warm.

Notes

Tortillas de Harina Gorditas

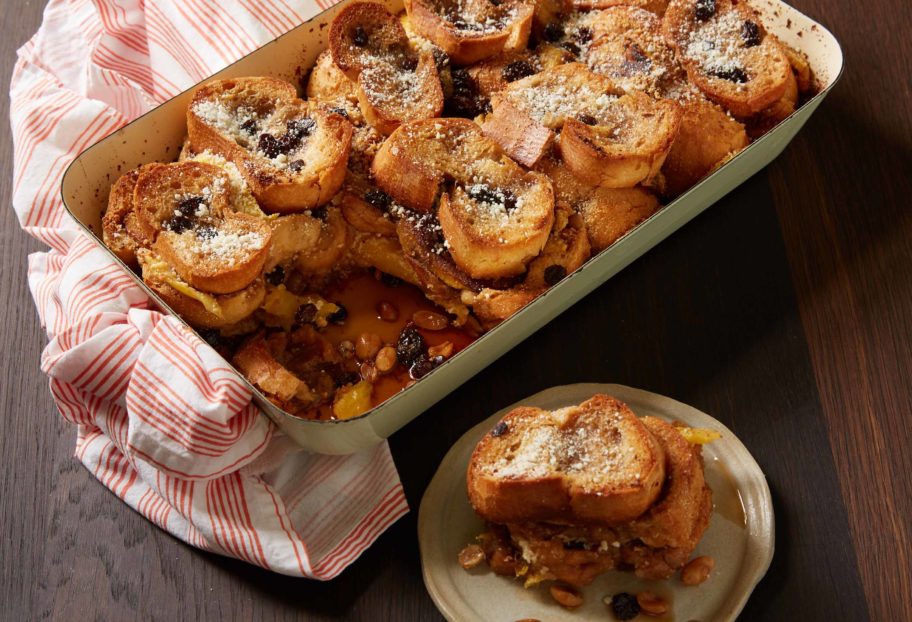
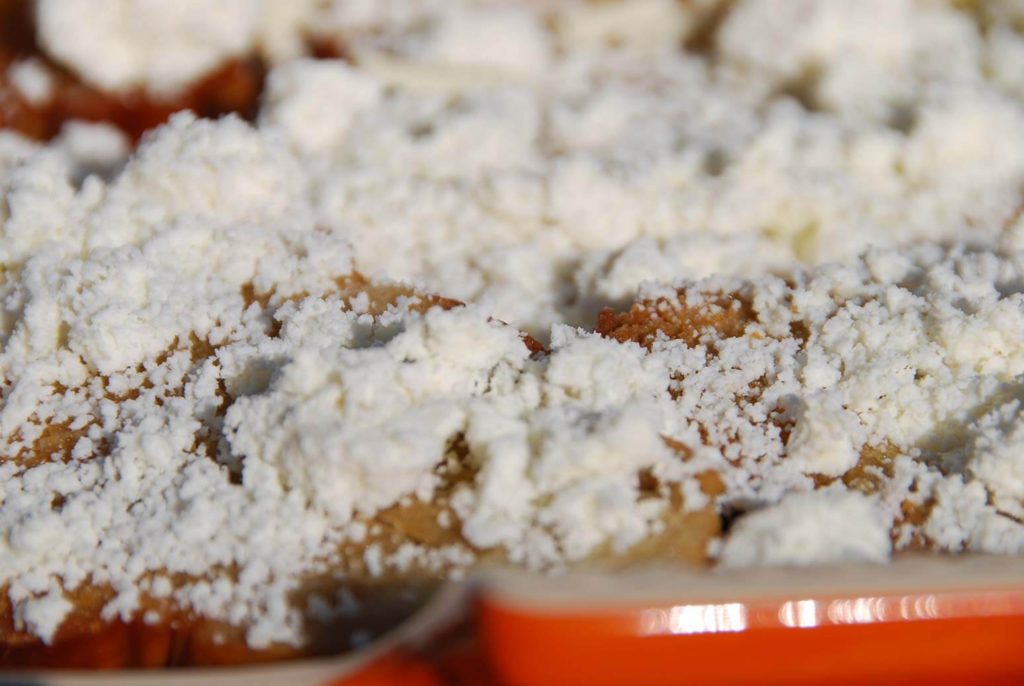
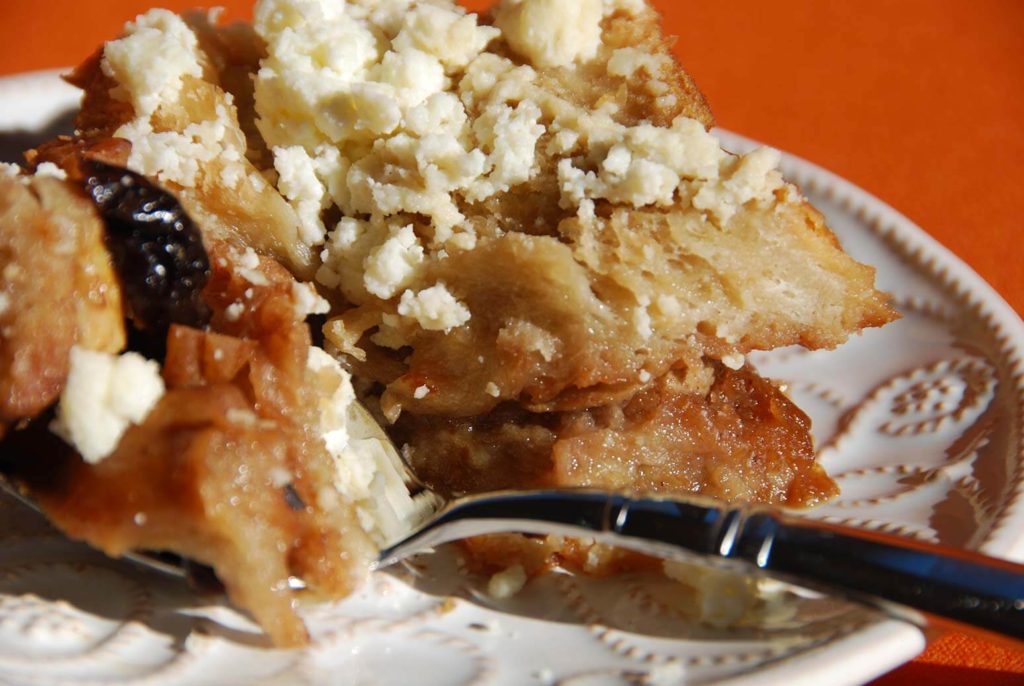
Traditional Capirotada with Mango and Plantains

Traditional Capirotada with Mango and Plantains
Print Recipe
3.88 from 8 votes

Traditional Capirotada with Mango and Plantains

Traditional Capirotada with Mango and Plantains recipe from Pati’s Mexican Table Season 8, Episode 7 “Jinetes, Adventure in the Mountains”
Prep Time15 minutes
Cook Time1 hour 5 minutes
Total Time1 hour 20 minutes
Course: Breakfast, Dessert
Cuisine: Mexican
Keyword: baguette, banana, bolillo, bread, brown sugar, canela, capirotada, ceylon, cinnamon, cloves, cotija cheese, mango, pati’s mexican table, Peanuts, piloncillo, Plantains, raisins, star anise, telera
Servings: 10 to 12 servings
Author: Pati Jinich

Ingredients

  • 6 tablespoons unsalted butter divided
  • 5 to 6 bolillos teleras or Portuguese buns, or 1 large baguette cut into 1-inch slices
  • 1 pound piloncillo grated, or substitute for 2 cups packed dark brown sugar
  • 1 stick canela ceylon or true cinnamon
  • 1 whole star anise
  • 3 whole cloves
  • 1/4 cup raisins
  • 2 quarts (or 8 cups) water
  • 1 tablespoon vegetable oil
  • 3 ripe plantains peeled and cut into 1/2-inch diagonal slices (about 3 cups)
  • 1 to 2 large ripe mangoes peeled and sliced (about 2 cups)
  • 1 cup finely crumbled or grated queso Cotija
  • 2/3 cups roasted peanuts
  • Confectioners’ sugar for serving

Instructions

  • Place racks on upper and lower thirds of the oven and preheat to 350°F.
  • Melt 4 tablespoons of the butter in a small pan. Brush the surface of two large baking sheets with some of the melted butter and place the bread slices onto the buttered baking sheets in a single layer. Use the remaining butter to brush on top of the bread slices. Bake for 20 minutes until golden brown on the bottom and remove from the oven.
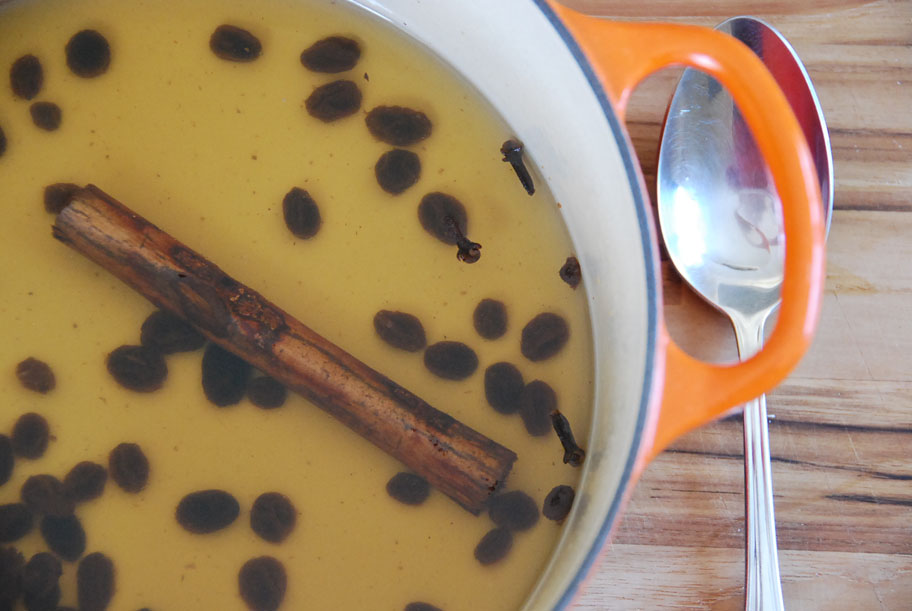
  • In a medium saucepan, place the piloncillo, cinnamon, star anise, cloves, and raisins, cover with the 8 cups of water, and set over medium-high heat. Once it comes to a simmer, stir occasionally, and let simmer for 30 minutes or until reduced by half. Turn off the heat. With a slotted spoon, remove the cinnamon stick, star anise, and, cloves and discard. Set the piloncillo syrup aside.
  • Add 1 tablespoon butter and 1 tablespoon oil to a large saute pan set over medium-high heat. Once the pan is hot, cook the plantain slices in a couple batches for about a minute per side, or until golden brown on both sides. Place the browned plantains on a paper towel covered plate and set aside.
  • Use the remaining tablespoon of butter to grease a 9×13-inch baking dish. Add a third of the bread to make the first layer covering the bottom of the baking dish. Distribute all around half of the plantains, half of the mango, half of the Cotija, and half of the peanuts. Pour on about a third of the piloncillo syrup. Start another layer, adding a third of the bread and the remaining half of the plantains, mango, Cotija, and peanuts. Pour another third of the syrup, trying to get all of the raisins in. Finally, cover with the remaining third of the bread and pour the rest of the syrup on top. Cover with aluminum foil.
  • Set oven rack in the middle of the oven. Bake the capirotada for 25 minutes, then remove it from the oven, carefully uncover, and press down with a spatula so it all bakes in the syrup. Cover again with aluminum foil and return to the oven. After another 25 minutes, carefully remove the foil, and bake for about 10 minutes more so the top browns. Cool slightly before serving and sprinkle with confectioners’ sugar.

Notes

Capirotada con Mango y Plátano Macho

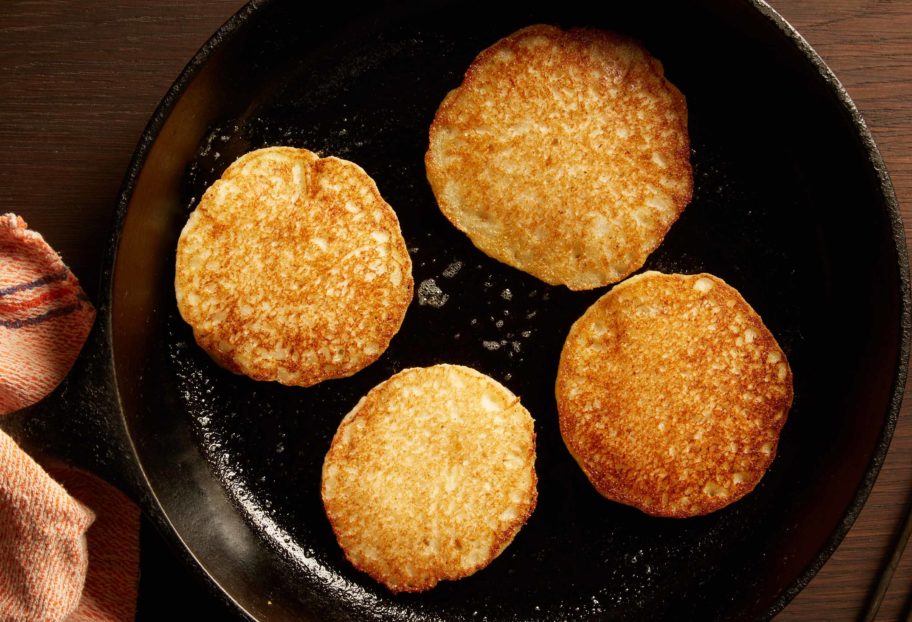
Grandma Hill’s Hoecakes

Grandma Hill's Hoecakes
Print Recipe
4.86 from 7 votes

Grandma Hill’s Hoecakes

Grandma Hill’s Hoecakes recipe from Pati’s Mexican Table Season 8, Episode 3 “South by South of the Border with Vivian Howard”
Prep Time5 minutes
Cook Time20 minutes
Total Time25 minutes
Course: Antojos, Main Course
Cuisine: American
Keyword: buttermilk, cornmeal, onion, pati’s mexican table
Servings: 12 to 16 hoecakes
Author: Pati Jinich

Ingredients

  • 1 cup self-rising cornmeal
  • 1/2 teaspoon salt
  • 1/2 teaspoon granulated sugar
  • 1/2 cup buttermilk
  • 1/4 yellow onion diced
  • 3/4 cup water divided
  • 1/4 cup vegetable oil divided

Instructions

  • If you plan to serve these within 20 minutes of cooking, preheat your oven to 200°In a medium bowl, sift together the cornmeal, salt, and sugar. Put the buttermilk and the onion in a blender and puree till it’s a homogenous liquid. Pour that plus 1/2 cup of the water into the cornmeal mixture and whisk to combine.
  • You’re looking for something akin to slightly loose pancake batter — a batter that, when you drop it into the skillet, spreads on its own, bubbles up around the edges, splatters a little. If you need to add more water to accomplish this, add the remaining water increments.
  • Heat 1 tablespoon of the oil in a 10-inch cast-iron skillet over medium heat. Spoon 2 tablespoons of batter onto the edge of the pan to form 1 corn cake. If the batter sizzles a little, the pan’s ready. Continue to drop the batter around the perimeter of the pan, finishing off with one in the middle. Make sure you get as many of them in there as you can without letting them touch. Lower your heat slightly and cook on one side for about 3 minutes. When they’re brown on the cast-iron side and little bubbles are shooting up through the center of batter, flip and cook an additional 3 minutes. Transfer the browned hoecakes to a baking sheet and hold them in the oven till you’re ready to eat. Add another tablespoon of oil and continue with the next batch.
  • If you, like my grandma, want to make these ahead and serve them a few hours later, warm them in a 375°F oven for 12-15 minutes. Do not use a microwave. The results will disappoint.

Notes

Hoecakes de la Abuela Hill, recipe courtesy of Vivian Howard

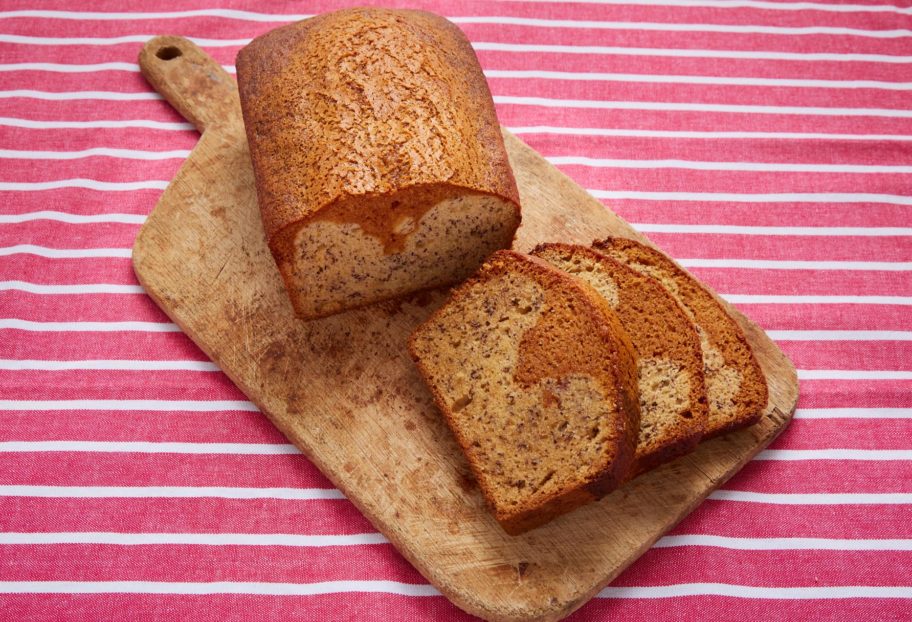
Dulce de Leche Banana Bread

Dulce de Leche Caramel Banana Bread
Print Recipe
4.15 from 7 votes

Dulce de Leche Banana Bread

Dulce de Leche Banana Bread from Pati’s Mexican Table Season 7, Episode 2 "Tijuana: Stories from the Border"
Prep Time15 minutes
Cook Time1 hour
Total Time1 hour 15 minutes
Course: Breakfast, Dessert
Cuisine: American, Mexican
Keyword: banana bread, Cajeta, Dulce de Leche, pati's mexican table
Servings: 8 to 10 Servings
Author: Pati Jinich

Ingredients

  • 1/2 cup (or 1 stick) unsalted butter at room temperature plus more to grease the pan
  • 1/4 cup brown sugar
  • 1/2 cup granulated sugar
  • 2 eggs
  • 1 teaspoon vanilla extract
  • 2 1/2 cups flour
  • 1 teaspoon baking soda
  • 2 teaspoons baking powder
  • 1/2 teaspoon salt
  • 2 ripe bananas peeled, sliced and completely mashed
  • 1/2 cup Dulce de Leche or Cajeta
  • 1/4 cup boiling water
  • For garnish confectioners' sugar

Instructions

  • Place rack in the middle of the oven and preheat to 350 degrees Fahrenheit. Grease a 9”x5” nonstick loaf pan with butter.
  • In the bowl of a standing mixer, set with the paddle attachment, beat the butter at medium speed until light and fluffy, about 3 to 4 minutes. Add the brown sugar and granulated sugar and continue beating until smooth. Add the eggs and vanilla and continue beating for a couple minutes.
  • In a bowl, combine the flour, baking soda, baking powder and salt. Reduce the mixer speed to low, and add the flour mixture ¼ cup at a time. Continue beating until well incorporated. You will have a very dry batter.
  • Remove a third of the batter and set aside in a separate bowl. Add the mashed bananas to the remaining batter in the mixer bowl and continue beating until the batter is fluffy and mixed. Pour the banana batter into the prepared pan.
  • Rinse the mixer bowl and paddle attachment. Add the reserved batter and the Dulce de Leche to the mixer bowl and beat at medium speed, for a minute, until blended. Reduce speed, pour in the boiling water and continue beating until completely smooth. Pour the dulce de leche caramel batter in the pan over the banana batter.
  • Place in the oven and bake for an hour, until the top is puffed up, golden brown and a toothpick comes out moist but not wet on a corner of the bread. Remove from the oven, let cool and flip out of the pan onto a platter. Garnish with confectioners’ sugar. Once it has cooled completely, cover it, so it retains and even gains more moisture.

Notes

Pan de Plátano con Dulce de Leche

Flour Tortillas

Flour Tortillas
Print Recipe
4.46 from 11 votes

Flour Tortillas

Flour Tortillas from Pati’s Mexican Table Season 7, Episode 3 "Ensenada’s Epic Seafood"
Prep Time40 minutes
Cook Time2 minutes
Total Time42 minutes
Course: Side Dish
Cuisine: Mexican
Keyword: pati's mexican table, tortillas
Servings: 16 Tortillas
Author: Pati Jinich

Ingredients

  • 1 pound all-purpose flour or about 4 cups plus more to roll out tortillas
  • 1 teaspoon kosher or sea salt
  • 2/3 cup vegetable shortening or lard
  • 1 cup lukewarm water

Instructions

  • In a mixing bowl, combine the flour, salt and vegetable shortening with your hands, slowly incorporate the lukewarm water and mix until it can come together into a ball. Transfer to the counter and knead for about 2 to 4 minutes, until it is smooth like play dough.
  • Divide the dough into halves until you have 16 balls of dough. Place them on a floured sheet or board, cover with a clean kitchen towel and let them rest for 25 to 35 minutes.
  • Heat your comal or ungreased cast iron or non-stick skillet over low heat. On a lightly floured surface, roll out each ball with a floured rolling pin, rotating 5 or 6 times until you get a 7” round.
  • Place the tortilla on the already heated comal or skillet. You will hear a faint sizzle. After 40 to 50 seconds, when there are brown freckles on the bottom side and there are air bubbles puffed up all over the tortilla, flip over. Cook for 40 to 50 seconds more, until the other side is freckled and the tortilla puffs up even more, like pita bread.

Notes

Tortillas de Harina

Chocolate, Chocolate Chunk Banana Bread

pati jinich chocolate chunk banana bread
Print Recipe
4.75 from 8 votes

Chocolate, Chocolate Chunk Banana Bread

Chocolate, Chocolate Chunk Banana Bread recipe from Pati's Mexican Table Season 6, Episode 11 "Juju’s Chocolate-Covered Life" 
Prep Time15 minutes
Cook Time55 minutes
Total Time1 hour 10 minutes
Course: Breakfast, Dessert, Snack
Cuisine: American, Mexican
Keyword: banana bread, Chocolate, pati's mexican table
Servings: 8 servings
Author: Pati Jinich

Ingredients

  • 1/2 cup unsalted butter at room temperature plus more to butter pan
  • 1/2 cup dark brown sugar
  • 1/4 cup granulated sugar
  • 1 large egg
  • 2 large ripe bananas peeled and mashed
  • 1/4 cup cream cheese
  • 1 teaspoon vanilla extract
  • 1 1/2 cups all-purpose flour plus more to butter pan
  • 1 teaspoon baking soda
  • 1 teaspoon baking powder
  • 1/2 teaspoon kosher or coarse sea salt
  • 1/4 cup boiling water
  • 2 tablespoons cocoa powder
  • 1/2 cup chocolate chunks or chocolate chips

Instructions

  • Pre-heat oven to 350 degrees Fahrenheit, and set a rack in the middle. Butter and flour a 9x5-inch loaf pan, shaking off any excess flour.
  • In a stand mixer, set with the paddle attachment, beat the butter and sugar on medium speed until completely creamy and smooth, about 3 to 4 minutes. Add the egg and give it a minute to mix in. Add the bananas, cream cheese and vanilla, continue mixing for a minute.
  • Reduce the speed to low, add the flour, baking soda, baking powder and salt and continue beating for another 3 to 4 minutes, scraping down the sides if need be.
  • In a small bowl, combine the boiling water with the cocoa powder and stir until well mixed. Add to the mixer and beat for another couple minutes. Lastly, add the chocolate chunks and beat for another minute until fully incorporated.
  • Scrape into the prepared loaf pan, shake a few times to level the batter. Place into the oven and bake anywhere from 55 minutes to an hour, until a toothpick comes out moist but not wet, the top of bread has browned and is springy to the touch.
  • Remove from the oven and let cool. Run a butter knife along sides of the pan, turn out onto plate, and then flip onto serving platter, so it is right side up.

Notes

Panqué de Plátano y Doble Chocolate

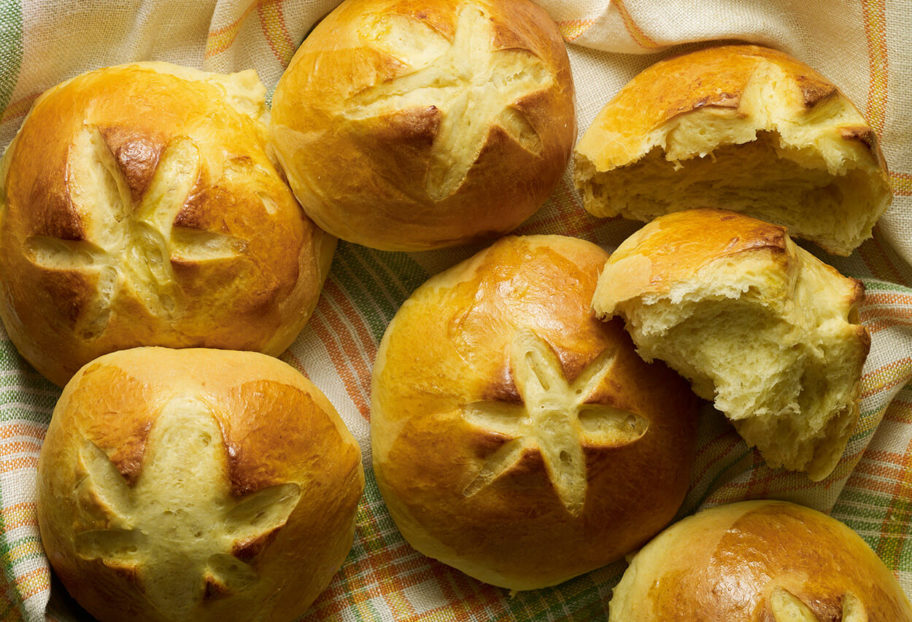
Oaxacan Yolk Bread

Pati Jinich Pan de Yema
Print Recipe
4.50 from 6 votes

Oaxacan Yolk Bread

Oaxacan Yolk Bread recipe from Pati's Mexican Table, Season 6 Episode 9 "Oaxaca Breakfast: Messy & Delicious"
Prep Time3 hours
Cook Time20 minutes
Total Time3 hours 20 minutes
Course: Breakfast
Cuisine: Mexican
Keyword: bread, pati's mexican table
Servings: 16 buns
Author: Pati Jinich

Ingredients

  • 3 envelopes active dry yeast granules
  • 2/3 cup sugar, plus 1 teaspoon
  • 1 1/4 cup lukewarm water
  • 6 cups all-purpose flour, divided,
    plus more for shaping dough
  • 1 cup unsalted butter, plus more for greasing a large bowl and baking sheets
  • 9 egg yolks
  • 2 large eggs plus 1 for egg wash
  • Pinch of kosher or coarse sea salt

Instructions

  • In a small bowl, combine the yeast granules with the 1 teaspoon of sugar and the lukewarm water (make sure it is not cold or hot, or the yeast will not react). Stir, let it sit in a warm area of your kitchen with no wind drafts, and after a few minutes, mix to dissolve. Let it sit again (in the same place) for a couple minutes more, until the mixture has reacted and looks frothy on top. Incorporate 1 cup of the flour and mix well. Cover with a clean kitchen towel and let it rise for an hour.
  • In a mixer fitted with the paddle attachment, beat the butter with the 2/3 cup sugar on medium speed until soft and creamy. Reduce speed to low, add yeast mixture along with the egg yolks, 2 eggs, the rest of the flour, and a pinch of salt.
  • After a few minutes, switch the paddle attachment for the hook attachment. Let the mixer knead the dough on low to medium speed for about 10 to 12 minutes, until the dough is very soft, smooth and shiny, and you can gather it into a ball.
  • Butter a large bowl. Gather the dough into a ball and place it in the bowl. Cover with a clean kitchen towel and place in the warm area of your kitchen with no drafts. Let it rise for about an hour until it doubles in size.
  • Pre-heat the oven to 350 degrees Fahrenheit and butter 3 baking sheets.
  • Uncover the dough and punch it down. Divide it in half, and consecutively halve the pieces until you have 16 pieces of dough. Roll each one into a ball and set on the buttered baking sheets. Place in the warm area of your kitchen for 45 minutes to an hour for a final rise.
  • In a small bowl, beat the remaining egg with a tablespoon of water. Make a 3 slashes on the top of each bun and brush with egg wash. Bake for 20 minutes, until cooked through and browned on top.

Notes

Pan de Yema

Pan de Arena

I am fascinated with a few things to the point that I obsess about them. Well, it may be more than a few things. One of them is words.

I become amazed with the beauty a word may have. With the way it sounds. With the way that pronouncing that word may change the way I breathe or make me pout my mouth. With how much power a word can hold. With the diverse meanings it can contain, depending on who you say it to, how you say it, or by which words it is accompanied by.

I absolutely adore words. I once started a “favorite words list” and just couldn’t keep up with how many I was adding. There were the words I had forgotten and had suddenly rediscovered. There were the words I had never ever heard of. I have a tendency to stop someone in the middle of a sentence to ask them about that word they just used. Where is it from, what exactly does it mean, how else can one use it? Always on the hunt for new words, when I find a great one, I fall in love with it. And once I do, I never fall out of love with it.

This may all have to do with my being a Spanish speaker until I moved to the US. Once here, I started noticing the beauty of words I was getting nostalgic about because I couldn’t find a good substitute in English. And once I started getting a bit more fluent in English, I would find the use of a certain English word so extraordinary that I couldn’t find the right substitute in Spanish. So I sort of blame it all on my move to the US because I certainly wasn’t obsessed with words when I lived in Mexico.

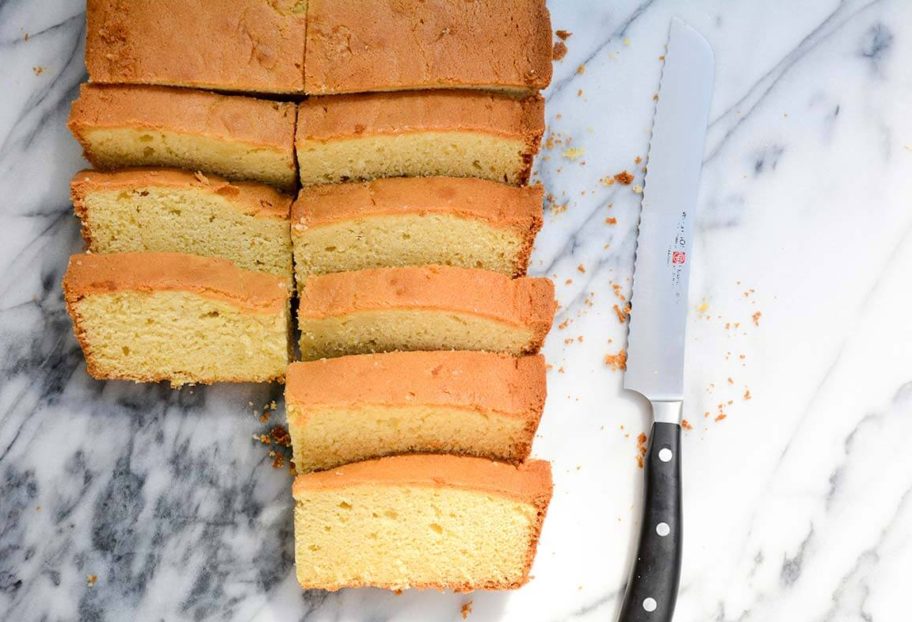
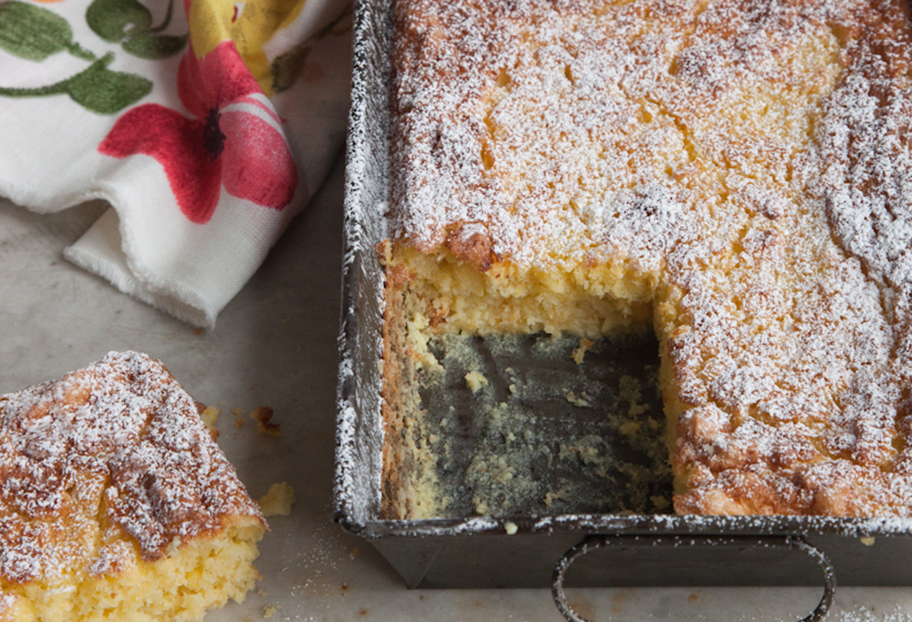
Anyway. This recipe has two words I adore in Spanish: pan and arena. Pan translates to bread and arena to sand. The funny thing is sometimes words and names play tricks on reality. This pan de arena is no bread and has no sandy texture.

More like a pound cake, pan de arena’s texture is really perfect. When you slice it, it feels like it came from a professional bakery. With just the right amount of moist and just the right amount of crumbly. It may be that because the texture is so evenly moist and crumbly throughout, it got named after sand. Its taste is also so well balanced. Just enough sweetness and a buttery taste that gets nuanced, but not over powered, by lime zest and lime juice. Yet it doesn’t taste citrusy at all.

This pan de arena comes from the state of Chiapas in Mexico. You can find it there from morning ‘til night. Sometimes it comes in individual sizes – that may be why it is also called bizcocho chiapaneco, as bizcocho refers to a sweet roll – but it is mostly cut from a bigger loaf into square or rectangular pieces.

Just like your favorite pound cake, it can be eaten on its own or topped with ice cream, fruit compote, fresh fruit coulis, or whipped cream. It is also ideal sliced and tucked away in your kid’s lunch box.

I am just as enamored with this poundcake’s charming taste and texture as I am with the beauty of its name. And for the life of me, I cannot find out why or who named it pan de arena.

Pati Jinich pan de arena or sand pound cake
Print Recipe
4.67 from 6 votes

Sand Pound Cake

More like a pound cake, pan de arena’s texture is really perfect. When you slice it, it feels like it came from a professional bakery. With just the right amount of moist and just the right amount of crumbly. It may be that because the texture is so evenly moist and crumbly throughout, it got named after sand. Its taste is also so well balanced. Just enough sweetness and a buttery taste that gets nuanced, but not over powered, by lime zest and lime juice. Yet it doesn’t taste citrusy at all.
Prep Time10 minutes
Cook Time50 minutes
Course: Dessert
Cuisine: Mexican
Keyword: cake, lime, pati's mexican table, pound cake
Servings: 16 servings
Author: Pati Jinich

Ingredients

  • 3 1/2 cups all-purpose flour plus more for dusting pan
  • 2 teaspoons baking powder
  • 2 teaspoons baking soda
  • Pinch of salt
  • 2 1/2 cups unsalted butter at room temperature, plus more for greasing pan
  • 1 1/2 cups granulated sugar
  • 6 large eggs
  • Grated zest of a large lime
  • 1/4 cup freshly squeezed lime juice
  • 1/4 cup whole milk

Instructions

  • Preheat oven to 350 degrees Fahrenheit. Butter the sides and bottom of a 9x13-inch baking pan and lightly coat with flour. Shake excess flour off.
  • In a medium bowl, combine your dry ingredients: the flour with the baking powder, baking soda and salt.
  • Beat the butter in a stand mixer with the paddle attachment over medium speed until very creamy and soft, at least 2 or 3 minutes. Incorporate the sugar, continue beating until well mixed. Add the eggs, one at a time, and continue beating until they are all incorporated.
  • Reduce speed to low, and add a cup of your dry ingredients, then add the lime zest and juice. Continue adding the rest of the flour, and finally add the milk. Scrape the sides of the bowl with a spatula if need be, and continue beating the mix until it is spongy, fluffy and very well mixed.
  • Pour the batter into the prepared pan and bake in the oven for 50 minutes, or until the pound cake is puffed up, golden brown on top, and a toothpick comes out clean and moist, but not wet.
  • Remove from the oven. Let cool and serve. It keeps very well covered for up to a week.

Notes

Pan de Arena

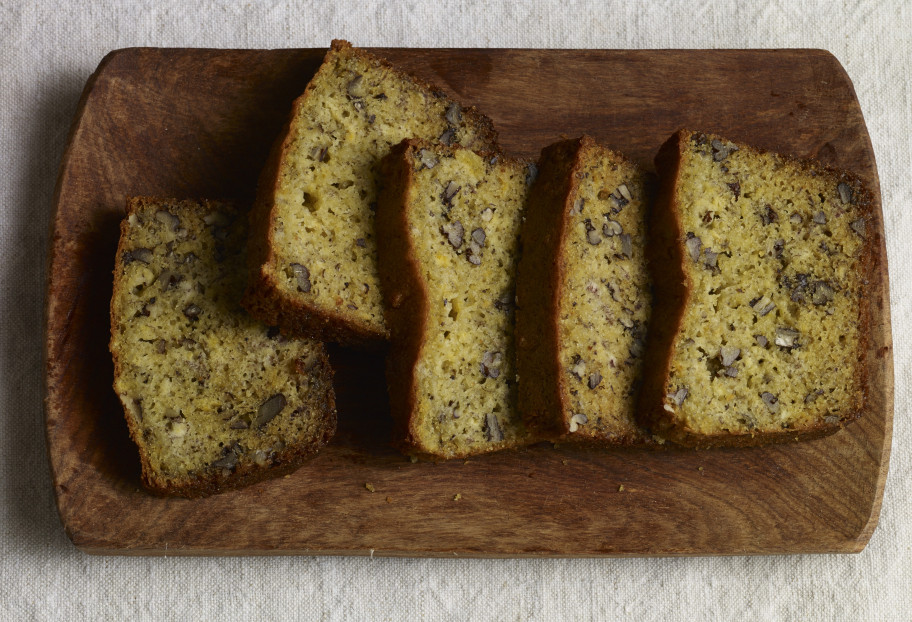
Fluffy Plantain and Pecan Bread

fluffy plantain bread
Print Recipe
4.34 from 6 votes

Fluffy Plantain and Pecan Bread

Fluffy Plantain and Pecan Bread recipe from Pati's Mexican Table Season 2, Episode 13 “Naturally Vegetarian Mexican”
Prep Time10 minutes
Cook Time55 minutes
Total Time1 hour 5 minutes
Course: Breakfast, Dessert
Cuisine: Mexican
Keyword: banana bread, pati's mexican table, pecans, Plantains, vanilla
Servings: 1 10-inch loaf
Author: Pati Jinich

Ingredients

  • 1 1/2 sticks or 6 oz unsalted butter plus more for the pan
  • 2/3 cup granulated sugar
  • 4 large eggs at room temperature
  • 1 pound ripe plantains peeled, sliced, and roughly mashed (about 1 1/2 cups mashed)
  • 1 teaspoon vanilla
  • 1 1/2 cups all-purpose flour
  • 1 tablespoon baking powder
  • 1 teaspoon baking soda
  • 1 pinch of salt
  • 1 cup roughly chopped pecans

Instructions

  • Preheat oven to 350 degrees.
  • Butter sides and bottom of the loaf pan and lightly dust it with flour; set it aside.
  • In the bowl of an electric mixer, beat the butter on medium-high speed for about 3 to 4 minutes, or until soft. Stir in the sugar and keep beating until fluffy. Beat in the eggs until well mixed.
  • In a large bowl, sift together the flour, baking powder, baking soda and salt. Lower the speed on the mixer. Alternate between adding the plantains and the sifted dry ingredient mixture.
  • Add the vanilla and pecans and mix until thoroughly combined.
  • Pour the batter into the prepared loaf pan and gently place a piece of aluminum foil on top. Place the pan in the oven and cook for 40 minutes. Remove the foil and cook for an additional 15 to 18 minutes, or until the top of the bread looks golden brown and puffed-out. If you inset a toothpick, it should come out moist but not wet.

Notes

Pan de Plátano Macho y Nuez

Blissful Corn Torte

blissful corn torte
Print Recipe
4.86 from 7 votes

Blissful Corn Torte

Blissful Corn Torte recipe from Pati's Mexican Table Season 2, Episode 3 “A French Twist on Mexico”
Prep Time15 minutes
Cook Time45 minutes
Total Time1 hour
Course: Side Dish
Cuisine: Mexican
Keyword: Corn, corn bread, cornbread, pati's mexican table, rice flour, Torta
Servings: 12 servings
Author: Pati Jinich

Ingredients

  • 1/2 pound unsalted butter
  • 3/4 cup sugar
  • 8 eggs separated
  • 4 cups corn kernels
  • 1 cup milk
  • 1/2 cup heavy cream
  • 3/4 cup rice flour
  • 1 tablespoon baking powder
  • 1 teaspoon kosher or coarse salt

Instructions

  • Place rack in the middle of oven and heat to 360 degrees. Butter a 9×12-inch pan.
  • Beat the butter with the sugar until creamy. Slowly add 8 egg yolks, one by one, until incorporated. Add the cream, rice flour and baking powder.
  • In a blender, process the milk with the corn kernels, then, incorporate it into the mix above. Place the mixture in a big mixing bowl.
  • Separately, beat the egg whites with salt until stiff peaks are formed. Add 1/5 of the egg whites to the butter/corn mix and blend carefully. Slowly blend the rest of the egg whites until everything is mixed, it is ok if the mixture looks streaky, don’t over work it or it will lose volume. Pour onto baking dish.
  • Bake until torte is springy to the touch and lightly browned, 45 to 50 minutes. Once it cools a little, cut into squares. It can be served either warm or cold; it can be covered and kept at room temperature for an entire day, or covered and stored in the refrigerator for up to 5 days.

Notes

Pan de Elote

Corn Tortillas

homemade corn tortillas
Print Recipe
5 from 9 votes

Corn Tortillas

Corn Tortillas recipe from Pati's Mexican Table Season 4, Episode 3 “Taco Night”
Prep Time15 minutes
Cook Time10 minutes
Total Time25 minutes
Course: Antojos, Main Course, Side Dish
Cuisine: Mexican
Keyword: corn tortillas, masa, pati's mexican table
Servings: 12 tortillas
Author: Pati Jinich

Ingredients

  • 2 cups corn tortilla flour
  • Pinch kosher or coarse sea salt
  • 1 3/4 cups water or enough for a Play Doh consistency may vary with climate

Instructions

  • Set a comal, griddle or ungreased dry skillet over medium heat for at least 8 to 10 minutes, until very hot.
  • Meanwhile, cut 2 circles about the size of the tortilla press plates out of thin plastic bags, such as produce bags from the grocery store.
  • In a large mixing bowl, mix together the corn tortilla flour, salt and the water and knead in a circular motion. It should feel smooth and without lumps, like Play Doh. Though, it shouldn’t be too wet or sticky. If it doesn’t feel smooth and feels coarse when you attempt to make the masa balls, add a bit more water. Masa dries out fast, so if you leave it unattended, cover it with a clean moist kitchen towel or cloth.
  • To make the tortillas, one by one, make dough balls of about 1 1/2-inch in diameter. Place one plastic circle on the bottom of the tortilla press and place the masa ball on top. Place the other plastic circle on top of the ball and clamp down the press to make a flat disk. As you clamp down the press, jiggle it a little as you are getting to the bottom, this makes for a rounder tortilla. It should be about 5-inches in diameter and about 1/8-inch in height.
  • If the edges of the tortilla seem cracked and jagged, the dough needs a bit more water. Once you have a tortilla with smoother edges, you are set. (Alternatively, you can place a ball of dough between two plastic pieces and roll the tortillas out with a rolling pin).
  • Open the press, take the top plastic off, lift the bottom plastic with the tortilla in one hand and peel the tortilla from the plastic with the other hand. I peel it with my right hand, as I am right handed. Lay it on the griddle, skillet or comal softly, but swiftly.
  • Once the tortilla is on the hot surface, don’t touch it for the next 30 seconds! Even if it didn’t lay completely straight, resist the temptation to fiddle with it. Let it cook until it can be flipped without sticking to the comal, just like pancakes, or until a spatula can easily lift it. Another sign that it is ready to be flipped, is it becomes opaque on the side that it was cooking on.
  • Turn over, and cook for a minute, until opaque and starting to get brown freckles on the side that is now on the hot surface. If it is opaque but it has white-ish areas, you need to leave it a bit longer until it becomes freckled with brown spots.
  • Turn over once more, and now after 10 to 15 seconds, the tortilla should puff up like pita bread, if not all over tortilla, at least in an area of it. If it is not puffing, gently tease it by poking with your finger softly in an area of the tortilla around the center. Once it puffs, let the tortilla cook for another 15 to 20 seconds, so that it cooks internally in the puffed up area. That is the difference between ok tortillas, and to die for, malleable, fully cooked, soft tortillas.
  • Transfer each cooked tortilla to a clean kitchen towel or a cloth-lined tortillero.
  • If eaten that same day, tortillas may be kept wrapped in a clean kitchen towel or cloth. If not, wrap in a kitchen towel, place inside a closed plastic bag, and store in the refrigerator. They will keep for up to 3 days, afterwards they will turn too hard. Reheat on hot comal for 30 seconds or so on each side before eating. They can also be frozen and kept for months.

Notes

Tortillas de Maiz

Yucatán Style French Toast: Ultra Decadent

It’s ironic. The farthest away from Mexico I’ve been, the closest I’ve felt to my home country and the more I’ve gotten to know it.

Namely, there are 2,419 miles between my home in the DC area and the home I was born and raised in, in Mexico City (I’ve seen it in Google maps a thousand times with my boys), it’s a 44-hour drive if you go non-stop and a 5-hour flight with no connections.

Distance matters. It weighs, in tons of pounds of nostalgia that can be soothed in the kitchen. Distance has made my time in Mexico intense and adventurous, and the foods I am able to replicate in my American kitchen that much more precious.

It has been 15 years since we packed our bags to move from Mexico City to Texas. Since then, I’ve taken every opportunity to go back to visit. There is always something new to learn and something to rediscover. And there is always a dish that sticks with me in such a way that it has me running back home to make it for my boys. If they request it, time and again, it becomes a home staple that I hope to pass on.

That’s the case with the ultra decadent Yucatán style French toast, also known as caballeros pobres. I even included it on an episode called Brunch at the Jinich Home, from Season 3 of my TV series. It is very similar to a dish called Capirotada, in fact, some consider it Yucatan’s version of it.

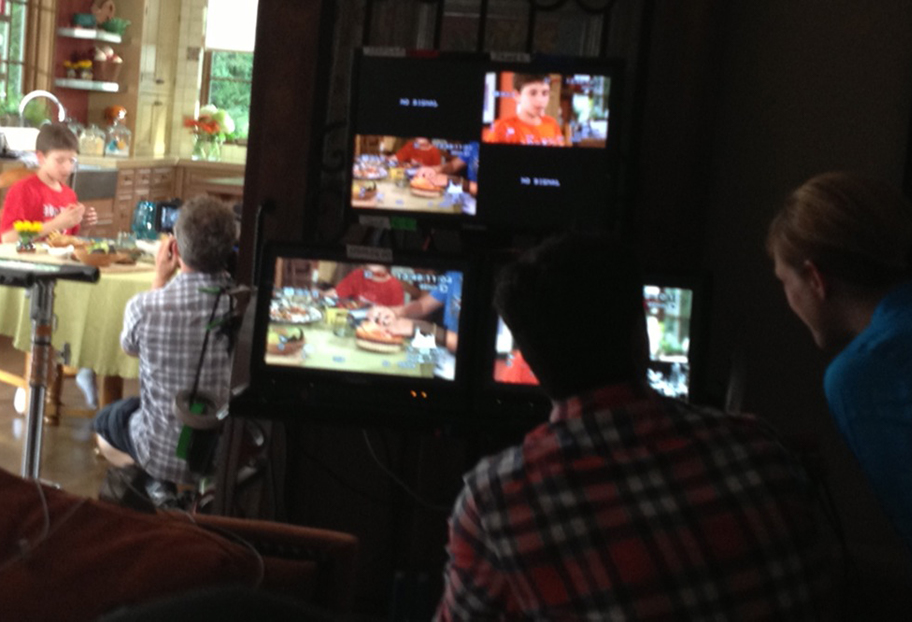
Pati's Mexican Table shoot
Here’s Dan, our amazing director, showing me how the food looked on camera on the set at home.

We love eating it on Sundays for a late and lazy brunch.  It marks the weekend for us, when we can linger at the table. When I don’t mind making things that may have a few more steps, or may be messier to prepare, all of which the boys love to take on.

Dany and I tasted it for the first time in Yucatán 5 years ago. As we sat down at Los Almendros, a classic restaurant in Mérida, I did what I always do – which drives Dany crazy – and asked the waiter 3 questions:

1. What’s your favorite thing to eat from the menu? I can hear Dany saying “what do you care what he likes to eat Pati, what if he has a completely different taste preference than you, or what if he is pushing things out of the kitchen that aren’t selling?”

2. What is the most traditional food on the menu? I can hear Dany saying “some dishes may be included to show the restaurant’s authenticity regardless of how good they may be…”

3. What is, by far, the best seller here? I can practically see Dany rolling his eyes…

For #1, waiter said “caballeros pobres!” The poetic and contrasting name of the dish hooked me: translates to “poor gentlemen”. For #2, he said “caballeros pobres, it has been on the menu since the restaurant opened in 1962, it’s a dessert that’s existed since anyone in Merida can remember.” By that point I was ready to run to the kitchen to get one. For #3, he said “everybody orders caballeros pobres.” Ok. Done deal.

I am a fan of the French toast food category. The Yucatán style, however, is in a  league of it’s own.

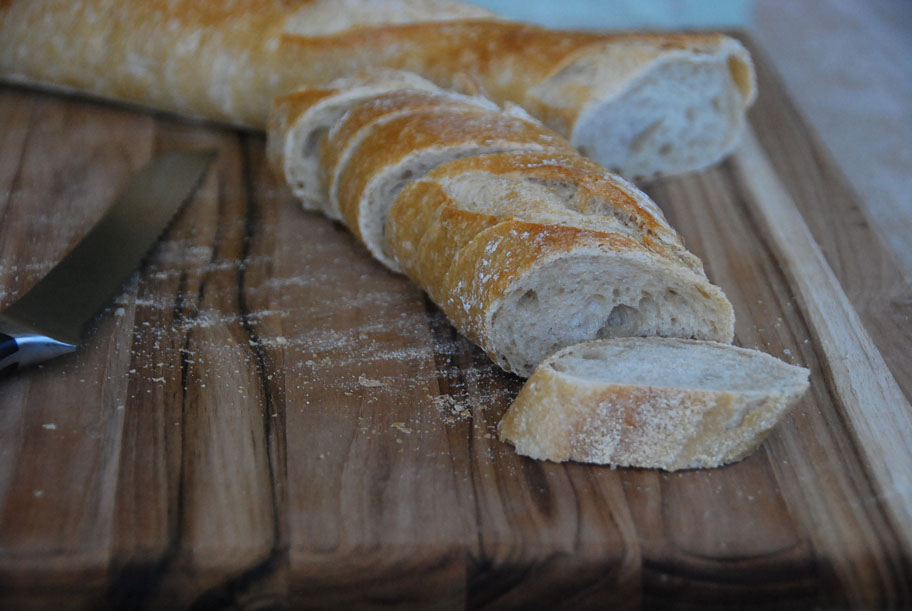
french bread slices

It uses what is known in Mexico as pan francés or French bread, which is like a baguette but a bit thicker. Some versions use bolillos or teleras (just smaller in size). You are safe to use any crusty bread of your choice.

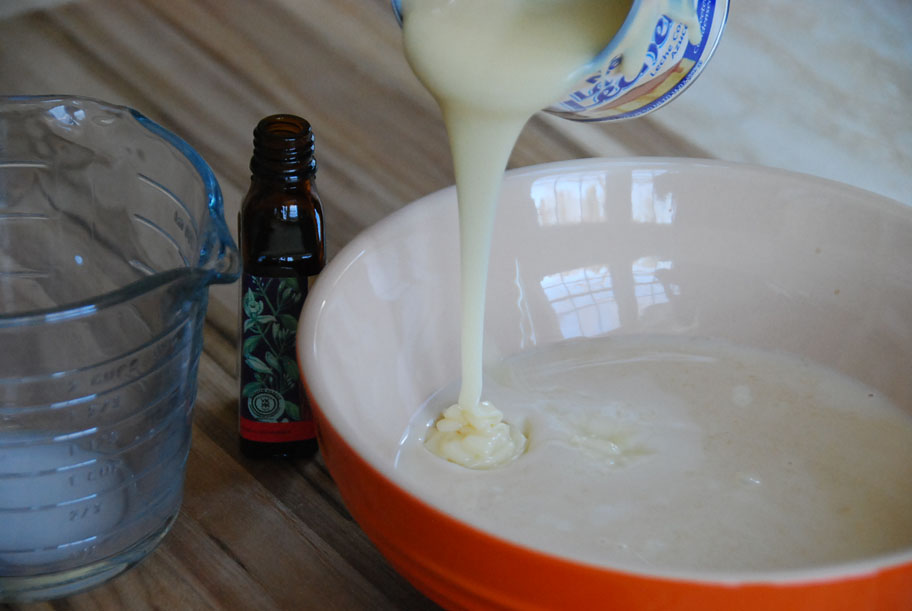
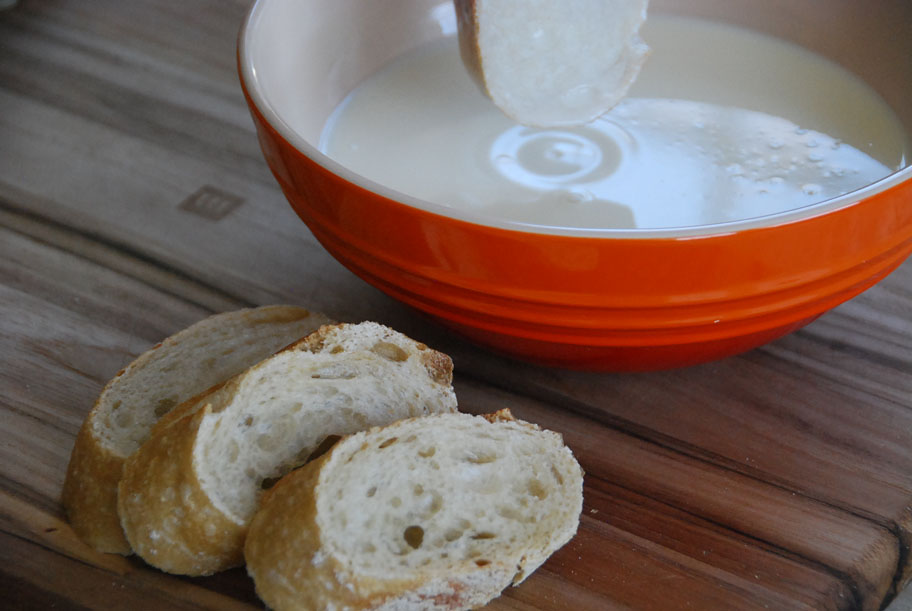
Then the thick slices are entirely soaked, drenched, in a mix of milk, vanilla and sweetened condensed milk. You heard that right: sweetened condensed milk.

pouring sweetened condensed milk

You know you want it.

I made it for a class on Yucatecan food at the Mexican Cultural Institute.  The 120 attendees were all oohs and ahs when I demoed the dipping of the bread in the sweetened condensed milk mix. Practically every one, wanted seconds, which I didn’t plan for.

coating bread slices

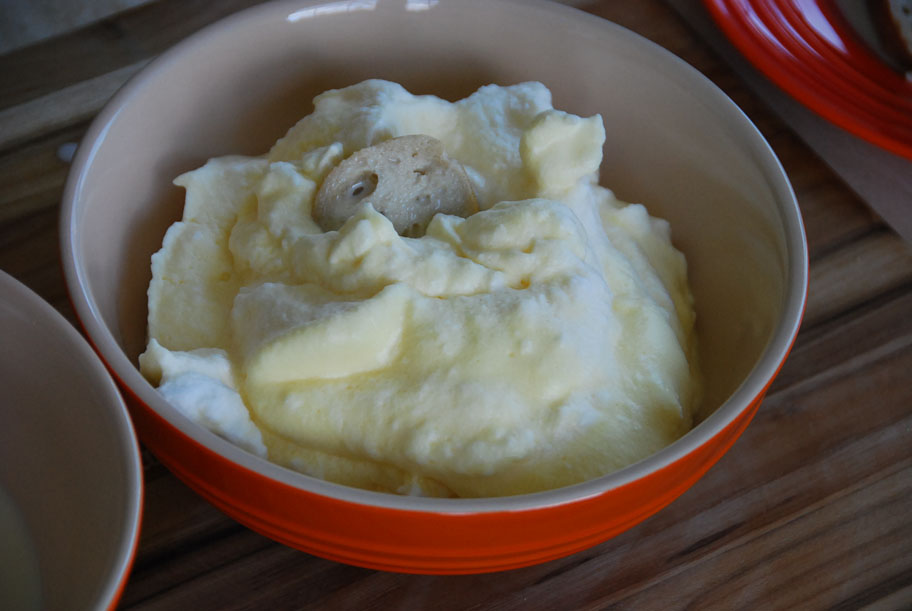
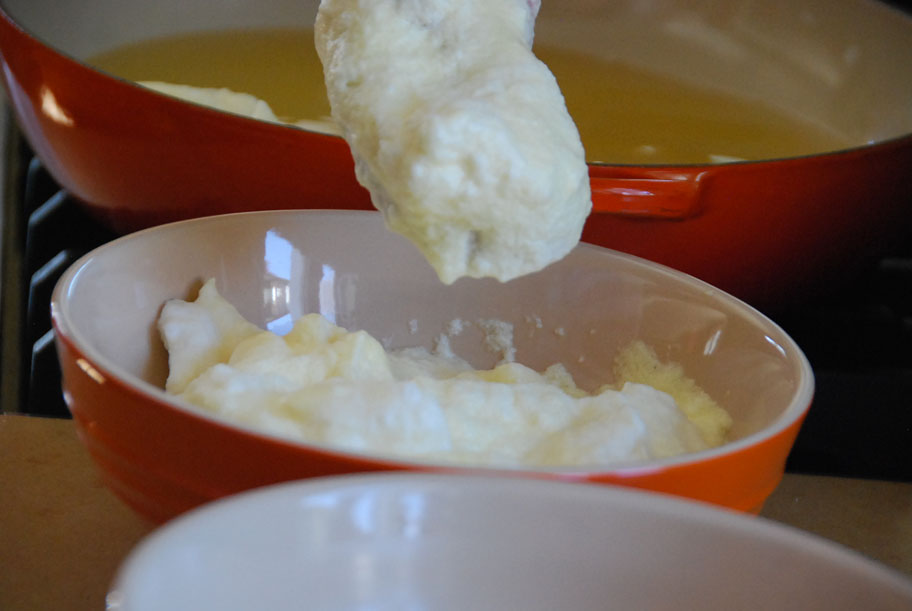
There’s more. Instead of dunking the bread in beaten whole eggs, the eggs are separated. The egg whites are beaten until stiff peaks are formed, as in a meringue, then the yolks are gently added to form a thick coating: a capeado.

dipping bread into egg mix

Hence, there may lay the gentlemen status of an everyday bread that is first soaked in a sweetened condensed milk bath, to be then fully dressed in a fluffy cape.

coating bread in egg mixture

Once luxuriously dressed, it is crisped and browned to golden status.

frying the french toast

That is not all: though at home we can happily eat it like that with a bit of honey, maple syrup or confectioner’s sugar.

fried french toast without syrup

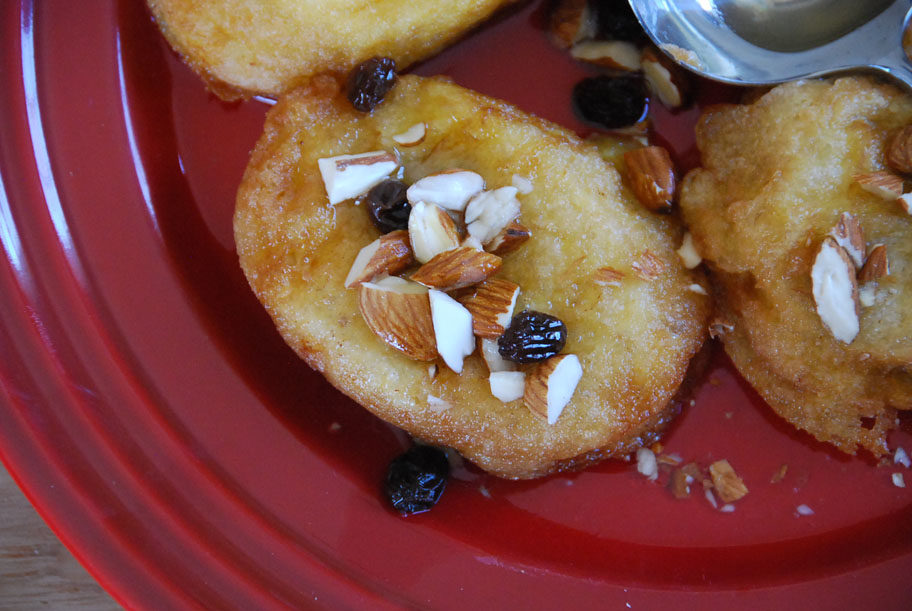
The caballeros pobres are then sauced with a simple syrup flavored with true cinnamon, a few whole cloves and raisins.

syrup

You can make the syrup ahead of time and reheat it. You can also make it while you are dressing and browning the bread.

Wait: I am still missing the last garnish: chopped, crunchy, nutty almonds.

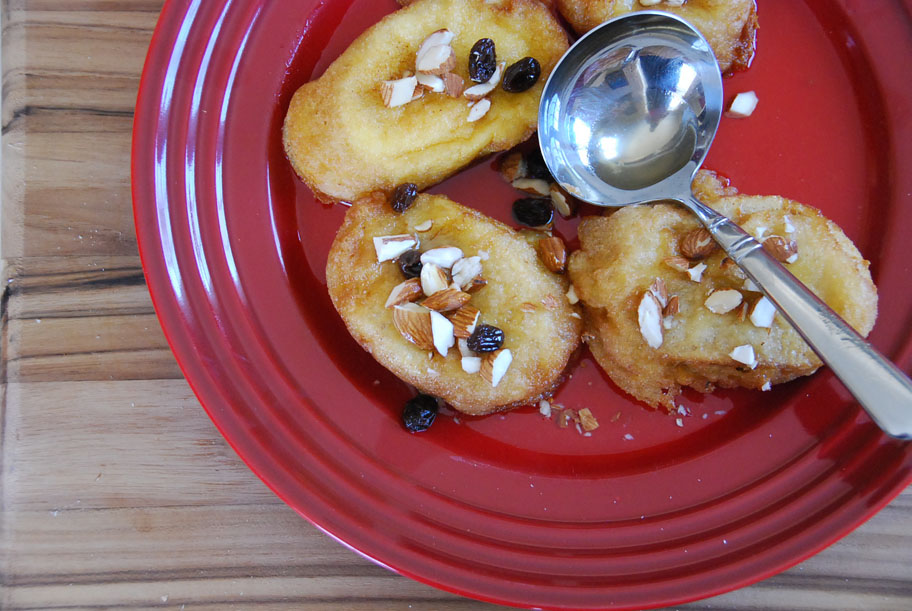
finished french toast with syrup and garnishes

Ok, wait, again: Some people add sherry to the syrup. That takes it to adult territory, which would pair well for a grown up brunch.

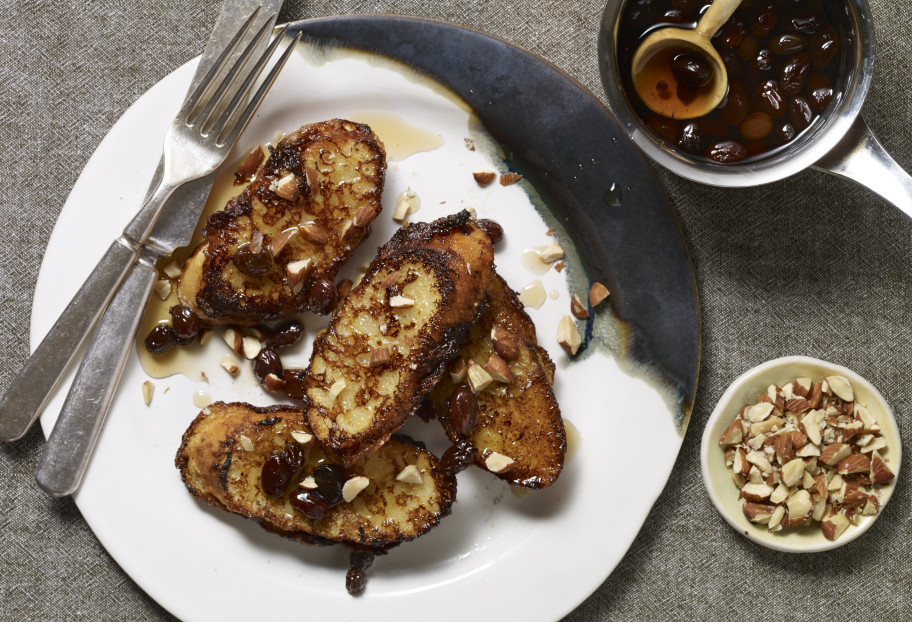
Of all the versions of Yucatán style french toast this recipe below is my favorite. Crispy, chewy, moist. I prefer to eat it hot and with the warm syrup on top as a main dish for a weekend breakfast or brunch. However, in Yucatán it is traditionally served very cold and for dessert. Then again, I have to admit that I always make extra to have leftovers in the refrigerator, so I can sneak into the kitchen at just about anytime, to eat them cold.

yucatan style french toast
Print Recipe
5 from 2 votes

Yucatán-Style French Toast

Of all the versions of Yucatán style french toast this recipe below is my favorite. Crispy, chewy, moist. I prefer to eat it hot and with the warm syrup on top as a main dish for a weekend breakfast or brunch. However, in Yucatán it is traditionally served very cold and for dessert. Then again, I have to admit that I always make extra to have leftovers in the refrigerator, so I can sneak into the kitchen at just about anytime, to eat them cold.
Prep Time35 minutes
Cook Time10 minutes
Course: Breakfast
Cuisine: Mexican
Keyword: almonds, bread, ceylon, cinnamon, raisins, Sherry, Sweetened Condensed Milk, vanilla
Servings: 6 to 8 servings
Author: Pati Jinich

Ingredients

For the syrup:

  • 4 cups water
  • 1 1/2 cups granulated sugar
  • 1/4 cup raisins or to taste
  • 1 ceylon or true cinnamon stick
  • 3 whole cloves
  • 2 tablespoons Dry Sherry optional

For the toast:

  • 6 eggs separated
  • 1 cup milk
  • 1 14-ounce can sweetened condensed milk
  • 1 tablespoon vanilla extract
  • Vegetable oil for frying
  • 1 large French baguette or thick baguette of your choice cut into 3/4-inch slices
  • 1/2 cup chopped almonds

Instructions

  • Place a medium saucepan with the water, sugar, raisins, cinnamon and cloves over medium heat. Bring to a simmer and let it cook until it achieves the consistency of a light syrup and the flavors from the spices have infused the liquid, about 35 minutes. Turn off the heat. If you like a hint of alcohol in your dessert, add the sherry. Remove the cinnamon stick and cloves. Cover to keep warm.
  • Meanwhile, beat the egg whites in the bowl of an electric mixer or with a hand mixer over medium-high speed until they hold stiff peaks. Reduce the speed to low, add the yolks one by one and continue beating just until incorporated, so the volume will not decrease much.
  • In a large bowl, combine the milk, sweetened condensed milk and vanilla, stir until incorporated.
  • Set the bowl with the milk mixture beside the bowl with the beaten egg whites and yolks.
  • Fill a large sauté pan with about 1/4-inch of oil and heat over medium heat until hot, but not smoking, and you see ripples in the oil when you tilt the pan.
  • One at a time, dunk each piece of bread in the milk mixture until soaked, immediately dip into the egg mixture to completely cover, and place the coated slice in the hot oil. Fry for about a minute on one side, until golden brown, flip to the other side and do the same. Add as many bread pieces as will fit into the pan without over-crowding. When finished frying, place the bread pieces on a baking dish covered with paper towels to drain.
  • Traditionally, the “poor gentleman” pieces are placed on a platter, covered with the syrup and refrigerated. But I think they are a thousand times tastier served hot! Cover the pieces with warm syrup, sprinkle chopped almonds on top and serve.
  • If you have leftovers, cover the battered and fried bread pieces with the remaining syrup and almonds, and store covered in the refrigerator. I admit they are also fabulous cold.

Notes

Caballeros Pobres

Yucatán-Style French Toast

Yucatan style french toast
Print Recipe
4.17 from 6 votes

Yucatán-Style French Toast

Yucatán-Style French Toast recipe from Pati's Mexican Table Season 3, Episode 10 “Brunch at the Jinich House”
Prep Time35 minutes
Cook Time10 minutes
Total Time45 minutes
Course: Breakfast
Cuisine: Mexican
Keyword: almonds, bread, ceylon, cinnamon, cloves, pati's mexican table, raisins, Sherry, Sweetened Condensed Milk
Servings: 6 to 8 servings
Author: Pati Jinich

Ingredients

  • 4 cups water
  • 1 1/2 cups granulated sugar
  • 1/4 cup raisins or to taste
  • 1 ceylon or true cinnamon stick
  • 3 whole cloves
  • 2 tablespoons Dry Sherry optional
  • 6 eggs separated
  • 1 cup milk
  • 1 14-ounce can sweetened condensed milk
  • 1 tablespoon vanilla extract
  • Vegetable oil for frying
  • 1 large French baguette or thick baguette of your choice cut into 3/4-inch slices
  • 1/2 cup chopped almonds

Instructions

  • Place a medium saucepan with the water, sugar, raisins, cinnamon and cloves over medium heat. Bring to a simmer and let it cook until it achieves the consistency of a light syrup and the flavors from the spices have infused the liquid, about 35 minutes. Turn off the heat. If you like a hint of alcohol in your dessert, add the sherry. Remove the cinnamon stick and cloves. Cover to keep warm.
  • Meanwhile, beat the egg whites in the bowl of an electric mixer or with a hand mixer over medium-high speed until they hold stiff peaks. Reduce the speed to low, add the yolks one by one and continue beating just until incorporated, so the volume will not decrease much.
  • In a large bowl, combine the milk, sweetened condensed milk and vanilla, stir until incorporated.
  • Set the bowl with the milk mixture beside the bowl with the beaten egg whites and yolks.
  • Fill a large sauté pan with about 1/4-inch of oil and heat over medium heat until hot, but not smoking, and you see ripples in the oil when you tilt the pan.
  • One at a time, dunk each piece of bread in the milk mixture until soaked, immediately dip into the egg mixture to completely cover, and place the coated slice in the hot oil. Fry for about a minute on one side, until golden brown, flip to the other side and do the same. Add as many bread pieces as will fit into the pan without over-crowding. When finished frying, place the bread pieces on a baking dish covered with paper towels to drain.
  • Traditionally, the “poor gentleman” pieces are placed on a platter, covered with the syrup and refrigerated. But I think they are a thousand times tastier served hot! Cover the pieces with warm syrup, sprinkle chopped almonds on top and serve.
  • If you have leftovers, cover the battered and fried bread pieces with the remaining syrup and almonds, and store covered in the refrigerator. I admit they are also fabulous cold.

Notes

Caballeros Pobres

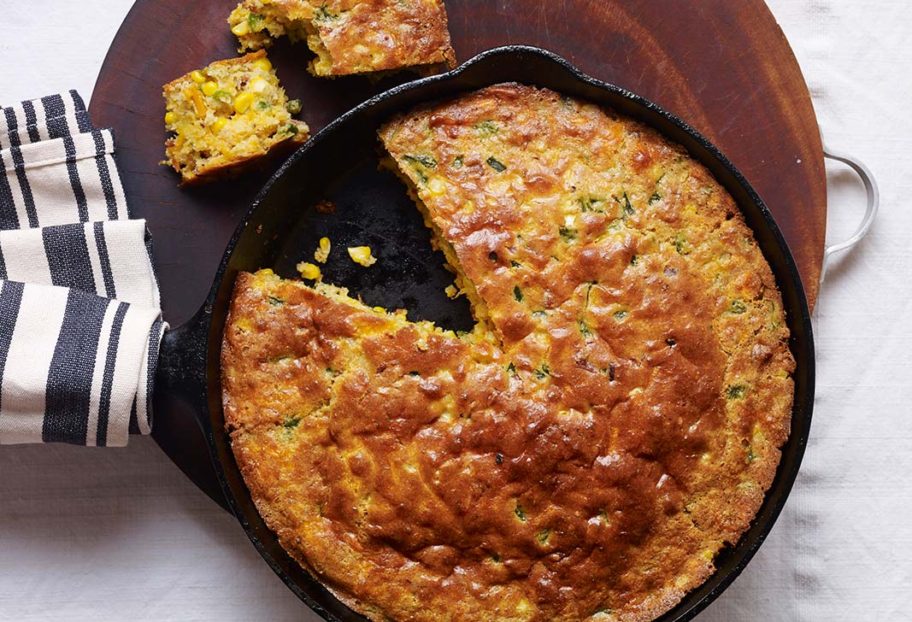
Poblano, Bacon and Cheddar Skillet Cornbread

Print Recipe
4.63 from 8 votes

Poblano, Bacon and Cheddar Skillet Cornbread

Poblano, Bacon and Cheddar Skillet Cornbread recipe from Pati's Mexican Table Season 3, Episode 2 “Pati’s Texican”
Prep Time15 minutes
Cook Time30 minutes
Total Time45 minutes
Course: Side Dish
Cuisine: American, Mexican
Keyword: bacon, cheddar, Corn, corn bread, pati's mexican table, Poblano
Servings: 10 servings
Author: Pati Jinich

Ingredients

  • 3 poblano chiles charred, sweated, peeled, seeded and diced
  • 6 to 8 slices center cut bacon
  • 1/2 cup yellow cornmeal
  • 1 1/4 cup all-purpose flour
  • 1/3 cup brown sugar
  • 1 teaspoon baking powder
  • 1 teaspoon baking soda
  • 1/2 teaspoon kosher or coarse sea salt
  • 1/2 teaspoon freshly ground black pepper
  • 1 cup whole milk
  • 1/2 cup heavy cream
  • 4 eggs well beaten
  • 2 cups grated cheddar cheese
  • 2 cups corn kernels preferably fresh, or thawed from frozen

Instructions

  • Preheat the oven to 375°F.
  • In a large cast-iron pan, over medium-high heat, add the bacon. Cook until crispy, about 3 minutes per side. Remove the bacon from the pan and turn off the heat.
  • In a large bowl, combine the cornmeal, flour, brown sugar, baking powder, baking soda, salt and pepper. In a small bowl, combine the milk, cream and eggs. Whisk the wet ingredients into the dry. Add the cheddar cheese, corn and poblano chiles. Crumble the bacon and toss it in. Pour in most of the bacon fat from the cast-iron pan into the batter, leaving about 1 tablespoon in the pan. Mix well.
  • Place the cast-iron pan with the remaining bacon drippings again over medium heat, pour the batter into the pan. Transfer to the oven and bake for 30 minutes or until golden brown. Cut into wedges and serve.

Notes

Pan de Elote de Cazuela con Poblanos, Tocino y Queso Cheddar

Make Pan de Muerto at Home!

I wouldn’t be caught dead without Pan de Muerto during Day of the Dead.

One of the most meaningful, colorful and delicious of Mexican celebrations, Dí­a de Muertos has this bread as one of its trademark treats. It may sound strange to eat fluffy sugared up bread in the shape of bones, but then again, we also eat calaveritas, candies in the shape of skulls. This shows how crucial food is for Mexicans but also how it gets infused with our sarcastic sense of humor, generous spirit and gutsy attitude.

Not that Day of the Dead is such a big occasion here in the United States, but I notice an increased awareness. Teachers are starting to talk about it in schools, sugar skulls and decorations are popping up in stores…It’s becoming trendy. As it happens right on the tail of Halloween, elements from both celebrations seem to cross paths. They both include graveyards and a lot of eating, but they are quite different.

Day of the Dead, which is not one but two days, November 1st and 2nd, is when those departed have a license to come back and visit the ones they’ve left behind. And hey, if they are coming back from another world, it better be a feast worth the trip! Altars are decorated, filled with the visitor’s favorite foods and drinks, candles and flowers placed throughout, to help illuminate for a safe journey back home. There are visits to the cemetery, too, but of a different nature than Halloween: Day of the Dead is a bittersweet, sad and joyous time for gathering, feasting and remembering.

Pan de Muerto, has to be one of the sweetest sides of it, eagerly awaited by all.

Those who have tried it want it, as it is really irresistible. But there are not that many panaderí­as that make it outside of Mexico.

pati jinich pan de muerto first rise

Well, guess what? Wait no more, you can make your own.

It is simple to do; the only downside is, it takes time. The dough needs to rise…four times, and one of them is overnight in the fridge. So if you want your Pan de Muerto for Friday, start it on Thursday.

First make your starter: a small leavened mix. I make mine by mixing dry yeast (oldest versions of Pan de Muerto use Pulque, a fermented drink) with lukewarm milk, not too hot and not too cold, to make it easy for the yeast to react. Fully dissolve and add a bit of flour, to get the yeast going on stronger. When it puffs up and has bubbled on the surface, about 20 to 30 minutes later, you have your starter.

That’s the first rise.

pan de muerto first rise 2

Then make your dough in the mixer with butter, sugar and eggs. I add orange blossom water, as is traditional in many parts of Mexico and the old fashioned way. It makes it fragrant and light. I also add a bit of orange zest and anise seeds, which perfume it even more. Once mixed, beat in the starter. Cover it and place it in a bowl.

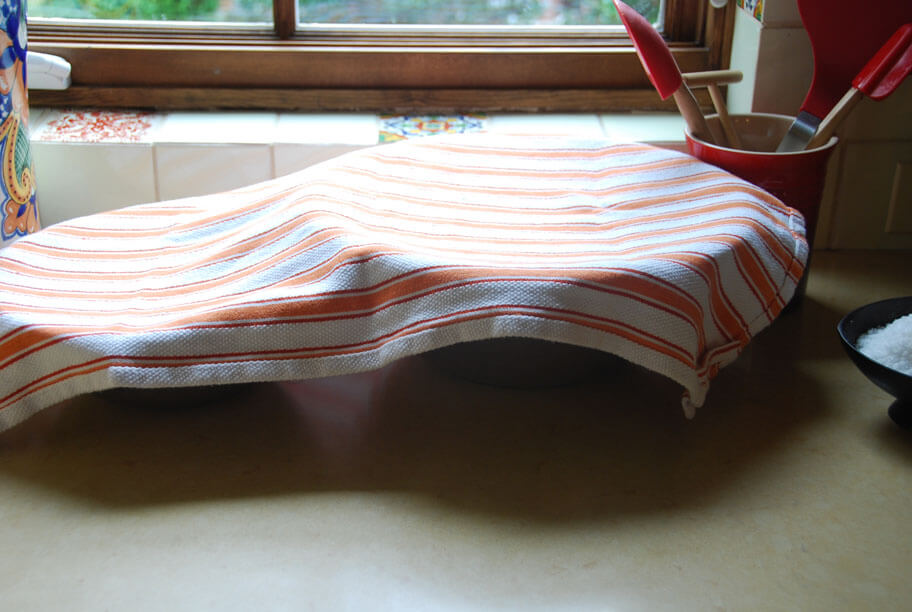
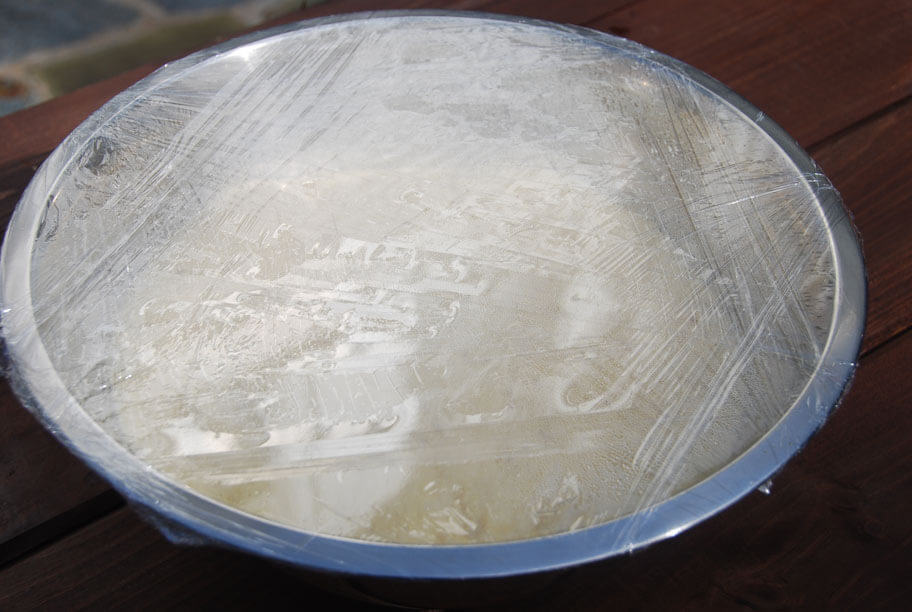
It’s better if you leave it in a warm area of your kitchen where there are no drafts, close to the oven or burners is a good idea, too. Leavened bread likes warmth and moisture, so much so, that I have gotten into the habit of placing a bowl with boiling water right next to the bowl with the dough and then cover it all together (in case you were wondering about the two bowls under the kitchen towel above).

Then leave it to rise.

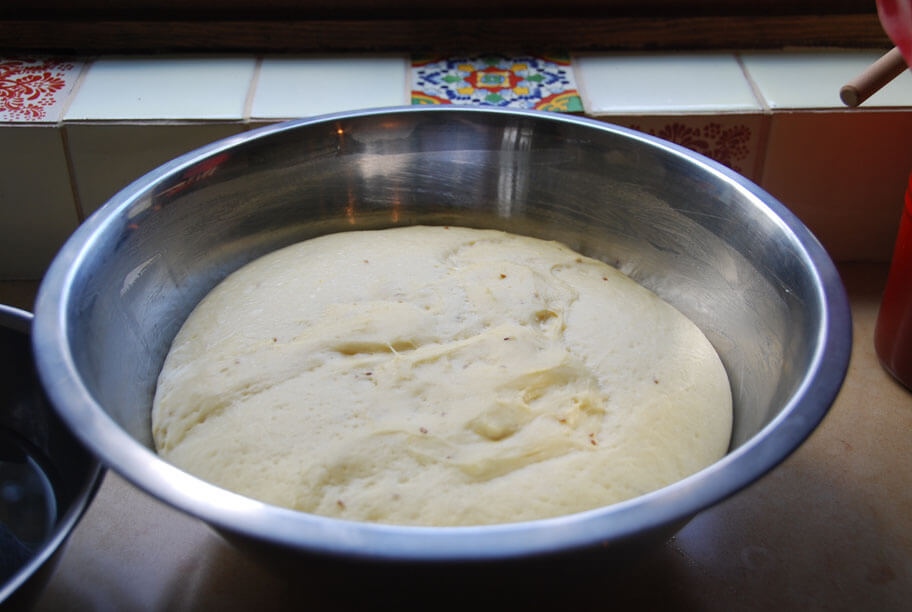
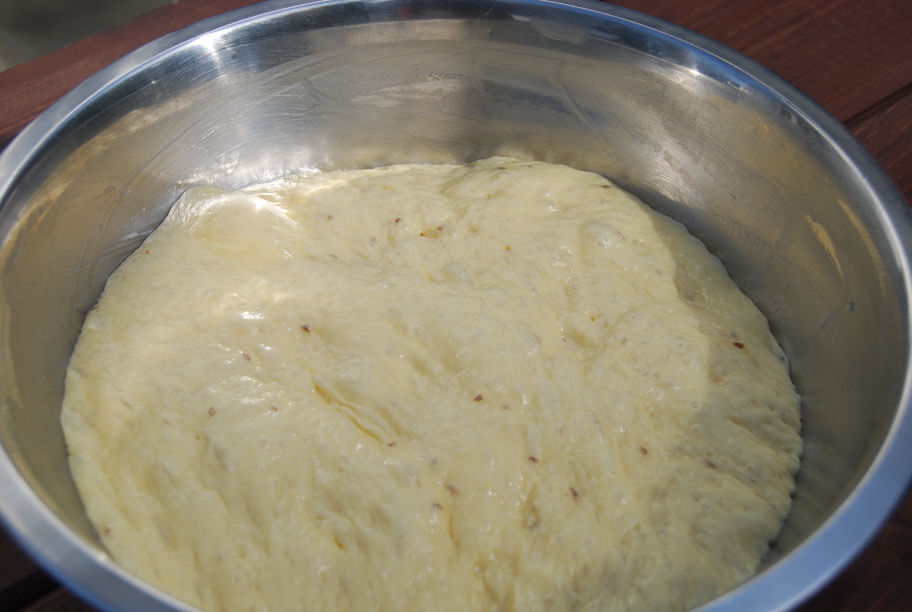
pati jinich pan de muerto first rise done

See how it puffed up in photo above? Almost tripled its volume.

That’s the second rise.

Then punch it back down. Just like that, make some fists and punch it twice.

pan de muerto dough punched down

Cover it with plastic wrap and place it in the refrigerator so that it will slowly but surely rise again, overnight. While you sleep, that dough will be getting ready for you.

pan de muerto overnight rise in refridgerator

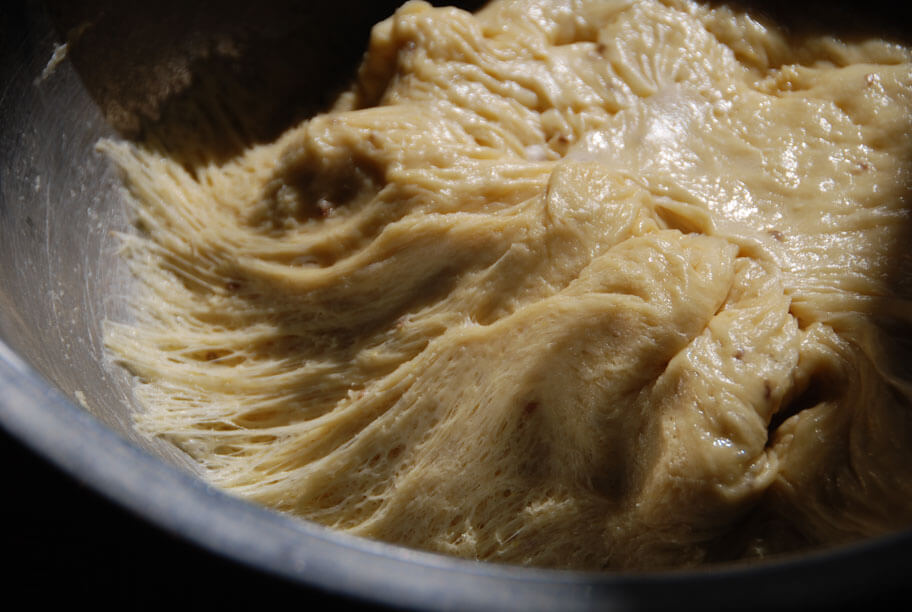
See below?? Look how it rose again!

This time it was even bubblier and a bit stringy.

This is the third rise. Next day, morning sun.

pan de muerto dough after overnight rise

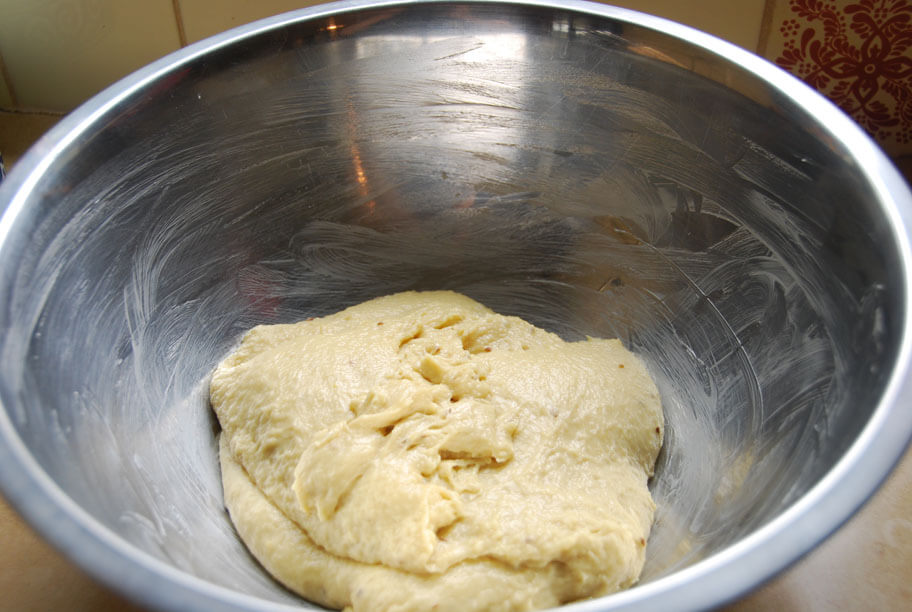
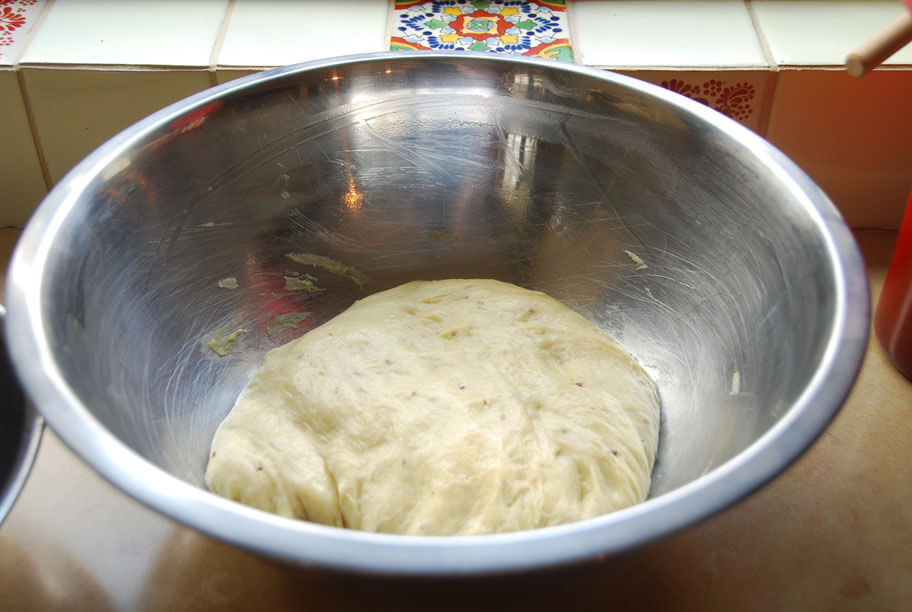
Then as you gather it into a ball, it will deflate in size, but you can see below how the dough has transformed and strands of dough are trying to stick to the bowl.

pan de muerto dough after punching down again

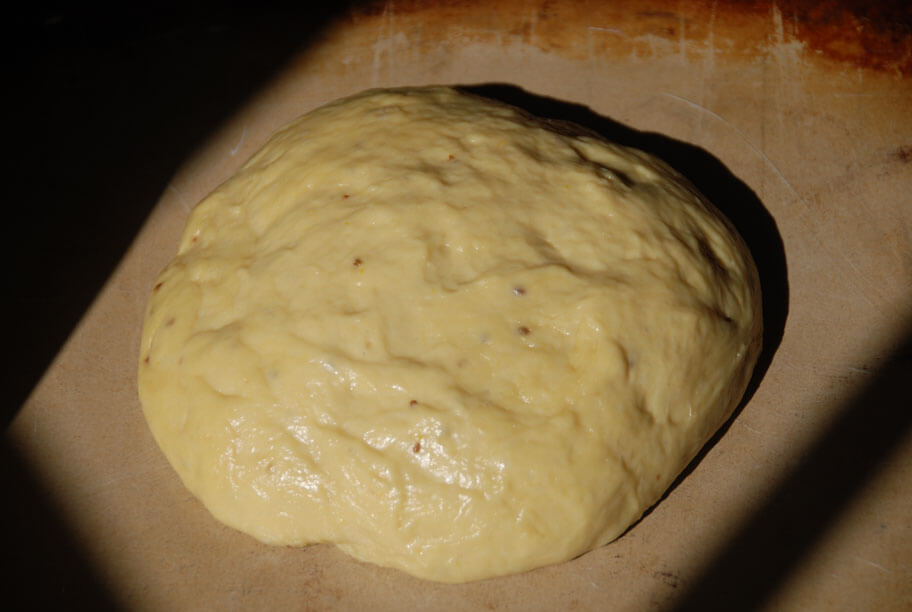
The dough ends up being shinny, sticky, compact…

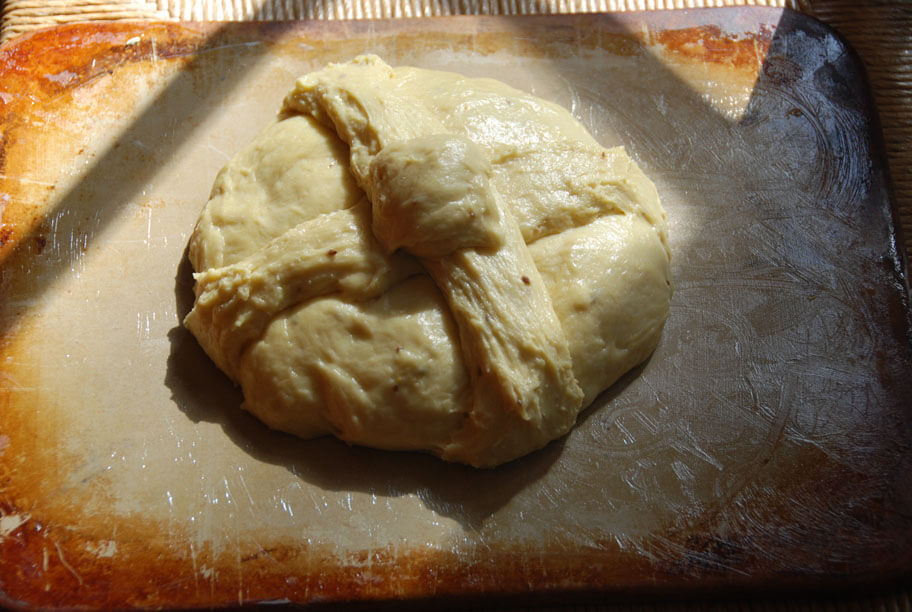
Grab two thirds to shape like a ball and place it over a buttered or oiled surface. I like using this pizza stone.

pan de muerto dough

You leave a third of the dough apart, to decorate the ball with a couple of ropes and a ball on top. And then.. you cover it and let it rise again under a towel.

pan de muerto dough with shaping

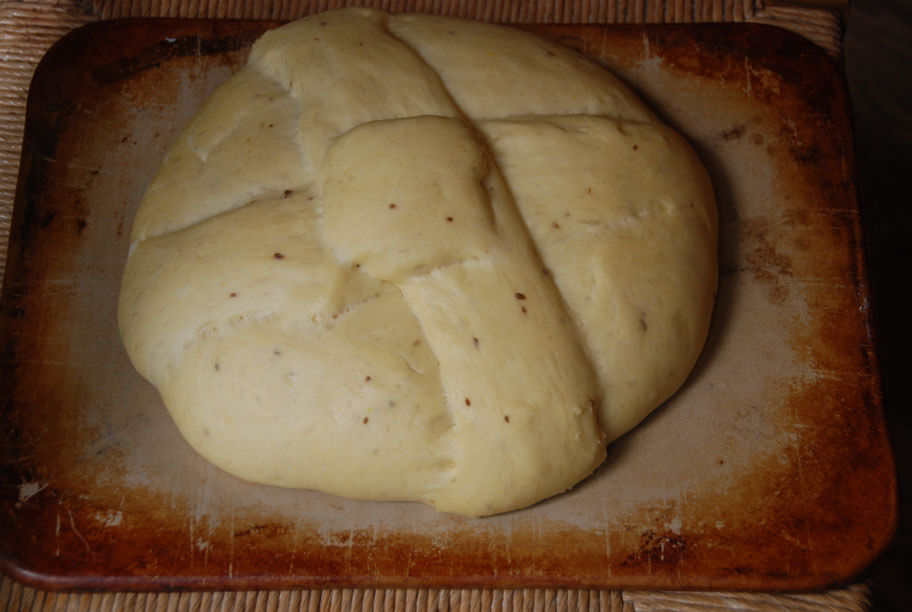
And so it rose, under the towel!

In the oven it goes.

shaped pan de muerto dough after rising

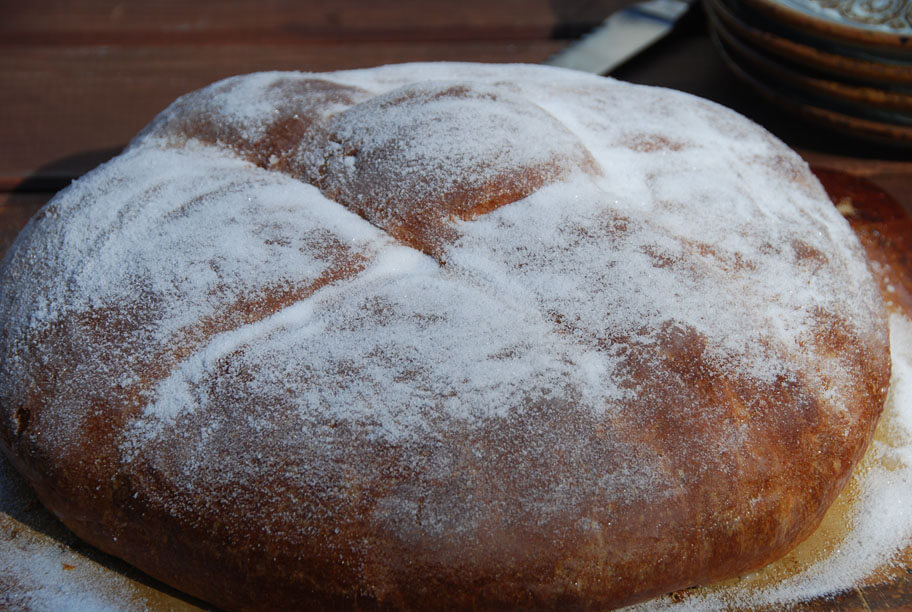
Lastly, when it comes out, it is entirely brushed with melted butter and covered in sugar. Some people add more complex decorations, like colored sugar or make intricate shapes. I like it straightforward with plain granulated white sugar and a round shape.

By mid morning the next day, you will have a Pan de Muerto ready to slice.

So, yes, it takes time, it has to rise many times, but every time it rises again you will feel a huge sense of accomplishment and satisfaction… And as you bake it, maybe you will find like me, that whoever is around in the house will start lurking in the kitchen to eat whatever it is that has such an irresistible aroma.

pan de muerto the finished product

Maybe you will find, also like me, that it was well worth the wait.

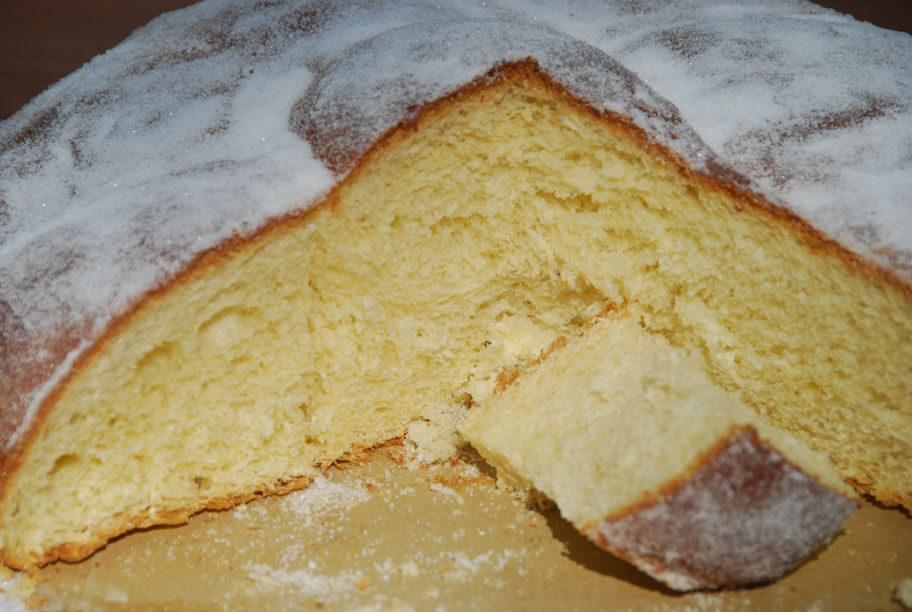
pati jinich pan de muerto
Print Recipe
4.50 from 6 votes

Pan de Muerto

One of the most meaningful, colorful and delicious of Mexican celebrations, Dí­a de Muertos has this bread as one of its trademark treats. It may sound strange to eat fluffy sugared up bread in the shape of bones, but then again, we also eat calaveritas, candies in the shape of skulls. This shows how crucial food is for Mexicans but also how it gets infused with our sarcastic sense of humor, generous spirit and gutsy attitude.
Prep Time10 hours
Cook Time55 minutes
Course: Breakfast
Cuisine: Mexican
Keyword: anise, bread, Dessert, orange, orange blossom water, Recipe
Servings: 10 to 12 servings
Author: Pati Jinich

Ingredients

  • 1/2 cup lukewarm whole milk
  • 2 packages active dry yeast (1/4 ounce each) or about 4 heaped teaspoons
  • 1/2 cup all-purpose flour plus 3 1/2 cups for later on
  • 1/4 cup unsalted butter at room temp plus more to grease the bowl
  • and 2 tablespoons to melt and brush on top
  • 1/2 cup granulated sugar plus 1/2 cup for dusting the bread
  • 6 large eggs at room temperature
  • 2 tablespoons orange blossom water or plain water
  • 1 teaspoon anise seeds optional
  • 1 teaspoon orange zest optional
  • Pinch kosher or coarse sea salt

Instructions

To make the starter:

  • In a small bowl, pour the lukewarm milk - making sure that it is not hot nor cold or the yeast will not react - and stir in the dry yeast granules. Give the yeast a couple minutes to sit in the liquid, and stir with a spatula until it is thoroughly and evenly dissolved. Give it time: stir a little, pressing gently on the yeast that has not yet dissolved with the spatula, give it a bit more time to sit in the milk, stirring again, press again. Once it has completely and evenly dissolved, add ½ cup flour. Mix it combining thoroughly, until it has no lumps. It will be gooey, runny and sticky. Leave it in the warmest area of your kitchen, for about 20 to 30 minutes, until it puffs up (to about doubles or triples its volume) and has bubbled on top. I like to place a sauce pan or cup with boiling hot water right next to it, but it's not necessary.

To make the dough:

  • In the bowl of a mixer, over medium low speed, beat the butter until soft. Add the sugar and beat until combined and fluffy. Add one egg at a time. Once eggs are incorporated, add the milk and yeast mixture. Then adding ½ cup at a time, add the rest of the flour (3 ½ cups). Stir in the orange blossom water if using and if not, add plain water. Also add the anise seeds and a pinch of salt. The dough will look wet, runny and sticky, but continue beating anywhere from 7 to 10 minutes, until all the dough comes off the sides of the mixing bowl. It will be elastic and sticky, but it will hold itself together.
  • Butter a large mixing bowl that can hold the dough, and will be able to hold it as it doubles or triples its volume. Place the dough in the bowl, cover it with a cloth or clean kitchen towel and leave it in the warmest area of your kitchen, that is draft free, making sure that it is not next to a window or door that gets opened. Leave it to rest and puff up anywhere from 2 to 3 hours, until it doubles its volume at least.
  • Punch the dough with your fist, flip it over, cover with plastic wrap and place in the refrigerator over night. The next day, remove the plastic wrap, place a cloth or kitchen towel on top and let it to come to room temperature.
  • Take off a third of the dough to make the bread decorations: make a 1 to 2-inch ball and use the rest to make 2 ropes. They need not be smooth nor perfect, as the dough is quite sticky, and no need to worry they will look beautiful once the bread is baked (and covered with sugar).
  • Butter a baking sheet or a bread or pizza stone, and make a ball with the rest of the dough. Place it in the center of the baking sheet and flatten it a bit on top. Place the dough ropes making a criss-cross -Mexican bakers usually shape the ropes to resemble bones, having thicker and thinner parts- and the ball on the top, right where they cross. Cover the bread with a cloth or kitchen towel, and let it rise and puff up again, for 1 to 2 hours.
  • Preheat the oven to 350. Bake the bread for for about 35 minutes. Halfway through baking, after about 20 minutes, cover the loaf with parchment paper or aluminum foil to prevent it from browning too much.
  • When they are ready, they sound "huecas", or hollow, if you hit the bottom of the bread.
  • Melt the butter and brush all over the bread. Sprinkle sugar all over until completely covered.

Going Nuts and Bananas for Capirotada

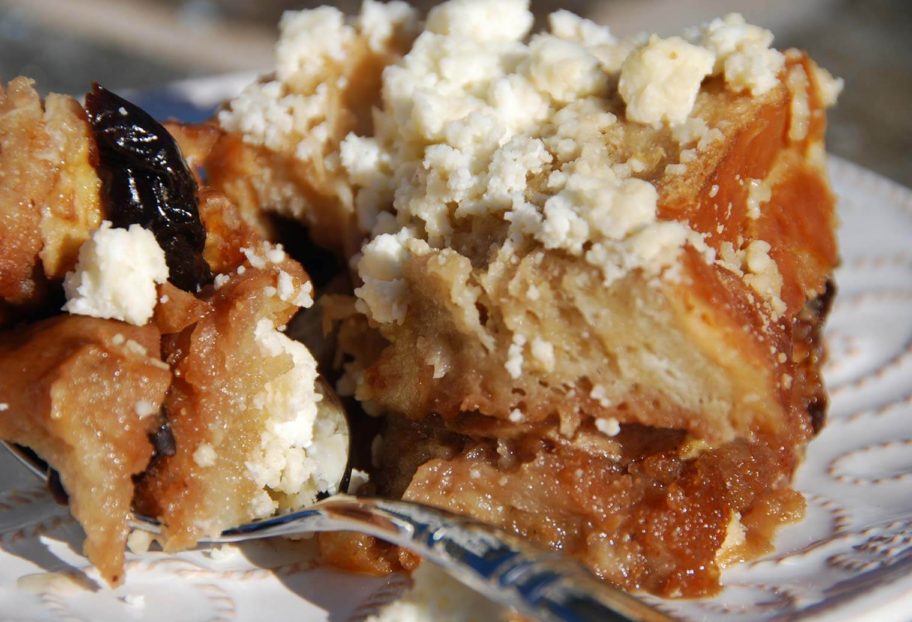
Sliced bread brushed with melted butter, toasted until golden, layered with handfuls of nuts and dried fruits, drenched in piloncillo syrup, topped with crumbled salty cheese and baked until it all comes together…. Once out of the oven, it tastes like a cross between French toast and bread pudding. Crisp-on-the-top and moist-in-the-center, every spoonful a delightful mess.

That is Mexico’s most well known version of Capirotada. Being a lover of delicious Mexican style food messes, I am one big fan of it. But some newcomers to the dish are taken aback by the salty cheese on top. What – you may ask like many do – is the need for the cheese on top? Well, that salty tease makes the thick feel and sweet taste of the dish come out in bold strokes in your mouth.

It reminds me of how my father loves to slice sweet bananas over his savory lentil soup; or how my family goes crazy over piling ates (fruit pastes) with Manchego cheese, as so many Mexicans do; or how I used to love eating a handful of chocolate covered raisins right after a handful salty pop corn, and then repeat it again and again at the movies growing up, as long as the movie lasted. Capirotada has that same wild mix.

Once you finish your piece, I bet you will beg for a bit more of that addicting combination. That’s probably why I have received so many requests for a recipe.

That is also why, although capirotada is traditionally made for Lent and we are no way near Easter, I’ve had such a big craving for it in this cold weather. No. I am not waiting until Spring. And I am making it again this Thanksgiving to share with friends.

As it is baked casserole style and it has such a sweet warmness to it, it is perfect for the holidays and for making ahead and just popping in the oven.

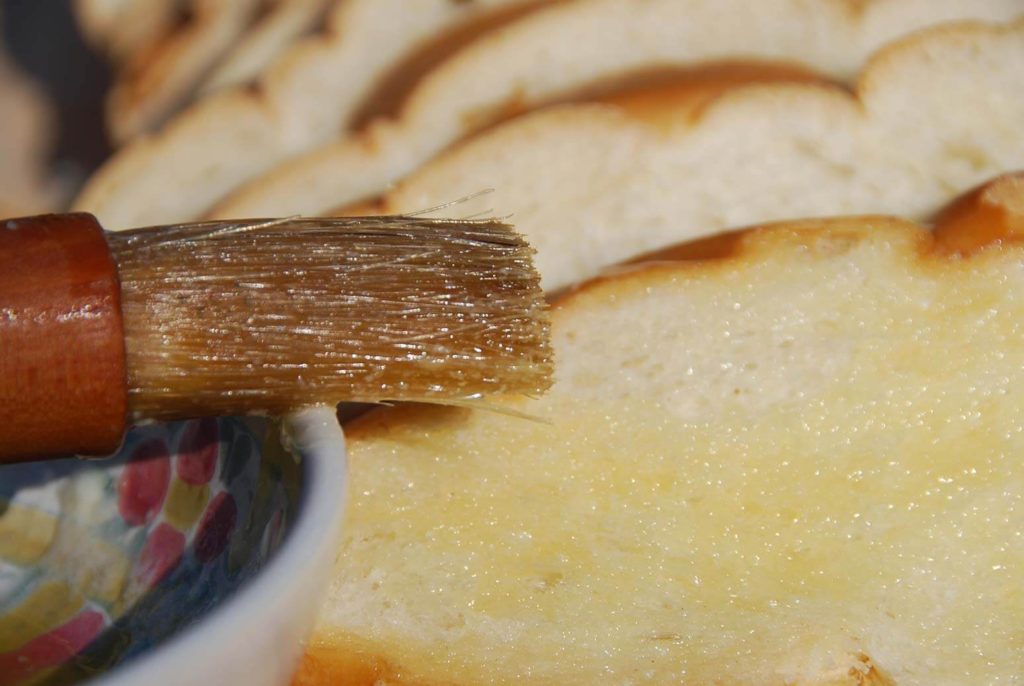
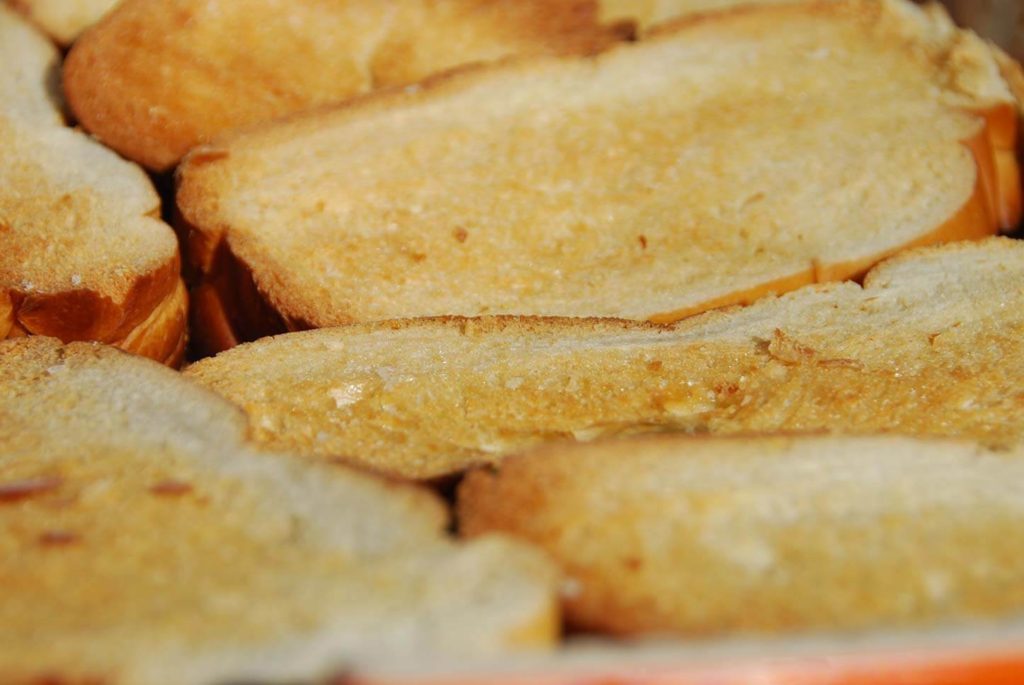
pati jinich capirotada brush bread with butter

There are, as all popular dishes, many versions of capirotada.

All capirotadas call for sliced and toasted bread. Some versions fry the bread in oil or lard to make it crisp and some brush it with melted butter and bake it. I go for the baked.

Also, some versions call for a crusty bread, like a baguette, bolillo or telera, while others call for pan de huevo, an egg and yeast based bread similar to the brioche or challah. Again, I go for the later….

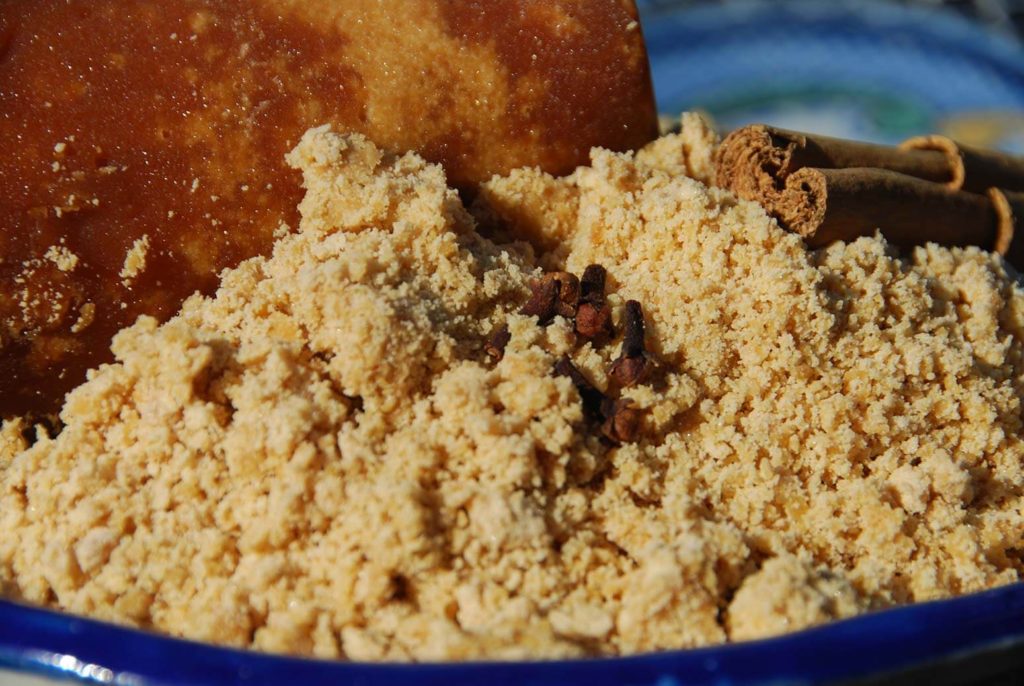
pati jinich capirotada ingredient piloncillo

Aside from which kind of bread and how to make it crisp, there seem to be two main camps where capirotada has fallen in the last couple centuries. The capirotada de agua (water based) and the capirotada de leche (milk based). De agua is baked in a piloncillo syrup while de leche goes in a custardy style sauce, with sweetened milk and yolks. Yet, the most traditional is the agua.

Yet the most common, and the one I’ve been asked for the most is de agua. The syrup tends to have the rich tasting piloncillo, true cinnamon and many times whole cloves.

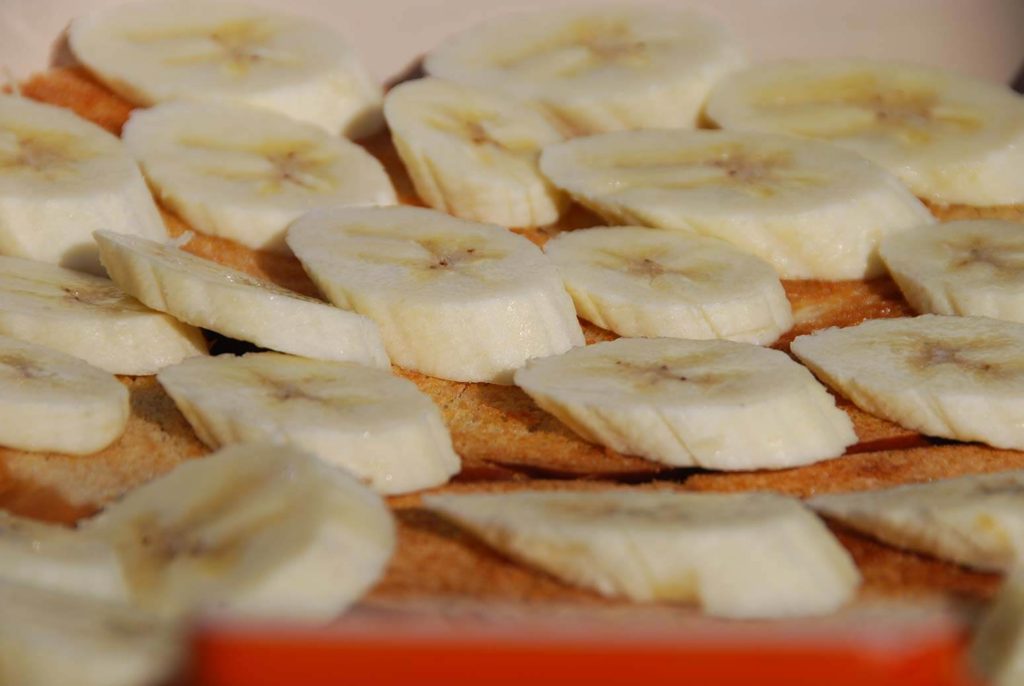
pati jinich capirotada top the bread with banana

There are many variations as to the additions. Most versions call for peanuts and raisins. So if you are looking for the most traditional capirotada, no need to add anything else. But there are many versions that add other kinds of nuts, fresh fruits like oranges, bananas, plantains, guavas, and grapes and dried fruits like candied figs and acitrón (the oldest recipes I researched about from a couple centuries ago even call for cooked onions, tomatoes and ground meat…)

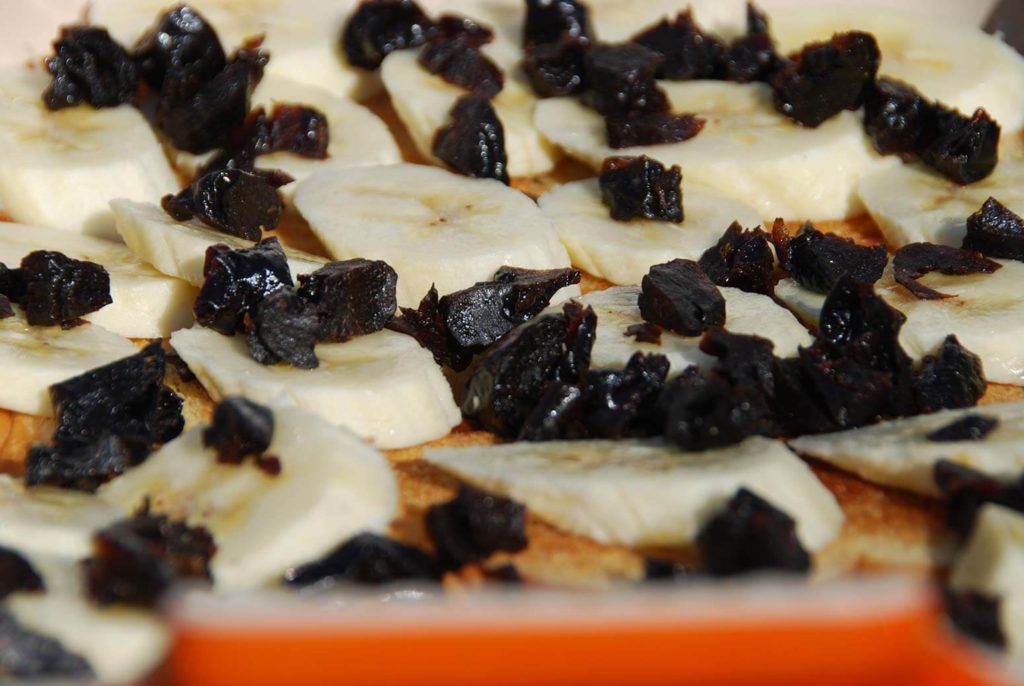
pati jinich capirotada top bread and banana with prunes

After trying one too many versions, what I like to combine the most, are pecans and prunes. And I can’t resist adding a full blown layer of bananas, like many cooks in Central Mexico. I am very fond of these three ingredients, and they seem to mingle so happily together, especially tugged between pieces of buttered and toasted slices of bread drenched in syrup…

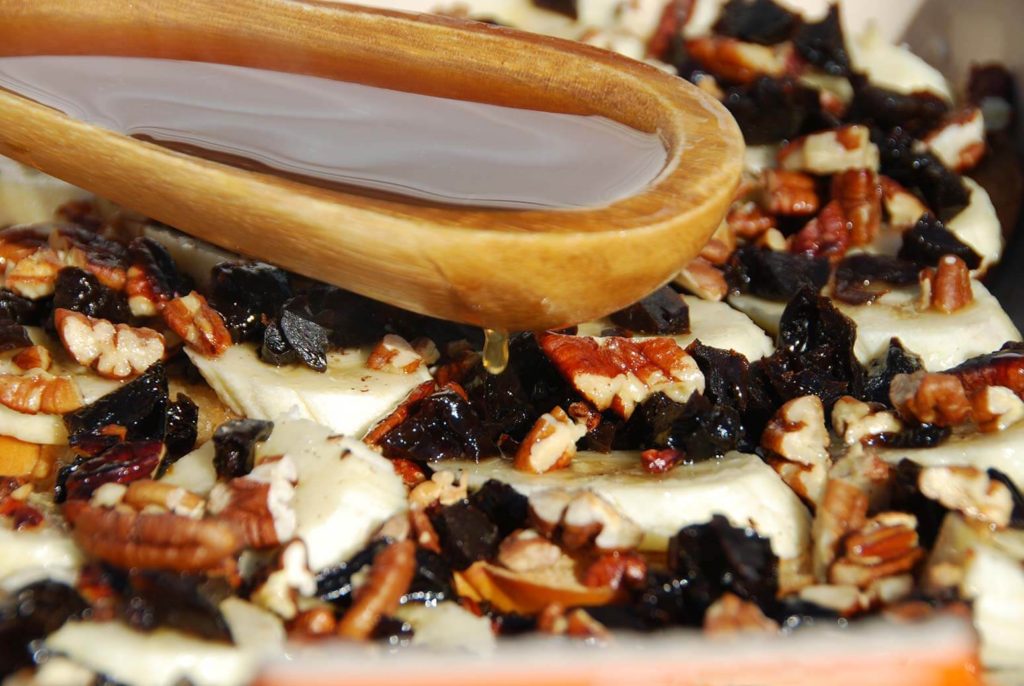
pati jinich capirotada drizzle piloncillo syrup on top

After the first layer of bread, in go the bananas, prunes, pecans and a bath of syrup.

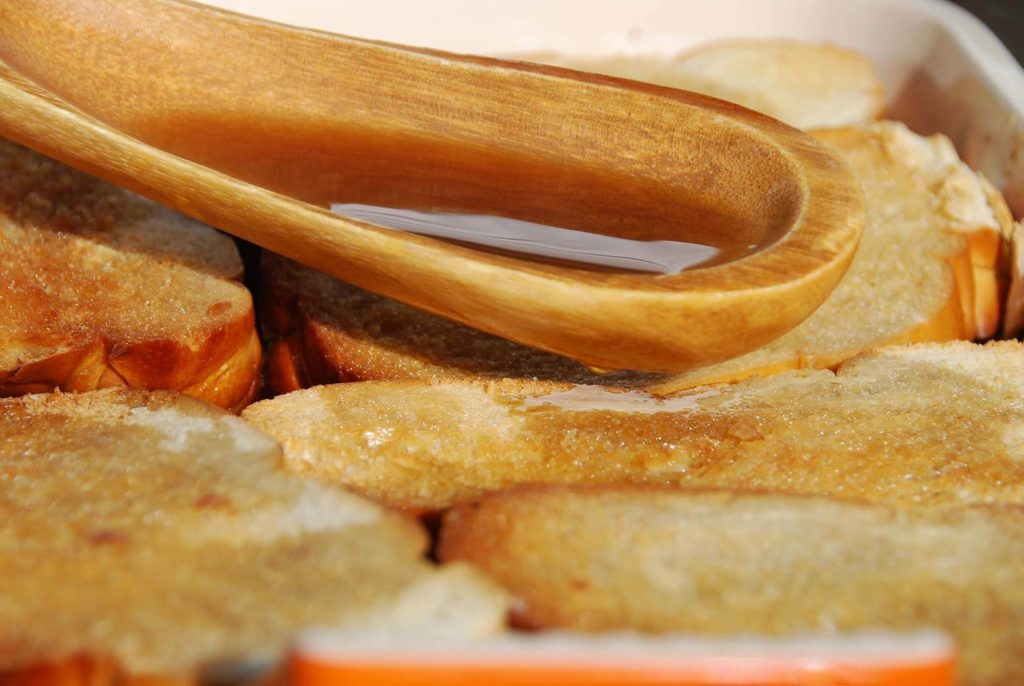
pati jinich capirotada add another layer of buttered bread

Then goes another layer of the bread…. with the rest of the syrup poured on top.

pati jinich capirotada drizzle more pilconcillo syrup on top

As for the question of the cheese…. de leche camp of the capirotadas don’t have cheese, while de agua ones do.

And again…there are many options. While in Michoacán, they tend to sprinkle a dried and crumbly cotija cheese or a queso fresco, in other regions they use melty stronger cheeses like a Mexican Manchego. So you could go for a cheddar, a Monterey Jack or a muenster. You have the chance to play with your taste buds. But as funny as it may sound if it is the first time you try it, don’t skip the cheese…

pati jinich capirotada top with queso fresco

Capirotada is filling, satisfying and sweet. And that cheese…. really does it’s thing…

pati jinich finished capirotada

Pati Jinich capirotada or bread pudding recipe
Print Recipe
4.84 from 6 votes

Capirotada with Bananas, Pecans and Prunes

Sliced bread brushed with melted butter, toasted until golden, layered with handfuls of nuts and dried fruits, drenched in piloncillo syrup, topped with crumbled salty cheese and baked until it all comes together…. Once out of the oven, it tastes like a cross between French toast and bread pudding. Crisp-on-the-top and moist-in-the-center, every spoonful a delightful mess. That is Mexico’s most well known version of Capirotada. 
Prep Time10 minutes
Cook Time1 hour 25 minutes
Course: Breakfast, Dessert
Cuisine: Mexican
Keyword: banana, bread, ceylon, cinnamon, cloves, cotija cheese, pecans, piloncillo, prunes, queso fresco
Servings: 10 servings
Author: Pati Jinich

Ingredients

  • 8 cups water
  • 1 pound grated piloncillo or about 2 cups packed dark brown sugar
  • 1 ceylon or true cinammon stick
  • 3 whole cloves
  • 1 loaf challah or brioche bread cut into 1/2-inch slices (preferably a couple days old)
  • 1/4 cup melted unsalted butter to brush bread, plus more to grease baking dish
  • 2 ripe bananas peeled and sliced
  • 2/3 cup pitted prunes chopped
  • 1 cup pecans roughly chopped and toasted
  • 4 ounces (about 1 cup) crumbled queso fresco or añejo or cotija
  • Pinch ground cinnamon to sprinkle on top (optional)

Instructions

  • In a medium sauce pan, pour the water and set it over medium high heat. Once it comes to a simmer, add the grated piloncillo, cinnamon and cloves, reduce heat to medium and simmer for about 25 minutes, until it has all dissolved and has a light syrup consistency. Turn off the heat and remove the cinnamon and cloves.
  • Preheat the oven to 350 degrees Fahrenheit. Brush the bread slices with unsalted butter. Place in a baking sheet and into the oven. Bake for 12 to 15 minutes or until golden.
  • Butter a 9x13 casserole or baking dish. Place a layer of bread in the bottom covering the entire surface. Cover with the banana slices, prunes and pecans. Pour half the syrup on top. Add another layer of bread, pour the remaining syrup on top and sprinkle the crumbled cheese. Sprinkle with cinnamon if desired.
  • Cover with aluminum foil and place in the oven for 45 to 50 minutes, or until the syrup has been absorbed. Remove from the oven. Let it sit for at least 20 minutes for the Capirotada to settle and for the entire syrup to be soaked up, then serve. You can also serve it lukewarm or cold. It can also be reheated.

Notes

Capirotada con Plátano, Nuez y Ciruela Pasa

Sweet Conchas!

I can finish a normal sized Concha, 4 to 5″ round, in exactly four bites. If it has been a long time since I had one or if I am very hungry, maybe three bites. Ok, I admit it, sometimes two bites. But never one.

Conchas are named after the shape of their sugar topping, which resembles a seashell. Conchas do have a hardened crust, but it is sugary, thick, crispy and crumbles right into your mouth as you take a bite. Right after you brake through that crust, there is a fluffy, soft, sweet roll made with flour, butter, yeast and eggs.  With such a pleasing experience, no wonder it is one of Mexico’s most favorite sweet rolls or pan dulce.

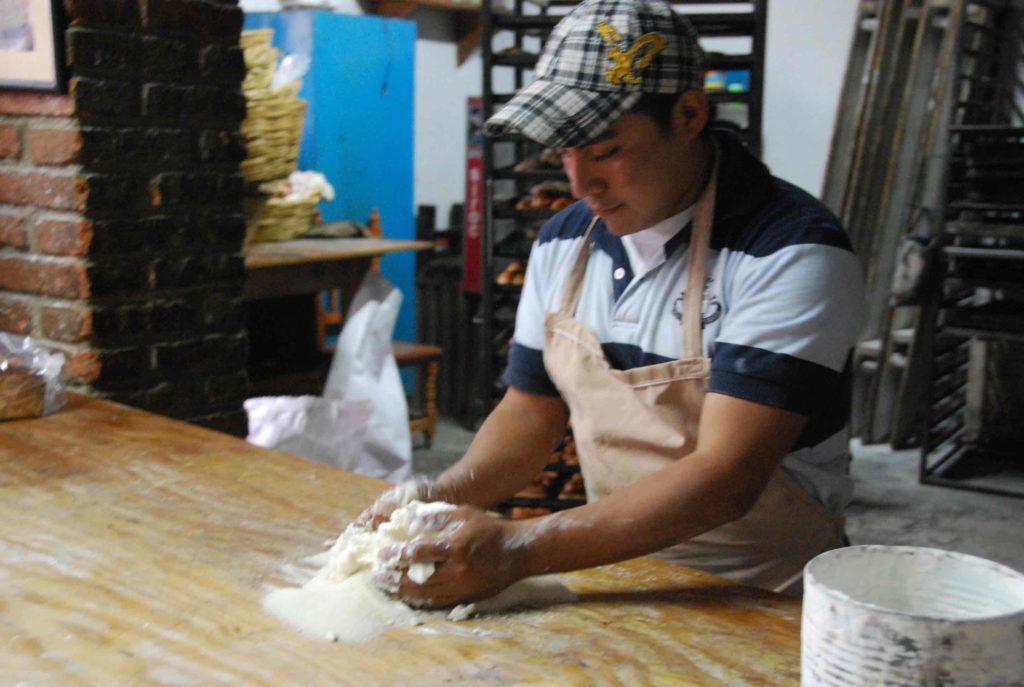
I have seen some in bakery shops around DC, but they just don’t taste like the ones we love at home. So on our most recent trip to Valle de Bravo in Mexico, I ventured with my boys, and many of their cousins and aunts, into a panaderí­a, or bread shop. They make such incredible conchas, it makes me wish I had a bigger mouth  to eat them each in a single bite.

This panaderí­a, named Santa Marí­a, like most in Mexico, has 2 daily shifts for making fresh breads of all sorts. On the second shift of a Monday afternoon, Mrs. Agustina López, who runs the bakery, saw my little battalion and announced that they give baking classes to little cooks.

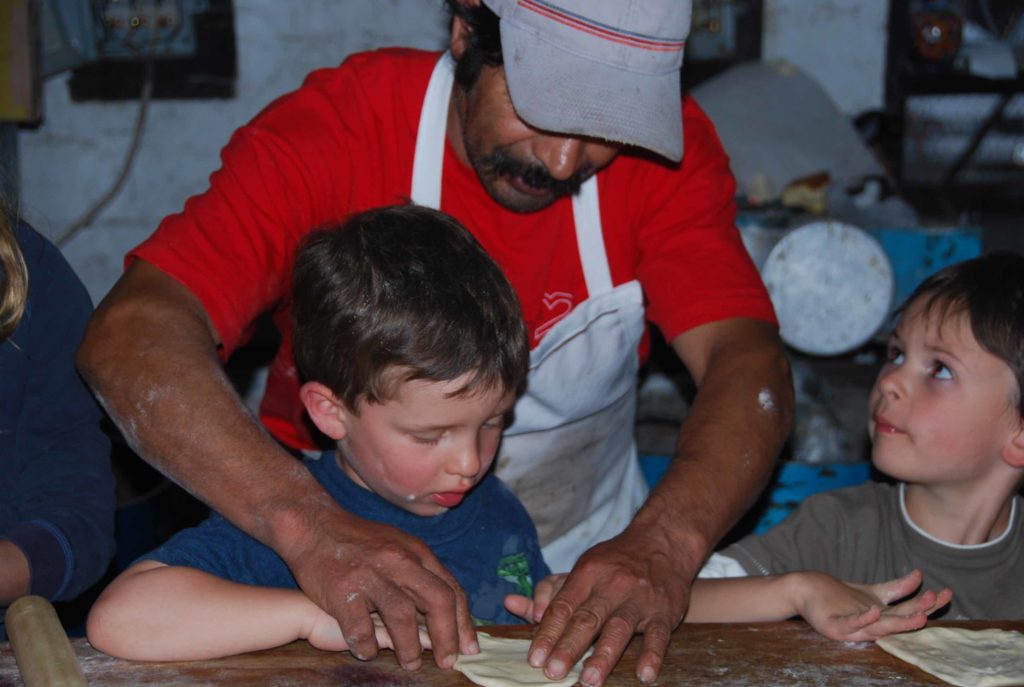
As the kids got a very hands-on class from her son Félix, master baker there, I soaked up all their secret ingredients and techniques, which they were very happy to share.

Conchas 1

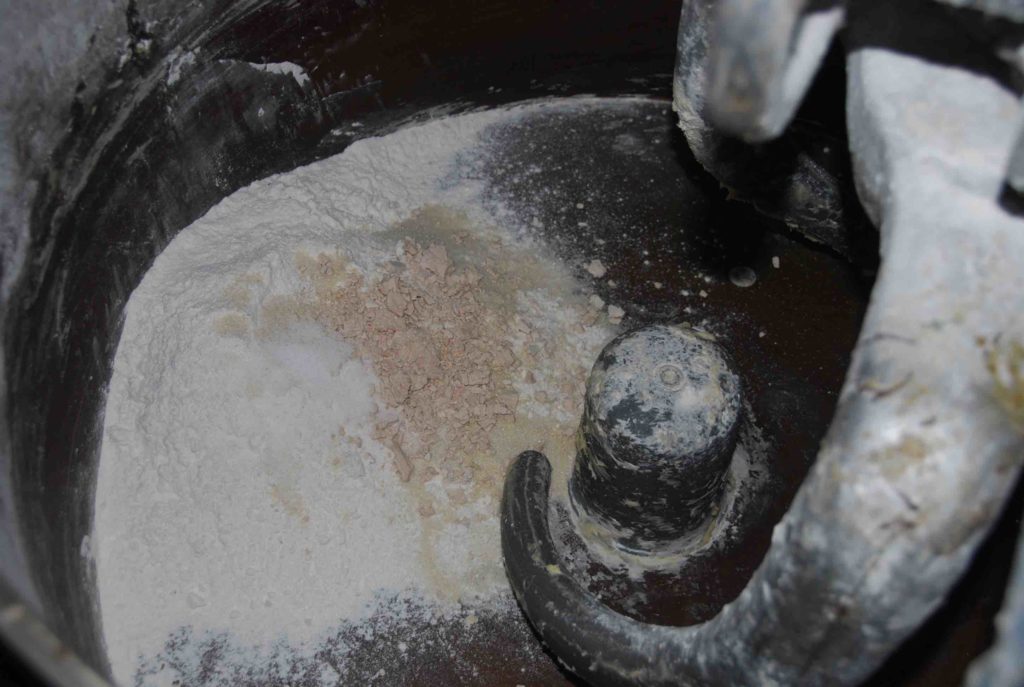
First of all, they have a beautifully aged and seasoned giant mixer. The kids took turns throwing (yeah, throwing) the flour, salt, yeast, water…

Conchas 2

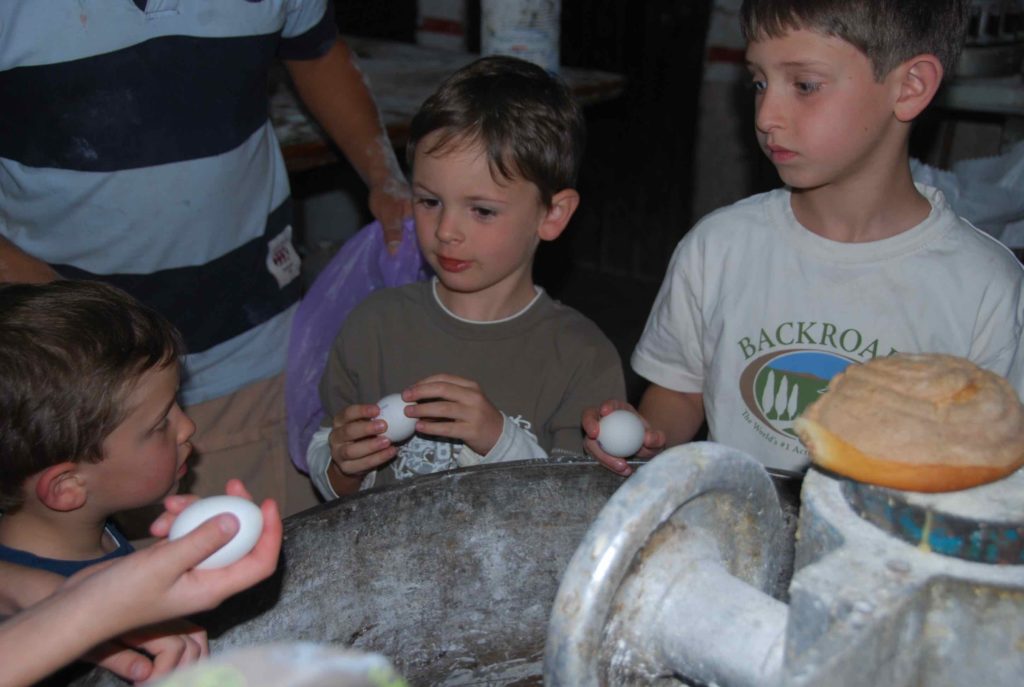
They were attempting to also throw the eggs into the mixer. See? I had to put my camera down to convince them that really, those eggs needed to be cracked first, though it seemed more fun to throw them all in. Just like that.

After, the roaring giant mixer helped knead a soft, gooey, elastic and very moist batter.

Conchas 3

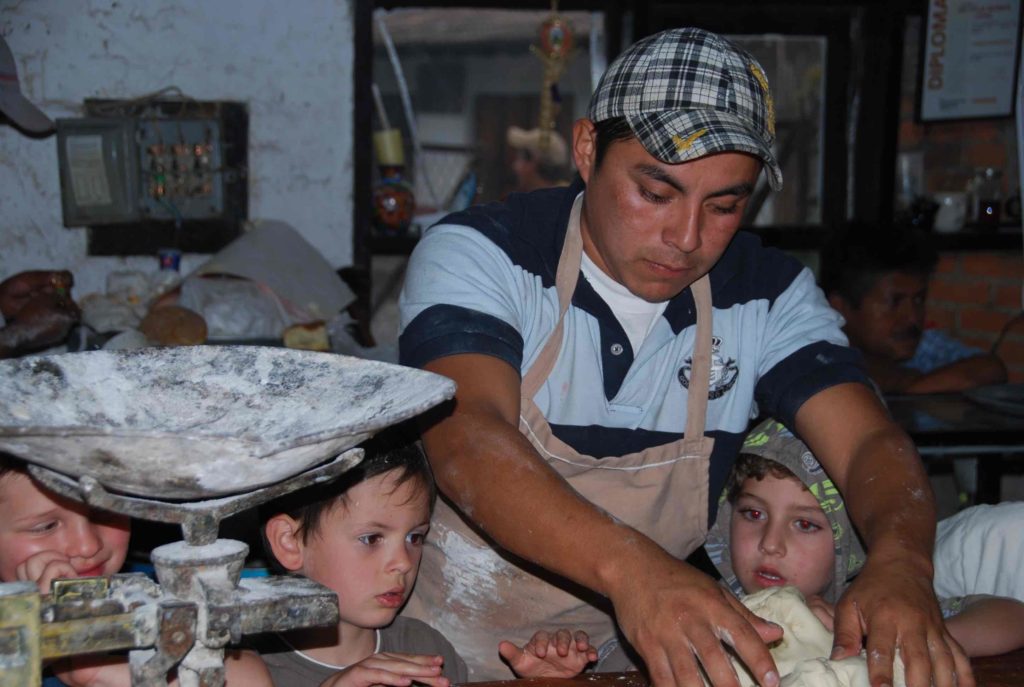
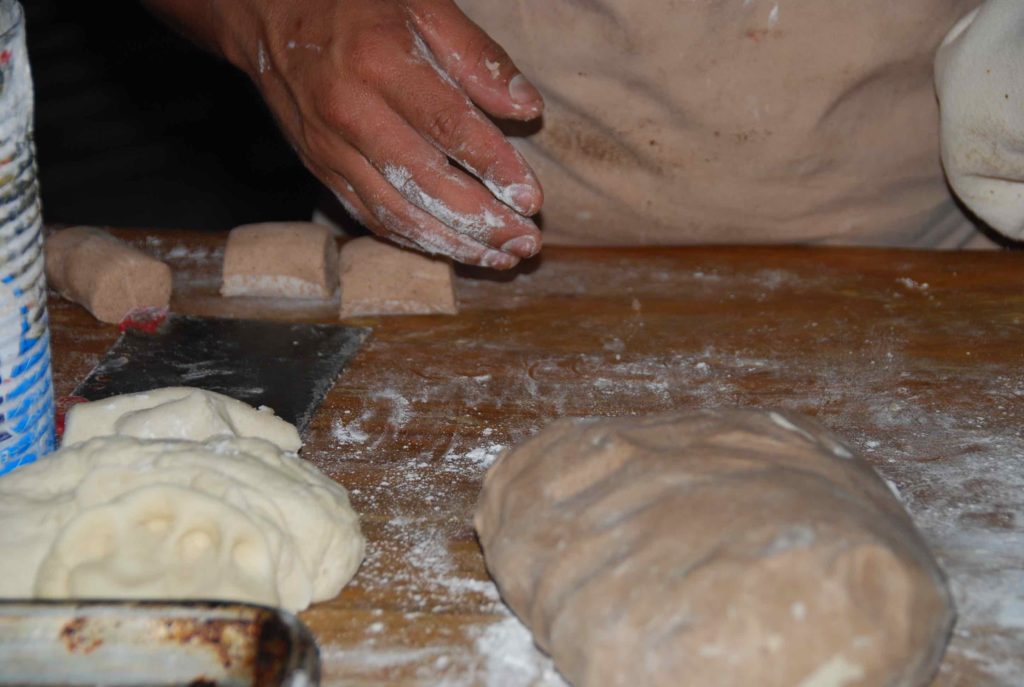
Félix showed them what that dough felt like. Then he left it to rise, and took it to another giant piece of equipment: a batter cutter.

Juju seemed to not believe his luck with those beautiful pre-cut pieces of dough… All the possibilities!

Conchas 4

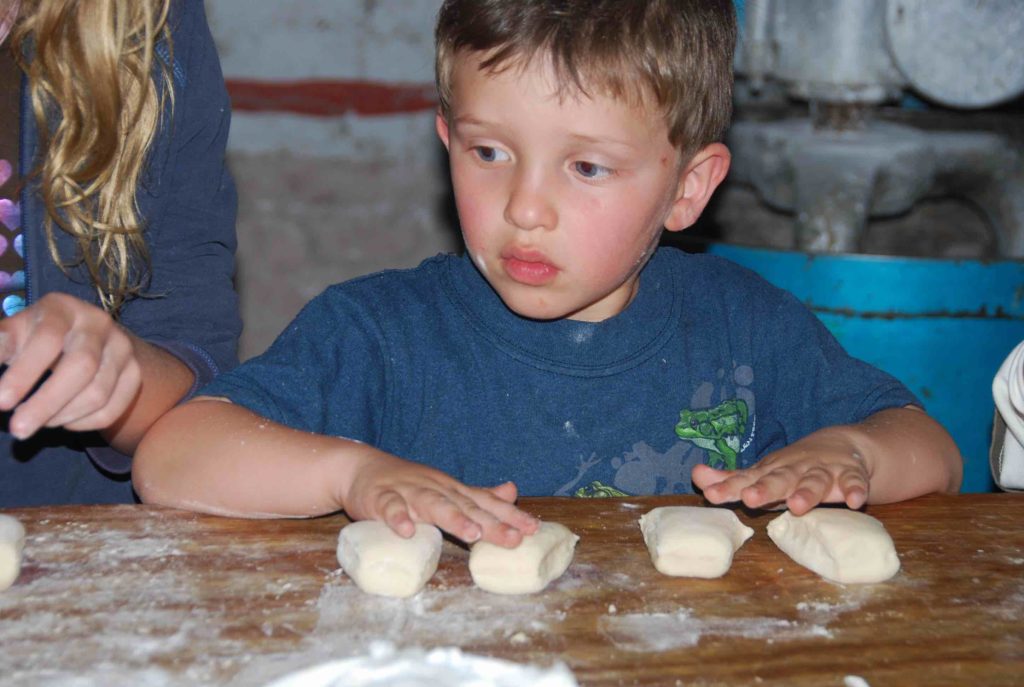
After the kids shaped them into thick, flattened rounds, Félix demonstrated how to make the sugar cover.

Conchas 5

Which was even more fun to make, because all you do is mix together flour, confectioners sugar and a heaven-full of butter with your hands until soft.

Conchas 6

Half that sugar cover is mixed with cocoa powder, because some people prefer their conchas chocolatey… Or some little cooks like to throw in something else to get even more messy…

Conchas 7
The kids were concentrated on making that sugar cover just about right before layering it on the concha dough flattened balls… Félix’s bakery assistant was so kind and patient with the kids.

Conchas 8

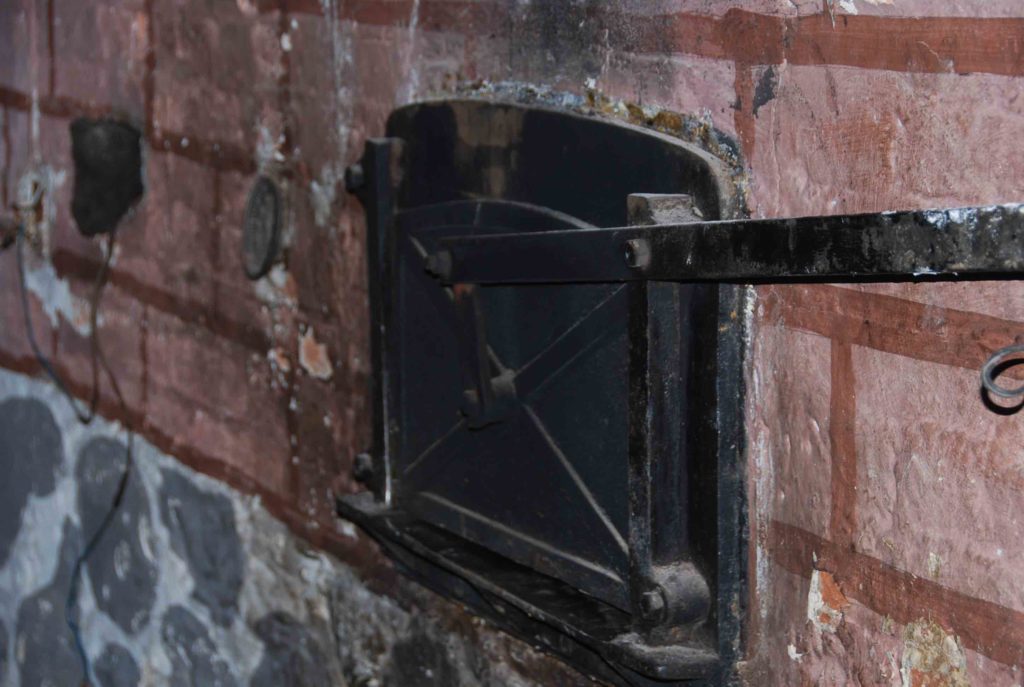
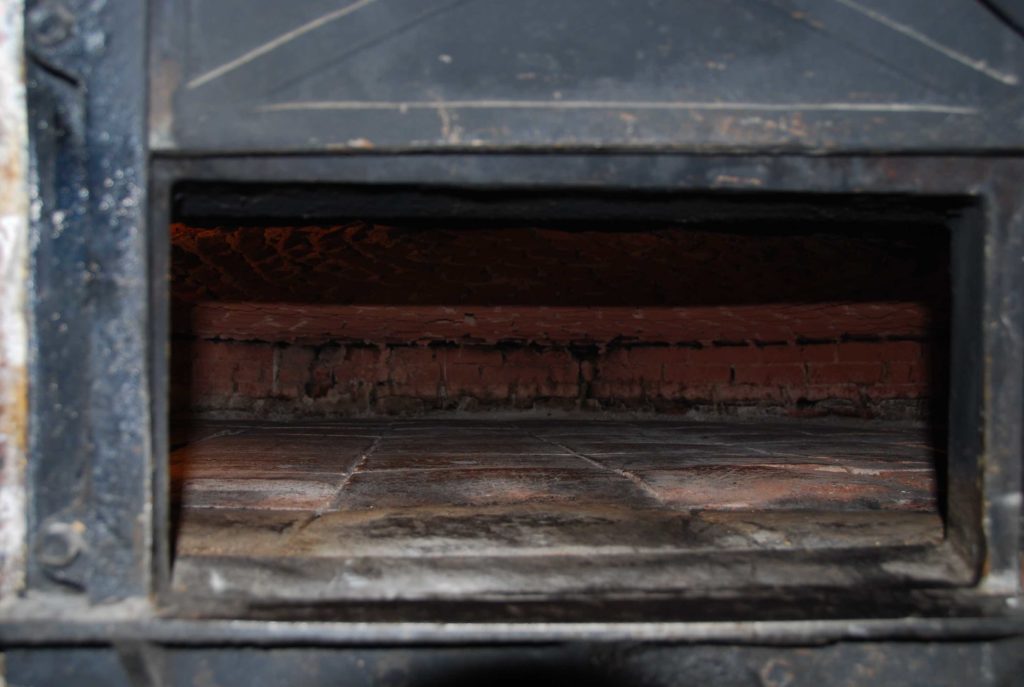
Now that is one charming looking oven. The moment I saw it, I imagined how just about anything baked in there has to taste so yummy…

Conchas 9

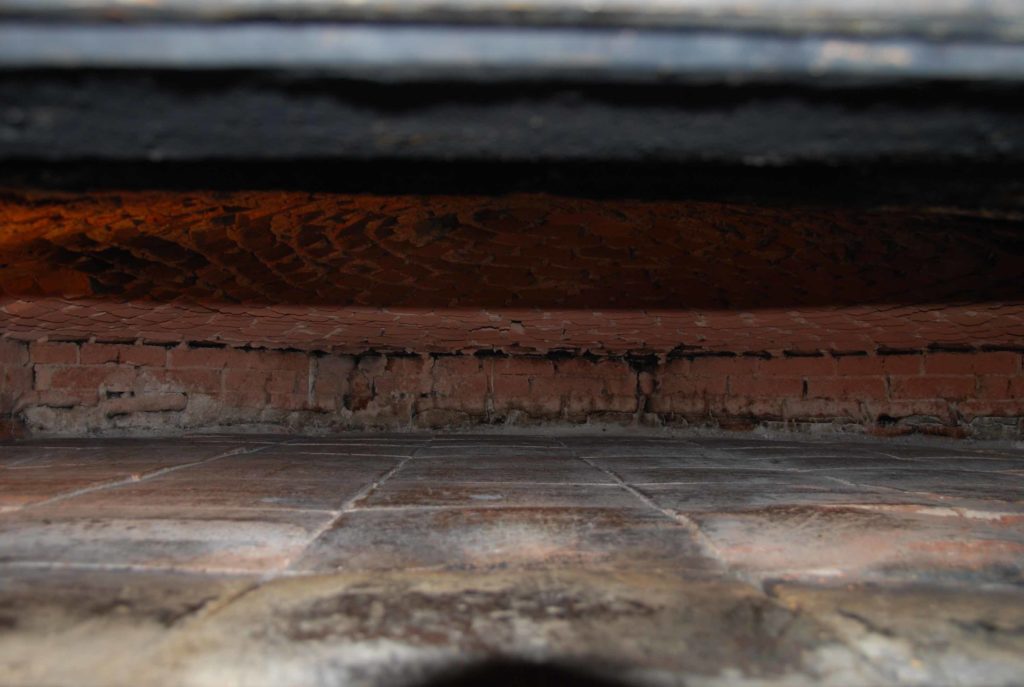
With the bottom made out of aged earthenware tiles and brick walls…

Conchas 10

And one can just dream of how many conchas can fit in there…. 500, 1000, 2000… Each one to be eaten in just…. two….  big…. bites.

And some whole milk on the side.

Print Recipe
3.84 from 6 votes

Conchas

Conchas are named after the shape of their sugar topping, which resembles a seashell. Conchas do have a hardened crust, but it is sugary, thick, crispy and crumbles right into your mouth as you take a bite. Right after you brake through that crust, there is a fluffy, soft, sweet roll made with flour, butter, yeast and eggs.  With such a pleasing experience, no wonder it is one of Mexico’s most favorite sweet rolls or pan dulce.
Prep Time4 hours 25 minutes
Cook Time20 minutes
Course: Breakfast, Dessert
Cuisine: Mexican
Keyword: bread, Dessert, dough, pan dulce, pati's mexican table, Recipe, rolls, sugar
Servings: 16 to 18 conchas
Author: Pati Jinich

Ingredients

For the dough:

  • 14 ounces or 2 3/4 generous cups all-purpose flour
  • 2 eggs
  • 1 egg yolk
  • 1/4 teaspoon salt
  • 2 packets (7 grams or .25oz each) dry active yeast
  • 1/2 cup lukewarm water
  • 4 ounces unsalted butter or vegetable shortening at room temperature
  • 5 ounces or 3/4 cup sugar

For the sugar topping:

  • 1/3 pound all-purpose flour
  • 1/3 pound confectioners' sugar
  • 5 ounces unsalted butter or vegetable shortening, at room temperature, diced
  • 1 1/2 tablespoons cocoa powder if you want to make half be chocolate flavored
  • Extra butter or vegetable shortening to assemble the conchas

Instructions

  • Add the all purpose flour to the mixer, set with the dough hook, along with the eggs, egg yolk, and salt. Start the mixer over low speed. Meanwhile, add the active dry yeast to 1/2 cup lukewarm water and stir until creamy and well dissolved. Stir it into the flour mixture, and let it continue beating, now over medium speed, for about 3 to 4 minutes.
  • Incorporate the unsalted butter, keep on beating for 3 to 4 minutes more. Lastly, add the sugar and continue mixing for another 3 to 4 minutes or until the dough is gooey, sticky, elastic and very smooth.
  • With a spatula, push the dough into a mixing bowl greased with butter or vegetable shortening, cover it with a kitchen towel and place it in the warmest area of your kitchen, where there are no wind currents. Let the dough rise for at least 2 and up to 8 hours. It should have doubled in size.
  • For the sugar topping, place the flour and confectioners' sugar in a large bowl. Using your hands, incorporate the diced butter into the flour mixture. Mix and knead it until its smooth and homogeneous. If you want half the conchas to be chocolate flavored, separate half of the mixture in another bowl, and mix it very well with the cocoa powder. Cover the sugar toppings with plastic wrap so they won't dry out.
  • To assemble the conchas, grease thick baking sheets with butter or vegetable shortening and keep your hands greased. They will need to be greased for you to shape the dough. Using your hands, make about 2 inch balls with dough. Then, slightly press them flat, as in a thick disk, but not a tortilla. Leave about 2 inches in between each of the conchas so they will have room to expand.
  • Once your baking sheet is filled with the dough disks, cover them with the sugar coating. To do this, grab about a tablespoon of sugar coating, plain or chocolate. Make a round ball with your hands and then flatten it thin, like a tortilla. Place it on top of the dough disk and slightly press down. It should cover most of the surface.
  • If you have a concha mold, press it on the sugar topping. If you don't have one, cut through the sugar topping making round lines or any decoration that reminds you of a shell.
  • Leave the prepared conchas in a warm area of your kitchen, uncovered, and let them rise again, for about 2 to 4 hours.
  • Preheat the oven to 350 degrees. Place the conchas in the oven for about 20 to 24 minutes, until the conchas are slightly browned around the edges and look fluffed up.

Tortillas: Make Corn Tortillas at Home

Yes, you can buy them already made at the store, but there are few things that can’t compare to the nurturing and filling sensation of homemade corn tortillas.

And the great thing is, we can buy the premade corn tortilla flour of extraordinary quality in the US these days, so you don’t have to nixtamalize the corn kernels (dry in the sun, cook and soak in hot water with lime, peel and grind to a paste) through a process of more that 36 hours to make your own fresh corn tortilla dough. Here is how you make them.

Print Recipe
4.80 from 5 votes

Corn Tortillas

Yes, you can buy them already made at the store… but there are few things that can compare to the nurturing and filling sensation of homemade corn tortillas.
Prep Time15 minutes
Cook Time10 minutes
Course: Antojos, Side Dish
Cuisine: Mexican
Keyword: corn tortillas, dough, masa, pati's mexican table, Recipe, tortilla
Servings: 10 to 12 tortillas
Author: Pati Jinich

Ingredients

  • 2 cups corn tortilla flour such as MASECA
  • 1 3/4 cup water or enough to achieve a play dough consistency dough! varies with climate
  • Pinch of salt optional

Instructions

  • Set a comal or ungreased dry skillet over medium heat, for at least 5 to 8 minutes, until thoroughly heated. (If your pan isn’t hot enough, the tortillas will stick.)

To make masa or dough:

  • Mix together the flour, salt, and water in a large mixing bowl and knead the masa in a circular motion. Do so for a couple minutes, until the dough feels smooth and has no lumps. If it feels too dry, add a bit more water. Masa dries out fast, so if you leave it unattended, cover it with a clean moist kitchen towel or cloth.

To make the tortillas:

  • Cut out 2 plastic circles from a thin plastic bag, like ones you get at grocery stores. (Don’t use plastic wrap.) Roll a piece of the masa in your palm into a ball about 1 1/2″ in diameter. Place one plastic circle on the bottom of the tortilla press and place the masa ball on top. Place the other plastic circle on top of the ball and press down the press to make a flat disk, jiggling the press a little as you get to the bottom (this makes a rounder tortilla). Open the press and check the tortilla for dryness and, if needed, add water to the remaining masa (the masa should be as soft and smooth as Play-Doh). Take the top plastic off, lift the bottom plastic with the tortilla in one hand and peel the tortilla from the plastic with the other hand.
  • Alternatively, you can place a ball between plastic sheets or parchment paper and roll the tortillas out with a rolling pin. They should be about 5″ in diameter and about 1/8″ thick.
  • Place the tortilla on the hot comal or skillet. Let it cook for at least 30 seconds (resist the urge to touch or adjust it). As soon as it can be flipped without sticking to the comal – it should be opaque on the side that it was cooking on. Flip with a spatula and cook for about a minute, until opaque and starting to freckle on the other side. If it is opaque but it has white-ish areas, you need to leave it a bit more, until those white-ish shadows become freckled with brown spots. Turn over once more, and now, after a couple seconds, tortilla should puff up like pita bread, if not all over tortilla, at least in an area of it. Let the tortilla cook still, for about 10 seconds, so that it cooks in between the area that puffed up.
  • If eaten that same day, tortillas may be kept wrapped in a clean kitchen towel or cloth. If not, wrap in a kitchen towel, inside a closed plastic bag and place in the refrigerator. They will keep for up to 3 days, afterwards they will turn too hard. Reheat in hot comal for 30 seconds or so on each side before eating. They can also be frozen and kept for months.