Herbs & Spices

Canela Carajillo

Canela Carajillo
Print Recipe
4.41 from 5 votes

Canela Carajillo

A spiced up take on the Mexican coffee cocktail Carajillo with cinnamon, star anise, and tequila.
Cook Time0 minutes
Course: Drinks
Cuisine: Mexican
Keyword: cocktail, coffee, tequila
Servings: 1 serving
Author: Pati Jinich

Ingredients

For the spiced simple syrup:

  • 1 cup sugar
  • 1 cup water
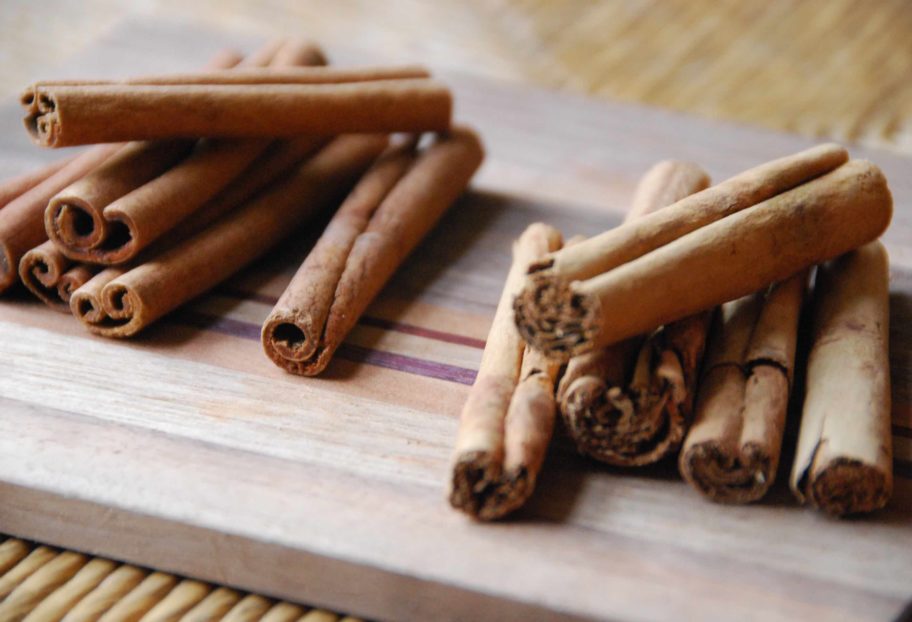
  • 1 canela or true cinnamon stick
  • 1 whole star anise

For the cocktail:

Instructions

To make the spiced simple syrup:

  • Combine the sugar, water, cinnamon stick, and star anise in a small saucepan. Bring to a simmer over medium heat and let it cook for 5 minutes. Let steep until it completely cools down, then strain. (You may store it in a closed container in the fridge.)

To make the cocktail:

  • Place ice in glass. Pour in the simple syrup and tequila, sir. Pour the hot espresso over the top.

Mint, Vanilla & Pear Cocktail

Mint, Vanilla & Pear Cocktail
Print Recipe
4.75 from 4 votes

Mint, Vanilla & Pear Cocktail

A delicious cocktail with muddled mint, pear, vanilla, honey and tequila.
Cook Time0 minutes
Servings: 1 serving
Author: Pati Jinich

Ingredients

  • 5 fresh mint leaves plus more to garnish
  • 1 ounce fresh squeezed lime juice
  • 2 ounces pear juice
  • 1 ounce honey
  • Dash of vanilla extract
  • 2 ounces Gran Centenario® Cristalino Tequila
  • 1 cup ice
  • Pear slice to garnish

Instructions

  • In a shaker add the mint leaves and lime juice. Using a muddler, muddle intensely until mashed. Incorporate the pear juice, honey, vanilla extract, tequila and ice. Shake until well mixed.
  • Pour into glass with ice. Garnish with a pear slice and a mint leaf.

Chaya Soup

Chaya Soup
Print Recipe
4 from 6 votes

Chaya Soup

Chaya Soup recipe from Pati’s Mexican Table Season 12, Episode 8 “Maya Today”
Cook Time20 minutes
Course: Soup
Cuisine: Mexican
Keyword: habanero, pumpkin seeds, soup
Servings: 4 to 6 servings
Author: Pati Jinich

Ingredients

  • 1/2 cup raw hulled pumpkin seeds
  • 1 teaspoon kosher or coarse sea salt divided, or to taste
  • 1 fresh habanero
  • Juice of one sweet lime or a combination of lemon and lime juice
  • 1 tablespoon vegetable oil
  • 1/2 cup finely chopped white onion
  • 1 xcatic, güero, banana, or jalapeño chile stemmed, seeded and finely chopped
  • 2 liters (8 cups) chicken broth
  • 4 cups chaya leaves torn into pieces, can sub for chard, spinach or watercress, or a mix
  • Fresh Herb Corn Tortillas or quesadillas

Instructions

  • In a small saute pan or comal, set over medium-low heat, toast the pepitas for 3 to 4 minutes, until they are lightly toasted. Don’t let them brown or burn. Remove from the heat. Once they cool down, either finely chop or coarsely grind them in a spice mill or food processor along with 1/2 teaspoon of the salt. Scrape into a bowl. Set aside.
  • Toast or char the habanero chile on a preheated comal set over medium heat, or under the broiler, 6 to 8 minutes, flipping as necessary. Remove from the heat, stem, seed and finely chop. Place in a small bowl, add the sweet lime juice and the remaining 1/2 teaspoon salt, and mix. Set aside.
  • Heat the oil in a soup pot or large casserole over medium heat. Once hot, add the onion and xcatic chile and cook for 5 to 6 minutes until softened. Raise the heat to medium high, pour in the chicken broth, and once it comes to a boil, add the chaya leaves. Cook for a couple minutes, just until they wilt. Taste and add salt to taste.
  • Serve in bowls and let your guests add the ground pepitas, habanero in sweet lime juice, and salt to taste. Eat chasing, dunking, or adding pieces of the fresh herb corn tortillas (or quesadillas).

Notes

Sopa de Chaya

Fresh Herb Corn Tortillas

Fresh Herb Corn Tortillas
Print Recipe
4.34 from 3 votes

Fresh Herb Corn Tortillas

Fresh Herb Corn Tortillas recipe from Pati’s Mexican Table Season 12, Episode 8 “Maya Today”
Cook Time30 minutes
Course: Antojos
Cuisine: Mexican
Keyword: tortillas, Vegetarian, Yucatán Peninsula
Servings: 16 corn tortillas
Author: Pati Jinich

Ingredients

  • 2 1/2 cups (231g) masa harina
  • 1/4 teaspoon kosher or coarse sea salt
  • 1 2/3 cups warm water plus more as needed
  • 1/2 cup finely chopped cilantro, epazote or chives or a mix of any of them
  • Grated melty cheese such as Oaxaca, Monterey Jack, Muenster or mozzarella, optional, if making quesadillas

Instructions

To make the dough:

  • In a large mixing bowl, combine the masa harina and salt. Gradually add the warm water, stirring with your hands to make a cohesive dough. Add the finely chopped herbs. Using your hands, knead the dough in the bowl until it’s smooth, about a minute or so. If the dough sticks to your hands and feels wet, add more masa harina a teaspoon at a time. If it crumbles when you roll a piece into a ball, add more water a teaspoon at a time.

To shape the tortillas:

  • Preheat a comal, a cast iron or nonstick pan, or a griddle, over medium heat for 5 minutes, or until evenly hot. Cut two round or square pieces of plastic – from a plastic produce or zip-top bag – to a size about 1/2″ larger than the diameter of your press. Set aside.
  • Divide the dough into 16 pieces and roll each piece into a ball. Cover them with a kitchen towel to keep them moist.
  • Working with one ball of dough at a time, place one piece of plastic on the bottom of the tortilla press, place the ball of dough, and top it with the second piece of plastic. Gently, squeeze the handle of the press until the dough is about 1/16” to 1/8” thick and about 5” in diameter. To achieve a nicely round tortilla, jiggle the handle of your press just as you near the bottom. You may need to press it a couple of times to get the desired thinness.

To cook the tortillas:

  • Open the tortilla press, peel off the top piece of plastic, and then take the tortilla on the bottom piece of plastic next to the comal, so that you can pass the tortilla to one hand as you remove the bottom plastic with the other hand and quickly but gently lay the tortilla on the hot pan. Don’t worry if it isn’t perfectly flat (you’ll get better as you practice), and don’t try to move it, which will cause it to tear. Return the piece of plastic to the bottom of the tortilla press.
  • Cook the tortilla until it releases easily from the pan and its color has lightened and become opaque, 40 to 45 seconds; you don’t want the tortilla to brown or become freckled at this point.
  • Using a spatula or your fingers, flip the tortilla and cook it until the bottom starts to brown and freckle, 70 to 90 seconds more. Flip the tortilla one more time and cook it until it puffs, 10 to 15 seconds. If the tortilla doesn’t puff on its own, gently poke it a few times near the center. Once it puffs, let the tortilla cook for 15 seconds longer, until fully set and soft. Remove the tortilla from the heat and wrap it in a clean kitchen towel, or transfer it to a cloth-lined tortillero.
  • Repeat the pressing and cooking process with the remaining dough.
  • If making quesadillas, add melty cheese, and if you want, a fresh leaf of epazote, to the center of a freshly made tortilla. Either fold in half or cover with a second tortilla and heat on the comal until the cheese is completely melted, flipping in between.

Notes

Tortillas con Hierbas Frescas

Pepita, Egg and Chaya Tamales

Pepita, Egg and Chaya Tamales
Print Recipe
4.75 from 4 votes

Pepita, Egg and Chaya Tamales

Pepita, Egg and Chaya Tamales recipe from Pati’s Mexican Table Season 12, Episode 10 “A Mayan League of their Own”
Cook Time1 hour
Course: Antojos, Main Course
Cuisine: Mexican
Keyword: Eggs, pumpkin seeds, Tamales
Servings: 14 to 16 tamales
Author: Pati Jinich

Ingredients

For the masa:

  • 1 pound chaya leaves can sub Swiss chard or spinach
  • 3 1/4 cups (about 1 pound) GOYA® Masarica
  • 2 3/4 cups chicken or vegetable broth
  • 1 cup lard or vegetable shortening
  • 2 1/2 teaspoons kosher or coarse sea salt or to taste, divided
  • 3 stems fresh epazote about 15 leaves, or sub cilantro, coarsely chopped

For the tamales:

  • 1/2 cup hulled raw pumpkin seeds lightly toasted
  • GOYA® Banana Leaves cut into 12” long pieces, rinsed, plus more for steaming tamales
  • 4 large eggs hardboiled, cooled, peeled, and cut lengthwise into 6 pieces
  • 1 cup Roasted Tomato and Habanero Salsa for filling, plus more for garnish

Instructions

To make the masa:

  • Bring salted water to a boil in a large pot over high heat. Once boiling, add the chaya leaves and let them cook for 2 minutes. Drain completely. Let them sit as you make the masa. Press with your hands to remove excess liquid as much as you can. Coarsely chop.
  • In a large bowl, combine the masa harina with the broth, using your hands to knead the dough until thoroughly mixed and very smooth, not “grainy.” Add the lard or vegetable shortening, and work it in, kneading, for a few minutes. Add 2 teaspoons of the salt, the chopped chaya and epazote, and mix until fully incorporated.

To assemble the tamales:

  • In a small saute pan or comal, set over medium-low heat, toast the pumpkin seeds for 3 to 4 minutes, until they are lightly toasted. Don’t let them brown or burn. Remove from the heat. Once they cool down, either finely chop or coarsely grind them in a spice mill or food processor along with the remaining 1/2 teaspoon salt. Scrape onto a bowl.
  • To prepare the banana leaves, turn a burner on to medium-low heat. Slowly pass each banana-leaf piece over the flame on both sides, until they change color and become fragrant, and set aside (so they will be resilient, malleable, and will not break).
  • One by one, set each leaf piece on your counter with the shiny, outer side down. Spoon about 1/3 cup of masa onto the center and spread to form a rectangle of about 5”x 3.” With the spoon, or your finger, make a shallow channel down the middle, creating a stripe in the masa. Add a couple teaspoons ground pepita, a couple pieces of hard boiled egg, and top with a tablespoon of salsa. Gently close each tamal by folding the longer sides first and then the short sides as if making a flat and tight package, but being careful not to press on the tamal too much.
  • Prepare your tamalera or steamer by adding just enough water to touch the bottom of the steaming basket. Line the steaming basket with a few banana-leaf pieces to gently cover the base. One by one, add the tamales, stacking them as evenly as you can, staggered in the same position as when you made them: laying them flat. Once you are done, cover with a few more pieces of banana leaves. Set the steamer uncovered over high heat, once there is a bit of steam coming out and the water starts boiling a few minutes later, cover, reduce heat to medium, and cook for an hour.
  • The leaves will have changed to a much darker color and will have completely wilted to wrap themselves as a second skin over the tamales, and the tamales should feel firm. Turn off the heat. Let the tamales sit for at least 15 minutes before serving so they will settle. Serve the tamales with the roasted tomato and habanero salsa.

Notes

Tamales Dzotobichay 

Chaya Egg Scramble

Chaya Egg Scramble
Print Recipe
3.34 from 3 votes

Chaya Egg Scramble

Chaya and Egg Scramble recipe from Pati’s Mexican Table Season 12, Episode 5 “Ode to the Egg”
Cook Time5 minutes
Course: Breakfast
Cuisine: Mexican
Keyword: breakfast, Eggs, Vegetarian
Servings: 2 servings
Author: Pati Jinich

Ingredients

  • 1 to 2 tablespoons vegetable oil
  • 1/2 cup chopped red onion
  • 4 cups finely sliced chaya leaves may sub with swiss chard, spinach or watercress
  • 10 to 15 fresh mint leaves thinly sliced, or 1/4 teaspoon dried mint
  • 6 large eggs
  • 1/2 teaspoon kosher or coarse sea salt or to taste
  • 1/4 teaspoon coarsely ground black pepper or to taste

To serve:

Instructions

  • Heat the oil in a medium skillet set over medium heat. Once oil is hot and shimmers, add the onion and cook for 2 to 3 minutes, until wilted but not browned. Incorporate the chaya and mint, mix, and continue cooking for a couple minutes, until completely cooked and wilted.
  • Meanwhile, in a small bowl, beat the eggs and season with the salt and pepper.
  • Reduce heat to medium low, pour the eggs over the onion and chaya mixture and, as they cook, scramble with a wooden spoon or spatula. Cook until desired doneness. I like my eggs tender, so I cook them for 2 to 3 minutes.
  • Serve with warm corn tortillas, habanero table salsa, ripe avocado slices, and colado black beans or refried beans.

Notes

Huevos Revueltos con Chaya

Super Greens Salad with Oregano Vinaigrette

Super Greens Salad
Print Recipe
4.80 from 5 votes

Super Greens Salad with Oregano Vinaigrette

Super Greens Salad with Oregano Vinaigrette from Pati's Mexican Table Season 11, Episode 9 "A Day with Hugo"
Cook Time0 minutes
Course: Salad
Cuisine: Mexican
Keyword: cilantro, oregano
Servings: 6 servings
Author: Pati Jinich

Ingredients

Oregano Vinaigrette:

  • 1 teaspoon dried oregano
  • ¼ teaspoon cumin seeds
  • 1 garlic clove pressed or finely chopped
  • 2 tablespoons capers finely chopped
  • ½ cup fresh squeezed lime juice
  • ¼ cup olive oil
  • 2 teaspoons soy sauce
  • 1 teaspoon Worcestershire sauce
  • 1 teaspoon grated piloncillo or dark brown sugar
  • 1 teaspoon kosher or coarse sea salt
  • ½ teaspoon freshly ground black pepper
  • 1 shallot thinly sliced

Salad:

  • 2 cups arugula rinsed and drained
  • 2 cups baby spinach leaves rinsed and drained
  • 2 cups watercress rinsed and drained
  • 1 cup basil leaves rinsed and drained
  • 1 cup cilantro leaves and upper part of stems rinsed and drained
  • 1 cup parsley leaves and upper part of stems rinsed and drained
  • ½ cup mint leaves rinsed and drained
  • 4 to 5 radishes rinsed and drained, bulbs thinly sliced, leaves coarsely chopped

Instructions

To make the oregano vinaigrette:

  • In a small saucepan preheated over medium-low heat for a few minutes, toast the oregano and cumin for 20 to 30 seconds, stirring occasionally, just until fragrant and toasty, don’t let them burn. Remove from heat set aside to cool. When cooled, finely chop or crush with a sharp knife.
  • In a small bowl, combine the oregano, cumin, garlic, capers, lime juice, olive oil, soy sauce, Worcestershire, piloncillo, salt and pepper. Whisk well until completely emulsified. Add the shallots, mix and let sit for at least 10 minutes.

To make the salad

  • In a large salad bowl, place the arugula, spinach, watercress, basil, cilantro, parsley, mint, radish leaves, and sliced radish bulbs. Pour the vinaigrette over, toss well, and serve.

Notes

Ensalada Verde con Vinagreta de Orégano

Green Piquin Chile and Oregano Salsa

Green Piquin Chile and Oregano Salsa
Print Recipe
5 from 5 votes

Green Piquin Chile and Oregano Salsa

Green Piquín Chile and Oregano Salsa from Pati's Mexican Table Season 11, Episode 1 "The Fire Kings"
Cook Time0 minutes
Course: Salsa
Keyword: chile piquín, Salsa
Servings: 1 1/2 cups approximately
Author: Pati Jinich

Ingredients

  • 1 cup fresh squeezed lime juice
  • ½ cup olive oil
  • 2 garlic cloves peeled and minced or pressed
  • 1/3 cup fresh oregano leaves finely chopped
  • ¼ cup fresh green piquín chiles stemmed and finely chopped (may be substituted for fresh serrano or jalapeño chiles)
  • 1 tablespoon kosher or coarse sea salt or more to taste
  • ½ teaspoon freshly ground black pepper

Instructions

  • In a small bowl, combine all ingredients and whisk until well emulsified. You may keep this in a closed glass jar or container with a lid in the refrigerator for up to a week.

Notes

Salsa Cruda de Chile Piquín Verde con Orégano

Arroz con Chepil

Print Recipe
4.84 from 6 votes

Chepil Rice

Chepil Rice recipe from Pati's Mexican Table Season 6, Episode 5 "From Pueblo to City"
Prep Time5 minutes
Cook Time30 minutes
Total Time35 minutes
Course: Side Dish
Cuisine: Mexican
Keyword: arroz, Chepil, jalapeno, pati's mexican table, rice, serrano chiles
Servings: 4 to 6 servings
Author: Pati Jinich

Ingredients

  • 3 tablespoons vegetable oil
  • 2 cups jasmine white rice or extra long white rice
  • 1/2 cup white onion finely chopped
  • 3 garlic cloves finely chopped
  • 1 to 2 serrano or jalapeño chiles finely chopped
  • 4 cups chicken broth
  • 1 teaspoon kosher or coarse sea salt
  • 1 cup chepil or chipilin leaves or substitute for baby watercress

Instructions

  • Heat the oil in a medium saucepan over medium-high heat until hot but not smoking. Add the rice and cook, stirring often, until it becomes milky white, crackles and feels heavier as you stir it in the pan, about 3 minutes. Make room in the center of the pan, add the onion, garlic and chile, and cook for 2 to 3 minutes, stirring and mixing with the rice, until the onion begins to soften.
  • Add the chicken broth and salt and stir once. Raise the heat to high, bring to a rolling boil, add the chepil leaves, stir, cover and reduce the heat to the lowest setting. Simmer 12 to 15 minutes, until most of the liquid has been absorbed but there is still some moisture in the pan. The rice should be cooked and tender; if it is not, but all the liquid has been absorbed, add 2 tablespoons of water, cover again, and cook for a couple more minutes.
  • Remove from the heat and let the rice rest, covered, for 5 minutes. Fluff the rice with a fork, and serve.

Notes

Arroz con Chepil 

Nutmeg or Nuez Moscada

Nutmeg is an ingredient that tends to be overlooked in the kitchen. With a fascinating taste that is mildly sweet, somewhat woody, and a bit peppery, it is used mostly for desserts or drinks.

A native ingredient from Indonesia, nutmeg comes from an evergreen tree, now planted in more countries, that found its way to Mexico in the years of the Spanish Colony with its vast and intensive trade routes to the East.

Cute little seeds, they appear to be unpeeled nuts or large pebbles from the outside. They are very hard and solid and cannot be chopped. The best way to use them is freshly ground with a grater. They are also best used judiciously, as a little goes a long way. Once you grate them, you can see their lovely marbled interior.
Continue reading “Nutmeg or Nuez Moscada”

Vanilla

Yep, Vanilla comes from Mexico!

Many people think that the vanilla bean originally came from Madagascar, but even though vanilla beans are grown there, they originated and were first cultivated in the lush state of Veracruz, which physically hugs the Gulf of Mexico. In fact, vanilla grown outside of Mexico has to be pollinated by hand, since the only insect that will pollinate it is the stingless Melipona bee, which only lives, and can only survive, in Mexico.

Vanilla, the fruit of the world’s only orchid with an edible pod, has been used since pre-Hispanic times by the Totonacs, first, then by other indigenous tribes throughout Mexico. The Totonacs were so incredibly resourceful they were able to develop the growing, harvesting and curing and drying methods that make vanilla edible. It was so revered it was used for sacred rituals, as well as for currency. And it is in Totonac lands, mainly in Papantla, where the finest vanilla thrives today.

Vanilla: the legend lives on

Not only does vanilla have a matchless flavor and one of the most sensual fragrances, it also has a deeply romantic tone — just like the legend behind it. Here’s how it goes.

According to Totonac mythology, the flower was born when Princess Xanath, in charge of caring for the Temple of the Goddess of Harvest along with eleven maidens, fell in love with Zkatan-Oxga. A doomed romance from the start, as Xanath’s father would never accept him as a son in law. They eloped and were captured and killed without having the chance to even kiss. In the place they were killed, were their blood spilled,  a climbing vanilla orchid grew in an eternal embrace, as only true lovers would.

Harvesting vanilla is an art

Legend or not, the very delicate vanilla plant is actually a temperamental species of orchid that has to be treated like a capricious bride to be in order for it to bloom, be pollinated, harvested, and cured and dried in such a way that either vanilla beans or vanilla extract can exist.

The flowers open up for one day only. One single day. After the flowers open, there are only 12 hours in which they have to be hand pollinated, if not pollinated by the Melipona bee. Then the pods take six months until they are ready to be harvested by hand, while still green, so they won’t dry out, crack open, or touch the ground and therefore lose the essential oils that give vanilla its unique flavor and aroma. During all those months, the caretakers have to make sure there is enough shade, enough air, just enough of everything, really.

Once hand picked, the vanilla beans are put in hot water or in a hot oven to stop them from maturing further. After that, they bask in the sun during the day and are placed in drawers at night to sweat. The process is repeated every day for 20 to 28 days. It is known in Mexico as “beneficio,” a process for which the world has to be grateful: for the earthy, almost other-worldly smell that makes me practically swoon and the flavor that makes any ingredient sing.

It even makes men fly!

It is said that it is because of vanilla that the Voladores or Papantla fly. According to myth, over 400 years ago the gods stopped the rains because the people weren’t paying enough attention to them. The acrobatic dance ceremony was created to appease the gods and bring back the rains, so the vanilla beans could grow and thrive. The Voladores de Papantla continue to dance, and vanilla in Mexico continues to thrive. The best part is that wherever you may live in the world, you can get your hands on vanilla grown, harvested and cured in Papantla. Once you smell it and use it, you will be as I am, bewitched.

Corn Husks

Corn has been a central part of the Mexican diet and culture since ancient times. Not only is it eaten fresh in its many varieties, its dried kernels are used for an infinity of things, including masa to make everything from tortillas to tamales. It’s husks are also treasured as an ingredient to wrap and cook food in. Tamales, of course, have remained the wrapped and cooked food par excellence in Mexico. Methods have varied from steaming, to cooking over comales or the open fire, to cooking in underground pits.

Now, the use of fresh or dried leaves for wrapping and cooking foods is not exclusive to Mexico. Grape leaves were used since ancient Greece and banana leaves in the Philippines, to name some. In Mexico, there has been a large variety of ingredients for this use like banana leaves, avocado leaves, chaya, hoja santa leaves, large spinach leaves and even some exotic flower leaves. Still corn husks, fresh or dried, have been and remain a crucial one.

Corn husks not only help keep the food in place, they also keep it moist, seal in the flavor, and impart their own essence, fragrance and taste. The flavor and aroma vary depending on whether the corn husks are fresh and tender, fresh and mature or dried.

To assemble, fresh corn husks are carefully taken from ears of corn, washed and used to wrap some types of tamales, usually those made from fresh corn like the famous Michoacán uchepos. However, most tamales that use corn husks use them dried, as they can be stored for a long time – as long as they are not stored in a sunny or moist area – and are available year round.

To use dried corn husks, they need to be soaked for about 10 minutes in warm water to make them pliable, thus preventing tears or breaks and making them more flexible for folding around the masa. I usually start soaking them as I begin to make my tamales, and they are ready by the time I am ready to form my tamales. Nothing happens if you soak them for hours on end. The husks are also used to line the tamaleras or steamers to keep the water away and steady the tamales.

Corn husks are most commonly sold dried, stacked together in plastic packaging. In Mexico, you will see them in abundance hanging from market stands. They are becoming more available in the U.S., as well. Look for them in the Latin aisles of your supermarket, at your local Hispanic or international market, or online. If you happen to get more than you need, you can give some to your kids, for them to fashion puppets or dolls…

Purslane or Verdolagas

Purslane or verdolagas, one of those ingredients that Mexicans hanker for when outside of Mexico, is likely to be growing in your backyard. In Mexico, it is considered one of the quelites or edible herbs. It is nutritious and succulent, yet it has long been considered a weed in the United States. Indeed, once it grows roots, it spreads and grows fast.

It is essential to the cuisine of Central Mexico, where it is most commonly added to Puerco con Verdolagas: my favorite way of eating them. There, slowly braised pork is finished off in a seasoned salsa verde and verdolagas are dropped in almost when it’s done.

Purslane Verdolagas 1

From purslane, almost all is eaten. Only the very lower part of the stems and the roots are removed. The further you go down the chubby stems, the lighter the green color becomes and it can sometimes fluctuate to violet or red.

The leaves are thick and crisp and the stems are crunchy. Both leaves and stems are very juicy and meaty. With a light bitter flavor, a bit lemony and a bit peppery, altogether, punchy and refreshing.

Just like tomatillos, purslane’s tartness pairs well with other ingredients typical in Mexican cooking such as tomatoes and chiles. It is a great complement to salsas and taco fillings. Not native to Mexico, but as you can see, it is an ingredient that over ceturies has grown deep roots.

Though my favorite way to eat them is cooked in that famous pork stew and in vegetable soups, verdolagas are also wonderful in hearty salads. Think watercress, but thicker, crisper, yet more defined and “vegetable” like. They can be prepared just like you would spinach or watercress too. So the options go from soups, casseroles and stews, to salads which can be simply coated with a generous squeeze of fresh lime juice, olive oil and sea salt. You can tuck them into a sandwich and feel like the most interesting sandwich-eating person on your block.

Because studies have shown it to be the richest in omega-3 fatty acids of any leafy green, purslane is increasingly being cultivated in the United States and is often available at farmers’ markets. You may find it under one of its popular nicknames pursley, pigweed or little hogweed. Or look closely, they may be closer to home. If you find them in your yard: cook them up!

Mexican Chocolate

Mexican chocolate is quite different from regular bittersweet chocolate sold throughout the world.

It is sweeter, yet with contrasting layers of flavor that seem to sweep your tongue in waves as you take a bite. It is also grainy, practically gritty.  It is traditionally made from a mixture of toasted cacao beans, ground almonds, regular sugar and cinnamon.

Native from Mexico, in pre-hispanic times cacao beans were transformed into a chocolate paste. In that form, chocolate was combined with water and drank every day, by the liters, by Aztec Emperor Moctezuma. It was served for him, in hand carved precious mugs and spiced up with ground chiles and sometimes honey. Only the high tier of the Aztec hierarchy had access to it, on special occasions. It was only after the Spaniards arrived that it turned into a sweeter ingredient by adding the sugar, cinnamon and almonds.

From the many stories told about chocolate, one of the most amusing, is the one about a rebellious group of women in the state of Chiapas during Colonial times: The bishop gave them a warning to stop drinking hot chocolate during mass. The women claimed they needed it for sustenance through the long sermons. The bishop found the practice a nuisance and banned it. The bishop died poisoned, after drinking hot chocolate.

Books have been written about how chocolate was taken to the Old World and conquered the Spanish palates first and then the French. The process of producing the chocolate bars as are sold in the general market, originated in the Old World as well.

Yet there is something so charming about chocolate tablets made the traditional Mexican way. You have to take a bite into one, to be mesmerized.

In Mexico there are special mills, where people and small companies bring their own ingredients and secret recipes, to be ground and turned into tablets. The aroma as one walks in the streets were these mills are located, is addicting. You do not want to go anywhere for a while… Tablets usually have the shape of balls or disks. As a little girl, and still today, I used to love to sit on the sidewalk, and carve one of these tablets slowly, with my teeth. It takes a – lovely – while to finish one.

The most common way to use Mexican style chocolate is to make hot chocolate. Sometimes made with water and sometimes made with milk. Cooks that make it the traditional way, use a clay pot and use a Molinillo that is placed between the palms of both hands and quickly made to spin, as if rubbing your hands when it is really cold outside. This back and forth spinning of the molinillo, produces a thick layer of foam on the chocolate, which is most prized and enjoyed by people, as it is drank in individual mugs.

There are many brands available in the US these days, that sell versions of Mexican style chocolate tablets, such as Chocolate Abuelita and Ibarra. There are even less commercial and artisanal brands like El Mayordomo and others, which come directly from Oaxaca, famous for making the tastiest Mexican chocolate.

Hoja Santa or Hierba Santa

The name Hoja Santa translates to “sacred leaf.” The leaves of the hoja santa plant are heart-shaped with a thick velvety texture. These leaves can grow up to a foot and sometimes more. I find them to be truly beautiful. Though hoja santa is found throughout Mexico, it is mostly used in the south.

Mexican cooks use hoja santa judiciously not only because of it’s strong, unique, unexpected taste, but also because too much of it is not good for you, just like epazote.

Hoja Santa 1

Hoja Santa is used fresh and dried in many different ways in Mexican cooking, from tamales to pozoles to moles to soups. It is also wrapped around meat, seafood and around tamales as an edible wrapper, keeping what’s inside moist but also infusing the filling with its peculiar flavor.

Getting back to it’s flavor: it’s really hard to describe…aromatic, fragrant with a hint of eucalyptus and a whisper of mint. Some people find it similar in taste to anise. I also find a slight echo of black peppercorn and allspice. The only way for you to find out is to give it a try.