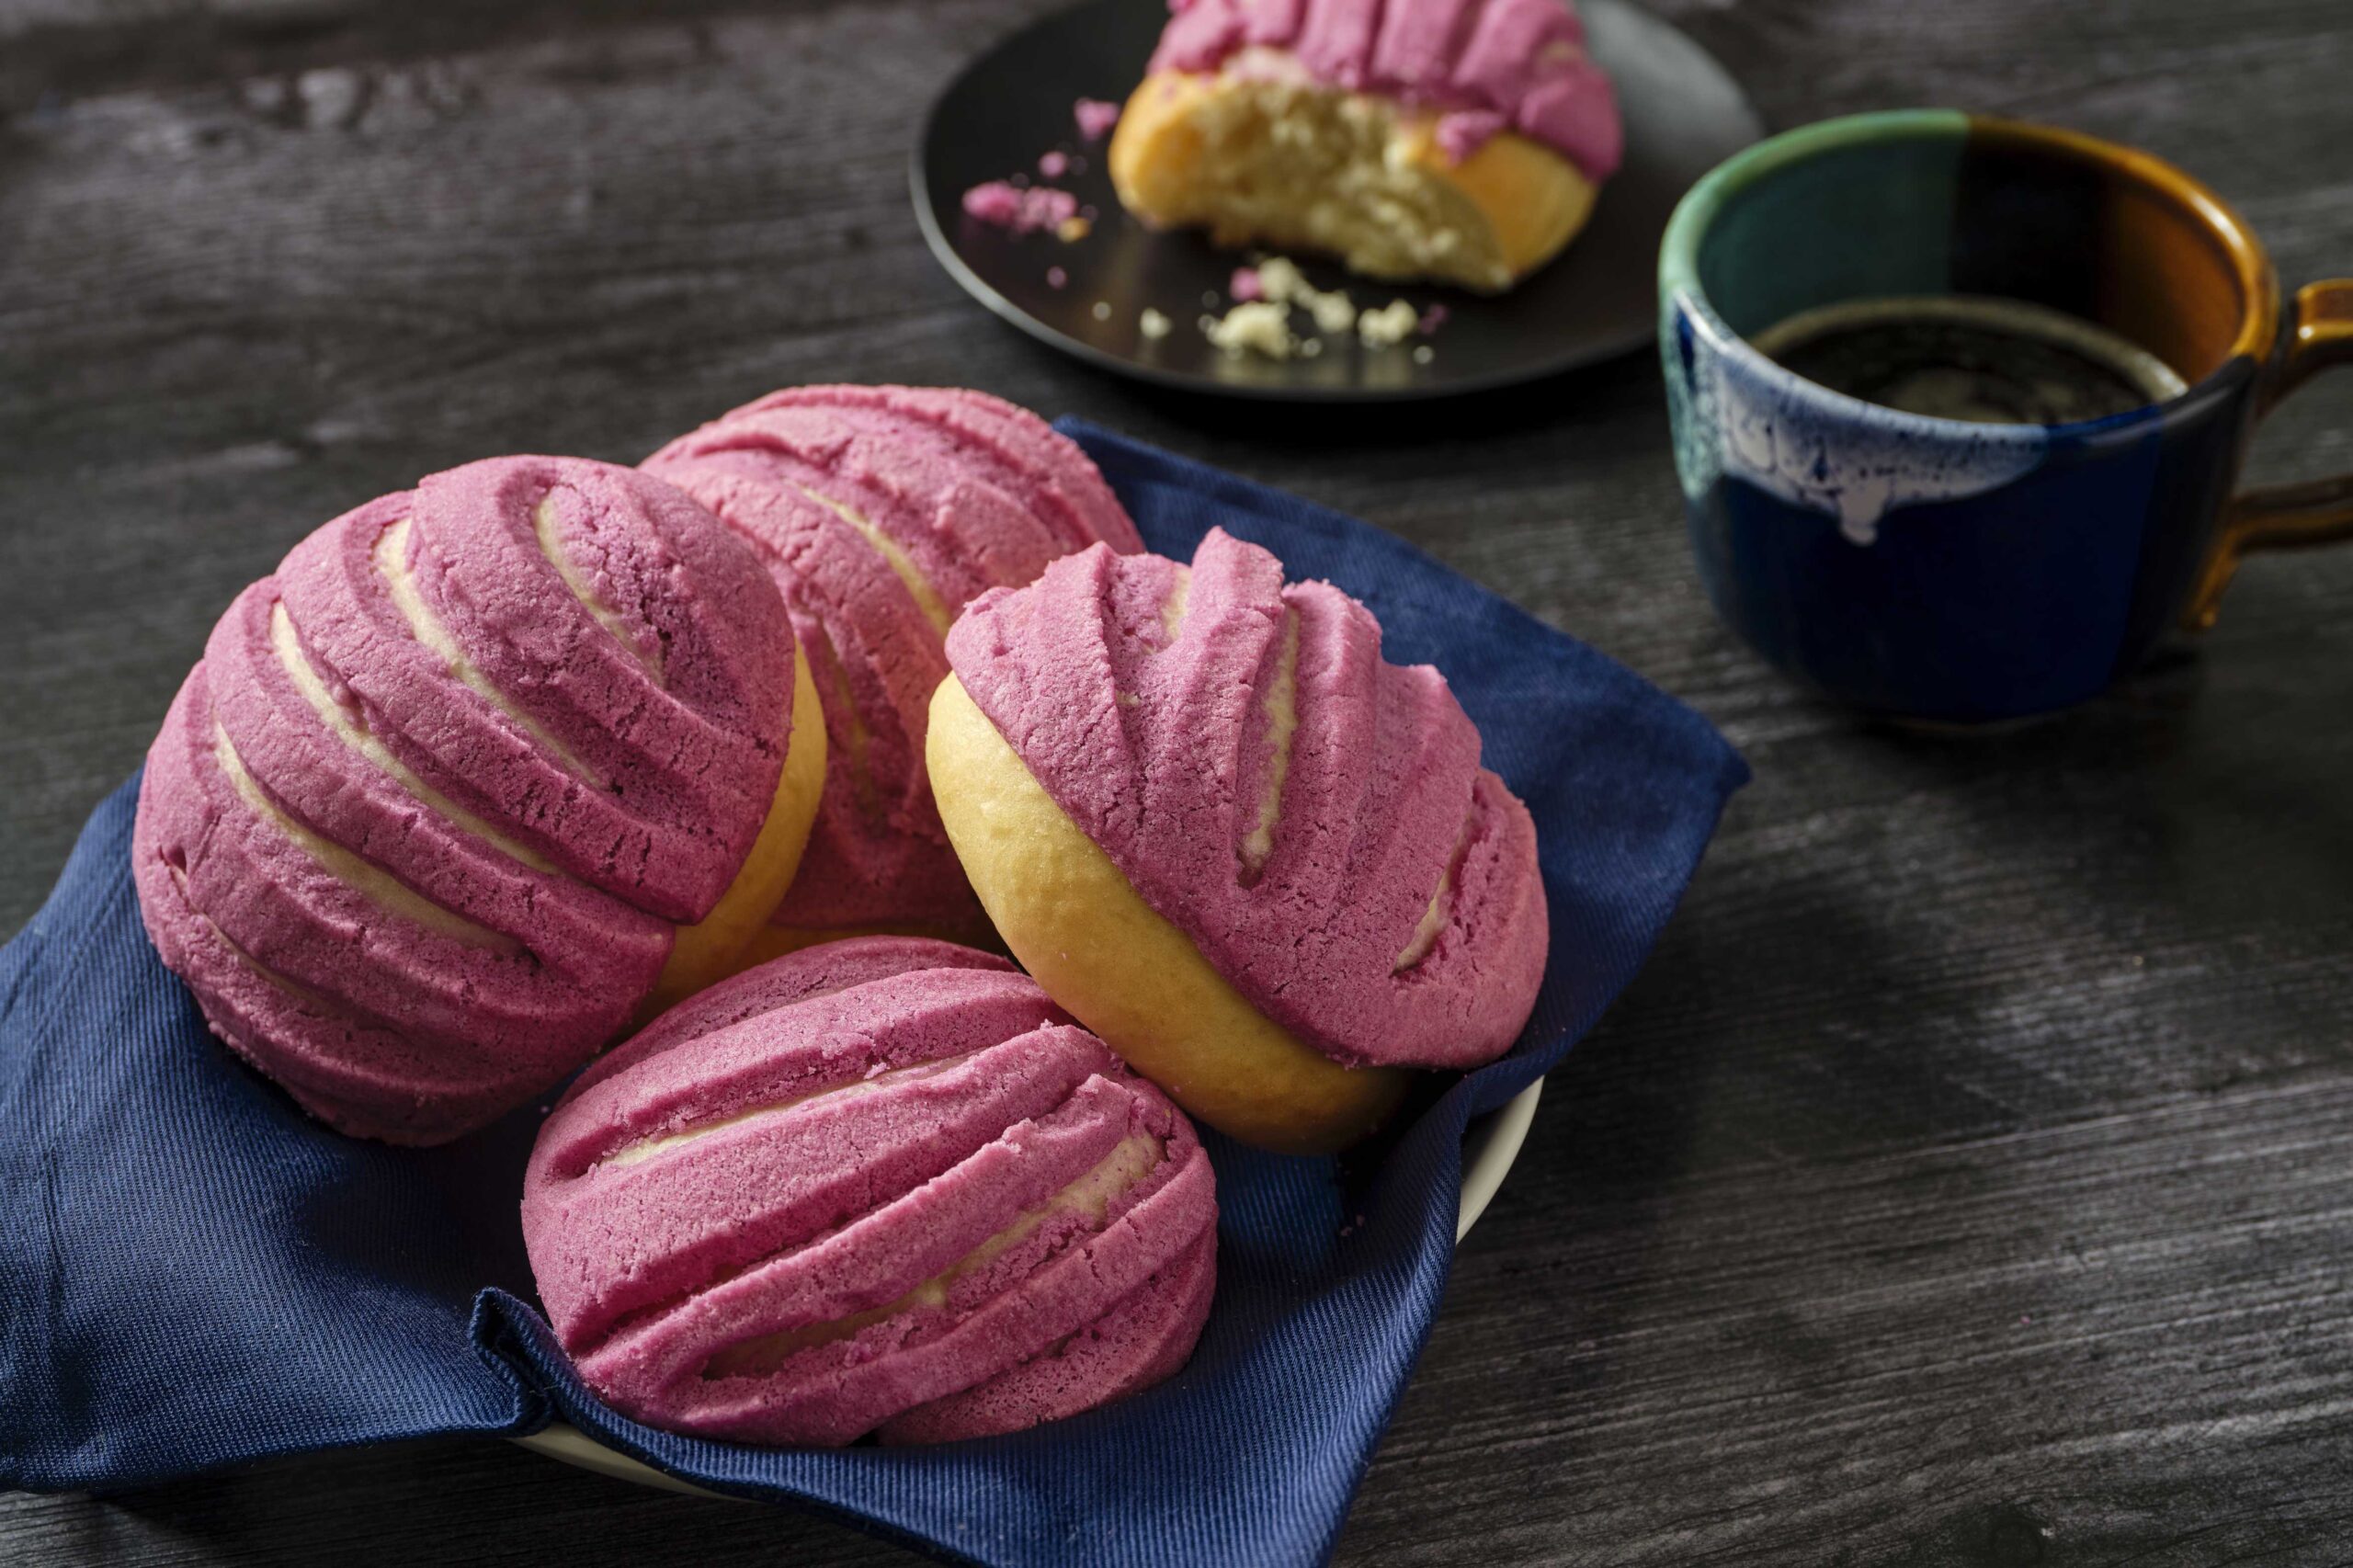
Conchas
Conchas, recipe courtesy of Francisco Migoya
Recipe Yield
15 conchas
Cooking time
25 minutes
Rate this recipe
Ingredients
For the dough:
- ½ cup (115g) whole milk, cold
- ⅓ cup (75g) water
- 2 teaspoons (8g) instant dry yeast
- 3½ cups (480g) bread flour
- 4 eggs cold (190g)
- ½ cup (120g) unsalted butter softened
- ⅓ cup, plus 2 teaspoons, (75g), sugar
- 2¼ teaspoons (12g) fine salt
- 2½ teaspoons (10g) vanilla extract
For the topping:
- 1¾ cups (200g) powdered sugar
- 1⅔ cups (200g) pastry flour
- ¾ cup, plus 1 tablespoon, plus 1 teaspoon (200g) vegetable shortening
- 2½ teaspoons (10g) vanilla extract
Optional flavorings:
- ¼ cup, plus 2 tablespoons, plus 2 teaspoons (60g) any freeze-dried fruit powder such as dragon fruit
- ¼ cup, plus 2 teaspoons (30g) cocoa powder
- 2 tablespoons (12g) matcha powder
- 1⅛ teaspoons (3g) any powdered spice such as cinnamon, pumpkin spice mix, etc.
- 1½ teaspoons (3g) any citrus zest
- 1½ teaspoons (3g) any tea finely ground
To Prepare
To make the dough:
- Dissolve the yeast in the milk and water in an electric mixer bowl using a whisk. Put the remaining ingredients on top. Start mixing on low speed using the hook attachment.
- Once the dough ingredients have formed a homogenous mass, turn the speed up to medium high for 10-15 minutes until the dough reaches full gluten development. To check if the dough has reached this stage, first check if the dough looks smooth and uniform in the mixer. The second is whether the dough is “slapping” the sides of the bowl while it mixes. The third and definite test is to perform the windowpane test, which consists in taking a small piece of dough and gently stretching it with your fingers to get it to stretch as thinly as possible without tearing. If it can form a thin translucent membrane without tearing, the dough is ready to come off the mixer.
- While the dough mixes, prepare a flat sheet pan by lining it with a lightly oiled non-stick rubber mat or plastic wrap.
- After mixing the dough, take it out of the mixer and place it on a flat work surface area that has been lightly greased with spray oil to keep it from sticking. Perform a four-fold on the dough (this consists of flattening the dough with the palms of your hand into a square or rectangle shape as best as you possibly can folding each end in towards the center of the dough to create a smooth surface), then place the folded dough on the prepared sheet pan, seam side down.
- Lightly oil the surface of the dough with spray oil and cover it with plastic wrap. Let the dough rest at room temperature for 30 minutes.
- Flatten the dough as best you can to about 1 inch/2.5cm using the palms of your hands. Cover the dough again with plastic wrap and chill for at least 2 hours or overnight in refrigeration.
Meanwhile, make the topping:
- Sift the powdered sugar and flour together in a mixer bowl, then add the shortening on top plus the vanilla extract and whatever additional optional flavorings. Using the paddle attachment, mix on low speed until the dough comes together to form one mass.
- Place the concha topping dough between two sheets of plastic wrap or parchment paper. Roll the dough out to 4mm. Place on a sheet pan and into the freezer for 15 minutes (this helps with achieving a clean cut disc).
- Cut the cold concha topping with a 2.4 inch/6 cm round cutter (weighing about 15g each). Place each topping disc on a sheet pan lined with parchment paper or a silpat and keep at room temperature until needed. If you are not using within 6-8 hours, wrap the sheet pan in plastic and place in refrigeration. It is important to note, when going to assemble the topping onto the dough balls, the topping must be at room temperature so it can be secured easily to the dough and stamped/scored in an even and clear design.
- Alternatively, you can form the concha topping into 15g balls and reserve on a small sheet pan, wrapped with plastic, at room temperature, until needed. If you are not going to use the topping that day, keep it wrapped well with plastic in refrigeration.
To assemble the conchas:
- Once it’s time to take the concha dough out of the refrigerator, remove the plastic wrap and flip it out onto a clean worktable. Peel off the non-stick rubber mat or plastic wrap that was used to line the sheet pan. Using a bench scraper or small knife, divide the dough into 70g pieces and shape each piece into a ball.
- Place the dough balls onto three or four separate half sheet pans lined with oiled parchment paper with enough space between the dough balls to expand during proofing and eventually baking; five balls maximum per sheet pan, ideally four if you have enough sheet pans.
- Take one disc of previously rolled out and cut concha topping. Center and place on top of a dough ball then press down lightly so it attaches well to the top and sides of the dough.
- NOTE: If you do not roll out and pre-cut your concha topping, you can also use a tortilla press or your hands. Place a 15g room temperature ball of concha topping between two lightly oiled plastic sheets and press it gently using a tortilla press to about 2.4 inch/6 cm. If you do not have a tortilla press, press the topping with your hands, that are lightly oiled, until you achieve the proper diameter disc. Center and place the concha topping disc on the dough then press down lightly so it attaches well to the top and sides of the dough.
- Directly after securing a disc of topping on the dough, use a concha cutter and press it onto the topping, forming the traditional shell-like pattern. If you do not have this cutter, use the tip of a paring knife to score the pattern on the topping. Continue, one at a time, securing a topping disc to the dough and stamping/scoring the topping directly after.
- NOTE: It helps to achieve a nice even design with the topping if it is stamped/scored right after placing on the dough while the topping is still room temperature. Since the dough is cold, the topping quickly takes on that temperature as well making it firmer. The colder the topping gets, the more difficult it is to achieve a nice design on your conchas.
- Proof the dough: If you are doing this at room temperature, cover the dough with a lightly tented clean plastic bag or a clean kitchen towel. It will take between 2-3 hours. If proofing in a fermenter/proof box, set it to 27℃/80℉ with 75% relative humidity it will take 1-1.5 hours.
- During the last 30 minutes of proofing, turn a convection oven on to 175℃/350℉ or a still (home) oven to 190℃/375℉.
- Bake in the convection or still oven for 20-25 minutes or until golden brown.

Comments
11comments inConchas
Veronica
Feb 12
Hi Pati,
Is the softened butter salted or unsalted? Thank you! 🫶🏼
Pati Jinich
Feb 15
It is unsalted Veronica 😉 Just fixed the recipe, thanks!
Nathan
Apr 28
These turned out beautifully! So delicious. I did have to add a lot more flour, maybe because I was kneading by hand.
Pati Jinich
May 07
So glad you enjoyed the Conchas Nathan 🙂
Anonymous
Nov 27
The first time I tried this recipe, I made the mistake of adding more flower. The 2nd time I let it mix for 30 minutes and the dough came out just right, did not add any more flour. Thanks Pati for inviting Chef Francisco to your show.
Getsemani
Apr 06
This was my first ever bread-making. I was so proud of myself. Followed directions to the t! My children and my mother were in love. The $20 dragonfruit powder is so worth it. A special special treat that will be made over and over every winter.
Pati Jinich
Apr 08
So happy you all enjoyed these Conchas, aren’t they amazing? My friend Francisco Migoya really outdid himself 🙂
Yajel Schwarz
Dec 24
Gracias por esta rica receta, Pati. Me encantaría la receta para las campechanas.
Pati Jinich
Dec 26
Con mucho gusto Yajel, aqui va Campechanas 🙂
Art
Dec 24
Need to see you do this in a video
Pati Jinich
Dec 26
You can see it in this link Art, it starts at about minute 20 http://patijinich.com/video/episode-1007/