Desserts

Mashed Sweet Potatoes with Caramelized Pineapple

Mashed Sweet Potatoes with Caramelized Pineapple
Print Recipe
5 from 4 votes

Mashed Sweet Potatoes with Caramelized Pineapple

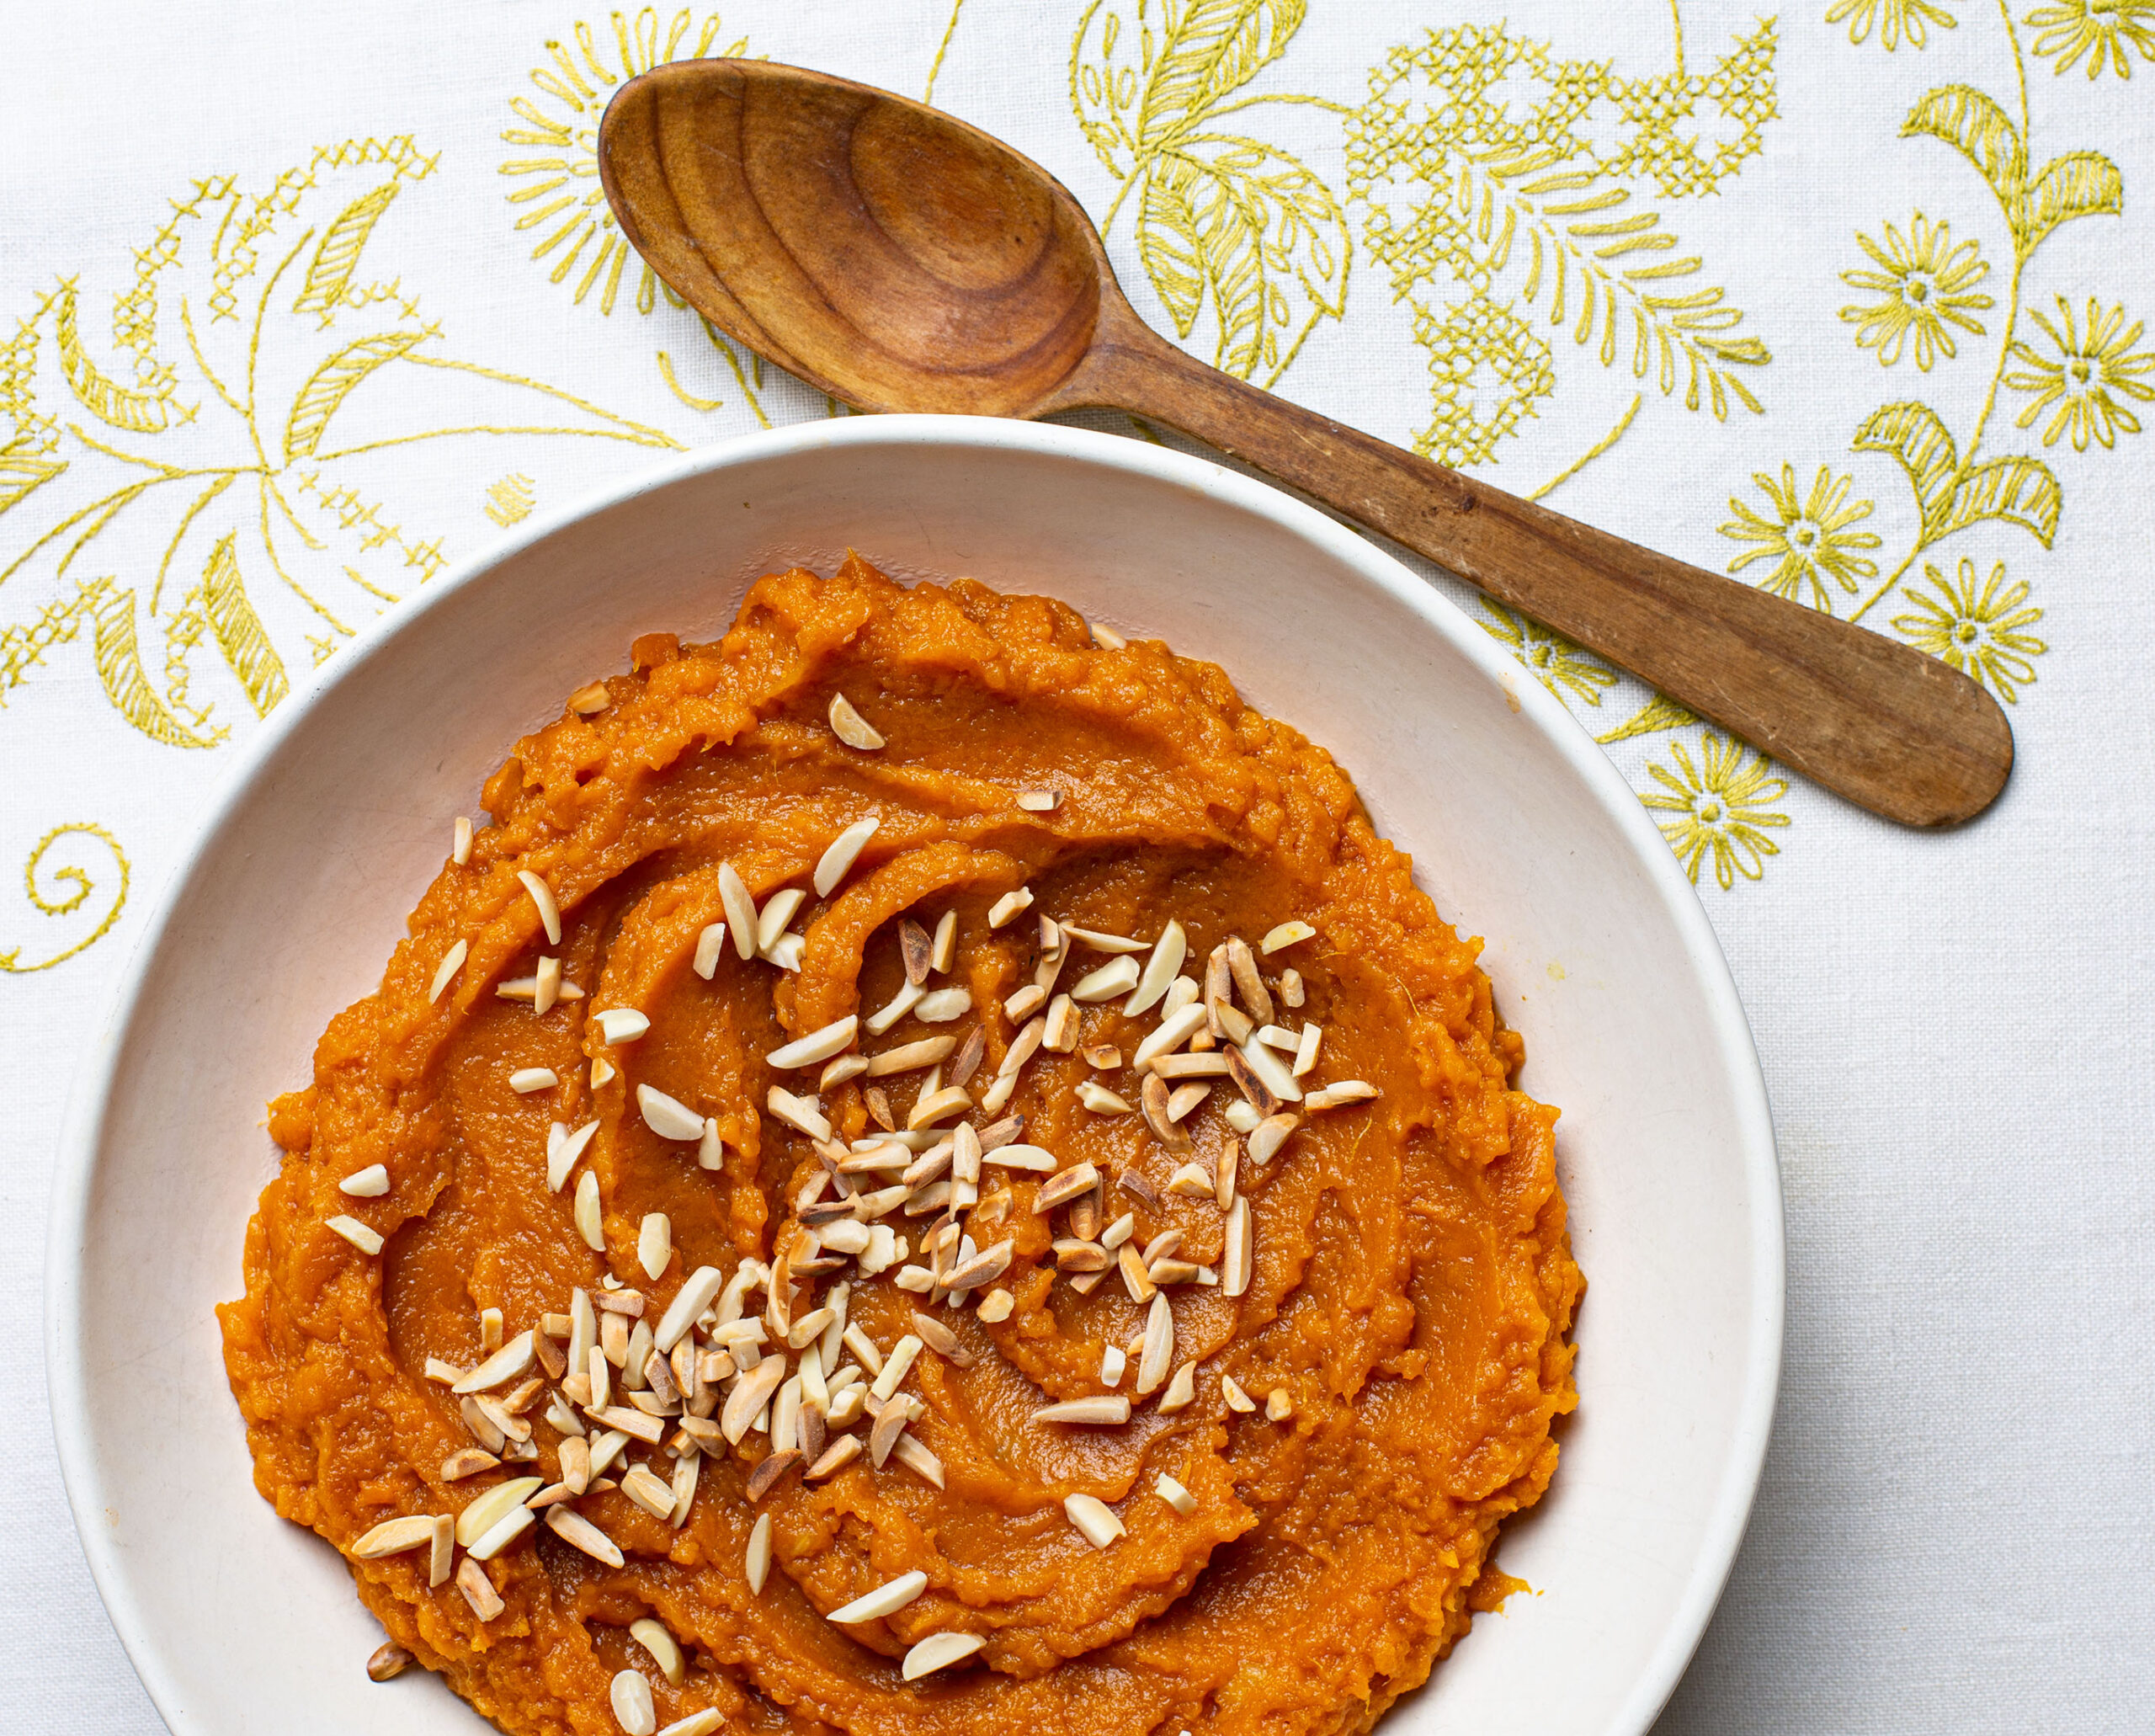
Dulce de camote, candied sweet potatoes mashed with fruit and topped with toasted nuts, is a cherished dish throughout Mexico, eaten for breakfast with coffee and for dessert.
Cook Time1 hour 15 minutes
Course: Dessert, Side Dish
Cuisine: Mexican
Keyword: sweet potato
Servings: 8 servings
Author: Pati Jinich

Ingredients

  • 4 pounds sweet potatoes scrubbed
  • 1 medium-to-large pineapple peeled, cored, and diced, with its juice
  • 3/4 cup packed dark brown sugar or grated piloncillo
  • 1/2 teaspoon kosher salt
  • 2/3 cup pine nuts or slivered almonds

Instructions

  • Preheat the oven to 425℉, with a rack in the middle. Cover a baking sheet with foil or parchment paper. Prick the sweet potatoes 5 or 6 times each with a fork or the tip of a paring knife and arrange on the baking sheet.
  • Bake the sweet potatoes for 50 minutes to an hour, depending on the size, until they are very soft, with juices beginning to ooze and caramelize on the baking sheet. Remove from the oven and let cool until you can handle them.
  • Carefully remove the skins from the sweet potatoes. Place the potatoes in a large bowl and mash with a potato masher or fork until very smooth.
  • Place the diced pineapple with all of its juice in a blender, and puree until smooth. Transfer to a large saucepan or Dutch oven, add the brown sugar, and bring to a simmer over medium heat. Attach a candy thermometer to the side of the pan and simmer until the mixture thickens, caramelizes, and reaches 210℉, usually 12 to 15 minutes. Stir in the sweet potatoes and salt and mix together thoroughly with a sturdy whisk. Cook for another 5 to 6 minutes, stirring and folding until you have a rich puree.
  • Meanwhile, toast the pine nuts or almonds in a small skillet over medium-low heat for a couple of minutes, stirring or shaking the pan, until lightly toasted and fragrant. Immediately remove from the pan.
  • Scrape the sweet potatoes into a serving bowl, garnish with the toasted nuts, and serve.

Notes

Dulce de Camote con Piña

Chocolate and Vanilla Three Kings’ Bread

Chocolate and Vanilla Rosca de Reyes
Print Recipe
3.72 from 7 votes

Chocolate and Vanilla Three Kings’ Bread

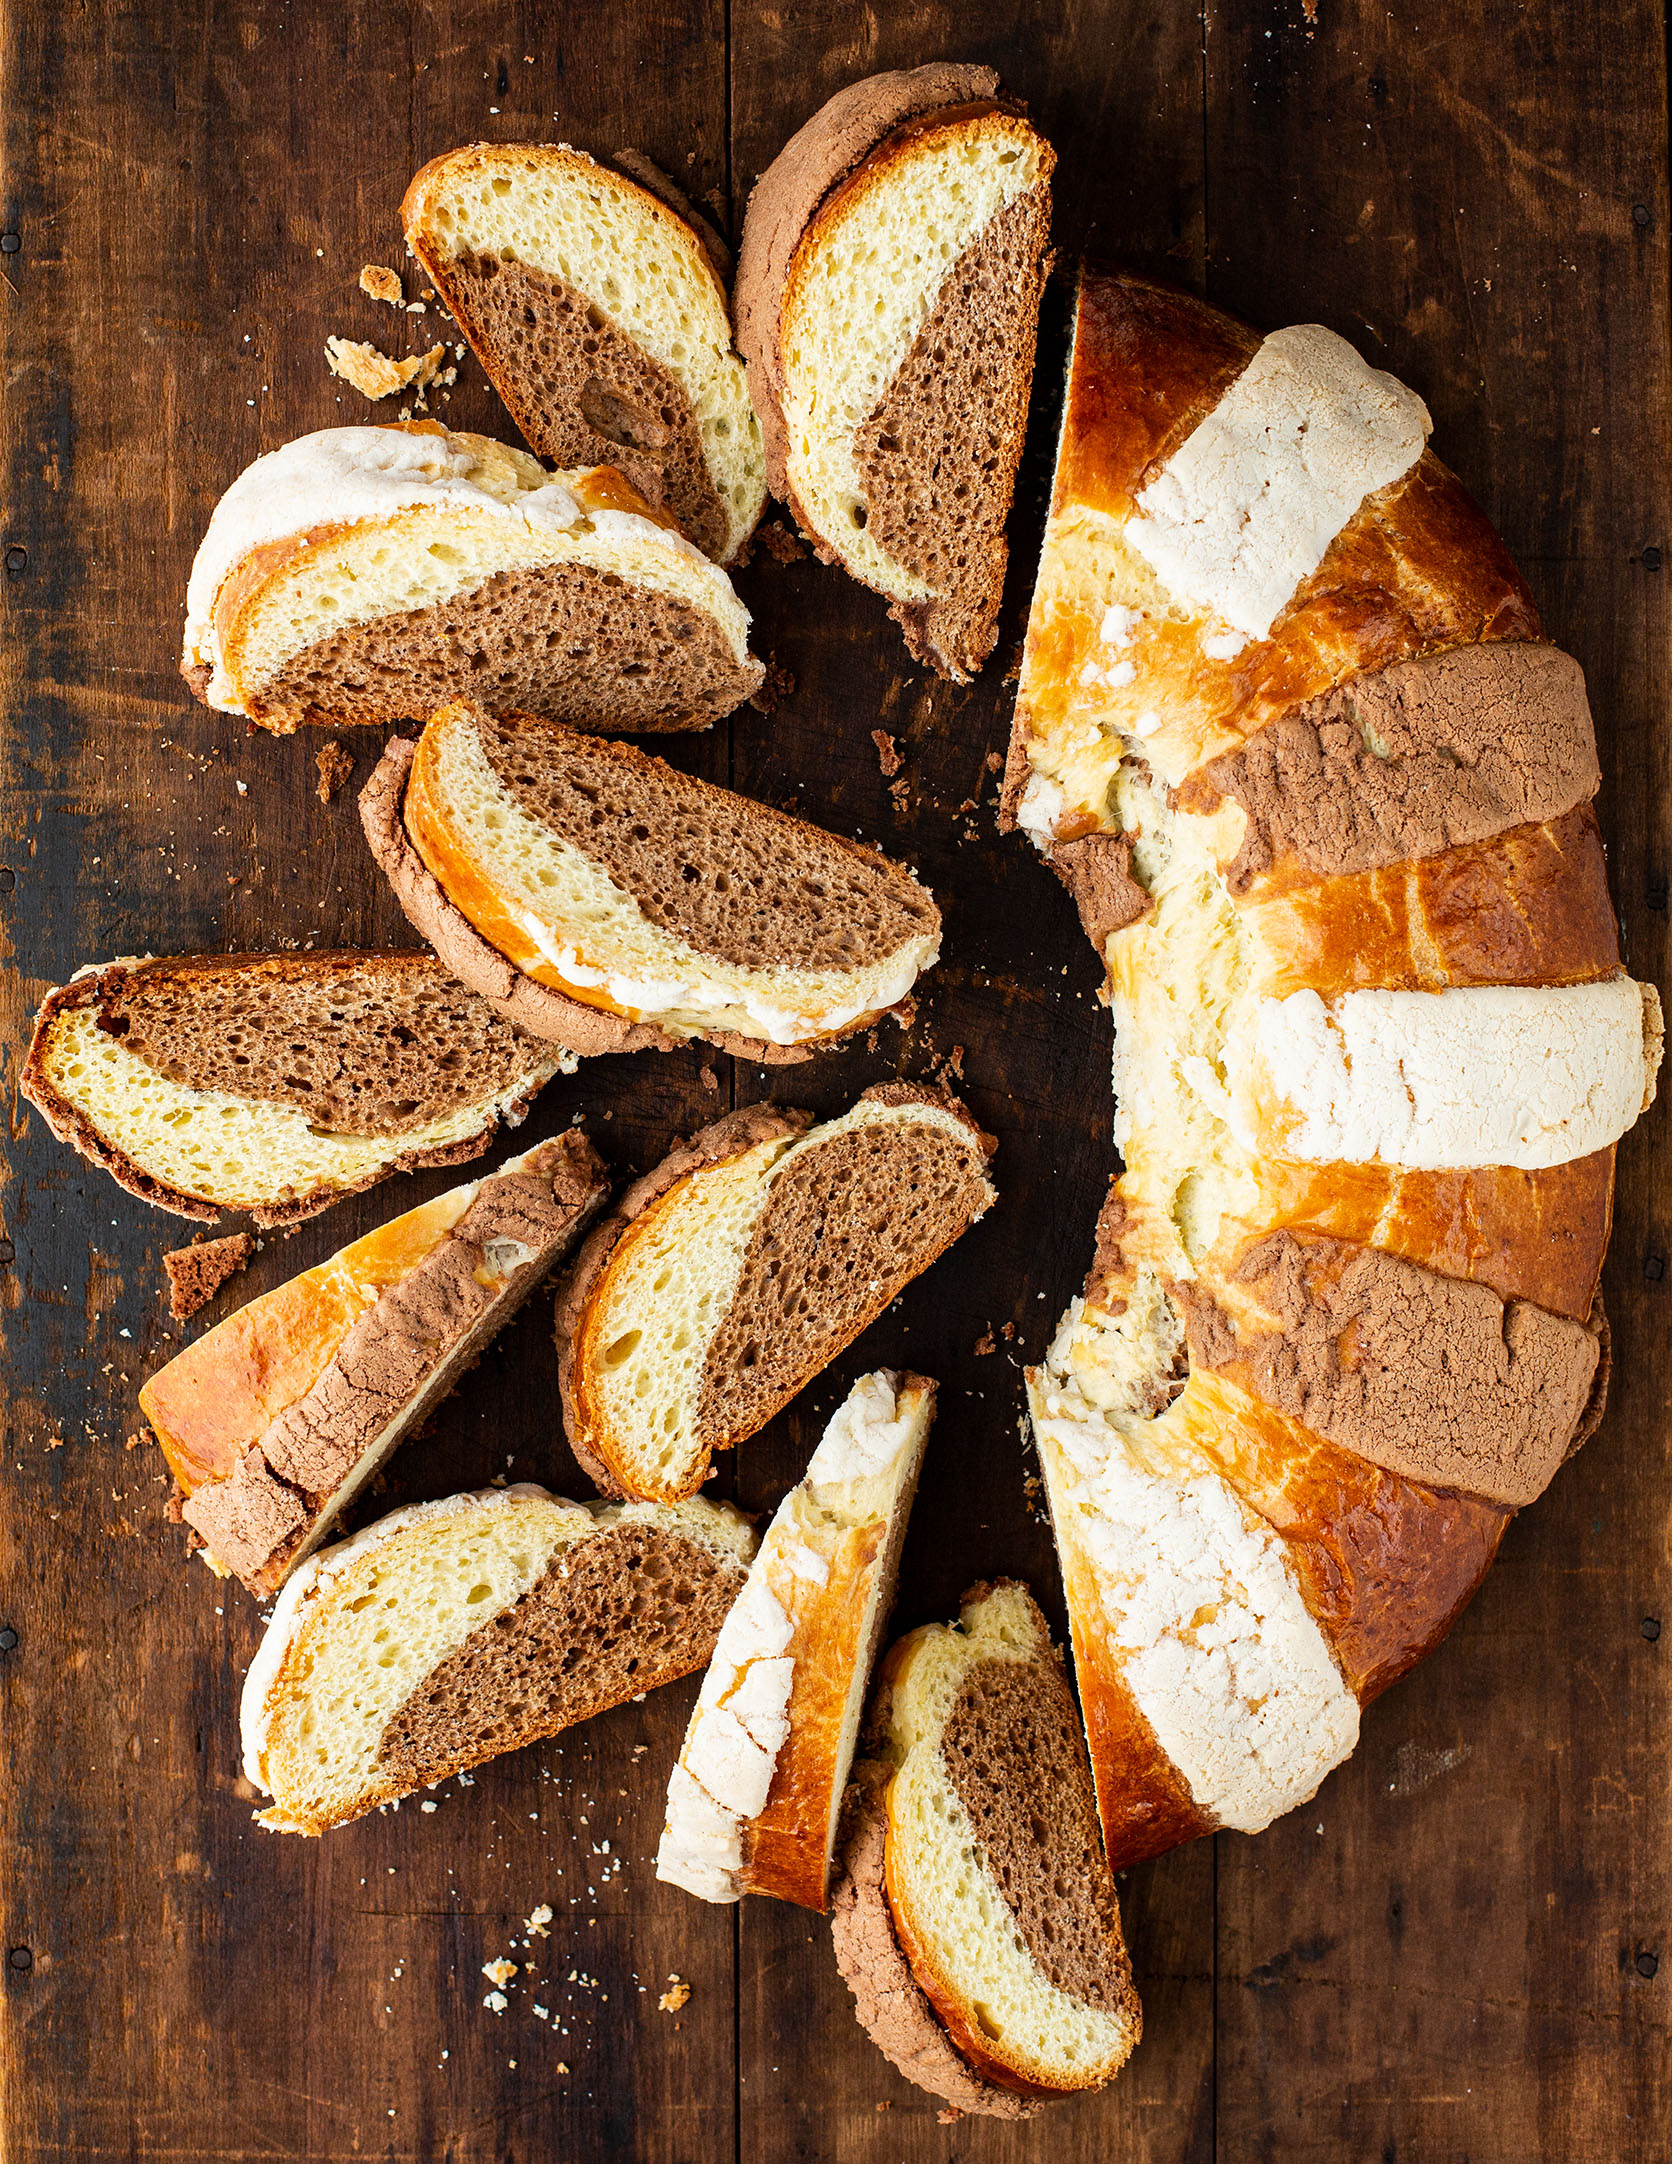
Rosca de Reyes is the Mexican version of Three Kings’ Bread. I wanted to create a version for my family, featuring just the parts we love. So why not make a chocolate-and-vanilla marbled bread with a chocolate-and-vanilla sugar coating?
Cook Time45 minutes
Course: Dessert, Side Dish, Snack
Cuisine: Mexican
Keyword: bread, Chocolate, vanilla
Servings: 15 servings; makes 1 large ring-shaped bread
Author: Pati Jinich

Ingredients

For the starter:

  • 1/2 cup whole milk heated to lukewarm
  • 1 tablespoon active dry yeast
  • 1 teaspoon granulated sugar
  • 1/2 cup all-purpose flour

For the dough:

  • 1 tablespoon orange blossom water or rose water (optional)
  • 1 teaspoon vanilla extract
  • 1 teaspoon grated orange zest
  • 4 large eggs
  • 3 1/2 cups all-purpose flour plus more for dusting
  • 1/2 cup granulated sugar
  • 1 teaspoon kosher salt
  • 1/2 pound (2 sticks) unsalted butter cut into 1⁄2-inch cubes, at room temperature, plus more for the bowls
  • 3 tablespoons unsweetened cocoa powder

For the topping:

  • 1 cup all-purpose flour
  • 1 cup confectioners’ sugar
  • 10 tablespoons (1 1/4 sticks) unsalted butter or 1/2 cup plus 2 tablespoons vegetable shortening, at room temperature
  • 1 teaspoon vanilla extract
  • 1 heaping tablespoon unsweetened cocoa powder
  • 1 large egg beaten with 1 tablespoon milk, for brushing

Instructions

To make the starter: 


  • Whisk the milk, yeast, and granulated sugar together in the bowl of a stand mixer. Whisk in the flour. Cover with a clean kitchen towel, set in a warm, draft-free place, and let stand until the mixture begins to bubble, 20 to 25 minutes.

To make the dough: 


  • Attach the bowl to the mixer stand and fit it with the paddle attachment. Add the orange flower or rose water (if using), vanilla, orange zest, eggs, flour, granulated sugar, and salt to the starter and beat on low speed just until combined. Scrape the bowl and beater and switch to the dough hook. Beat on medium speed for 10 to 12 minutes, until the dough pulls away from the sides of the bowl and starts to make a slapping sound.
  • On low speed, add the butter in 4 to 6 additions, incorporating each addition before adding the next one. From time to time, scrape the bowl. When all of the butter has been added, increase the speed to medium and beat for another 8 to 10 minutes, until the dough slaps against the sides of the bowl again. It will still be sticky, but don’t be tempted to add more flour.
  • Butter two medium bowls. Remove the dough from the mixer bowl, divide it in half, and return one half to the bowl. Shape the other piece into a ball and transfer to one of the buttered bowls.
  • Add the cocoa powder to the dough in the mixer bowl and mix on low speed until incorporated. Turn the dough out, shape it into a ball, and place in the other buttered bowl. Cover each bowl with plastic or a clean kitchen towel and let the dough rise in a warm, draft-free place until doubled, 1 to 1 1⁄2 hours.
  • Gently deflate both portions of dough with your fist and shape into balls again. Cover and let rise in the refrigerator for at least 3 hours, or for as long as overnight.
  • Remove the dough from the refrigerator and set, still covered, in a warm, draft-free spot for about an hour so it comes to room temperature and rises.
  • Line a baking sheet with parchment paper. Remove the doughs from the bowls and shape each one into a ball. Press each ball down to flatten it slightly. Place the vanilla round on top of the chocolate round and stretch it so that it completely envelops the chocolate round, turning the dough over to stretch it over the bottom. Make a hole in the center of the dough by pushing your fist through it, then gently stretch the dough out to make a 9-x-13-inch oval.
  • Place the dough on the baking sheet. Insert a couple of plastic Baby Jesus figurines into the dough, if using. Cover with a clean kitchen towel and let rise for an hour or so, until the dough has puffed.
  • Meanwhile, preheat the oven to 350℉ degrees, with a rack in the middle.

To make the topping:

  • Combine the flour, confectioners’ sugar, butter or shortening, and vanilla in a medium bowl and mix together into a smooth paste with your hands. Divide the paste in half. Add the cocoa powder to one half and knead and mix well until evenly incorporated. Divide each of the pastes into about 6 portions and shape into balls.
  • Gently brush the bread with the egg wash. Roll each paste ball into a log and then press to flatten it into a strip about 7 inches long, 1 inch wide, and 1⁄8 to 1⁄4 inch thick. Arrange them on the bread, alternating chocolate and vanilla strip, at approximately 2-inch intervals.
  • Bake for about 45 minutes, or until the bread is golden brown and makes a hollow sound when tapped on the bottom. Cool on a rack before slicing.

Notes

Rosca de Reyes de Chocolate y Vainilla

Conchas

Conchas
Print Recipe
3.80 from 10 votes

Conchas

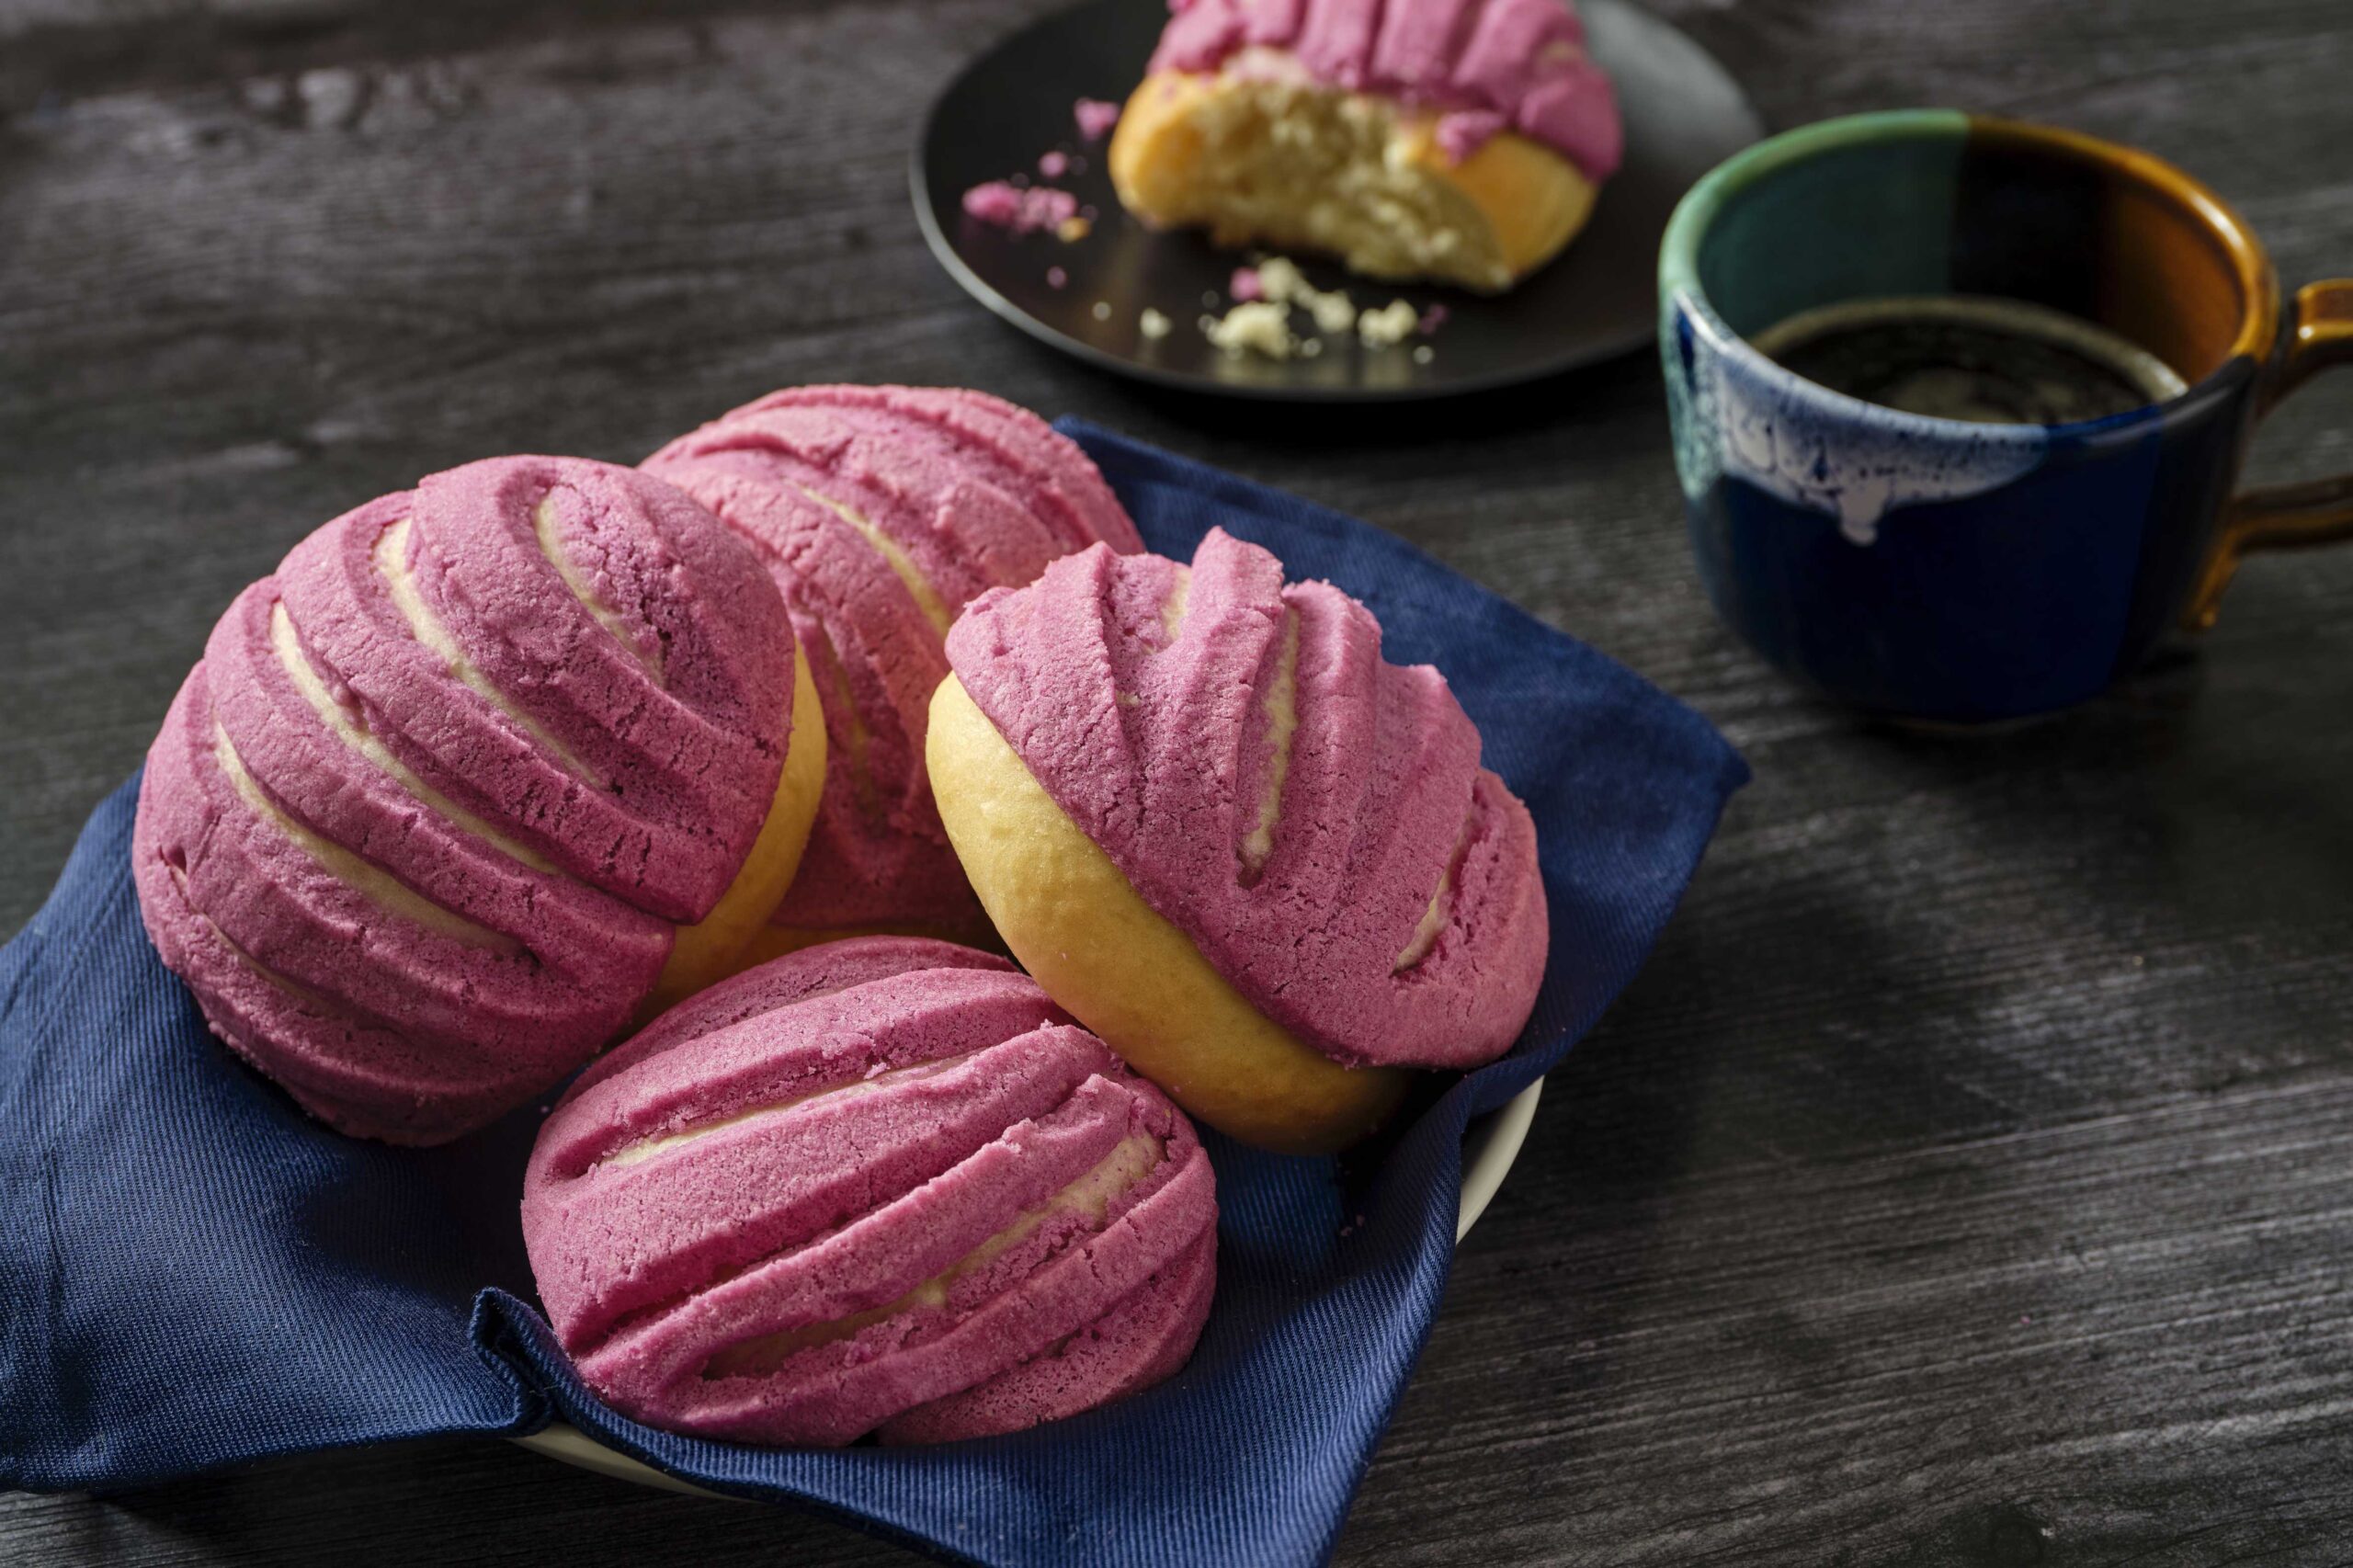
Francisco Migoya’s Conchas recipe from Pati’s Mexican Table Season 10, Episode 7 “Getting to the Roots”
Cook Time25 minutes
Course: Antojos, Breakfast, Dessert
Cuisine: Mexican
Keyword: sugar, vanilla
Servings: 15 conchas
Author: Pati Jinich

Ingredients

For the dough:

  • ½ cup (115g) whole milk, cold
  • cup (75g) water
  • 2 teaspoons (8g) instant dry yeast
  • cups (480g) bread flour
  • 4 eggs cold (190g)
  • ½ cup (120g) unsalted butter softened
  • cup, plus 2 teaspoons, (75g), sugar
  • teaspoons (12g) fine salt
  • teaspoons (10g) vanilla extract

For the topping:

  • cups (200g) powdered sugar
  • 1⅔ cups (200g) pastry flour
  • ¾ cup, plus 1 tablespoon, plus 1 teaspoon (200g) vegetable shortening
  • teaspoons (10g) vanilla extract

Optional flavorings:

  • ¼ cup, plus 2 tablespoons, plus 2 teaspoons (60g) any freeze-dried fruit powder such as dragon fruit
  • ¼ cup, plus 2 teaspoons (30g) cocoa powder
  • 2 tablespoons (12g) matcha powder
  • 1⅛ teaspoons (3g) any powdered spice such as cinnamon, pumpkin spice mix, etc.
  • teaspoons (3g) any citrus zest
  • teaspoons (3g) any tea finely ground

Instructions

To make the dough:

  • Dissolve the yeast in the milk and water in an electric mixer bowl using a whisk. Put the remaining ingredients on top. Start mixing on low speed using the hook attachment.
  • Once the dough ingredients have formed a homogenous mass, turn the speed up to medium high for 10-15 minutes until the dough reaches full gluten development. To check if the dough has reached this stage, first check if the dough looks smooth and uniform in the mixer. The second is whether the dough is “slapping” the sides of the bowl while it mixes. The third and definite test is to perform the windowpane test, which consists in taking a small piece of dough and gently stretching it with your fingers to get it to stretch as thinly as possible without tearing. If it can form a thin translucent membrane without tearing, the dough is ready to come off the mixer.
  • While the dough mixes, prepare a flat sheet pan by lining it with a lightly oiled non-stick rubber mat or plastic wrap.
  • After mixing the dough, take it out of the mixer and place it on a flat work surface area that has been lightly greased with spray oil to keep it from sticking. Perform a four-fold on the dough (this consists of flattening the dough with the palms of your hand into a square or rectangle shape as best as you possibly can folding each end in towards the center of the dough to create a smooth surface), then place the folded dough on the prepared sheet pan, seam side down.
  • Lightly oil the surface of the dough with spray oil and cover it with plastic wrap. Let the dough rest at room temperature for 30 minutes.
  • Flatten the dough as best you can to about 1 inch/2.5cm using the palms of your hands. Cover the dough again with plastic wrap and chill for at least 2 hours or overnight in refrigeration.

Meanwhile, make the topping:

  • Sift the powdered sugar and flour together in a mixer bowl, then add the shortening on top plus the vanilla extract and whatever additional optional flavorings. Using the paddle attachment, mix on low speed until the dough comes together to form one mass.
  • Place the concha topping dough between two sheets of plastic wrap or parchment paper. Roll the dough out to 4mm. Place on a sheet pan and into the freezer for 15 minutes (this helps with achieving a clean cut disc).
  • Cut the cold concha topping with a 2.4 inch/6 cm round cutter (weighing about 15g each). Place each topping disc on a sheet pan lined with parchment paper or a silpat and keep at room temperature until needed. If you are not using within 6-8 hours, wrap the sheet pan in plastic and place in refrigeration. It is important to note, when going to assemble the topping onto the dough balls, the topping must be at room temperature so it can be secured easily to the dough and stamped/scored in an even and clear design.
  • Alternatively, you can form the concha topping into 15g balls and reserve on a small sheet pan, wrapped with plastic, at room temperature, until needed. If you are not going to use the topping that day, keep it wrapped well with plastic in refrigeration.

To assemble the conchas:

  • Once it’s time to take the concha dough out of the refrigerator, remove the plastic wrap and flip it out onto a clean worktable. Peel off the non-stick rubber mat or plastic wrap that was used to line the sheet pan. Using a bench scraper or small knife, divide the dough into 70g pieces and shape each piece into a ball.
  • Place the dough balls onto three or four separate half sheet pans lined with oiled parchment paper with enough space between the dough balls to expand during proofing and eventually baking; five balls maximum per sheet pan, ideally four if you have enough sheet pans.
  • Take one disc of previously rolled out and cut concha topping. Center and place on top of a dough ball then press down lightly so it attaches well to the top and sides of the dough.
  • NOTE: If you do not roll out and pre-cut your concha topping, you can also use a tortilla press or your hands. Place a 15g room temperature ball of concha topping between two lightly oiled plastic sheets and press it gently using a tortilla press to about 2.4 inch/6 cm. If you do not have a tortilla press, press the topping with your hands, that are lightly oiled, until you achieve the proper diameter disc. Center and place the concha topping disc on the dough then press down lightly so it attaches well to the top and sides of the dough.
  • Directly after securing a disc of topping on the dough, use a concha cutter and press it onto the topping, forming the traditional shell-like pattern. If you do not have this cutter, use the tip of a paring knife to score the pattern on the topping. Continue, one at a time, securing a topping disc to the dough and stamping/scoring the topping directly after.
  • NOTE: It helps to achieve a nice even design with the topping if it is stamped/scored right after placing on the dough while the topping is still room temperature. Since the dough is cold, the topping quickly takes on that temperature as well making it firmer. The colder the topping gets, the more difficult it is to achieve a nice design on your conchas.
  • Proof the dough: If you are doing this at room temperature, cover the dough with a lightly tented clean plastic bag or a clean kitchen towel. It will take between 2-3 hours. If proofing in a fermenter/proof box, set it to 27℃/80℉ with 75% relative humidity it will take 1-1.5 hours.
  • During the last 30 minutes of proofing, turn a convection oven on to 175℃/350℉ or a still (home) oven to 190℃/375℉.
  • Bake in the convection or still oven for 20-25 minutes or until golden brown.

Notes

Conchas, recipe courtesy of Francisco Migoya

Mosaic Jell-O

Print Recipe
4.67 from 9 votes

Mosaic Jell-O

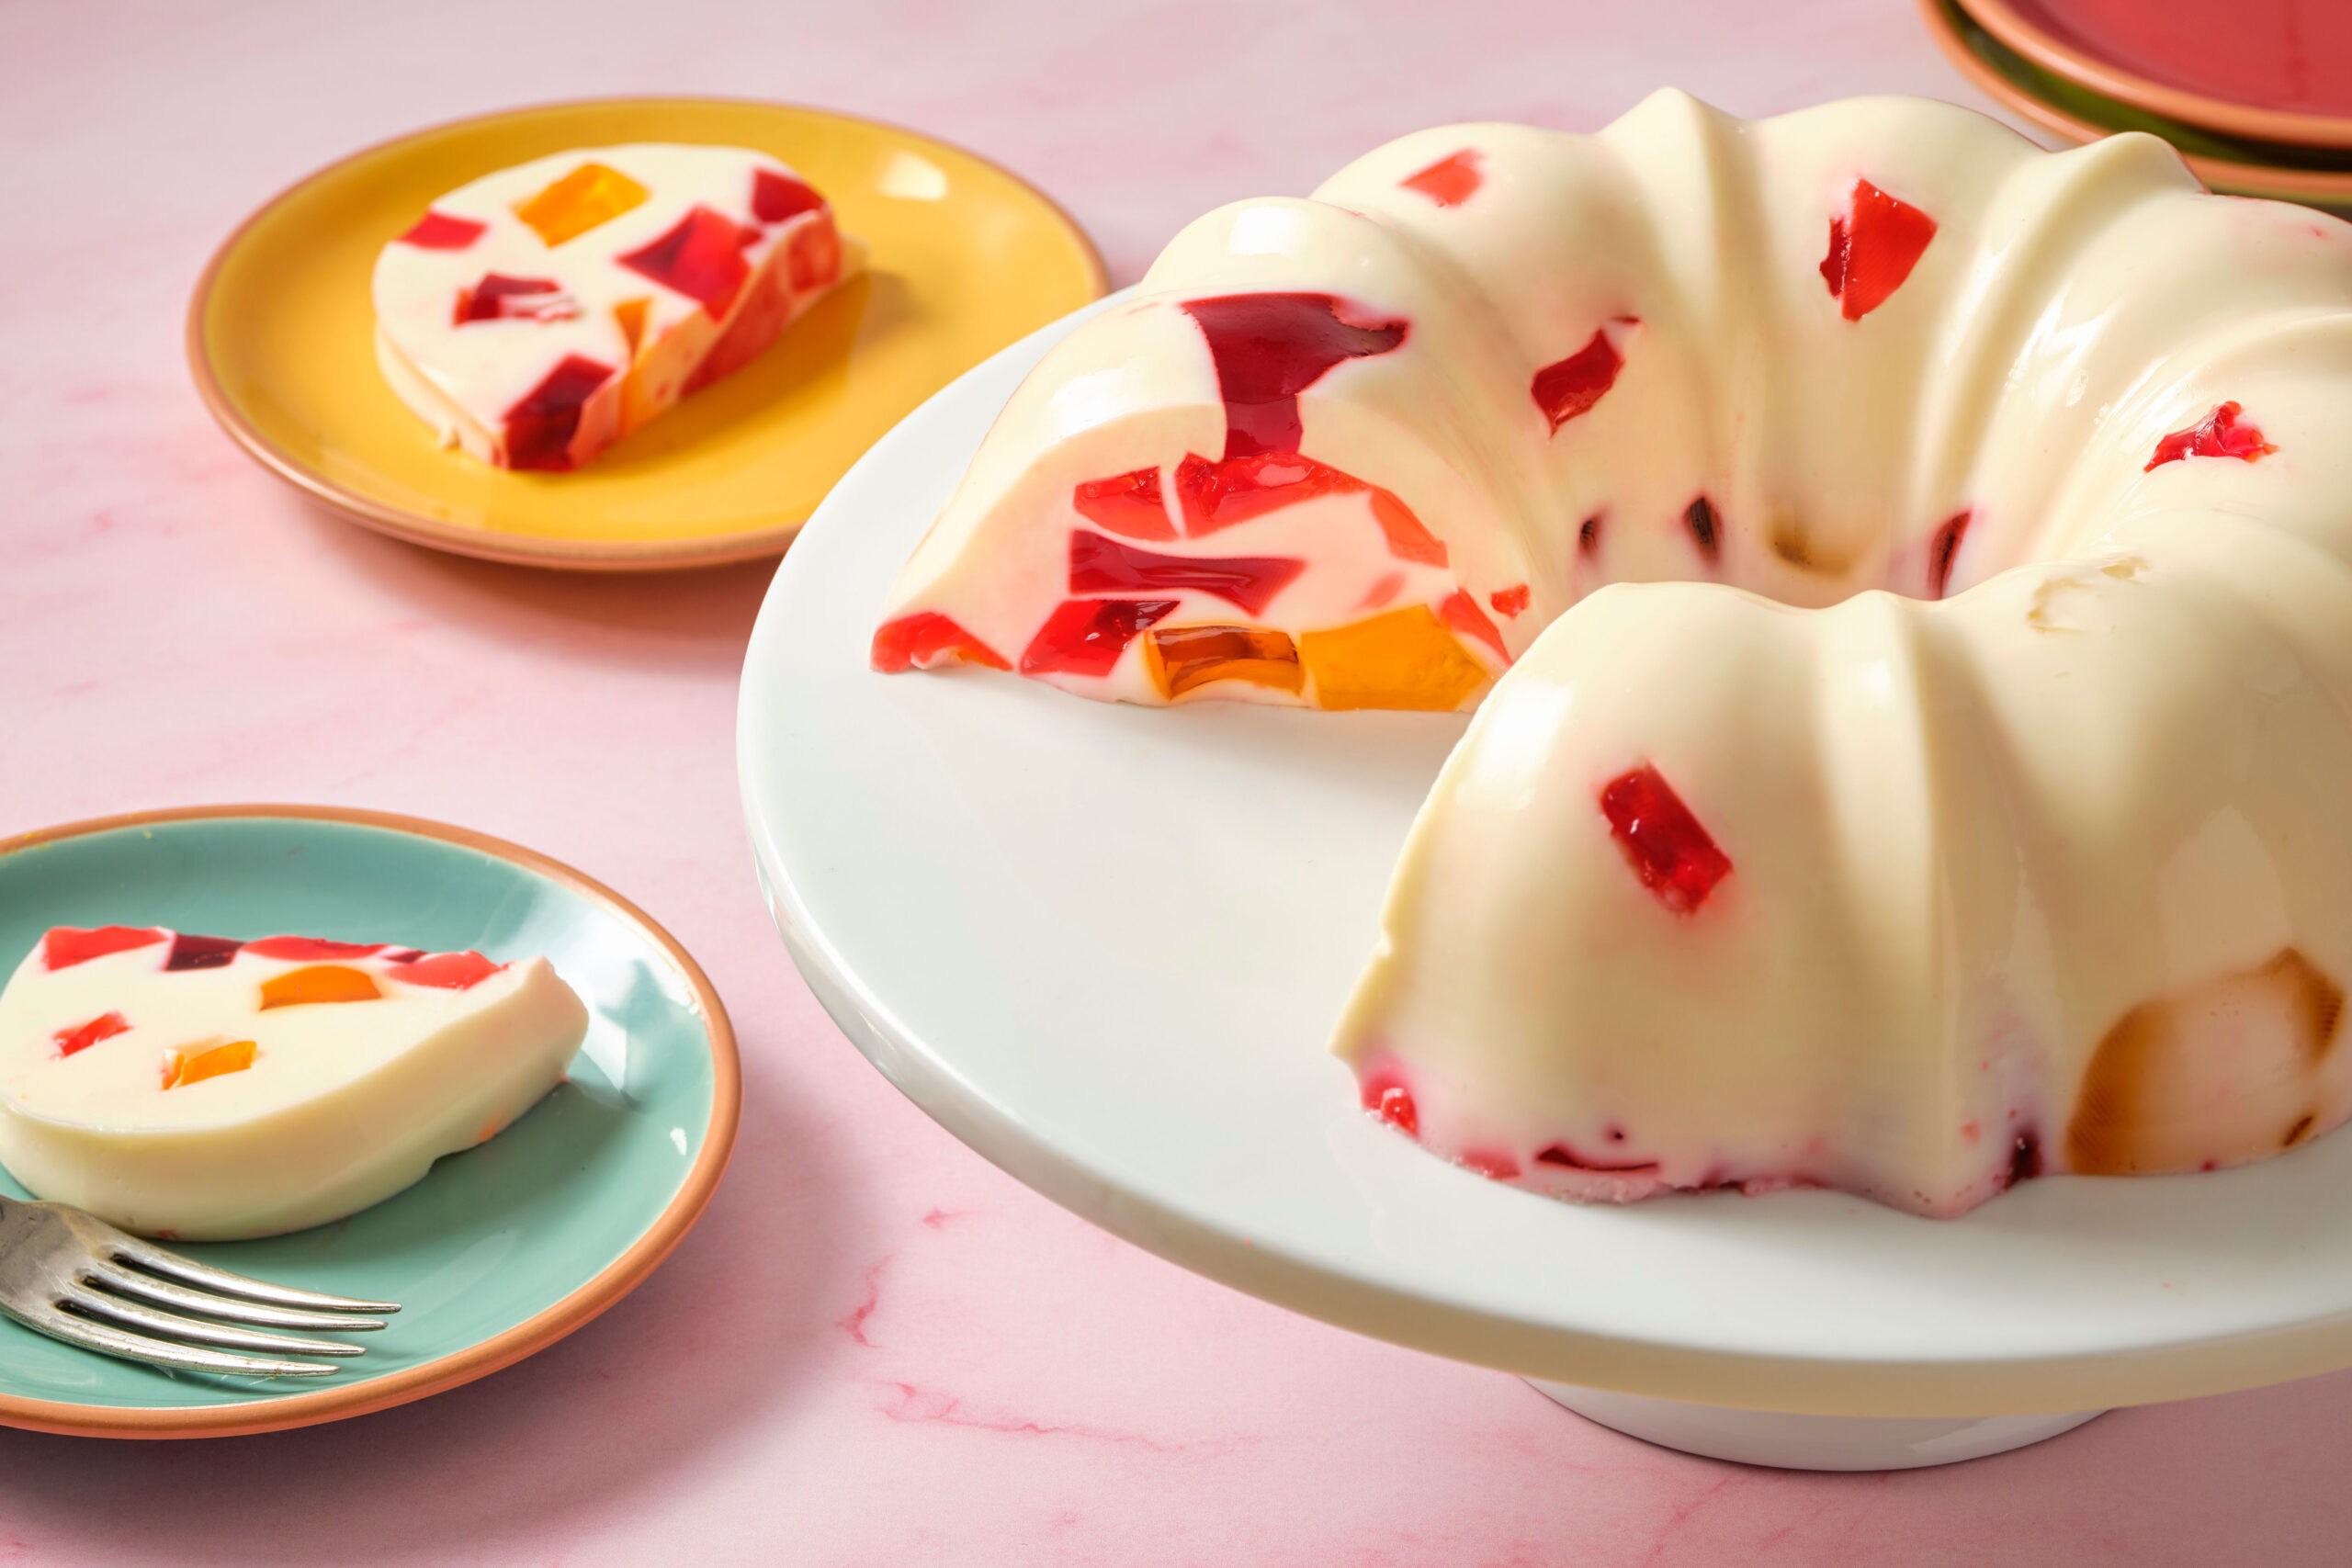
Fany Gerson’s Mosaic Jell-O recipe from Pati’s Mexican Table Season 10, Episode 5 “Escaramuza”
Cook Time20 minutes
Course: Dessert
Cuisine: Mexican
Keyword: berries, evaporated milk, pineapple, Sweetened Condensed Milk, Vainilla
Servings: 2 large bundt mold portions
Author: Pati Jinich

Ingredients

For each fruit flavored Jell-O (you’ll want to make 3 flavors):

  • 1/3 cup cool water
  • 1 tablespoon, plus 2 teaspoons, powdered gelatin
  • 1 1/2 pounds fresh or frozen fruit such as mango, raspberries, strawberries, blackberries, pineapple, passion fruit, peeled and/or roughly chopped as necessary
  • 1/2 cup granulated sugar
  • Pinch salt

For the milk gelatin:

  • 4 tablespoons unflavored gelatin
  • 1 cup cold water
  • cups milk
  • 1 12-ounce can evaporated milk
  • 2 14-ounce can sweetened condensed milk
  • 1 teaspoon vanilla extract
  • Pinch salt

Instructions

To make the fruit flavored Jell-Os:

  • Place the water in a wide, shallow bowl, and evenly sprinkle the powdered gelatin over it. Let bloom for a few minutes.
  • In a large pot, combine the fruit, sugar, and salt. Heat the mixture over medium-low heat, stirring occasionally, until the fruit breaks down and releases its juices, about 5-10 minutes.
  • Strain the juice through a fine mesh strainer. Measure the juice – you should have about 2 cups of liquid. If you have less, add enough water to have at least 2 cups. Take the temperature of the liquid to make sure it’s not above 212°F.
  • Melt the gelatin in the microwave or over a double boiler being careful that it doesn’t boil. Stir the melted gelatin into the fruit juice liquid, and pour the liquid into heat resistant containers that hold at least two cups of liquid.
  • Transfer to the refrigerator and let the gelatin set until fully chilled and firm, at least 4 hours or overnight.
  • Repeat this same process to make all three flavors of Jell-O.
  • Once the fruit gelatins are set, using a small knife, cut each fruit flavor into squares, triangles, or rectangles, or a combination (this is a matter of preference). Carefully scoop the cubes out into a container and set aside in the fridge.

To make the milk gelatin:

  • Pour the gelatin powder into a bowl. Mix in 1 cup of cold water. Stir quickly with a fork or whisk until dissolved and allow to sit for 10 minutes until set.
  • In a medium-sized saucepan, add the milk and bring to a boil. Once the milk starts to simmer, turn off and remove from heat. Stir in the evaporated milk, sweetened condensed milk, vanilla, and salt to combine.
  • Once the gelatin has set, microwave it on high for 30 to 40 seconds (or heat in double boiler) until it becomes liquid form but be careful that it doesn’t boil. When ready, pour the gelatin into the milk mixture and stir to combine. Let the mixture cool down without refrigerating.
  • Get your preferred mold ready. You can use something like a bundt pan or glasses if you want individual portions. Pour in a little bit of milk/gelatin mixture. Add some of the cut up fruit gelatin and pour in more milk-gelatin mixture. Continue layering until you fill the pan. You may have just a little of the milk leftover depending on the size of your pan. Chill in the refrigerator overnight.
  • Once the gelatin has set and you are ready to unmold, you can dip the mold into warm water for about 10 seconds, then use a paring knife or small spatula to release one edge of the Jell-O from the mold. This action combined with the heat usually causes the gelatin to slip right out. You can have it unmolded and refrigerated until you are ready to enjoy.

Notes

Gelatina Mosaico, recipe courtesy of Fany Gerson

Masa Berry Shortcake

Masa Berry Shortcake
Print Recipe
5 from 6 votes

Masa Berry Shortcake

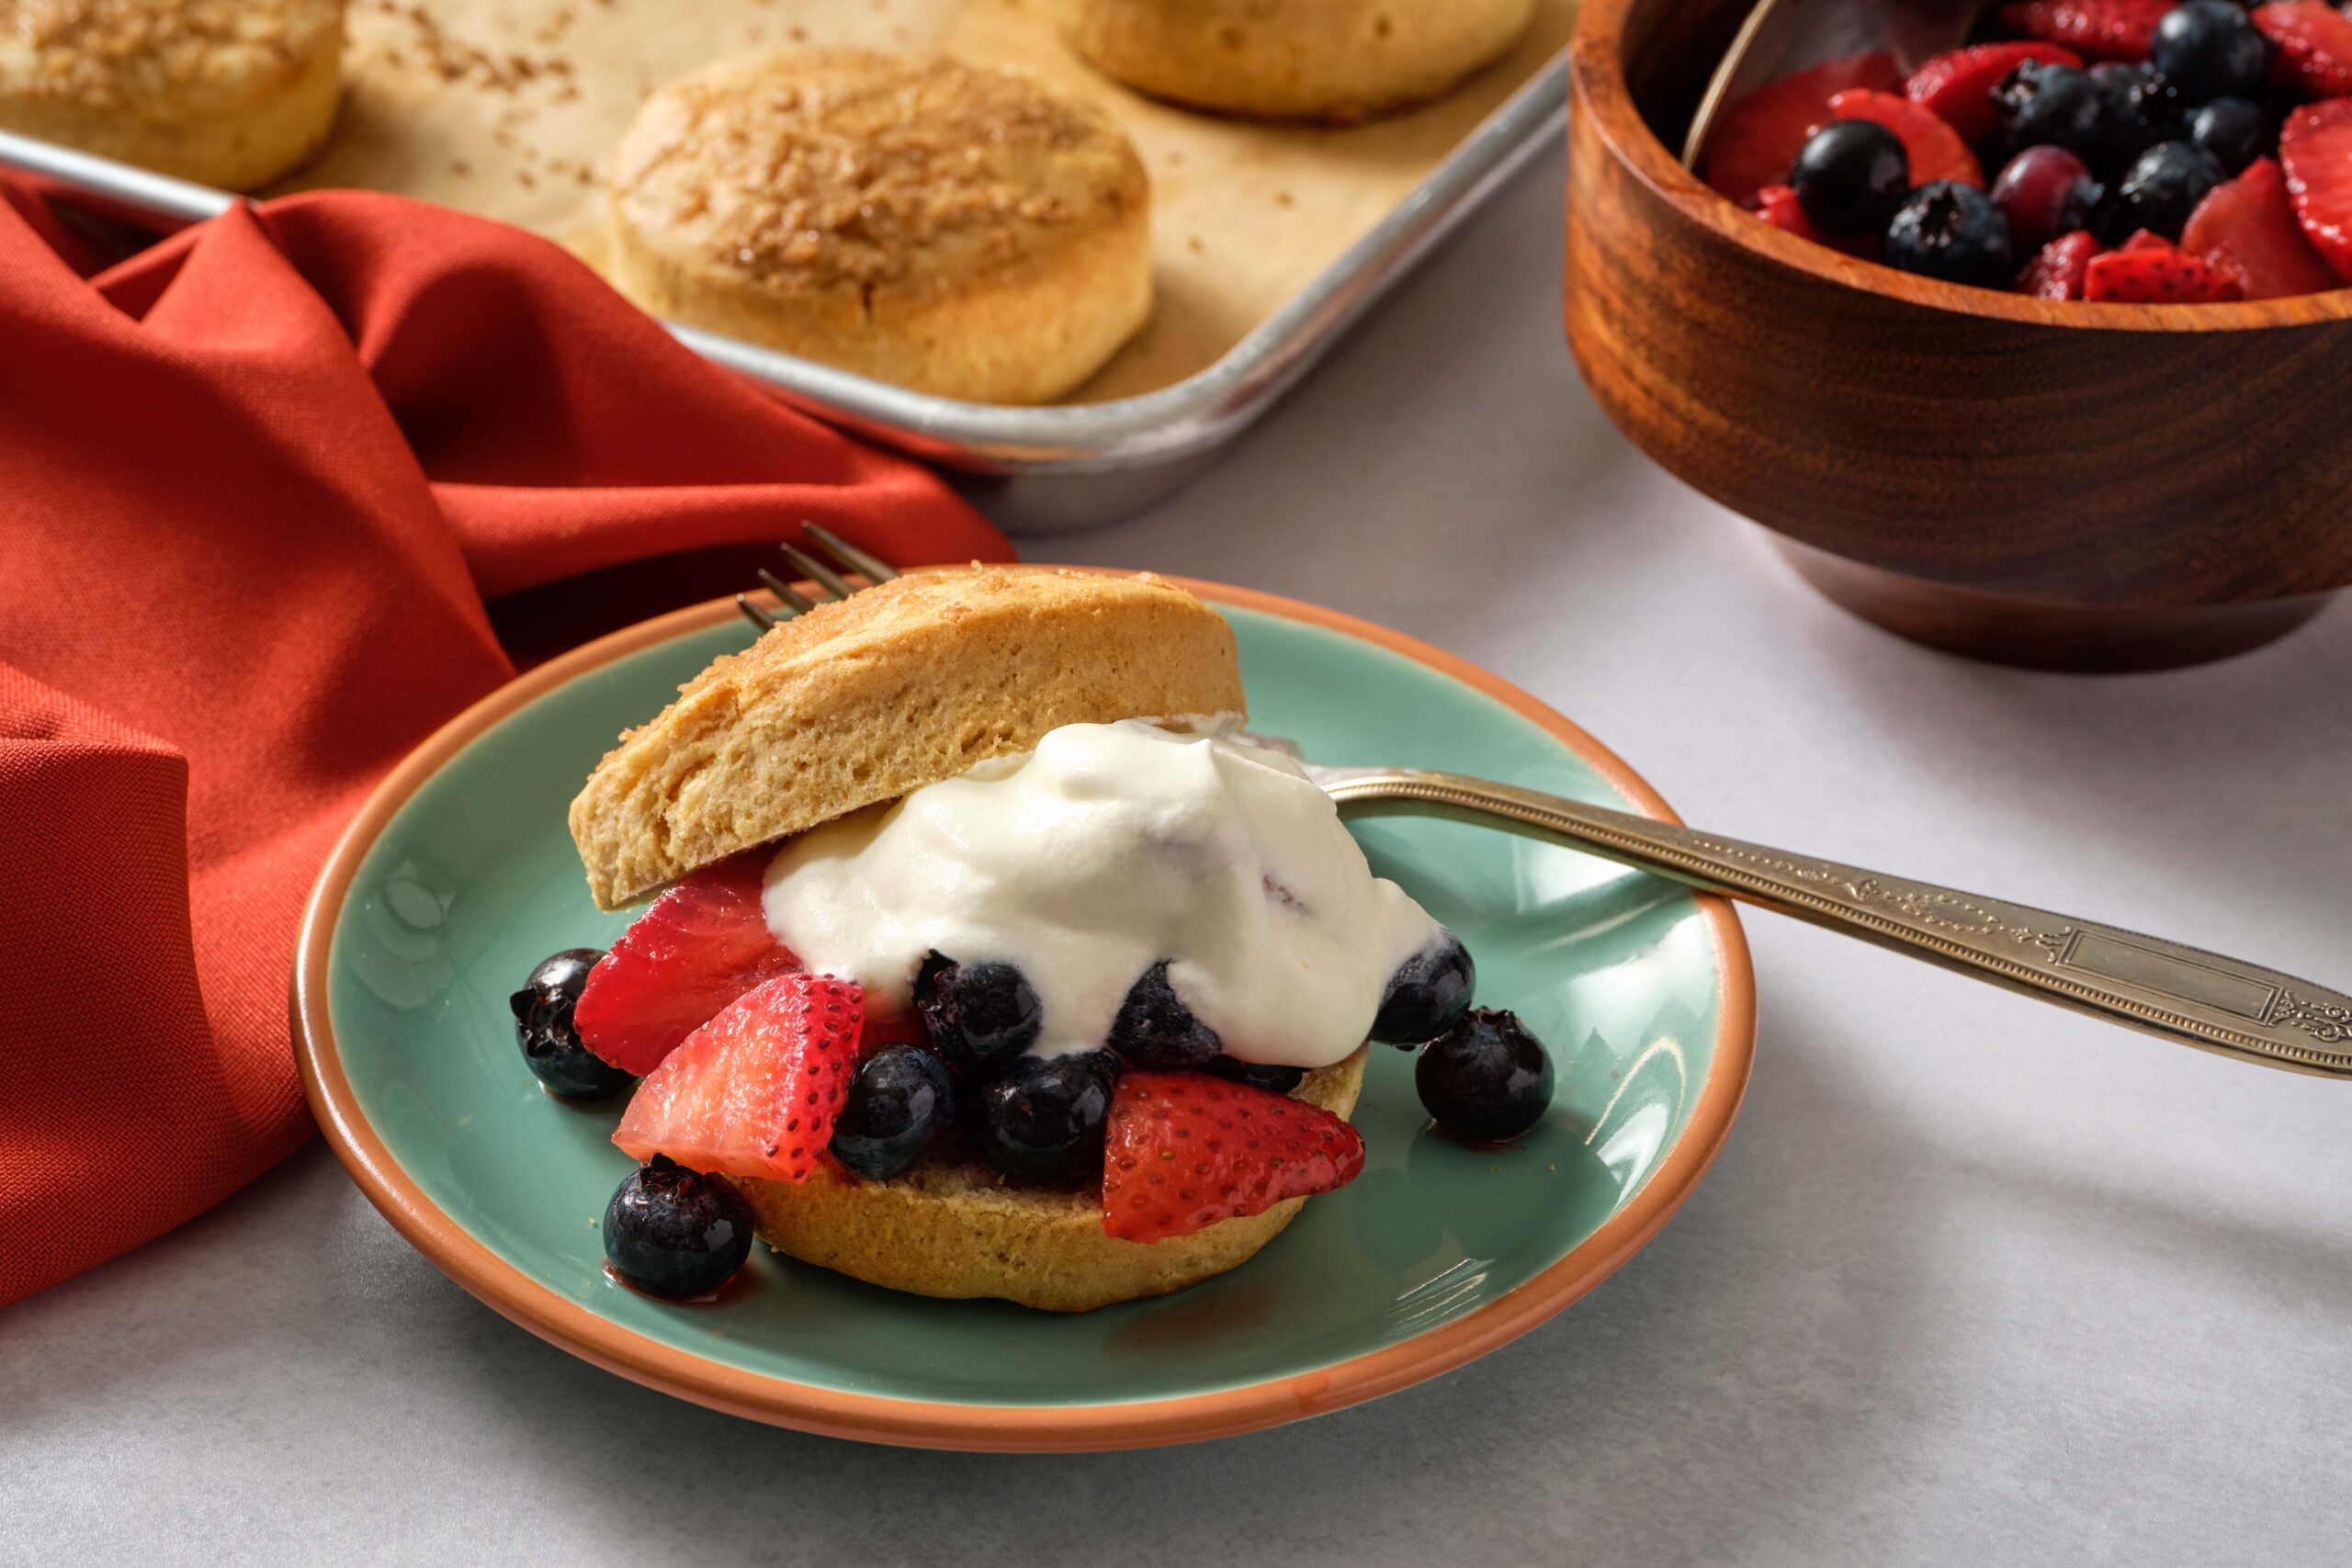
Masa Berry Shortcake recipe from Pati’s Mexican Table Season 10, Episode 4 “Los Mariachis”
Cook Time15 minutes
Course: Dessert
Cuisine: Mexican
Keyword: berries, masa, vanilla
Servings: 6 servings
Author: Pati Jinich

Ingredients

For the berry topping:

  • 3 cups strawberries hulled and sliced ¼ inch thick
  • 1 cup blueberries
  • Juice of half a lemon
  • 2 tablespoons granulated sugar
  • ½ teaspoon pure vanilla extract

For the biscuits:

  • 1 cup masa harina
  • cups all purpose flour plus more to dust work surface
  • tablespoons granulated sugar
  • 2 teaspoons baking powder
  • ¼ teaspoon baking soda
  • ¾ teaspoon kosher salt
  • 1⅓ cups heavy cream plus 1 tablespoon for brushing tops of biscuits
  • teaspoons turbinado sugar or brown sugar for sprinkling

For the whipped cream:

  • ½ cup heavy whipped cream
  • ½ cup sour cream
  • ¼ tablespoon confectioners’ sugar
  • ½ teaspoon pure vanilla extract

Instructions

To make the berry topping:

  • Combine the berries in a large bowl with the lemon juice, sugar, and vanilla. Toss and let sit out at room temperature while you prepare the biscuits and whipped cream.

To make the biscuits:

  • Preheat oven to 375℉. Whisk together the masa, flour, sugar, baking powder, baking soda, and salt in a large bowl. Make a well in the center and stir in 1⅓ cups heavy cream until incorporated. Dust your work surface with flour and knead the dough for one minute until it fully comes together.
  • Pat the dough into a ¾ inch thick square. Use a 3 inch biscuit cutter and cut out 6 biscuits. Repat the dough together to cut the last few biscuits. Place on a parchment lined baking sheet. Brush with the remaining tablespoon heavy cream and sprinkle with sugar. Bake for 15-18 minutes, until lightly golden brown. Cool before serving.

To make the whipped cream:

  • Combine the heavy cream and sour cream in a large bowl. Use a hand mixer to whip it until it thickens. Add the sugar and vanilla and continue to whip it until it reaches soft peaks.
  • To serve, split the biscuits in half after they have cooled. Top with the juicy berries and whipped cream.

Notes

Pastelito con Fresas y Moras

Dulce de Leche Custard

Jericalla de Cajeta
Print Recipe
4 from 7 votes

Dulce de Leche Custard

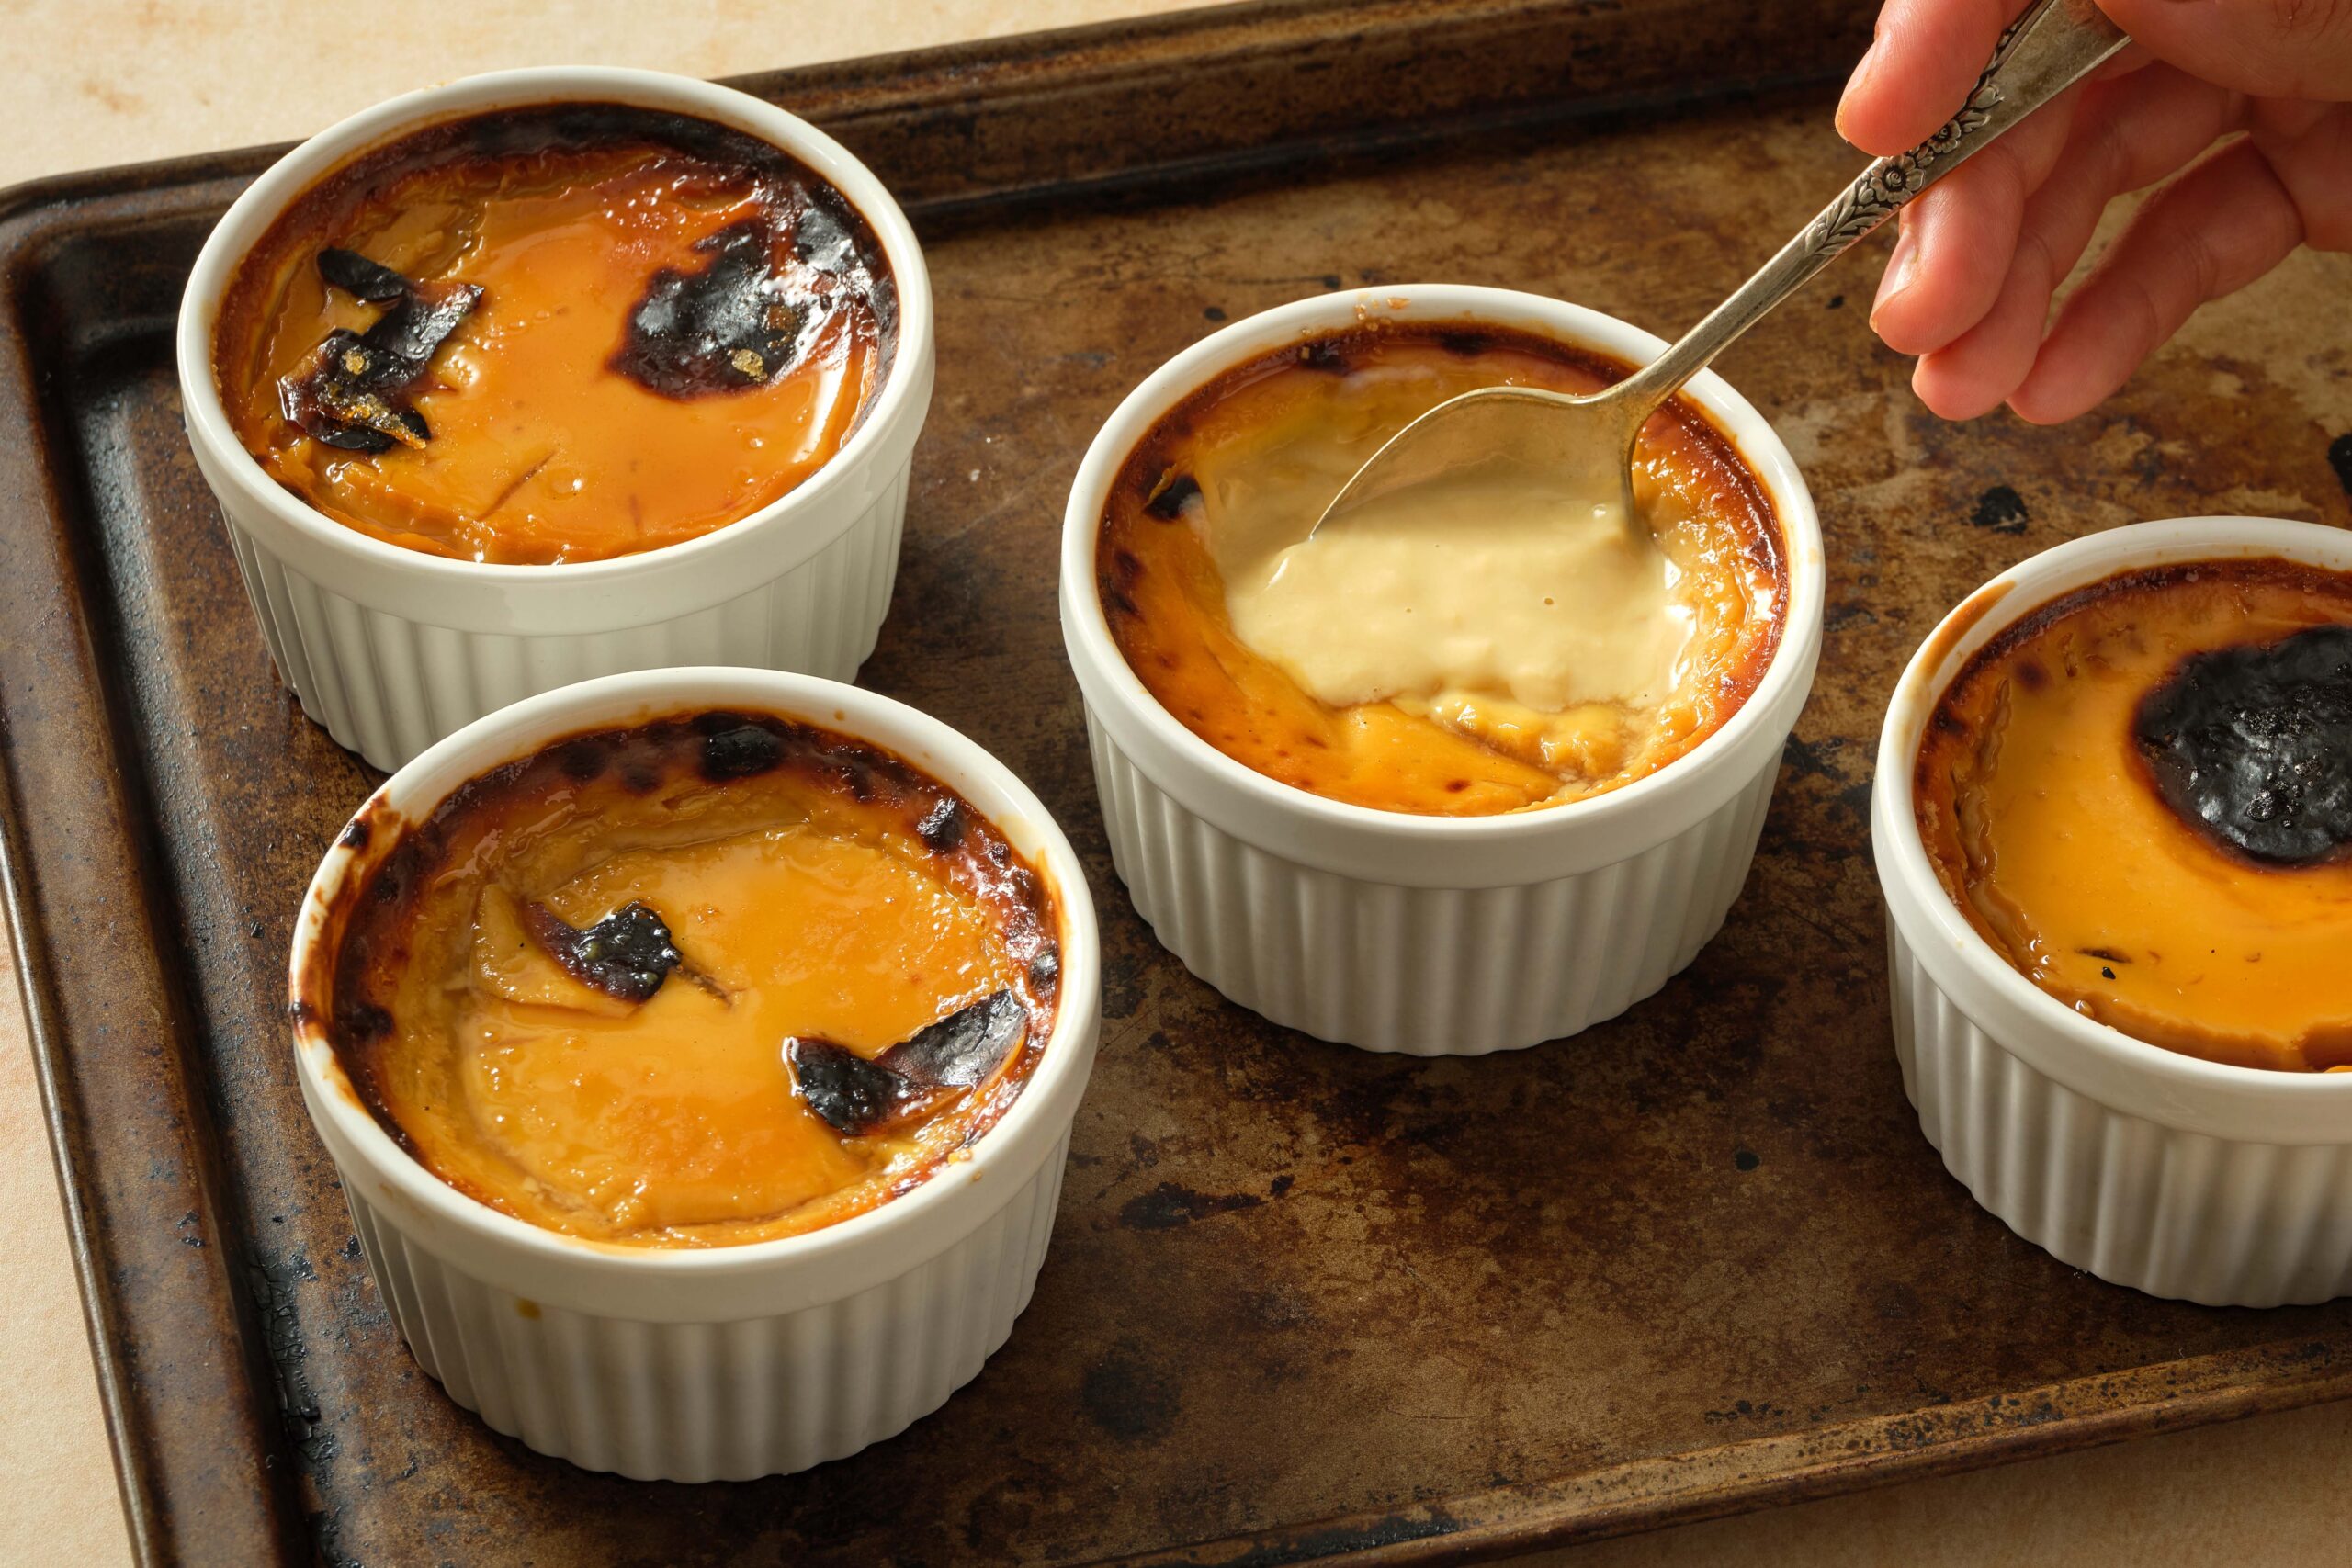
Dulce de Leche Custard recipe from Pati’s Mexican Table Season 10, Episode 3 “Jalisco Classics”
Cook Time50 minutes
Course: Dessert
Cuisine: Mexican
Keyword: Cajeta, Dulce de Leche, Eggs
Servings: 8 individual custards
Author: Pati Jinich

Ingredients

  • 4 cups whole milk
  • 2 teaspoons vanilla extract
  • 1 cup cajeta or dulce de leche
  • 8 egg yolks
  • 1/2 cup sugar

Instructions

  • Place the milk, vanilla extract and cajeta in a medium saucepan over medium heat. Once it comes to a simmer, reduce the heat to low, and cook for 2 minutes more, stirring. Remove from the heat and let it sit until it cools down.
  • Preheat the oven to 350℉.
  • In a medium bowl, beat the egg yolks with a fork or whisk, until pale yellow and thick, about a minute. Add the cooled milk a ladle at a time, incorporating with the fork or whisk.
  • Pour the mixture into the individual ramekins, dividing evenly among all. Place in a baking dish or roasting pan and create a water bath by pouring enough boiling water to reach halfway up the ramekins. Carefully place into the oven. Bake for about 50 minutes, or until the custard has begun to set and the top has created an evident thick layer. It will still look jiggly in the center.
  • Remove the pan from the oven, sprinkle the top of each jericalla with sugar. Set oven to broil, return pan with ramekins to broil for 30 seconds or until sugar has melted and browned. Remove from the oven, let cool slightly and remove the ramekins from the water bath.
  • The jericalla should be creamy and smooth, but more runny than a pudding. Let cool and chill in the fridge before serving. It will continue to set as it chills.

Notes

Jericalla de Cajeta

Almond Tres Leches Cake

Almond Tres Leches Cake
Print Recipe
4.78 from 9 votes

Almond Tres Leches Cake

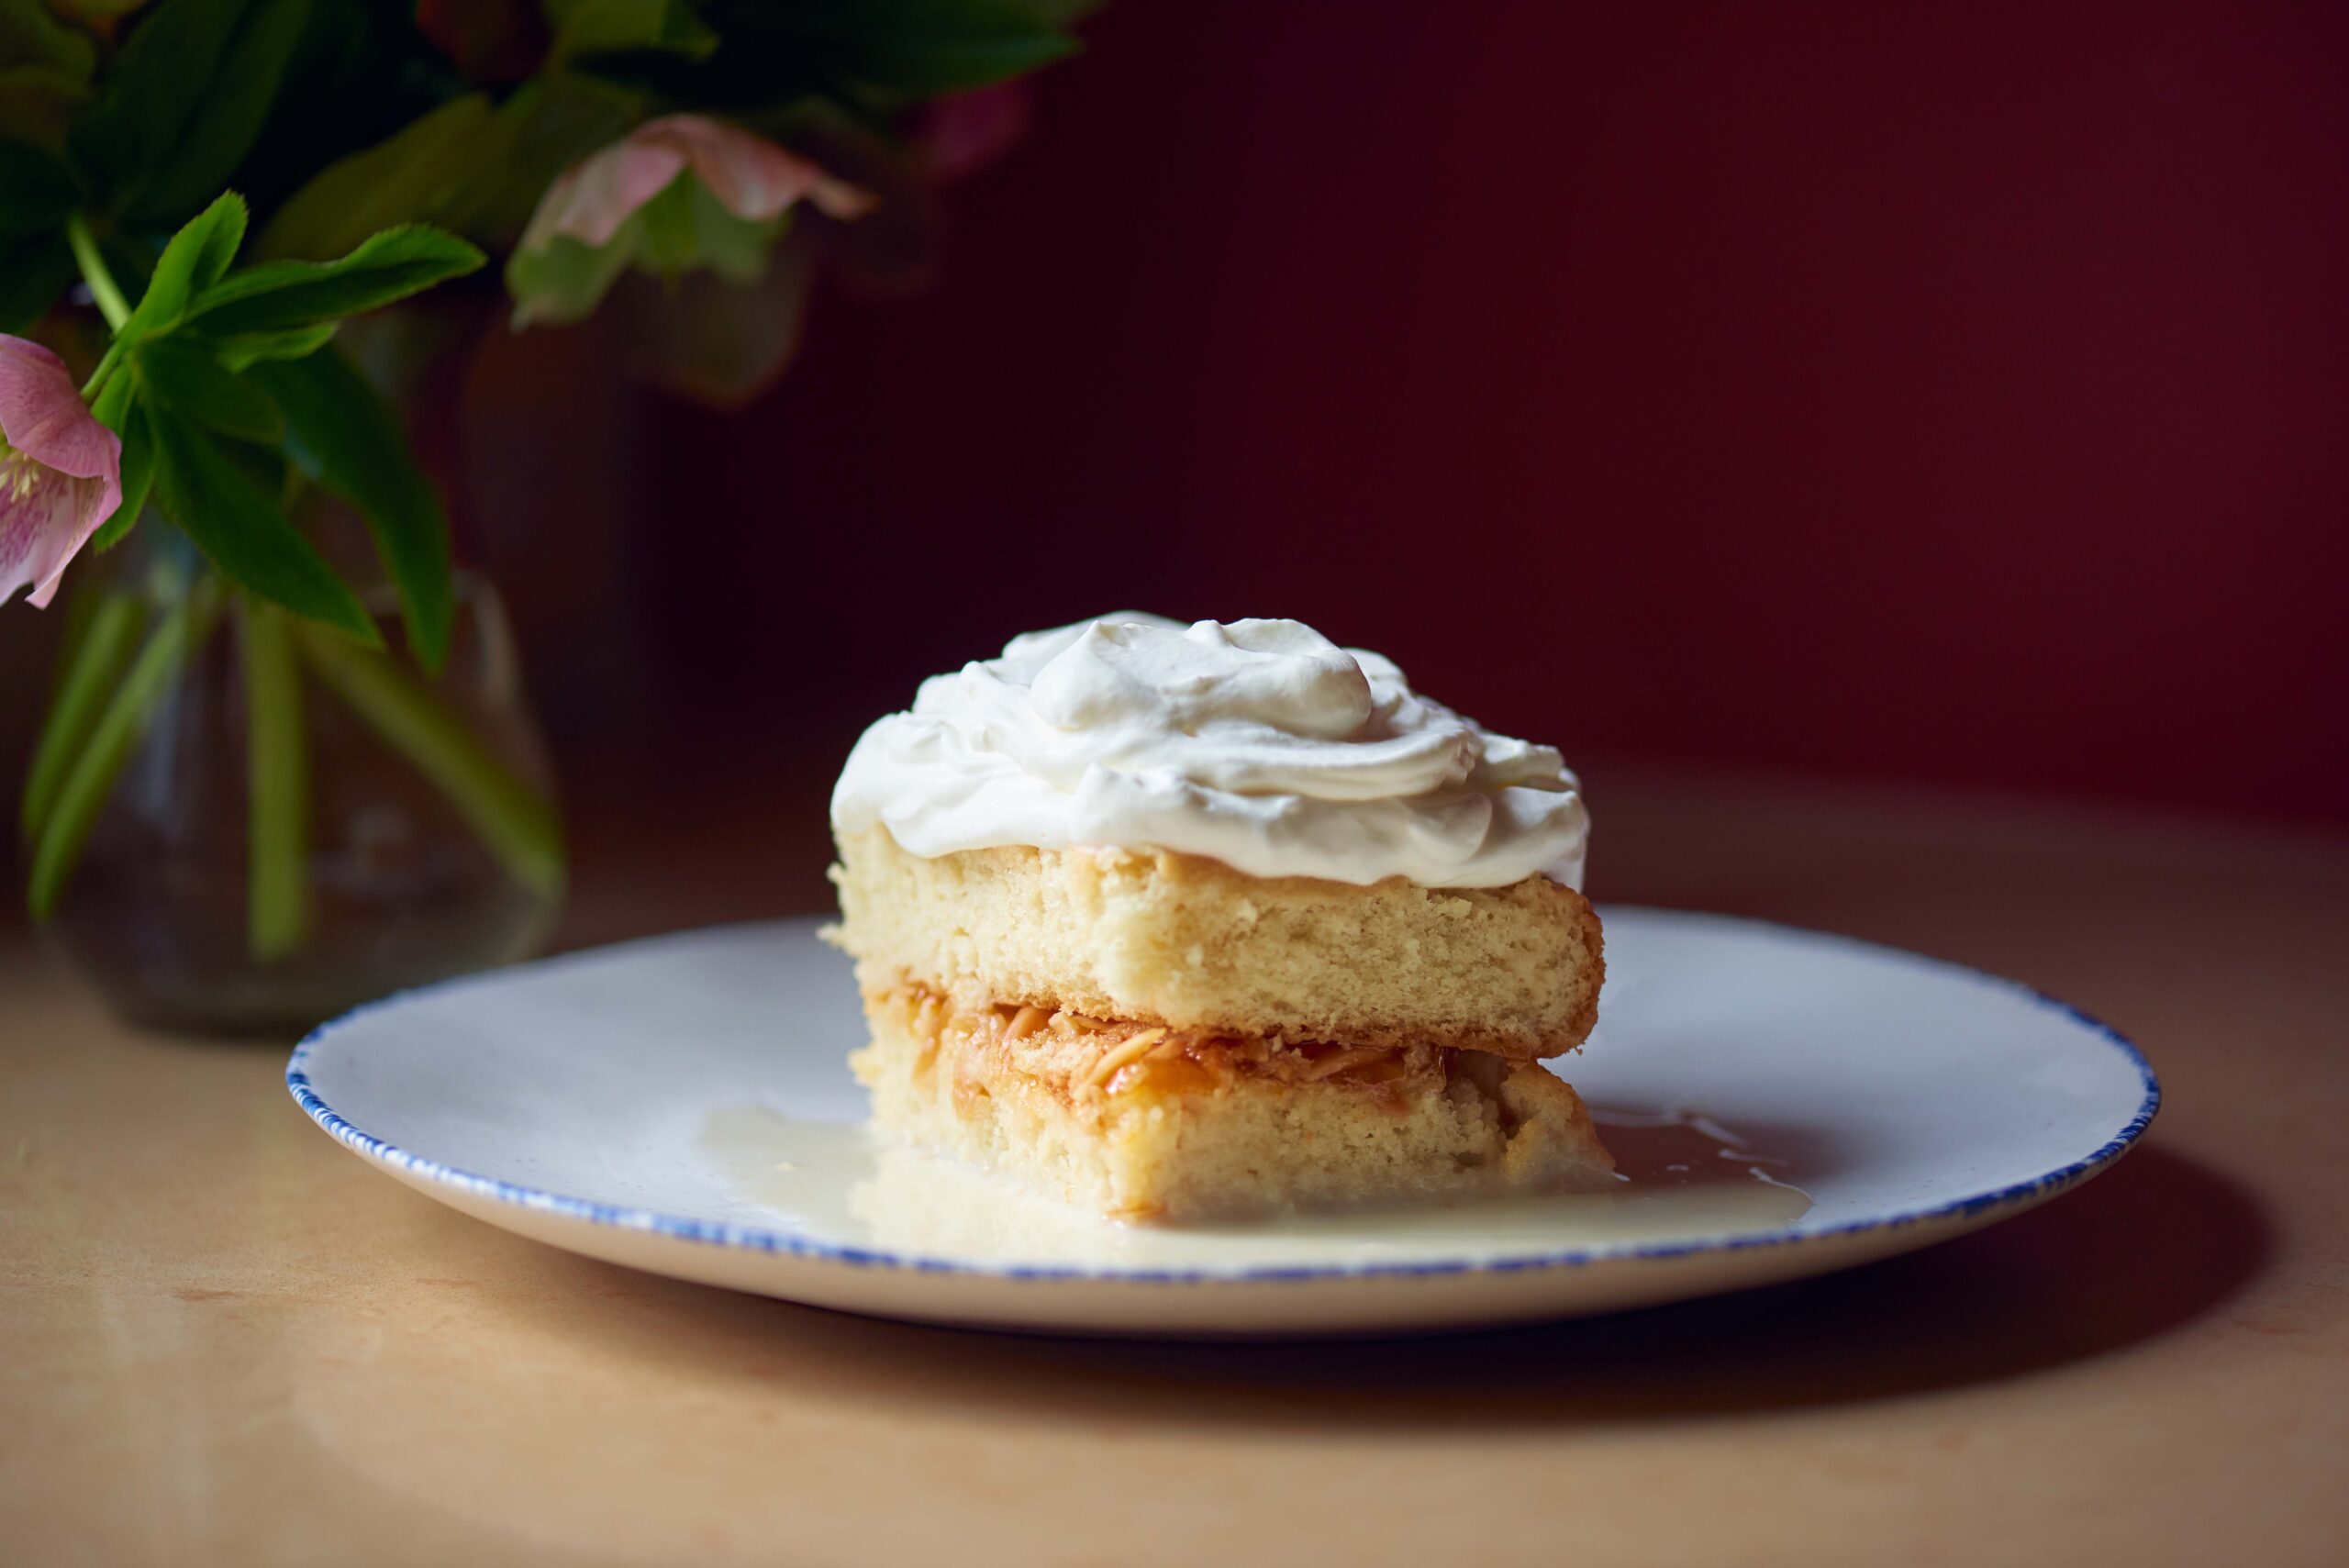
Almond Tres Leches Cake recipe from Pati’s Mexican Table Season 10, Episode 2 “Food Meets Art”
Cook Time20 minutes
Course: Dessert
Cuisine: Mexican
Keyword: almonds, apricot, cake, Eggs, milk
Servings: 1 two-layer 9”x13” cake
Author: Pati Jinich

Ingredients

Cake:

  • 1 1/2 cups (180g) cake flour
  • 1 cup (96g) almond flour
  • 1 teaspoon baking powder
  • 1 teaspoon baking soda
  • 1/4 teaspoon salt
  • 8 large eggs separated
  • 1/2 cup (99g) vegetable oil
  • 3/4 cup (170g) unsweetened almond milk
  • 1 teaspoon almond extract
  • 1 cup (198g) sugar
  • 1 teaspoon cream of tartar

Tres Leches Soak:

  • 1 cup (227g) unsweetened almond milk
  • 1 12-ounce can evaporated milk
  • 1 14-ounce can sweetened condensed milk

To Assemble:

  • 1 cup (340g) apricot jam or marmalade
  • 1 cup (114g) slivered almonds, lightly toasted and chopped
  • All of the Tres Leches Soak from above

Topping:

  • 2 cups (454g) heavy cream
  • 1/4 cup (28g) confectioners’ sugar
  • 2 teaspoons lime zest

Instructions

  • Preheat the oven to 350°F. Lightly grease two 9″x13″ pans; line with parchment and grease the parchment. If you only have one 9”x13” pan, you will need to bake the batter in two batches.

To make the cake:

  • In a medium bowl, combine the flours, baking powder, baking soda and salt. Set aside.
  • In a large bowl, whisk the egg yolks until creamy and pale. Add the oil, almond milk, and almond extract and continue whisking to combine. Fold the dry ingredients into the egg yolk mixture and mix gently until completely combined.
  • In a separate large bowl, using a whisk or a mixer with the whisk attachment, combine the egg whites and cream of tartar and whip until soft peaks form. Slowly add the sugar and continue whipping until stiff peaks form. Gently fold the whipped egg whites into the egg yolk mixture, stirring until no streaks of white show.
  • Divide the batter among the two pans (about 560 grams per pan), gently smoothing the top. Bake for 20 to 22 minutes until a toothpick comes out moist but not wet. Remove the cakes from the oven and let cool completely.

To make the tres leches soak:

  • Whisk together the almond milk, evaporated milk, and sweetened condensed milk. Set aside until you are ready to assemble the cake.

To assemble the cake:

  • Once the cakes have cooled to room temperature, transfer one 9”x13” layer to a large serving platter. You can also assemble and serve the cake from a clean 9”x13” pan if you don’t have a large platter.
  • Poke the cake all over with a fork, and slowly pour on about a cup of the tres leches soak, then spread the apricot jam over the surface. Sprinkle the toasted, chopped almonds over the jam. Place the second 9”x13” layer on top of the first layer and again, poke the cake all over with a fork.
  • Slowly pour half of the remaining tres leches soak over the cakes. Let the liquid seep in for 10 to 15 minutes. Pour the remaining tres leches soak over the cakes, cover, and place in the refrigerator for at least 8 hours, or overnight.

To make the topping:

  • When ready to serve the cake, whip the cream, confectioners’ sugar and lime zest until the cream holds a medium peak. Spread over the top of the cake and serve.
  • Refrigerate any leftover cake, covered, for up to a week.

Notes

Pastel de Tres Leches con Almendras

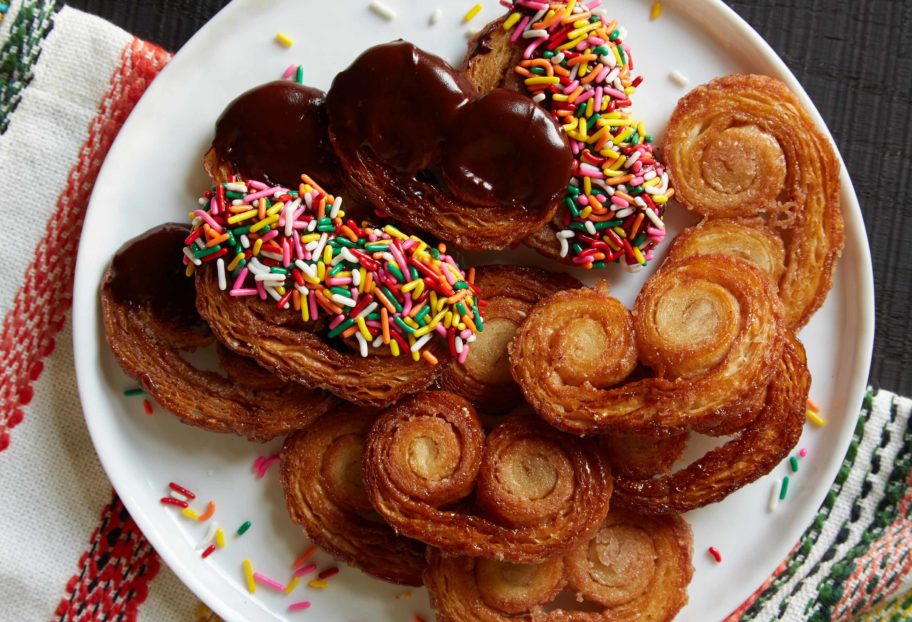
Chocolate Dipped Orejas

Orejas
Print Recipe
3.84 from 6 votes

Chocolate Dipped Orejas

Chocolate Dipped Orejas recipe from Pati’s Mexican Table Season 8, Episode 8 “El Chepe, Railway to the Past”
Prep Time25 minutes
Cook Time15 minutes
Total Time40 minutes
Course: Dessert
Cuisine: Mexican
Keyword: canela, Chocolate, cinnamon, cookies, pati’s mexican table, puff pastry
Servings: 40 orejas approximately
Author: Pati Jinich

Ingredients

  • 1 1/2 cups granulated sugar
  • 1 teaspoon freshly ground canela or true cinnamon
  • 1 large pinch of kosher or sea salt
  • All-purpose flour for dusting the countertop and rolling pin
  • 1 recipe Easy Homemade Puff Pastry
  • 1/2 cup heavy cream
  • 4 ounces dark chocolate chopped, or chocolate chips
  • Rainbow sprinkles optional

Instructions

  • Place racks in the upper and lower thirds of the oven and preheat to 425°Line 4 baking sheets with parchment paper (or cook in batches).
  • Mix the sugar, cinnamon, and salt together in a bowl.
  • Sprinkle a light coating of flour on your countertop, then spread 1 cup of the cinnamon-sugar mixture on top, right where the puff pastry will go. Place the puff pastry in the center of the cinnamon-sugar mixture. Lightly flour your rolling pin and roll the puff pastry out into a large rectangle, about 12-by-26-inches with a 1/4-inch thickness, adding a bit of flour as needed while you roll. Sprinkle the top with the remaining cinnamon-sugar mixture.
  • Mark a line horizontally across the center of the puff pastry with a knife or ruler, without cutting all the way through. Roll the bottom of the puff pastry toward the center line, creating a layered spiral. Repeat with the top of the puff pastry, rolling in toward the center line, then press both rolls towards the center. The shape should resemble a pretzel.
  • Cut in half horizontally, across the two rolls, and wrap in plastic wrap. Place in the refrigerator for at least 30 minutes. Scrape any leftover cinnamon-sugar mixture onto a small plate.
  • Slice the chilled rolls into 1/2-inch slices. Dip both sides of slices in the remaining cinnamon-sugar mixture and place on a baking sheet, making sure to leave about an inch between the slices.
  • Bake for 10 to 12 minutes, then remove from the oven, flip the orejas, and return to the oven (swapping the baking sheet that was on top with the bottom). Bake for 10 to 12 minutes more, until both sides are golden brown. Transfer to a metal cooling rack and cool completely.
  • While the orejas are cooling, bring the heavy cream to a simmer in a small pot. Place the chocolate in a medium heatproof bowl and pour the hot cream over the chocolate. Let sit for 5 minutes, then stir until smooth. If using rainbow sprinkles, place them on a small plate.
  • Dip the tops of the orejas in the chocolate. If using rainbow sprinkles, lightly press the chocolate-dipped side into the sprinkles and return to the rack. Repeat with about half of the remaining cookies, leaving some plain, some chocolate dipped, and some dipped and with sprinkles.
  • Note: If you do not want to bake all of them at once, you may store the rolled oreja dough tightly wrapped in the refrigerator for a couple days, or freeze in a tight plastic bag for up to a month. Thaw in the refrigerator before baking.

Notes

Orejas con Chocolate