Lunch

Guest: Cristina Potters’ Refried Beans

In this post, I have invited Cristina Potters to be a guest and share one of her favorite recipes. Cristina is the author of Mexico Cooks!, a culinary and cultural website about all things Mexico. She is also known for giving outstanding tours. 

A Chicago native who arrived in Mexico in 1981, she was first a social worker in Tijuana.  Now, after 30 years, she is a permanent fixture in Morelia, Michoacan.  She learned the cuisines of the central highlands of Mexico from the Mayoras (Michoacan home cooks). Now, without further ado, here is Cristina…

I’d like to offer my personal recipes for frijoles refritos and frijoles de la olla. The following recipe for refried beans is not only simple and delicious; it converts people who turn up their noses at ordinary refried beans into folks who insist on another helping!

Christina Potters Refried Beans 1

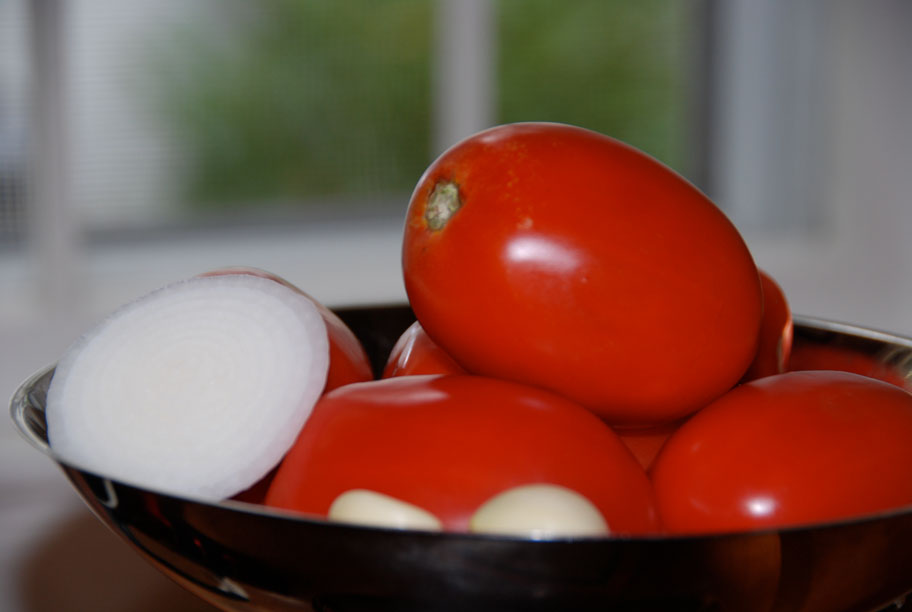
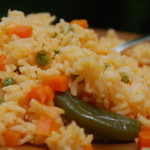
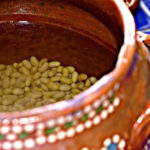
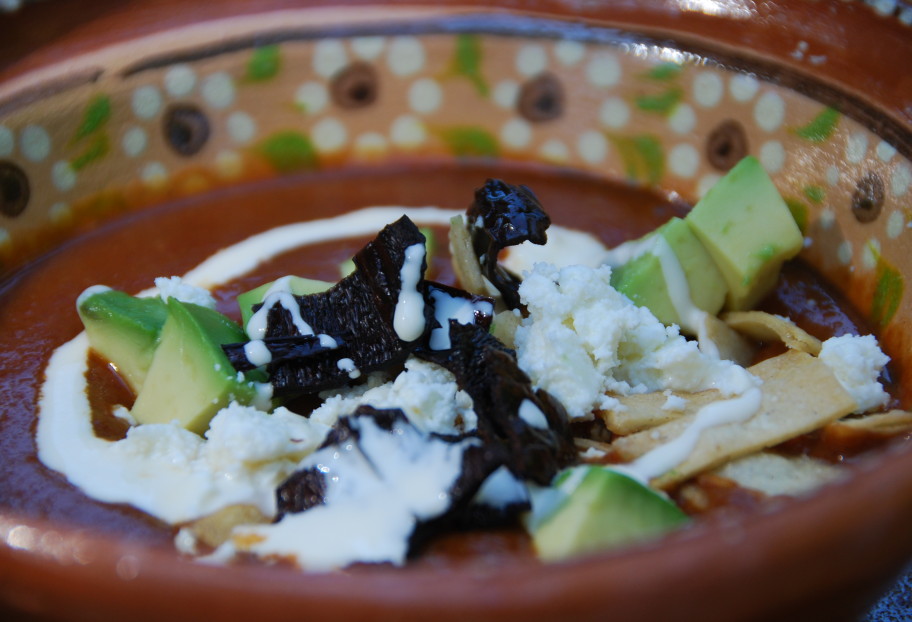
In central Mexico, the most commonly eaten bean is the peruano (peh-roo-AH-noh), an oval, yellow bean that cooks to a pale beige color with a creamy consistency.  I like frijoles de la olla (freshly cooked beans, straight from the pot) served with a big spoonful of salsa fresca (chopped tomato, minced onion and chile serrano, salt, and roughly chopped cilantro).  I often steam white rice, fill a bowl with it, add frijoles de la olla, salsa fresca, and crumble cotija cheese and call it comida (main meal of the day).

Cristina Potters Refried Beans 2

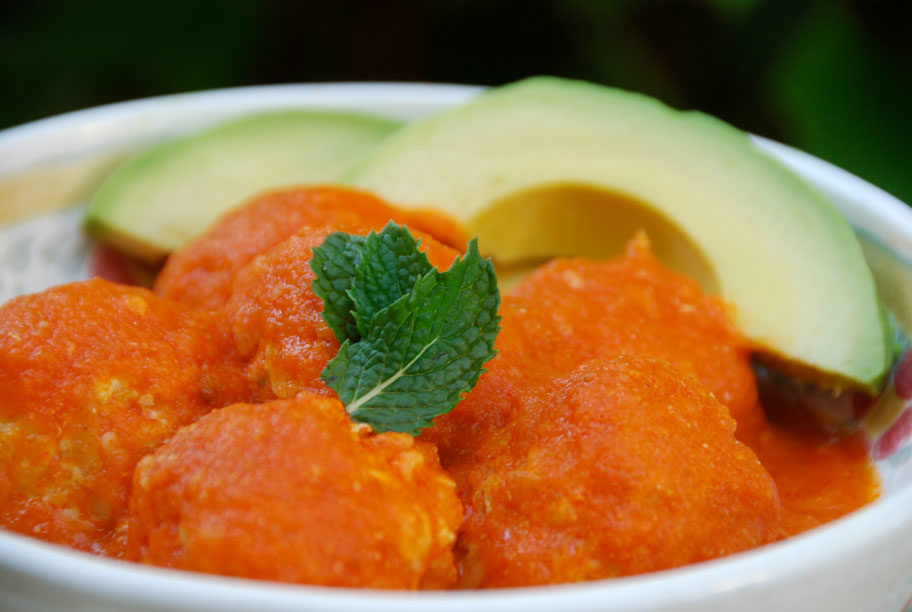
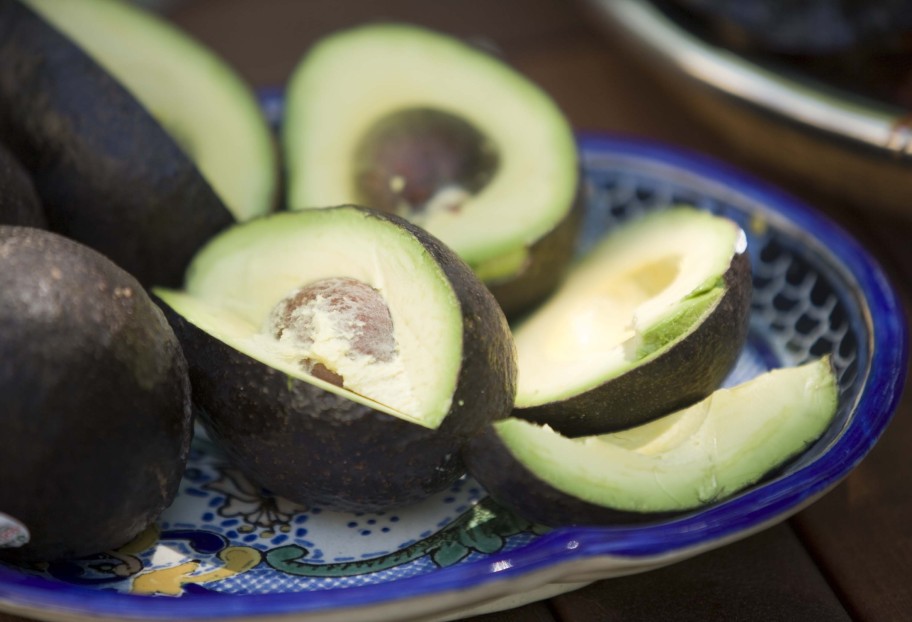
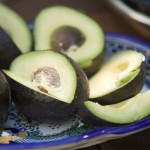
For breakfast, I often prepare frijoles refritos (refried beans).  Served with scrambled eggs, sliced Mexican avocado, and a stack of hot tortillas, beans are a great way to start the morning.

Here’s some fun bean trivia: frijoles refritos doesn’t really mean ‘refried’ beans. Mexican Spanish often uses the prefix ‘re-‘ to describe something exceptional.  ‘Rebueno’ means ‘really, really good’.  ‘Refrito’ means–you guessed it–well-fried.

Frijoles de la olla are very easy to cook and the fresh-cooked flavor is a million times better than canned beans! In my kitchen I prepare about a pound of dried beans at a time.  After cooking, I serve some as frijoles de la olla, prepare some as refried beans, and freeze the rest in plastic sandwich bags.  The cooked beans and their pot liquid freeze very well.

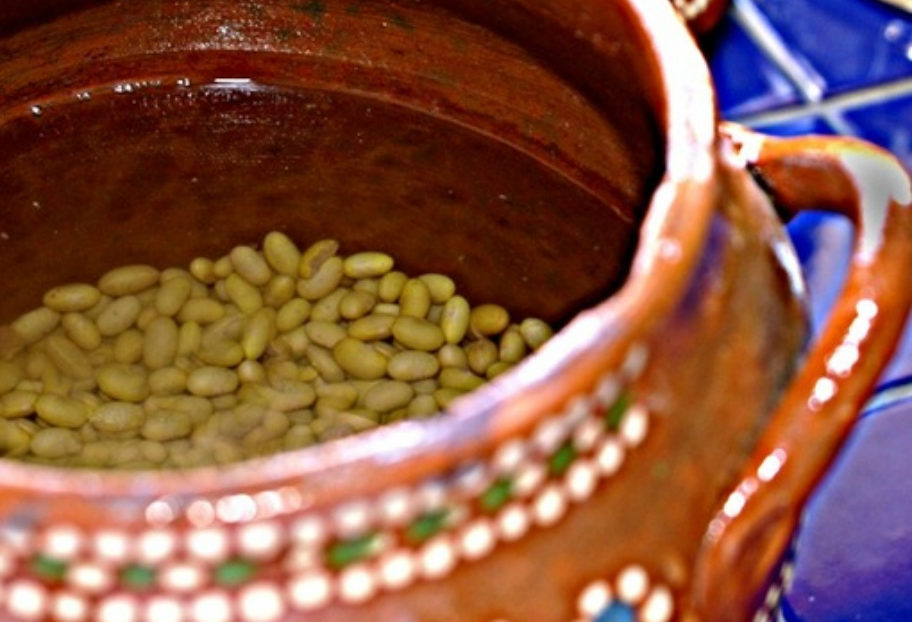
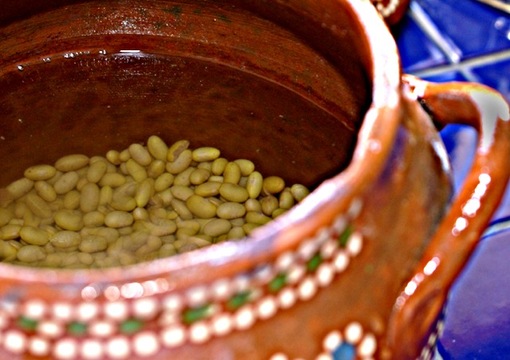
To make frijoles de la olla, the traditional cooking method I use has no onions, no garlic, no salt, and no other seasonings–just water and dried beans. First, pick carefully through your beans.  Put the cleaned beans in a strainer and wash well under running water.  Now, to soak or not to soak?  I have tried both soaking and not soaking and have noticed that the cooking time is about the same either way. I never soak my beans.  My olla de barro (clay bean pot) holds about a half kilo of frijol plus enough water to cook them.  If you don’t have an olla de barro, a heavy metal soup pot will work almost as well.  After the beans are in the pot, add 6 to 8 cups of cold water.

Over a high flame, bring the pot of beans to a rolling boil.  Turn the flame to a medium simmer and cover the pot.  Allow the beans to cook for about an hour and check the water level.  If you need to add more water, be sure it is boiling before you pour it into the bean pot; adding cold water can cause the beans to toughen.  Continue to cook the beans until, when you bite into one, it is soft and creamy.  The pot liquid will thicken slightly.

Cristina Potters Refried Beans 3
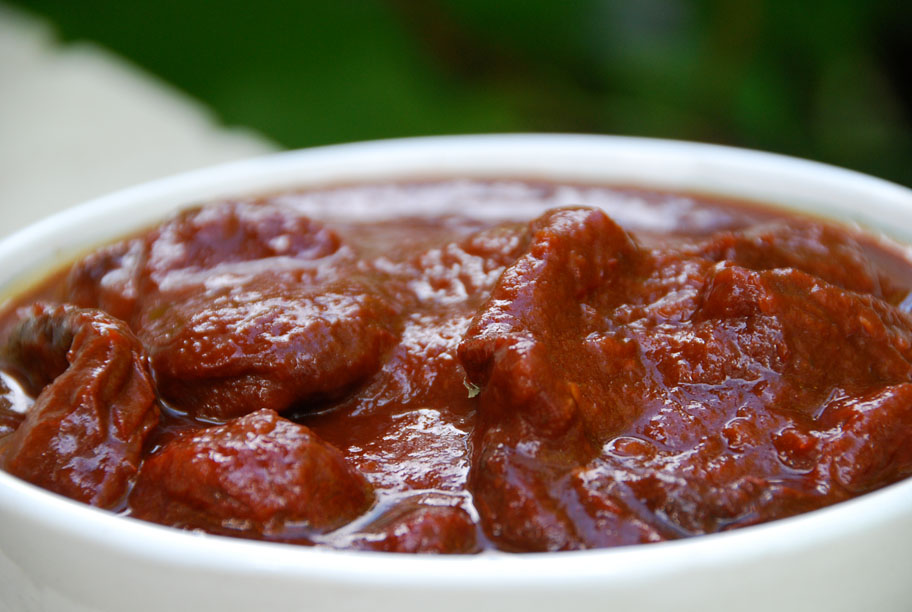
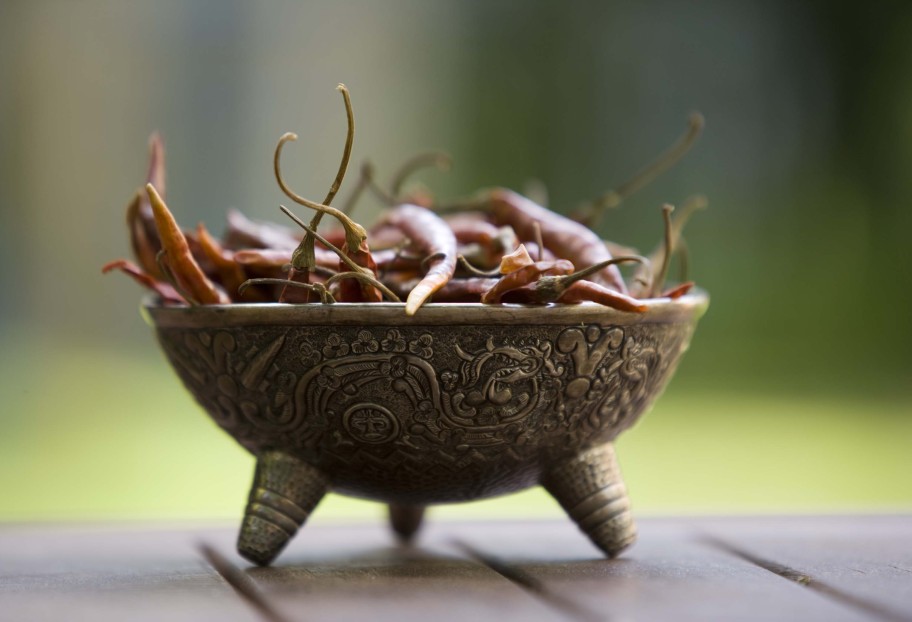
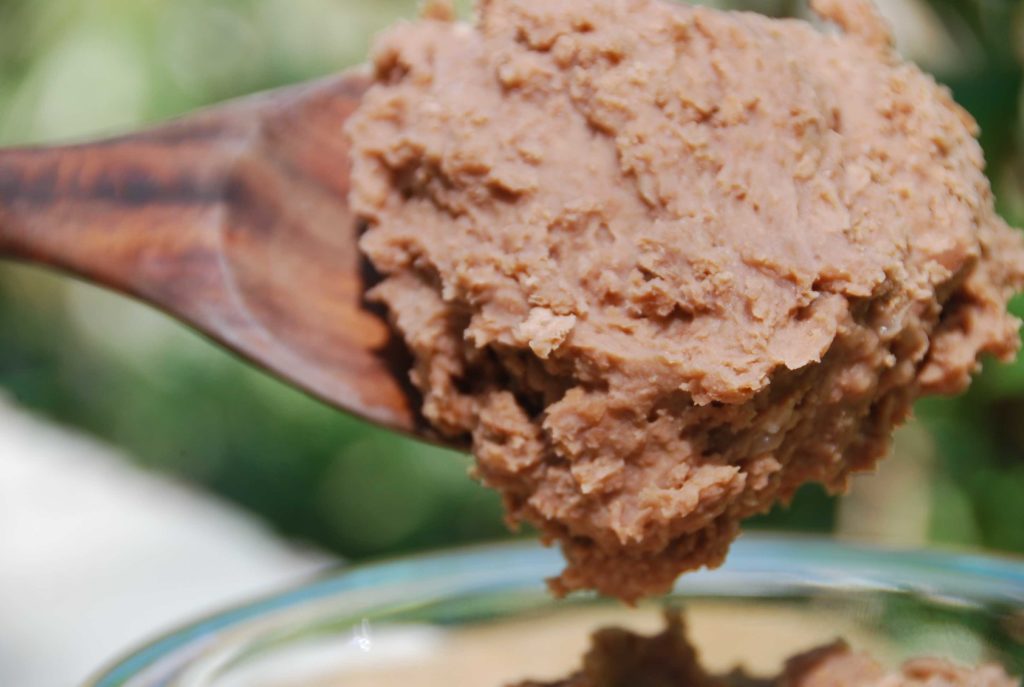
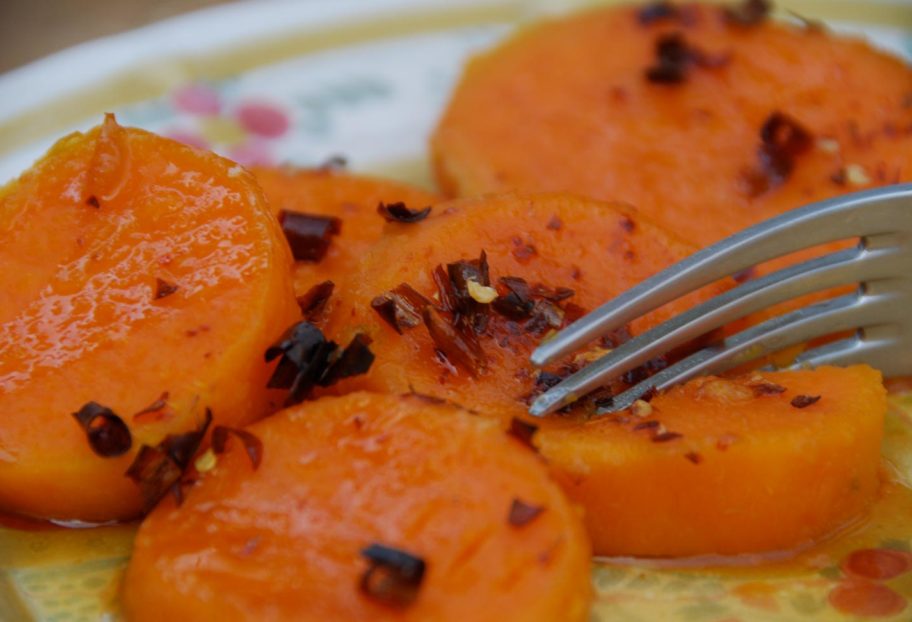
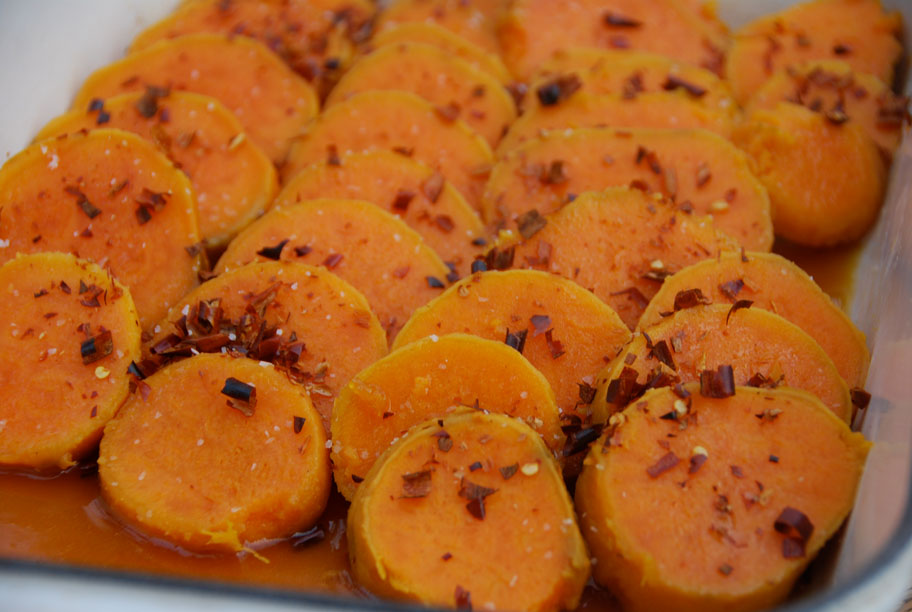
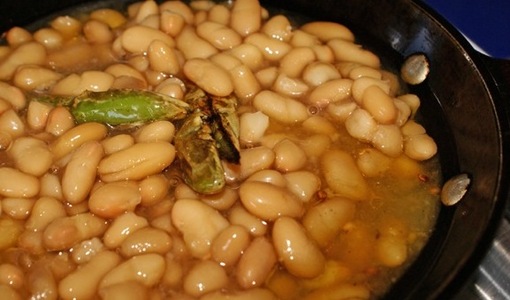
(Frijoles de la Olla, already cooked over the fried chilies, ready to be turned into refried beans)

Now’s the time to salt your beans–after cooking, but while the beans are still hot. I use Espuma del Mar (Mexican sea salt from the state of Colima) for its wonderful sweetly salty flavor, but any salt will do.  Add a little less salt than you think is correct–you can always add more later, and you don’t want to over salt your beans.

If you live in the United States or Canada, you’ll want to order the fabulous heritage dried beans sold by Rancho Gordo.  Its owner, my friend Steve Sando, has nearly single-handedly brought delicious old-style beans to new popularity in home and restaurant kitchens.  If you’ve tasted ordinary beans and said, “So what?”, try Rancho Gordo beans for a huge WOW! of an eye opener.

Following is a recipe for turning these frijoles de la olla into refried beans.

Cristina Potters Refried Beans 4 
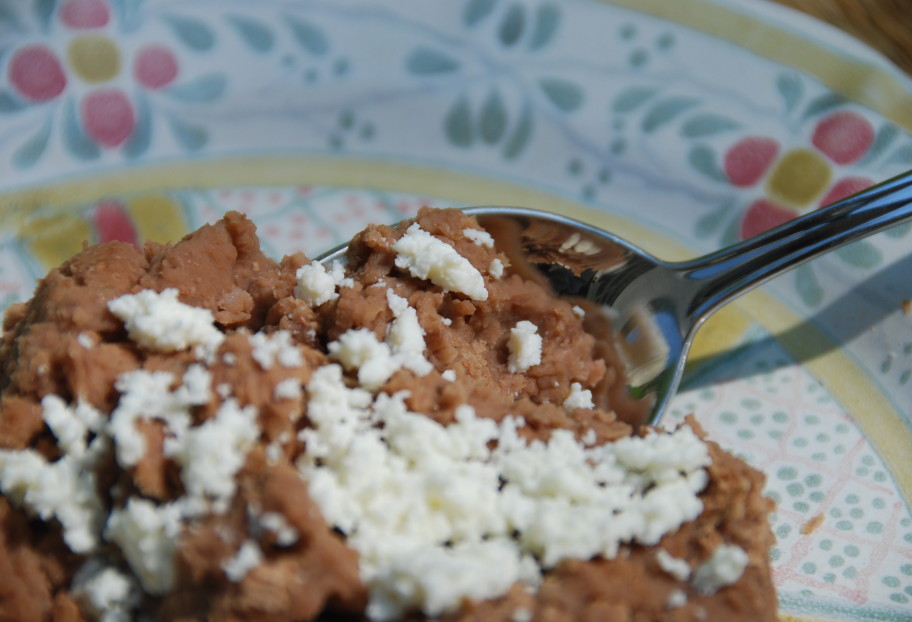
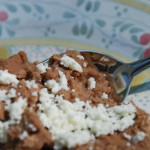
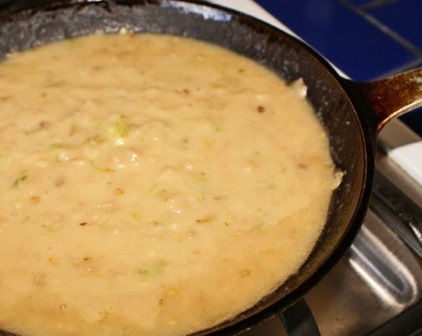
(Refried beans ready to eat)

Christina Potters Refried Beans Main
Print Recipe
4.20 from 5 votes

Refried Beans

I’d like to offer my personal recipes for frijoles refritos and frijoles de la olla. The following recipe for refried beans is not only simple and delicious; it converts people who turn up their noses at ordinary refried beans into folks who insist on another helping!
Prep Time2 minutes
Cook Time10 minutes
Course: Side Dish
Cuisine: Mexican
Keyword: beans, Peruvian beans, pinto beans, refried beans, serrano chiles
Servings: 6 servings
Author: Pati Jinich

Ingredients

  • 3 cups recently cooked frijoles peruanos de la olla
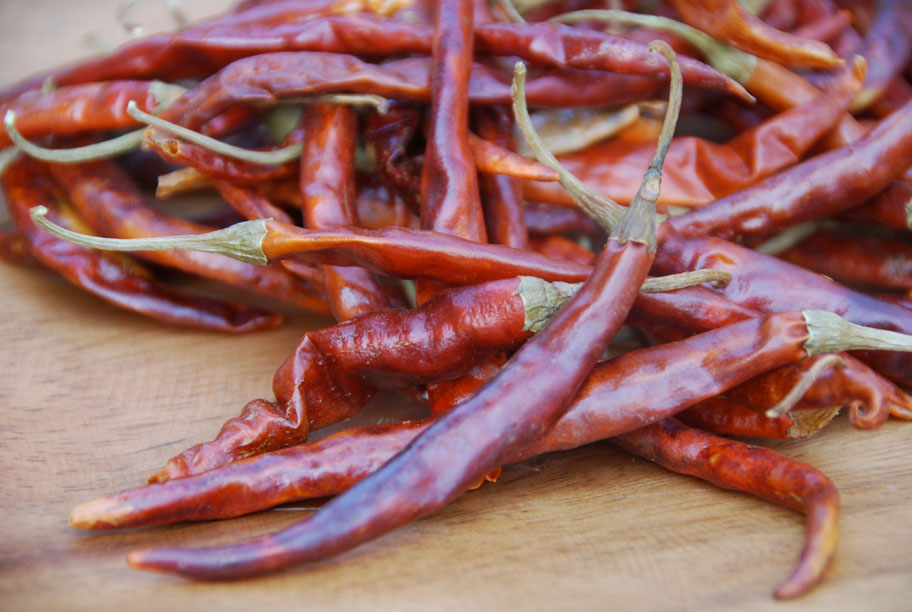
  • 1 or 2 chiles serranos depending on your heat tolerance
  • 1 or 2 tablespoons lard or vegetable oil -- preferably lard and definitely NOT olive oil
  • Bean cooking liquid
  • Sea salt to taste

Instructions

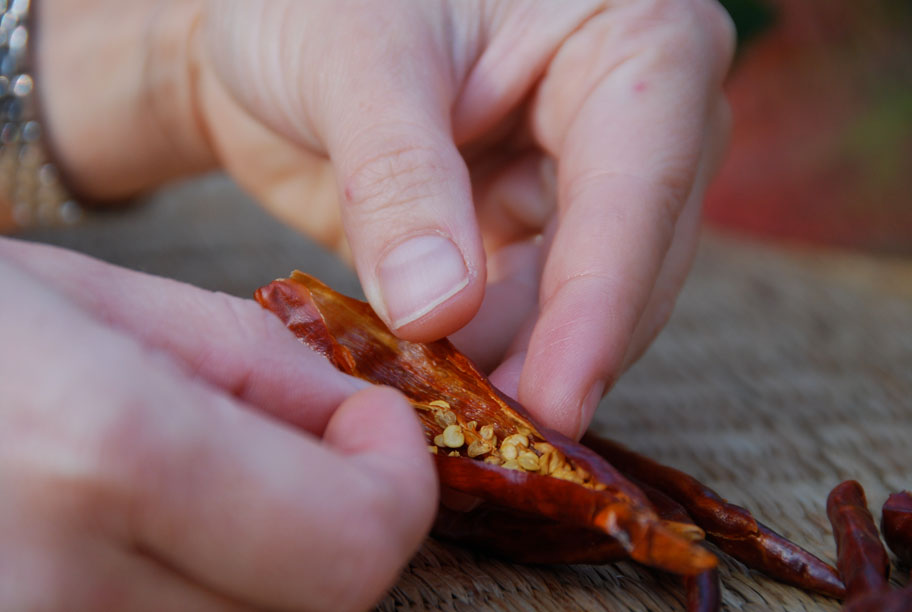
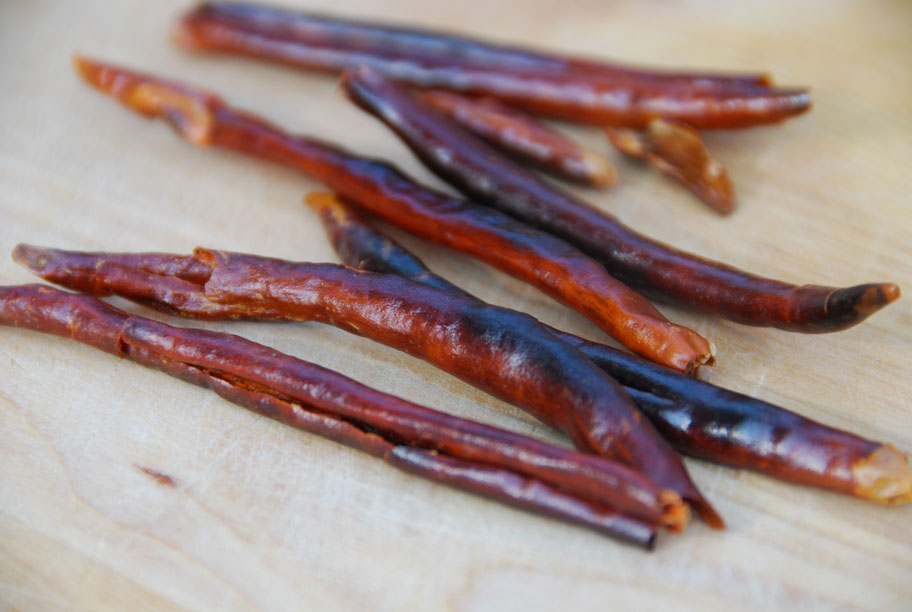
  • Melt the lard in an 8-inch skillet. Split the chile(s) from the tip almost to the stem and add to the melted lard. Saute over a medium flame until the chile is dark brown, almost black. Allow the lard or oil and chile to cool a bit before the next step.
  • Now add the beans and a little of the bean liquid. When the beans begin to simmer, mash them and the chile with a potato or bean masher until they are smooth. Add more liquid if necessary to give the beans the consistency you prefer. Add sea salt to taste, stir well, and serve.

Notes

Frijoles Refritos

Sweet potatoes with orange-piloncillo syrup and chile de árbol

Our friends Tamara and Sean are crazy foodies and fans of the richness and versatility of chilies. So after receiving the invitation to join them next week for their Thanksgiving feast, I started playing with options on what to bring; with chilies of course.

This is one of the things I came up with and can’t wait for them to try:  creamy and soft sweet potatoes bathed in a buttery orange-piloncillo syrup sprinkled, with toasted chile de arbol. How good are they? That fork in the picture I just shot accounts for my third consecutive serving today. How easy are they to make? Read below…

sweet potatoes
I am fond of sweet potatoes. Called camotes in Mexico, and eaten since Pre-Hispanic times, they tend to be eaten with a sweet spin. The most popular versions are either steamed and drizzled with sweetened condensed milk, honey or syrup as the plantains I recently posted; or cooked into a sweetened paste, molded, caramelized and turned into addictive candies.

However, they are also cooked in many other ways. Through my travels and research I have tasted them in soups, puddings, warm salads, purees and even flans. Yet one of my favorite versions is how my mother makes them.

syrup ingredients for sweet potatoes with chile de arbol

She boils, peels and slices them. Then she adds chunks of butter, brown sugar or piloncillo, chile de arbol and into the oven they go. I started from her idea, but opted to make a syrup with what you see in the photo above: butter, brown sugar or shredded piloncillo, orange and lime juice for an extra layer of flavor.

Its simple: just place those ingredients in a saucepan over medium-low heat. Once the butter dissolves, let the mix turn into a light syrup, which takes about 4 minutes of gentle simmer. This syrup is so good, it could be drank out of a cup…

Instead of drinking it all…  you can drizzle most of it over the sliced sweet potatoes in a buttered baking dish. For an incredibly earthy, deep and spicy kick, sprinkle some toasted and chopped chile de arbol on top.

If you are not familiar with the chile de arbol, this is what they look like.

chiles de arbol

Chile de arbol have become widely available outside of Mexico. They are thin, elongated, have a beautiful red/orange color, and are spicy with a rich, deep flavor.

To use them for this dish just remove the stems, make a slit down their sides and take the seeds off. See how I am opening them up? The seeds just come right off. It takes a minute.

opening chile de arbol

In an already hot dry skillet or comal set over medium-low heat (takes 3 to 4 minutes to heat up), toast the chilies for about 20 to 30 seconds on each side. Their inner skin will become opaque, they will let some aroma loose, and their outside skin will gain a toasty dark brown tan. Be careful not to let them burn all over.

They should look similar to this…

toasted chiles de arbol

Then, just give them a friendly chop. And after you do, wash your hands with soap and water… you don’t want to rub your eyes with chile de arbol. If you made more than you need, store them in a closed bag or container. They will keep forever.

Once you drizzle the syrup and sprinkle the chopped chile de arbol, add a bit of salt on top. Place in a 425 degree oven for 15 to 20 minutes. And you are set.

sweet potatoes with chile de arbole in baking dish

Ok, that’s before my fork went in!  These are sweet potatoes with a delicious citrusy sweet spin and a flavorful spicy kick.

By boiling the sweet potatoes before placing them in the oven, you are getting a creamy and soft texture that can’t be achieved by just roasting them in the oven. The quick finish in the oven, thickens the syrup further as it gives the already soft sweet potatoes a nicer outer finish. It is a great combination. I might as well finish what’s on the plate…

Pati Jinich sweet potatoes with chile de arbol
Print Recipe
4.80 from 5 votes

Sweet potatoes with orange-piloncillo syrup and chile de árbol

This is one of the things I came up with and can’t wait for them to try:  creamy and soft sweet potatoes bathed in a buttery orange-piloncillo syrup sprinkled, with toasted chile de arbol. How good are they? That fork in the picture I just shot accounts for my third consecutive serving today. How easy are they to make? Read below…
Prep Time10 minutes
Cook Time45 minutes
Course: Side Dish
Cuisine: Mexican
Keyword: chiles de arbol, lime, orange juice, piloncillo, Potato, Recipe, sweet potato, Vegetarian
Servings: 4 to 6 servings
Author: Pati Jinich

Ingredients

  • 3 pounds sweet potatoes
  • 1/2 cup orange juice preferably fresh
  • 2 tablespoons fresh squeezed lime juice
  • 3/4 cup grated piloncillo or brown sugar
  • 1/4 cup 2 ounces unsalted butter
  • 4 to 6 chiles de arbol stems and seeds removed, toasted and chopped
  • 1/4 teaspoon kosher or sea salt more or less to taste

Instructions

  • Rinse and scrub the sweet potatoes. Place them in a large pot, cover them with water, over medium heat. Once it comes to a boil, reduce heat to low, cover the pot, and let it simmer for about 25 to 35 minutes. You will know they are ready, just like with boiling potatoes, when the tip of a knife can easily go through. Drain and let cool.
  • Remove the stems from the chile de arbol, make a slit down their sides and take out the seeds. On a preheated comal or dry skillet over medium-low heat, toast the chiles for about 20 to 30 seconds per side. Their inner skin will have become opaque and the outer skin will achieve a brown tan. Be careful to not let them burn.
  • To make the syrup, place the butter, piloncillo or brown sugar, orange and lime juice in a sauce pan over medium-low heat. Once the butter dissolves, let it simmer 4 to 5 minutes until it gains a light syrupy consistency.
  • Preheat the oven to 425 degrees and butter a baking dish (I use a 9" x 13").
  • Once the sweet potatoes have cooled, peel and slice them into about 1/2 to 1 inch rounds. Layer them in rows, pour the syrup on top, sprinkle the toasted and chopped chile de arbol and sprinkle some salt on top. Place the dish in the oven and bake anywhere from 15 to 20 minutes. Halfway through, spoon some of the syrup on top of the sweet potatoes. Bake them until the syrup has thickened to your liking and they have achieved a glazed crust. They are specially delicious if eaten while still hot.

Notes

Camote con Jarabe de Piloncillo y Chile de Arbol

Foods of Michoacan are Forever

You know how some people become attached to a certain dish? They try it somewhere once and then want to go back to eat it again and again, or they make it at home repeatedly in an until-death-do-us-part kind of vow? Well, I am one of those people, and I have made that vow with quite a few dishes from the Mexican state of Michoacan. It surprises me how Michoacan’s cuisine has remained such a well-kept secret. It has a defined personality and a complex layering of delicious flavors like the more popular cuisines from Oaxaca and Puebla, but its dishes seem to be a bit more comforting and use fewer ingredients.

What’s more, some of Michoacan’s basic ingredients, such as pasilla chiles, tomatillos, cotija cheese and fruit pastes, have become readily available in stores outside of Mexico.

My love for Michoacan is inevitably tied to its food, but it goes well beyond its kitchens. The first time I went to Michoacan as a little girl, it had such an impact on me that whenever our family planned a trip, I begged my parents to return there. It wasn’t only the enchanting cobbled streets, the immense wooden doors framed in cantera stone, the aromas of freshly made breads and ground mountain coffee, or the town squares filled with dozens of home-style ice cream carts and sweets stands, all surrounded with colorful balloons and birdseed sellers. There was something more.

I returned a couple of decades later, as a production assistant for a traveling cooking show. It was breathtaking. As we researched for and filmed foods prepared for Day of the Dead — a Mexican holiday celebrated this week — we traveled from town to town, sampling delicate and simple dishes in the markets filled with fresh ingredients and goodies that women brought in baskets and set down on mats on the floor.

In the cities surrounding the Patzcuaro Lake area, we saw the famous fishermen using their immense nets, which seemed to fly off into the sky, before sunrise. We tasted to-die-for fish soups, meat stews, tamales and sweets that cooks prepared for this occasion.

Day of the Dead is one of Mexico’s most meaningful celebrations, and Michoacan is a spectacular place to experience it, partly because of its beauty and cuisine, but also because of the richness and depth of its centuries-old traditions.

The Purepechas, also called Tarascos, who remain the predominant indigenous group of the region, believed since pre-Hispanic times that the dead return once a year to visit those they miss. Centuries of intermarriage between Purepecha, Spanish and Catholic Church traditions and ingredients resulted in an eclectic mix of rituals and exquisite foods.

Last year, a decade after my second trip, I returned to Michoacan to do further research for the culinary program I teach at the Mexican Cultural Institute in Washington, D.C. We brought our three young sons, and I was eager to share with them the things and foods I had been fascinated with on previous trips. Yet as soon as we unpacked, it became clear that there was so much more to taste and learn. I experienced new things along with my boys.

After a stay in Morelia, the colonial capital where we tasted traditional and modern spins of Michoacan cuisine, we spent a sweet time in the small town of Santa Fe de la Laguna among a Purepecha community. Some of the women fed us their traditional foods and invited us into their kitchens to teach us how to make those dishes. They also taught our boys, with so much patience and tranquility, how to work with their traditional black and green clay.

Upon our return, I finally realized what makes the cuisine of Michoacan distinctive: its people. Michoacanos are generous, warm, hospitable and caring. No wonder the state is known as “the soul of Mexico.” And it is a beautiful soul for Mexico to have. The more I cook, the more I am convinced that the food of a place resembles the characteristics of its people. If asked to define in one word the cuisine from Michoacan, I would say “soulful.”

In my until-death-do-us-part vow with the food of Michoacan, I shall keep sharing and cooking what I have learned from its cuisine until I am able to go back to explore and eat some more. What’s more, if I’m given a license to come back from another world for Day of the Dead, I will happily feast on this menu with the people I love.

Article written for and published by National Public Radio’s Kitchen Window.

tarascan soup
Print Recipe
4.45 from 9 votes

Tarascan Pinto Bean and Tomato Soup

Tarascan Soup Pinto Bean and Tomato Soup, from Pati’s Mexican Table Season 7, Episode 12 "Photographic Food Memories"
Prep Time5 minutes
Cook Time30 minutes
Total Time35 minutes
Course: Soup
Cuisine: Mexican
Keyword: beans, pati’s mexican table, pinto beans, Recipe, soup, Vegetarian
Servings: 6 to 8 Servings
Author: Pati Jinich

Ingredients

For soup:

  • 1 pound ripe plum or roma tomatoes
  • 1 clove garlic
  • 1 (about 1 ounce) ancho chile, stem and seeds removed
  • 1/2 cup white onion, coarsely chopped
  • 1 1/2 teaspoons kosher or sea salt divided, or more to taste
  • 3 tablespoons safflower or corn oil
  • 1 pound cooked pinto beans plus 2 cups of their cooking liquid or 2 14-ounce cans cooked pinto beans plus 2 cups water
  • 3 cups chicken broth vegetable broth or water

For garnishes:

  • 1/2 cup Mexican style cream
  • 1 cup crumbled Cotija cheese
  • 1 1/2 cups crumbled tortilla chips or tortilla strips
  • 1 ancho chile stemmed, seeded, diced, deep fried for a few seconds
  • 1 avocado, peeled seeded, meat scooped out and diced, optional

Instructions

  • Place the tomatoes, garlic, and ancho chile in a saucepan. Cover with water, and simmer over medium-high heat for 10 to 12 minutes, until the tomatoes are completely cooked through and ancho chile is rehydrated.
  • Transfer the tomatoes, garlic, and ancho chile to a blender or food processor, along with 1 cup of the cooking liquid, the white onion, and 1 teaspoon of the salt. Puree until smooth.
  • Heat the oil in a large soup pot over medium-high heat. Add the pureed tomato mixture and cook for 6 to 8 minutes, stirring occasionally, until it darkens in color and thickens in consistency.
  • Meanwhile, rinse your blender or food processor, then add the pinto beans and 2 cups of their cooking liquid (or water, if using canned beans) and puree until smooth.
  • Reduce the heat to medium and stir the bean puree, broth and the remaining ½ teaspoon of salt into the thickened tomato mixture. Simmer for 10 to 15 minutes, or until the soup has seasoned and has a creamy consistency. Taste for salt and add more if needed. Turn off the heat, as it thickens quickly.
  • Ladle the soup into bowls, drizzle with a tablespoon of the cream and top with some cheese, a handful of crumbled tortilla chips or tortilla strips, a few fried ancho chile crisps and some diced avocado. You can also place the garnishes in bowls on the table to let your guests decide how much of each garnish they want to add to their bowls.
  • The soup itself may be cooled and stored in a tightly sealed container in the refrigerator for up to 4 days. Because this soup thickens a bit as it cools, you may need to add some chicken broth or water to thin it out when you reheat it.

Notes

Sopa Tarasca
Print Recipe
4.80 from 5 votes

Brisket in Pasilla Chile and Tomatillo Sauce

This is by far, the best brisket I’ve ever had. The meat chunks gain a nutty brown crust as they cook, yet as you take a bite they fall apart in your mouth. And the sauce, thick, a bit tart, a bit spicy and wholeheartedly rich, enhances the flavor of the meat. It is a dish with a flavor hard to forget: it has loads of personality.
Prep Time10 minutes
Cook Time4 hours 15 minutes
Course: Main Course
Cuisine: Jewish, Mexican
Keyword: beef, chile, garlic, Jewish Mexican, pasilla, pati’s mexican table, piloncillo, Recipe, tomatillos
Servings: 6 to 8 servings
Author: Pati Jinich

Ingredients

  • 3 pounds trimmed brisket of beef rinsed and cut into about 2-inch chunks (leave some fat on!)
  • 5 garlic cloves peeled
  • 5 peppercorns
  • 2 teaspoons kosher or sea salt divided (plus more to taste)
  • 1 pound tomatillos husks removed and rinsed
  • 3 ounces black or pasilla chiles (may sub for New Mexico chiles) stems and seeds removed
  • 3 tablespoons corn or safflower oil
  • 1/2 cup white onion chopped
  • 1 cup boiling water
  • 2 cups meat cooking liquid
  • 2 to 3 tablespoons grated piloncillo or dark brown sugar
  • Chopped white onion and cilantro leaves optional garnish

Instructions

  • Place meat chunks in a large cooking pot along with 5 garlic cloves, peppercorns and salt. Cover with water, bring to a boil, cover partially and simmer over medium heat for 3 hours, or until meat is very soft. Drain and reserve 2 cups of its cooking liquid.
  • Meanwhile, char or roast the tomatillos on a baking sheet under the broiler, or directly on the comal or dry skillet or grill over medium heat, for about 10 minutes, turning 2 or 3 times. Tomatillos are ready when their skin is blistered and lightly charred, and their flesh is soft, mushy and juicy.
  • Toast chiles on a hot comal or dry skillet over-medium heat for 5 to 10 seconds per side. Chiles will release their aroma and become more pliable, and their inner skin will become a bit opaque. Don’t let them burn.
  • Place toasted chiles and roasted or charred tomatillos in a bowl and cover with 1 cup boiling water and 2 cups of reserved meat cooking liquid (if you don’t have 2 cups, add more water). Let this mixture soak for at least a half-hour and up to 4 hours. Pour the mixture into the blender or food processor, puree until smooth and reserve.
  • Add 3 tablespoons of corn or safflower oil to the same pot in which meat was cooked, and heat over high heat until hot but not smoking. Add cooked meat chunks and brown them, 2 to 3 minutes. Reduce heat to medium, add the chopped onion, and stir as you continue to brown the meat for another 2 to 3 minutes.
  • Incorporate pureed chile mixture, a teaspoon of salt and the piloncillo or brown sugar. Stir and simmer over medium heat for about 10 more minutes. The meat should be completely tender, yet still in chunks. The sauce should be thick enough to coat the back of a wooden spoon, but not pasty. Taste for salt and add more if need be. To serve, you can garnish with some raw chopped onion and cilantro leaves.
  • If there is any meat left over, you can cool, store and refrigerate it in a closed contained and then reheat, covered over a low simmer.

Notes

Carne Enchilada
tarascan bean and tomato soup
Print Recipe
5 from 4 votes

Cheesecake with Guava

In Mexico, a favorite dessert is to pair sweet slices of guava or other fruit pastes called ates with savory slices of cheese. Cheesecake with guava paste is a modern take on this combination. We tried it for the first time in the Museo del Dulce — the sweets museum — in Morelia. My adaptation has a thinner layer of guava paste than the museum's, and it is placed between the crunchy bottom and the smooth cream cheese batter, rather than on top. Also, the sweetened sour cream topping reflects a craving of mine, but it seems to make the combination even more irresistible. You can use this recipe as a guideline and see if you want to take the cheesecake in other directions: more guava, less guava, more sour cream or no sour cream.
Prep Time30 minutes
Cook Time35 minutes
Chilling Time4 hours
Course: Dessert
Cuisine: Mexican
Keyword: Ate De Guayaba, cheesecake, Dessert, guava, guava paste, Guayaba, pay de queso, Recipe
Servings: 10 servings
Author: Pati Jinich

Ingredients

Crust:

  • 1 1/2 cups (6 ounces ground) Maria cookies or vanilla wafers, or graham crackers
  • 1 teaspoon sugar
  • 3 ounces (or 3/4 stick) butter melted

Guava Spread:

  • 11 ounces guava paste or ate de guayaba
  • 5 tablespoons water

Cheese Filling:

  • 1 pound cream cheese
  • 1/3 cup sugar
  • 1 teaspoon vanilla extract
  • 3 large eggs
  • 1/4 cup heavy cream

Sour Cream topping:

  • 1 1/2 cups sour cream
  • 1/4 cup sugar

Instructions

Crust:

  • In a big bowl, stir the ground cookies, sugar and melted butter until thoroughly mixed. Butter a 9- to 10-inch springform pan. Turn the cookie mixture into the pan. With your fingers or a small spatula, spread it evenly along the pan. Press gently, making a side rim of 1/2 to 1 inch on the sides. Refrigerate while you make the guava spread, cheese filling and sour cream topping.

Guava Spread:

  • Place guava paste and water in the blender jar or food processor. Process until smooth, and reserve.

Cheese Filling:

  • Place the cream cheese in the bowl of an electric mixer, and beat at medium speed until smooth and foamy, 3 to 4 minutes. Add sugar and vanilla, and continue beating until well mixed. Add eggs, one at a time. You may need to stop the mixer to scrape down the sides and bottom of the bowl, as the batter may stick to it. Add the heavy cream, and beat until the mixture is all incorporated and smooth. Reserve.

Sour Cream Topping:

  • In a bowl, mix the sour cream and the sugar together.

Assemble Together:

  • Adjust rack of the oven one-third up from the bottom and preheat to 350°F.
  • Remove the pan with the crust from the refrigerator. With a spatula, spread the guava mixture evenly over the crust. Turn out the cheese filling onto the guava layer, and spread gently and evenly.
  • Place the cheesecake in the oven and bake for 35 minutes, or until it is cooked and has a lightly tanned top. Remove from oven and let cool for at least 10 minutes. Then spoon the sweetened sour cream over the cheese filling and place it back in the oven for 10 more minutes.
  • Remove from the oven and let it cool to room temperature. Cover and refrigerate for at least 4 hours before serving. It tastes even better if it chills overnight.
  • Before serving, release the sides of the springform pan. Place the cheesecake onto a plate (keeping it on the bottom of the pan), slice and serve.

Notes

Pay De Queso Con Ate De Guayaba

Zucchini Torte for You and Me (and turns out my mother too)

Each time a vegetable torte is included in the menu of one of my classes, I have noticed a similar trend: tortes have a warm and friendly reception, that turns into a loving embrace once participants make the recipe at home and find out they want to make it again and again.

Not to be confused with the other kind of tortas, (tortes translates to tortas in Spanish…) Mexico’s favorite sandwich made with a crispy bread roll adapted from the baguette; tortes are a cross between a fluffy and moist bread, a savory pudding, and now that I think of it, also a souffle.

Although there are quite a few variations, tortes have a few things in common. For one thing, they are easy to prepare. Next, they are versatile since they can be a side to both dry or saucy entrees, they can become the main dish accompanied by a salad and they can travel solo in grand style. What’s more, and crucial around home, they help eager parents deceive picky eaters who don’t like vegetables that much.

Zucchini Torte 1

(Two kinds of zucchini posing in my backyard)

Tortes swaddle vegetables in a comforting cushion of eggs (sometimes beaten separately), one or another kind of flour, at times milk, cream or cheese and a nice dose of sugar, some salt, and depending on the spin, other spices. Despite the variations, the signature of each torte is typically given by the vegetable that predominates. The most common ones that come to mind are pea, carrot, spinach, zucchini and corn. The last two are the ones I repeat the most and since I found such beautiful zucchini in the market yesterday, that’s what is going in the mixer today.

Zucchini Torte 2
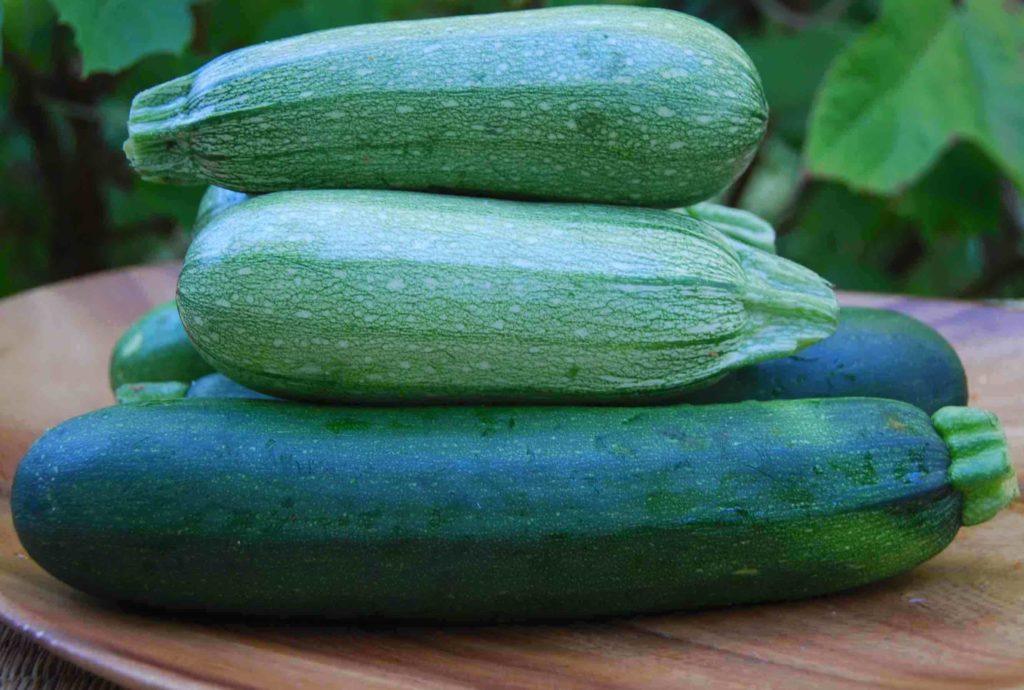
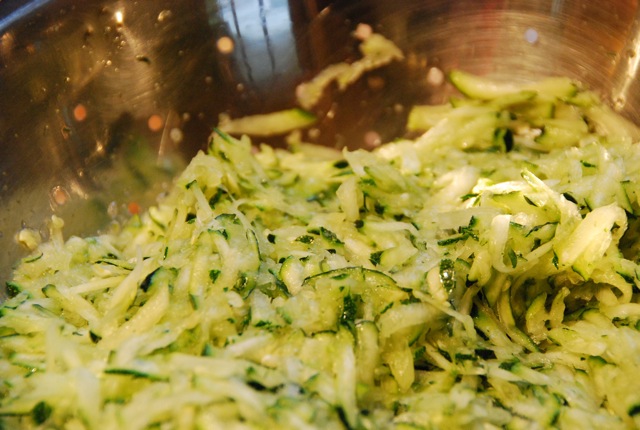
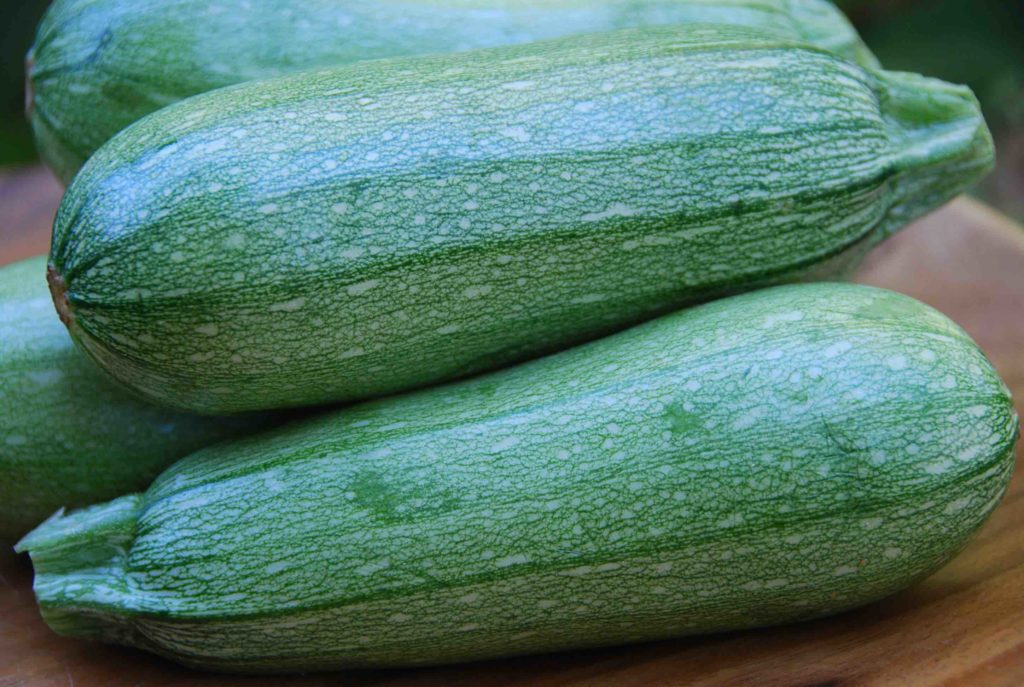
(The zucchini mostly found in Mexican markets, calabacita italiana, sometimes called Pipian in Latin stores throughout the US.)

Though in Mexico the zucchini that is mostly used is the calabacita italiana, which translates to italian zucchini, the one I find most often in the US is the larger, dark green zucchini. The first is smaller, a bit rounder, with a lighter green color speckled with cream. The second tends to be longer and with a deeper, darker and more uniform green color. Both work just as well, but the first tends to be a bit milder and sweeter than the latter.

There are countless ways in which calabacitas, or different kinds of zucchinis, are used. It may just be one of the most used vegetables in Mexican cooking. And all of its parts are used: the vegetable, the shoots (especially in tasty soups) and the seeds.

grating
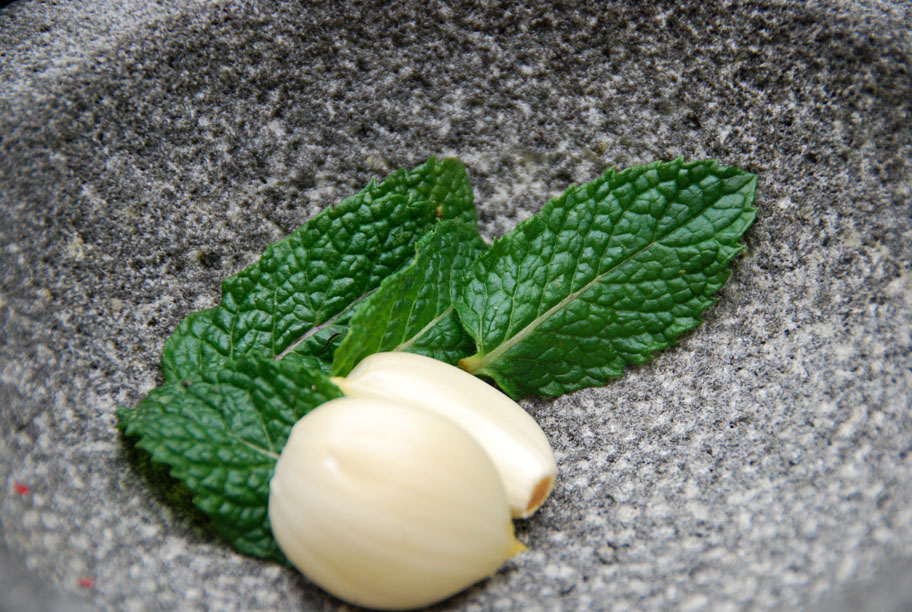
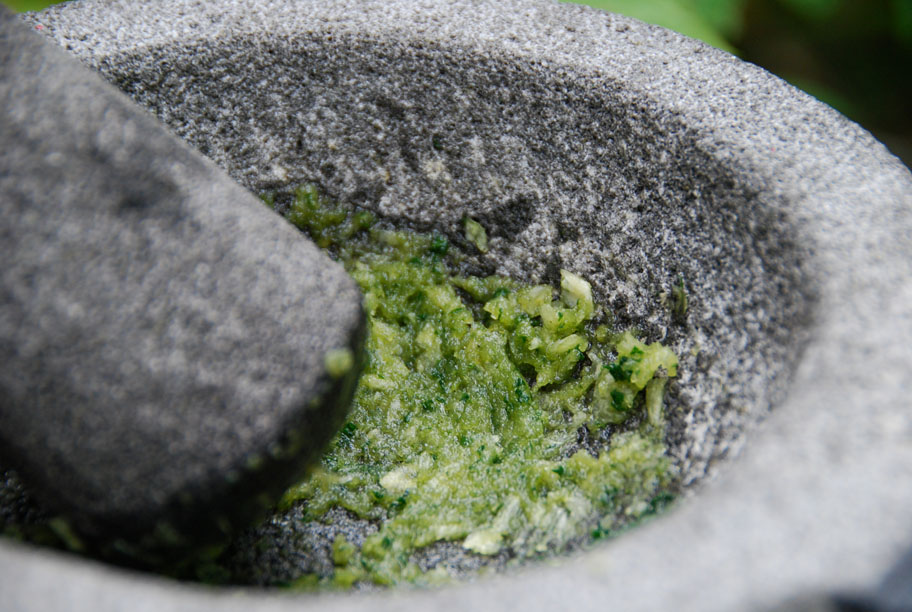
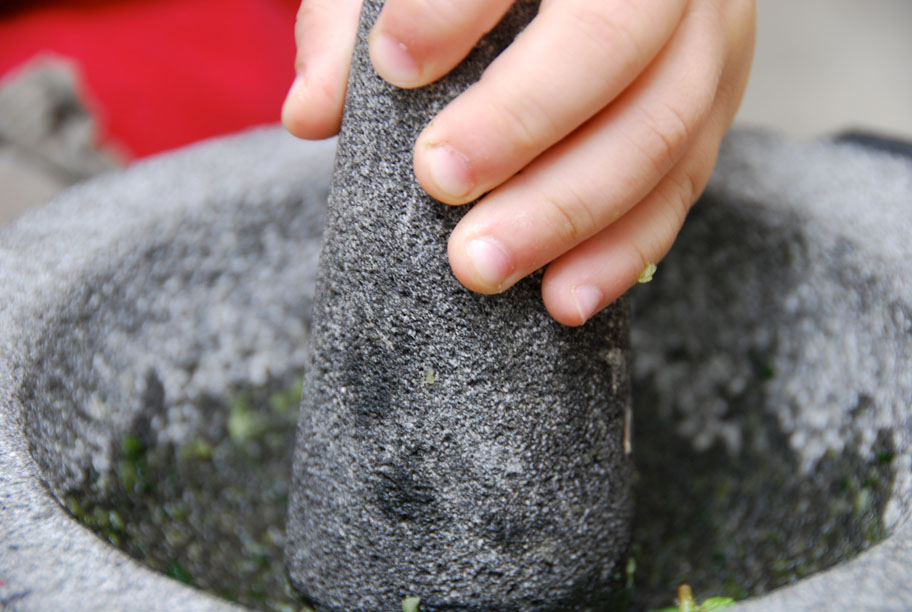
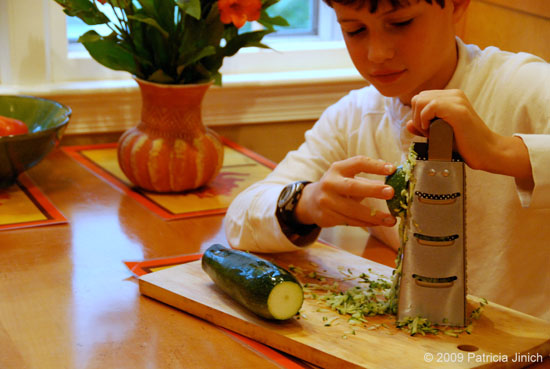
(While my youngest son loves to mash away with the molcajete, or anything else, my oldest has graduated to use the grater, which he does with worldly pride.)

Making this torte is as simple as can be: Grate and drain the zucchini.

grated zucchini
(Grated and drained zucchini. You can use a cheese cloth or a strainer and squeeze the juice out with your hands or a spoon)

Then mix it with the already beaten butter, eggs, a mix of rice flour, baking soda, baking powder, pinch of salt and sugar.

Then, into the oven, and that’s it.
zucchini torte mix
(There you go, a dangerous shot from an unexperienced photographer to give you that close up…)zucchini torte
(The zucchini bread before adding the powdered sugar, my preferred topping.)
I have been making this torte for quite some time now. The original recipe comes from Diana Kennedy’s The Art of Mexican Cooking, but it has gone through some adaptations over time.

And from what I can tell, it is about to go through even more: I was nicely surprised last week when I brought it to Ilana’s dinner. As she asked for details on it, she screamed out loud: Its gluten free! Thanks to the rice flour, which also gives the torte such a welcome grainy texture. So I called my mother to say I had accidentally found something else she can make, as she eats gluten free. As I described it, she decided it would be irresistible with grated Mexican Manchego, a cheese similar to Monterey Jack, on top. Turns out, it makes for a deliciously tanned, crispy cheesy top. Who can say no to that?

Though Diana Kennedy likes to eat it with a spoonful of creme fraiche seasoned with salt and pepper on top, I prefer to eat it with powdered sugar. But please, go ahead and choose what you are in the mood for…

Zucchini Torte main
Print Recipe
4.80 from 5 votes

Zucchini Torte

Each time a vegetable torte is included in the menu of one of my classes, I have noticed a similar trend: tortes have a warm and friendly reception, that turns into a loving embrace once participants make the recipe at home and find out they want to make it again and again. Not to be confused with the other kind of tortas, (tortes translates to tortas in Spanish…) Mexico’s favorite sandwich made with a crispy bread roll adapted from the baguette; tortes are a cross between a fluffy and moist bread, a savory pudding, and now that I think of it, also a souffle.
Prep Time10 minutes
Cook Time40 minutes
Course: Side Dish
Cuisine: Mexican
Keyword: mexican crema, pati's mexican table, Recipe, rice flour, Torta, Vegetarian, Zucchini
Servings: 10 to 12 people
Author: Pati Jinich

Ingredients

  • 1 1/2 pound zucchini ends trimmed, grated and strained, about 4 cups
  • 1/4 pound plus 4 tablespoons unsalted butter
  • 3 eggs at room temperature
  • 1 1/2 cup rice flour
  • 1/2 teaspoon baking powder
  • 1/2 teaspoon baking soda
  • Pinch Kosher or sea salt
  • 1/3 cup sugar
  • Powdered sugar optional
  • Creme fraiche or Mexican style cream seasoned with salt and pepper, optional

Instructions

  • Butter a 9x12 baking pan. Heat the oven to 350 degrees and place the rack in the middle of the oven.
  • Trim the ends off the zucchini and grate. Place in a colander and strain the juice either pushing with your hands or the back of a spoon, set aside.
  • In a bowl combine the rice flour, baking soda, baking powder and salt.
  • In a mixer, beat the butter at medium high speed for a couple minutes until creamy. Reduce the speed to low and incorporate the eggs one by one. After each egg add about 1/3 of the flour mixture, keep beating until thoroughly mixed. Lastly, add the strained zucchini and the sugar. Beat for another minute until the batter is well mixed and pour onto greased baking dish.
  • Place into the oven and bake for 40 minutes or until torte starts to show a nice golden tan and a toothpick comes out a bit moist but not wet. Remove from the oven, cut in squares and serve.
  • It can be eaten with sprinkled powdered sugar on top for a nice sweet spin, or with spoonfuls of creme fraiche or Mexican style cream seasoned with salt and pepper. Can be eaten hot, warm or cold. If there is any left, it can be kept covered outside of the refrigerator for a couple days.

Notes

Torta de Calabacitas

Dreaming of Julio’s Albóndigas with Chipotle and Mint

I have been humbled, time and again, by how one never stops learning from other cooks in the kitchen. That has especially been the case with my cooking team at the Mexican Cultural Institute. We are all from different parts of Mexico, with our peculiar twists and spins, influences and very strong opinions, which we love to scream out loud when trying to make what we serve at each event be the best it can possibly be. Though we get a bit stressed when cooking for kitchen outsiders, we really let loose when making lunch for ourselves. We take turns and last week Julio, a former Mexican taquerí­a cook, made his albóndigas. I had been dying to try them since not only he, but his aunt Maricruz, had been raving about them for over two years. “De veras, de veritas Pati” (Maricruz said, which means really, REALLY) “he makes the most delicious albóndigas of them all.”

There are multiple versions of just about any dish in the world. I am always amazed each time I test and play around with a single dish, at the many directions it can be driven to. That said, we have a family albóndigas version at home, which my boys eat happily at least a couple times a month.

As I watched Julio prepare his albóndigas, I asked him about things I was biased against for the dish, like the use of rice and mint.  Well, humbled again I as! As it is said, the devil is in the details, it’s a matter of how these ingredients are used.  Each thing that makes these albóndigas work so well, does so for a reason. I liked the so, that we will be making Julio’s meatballs at home now too.  My boys noticed the difference in such a good way: “There is something different Mami”, they were telling each other, as they cleaned their plates up. Here is a step by step guide on how to make this easy and perfect dish for the Fall.

onion, tomatoes, and garlic
Ripe Roma tomatoes, a couple garlic cloves and a thick slice of white onion to prepare the base for tomato broth.

First of all, the tomato broth where the albóndigas are cooked in uses not just a couple of tomatoes, but a couple pounds. Though in Mexican cooking we usually use Roma (called Guaje) tomatoes for sauces and salsas rather than Round tomatoes, I would recommend using the freshest and ripest you can find, or let them mature outside the refrigerator for a couple days. As the Fall sets in, you can substitute the fresh tomatoes with a brand you like of simple tomato puree.

chipotle chiles in adobo sauce
Chipotle chiles in adobo sauce give the broth a smoky, sweet and rich depth

Once the tomatoes are simmered in water for about 10 minutes, they are placed in the blender with a couple garlic cloves, a thick slice of raw onion and a nice healthy dose of Chipotle chiles in Adobo Sauce. If you can take more heat, drop in a whole Chipotle chile in adobo as well. But remember, you can always add more heat, but it is much more challenging to tone it down once it’s in the mix. So you may want to start with a tablespoon of sauce, and as the broth cooks on, taste to see if you can take a bit more heat. If you are a Chipotle addict, like me, no need to take precautions.After this tomato broth is cooked and seasoned, you can add some chicken broth.

mint and garlic in a molcajete
The mint and garlic play subtly with the tomato and the Chipotle adding both fragrance and welcomed layers of flavor.

Up to this point, all is familiar to me. Julio’s spin though, mashes a couple garlic cloves with 5 or 6 fresh mint leaves in a molcajete and tejolote, the Mexican version of a mortar and pestle. You can use the former or the latter, and if you don’t have either, just mince them finely with a knife. The way the mint plays with the tomato and the chipotle in the dish is subtle, yet quite spectacular.

mint and garlic mashed in a molcajete
Quickly mashed garlic and fresh mint leaves.

It takes no more than 10 seconds to mash it all up. And if you have a molcajete or want to get one, this is a great way to start seasoning it or to season it further.

juju mashing mint and garlic in the molcajete
My 3 year old sous chef, or as my late grandfather would say, my bandido, mashing away.

Since mashing is an activity loved by just about everyone around here, we ended up adding a bit more of this seasoning when we made the dish at home.

the mixture for the albondigas
Ground turkey breast, white rice cooked al dente, mashed mint and garlic, eggs, kosher or sea salt and freshly ground black pepper

Julio used ground turkey breast, which is what we had at hand. I love to use turkey to make albóndigas, as it makes them lighter and leaner while still very flavorful. You can also use ground chicken, beef, or your preferred combination of meats: veal, beef and pork. This latter one, is my mother’s take. It is pretty tasty too. Julio typically makes them with a mix of beef and pork, but he was unexpectedly more than happy with the results from the turkey.The last of Julio’s spins, that I was skeptic about, was the addition of rice to bind the meat and give the albóndigas nice texture. Turns out, it depends on how you use the rice. Other versions I had tried before with rice, add it completely raw. Julio, quickly cooks the rice in water for 6 to 8 minutes until it is barely cooked through or al dente. So when you add it to the mixture, it finishes cooking as the meatballs cook in the broth and it bonds beautifully together making them fluffy, soft and with such a bite-able consistency.

A plate, ready for you to jump into, with ripe Mexican avocados, tasty with corn tortillas and cooked beans too.

So finally, here goes the recipe for you to print out! My guess is that you will also be pleasantly surprised by what mint and garlic do to the already smashing combination of tomato and chipotle. If you try them, let me know!

Julio's albondigas with mint and chipotle
Print Recipe
5 from 6 votes

Julio’s Albóndigas with Chipotle and Mint

As I watched Julio prepare his albóndigas, I asked him about things I was biased against for the dish, like the use of rice and mint. Well… humbled again I was! As it is said, the devil is in the details, it’s a matter of how these ingredients are used. Each thing that makes these albóndigas work so well, does so for a reason. I liked them so, that we will be making Julio’s meatballs at home now too. My boys noticed the difference in such a good way: “there is something different Mami” they were telling each other, as they cleaned their plates up. Here is a step by step guide on how to make this easy and perfect dish for the Fall.
Prep Time10 minutes
Cook Time45 minutes
Course: Main Course
Cuisine: Mexican
Keyword: Albondigas, chicken broth, chipotles in adobo, meatballs, mint, onion, Recipe, rice, Tomatoes, turkey
Servings: 8 to 10 people
Author: Pati Jinich

Ingredients

  • 1/3 cup long or extra long grain white rice
  • 2 cups water
  • 2 cloves garlic
  • 5 to 8 mint leaves
  • 1 1/2 pounds ground turkey chicken breast or a combination of beef, veal and pork
  • 2 eggs
  • 1/2 teaspoons kosher or sea salt or more to taste
  • 1/4 teaspoon black pepper freshly ground, or more to taste
  • 2 pounds ripe tomatoes
  • 2 cloves garlic
  • 3 tablespoons white onion roughly chopped (or a slice to your liking)
  • 1 to 2 tablespoons of sauce from chipotle chiles in adobo or to taste
  • 1 chipotle chile in adobo seeded, optional
  • 2 tablespoons safflower corn or vegetable oil
  • 1 cup chicken broth
  • 1/2 teaspoon kosher or sea salt or to taste

Instructions

  • In a small sauce pan place the rice and cover with 2 cups hot water. Simmer over medium high heat for 6 to 8 minutes, until rice is cooked al dente but not mushy. Drain and let cool.
  • In a molcajete, mash the mint leaves and 2 garlic cloves with the tejolote until pureed. Alternatively you can use a mortar and pestle or you can simply mince them together.
  • In a large mixing bowl, combine the ground meat of your choice, the raw eggs, the cooled and drained rice, the mashed or minced garlic cloves with the mint, 1/2 teaspoon salt and 1/4 teaspoon ground black pepper. Mix thoroughly, with your hands or spatula.
  • In a pot, place the tomatoes and cover with water. Simmer over medium high heat for 8 to 10 minutes, until cooked through and mushy. Add the cooked tomatoes along with 1/4 cup of their cooking liquid, 2 garlic cloves, white onion, the sauce from the chipotles in adobo and if desired the chile chipotle in adobo in the blender and puree until smooth.
  • Pour 2 tablespoons of oil to a large deep pot and place over medium high heat. Once oil is hot, incorporate the pureed tomato mix. Let it simmer anywhere from 6 to 8 minutes, or until it has changed its color to a deeper red, thickened in consistency and lost its raw flavor. Add chicken broth and 1/2 teaspoon salt and reduce heat to medium low.
  • Along the side of the pot with the simmering tomato broth, place a small mixing bowl with about a cup of water as well as the mixing bowl with the albóndiga mix. Start to make the albondigas, one by one, anywhere from 1 to 2" in width and place them gently in the simmering liquid. Wet your hands in the water before you start and after you make a couple of albóndigas so they are easier to shape and the the mix doesn't stick to your hands.
  • Once you have shaped all the albóndigas, cover the pot and let them simmer over medium low heat for 20 minutes. If you want the tomato broth to thicken a bit more, uncover the pot and let it simmer for 5 to 8 more minutes.
  • Serve hot with a side of freshly sliced avocado, some warm corn tortillas and if desired, frijoles de olla, or cooked beans.

OK… Chiles en Nogada, at last!

During the years I’ve been teaching at the Mexican Cultural Institute I’ve been hesitant to demonstrate and serve Chiles en Nogada. There are many reasons…

First, one of my goals has been to open a window into the world of Mexican cooking in an accessible way. I’ve introduced basic ingredients and dishes along with bits of their history, fun facts, cooking methods and new spins, so people can become familiar with this cuisine and feel empowered to play with its basics in their own kitchens.

No sense in teaching how to make something incredibly complex with tons of new ingredients, which can be quite overwhelming, right?

Chiles in Nogada are laborious. They use many ingredients, such as Poblano chiles, plantains, and piloncillo, that require a proper introduction by themselves or in a simpler dish.

piloncillo for chiles en nogada
Piloncillo in a disk, a cone and shredded. Also called panela, can be substituted with dark brown sugar.

Also, Chiles in Nogada look strange. If you are not familiar with them, you see a large green chile overstuffed with an odd looking filling, covered in a pale looking sauce and pomegranate seeds on top. What’s more, they are served lukewarm, which is unexpected.

Let me add more. Since they are so rich and complex, they are typically served on their own. They don’t like the company of much more than white rice or a freshly favored water….

All this said… I am making them for my next class!! Let me tell you how this came to be.

To start with, the topic is Celebrating Independence Day with Frida Kahlo and Diego Rivera.

Chiles in Nogada are the quintessential dish eaten throughout the country on this day, and for the whole month of September. It is is a symbol, although there are many versions for how they came to be  (ladies in waiting celebrating a military victory, young nuns welcoming a famous presidents, and a people’s way of celebrating the seasons’ bounty) they all agree it was created with the colors of the Mexican flag in mind: green chile, white walnut sauce and red pomegranate.

Other years, I had gotten away with making other dishes prepared for this holiday that aren’t so labor intensive and just as good. However, the second part of the topic made it harder. Frida and Diego, one of Mexico’s most iconic figures who embody Mexicanidad and they ate Chiles in Nogada during this holiday. And believe me, I thoroughly researched, trying to find other things they also ate then!!

chiles en nogada filling
Moist filling of meat seasoned with garlic, onion, tomatoes, fruits, nuts, olives and spices…

The last straw came when Humberto (coordinator at the Institute) sent me the proof for the invite for the classes. The cover? Chiles en Nogada. I wasn’t going to change something that had hours of work involved already. And yes, Chiles en Nogada are such a staple. And…OK! If they are in the cover, I have to make them.

So with the fear of not wanting to scare away our guests with such complex dish on the back of my mind, I set on a quest to find the most delicious recipe. Remembering how every year I, along with millions of Mexicans and Mexican food aficionados, await for September to be able to eat this deliciously extravagant dish, I had to find the best version to share.

I began by making the version I grew up eating made by my nana, who gave me detailed instructions over the phone. Then I tried my mothers’ sophisticated take. Then I compared the two, and even mixed things of one into the other (oh sacrilege! the eternal culinary competition of my memories). Then I made Guadalupe Rivera’s version (Diego Rivera’s daughter), followed by Diana Kennedy’s… and any other I could find. Misery! I could not get the exquisite result I remembered savoring time and again.

Frustrated, as she saw me, Alejandra de la Paz (Director of the Mexican Cultural Institute) contacted Don Luis Bello Morin, director at the Restaurant of Palacio Nacional de las Bellas Artes in Mexico City. It took no more than a couple hours for him to respond with a recipe which included possible substitutions for hard to find ingredients and a detailed guide to make them. His instructions were so precise, that it was like having a co-pilot throughout the ride: he described the minutes, the smells, the sounds and textures to be found through his tested road to make the best ever Chiles en Nogada I have ever tried.

Not only was he so generous to share his recipe, but the results went beyond my expectations.  Since he loves to share recipes so that dishes such as this will not be lost, here is his adapted recipe (since the one he sent is for an industrial quantity). Thank you Don Luis!

As for my hesitations: I can’t wait to share this recipe and all the stories I’ve gathered for next class. In hindsight, I have been so pleasantly surprised with the eagerness of participants to eat and cook many more things than I would have expected. Of course, Chiles en Nogada are at the end of labor intensive spectrum, but they are so worth it.

Now, if you feel like making this recipe, let me know how it turned out. If you don’t and really want to try it, come to my next class!

chiles en nogada
Print Recipe
4.67 from 6 votes

Chiles en Nogada

Chiles in Nogada are laborious. They use many ingredients, such as Poblano chiles, plantains, and piloncillo, that require a proper introduction by themselves or in a simpler dish. Also, Chiles in Nogada look strange. If you are not familiar with them, you see a large green chile overstuffed with an odd looking filling, covered in a pale looking sauce and pomegranate seeds on top. What’s more, they are served lukewarm, which is unexpected.
Prep Time2 hours 30 minutes
Cook Time50 minutes
Course: Main Course
Cuisine: Mexican
Keyword: almonds, apple, ceylon, chile, cinnamon, garlic, olives, onion, peaches, pear, pecans, piloncillo, pine nuts, Plantains, poblanos, pomegranate, pork, raisins, Sherry, Tomatoes, walnut, walnuts
Servings: 10 chiles en nogada
Author: Pati Jinich

Ingredients

For the chiles:

  • 10 chiles poblanos
  • 6 cups water
  • 5 tablespoons shredded or chopped piloncillo or brown sugar

For the meat:

  • 2 pounds pork shoulder butt, leg or ribs or a combination of meats such as veal and beef, deboned and cut into chunks
  • 2 cloves garlic
  • 1/4 white onion
  • 1 carrot peeled, cut into two pieces
  • 1/4 teaspoon dried thyme or a couple fresh thyme sprigs
  • 5 black peppercorns
  • 1 teaspoon kosher or coarse sea salt

For the filling:

  • 3 tablespoons olive oil
  • 1 garlic clove finely chopped
  • 1/4 cup white onion chopped
  • 1 pound ripe tomatoes pureed, or about 2 cups tomato puree
  • All the cooked meat finely chopped
  • 2 cups meat cooking broth
  • 1 teaspoon kosher or coarse sea salt
  • 3 ounces candied pineapple chopped
  • 1 cup ripe plantain peeled and diced, about 1 1/4
  • 1 diced Bartlett pear about 1 1/4 cup
  • 1 diced Golden Delicious apple about 1 1/4 cup
  • 1 large yellow peach mature but firm, diced, about 1 1/4 cup
  • Pinch of cumin
  • Pinch of ground cloves or 4 to 5 whole cloves seeds smashed and stems discarded
  • 1 ceylon or true cinnamon stick
  • 1/4 cup blonde raisins
  • 1/4 cup silvered almonds lightly toasted
  • 1/4 cup pinenuts lightly toasted
  • 1/4 cup chopped manzanilla olives

For walnut or pecan sauce:

  • 1 1/2 cup freshly peeled walnuts if not fresh DON'T use packaged, use pecans
  • 2 1/2 cups heavy cream
  • 1/2 cup milk more or less to taste
  • 1/4 cup confectioners' sugar or more to taste
  • Pinch kosher or coarse sea salt or to taste
  • Pinch of ground white pepper
  • 1 tablespoon Dry Sherry or more to taste

For the garnishes:

  • 1 cup pomegranate seeds
  • 1/4 chopped parsley optional

Instructions

To prepare the chiles:

  • Rinse and char chiles. To char, you can either place them on a baking sheet or pan under the broiler, directly on the grill, hot comal or directly on an open fire flame. In any case, turn every 2 to 3 minutes until they are charred and blistered but not burnt. Place them, while very hot, in a plastic bag. Close bag tightly and cover with a kitchen towel. Let them sweat for 10 to 20 minutes.
  • Take them out one by one, and peel off the skin in the sink. As you do so, lightly rinse the chile with water. With a knife, make a slit down one side to take out and discard the seeds and membrane. Treat the flesh carefully so it will not tear and keep the stem on. Place them in a container and cover with the water previously simmered with the piloncillo or sugar until well diluted, anywhere from 2 to 24 hours. If it is more than 2 hours, place them in the refrigerator, covered once they have cooled down. Drain and either use or store in the refrigerator. You can prepare them 4 to 5 days ahead up to this point.

To prepare the filling:

  • Place the meat already cut into 3 to 4" chunks on the bottom of a cooking pot along with the garlic cloves, 1/4 white onion, carrot, bay leaves, thyme, peppercorns and a teaspoon of salt. Cover with water and place over medium high heat. Simmer for 20 to 25 minutes, until meat is cooked through. Turn off the heat and let the meat and broth cool down. remove the meat with a slotted spoon and chop it finely, reserve. Strain the broth into a container, reserve.
  • Heat the olive oil in a large deep saute pan over medium high heat. Add the garlic clove and saute for a minute or until it starts becoming fragrant, but don't let it brown. Add the onion and saute for a couple more minutes, until it becomes translucent and soft and starts gaining some color. Pour in the tomato puree and let it season, stirring often, for about 5 to 7 minutes, until it has deepened its color, thickened its consistency and lost its raw flavor.
  • Incorporate the chopped meat, 2 cups of cooking broth, a teaspoon of salt, mix it all together and let it cook 3 to 4 minutes. Add the candied pineapple, mix with the meat and let it cook for 4 to 5 minutes. Incorporate the chopped plantain, pear, apple, and peach and gently mix it all together, let it cook for a couple minutes. Sprinkle the cumin and ground cloves, making sure you mix those spices well. Place a cinnamon stick in the middle of the pan, cover with a lid, lower the heat to medium and let it cook for about 8 to 10 minutes.
  • Uncover, add the raisins, almonds, pine nuts, green olives, mix well and taste for salt. Add more if need be. Turn off the heat. You can make the filling up to 2 days in advance, cool, cover and refrigerate.

To prepare the sauce:

  • Place all ingredients except the Sherry in the blender and puree until smooth. You can make the sauce a couple days in advance, but bring it to out room temperature before using. Mix the Sherry into the sauce up to 2 hours before serving. Add more to taste, but it shouldn't have a strong alcohol flavor. If it thickened while in the refrigerator, lighten it up with some milk.
  • Finally!!!! To assemble Chiles en Nogada: Place the chiles in a serving platter. Stuff each one with about 1/2 cup filling. Close as best you can. Generously spoon walnut or pecan sauce on top to cover chiles entirely and sprinkle with pomegranate seeds and chopped parsley on top.
  • NOTE: Some cooks batter and fry the chiles before adding the sauce. But that version is much heavier and has become less and less popular over time.

Notes

Recipe adapted from Don Luis Bello Morin

Unforgettable Rice from El Chepe

I wish each day had ten more hours so I could tell you about so many dishes already.

This is how behind I feel in all I want to share: Six weeks ago our family came back from the Copper Canyon in Mexico. I took notes, pictures, short videos, interviewed cooks, planted myself in their kitchens until forcefully uprooted by my husband, and ate like a mad woman from any interesting sounding dish, which was practically everything (partly with the purpose to come and tell you all about it…).

Then we came home, and life got in the way… I took longer to launch this site because I wanted to add more sections. By the time it was ready, so many weeks had gone by, I was eager to share more recent food excursions from my kitchen.

Yesterday, these red tomatoes reminded me of my delayed purpose. They looked perfectly ripe to become the base for that Mexican Style Rice we ate at the Chepe train (formally known as the Chihuahua al Pací­fico). It was unbelievable. Not only how good it tasted, but where and how it is made, every day.

Unforgettable rice from el chepe 2-thumb-510x342-1914
I expected to find scrumptious food along the Copper Canyon, but not aboard the train.  Used to pre-packaged sandwiches and microwaved hot dogs on the Amtrak, it was such a treat to choose from a full menu of home-style food.

As we sat on the cushy blue seats, we were amazed at how the individual place settings set on the wooden tables jumped without falling as the train rocked on the old wooden tracks.  With the light from the sun peeking through the window, the formally dressed waiters coming out of the kitchen appeared to step out from the Mexican 19th century, with charming mustaches in the like of the long gone Profirian era and all.

Unforgettable rice from el chepe 3-thumb-510x342-1916
More amazement, as they poured coffee, dancing as on a tight rope with the steaming pots at least 10 inches away from the cups they were aiming to fill. But even more amazement, after we tasted the food. Such good food on a train? I had puntas de filete with a side of refried beans, quesadillas and the best ever Mexican style rice. Even before dessert, this felt like a trip within the trip itself.

Each time, I would ask the waiter to introduce me to the cook in turn. There were not one but three cooks in a fully sized and stocked kitchen. Balancing as if on steady ground, up and down bridges, inside tunnels and around curves, they made some of the most comforting foods I can think of.

Unforgettable rice from el chepe 4-thumb-510x342-1918
Here is a tip:  when you go to the Chepe, disregard when train officers say the Restaurant is closed.  It seems to be a technique to help guests avoid long waits (or a bottleneck in the kitchen).  Go check it out yourself, there is typically no line and by the time they announce its open, the train ride may be over.  If you are not planning on going to the Chepe train soon, here is the recipe for that deliciously satisfying Mexican rice, shared by the chef in charge of the Chepe’s food and menu, Jesus Ley.

unforgettable rice from el chepe 5-thumb-510x342-1920
There are of course many variations to this dish. You can substitute fresh tomato puree for 1 1/2 cups of canned puree. Except for few rice dishes, I always add some fresh squeezed lime juice. It makes it crisp and helps the flavors of the other ingredients shine through, but it is optional.You can include the carrots and peas, exclude them or change that vegetable such as by adding green beans and red bell peppers.

And yes, that chile serrano you see in the picture is optional. You can omit it, substitute it for a jalapeño, and can add a couple more if you like. But if you are having Mexicans over, watch out: those chiles that have absorbed the flavors from all the ingredients in that pot, are the rice treasure we all hunt for.

mexican red rice
Print Recipe
4.50 from 6 votes

Mexican Style Rice

Arroz Rojo
Prep Time10 minutes
Cook Time25 minutes
Course: Side Dish
Cuisine: Mexican
Keyword: carrots, chicken broth, lime, Mexican rice, pati's mexican table, peas, rice, serrano chiles, Tomatoes
Servings: 6 to 8 people
Author: Pati Jinich

Ingredients

  • 2 cups white rice
  • 2 tomatoes or about 1 pound, quartered
  • 1/3 cup white onion roughly chopped
  • 2 garlic cloves peeled
  • 1 1/2 teaspoons kosher or sea salt or more to taste
  • 3 tablespoons safflower or corn oil
  • 3 1/2 cups chicken or vegetable broth or water
  • 1 tablespoon fresh lime juice optional
  • 2 parsley sprigs
  • 3/4 cup carrots peeled and diced, optional
  • 1/2 cup shelled green peas fresh of frozen, optional
  • 1 or 2 chiles serranos optional

Instructions

  • In a bowl, soak the rice in hot water for about 5 minutes. Rinse with cold water and drain very well.
  • While the rice soaks, purée the tomatoes in the blender along with the onion, garlic and salt. Pass through a strainer and reserve.
  • Heat the oil in a thick heavy skillet (if you have one with a transparent lid, pick that one) over medium high heat until hot but not smoking. Add the rice and sauté, stirring often, until the color of the rice changes to a strong milky white and it shows more resistance and makes a heavier sound as you stir it around, probably about 3 to 4 minutes.
  • Pour in the strained tomato purée, mix it gently and let it cook until the color of the purée has darkened, thickened and is mostly absorbed, about 3 more minutes.
  • Stir in the chicken or vegetable broth and lime juice, give it a gentle stir and top with the parlsey sprig, the diced carrots, peas and serrano chiles, if so desired.
  • Let it all come to a boil, and when it does, put the cover on and reduce the heat to low and cook for about 20 minutes. Here is where that transparent lid becomes so handy, as you can see what is going on inside the pot without losing steam. You know the rice is ready when it is cooked through and tender, most of the liquid has been absorbed, but there is a lot of moisture in the pot. If the rice is not yet tender and the liquid has dried up, add a couple tablespoons more water, cover again and let it cook for a couple more minutes.
  • Let the rice sit covered for at least 5 minutes before you fluff with a fork and serve. You may also make it beforehand and reheat it covered over low heat with a tablespoon of water.

A salad to dress and impress

I have come to realize a couple things regarding a group get together around here.

For one thing pot lucks are so popular. Maybe it’s because they can make entertaining easier and promote a warm feeling of collaboration. I don’t remember many pot luck meals growing up in Mexico. It was generally assumed that the host was in charge of the whole meal and guests arrived with a box of chocolates, a bunch of flowers, or maybe a bottle of wine or tequila too. So that pot luck pitching in element, has been such a nice surprise.

Secondly, no potluck seems to be complete without a salad, which seems to represent the wholeness of a meal and that higher degree of healthfulness. They aren’t always that fat-free. But in any case, they help reduce the guilt we all may feel after indulging in a couple of servings of whatever decadent dish may happen to be there too. Now I just can’t remember having a salad growing up, come what may, in every gathering either. There were vegetable sides, but not always salads. When there were, they either had a welcome exotic twist,  or a to die for “secret” house vinaigrette. And yes! The host would spell out the “secret” with any given opportunity.

As much as pot lucks are based on great principles, they can be damaged if participants think that whatever they bring works out well, just because they are bringing “something.” But here’s the thing, you are not helping much if the main dish is an Indian curry and the salad you walk in with has a creamy, garlicky and heavily parmesanned dressing.

Two ideas come to mind to try make that next pot luck a success. One, someone can be in charge of informing everyone of what others are planning to bring with a bit of detail. If that seems like a hassle, then pick a theme. Just to make sure there are no guns and roses on the table. Another idea, goes to the salad bearer. Instead of a pre mixed salad bag splashed with a random bottled vinaigrette, why not make a flavorful, exotic and wholesome salad? This will pump up the quality of the meal, make the health-minded happier and give the salad maker a ton more satisfaction.

Here, let me give you a salad that you can brag about and then happily devour. One of the most popular salads I have shared in class, it has also prompted a next day email to ask for the recipe whenever we have served it to friends at home. If you bring it to your next pot luck, it will make that table where you set it on, wish it had a mouth to eat it all up.

The original recipe comes from Marí­a Dolores Torres Izabal, one of the leading ladies of the Mexican culinary world and a woman I admire so. As the years have passed, I have adapted it.

jicama

Just the combination of ingredients is exciting enough. It has the depth of the spinach, the tanginess and strong color of the raw beets, the crispness of the typically ignored cabbage, the sharpness of the red onion, the sweetness and chewiness of the dried pineapple or acitrón, and the wonderful crunch, and clean and fresh feel of the jí­camas.

I found the freshest jí­camas today, as you can see in the picture above, though the weather didn’t help much for a good picture (I need a lot more help than a sunny day for that)

This mix of ingredients is first lightly covered in a light oil and vinegar dressing, just to get ready for a luxurious embrace from the creamy Mexican avocado sauce. Now add the flavor of toasted sesame seeds and the satisfying bite you get out of the croutons. Just can’t go wrong.

Oh, and it is practical too, since everything can be prepped at least a day ahead, refrigerated and assembled before serving.

rosura salad
Print Recipe
4.67 from 3 votes

Rosaura Salad

This award winning recipe, adapted from caterer Marí­a Dolores Torres Izabal is festive and colorful. You can prepare all the ingredients ahead of time and assemble right before serving.
Prep Time45 minutes
Cook Time0 minutes
Total Time45 minutes
Course: Salad
Cuisine: Mexican
Keyword: Avocado, beets, Jicama, red cabbage, Rosura, salad, Spinach, vinaigrette
Servings: 12 servings
Author: Pati Jinich

Ingredients

Vinaigrette:

  • 1/4 cup tarragon vinegar
  • 1 garlic clove pressed or finely chopped
  • 2 tablespoons finely chopped white onion
  • 1 tablespoon kosher or sea salt
  • 1 teaspoon sugar
  • 1/4 cup olive oil
  • 1/4 cup vegetable oil

Avocado dressing:

  • 1 cup milk
  • 1 garlic clove
  • 2 tablespoons fresh lime juice
  • 1 cup Mexican crema
  • 2 ripe avocados
  • 1 tablespoon kosher or sea salt or to taste
  • 1 tablespoon finely chopped chives

To serve:

  • 5 cups (or about 1 pound) thinly sliced red cabbage
  • 3 cups peeled and shredded raw beets from about 2 beets
  • 5 cups (or about 8 ounces) spinach rinsed and thinly sliced
  • 5 cups jícama peeled and cut into small sticks (from about 1 jícama)
  • 1/4 of a white onion thinly sliced
  • 3 ounces candied pineapple or other candied fruit
  • 1 cup croutons
  • 1/2 cup lightly toasted sesame seeds

Instructions

For the vinaigrette:

  • Add the vinegar, garlic, chopped onion, salt, and sugar to a small bowl, then whisk in the oils to emulsify.

For the avocado dressing:

  • Place milk and garlic in a blender and puree. Add the lime juice, crema, avocados and salt to taste and blend until smooth. Pour avocado dressing in a bowl and stir in the chives. 

To serve:

  • Combine the cabbage, beets, spinach, jícama, onion and dried pineapple or dried fruit in a salad bowl. 
  • Lightly dress the salad with some of the vinaigrette. Place the salad on the table and leave the avocado dressing, croutons and toasted sesame seeds on the side for people to add as they please.  

Notes

Adapted from Marí­a Dolores Torres Izabal

A comfy soup for the still chilly nights

While most of us in DC have stacked our winter clothes up in the attic or inside a trunk, the truth is, it’s still a bit chilly. So today I made this mushroom soup, yet again. I should be tired of it already, since I just cooked 100 portions of it for last Friday’s cooking class at the Institute and I had tested it for weeks… But here I go.. It is just too good!

It is not your typical soup at all. It has the woody and earthy feel of the mushrooms, but their flavor is somehow enhanced by the chile de árbol. It may sound strange, since one would think that chiles mask the flavor of ingredients. But depending on how you use them, they can pronounce rather than overpower other flavors.

Although the chile de árbol is quite spicy, in this soup you can taste its depth but not its heat, since they are browned but never opened. This is one of the subtle ways to use them, as the seeds and veins which contain most of the heat are bundled up inside throughout the cooking.

Luckily, these chiles can be found almost anywhere these days. Like other dried chiles, they are a very smart staple to incorporate into your pantry since they last forever, they are filled with Vitamin A (great excuse to indulge…) and they can enrich your home cooking immensely.

The soup has a flavorful roasted tomato base. You can buy the already roasted tomatoes, but down below I tell you how to roast or char them yourself. It takes no more than 10 minutes, it is rather simple and it gives the soup a nice rustic feel. I include the epazote in the end, but if you don’t find it don’t worry, it is optional. It just gives it a nice accent.

It takes about 25 minutes to make this soup. Go for it! You can make a double batch and reheat it the next day for lunch, accompanied with some sliced toasted baguette or bolillo, and a slice of ripe Mexican avocado on top.

Print Recipe
5 from 3 votes

Mushroom, Chile de Arbol, and Roasted Tomato Soup

Prep Time5 minutes
Cook Time35 minutes
Course: Soup
Cuisine: Mexican
Keyword: Avocado, bolillo, chicken broth, chile, chiles de arbol, epazote, garlic, Mushroom, onion, pati's mexican table, Recipe, soup, Tomatoes, Vegetarian
Servings: 4 to 6 people
Author: Pati Jinich

Ingredients

  • 1 1/2 pound, or 6 to 7, ripe roma/guaje tomatoes
  • 3/4 cup white onion roughly chopped
  • 4 garlic cloves peeled
  • 2 tablespoons safflower or corn oil
  • 1 tablespoon butter
  • 3 chiles de arbol
  • 2 pounds mushrooms rinsed and sliced
  • 1 teaspoon kosher or sea salt or to taste
  • 8 cups chicken broth homemade or storebought
  • 2 fresh epazote sprigs may substitue for dried, optional
  • 1 ripe Mexican avocado peeled and sliced
  • 1 or 2 bolillos or small baguettes sliced and toasted, optional

Instructions

  • Char the tomatoes, onion and garlic, by placing them in a single layer on a baking sheet under the broiler. Alternatively, you can char them on the grill or on a hot comal, the traditional way. Whichever method you choose, tomatoes will take between 6 to 9 minutes, and the onion and garlic between 3 to 4 minutes. Turn them around halfway through.
  • Tomatoes are ready when they are completely cooked through, mushy and their skin is charred, blistered and wrinkled. Garlic and onion will have also charred and softened.
  • Place charred tomatoes, onion and garlic in the blender and puree until smooth. In a pot, heat one tablespoon of the oil and the butter over medium heat until butter starts to bubble. Add Chiles de Arbol and sautee for a couple minutes, turning them around, until they are lightly browned and crisp.
  • Add sliced mushrooms, sprinkle with salt, cover the pot and let them steam for 5 minutes.
  • In a soup pot, add a tablespoon of oil and heat over medium high heat. Stir the tomato puree into the pot. For a smoother feel, you can place a strainer on top of the soup pot, and strain the tomato puree into the pot. Let the puree simmer, season and thicken for about 4 to 5 minutes. Its color will darken and become deeper.
  • Stir in the chicken broth and simmer for 5 more minutes. Incorporate the mushrooms along with the chiles. Add the fresh epazote sprigs, if you want, and let it all simmer 5 more minutes. Taste for salt and add more if need be.
  • Serve very hot. If you wish, add a slice of avocado on top of each bowl of soup. It can be eaten with a side of toasted bolillos or baguettes as well.

Notes

Sopa de Hongos con Tomate y Chile de Arbol

The double life of an avocado

My friend Vered walked into my house carrying a pound of French feta cheese and some freshly baked pitas she found at a Middle Eastern store. It was the kind she used to cook with in her Israeli home. Just a taste made us realize how hungry we were, though we were not near any mealtime. Nonetheless, we had 20 minutes before we had to run, so that’s a great excuse for a snack.

The last beautifully ripe Mexican avocado I had in the basket was staring at me. So I offered to make a Mexican Farolada out of her pita, of course to top with some fresh Guacamole.

The Farolada, named after the Farolito chain of taco restaurants, consists of pita bread stuffed with Mexican Manchego cheese (similar to Monterey Jack), thrown on the grill until the cheese oozes out. If let to sit there per your request, it will become crispy too.

I turned around to start chopping some Serrano chile for the guacamole when Vered said she had another plan for my avocado and her pita: the Israeli way. Which, she said in a challenging fashion, was incredibly tasty.

Now, you can’t just walk into my kitchen and tempt me with something I have never eaten before.

We split that creamy, perfect avocado in half.

She mixed hers with feta cheese, green olives, lime juice (much to her dismay since she never uses limes, but it is very strange to find a lemon in my kitchen) olive oil and salt. She didn’t fill her pita with anything, just heated it up.

While the Farolada was getting nice and crunchy, I prepared my favorite guacamole version: smashed avocado with rivers of lime juice, generous amounts of serrano chile and cilantro and a healthy sprinkling of salt. No chopped tomatoes in there, thank you.

She ate my Mexican version and nodded in approval; I ate her Mediterranean one and loved it. In fact, I think I liked hers more. It seemed more exotic, plus I really enjoy the tangy taste of French feta.

Nonetheless, I finished with a piece of mine, if only because it tasted like home.

Here, you can try them both! See what you think.

Avocados main
Print Recipe
5 from 1 vote

Vered’s Avocado Salad with Toasted Pita Bread

My friend Vered's avocado salad the Israeli way. She mixes the avocado with feta cheese, green olives, lemon juice, olive oil and salt.
Prep Time15 minutes
Cook Time0 minutes
Total Time15 minutes
Course: Appetizer, Snack
Cuisine: Israeli, Mexican
Keyword: Avocado, cheese, Eggs, feta, lemon, olives, pita, Recipe
Servings: 6 servings
Author: Pati Jinich

Ingredients

  • 2 ripe Mexican avocados halved, pitted and peeled
  • 1/2 cup pitted green olives chopped (preferably the cracked bitter ones)
  • 3 scallions chopped
  • 2 to 3 tablespoons fresh lemon juice (she asked me to point out that she meant lemon and never lime)
  • Salt to taste
  • Ground black pepper to taste
  • 2 hard boiled eggs peeled and chopped (optional)
  • 1/2 cup Israeli or French feta cheese crumbled (optional)
  • Hot or toasted pita breads

Instructions

  • In a mixing bowl, mash the avocados with a fork to a chunky paste. Add the olives, scallions, lemon juice, salt and pepper and mix well. Add chopped egg and/or crumbled feta if you are going to use.
  • Spread the avocado salad over toasted pita bread or a slice of bread. For the perfect Israeli dinner – eat with a side of an Israeli salad and scrambled eggs (she pointed out I should add that too…)

Notes

Ensalada de Aguacate con Pita Arabe
avocado
Print Recipe
5 from 1 vote

Pati’s Guacamole Ranchero with Faroladas

The Farolada, named after the Farolito chain of taco restaurants, consists of pita bread stuffed with Mexican Manchego cheese (similar to Monterey Jack), thrown on the grill until the cheese oozes out. If let to sit there per your request, it will become crispy too.
Prep Time15 minutes
Cook Time5 minutes
Total Time20 minutes
Course: Antojos, Appetizer, Main Course, Snack
Cuisine: Mexican
Keyword: Avocado, cheese, Farolada, guacamole, Mexican Manchego, pita, Ranchero, Recipe, serrano chiles
Servings: 4 servings
Author: Pati Jinich

Ingredients

Guacamole:

  • 2 ripe Mexican avocados halved, pitted, peeled and diced
  • 1 tablespoon chopped white onion
  • 1 serrano chile or to taste, minced (seeding is optional and may substitute with jalapeño)
  • 1 tablespoon roughly chopped cilantro leaves
  • 3 tablespoons fresh lime juice
  • 1 teaspoon kosher salt or to taste

Faroladas:

  • 4 whole pita breads
  • 1 cup shredded Mexican Manchego cheese or Monterey Jack

Instructions

To make the guacamole:

  • Gently mix ingredients in a bowl and serve. It can be prepared a couple of hours in advance if covered and stored in the refrigerator.

To make the faroladas:

  • Heat a comal or heavy dry skillet over medium-low heat for about 5 minutes. Gently heat the pita breads over the comal or skillet for about 15 seconds per side. Remove and make a horizontal slice halfway through, making a long and wide pocket.
  • Stuff each pita with about 1/4 cup shredded cheese. Place them back on the hot comal or skillet and heat for about 3 to 4 minutes on each side, to your liking, until cheese is melted and depending how crunchy or soft you want the pita bread. For crunchier, leave longer. Remove from heat, cut into 4 pieces and eat with the guacamole.

Notes

Guacamole Ranchero con Faroladas

Refried Beans

You will find that refried beans are one of the most common sides for traditional Mexican dishes. From breakfast, to dinner, they are always a welcome companion. You can make them with different kinds of beans, like Black, Pinto,  or Peruvian. The choice in Mexico varies among regions but also among cooks. I tend to use the Pintos more, because they have a creamier consistency and softer flavor. The Black, delicious as well, have a stronger flavor and texture. The Peruvian have a peculiar flavor, that is hard to define, but it is stronger than the Pintos and lighter than the Black.

You can make the Refried beans in a traditional way, which is by mashing the Frijoles de Olla in the pan with onion that has been sauteed in lard, or you can substitute for oil. You can also make quicker and smoother Refried beans, by skipping the mashing part, and placing the Frijoles de Olla in the blender, to make a smooth Bean puree that you can then thicken and season.

Aside from a side, Refried beans are used to make many things like Tortas, Molletes, Tacos, Quesadillas and Dips.

Refried beans are absolutely delicious on their own, with corn tortillas and pickled jalapenos.  They also can be turned into many dishes such as charros beans.

Refried Beans 1

You can choose if you want your beans the traditional way, which takes a little bit more effort as you have to mash them as they season and thicken. Or you can opt for an easier and faster way, which doesn’t have that rough textured feel, but it is much smoother.

Print Recipe
4.67 from 6 votes

Smooth and Easy Refried Beans

You will find that refried beans are one of the most common sides for traditional Mexican dishes. From breakfast, to dinner, they are always a welcome companion. You can make them with different kinds of beans, like Black, Pinto,  or Peruvian. The choice in Mexico varies among regions but also among cooks. I tend to use the Pintos more, because they have a creamier consistency and softer flavor. The Black, delicious as well, have a stronger flavor and texture. The Peruvian have a peculiar flavor, that is hard to define, but it is stronger than the Pintos and lighter than the Black.
Prep Time2 minutes
Cook Time15 minutes
Course: Side Dish
Cuisine: Mexican
Keyword: beans, black beans, onion, Peruvian beans, pinto beans, Recipe, refried beans
Servings: 4 cups
Author: Pati Jinich

Ingredients

  • 6 cups basic bean puree
  • 3 tablespoons safflower or corn oil
  • 1/2 cup white onion chopped

Instructions

  • In a large saute pan over medium high heat, pour the oil and heat until hot but not smoking, about 1 to 2 minutes. Add the onions and let them saute for about 3 to 4 minutes, until they have softened, become translucent and have started to slightly brown along the edges.
  • Add the bean puree over the sauteed onion, and let them season and thicken for about 10 to 15 minutes, stirring occasionally. If the beans are bubbling way too much, lower the heat a little to medium-low heat. Let them continue thickening, until they have achieved a thick puree consistency and are somewhat pasty looking. It depends on your liking, some people like them thicker and some people like them with a softer consistency. While it depends on how you like them, they are mostly cooked until they can hold a shape when scooped with a spoon.

Tex Mex or Mex Tex: Take Two

Talking about American foods enriched by Mexican ingredients, I can’t leave out those tasty, juicy and smoky Ancho Chile hamburgers. My mother used to make them for our birthday parties as me and my sisters grew into teenagers. We felt more hip having funky burgers instead of kid sized tacos. Plus, they were a hit with our friends.

They are a snap to make and for the Mexican spin you just need to prepare a seasoning paste with Ancho Chiles.  Anchos, being ultra mild and somewhat fruity with a hint of prunes, make an instant click with the meat.

My mother used to mix half veal and half beef, when making hamburgers, meatloaf or meatballs. It works out well, but it is not necessary. She used to serve these hamburgers with the traditional American trimmings: sliced onions, tomatoes, fresh lettuce, ketchup and mustard.

But when I was reminiscing with my friend Andrea about these Mexicanized American dishes, she suggested we try a citrusy mayo spread. What a surprise! That tangy spread makes these tasty hamburgers bounce off the walls out of happiness.

I wouldn’t dare call this hamburger traditional Mexican food, although the recipe has been in my family for more than four decades. When you think about it, once an ingredient or a dish of a country enters another country and becomes accepted, it gains a life of its own.

I don’t think there ever is a right or wrong take in the kitchen (Diana Kennedy may just be aiming at me with a rifle now). It seems to me that it is all fair game as long as you get to know your ingredients and how to use them. And of course, there has to be a worthwhile and delicious result.

Print Recipe
4.50 from 2 votes

Ancho Chile Mexican Hamburgers with Lime Aioli

Talking about American foods enriched by Mexican ingredients, I can’t leave out those tasty, juicy and smoky Ancho Chile hamburgers. My mother used to make them for our birthday parties as me and my sisters grew into teenagers. We felt more hip having funky burgers instead of kid sized tacos. Plus, they were a hit with our friends. They are a snap to make and for the Mexican spin you just need to prepare a seasoning paste with Ancho Chiles.  Anchos, being ultra mild and somewhat fruity with a hint of prunes, make an instant click with the meat.
Prep Time15 minutes
Cook Time8 minutes
Course: Main Course
Cuisine: Mexican
Keyword: ancho chiles, beef, chile, hamburger, lime, lime aioli, mayonnaise, Recipe, veal
Servings: 8 burgers
Author: Pati Jinich

Ingredients

For the burgers:

  • 1 1/2 pounds ground beef
  • 1 1/2 pounds ground veal
  • 1 1/2 cup white onion roughly chopped
  • 3 cloves garlic
  • 4 ancho chiles rinsed, seeded and soaked (explanation follows)
  • 1 1/2 teaspoons kosher or sea salt or to taste
  • 1/2 teaspoon black pepper freshly ground, or to taste
  • 2 eggs lightly beaten
  • safflower or corn oil

For the lime aioli:

  • 1 cup mayonnaise
  • Juice of 1 lime about 2 tablespoons
  • 1 teaspoon grate lime rind
  • 3 garlic cloves pressed
  • 1 teaspoon kosher or sea salt
  • 1/4 teaspoon black pepper

For the garnishes:

  • 8 hamburger buns
  • yellow mustard
  • ketchup
  • 2 red tomatoes sliced
  • 8 iceberg or romaine lettuce leaves rinsed and dried
  • 1/2 white onion sliced

Instructions

  • Rinse the ancho chiles. On a chopping board, make a slit down their side and take out all of their seeds, veins and stems. Place the cleaned chiles in a small bowl and cover with 1/2 cup boiling hot water. Let it soak for 10 to 15 minutes. Places chiles in the blender along with the soaking liquid, onion and garlic, and puree until smooth.
  • In a mixing bowl, combine the ground beef and veal. Add the chile mixture, two lightly beaten eggs, salt and pepper. Mix until it is all well incorporated.
  • Heat the griddle or pan over medium heat until very hot, about 6 to 8 minutes. Brush some oil on the griddle or pan.
  • With your hands, mold the patties and place them on the hot griddle or pan. Cook for about 4 to 6 minutes per side, depending on how well cooked you like your burgers. I like them medium-well, so it is about 5 minutes per side for me.
  • Place the garnishes on the table so that everyone can choose to their liking.
  • To make the lime aioli, place everything in a mixing bowl, and just mix it all up!
  • If you want to make this hamburger into a cheeseburger, Monterey jack is a great companion. Just place a slice of cheese on to the burger once you flipped it and let it melt as it finishes cooking.

Notes

Hamburguesas con Chile Ancho y Aioli de Limon