I am talking Cinco de Mayo on The Splendid Table! You can listen in on my conversation with Lynne Rossetto Kasper below.
Santa Clara Cookies
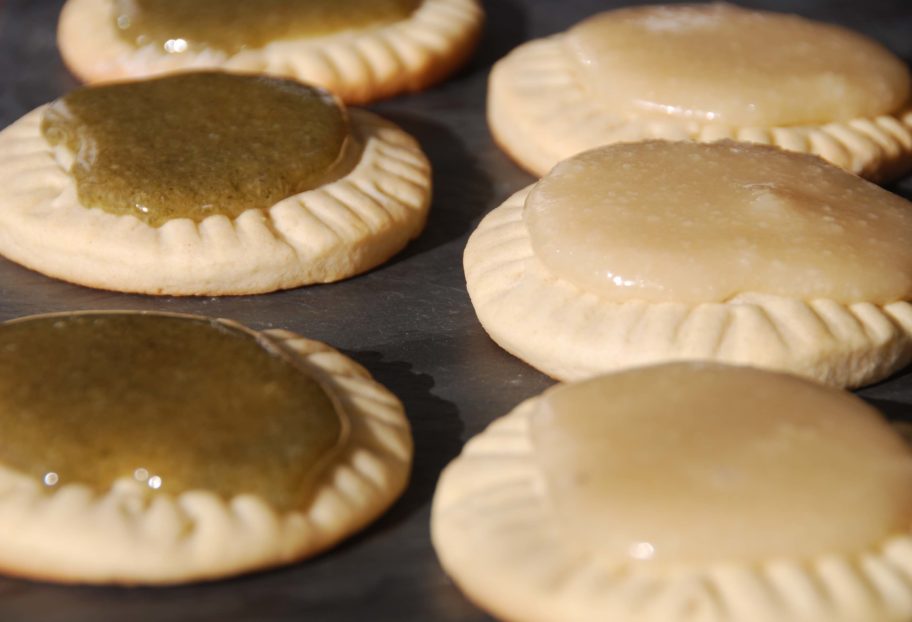
You know what happens when you eat a Santa Clara Cookie?
When you first bite into it, you go through a soft layer with grainy texture that tastes like a moist version of marzipan. But as your teeth sink in they hit the hard crust of a buttery cookie that breaks into the crunchiest of chunks in your mouth. It makes for such tasty contrast that you have to take more bites to understand their beauty. Since one cookie doesn’t explain it, you will reach for another one…
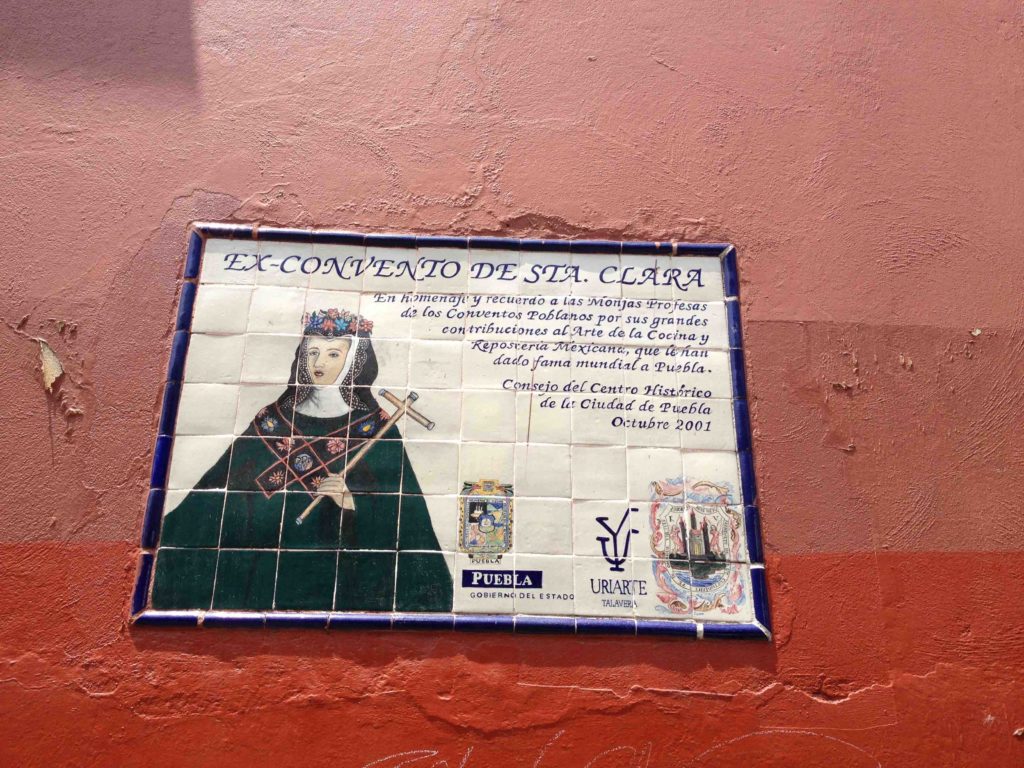
There you go! Another sweet concoction from the nuns of the Santa Clara convent in Puebla whose recipe has been passed down for over a dozen generations. Together with the nuns from Santa Rosa Convent (where Mole Poblano is believed to have been invented) and Santa Monica Convent (where many say Chiles en Nogada come from) they are much to blame for the baroque foods, which mixed European and Mexican ingredients with much passion and devotion, that shaped the cuisine of this city – and has made it an epicenter of gastronomy in Mexico.
Yet it was the nuns from Santa Clara who were most famous for their sweets. You can read what the plaque says outside of the standing convent which shut its doors long ago but left behind a strong legacy and a trail of sweets.
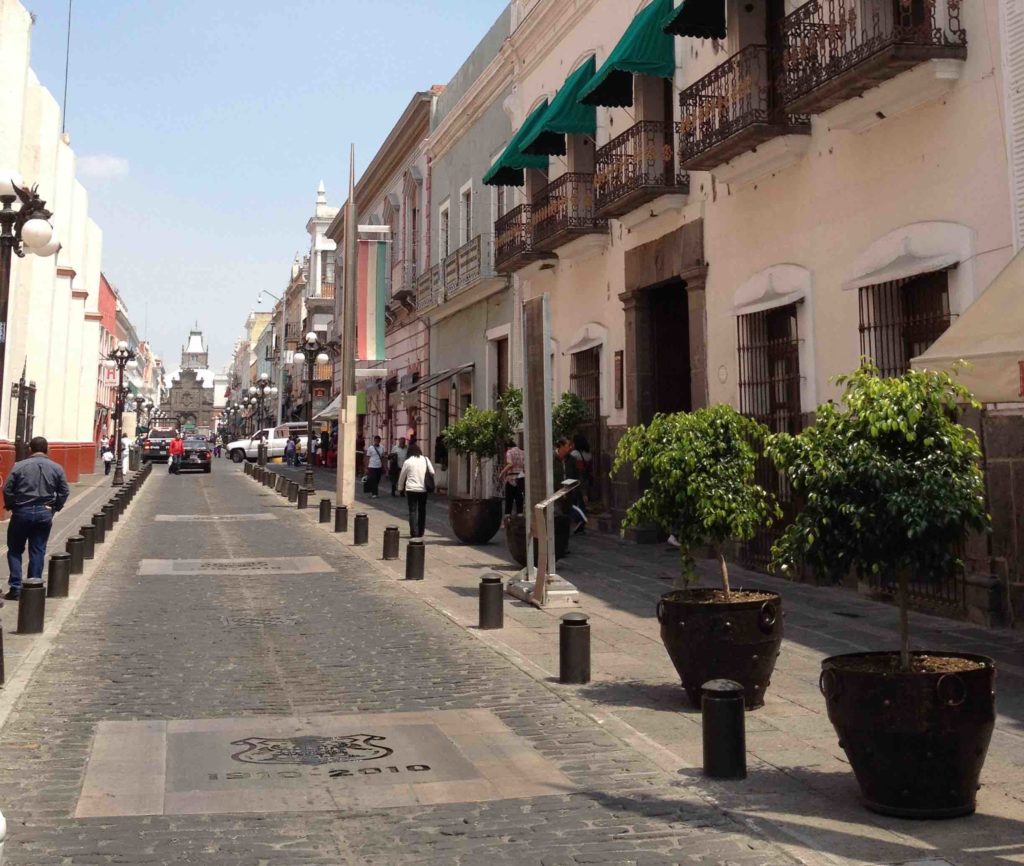
You can eat most of these sweets in the two block-stretch that makes La Calle de los Dulces “The Sweets Street” where the convent stands. There are sweets shops lined one after another selling truckloads of them.
We went down there this spring to film the Puebla Episode for Season Two. I stood on the street in awe and a bit confused (and hurried by the production company too) not knowing which store to choose from and wanting to sample every kind of sweet from them all.
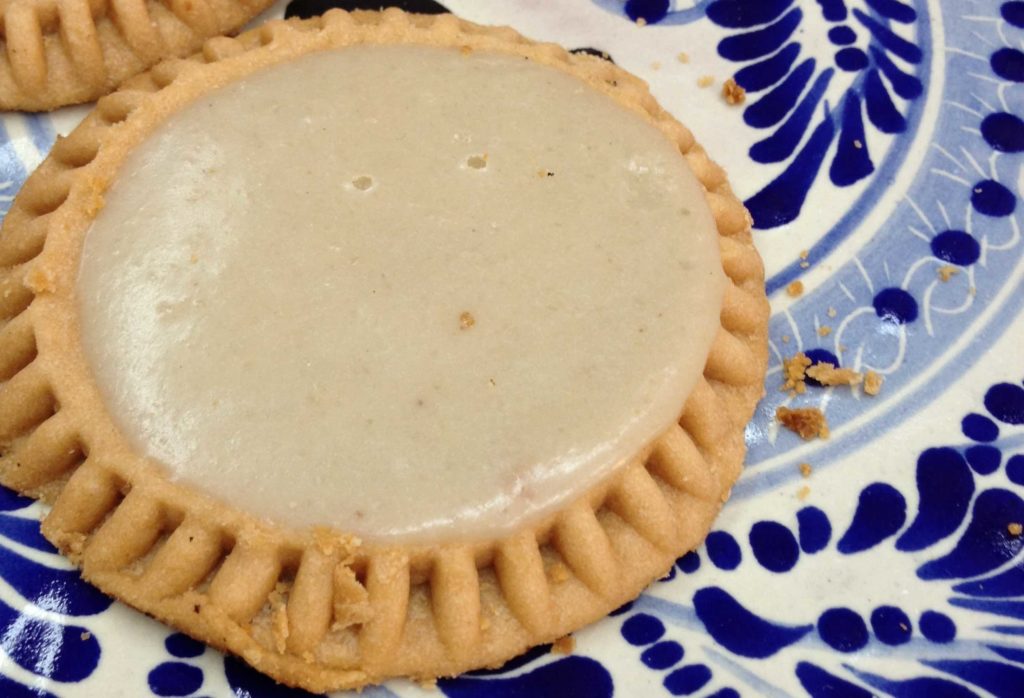
The cookies are sold individually wrapped so the base won’t crack and the thick nutty glaze won’t spread. They come in three sizes: gigantic, normal and small. And yes, I ate the cookies that are missing from this beautiful Talavera platter below, while standing right in the middle of the street, telling the producer that I really needed to eat a few before being able to talk about them in front of the camera.
If you saw the episode, you saw me eating them!
So unique are these cookies, that there are special Santa Clara cookie molds to make them in that exact shape in one swift press. There is also a laborious technique for making the glaze. However, I have tested versions galore in my kitchen and I have a genuine and true short cut that makes any round cookie mold work and an easy way to get the same glaze.
Let’s begin with the glaze.
Traditionally, it is made with Pumpkin Seeds (some companies have gotten away with making the glaze with confectioners sugar, but connoisseurs know not to be tricked!). The thing is, since the Colonial era, the Spanish nuns were keen on making the sweets they knew from back home but with Mexican ingredients. So the pumpkin seeds took their turn in marzipan instead of almonds, hence the Dulce de Pepita. It was a success. The next step was to use this sweet to coat a cookie.
Yet, the laborious part of making the glaze is that pumpkin seeds once hulled are green. Be it for their spiritual beliefs, obsession with purity, or wanting to use same technique as blanching and peeling the almonds for marzipan, the nuns found a way to remove the super thin skins that are completely stuck to the seeds until the seeds reach a shinny ivory white.
To begin with, hulling the seeds out of the outer thick shell is time consuming, we are lucky they are sold already hulled. This thing of removing the thin green skin just complicates it much further…
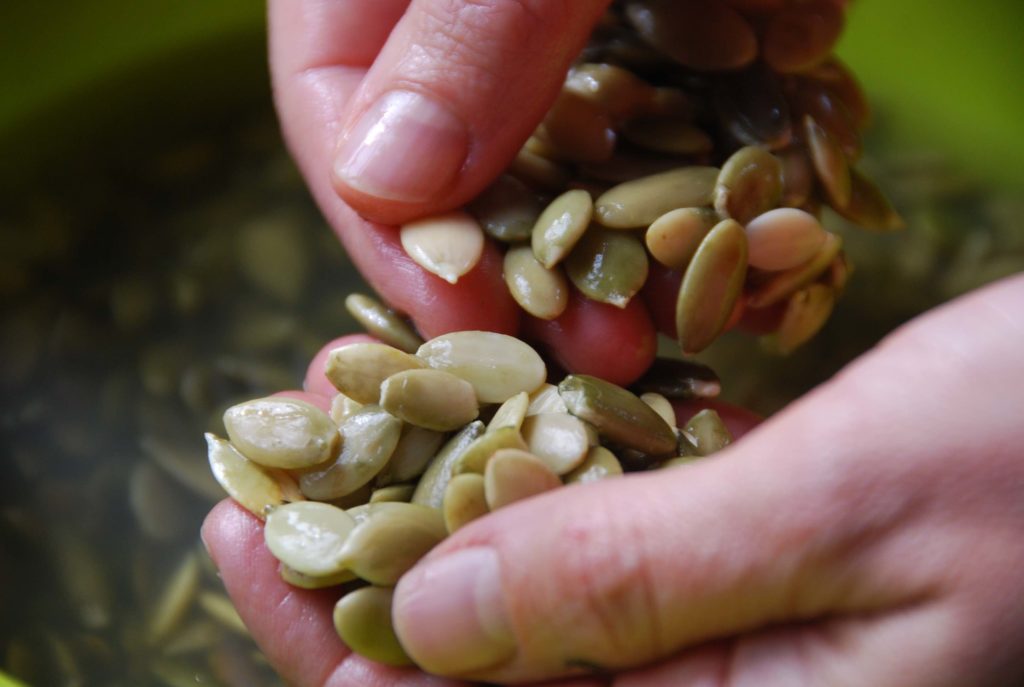
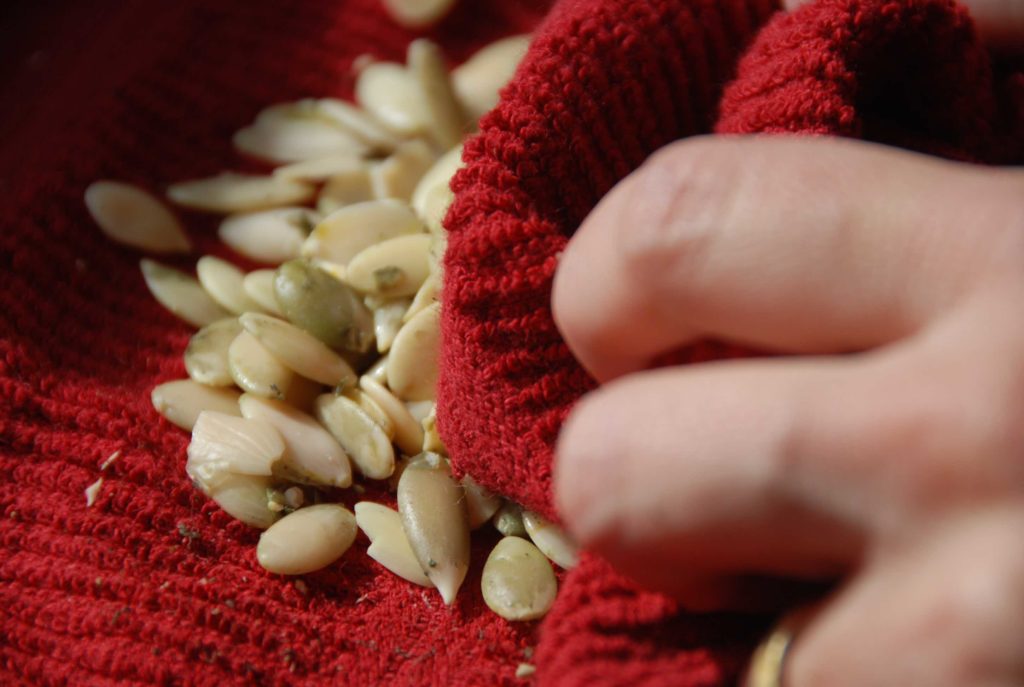
To make the glaze like the nuns, you have to soak the seeds overnight either with slaked lime, ashes or baking powder. Then you have to rub them with your hands to peel away the thin skin. But since that won’t remove the skin all the way, you have to rinse and rub them between clean kitchen towels, many times, until they are completely ivory white.
I am one to have patience in the kitchen, but I don’t think I have the patience of Santa Clara nuns…
I don’t know if the nuns knew then just how healthy and nutritious the pumpkin seed skin is. But if you leave it on, you have a glaze that is just as fabulous but with a light green color. Of course you can test your patience and try the technique for making them ivory white, but if you insist on making a white glaze and don’t want to spend the hours rubbing the seeds, you can substitute the green pumpkin seeds for white slivered almonds!
Whichever nut or seed you decide to use, peeled or not, you need to grind them in a food processor or blender. That is easy enough if you don’t have to peel them… The rest also goes easy as pie.
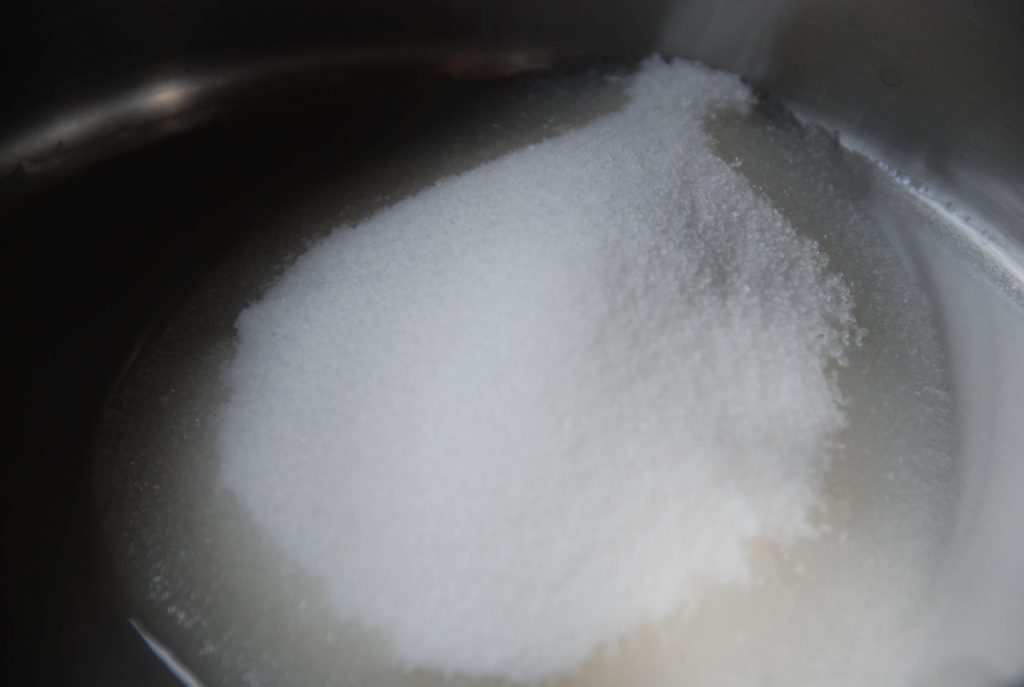
Make a syrup by mixing water and sugar in a medium sauce pan.
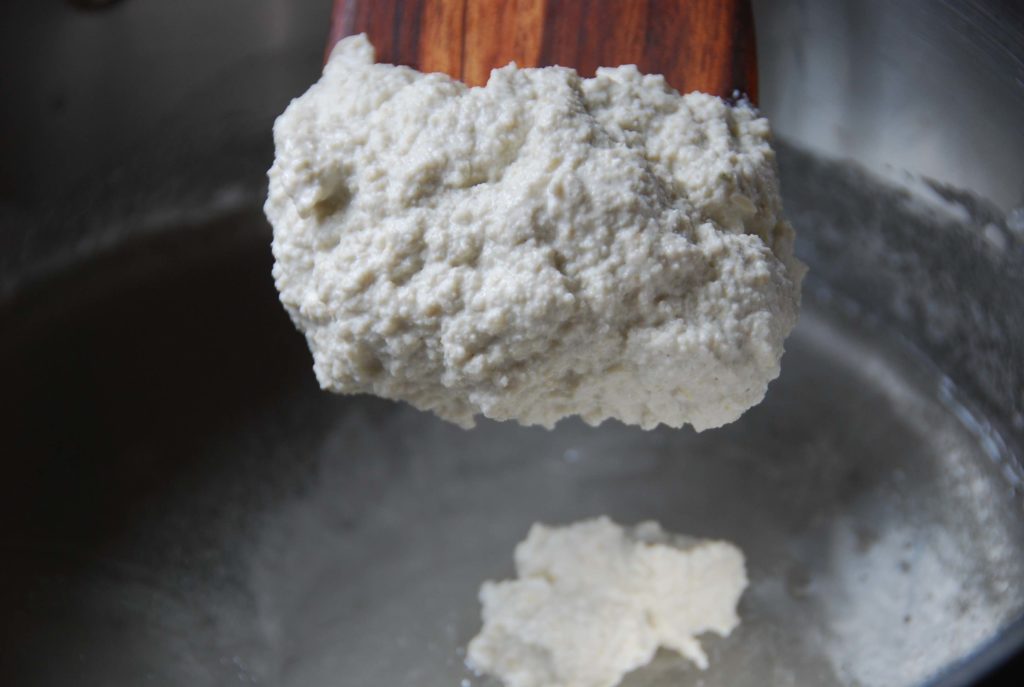
Once the sugar dissolves, let it thicken to a light syrup, about 10 minutes. See below, just until the syrup drops begin taking their time letting go of the wooden spoon.

Add the ground seeds or nuts and mix with the syrup and cook for about 3 to 4 minutes. Lastly, add a splash of milk. It makes the glaze be shinny and beautiful, almost like a mirror where you can reflect your soul in: just like the nuns liked it!
Then you make the cookies.
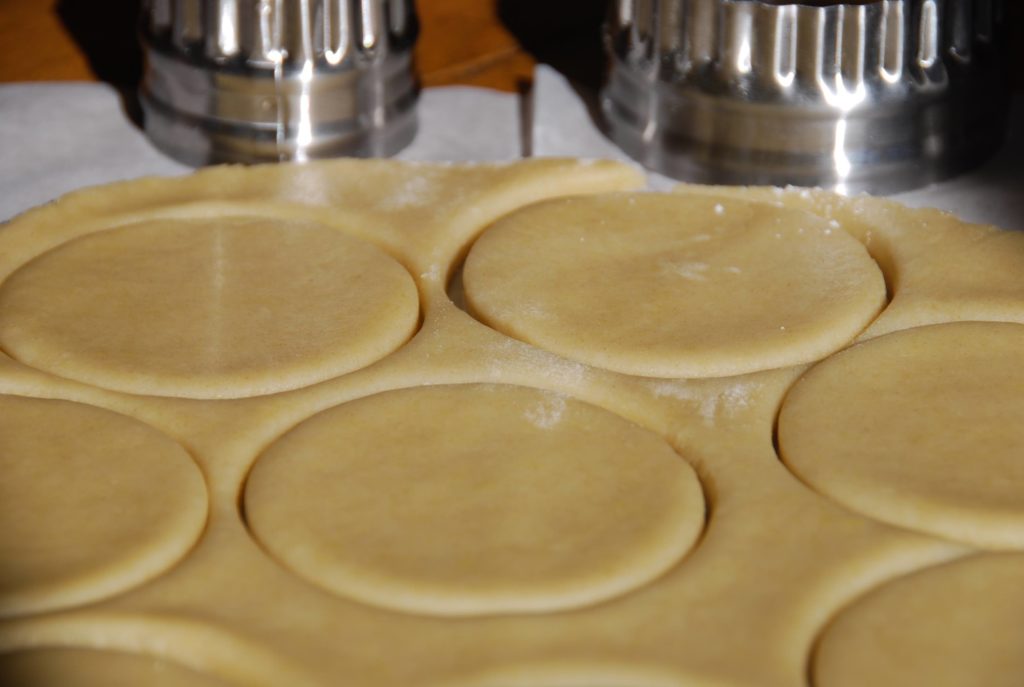
If you go to Puebla and find a special Santa Clara Cookie mold that’s great! If you don’t, fear not. Spread the dough and grab a round cookie cutter.
I like a 3″ round.
Cut the circles.
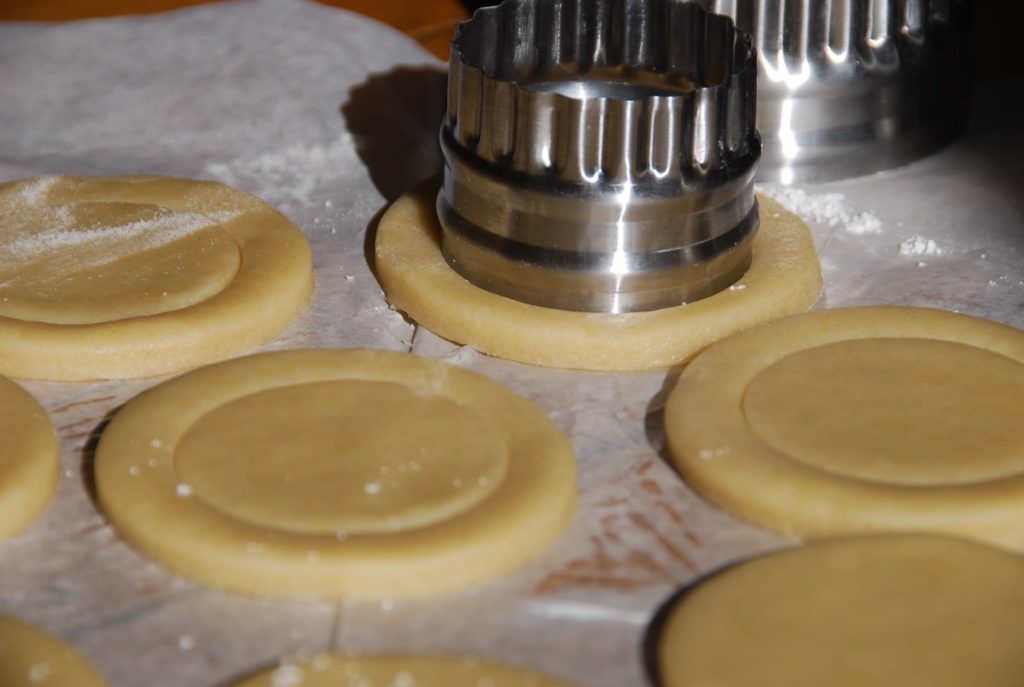
Then use the cookie cutter next size down… Press inside each circle, but don’t go all the way down. That will give you a border to decorate but also a boundary for the glaze to be contained.
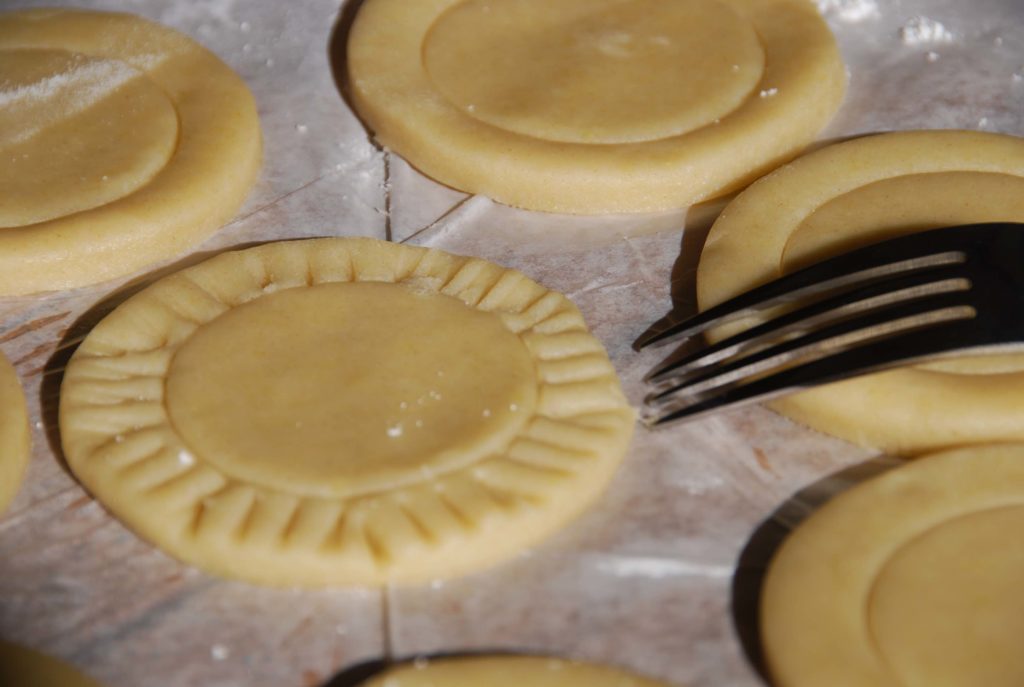
Decorate around the border with a fork.
Bake the cookies.
Let them cool completely and add the thick glaze on top. Wait until both the cookies and the glaze have cooled down or the glaze will run all over the cookies. You can make both things ahead of time…
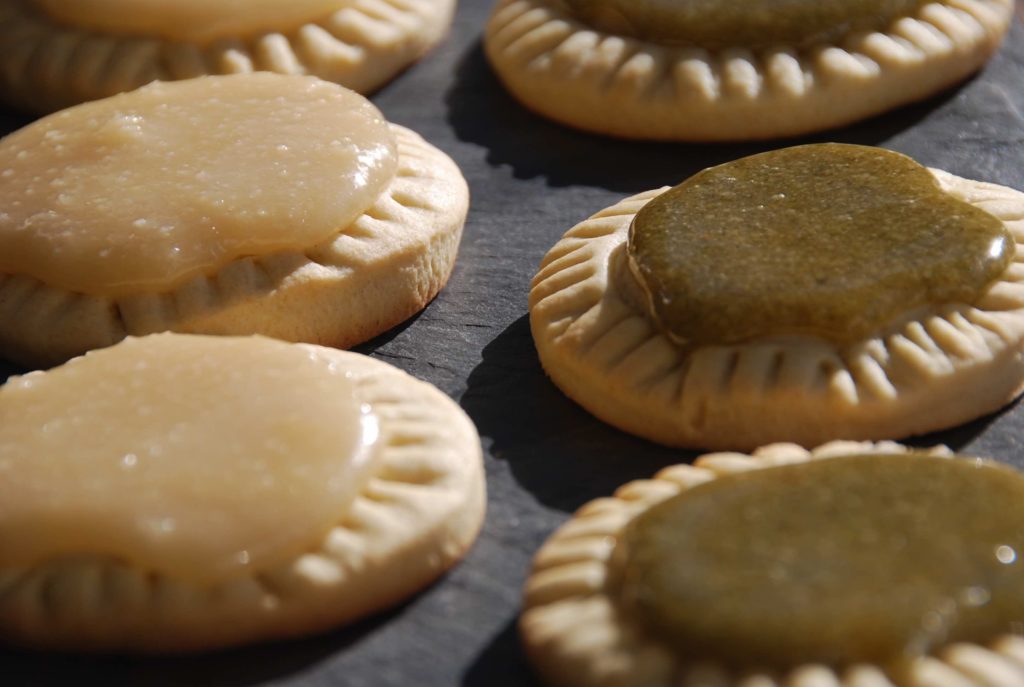
Which cookie tastes better, the one made with thoroughly peeled pumpkin seeds or the one with the un-peeled pumpkin seeds? Both! They are just as good. And the one made with almonds, too.
Which one looks prettier?
As it is well said: Beauty is in the eyes of the beholder. You choose. In any case, don’t wait to get to Puebla, until you do, give these a try.

Santa Clara Cookies
You know what happens when you eat a Santa Clara Cookie? When you first bite into it, you go through a soft layer with grainy texture that tastes like a moist version of marzipan. But as your teeth sink in they hit the hard crust of a buttery cookie that breaks into the crunchiest of chunks in your mouth. It makes for such tasty contrast that you have to take more bites to understand their beauty. Since one cookie doesn’t explain it, you will reach for another one…
Servings: 24 cookies
Ingredients
For the dough:
- 1 4-ounce stick unsalted butter at room temperature, sliced
- 1 cup confectioners' sugar
- 1/4 teaspoon baking powder
- 3 cups flour plus more for rolling out the dough
- 3 egg yolks
- 1/2 cup lukewarm water
For the glaze:
- 2 cups sugar
- 1/2 cup water
- 3 cups hulled and unsalted pumpkin seeds may substitute with blanched and slivered almonds
- 1/2 cup milk
To blanch the pumpkin seeds:
- 1/2 teaspoon baking powder or baking soda
Instructions
To prepare the dough:
- In the bowl of a mixer, beat the butter over medium speed until creamy. Reduce speed to lowest setting and gently add the confectioners' sugar and baking powder. Continue mixing until everything is incorporated. Add the flour, one cup at a time, and then the egg yolks one at a time; continue beating for a minute. Pour in the water and continue mixing until the dough is smooth and can form a ball (it will take less than a minute). Wrap the dough in plastic wrap and place it in the refrigerator. Let it cool until it hardens enough to be manageable, at least 1/2 hour (the dough can be kept in the refrigerator for up to a couple days).
- When ready to bake, preheat the oven to 375 degrees and cover a baking sheet with parchment paper. Place half of the dough on a piece of lightly floured parchment paper, sprinkle some flour over it and then place another piece of parchment paper on top. Use a rolling pin to gently roll out the dough, spreading it evenly about 1/4" thick. Remove the top piece of parchment paper and cut out circles with a round, 3" cookie cutter. With a smaller cookie cutter, make a circular indention in the middle of each cookie, without cutting all the way through the dough (there should be about a 1/4" space between the indentation and the edge). Press the edges of each cookie with a fork as if marking the edges of a pie. Repeat the process with the remaining dough and roll it out again making as many cookies as possible.
- Space the cookies at least 1/4" apart on a cookie sheet and bake for about 10 minutes, until they are fully cooked and the bottoms are lightly browned. Remove from the oven and let cool; repeat with the remaining cookies.
To prepare the glaze:
- Like the nuns - Bring water to a boil in a small saucepan, add pumpkin seeds, simmer about 5 minutes and turn off the heat. Let it cool, stir in baking soda or powder and let it sit over night. With your hands, rub the pumpkin seeds between your fingers and thumbs to try to release their skins. The skins will float in the water. Carefully pour out the water, cover again with clean water and drain again. With a slotted spatula, place the pumpkin seeds on a clean kitchen towel, rubbing them so the remaining skins come entirely off. Place the seeds in a bowl, cover them with water, rinse and place them on a towel to dry.
- Like me - You can skip this part and use normal hulled pumpkin seeds or blanched almonds.
- In a medium saucepan, place the sugar and 1/2 cup of water over medium low heat. Cook, keeping a close eye on it, until the sugar has completely melted into the water and appears to be a happily bubbling syrup (which should take anywhere from 8 to 10 minutes). Add the ground pumpkin seeds or almonds and stir well, creating a thick paste. Let the mixture cook for another 3 to 4 minutes --it will thicken and become even more pasty. Turn off the heat, pour the milk and stir well. It should be thick yet shiny and liquid. Remove the mixture from the heat and let it cool slightly. Use it to top the cookies but before it hardens. If it does harden, just heat the mixture over low heat with a tablespoon of water until it becomes runny again.
- Once the cookies are no longer warm to the touch, add the cooled candied pumpkin seed or almond glaze on top with a spoon. 1 to 1 1/2 teaspoons of glaze is more than enough, it spreads as it settles.
Notes
Tortitas de Santa Clara
Pomegranate or Granada
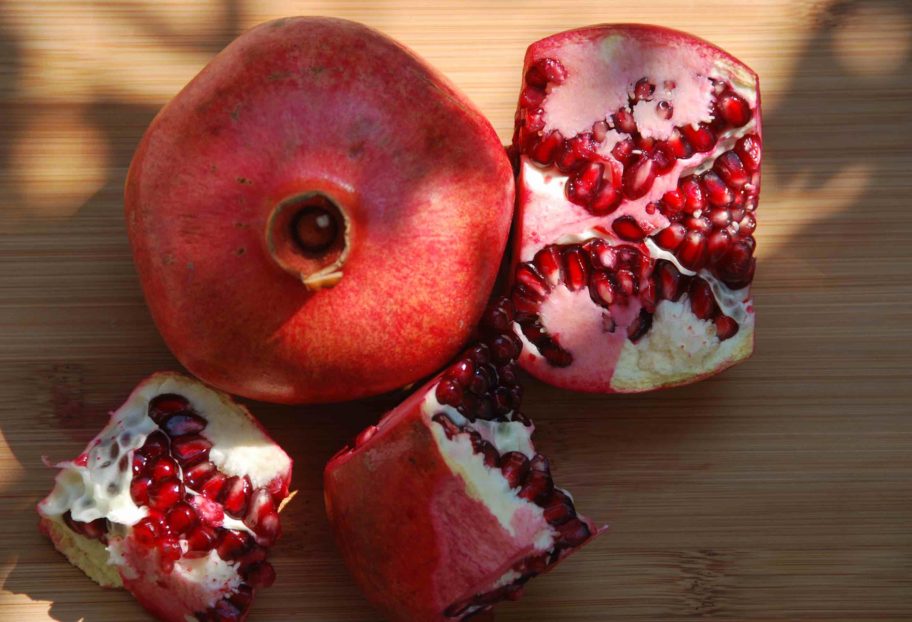
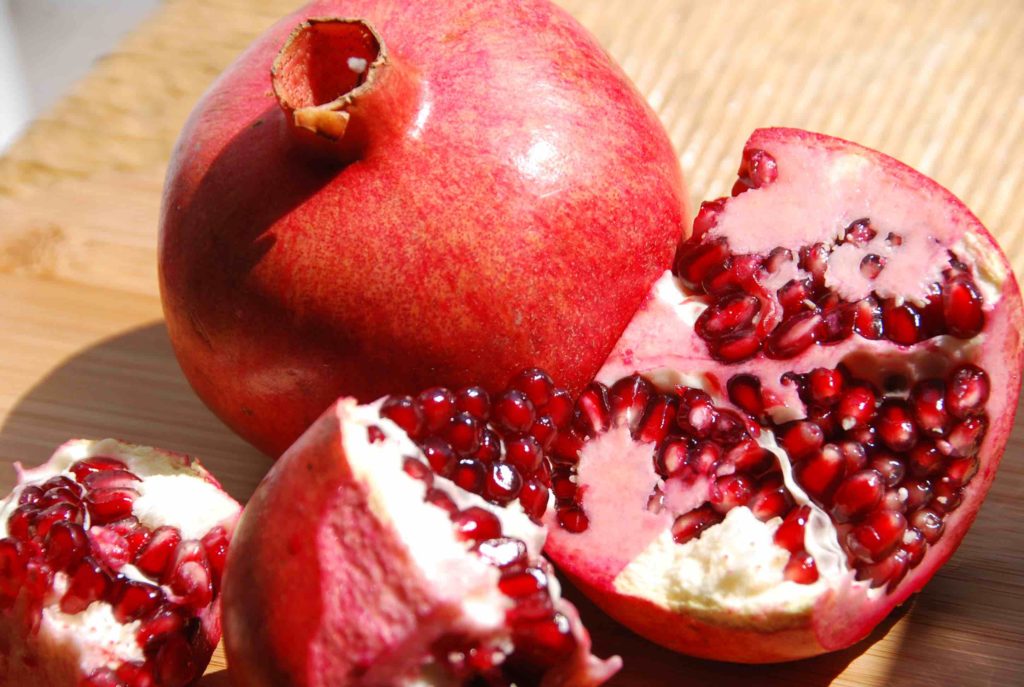
The pomegranate is such a vivid, vibrant and enticing fruit, that I consider it to be one of the most sensuous ingredients. It has a thick and tough pink-to-reddish skin that comes off as impenetrable. But, break into it, and you will find an overabundance of shiny, ruby red seeds that resemble jewels and have the juiciest crunch.
The taste is sweet, bright and slightly tart and the bursting juice seems primed to make wine. Be mindful when you peel them, as the stains from the juice can be hard to clean off. I cut the fruit in half and then use my fingers to open up the clusters covered in a white membrane. As I remove the membrane I loosen the seeds. Some people like to do this in a bowl with water to avoid the stains. I do it without the bowl of water but use an apron for sure.
Pomegranate season in Mexico starts in early August and goes through October. No coincidence, as one of the most famous dishes it is used for, the Chiles in Nogada proudly boasting the three colors of the flag (green, white and red) are made mainly in the month of September to celebrate the month of Independence. In the US the prime season is a bit later: from (sometimes end of September) October through January/February, which makes it a bit of a challenge for those of us craving that peculiar dish on that specific month.
Although pomegranates are used in such a traditional Mexican dish, they are not native to Mexico. However, since their arrival to Mexico early on in the Spanish Conquest, they have grown deep roots and are grown and eaten with much enthusiasm. During pomegranate season, you will see market stands with mountains of pomegranates with the most beautiful one of the bunch opened up on top, to show customers just how red, plump and shinny the seeds are.
The pomegranate is one of the world’s oldest fruits and has such a long history that it has been suggested a pomegranate, not an apple, tempted Eve in the Garden of Eden. I’m not one to know, but it originated in Persia and the Himalayas; it has been traced back as early as 3,000 B.C. And these days, it is getting to be considered a super food. Some people consider that to be because of good marketing, but it is, in fact, proven to be very nutritious with it’s generous share of Vitamin C, antioxidants, potassium, folic acid and iron.
In ancient times, the pomegranate’s most noted use was extracting the juice to be used as a thirst-quencher for warriors in battle. You can still find it being juiced right next to oranges in the Middle East. So the juice is still popular for drinking, but it is also sold ready to reduce into sauces, syrups, flavoring desserts, and even making into wine. The seeds are just as widely used and are most often used raw to garnish dishes, in salads, and in desserts; if not, eaten directly out of the fruit!
Many modern Mexican cooks are starting to play with it in more savory main dishes. I, like many cooks, like to sprinkle it on top of guacamole! But it would be delightful in a Pico de Gallo, right?
The pomegranate may be a little intimidating to use for new comers, but it’s easy. It is not worth (if you ask me) to pay the extra bucks to buy the seeds already set free. Just put on an apron and dig in for quick gold.
And if you are not in a hurry and you already brought the chubby pomegranates home, just keep them in a shaded and ventilated area of the kitchen. They last for months.
Sweet Potato Rounds with a Punch

I hadn’t heard about Thanksgiving until I moved to Texas. Yet, I took my first shot at cooking the meal that cold fall of 1997 in the vast yellow plains of Dallas. Inspired by the glossy food magazines, cookbooks and TV shows, and wanting to immerse myself in the American experience, I baked, cooked and stirred while feeling homesick for my family’s home-cooking. It took years of living in the US for me to grasp the depth and warmth of the holiday and the menu, many failed turkeys and side dishes along the way.
It turns out, fifteen years later, the Thanksgiving feast has become such a relevant part of our lives that if we ever moved back to Mexico, I’d have to bring it back with us.
The connection wasn’t instantaneous. Slowly, some elements began to resonate within me. Take the bird: Turkey is an indigenous ingredient in Mexican cookery and a center piece for Christmas and the New Year. Both are holidays which also happen near the end of the year, during the coldest season, and have to do with gathering family and friends around a plentiful table. And being thankful. And hopeful.
Regardless of the many recommended takes on turkey I tried, it wasn’t until I came up with my own Mexican version (it’s in my new cookbook please get it!) that the Thanksgiving turkey felt like part of our home and our home grew deeper roots in the United States.
Now my Mexican turkey is part of the Thanksgiving menu, we eat every year with our same dear American friends, along with Debra’s butternut squash soup; Tamara’s fennel, pear and parmesan salad; Sean’s changing sides (as my turkey replaced his, he is finding his way on the sides territory – sorry Sean, but you’re the one who chose mine…); Viviana and Mario’s very berry sauce; and David’s chocolate pecan pie and home made ice creams.
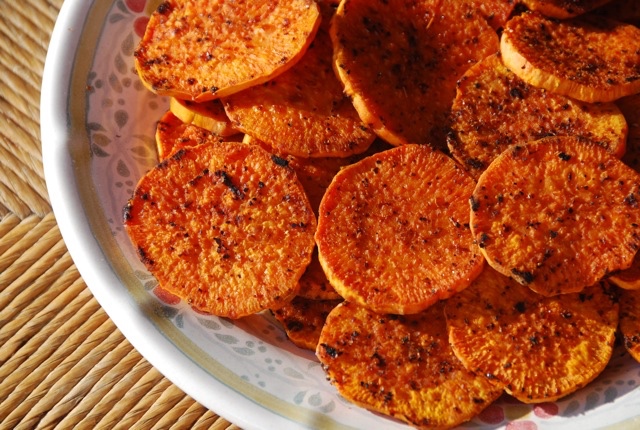
This year, I have some sweet potato rounds with a punch to share.
I realize the Thanksgiving menu has a permanent side to it: dishes that become part of it tend to be recurring for decades and very few get added or replaced along the way.
I envision these sweet potato rounds will have the same fate as my turkey: repeated appearances and a big chance of permanent status.
Just like turkey, sweet potatoes are so familiar to me. Called Camote in Spanish, from the náhuatl Camotli, they’ve been part of Mexico’s culinary lingo since pre-Hispanic times.
Mostly eaten cloaked in sugar or with a sweet spin, baked or roasted, they are culturally linked to the figure of the Camotero, a street vendor selling warm and soft sweet potatoes and plantains to order on a pushing cart, that moves around the city on cold evenings, turning people’s cravings on with the tune of its piercing whistle sound.
Here in the US, I’ve come up with a speedy, savory, irresistible take that can be a companion to whatever you may serve on your Thanksgiving table and will perk up the entire meal.
The best part: this will be a stress-free dish. It takes only four basic ingredients and it can be eaten warm, lukewarm or completely cooled.
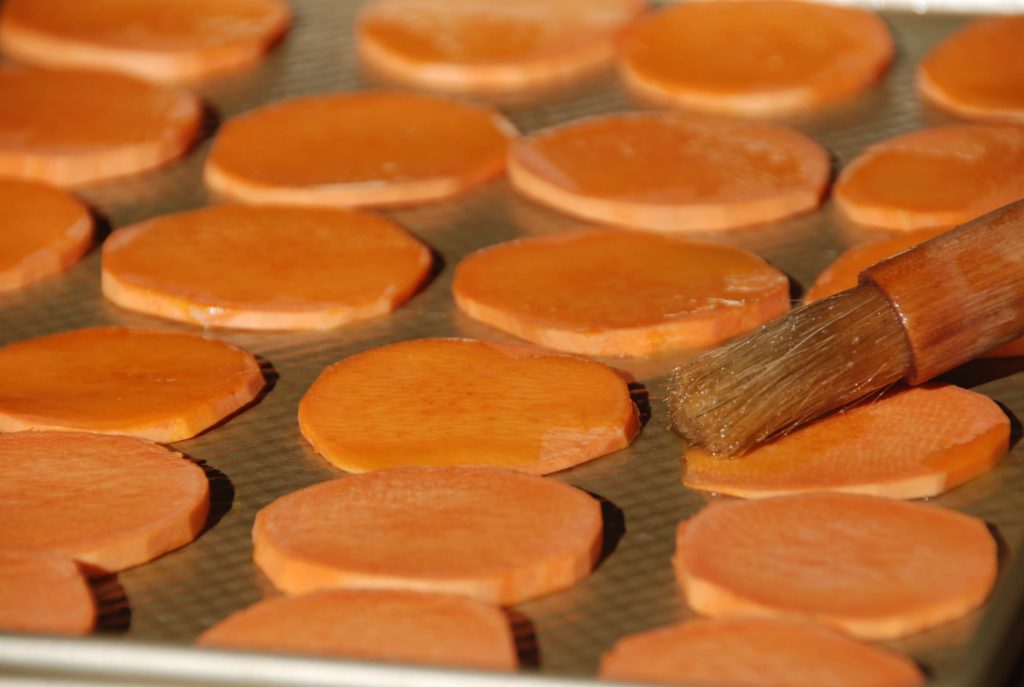
Just slice the sweet potatoes into rounds, you can do that ahead of time. Brush them with a combination of melted unsalted butter and olive oil. Yes, please use both, it tastes so good, trust me.

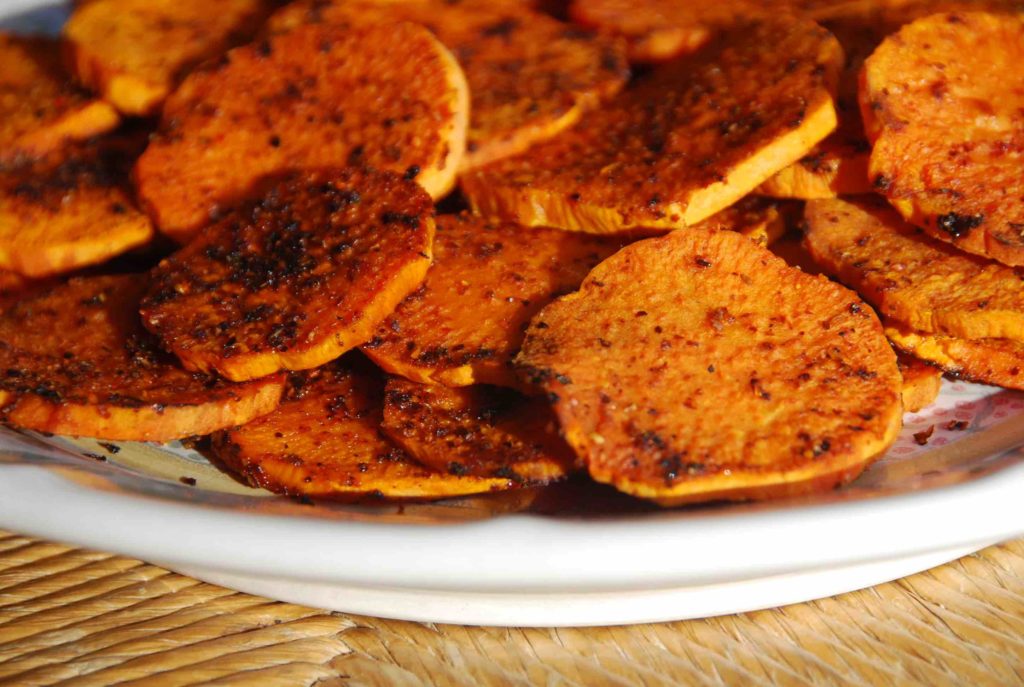
Generously sprinkle your favorite ground chile blend to cover on both sides.
The rounds will fly off of your platter, so bake plenty: they are thin and soft with a sweet bite on the inside, and lightly crispy on the outside with that lightly spicy, deliciously tart and barely salty seasoning.
It is during Thanksgiving when I most realize how fully Mexican I can be in the United States, and how much the US has grown on me. And I feel immensely thankful.
Having come from Mexican grandparents who were once immigrants too, who made their home in Mexico, missing my Mexican parents and family, and now raising my Mexican-American family in the US… now I get it!
Just like so many people, I can’t be pigeonholed. And rather than feeling at a loss, I relish in the diversity of it all.
Wishing you a happy and plentiful Thanksgiving (with some punchy bites).

Sweet Potato Rounds with a Punch
Just like turkey, sweet potatoes are so familiar to me. Called Camote in Spanish, from the náhuatl Camotli, they’ve been part of Mexico’s culinary lingo since pre-Hispanic times. Mostly eaten cloaked in sugar or with a sweet spin, baked or roasted, they are culturally linked to the figure of the Camotero, a street vendor selling warm and soft sweet potatoes and plantains to order on a pushing cart, that moves around the city on cold evenings, turning people’s cravings on with the tune of its piercing whistle sound.
Servings: 4 to 6 servings
Ingredients
- 2 pounds sweet potatoes
- 2 tablespoons unsalted butter
- 2 tablespoons olive oil
- 1 tablespoon ground ancho or chipotle chile
- 1 teaspoon kosher or sea salt
- 1 teaspoon brown sugar
Instructions
- Rinse and peel the sweet potatoes. Slice them into thin rounds of about ¼ inch.
- Place oven racks on lower and upper thirds. Preheat oven to 400 degrees.
- In a small saucepan melt the butter over low heat. Once it melts pour in the olive oil, combine and remove from the heat.
- Brush the butter/oil mix onto the bottom of two large baking sheets. Place the sweet potato rounds in a single layer. Brush the tops with more of the butter/oil mix. In a small bowl, combine the ground chile, the salt and the sugar. Sprinkle the sweet potatoes generously with ground chile blend. Flip rounds on to the other side and sprinkle generously with ground chiles. Place in the oven for about 20 minutes, or until they have started to brown. Remove baking sheets. With a set of tongs or a pair of forks, flip the sweet potato rounds. Place back in the oven for 12 to 15 minutes more, until they have browned on both sides. Don't let them burn.
- Remove them from the oven. As they cool a little, their edges will crisp a bit more. Serve hot or not: either way they are delicious!
Notes
Rueditas de Camote
The Splendid Table: Day of the Dead Talk
Do we celebrate Halloween in Mexico? Yes, more so in the big cities, but Halloween is a growing holiday throughout Mexico. However, what is predominately celebrated around this time of year is Day of the Dead. I had a wonderful time speaking with Lynne Rossetto Kasper about the iconic festivities of Day of the Dead, including the many things we do with pumpkins.
For the whole show, click here.
For recipe on Pumpkin and Ancho Chile Mole, click here.
Make Pan de Muerto at Home!
I wouldn’t be caught dead without Pan de Muerto during Day of the Dead.
One of the most meaningful, colorful and delicious of Mexican celebrations, Día de Muertos has this bread as one of its trademark treats. It may sound strange to eat fluffy sugared up bread in the shape of bones, but then again, we also eat calaveritas, candies in the shape of skulls. This shows how crucial food is for Mexicans but also how it gets infused with our sarcastic sense of humor, generous spirit and gutsy attitude.
Not that Day of the Dead is such a big occasion here in the United States, but I notice an increased awareness. Teachers are starting to talk about it in schools, sugar skulls and decorations are popping up in stores…It’s becoming trendy. As it happens right on the tail of Halloween, elements from both celebrations seem to cross paths. They both include graveyards and a lot of eating, but they are quite different.
Day of the Dead, which is not one but two days, November 1st and 2nd, is when those departed have a license to come back and visit the ones they’ve left behind. And hey, if they are coming back from another world, it better be a feast worth the trip! Altars are decorated, filled with the visitor’s favorite foods and drinks, candles and flowers placed throughout, to help illuminate for a safe journey back home. There are visits to the cemetery, too, but of a different nature than Halloween: Day of the Dead is a bittersweet, sad and joyous time for gathering, feasting and remembering.
Pan de Muerto, has to be one of the sweetest sides of it, eagerly awaited by all.
Those who have tried it want it, as it is really irresistible. But there are not that many panaderías that make it outside of Mexico.

Well, guess what? Wait no more, you can make your own.
It is simple to do; the only downside is, it takes time. The dough needs to rise…four times, and one of them is overnight in the fridge. So if you want your Pan de Muerto for Friday, start it on Thursday.
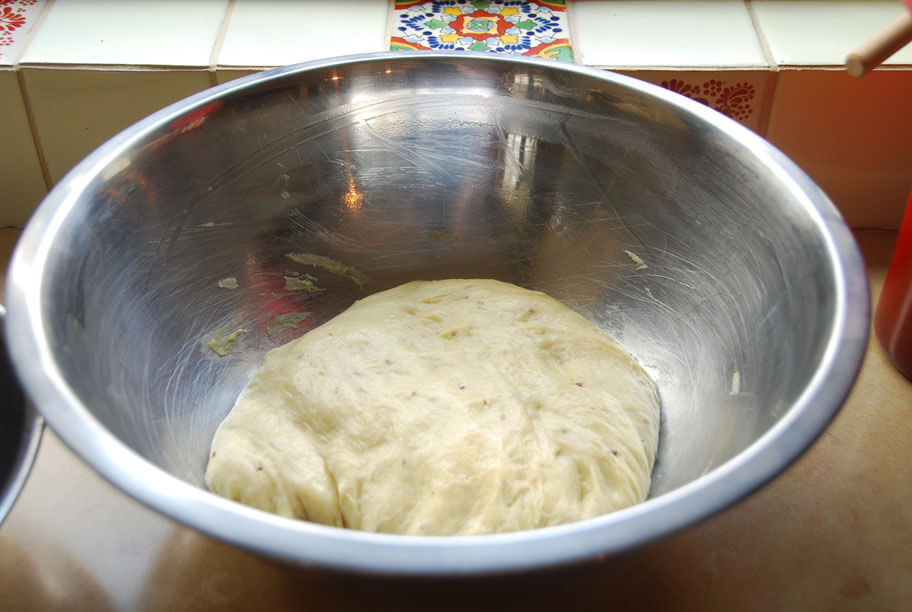
First make your starter: a small leavened mix. I make mine by mixing dry yeast (oldest versions of Pan de Muerto use Pulque, a fermented drink) with lukewarm milk, not too hot and not too cold, to make it easy for the yeast to react. Fully dissolve and add a bit of flour, to get the yeast going on stronger. When it puffs up and has bubbled on the surface, about 20 to 30 minutes later, you have your starter.
That’s the first rise.
Then make your dough in the mixer with butter, sugar and eggs. I add orange blossom water, as is traditional in many parts of Mexico and the old fashioned way. It makes it fragrant and light. I also add a bit of orange zest and anise seeds, which perfume it even more. Once mixed, beat in the starter. Cover it and place it in a bowl.
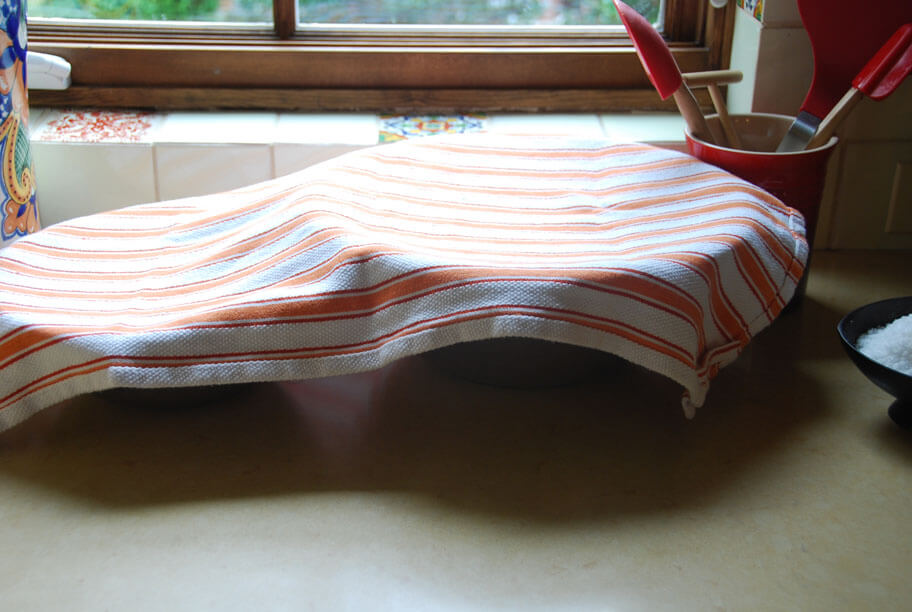
It’s better if you leave it in a warm area of your kitchen where there are no drafts, close to the oven or burners is a good idea, too. Leavened bread likes warmth and moisture, so much so, that I have gotten into the habit of placing a bowl with boiling water right next to the bowl with the dough and then cover it all together (in case you were wondering about the two bowls under the kitchen towel above).
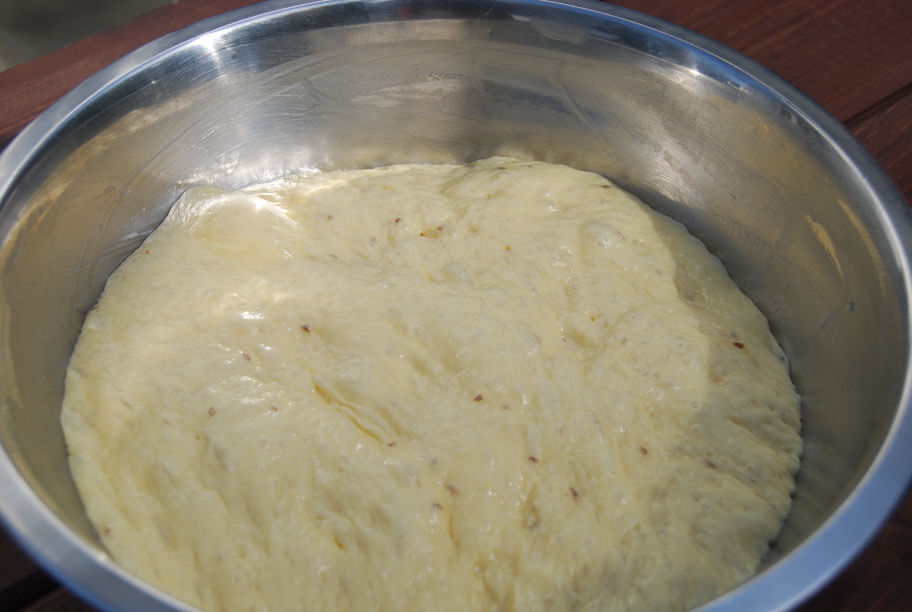
Then leave it to rise.
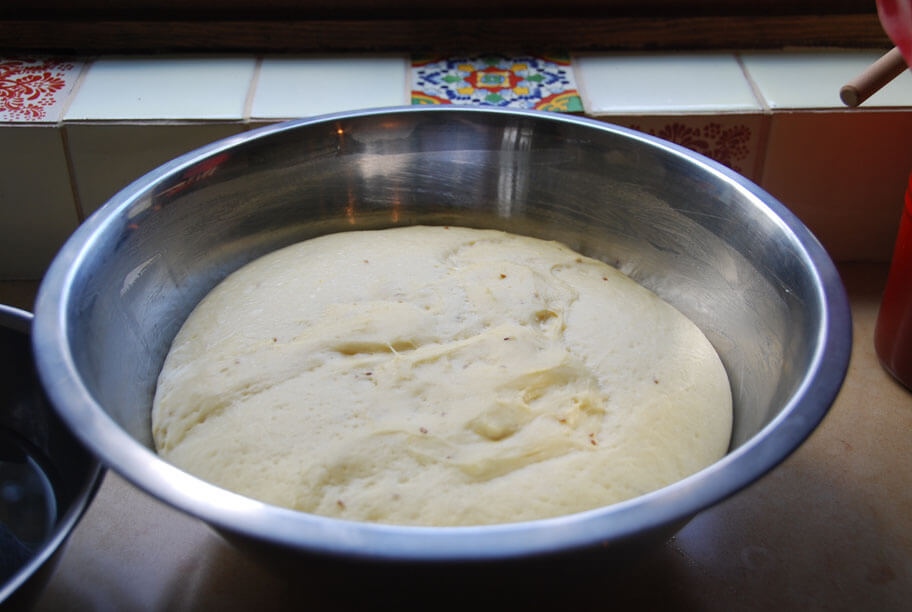
See how it puffed up in photo above? Almost tripled its volume.
That’s the second rise.
Then punch it back down. Just like that, make some fists and punch it twice.
Cover it with plastic wrap and place it in the refrigerator so that it will slowly but surely rise again, overnight. While you sleep, that dough will be getting ready for you.

See below?? Look how it rose again!
This time it was even bubblier and a bit stringy.
This is the third rise. Next day, morning sun.
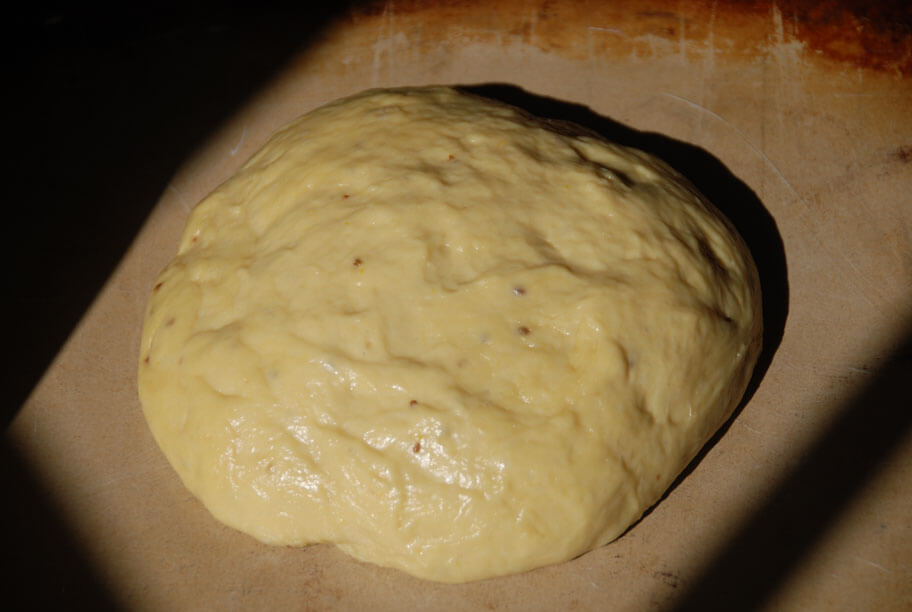
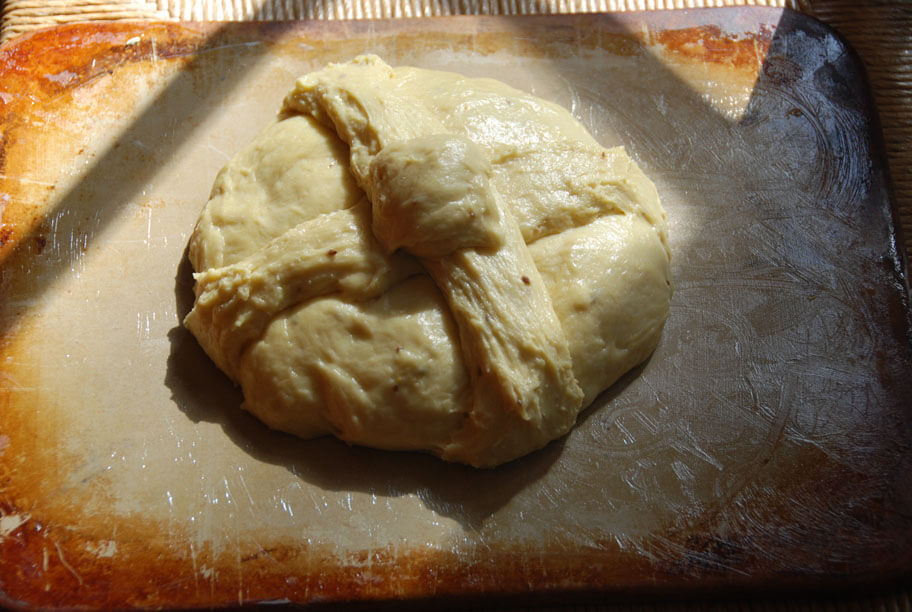
Then as you gather it into a ball, it will deflate in size, but you can see below how the dough has transformed and strands of dough are trying to stick to the bowl.
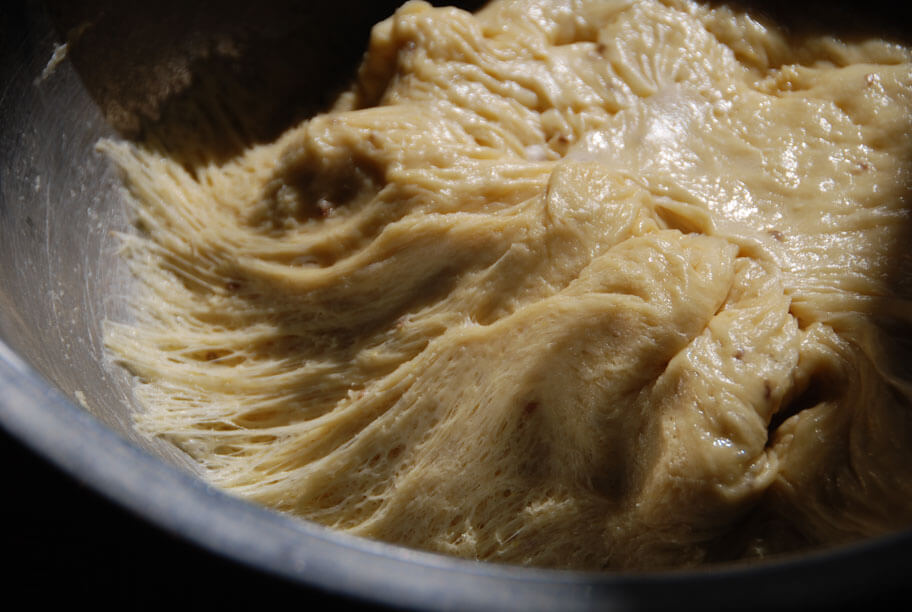
The dough ends up being shinny, sticky, compact…
Grab two thirds to shape like a ball and place it over a buttered or oiled surface. I like using this pizza stone.
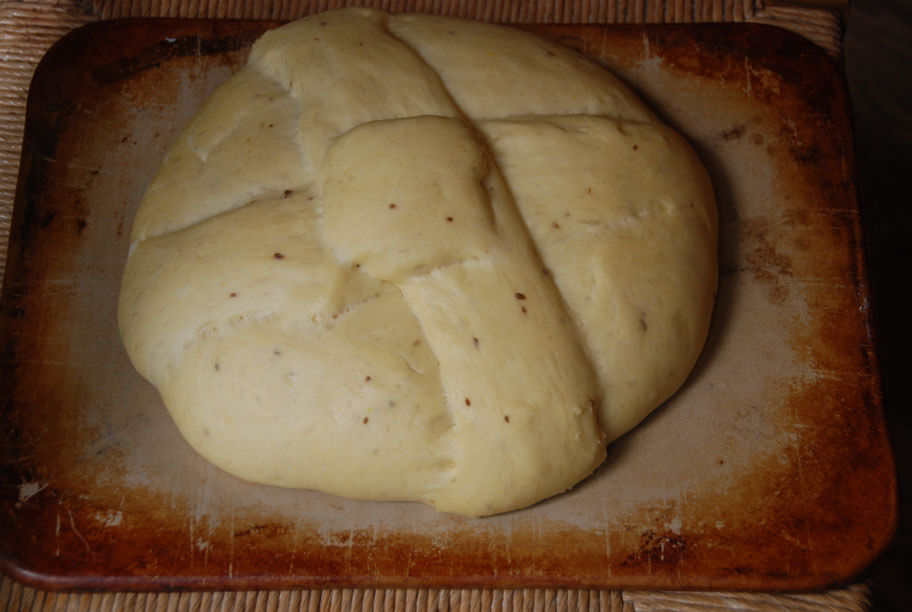
You leave a third of the dough apart, to decorate the ball with a couple of ropes and a ball on top. And then.. you cover it and let it rise again under a towel.
And so it rose, under the towel!
In the oven it goes.
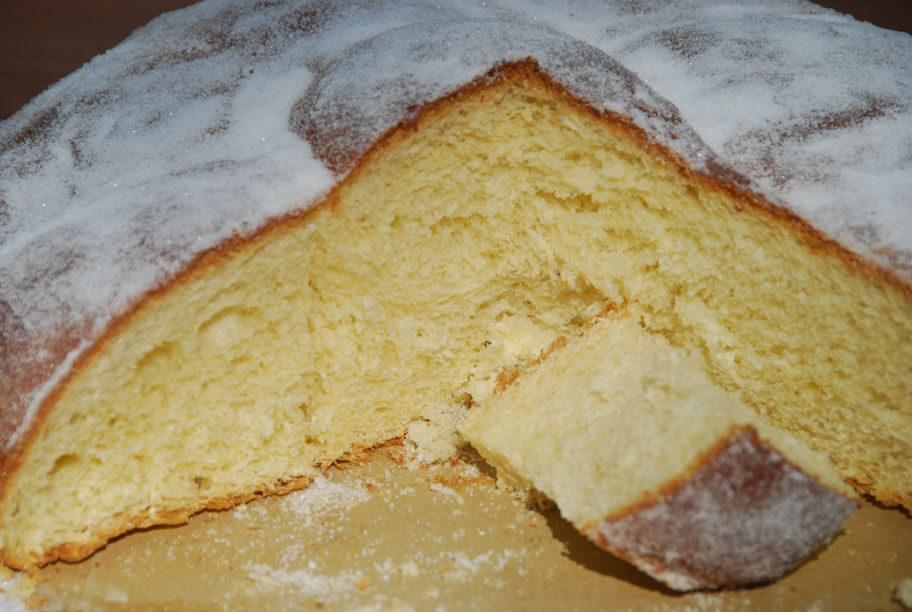
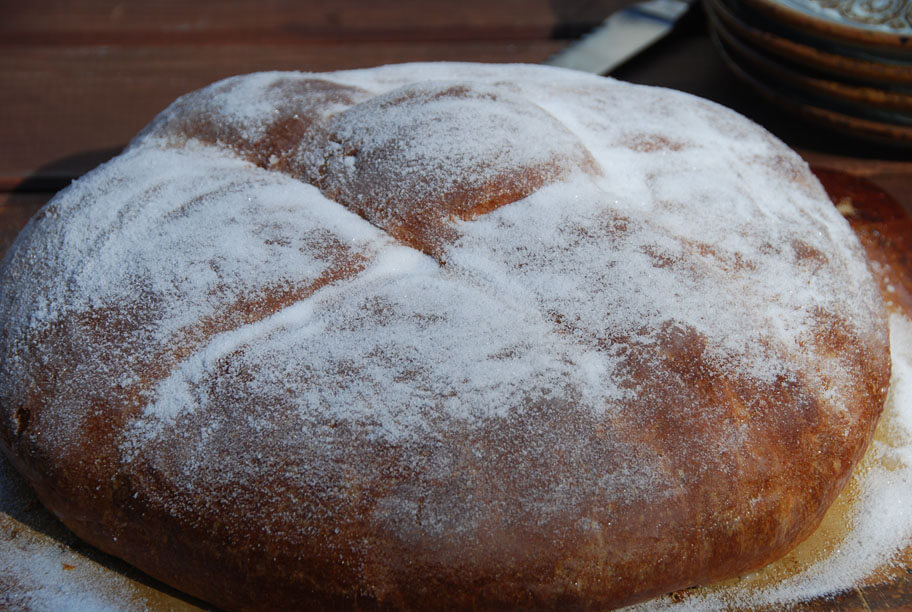
Lastly, when it comes out, it is entirely brushed with melted butter and covered in sugar. Some people add more complex decorations, like colored sugar or make intricate shapes. I like it straightforward with plain granulated white sugar and a round shape.
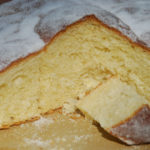
By mid morning the next day, you will have a Pan de Muerto ready to slice.
So, yes, it takes time, it has to rise many times, but every time it rises again you will feel a huge sense of accomplishment and satisfaction… And as you bake it, maybe you will find like me, that whoever is around in the house will start lurking in the kitchen to eat whatever it is that has such an irresistible aroma.
Maybe you will find, also like me, that it was well worth the wait.
Pan de Muerto
One of the most meaningful, colorful and delicious of Mexican celebrations, Día de Muertos has this bread as one of its trademark treats. It may sound strange to eat fluffy sugared up bread in the shape of bones, but then again, we also eat calaveritas, candies in the shape of skulls. This shows how crucial food is for Mexicans but also how it gets infused with our sarcastic sense of humor, generous spirit and gutsy attitude.
Servings: 10 to 12 servings
Ingredients
- 1/2 cup lukewarm whole milk
- 2 packages active dry yeast (1/4 ounce each) or about 4 heaped teaspoons
- 1/2 cup all-purpose flour plus 3 1/2 cups for later on
- 1/4 cup unsalted butter at room temp plus more to grease the bowl
- and 2 tablespoons to melt and brush on top
- 1/2 cup granulated sugar plus 1/2 cup for dusting the bread
- 6 large eggs at room temperature
- 2 tablespoons orange blossom water or plain water
- 1 teaspoon anise seeds optional
- 1 teaspoon orange zest optional
- Pinch kosher or coarse sea salt
Instructions
To make the starter:
- In a small bowl, pour the lukewarm milk - making sure that it is not hot nor cold or the yeast will not react - and stir in the dry yeast granules. Give the yeast a couple minutes to sit in the liquid, and stir with a spatula until it is thoroughly and evenly dissolved. Give it time: stir a little, pressing gently on the yeast that has not yet dissolved with the spatula, give it a bit more time to sit in the milk, stirring again, press again. Once it has completely and evenly dissolved, add ½ cup flour. Mix it combining thoroughly, until it has no lumps. It will be gooey, runny and sticky. Leave it in the warmest area of your kitchen, for about 20 to 30 minutes, until it puffs up (to about doubles or triples its volume) and has bubbled on top. I like to place a sauce pan or cup with boiling hot water right next to it, but it's not necessary.
To make the dough:
- In the bowl of a mixer, over medium low speed, beat the butter until soft. Add the sugar and beat until combined and fluffy. Add one egg at a time. Once eggs are incorporated, add the milk and yeast mixture. Then adding ½ cup at a time, add the rest of the flour (3 ½ cups). Stir in the orange blossom water if using and if not, add plain water. Also add the anise seeds and a pinch of salt. The dough will look wet, runny and sticky, but continue beating anywhere from 7 to 10 minutes, until all the dough comes off the sides of the mixing bowl. It will be elastic and sticky, but it will hold itself together.
- Butter a large mixing bowl that can hold the dough, and will be able to hold it as it doubles or triples its volume. Place the dough in the bowl, cover it with a cloth or clean kitchen towel and leave it in the warmest area of your kitchen, that is draft free, making sure that it is not next to a window or door that gets opened. Leave it to rest and puff up anywhere from 2 to 3 hours, until it doubles its volume at least.
- Punch the dough with your fist, flip it over, cover with plastic wrap and place in the refrigerator over night. The next day, remove the plastic wrap, place a cloth or kitchen towel on top and let it to come to room temperature.
- Take off a third of the dough to make the bread decorations: make a 1 to 2-inch ball and use the rest to make 2 ropes. They need not be smooth nor perfect, as the dough is quite sticky, and no need to worry they will look beautiful once the bread is baked (and covered with sugar).
- Butter a baking sheet or a bread or pizza stone, and make a ball with the rest of the dough. Place it in the center of the baking sheet and flatten it a bit on top. Place the dough ropes making a criss-cross -Mexican bakers usually shape the ropes to resemble bones, having thicker and thinner parts- and the ball on the top, right where they cross. Cover the bread with a cloth or kitchen towel, and let it rise and puff up again, for 1 to 2 hours.
- Preheat the oven to 350. Bake the bread for for about 35 minutes. Halfway through baking, after about 20 minutes, cover the loaf with parchment paper or aluminum foil to prevent it from browning too much.
- When they are ready, they sound "huecas", or hollow, if you hit the bottom of the bread.
- Melt the butter and brush all over the bread. Sprinkle sugar all over until completely covered.
Purslane or Verdolagas
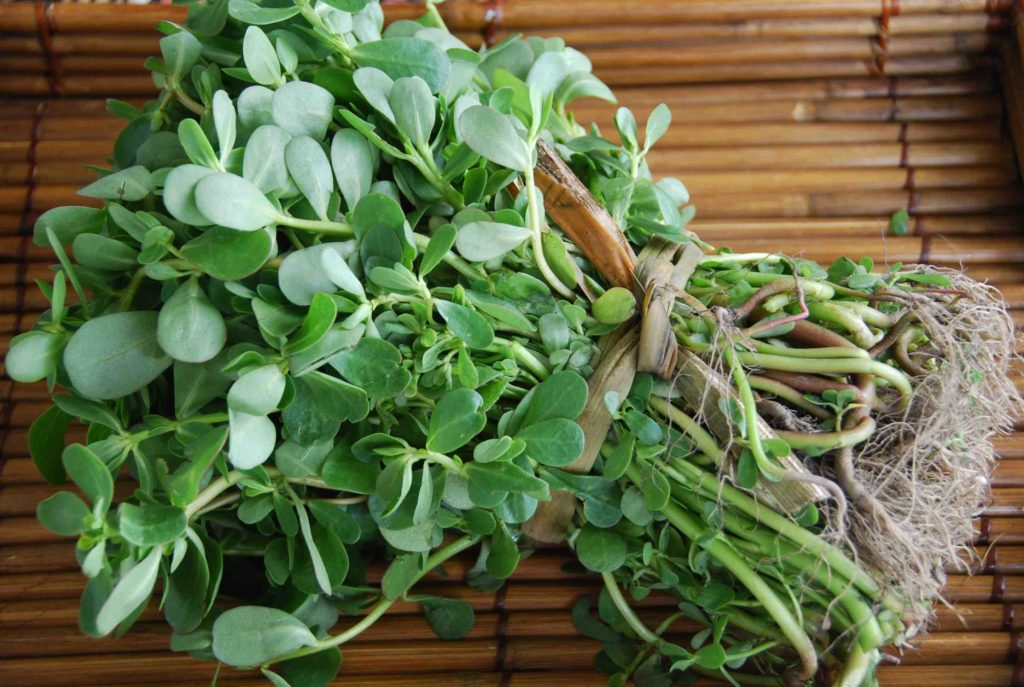
Purslane or verdolagas, one of those ingredients that Mexicans hanker for when outside of Mexico, is likely to be growing in your backyard. In Mexico, it is considered one of the quelites or edible herbs. It is nutritious and succulent, yet it has long been considered a weed in the United States. Indeed, once it grows roots, it spreads and grows fast.
It is essential to the cuisine of Central Mexico, where it is most commonly added to Puerco con Verdolagas: my favorite way of eating them. There, slowly braised pork is finished off in a seasoned salsa verde and verdolagas are dropped in almost when it’s done.
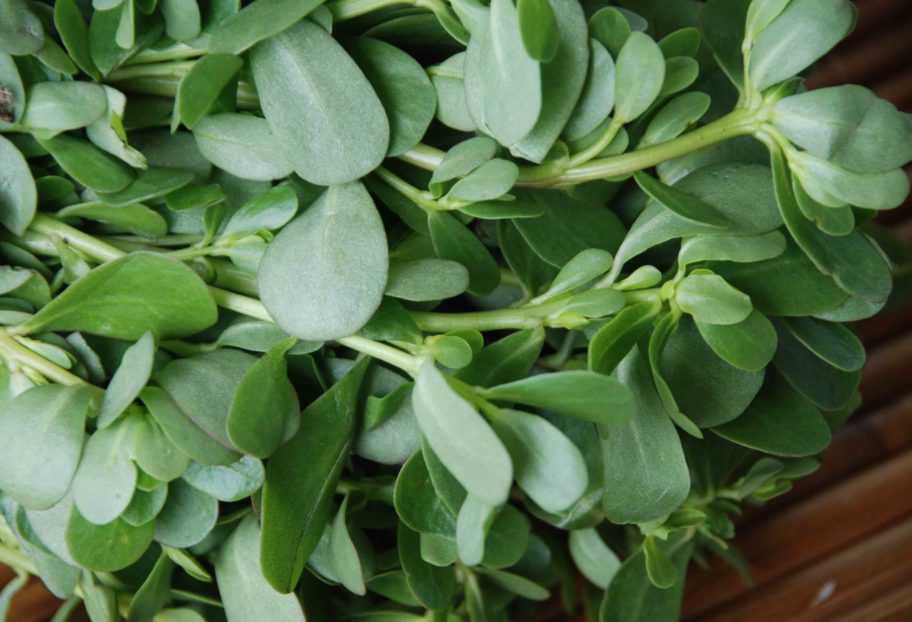
From purslane, almost all is eaten. Only the very lower part of the stems and the roots are removed. The further you go down the chubby stems, the lighter the green color becomes and it can sometimes fluctuate to violet or red.
The leaves are thick and crisp and the stems are crunchy. Both leaves and stems are very juicy and meaty. With a light bitter flavor, a bit lemony and a bit peppery, altogether, punchy and refreshing.
Just like tomatillos, purslane’s tartness pairs well with other ingredients typical in Mexican cooking such as tomatoes and chiles. It is a great complement to salsas and taco fillings. Not native to Mexico, but as you can see, it is an ingredient that over ceturies has grown deep roots.
Though my favorite way to eat them is cooked in that famous pork stew and in vegetable soups, verdolagas are also wonderful in hearty salads. Think watercress, but thicker, crisper, yet more defined and “vegetable” like. They can be prepared just like you would spinach or watercress too. So the options go from soups, casseroles and stews, to salads which can be simply coated with a generous squeeze of fresh lime juice, olive oil and sea salt. You can tuck them into a sandwich and feel like the most interesting sandwich-eating person on your block.
Because studies have shown it to be the richest in omega-3 fatty acids of any leafy green, purslane is increasingly being cultivated in the United States and is often available at farmers’ markets. You may find it under one of its popular nicknames pursley, pigweed or little hogweed. Or look closely, they may be closer to home. If you find them in your yard: cook them up!
Chipilín Soup with Masa and Fresh Cheese Dumplings
I have a thing for soups.
Doesn’t matter what time of day, what season of the year, what place I’m in, if I want tasty comfort my entire self craves a big bowl of soup.
As far as soups go, I have concocted some, I religiously repeat some I grew up eating, and then there are others I’ve become enamored with as I’ve ventured deeper into my home country’s cuisine.
As soon as my feet touch new territory, I search for its signature soup: the one everyone knows; the one everyone loves; the one present at every home kitchen. As easy as it may sound, sometimes those soups stir away from restaurants. Luckily, the first meal we had during our trip to Chiapas included that soup.
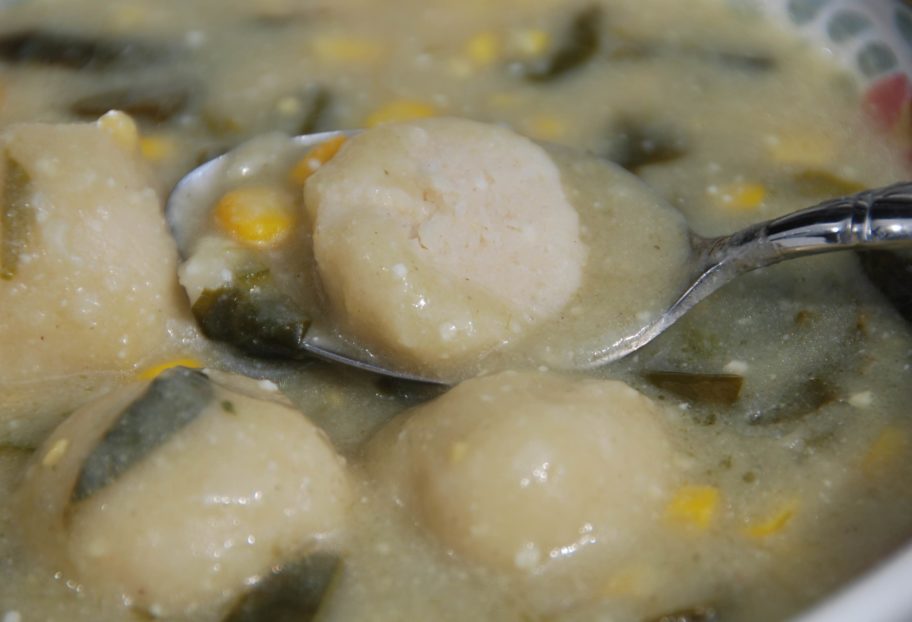
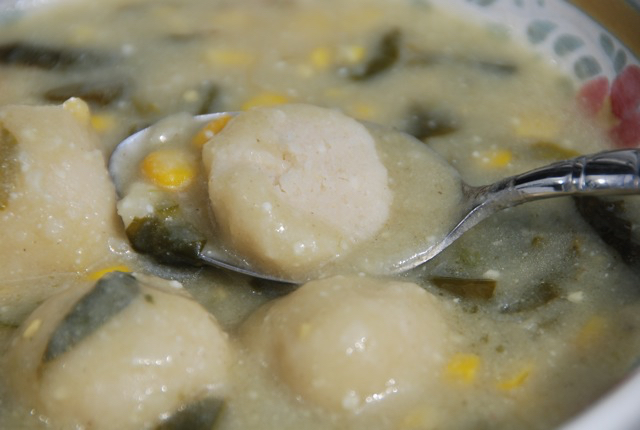
It was at a touristy restaurant serving a regional specialties buffet. The broth was thick and brimming with Chipilín, an herb with a grassy taste (like a mellow version of spinach or a gentle variation of watercress) and a silky delicate bite. The best part of the soup was the corn masa dumplings, dfferent from other I’ve tried, these had queso fresco mixed in the masa or dough, resulting in fluffier balls with a deep soft bite.
A couple days later, I bought a big bowl of Chipilín soup at a small fonda in Chamula. I sat on the sidewalk and ate it as I watched the church procession pass by.
The Church of San Juan Chamula is one of Mexico’s most famous: probably the most controversial as well, for its wildly eclectic combination of indigenous, pagan and Catholic rituals. Not to mention it’s particular architecture and decorations.
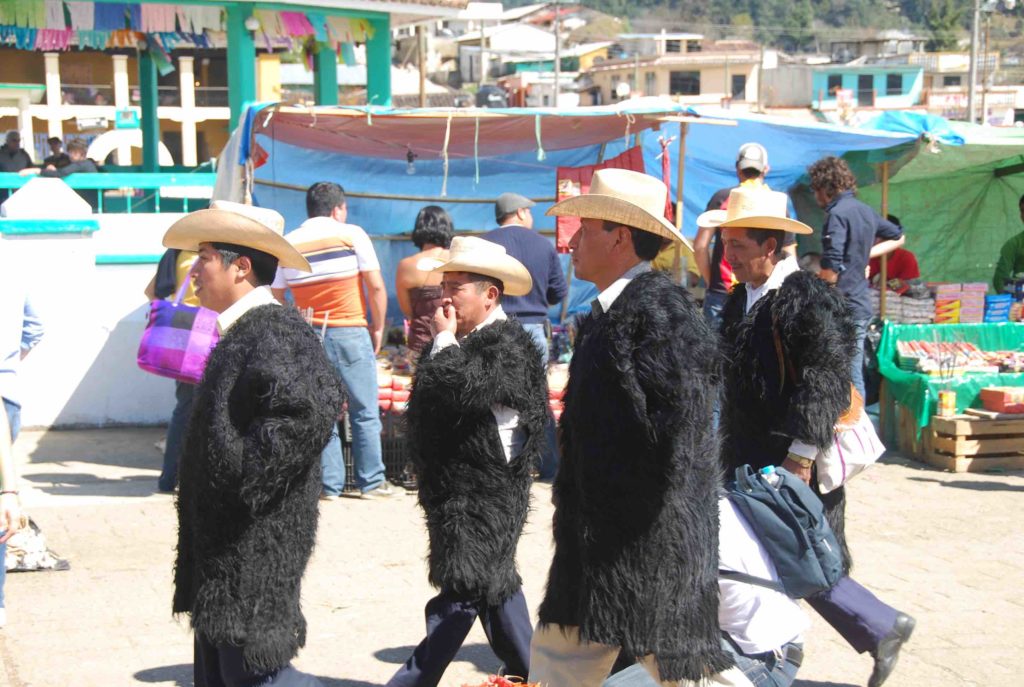
This second version of the soup was lighter, yet it had much more color, like the doors in the photo above. A bit of tomato spiked the broth and I tasted a bit of green heat. Don’t ask me why it didn’t occur to me to take a photo of the soup. Instead, I took photos of the Señores below.

Tzotzil Mayas, which form part of one of the twelve indigenous groups that live in this state, were getting ready to walk in the procession, with their unique attire made with goatskin. Some men wear black, some wear white…and the women make skirts in the same style.
If you have never heard “Tzotzil”, a Maya language, you have missed listening to one of the sweetest sounds. As delicate as those Chipilín leaves…
Ok, back to the soup. That same day, I tried a third version.
A short ride away we landed in a restaurant with a sumptuous buffet that was different from the first. This one boasted a larger display of typical dishes from the region. Their Chipilín soup had a much clearer broth, as if the masa dumplings had been cooked separately from the final soup and incorporated in the end. It had less Chipilín leaves in the broth, making it look more elegant and light, and there was queso fresco to add as a garnish, as well as Mexican crema and small pieces of chicharrón.
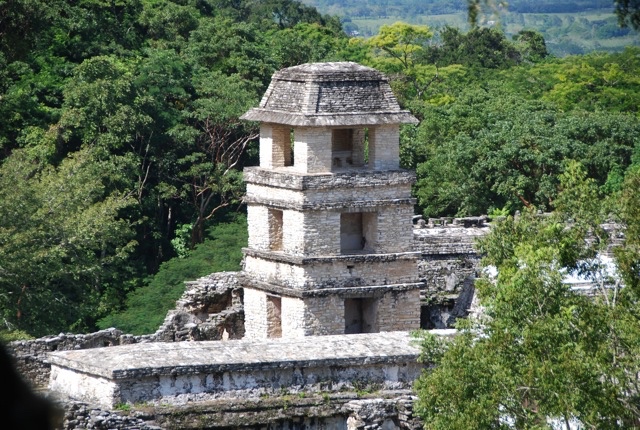
I tried a fourth version in a restaurant near the Palenque ruins (which can take anyone’s breath away and I am just adding more photos of the ruins because I can’t help myself…)
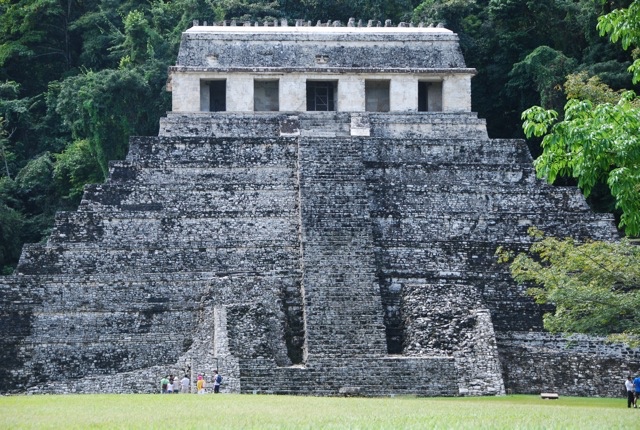
…let me indulge… and yes I climbed up so high to look at that view…

… here is a close up…
Alright, back to the soup. This one had the smallest of masa balls, and different than the soups before, aside from having Chipilín in the broth, there was a generous amount of Chipilín chopped into the masa balls. It also had extra garnishes of more queso fresco and thick Mexican cream. But no chicharrón.
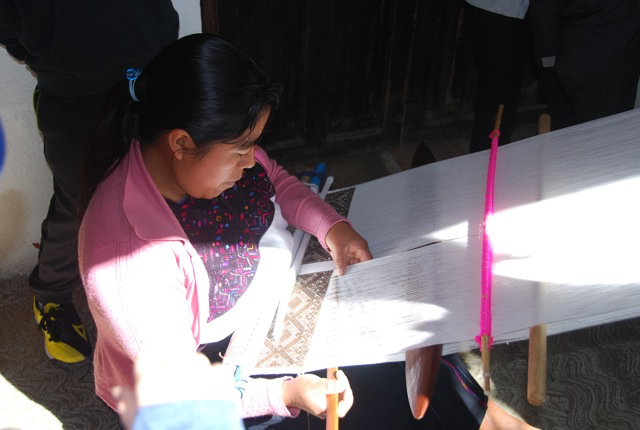
I did think about other things than trying more versions of the Chipilín soup and other foods I had no idea existed (which I will write about in other blog posts). Especially when we had the chance to learn about the insanely gorgeous textiles made in Chiapas…
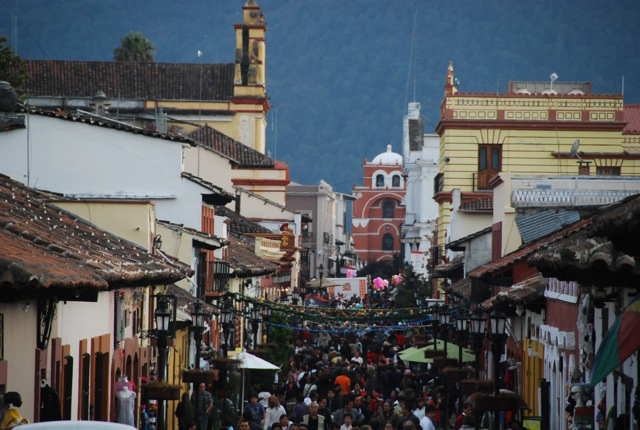
Once at San Cristobal de las Casas, I tried one last version of the soup in one of the restaurants in that busy street below. This soup included corn kernels in the broth. The contrast of that sweet crunch next to the soft masa balls in the flavored broth worked so well!
No. I did not take a photo of it, because I didn’t know I was going to write about all the Chipilín soups I tried in Chiapas! Of course now I wish I had.
The good thing is that here is a recipe for you to try the soup.
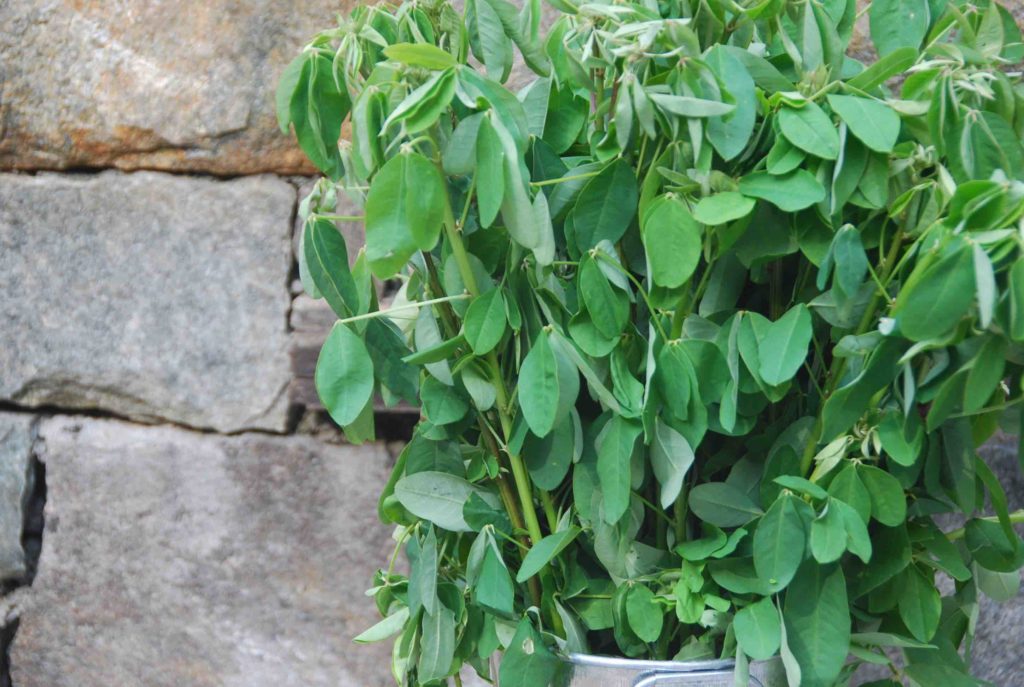
You can find Chipilín in the US these days, especially in Latin markets in the Summer and Fall. I just found some at Panam market in DC.
It looks like this. It is so pretty I put a big bunch in a flower vase and admired it as I ate it away and the bunch kept getting thinner.
Here is a close up, so you can see just how delicate the leaves are…
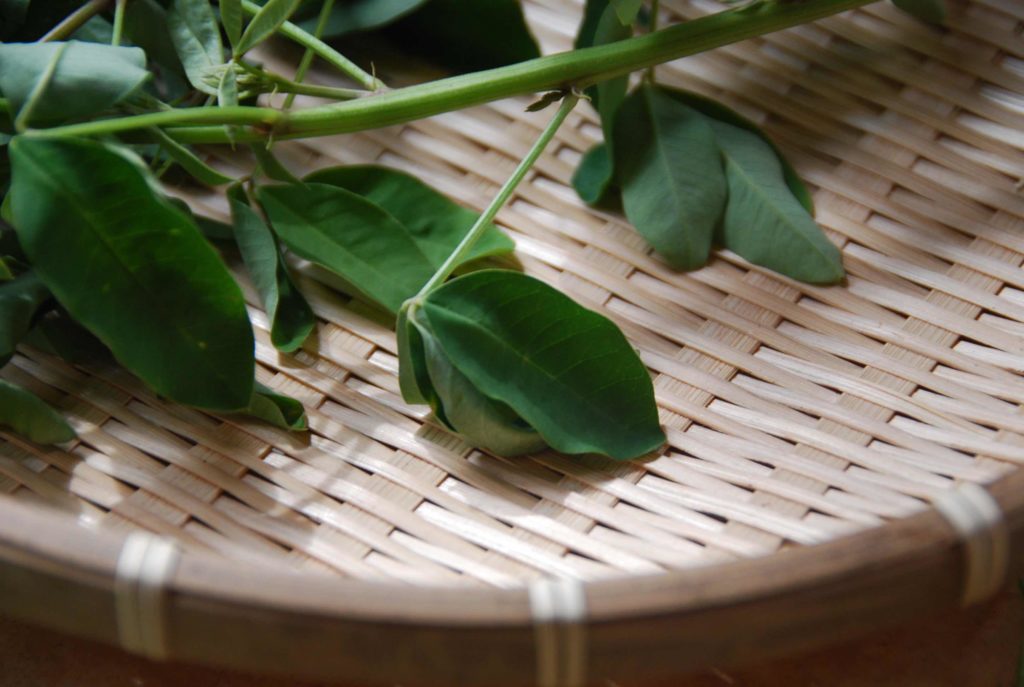
If you can’t find it, you can substitute it with sliced baby spinach or watercress.
The recipe I am giving you here, was tested in my kitchen until I nailed down all the elements I enjoyed in the different versions: fluffy masa balls flavored with cheese, an abundance of Chipilín leaves in the broth but not in the masa balls, sweet crunchy corn seasoned along with the onion that makes the base of the soup, and cooking the masa balls in the soup so that as they cook, they thicken the broth. I find that extra thick broth to be irresisitible. It almost resembles atole or a very light porridge (in a good way).
Just like Chiapas is not so well known outside of Mexico, it’s cuisine remains to be enjoyed abroad. This soup has many of the features I recognized in the different meals I ate there: distinct, with a lot personality, yet at the same time homey, delicate and comforting. Thankfully, many of the ingredients used in Chiapas, are now accessible abroad too.
A good soup recipe, I’ve learned, always comes in handy. Especially if it takes you somewhere. This one takes me right back to Chiapas.

Chipilín Soup with Masa and Fresh Cheese Dumplings
The recipe I am giving you here, was tested in my kitchen until I nailed down all the elements I enjoyed in the different versions: fluffy masa balls flavored with cheese, an abundance of Chipilín leaves in the broth but not in the masa balls, sweet crunchy corn seasoned along with the onion that makes the base of the soup, and cooking the masa balls in the soup so that as they cook, they thicken the broth. I find that extra thick broth to be irresistible. It almost resembles atoleor a very light porridge (in a good way).
Servings: 6 to 8 servings
Ingredients
- 3 tablespoons vegetable oil
- 3/4 cup white onion chopped
- 1 serrano chile finely chopped, seeding optional, add more or less to taste
- 3 cups fresh corn kernels or thawed from frozen
- 8 cups chicken broth
- 3 cups packed chipilín leaves rinsed
- 2 cups corn masa flour or Maseca
- 1 3/4 cups water
- 8 ounces or about 1 cup queso fresco crumbled, may substitute for farmer's cheese or a mild feta
- 1/2 cup vegetable shortening or lard
- 1/2 teaspoon kosher or coarse sea salt divided
- Mexican cream optional to garnish
Instructions
- Heat oil in a soup pot over medium heat. Add the onion and cook for about 4 to 5 minutes, stirring occasionally, until it has completely softened, the edges have begun to slightly brown and there is a sweet smell stemming from the pot. Add the chile, stir and cook for another couple minutes. Toss in the corn, stir and let it cook for about 3 to 4 minutes. Pour in the chicken broth. While it comes to a simmer, prepare the masa for the dumplings.
- In a bowl, combine the corn masa flour with the water, the vegetable shortening and a pinch of salt. Combine and knead with your hands until the dough is soft and homogenous, it will take a minute. Add the crumbled queso fresco and knead into the dough.
- Once the soup comes to a gentle simmer, add the chipilín leaves. Once it is heated through, lower the heat to low and start shaping the dumplings. With your hands, make about 1 to 1½" balls, as you make them, gently drop them into the soup. Once you are done with all the balls, let the soup cook for about 20 more minutes. It should be gently simmering. The balls should be cooked through and as they cooked in the soup they should have thickened to the consistency of a thin porridge. But it will be a most delicious one! Serve hot. You may garnish with some fresh cream on top of each individual soup bowl.
Notes
Sopa de Chipilín con Bolitas de Masa y Queso
BBC The World: Eggs In Short Supply
“There’s a national shortage of eggs in the country that is the world’s biggest consumer of eggs (350 per person per year). It’s causing prices to rise, and chefs are having to get creative says Patricia Jinich, host of the popular cooking program Pati’s Mexican Table…”
Read more here.
Listen to the broadcast.
Periódico Excélsior: Intérprete de sabores
“Es una mujer apasionada de la cocina y la historia, y a quien le gusta difundir lo que sabe. Patricia Jinich empezó hace un año con el programa de televisión Pati’s Mexican Table, que se transmite a nivel nacional en Estados Unidos por la red de televisión píºblica Public Broadcasting Service (PBS), y que incluso llega al sur de Canadá. El éxito en audiencia fue tal –la primera temporada tuvo presencia o cobertura en 94.43% de Estados Unidos y en 6.8 millones de hogares la vieron más de dos veces — que a partir de este mes ha comenzado a transmitirse su segunda temporada.
‘Trato de enseñar todo lo que se puede hacer en la casa, la comida casera que come mos los mexicanos a diario, que es la que no se conoce aquí y que ayuda a desmentir mitos…'”
Para leer el artículo completo, haga clic aquí.
Periódico Excélsior, RSVP: Orgullo Nacional
“Con su programa de TV, Pati’s Mexican Table, Patricia Jinich lleva el sabor de la comida mexicana a los hogares norteamericanos.
Calidez, explicaciones muy sencillas acompañadas de historia, y un acento latino –que porta con orgullo–, son las características con las que muestra la esencia de la culinaria mexicana. Así derriba mitos sobre nuestra cocina: que es compleja y difícil de hacer; que es fast food, grasosa, y que es picosa y pesada.”
Para leer el artículo complete, haga clic aquí.
Juju’s Birthday Cake


Juju’s Birthday Cake
Juju’s Birthday Cake recipe from Pati's Mexican Table Season 2, Episode 2 “School Lunch with a Mexican Twist”
Servings: 10 to 12 non-hungry people
Ingredients
For the cake:
- 1 cup water
- 2/3 cup cocoa
- 1/2 cup unsalted butter
- 2 cups all-purpose flour
- 1 3/4 cups sugar
- Pinch of salt
- 1 teaspoon baking soda
- 1 teaspoon baking powder
- 1/2 cup sour cream
- 2 large eggs preferably at room temperature
For the Frosting:
- 1/4 cup milk
- 1 tablespoon vanilla
- 1/2 cup cocoa
- 1/2 cup unsalted butter
- 2 cups confectioners' sugar
- 1/4 cup sprinkles optional
Instructions
To prepare the cake:
- Grease a 9x13-inch cake pan with butter. Cover the bottom of the pan with parchment paper. Preheat the oven to 350 degrees.
- In a large pot, over medium heat, pour the water, stir in the cocoa and add the butter. Let it heat for a few minutes, stirring now and then, until it all dissolves. Remove the pot from the heat.
- In another bowl, combine the flour, sugar, salt, baking soda and baking powder. In another, beat the eggs and combine them with the sour cream.
- In turns, add a quarter of the flour mix and then a quarter of the sour cream mix at a time into the pot with the cocoa mixture; stir with a spatula, mixing all of the ingredients as you move along. Pour onto the greased cake pan and place in the oven for 25 to 30 minutes, or until a toothpick inserted in the center comes out barely moist but not wet.
- Take the cake out of the oven and let it cool a bit while you prepare the frosting.
To prepare the frosting:
- In a saucepan, over medium heat, pour in the milk and the vanilla. Stir in the cocoa and add the butter. Heat and stir until everything is all dissolved and combined. Remove from the heat and stir in the confectioners' sugar. Thoroughly mix with a spatula and set aside.
To assemble:
- Run the tip of a knife around the edges of the cake. Turn the cake onto a platter and gently remove the parchment paper. Pour the still-warm frosting over the cake and gently spread it out with a spatula. If you wish, you may add sprinkles of your choice before the frosting hardens (NOTE: The cake is soft and moist the first couple days, then hardens like a brownie afterwards if left uncovered-- perfect for packing in school lunches).
Notes
Pastel de Chocolate de Juju
Cucumber Soup with Mint, Jalapeño and Pomegranate
Last post was about that Cucumber Martini I could drink an entire pitcher of. It feels like a century has passed, and I have so, so, so many stories and recipes to share with you. But only now, after a wildly crazy hectic summer desperately missing this blog, am I able to sit down and write. And guess what? I have no choice but to continue with cucumbers!
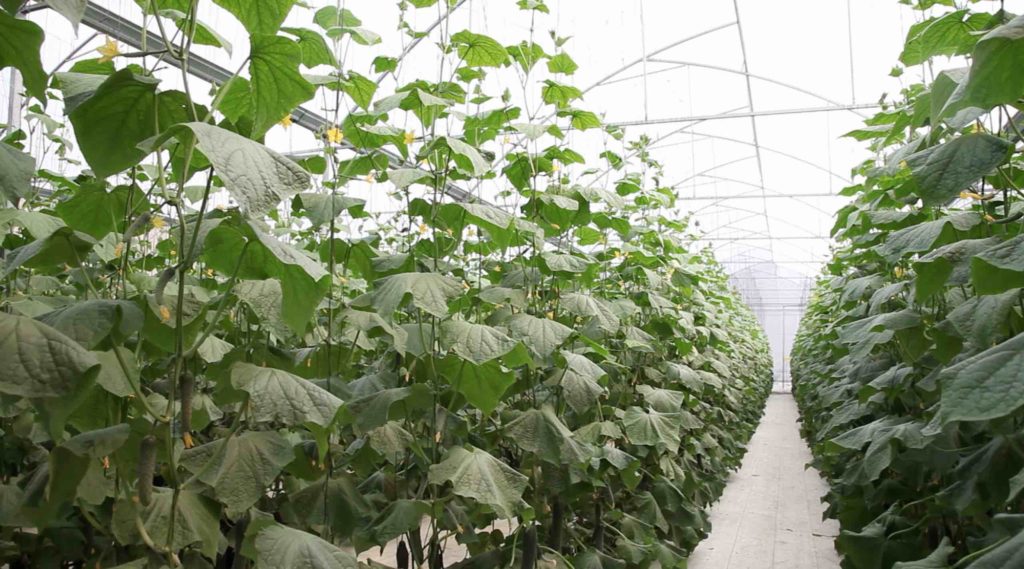
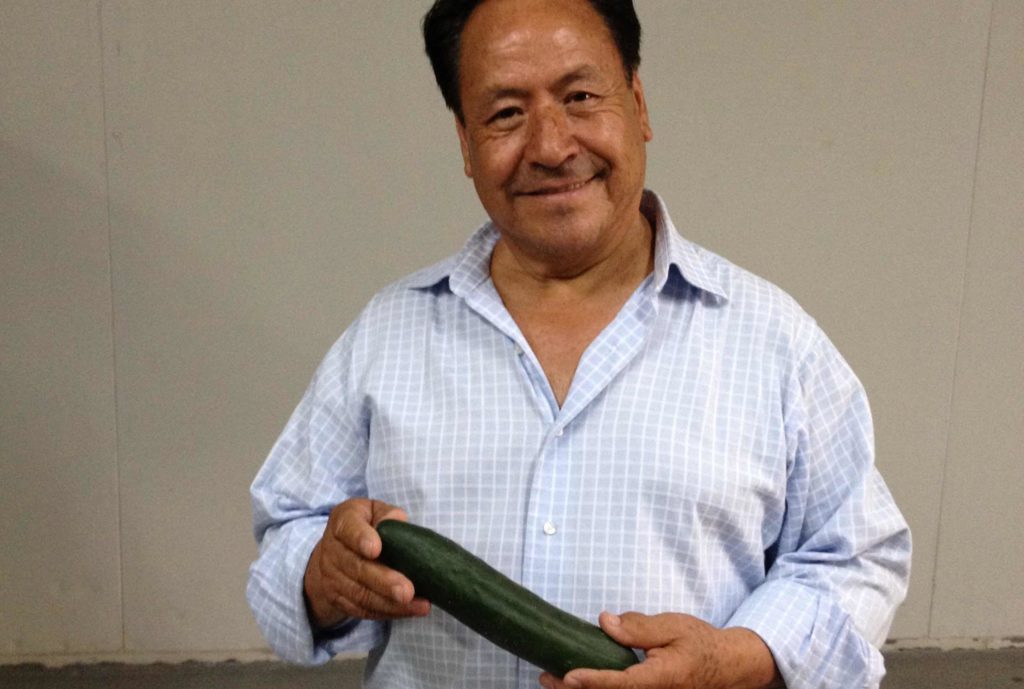
This is why: I thought I knew cucumbers, I really did, until I visited Mr. Jose Luis Rodríguez Rojas’ cucumber green house in the state of Morelos, a state known as “Mexico’s Spring”. Cucumbers grown there are the slicers, ironically called pepino Americano or pepino común in Mexico. Slicers are the cucumbers mostly used in Mexico’s kitchens. And the ones I use all the time.
Now I know how little I knew about them.
Sure I have peeled, sliced, diced and julienned a gazillion and have used them in so many ways, from salads to sorbets. I know it’s taste: mild, watery, fresh, wanting to be lemony. I know it’s bite: soft yet crisp. I know the coolest trick to help them never be bitter (cut ends and rub the opposing sides before peeling).
But I had never seen their plants in their youngest form, as Miguel, one of the farmers showed me.
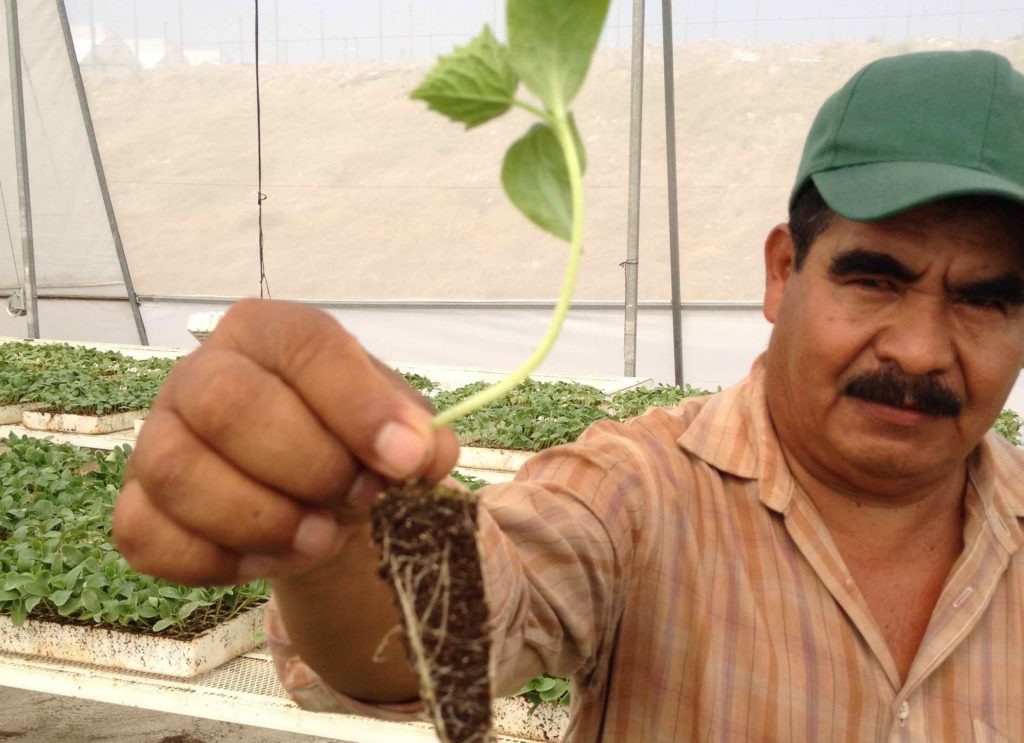
Nor was I aware, that after just one month of protected care, they grow to have jungle like looks and size.
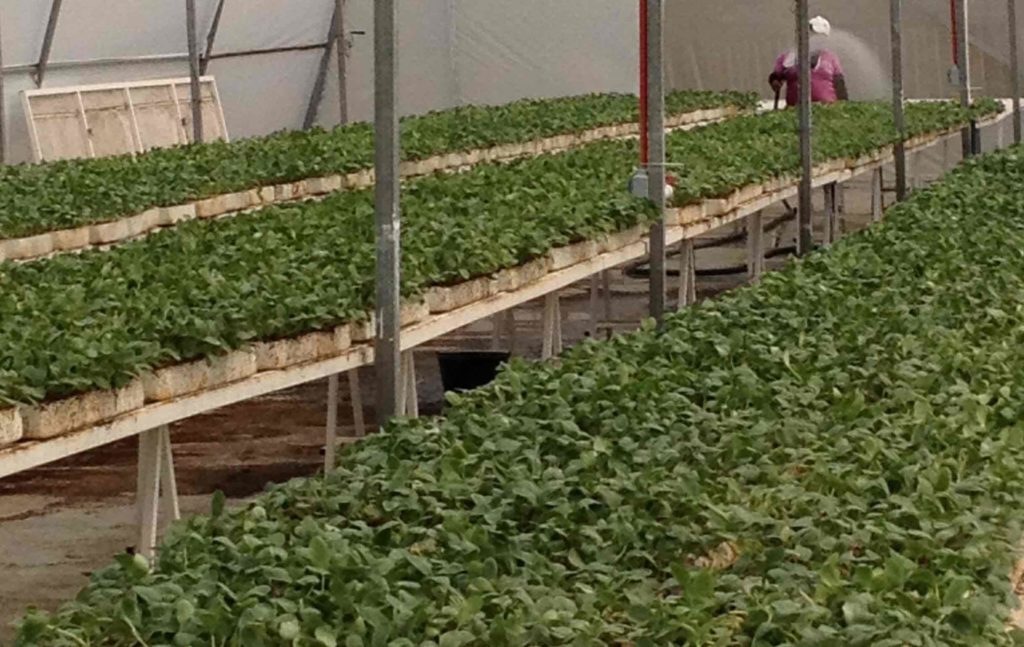
Look at them!
If I could only embed here the moist and clean smell of the plants and the velvety feel of their immense fully grown leaves, I would be so pleased.
Much to my surprise, the flowers from where those huge cucumbers grow from are delicate and feminine. Their color a strong yellow that seems to want to fade right before your eyes, just as their petals seem to tell you to please be careful if you dare touch them.
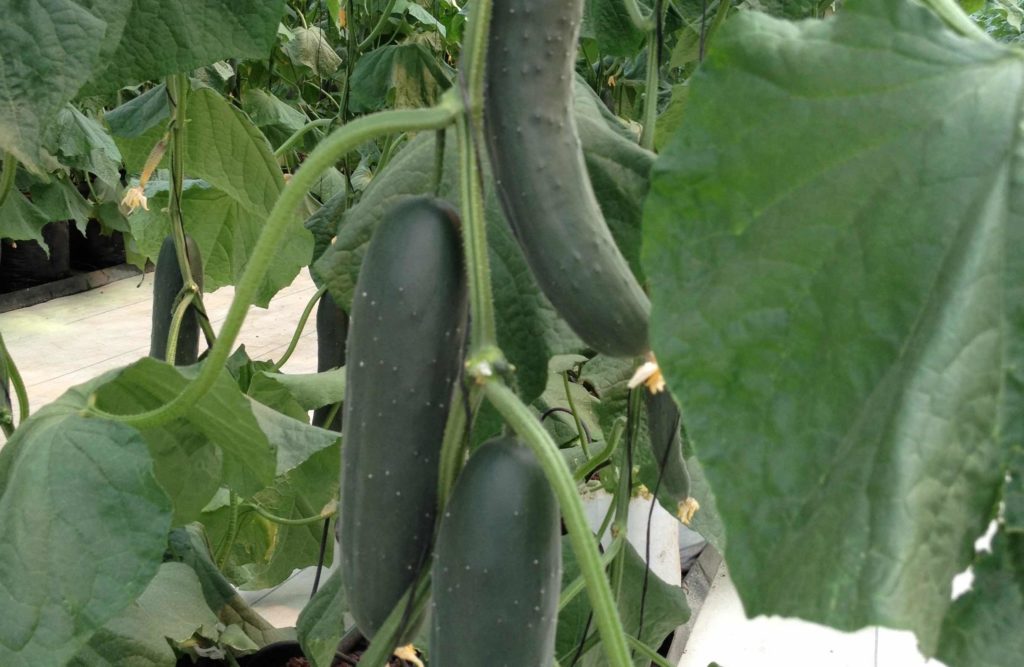
There are male and female cucumber flowers and they are both as pretty. It is the female pollinated flowers, which grow a miniature baby cucumber right behind, covered in tiny-prickly-thin-like thorns that protect it as it grows. So they have ways of telling you not to touch them.
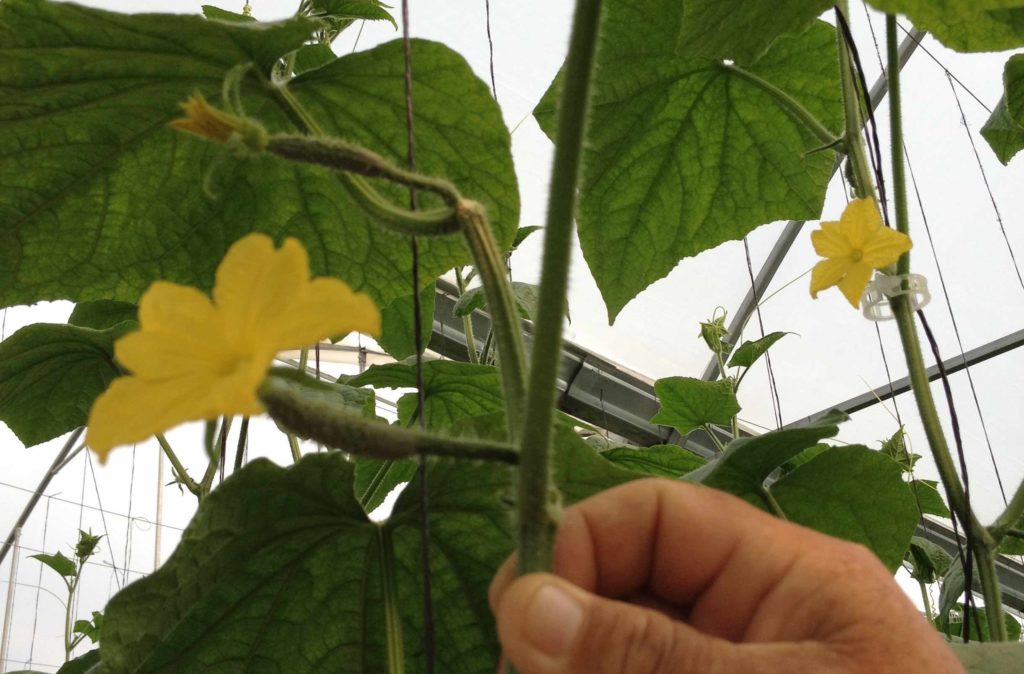
The flower holds on, as the cucumber grows. See below?
I marveled.
After a while, I had to make an effort to stop ooooohing and aaaaahing at every site (I have to act more my age, you know…).
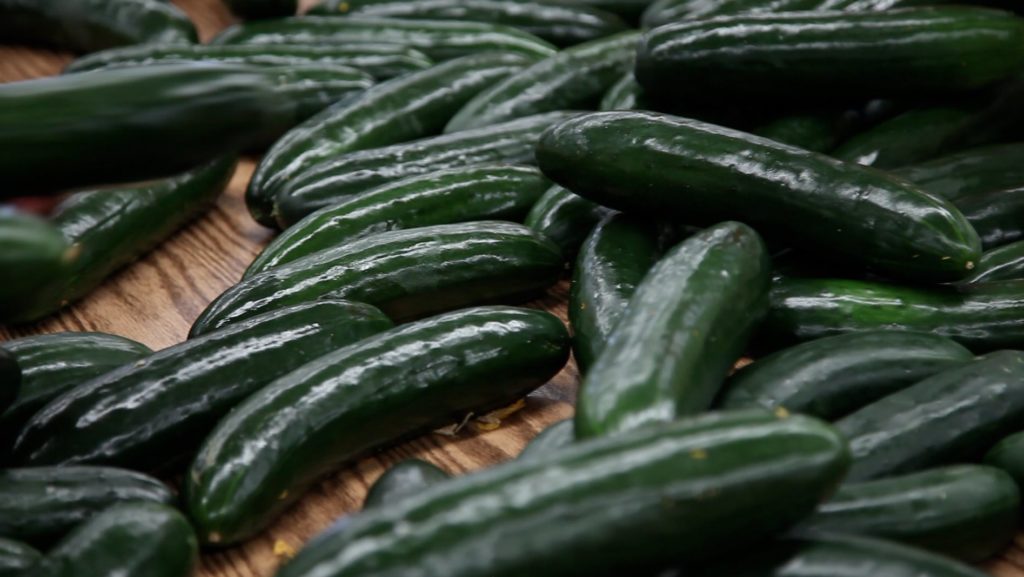
After they pick the cucumbers, they clean them and pack them up.
Mr Jose Luis employs about 300 people a year. Each person I met, seemed proud about their job and meticulous in their care of the green house facilities and mostly, the plants. “No one kneels here to work”, Mr. Jose Luis repeated a couple times, “work here is worthy, dignified”. Truth is, it genuinely felt that way. It seemed that people felt vested in the business. Their faces lit up when I asked any question that popped out of my mouth (if you know me by now you know I have an endless stream of questions…).
Crazy Nacho Guani, who was filming with Cortez Brothers and I (for Season 2, which launches this weekend, yey!) was filming up there like a wild monkey (if you knew Nacho you’d know he climbs anything that has any height… )
Mr Jose Luis’ chest seems to burst as he talks about the history of his green house, more so about the vegetables he grows. He drastically changed careers, like I did too. He, also, has never looked back.
After spending the day, Mr Jose Luis, who could not have been more friendly, asked if we were hungry. We were starved. He immediately offered to take us to his favorite place for a late lunch-early dinner. But that’s another story.
Lesson learned, yet again: no ingredient, no single one is common. Even if it goes by the name pepino común, or common cucumber. Not even if you have used it a thousand ways and have chopped it a gazillion times.
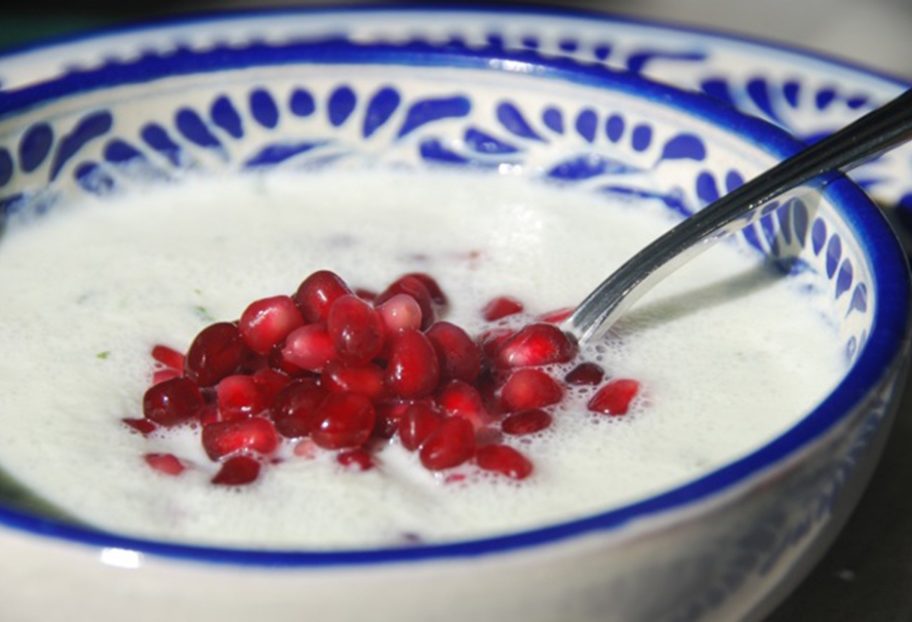
Getting to know cucumbers, from flower to tops, made me think of so many new ways to use them. In a cold soup? With a bit of a bite from a jalapeño? With the wide echo from some mint? Topped with something sweet and crunchy and tart to make it all go wild in your mouth?
I played with the idea and once that I nailed a take I liked, I can’t stop making it.
Think of it as a Mexican tzatziki or as a white cucumber gazpacho of sorts… Or better yet, indulge me please and just make it. To boot: takes but 2 minutes in the blender.
p.s. Party or Holidays coming soon? Serve it in little mugs or cups for people to drink and munch along.

Cucumber Soup with Mint, Jalapeño and Pomegranate
Getting to know cucumbers, from flower to tops, made me think of so many new ways to use them. In a cold soup? With a bit of a bite from a jalapeño? With the wide echo from some mint? Topped with something sweet and crunchy and tart to make it all go wild in your mouth? I played with the idea and once that I nailed a take I liked, I can’t stop making it.
Ingredients
- 1 1/2 cups thick Greek yogurt
- 3 pounds slicer/common cucumbers about 2 1/2
- 1 tablespoon red onion chopped
- 1 clove garlic
- 1 tablespoon jalapeño chopped or more to taste (seeding optional)
- 15 mint leaves
- 2 tablespoons fresh squeezed lime juice
- 1 teaspoon kosher or coarse sea salt or more to taste
- 3/4 cup pomegranate seeds or more to taste
Instructions
- Wash cucumbers, cut the ends and use them to rub the opposing cut ends of the cucumber. Peel and cut lengthwise into 4 long strips and slice off the seeds. Discard the seeds and cut into chunks.
- In the jar of a blender, place the yogurt, cucumbers, red onion, garlic, jalapeño, mint, lime juice and salt.
- Puree until smooth. Pour inside a mug or container and store in refrigerator until ready to serve.
- Serve and sprinkle pomegranate seeds on top.
Notes
Sopa de Pepino con Jalapeño, Menta y Granada
Cascabel Chile
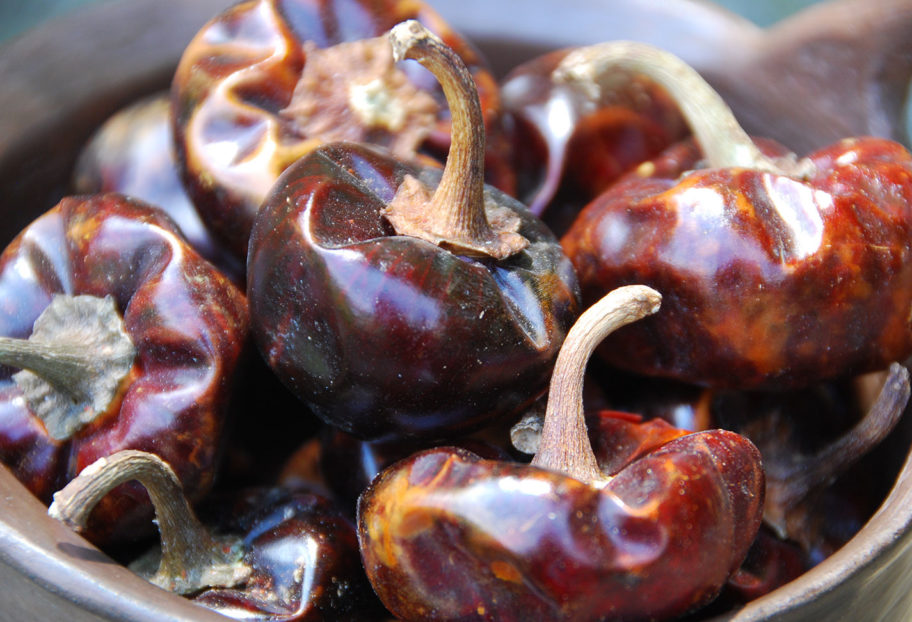
The name Cascabel, which translates to rattle, comes from the sound it makes when you shake it. With its sphere, globe-like shape, the dried seeds have a lot of room to play and make noise in. Sometimes, because of that shape it is also called Chile Bola, as in ball.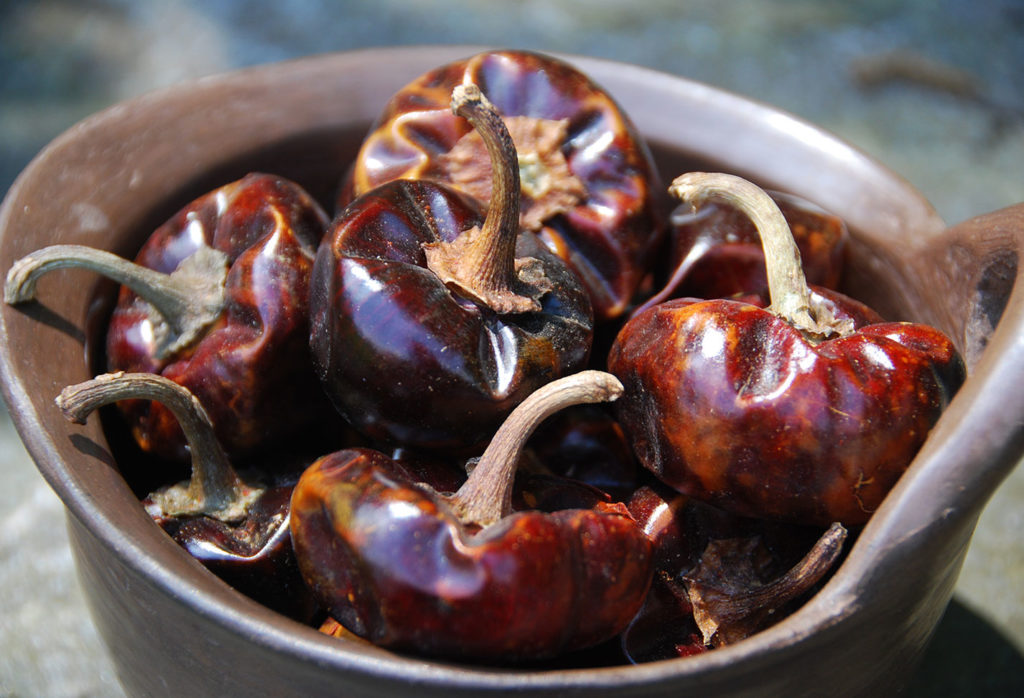
Different from most fresh chiles that are dried, it retains its shape and doesn’t flatten out once it is dry. Also, different from many chiles, it maintains the same name when fresh or dried. It has a thick and smooth skin and a gorgeous deep brown color with red and sometimes copper hues. And its flavor resembles those colors: toasty, nutty and rustic with moderate heat.
The Cascabel is used in many ways from salsas to stews, to sauces and soups. It is used as is toasted, ground or simmered. It is not widely available outside of Mexico or even in some areas of Mexico. When I get my hands on some, I of course like to cook with the Cascabel Chiles, but I also get a good amount of pleasure admiring them as they sit in a bowl in my kitchen.
Season One
Click below to see a sneak peek of Season 1!
Season Two
Season 2 sneak peek is here!
Totally Unexpected: Cucumber Martini
I had fallen for the city of Puebla almost 20 years ago. And you know how that goes, sometimes when going back to things you loved while young and are nostalgic about, there’s a risk of disappointment.
Just the first night I was back, I felt myself fall for it all over again. After days of scouting, eating, researching, testing and filming with Cortez Brothers, I left with a disorganized mental list of things I didn’t even had the chance to try.
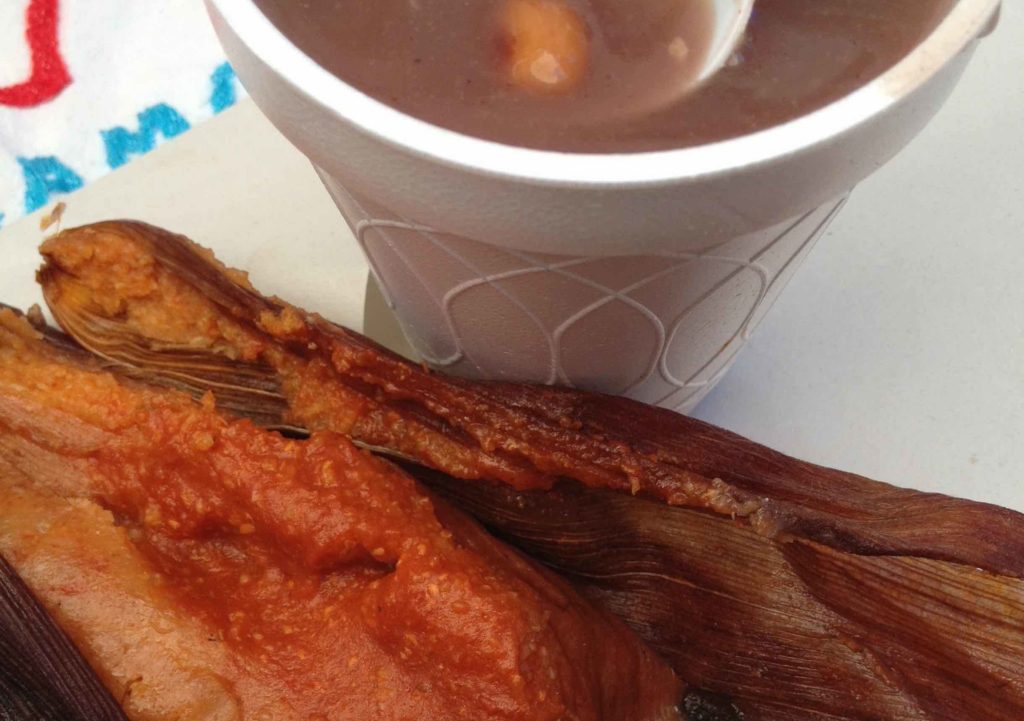
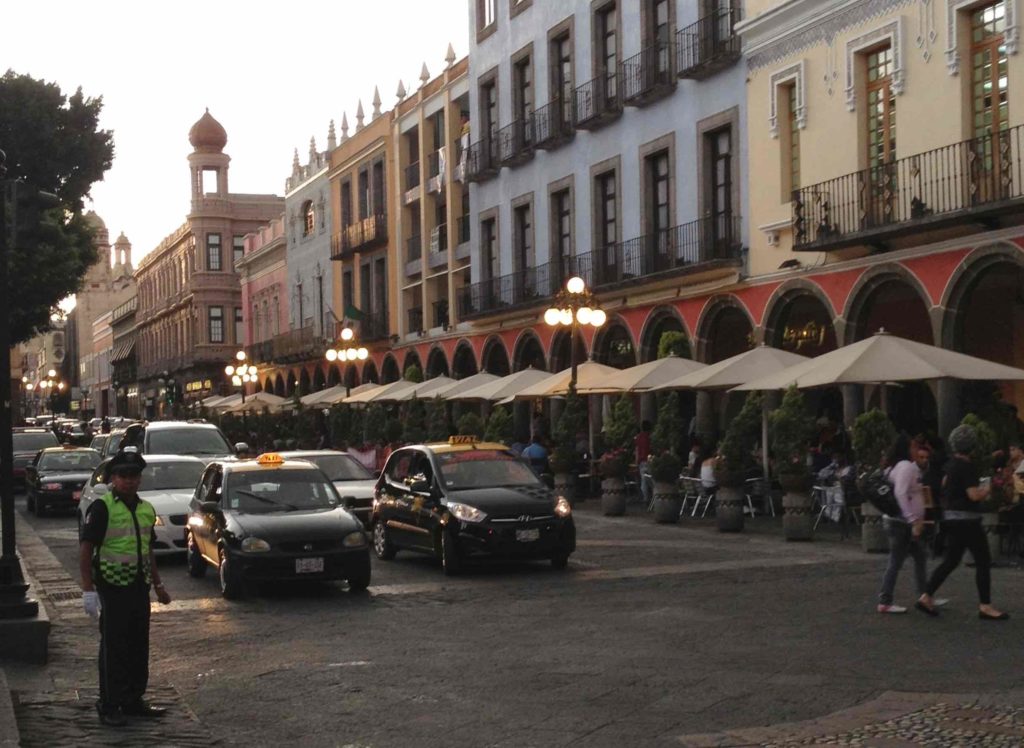
See, the charm is everywhere: from the history inhaled in each corner; to the talavera tiles splattered all over buildings, tables, vases and plates; to the food which makes you want to lick the plates clean, be it paper plates at markets – like this one holding cumin tamales with a side of peanut atole…
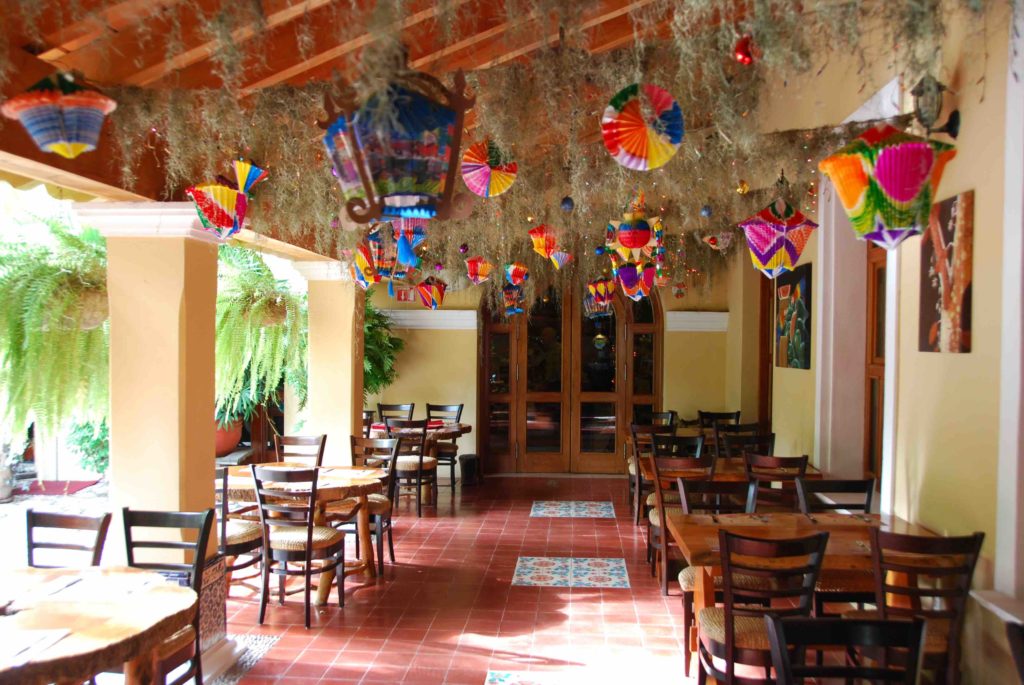
…or fine talavera holding Mole Poblano enchiladas,
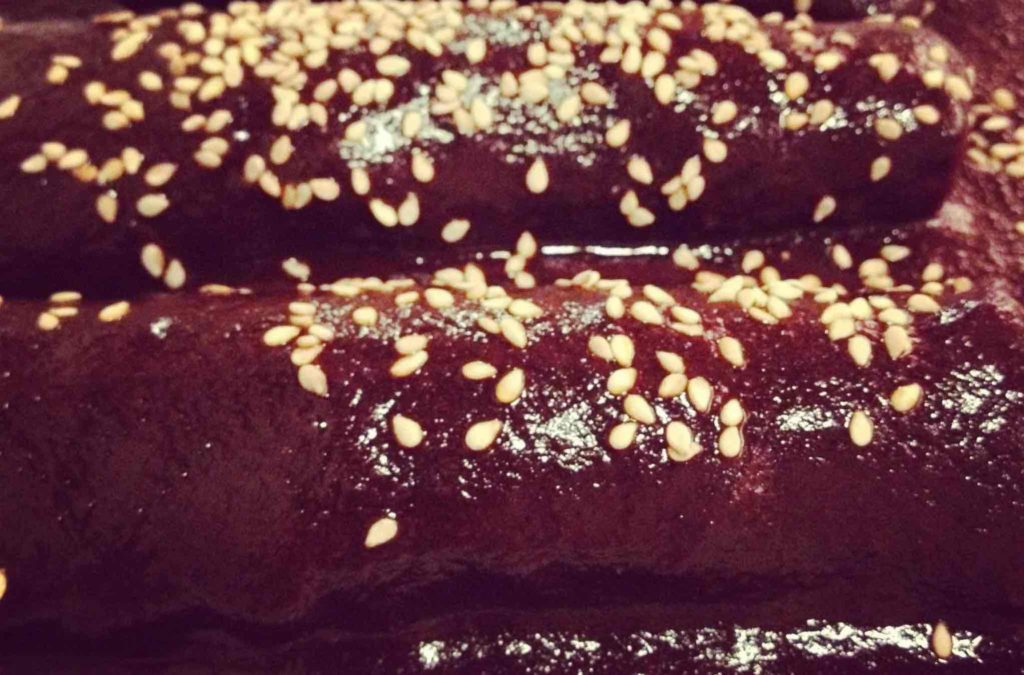
at El Mural de los Poblanos, one of the city’s top restaurants with to-die-for food.
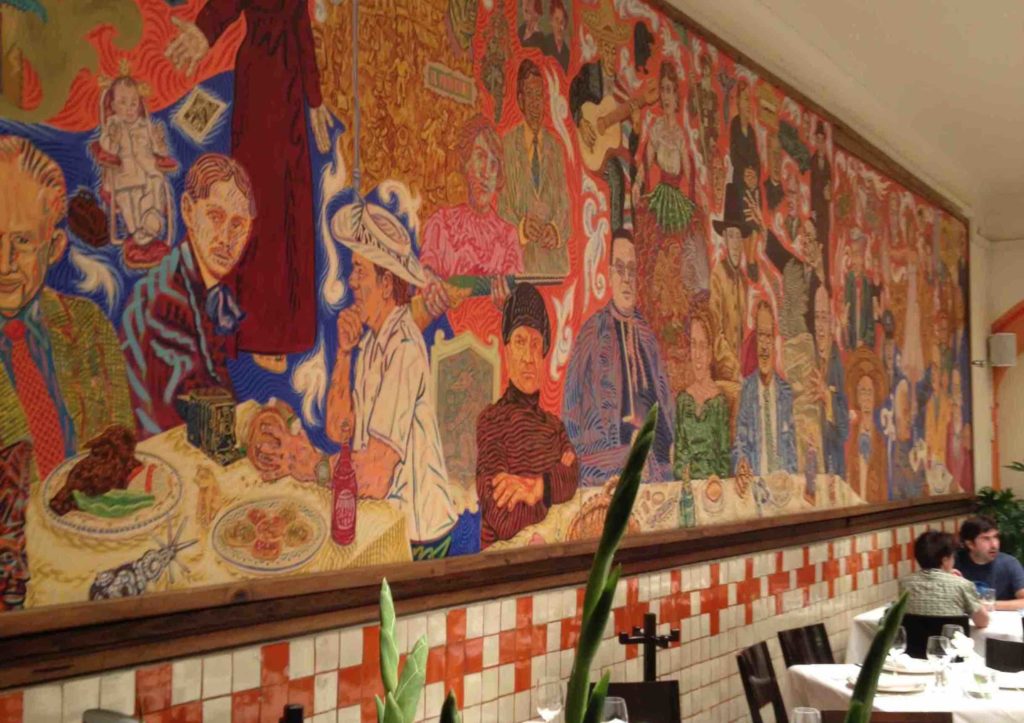
But what I fell for the most, were Poblanos-namely the people from Puebla. Poblanos will give you their time and attention, no matter how busy their schedule may be. And they will do it wholeheartedly with care and sweet enthusiasm.
No wonder why, in the midst of a city where just about any random street gives you a thousand photo shots to aim at, Poblanos are falling all over each other.
Seriously: There are people hugging everywhere…

…despite posts, whether it rains or shines, and no matter what time of day.
I mean, forget about hugging, there seemed to be a lot of kissing too (I am all for public displays of affection, because hey, we have just so much time on this earth and if someone is lucky to be with whom they love and they want to show it, I say go for it).

So, I fell for Puebla, which was to be expected. But what was totally unexpected in my hunt for tasting more scrumptious Mexican food, which is found in every corner of this city, was finding some of the best Italian food I have ever tried.
That’s right.
In the middle of the heart of Puebla.
And what do you know? There had to be a love story involved…

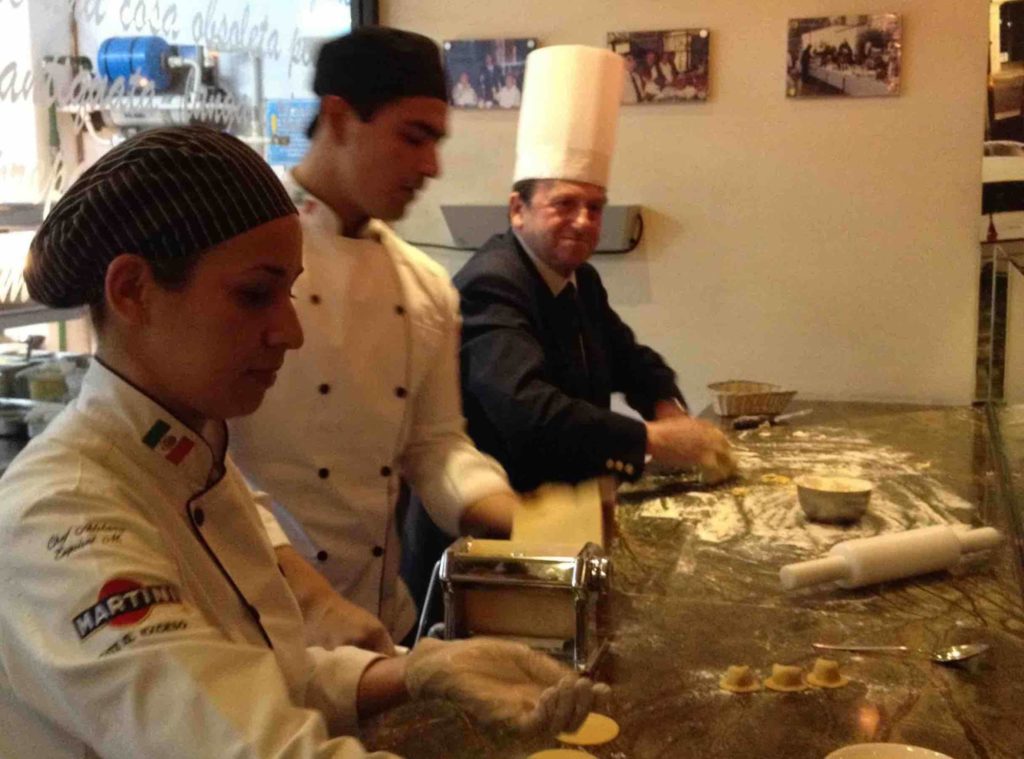
photo Nacho Guani
Luis Carpintero, the owner, had worked in restaurants and bars for most of his life -since he was a kid in his mother’s small restaurants. He fell in love with Monica and for years their dream was to open up a restaurant together. Since Puebla has such extraordinary Mexican food wherever you turn, they opted for Italian, which is their favorite after Mexican (like me…).
A friend of a friend of a friend of Luis knew of a Mexican woman, who had gone to Italy 3 decades ago. She had fallen in love with an Italian chef named Piero Giangrande and dragged him to Tlaxcala, a neighboring state of Puebla, where he opened up shop. Luis and Monica sought him out and for ten years planned this Italia Mia endeavor.
There is a large wooden oven for pizza and pasta made from scratch. About that pasta: I had such a hard time choosing which to have that I ended up sampling from everyone’s plates and still couldn’t decide. Chef Piero, watches over the staff as they roll out every single sheet of pasta. That one right there is stuffed with veal, pork, Parmesano Reggiano and Prosciutto, and it is served with a white truffle sauce that is as delicate in your tongue and as strong in its intensity after you swallow.
Luis and Monica put their lifetime savings and the entirety of their hopes and hard work into this place. And you can feel it: sparks fly when they light up the bar (photo does not do justice to it really, it was taken with my phone).
They have a Martini menu with 22 options where they serve, as Luis calls, tragos coquetos – flirty drinks. And flirt they do!

The Cucumber Martini that Luis and Monica suggested I try bewitched me so, that as soon as I had the chance back in DC I ran to the liquor store to get Limoncello, one of its main ingredients. I even made it at a function last week and guests were marveling about it.
Cucumber in a Martini?!? Yeah, that’s what I thought. Try it: you will not believe how charming it tastes. Just like Puebla, anything that I tried there, whether Mexican or not, makes me want to come back for more.
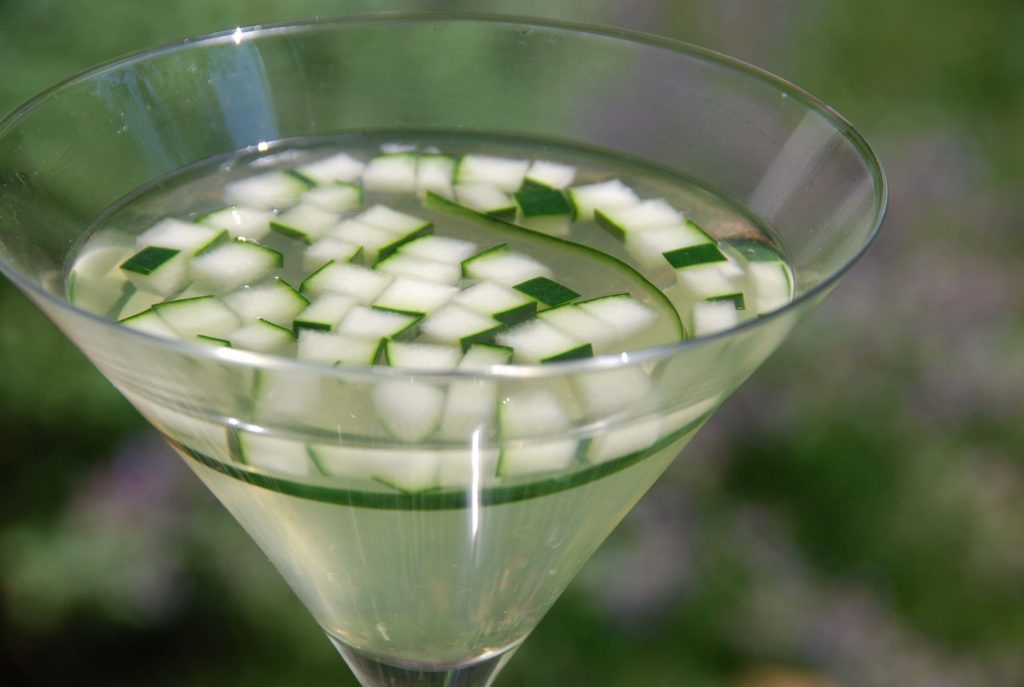
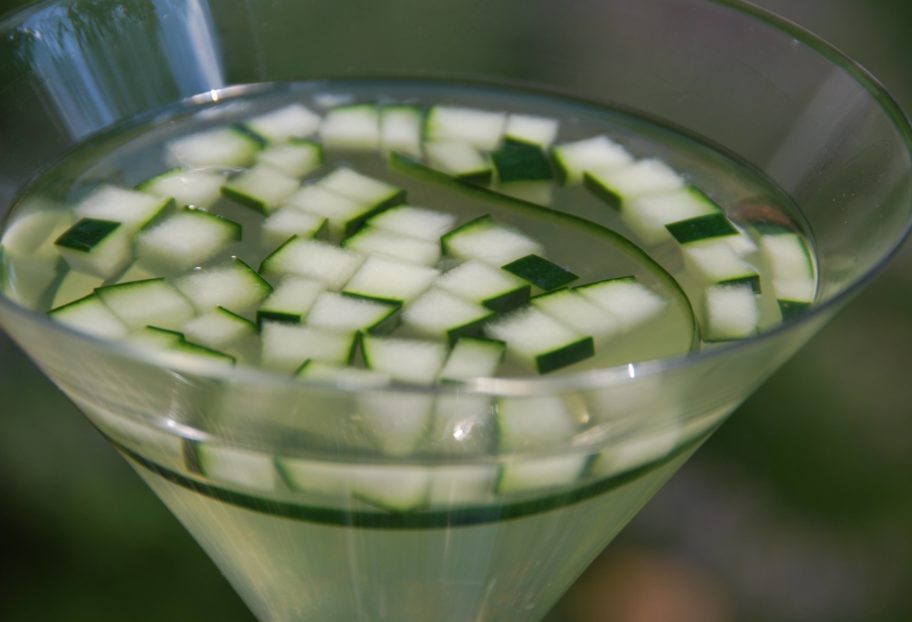
As you take each sip, you get the chance to munch on the diced cucumber, which has been soaking in the martini. When you try it, you will find the experience to be totally unexpected too.

Cucumber Martini
The Cucumber Martini that Luis and Monica suggested I try bewitched me so, that as soon as I had the chance back in DC I ran to the liquor store to get Limoncello, one of its main ingredients. I even made it at a function last week and guests were marveling about it. Cucumber in a Martini?!? Yeah, that’s what I thought. Try it: you will not believe how charming it tastes.
Servings: 1 martini
Ingredients
- 1 1/2 ounce Bombay Gin or gin of your choice
- 1 ounce Limoncello
- A slice of lemon and cucumber to macerate
- 1/2 ounce natural or simple syrup
- 1 tablespoon diced cucumber
Instructions
- In an empty shaker or martini mixer combine all the liquors, slices of lemon and cucumber, and the syrup. Mix and macerate all the ingredients for about 5 minutes. If making a large quantity, let it sit in the refrigerator in a pitcher up to 12 hours.
- Fill the shaker with ice and shake vigorously for 1 minute. Strain and pour the liquid into a chilled martini glass. Decorate the martini with the small pieces of cucumber and a spiral of cucumber skin.
Notes
Martini de Pepino
Cleaning and Cooking Cactus Paddles or Nopales
Cleaning and cooking nopales can seem challenging if you are not familiar with the ingredient. Truth is, cleaning them, can be a bit daunting at first. That’s why I CANNOT wait for cleaned and diced fresh nopales to be readily available in grocery stores here in the US, just like they are in Mexico. But while that happens, let me give you some tricks.
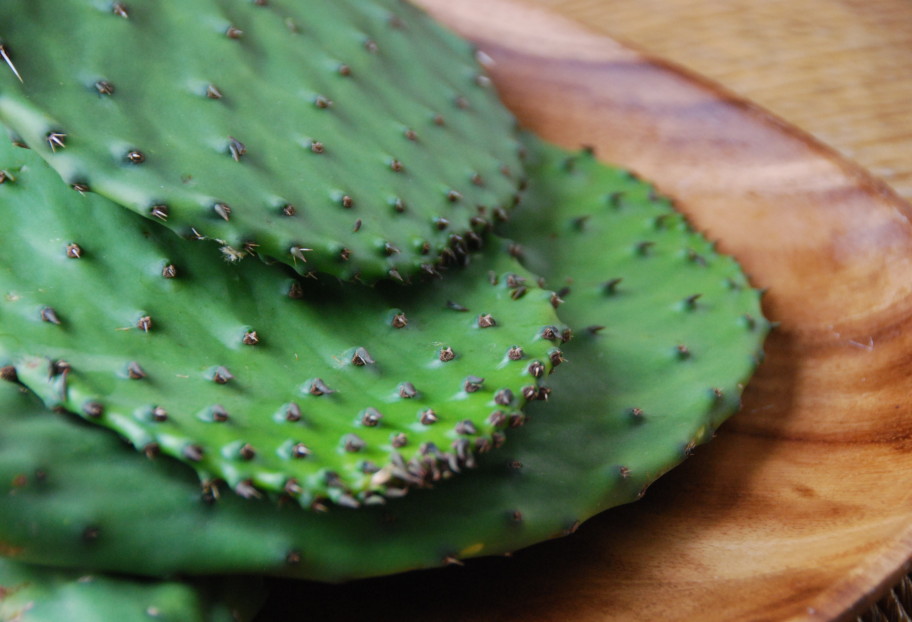
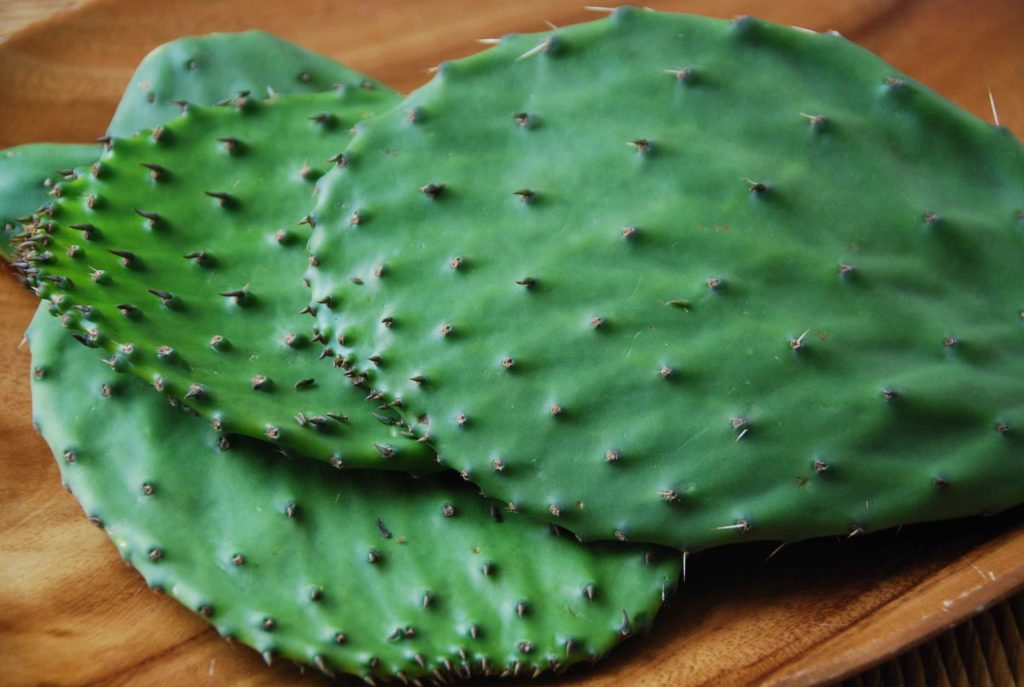
First, to choose them, you want paddles that are bright green and although soft, not limp. The smaller the paddle the more tender it will be, but large ones are delicious too.
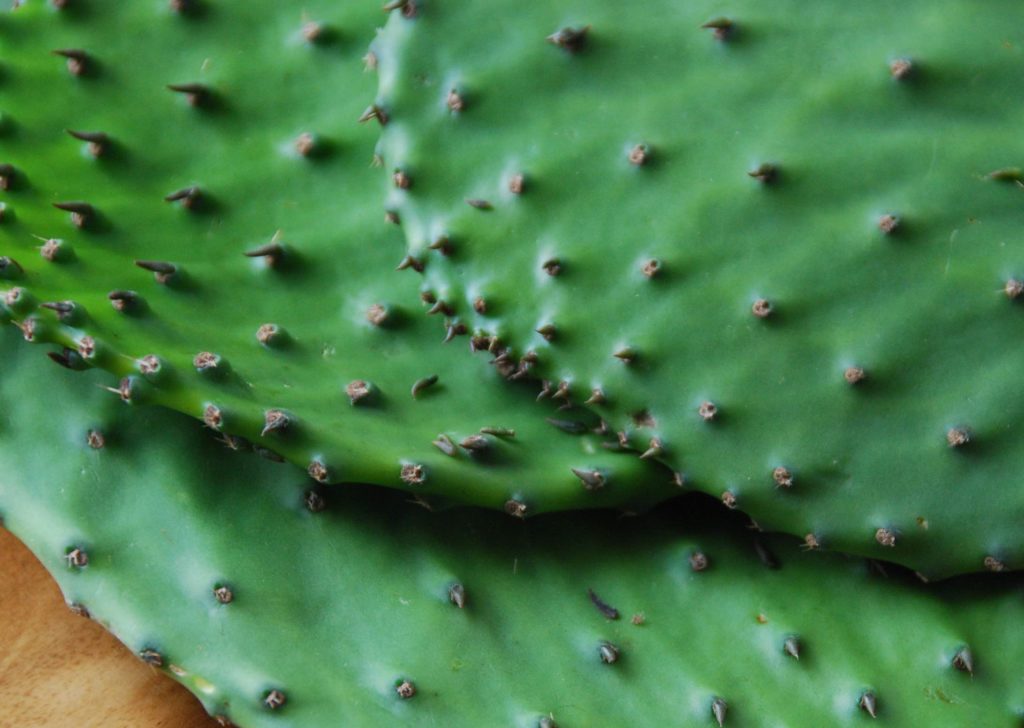
To clean them, if it’s your first time, you may want to use plastic gloves. Rinse under cold water being careful with the thorns. Nopales are persnickety, their thorns are almost invisible, but a good clue is that wherever there is a bump there may be a thorn. Then, using a vegetable peeler or small sharp knife, pretty much as if they were asparagus, peel away the bumps and thorns, you may want to lean the nopales against a chopping board, and then rinse again. No need to peel off all of the outer dark green skin, in fact, try to keep as much as you can.
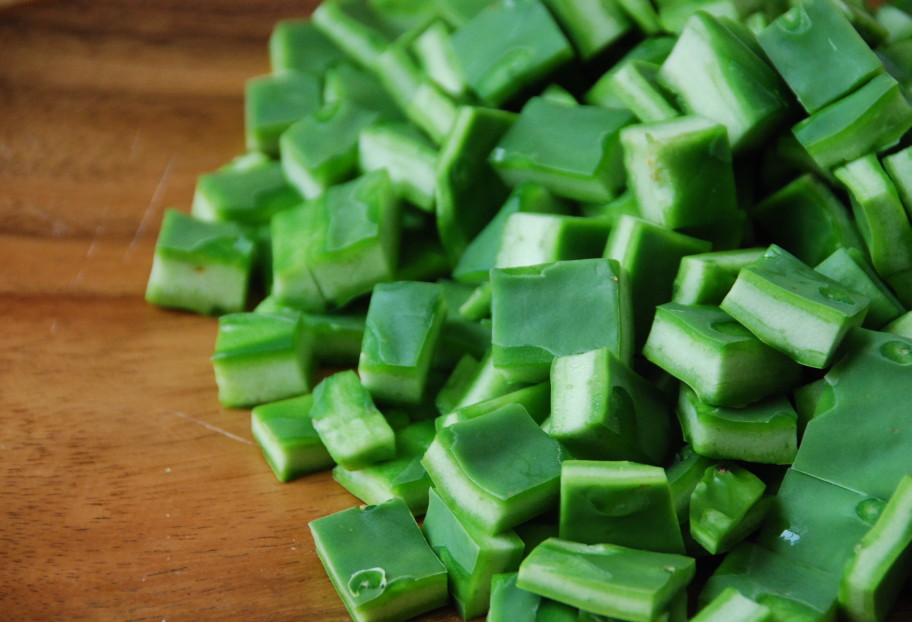
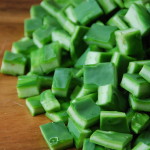
Lay the paddle flat on a chopping board and trim about ¼ inch off the edges and about ½ inch of the thick base. Then slice in any shape or size, or keep it whole if it will be grilled or asado or used as a mounting base. I usually cut them into little squares and rectangles as I mostly use them for salads and soups.
As for how to cook them, there are many ways. A main concern for newcomers is how to get rid of that gelatinous liquid they exude as they cook. Variations go from cooking them in salted water to adding elements that supposedly help, like tomatillo husks, scallion tops, baking soda and even a copper coin. Whichever way you boil them, once cooked you have to drain and rinse them many times.
My favorite way to cook them, aside from grilling them, is to sear them in a skillet with a bit of oil for a few minutes and then let them cook covered until all of that liquid comes out, then uncover until all that liquid cooks off. Pretty much like cooking mushrooms. Not only does it work, but it also adds a nice seared flavor with merely any oil and you don’t have to drain and rinse many times. See below for precise directions, and give it a go!
Basic Cooking for Cactus Paddles
My favorite way to cook them, aside from grilling them, is to sear them in a skillet with a bit of oil for a few minutes and then let them cook covered until all of that liquid comes out, then uncover until all that liquid cooks off. Pretty much like cooking mushrooms. Not only does it work, but it also adds a nice seared flavor with merely any oil and you don’t have to drain and rinse many times. See below for precise directions, and give it a go!
Ingredients
- 2 tablespoons safflower or corn oil
- 3 pounds nopales rinsed, cleaned and diced
- Kosher or sea salt to taste
Instructions
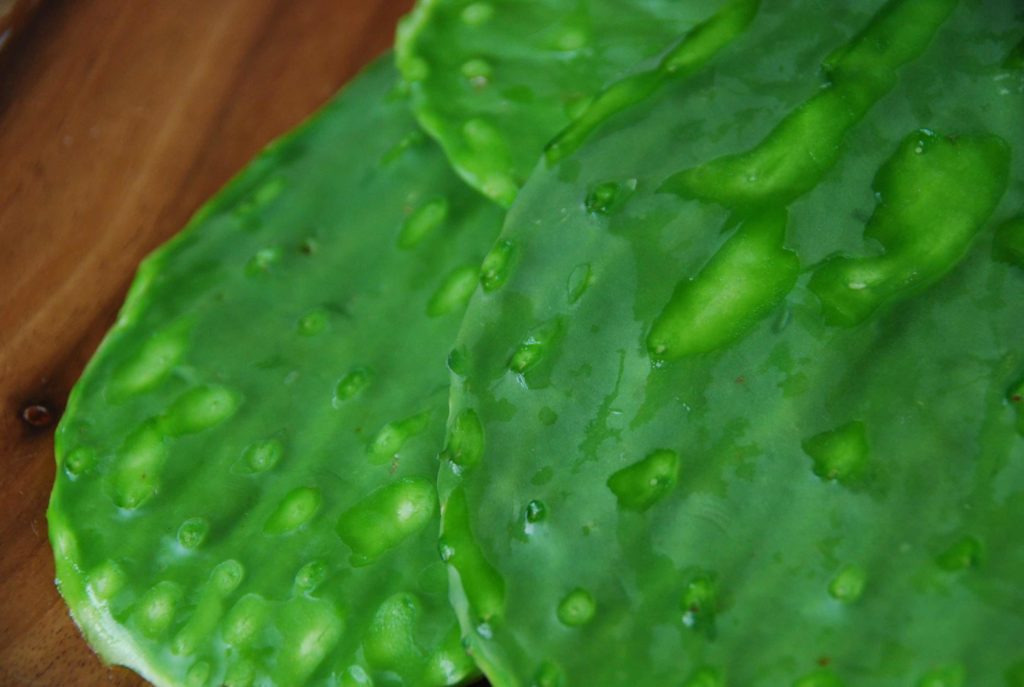
- Rinse the fresh cactus paddles under cold water, being careful not to prick your fingers with the small thorns on its surface. Using a vegetable peeler or small sharp knife, peel away the darker bumps where thorns grow, as well as the thorns, trying not to peel off all the outer dark green skin.
- Lay the paddles flat on a chopping board, then trim around approximately 1/4 inch of the edges and 1/2 inch of the thick base. Once cleaned, rinse and dice into 1/2 to 1 inch-sized squares, to your liking.
- Heat the oil in a thick, large-sized skillet (one that has a lid, since we will need it later on) over medium-high heat. Add the diced cactus, stir in the salt and stir for a minute or two. Place the lid on the skillet.
- Reduce the heat to medium and let the cactus cook and sweat for about 20 minutes, until it has exuded a gelatinous liquid that will begin to dry out. Take the lid off the skillet, stir and make sure most of that gelatinous substance has dried up. If it hasn’t, let the cactus cook for a few more minutes until it does. Let the cactus cool and they are ready to go in a thousand directions including inside of a tortilla.
Cactus Paddles or Nopales
It’s hard to think of Mexico without images of cactus plants. From landscapes to murals, to paintings, photos, plays, songs, and namely to the Mexican flag! Mexico’s coat of arms has an eagle eating a snake triumphantly standing on a cactus plant. As legend goes, that sign led the Aztecs to their promised land, Tenochtitlán.
But you know what is even harder? To think of a Mexican table without cactus, or nopales, on our plates. They’ve been a crucial ingredient since pre-Hispanic times.
Though there are hundreds of varieties, the most common is the Prickly Pear cactus. It has fleshy leaves or paddles, that are used as a vegetable in salads, stews, soups, eggs, all sorts of appetizers and even smoothies and juices -a really popular one combines nopales with orange juice and my mom is fond of adding fresh spinach to the mix. They are used as a base to mount other ingredients onto, as a wrapper instead of thick tortillas and as a filler or topper for tamales, quesadillas, tostadas, and more. They are found from breakfast to dinner options and anywhere in between (continue for more information and photos).
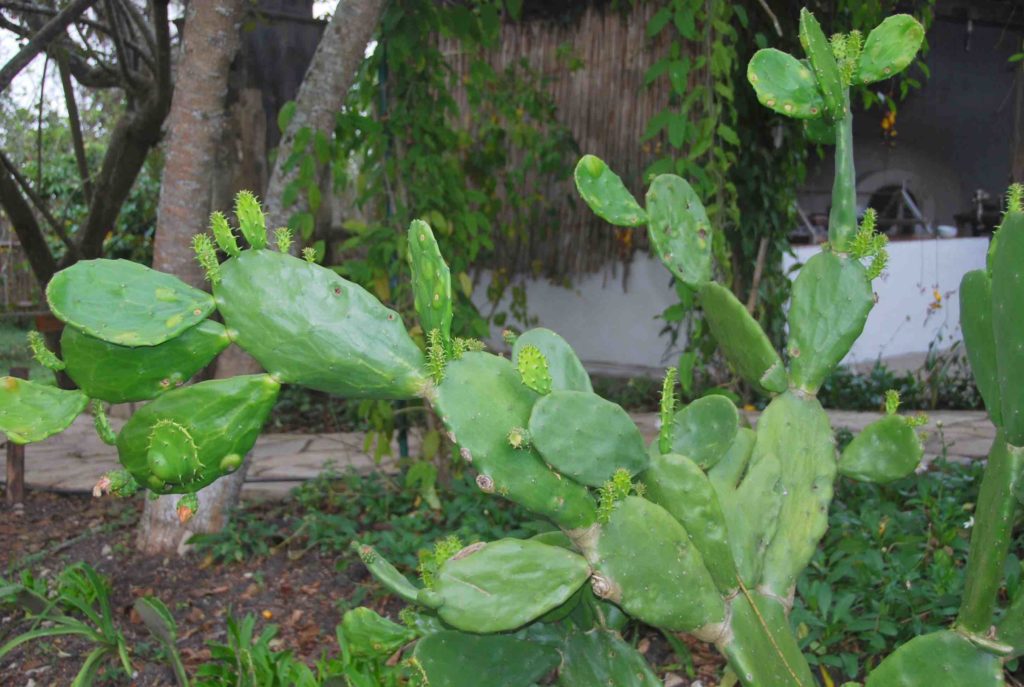
They grow onwards and upwards in a funny way, from paddle to paddle. Their skin is shinny and green, and it is covered in tiny, almost transparent, thorns that happen to be quite vicious when you try to remove them from the little bumps they grow out of. If the paddles aren’t cut, those bumps grow into tunas, or prickly pear fruits.
Nopales are so filling and versatile, that I am waiting to see them star as a top choice for vegetarians outside of Mexico. More so, as they are insanely nutritious, with vitamin A, C and a loadful of Iron. And to top that off, they are low, low, low in fat. They can be cooked in many ways, from boiled, to steamed, sautéed, grilled and are delightful when pickled. Whichever way they are cooked, they have an irresistible chewy meaty bite and a mild flavor that has a tart edge to it.
One reason they haven’t spread like wild fire may be that many people don’t know how to cook them and when they try, they don’t know how to deal with the gelatinous, viscous, slimy liquid they exude as they cook. Now, you can’t let yourself get discouraged from that description, there are many ways to deal with that gooey liquid -think of cooking down mushrooms. I have my favorite way, that always works!
Another reason nopales haven’t become so popular outside of Mexico, yet, may be that they are not so easy to clean. Skilled Mexican cooks get away with removing the thorns without being pricked and out in the country they tend to be cleaned with a machete. It does take some practice, but there are ways to go about it even without such a rough tool.
In Mexico, you find nopales sold in markets and stores already cleaned and even diced. You can find them like that in a few Latin or international stores abroad, but mostly, when found fresh, you have to clean them yourself. They are also sold in jars, cans or bags preserved in a lightly pickled juice; if this is the only way you find them, grab them, run for the checkout and give them a quick rinse before you use them. Better to get that, then none at all, take it from a nostalgic Mexican.
Creamy Poblano Soup
Growing up in Mexico City, I didn’t know a single person who celebrated Cinco de Mayo, except for the people who lived in the state of Puebla. We didn’t even get the day off! Sure we studied it in school–the unprecedented victory of a small Mexican militia against the large French army in 1862–but it was a short-lived victory, as the French won right back.
Fast forward 150 years to 2012: the French and Spanish are gone; Mexicans proudly celebrate Independence Day every September 16; yet, for reasons few of us can explain, Cinco de Mayo has become the greatest, most joyous, colorful celebration–for Mexicans living abroad. As strange as the nostalgia is, the longer I live abroad, the stronger the impact Cinco de Mayo has within my soul. These words fluff up like soft conchas right out of the oven, getting fluffier, sweeter and more comforting as the years go by.
As do so many Mexicans (and, increasingly, non-Mexicans), I celebrate anything that can be celebrated about our Mexicaness: our heritage, resilience, hard-working and accommodating nature, our warmth, hospitality, generosity, the vibrancy and richness of our music, dance and food. Above all, our tendency to tirar la casa por la ventana (to throw out the house through the window) when it comes to throwing a party.
Thankfully, as Cinco de Mayo celebrates its 150th anniversary this year, the spotlight is finally being cast on Puebla, the place where that famous battle took place. At last, the celebration that has become the rage beyond Mexico’s borders is coming back to the place where it originated. It’s about time!
Puebla is a hidden treasure, a colonial jewel with rich history, architecture, arts and culture, coupled with an exquisite overlay of modernity. Most important, its one of Mexico’s main culinary hubs.
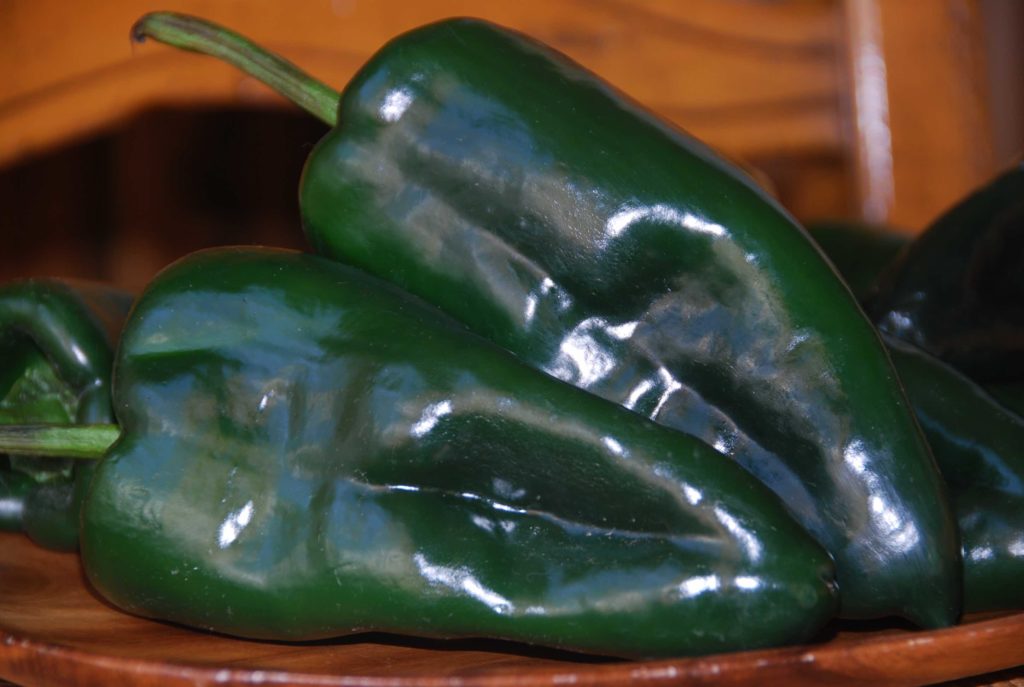
Some of our most iconic (and most labor intensive) dishes come from Puebla, born in convents where Spanish and Mexican cuisines wedded so beautifully. There’s the classic mole Poblano, with its layers of complex flavors subtly coming together once in your mouth; and there’s the colorful chiles en Nogada whose red, white and green represents the Mexican flag.
Yet Puebla is also home to a bounty of homestyle accessible dishes like the chicken tinga and the corn torte. And it’s home to one of my favorite Mexican ingredients: the chile Poblano. See below? That is how many Poblano chiles I go through a week in my house.
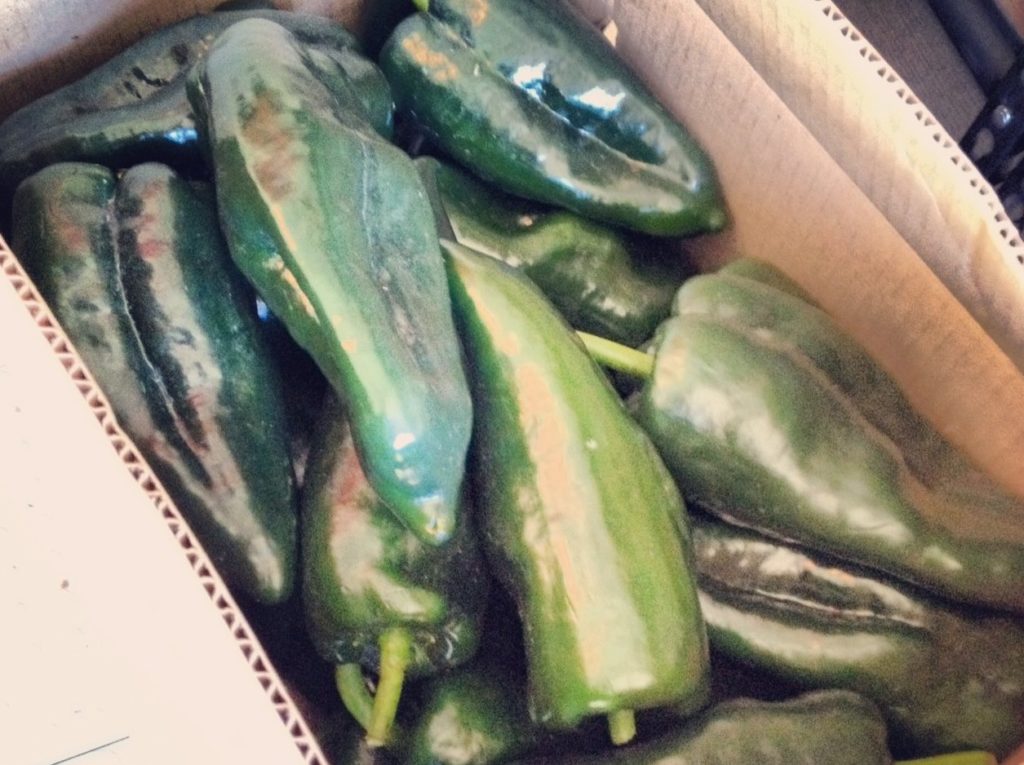
This key ingredient has never ceased to charm me, from the moment I get it at the store to the moment I taste its exuberant, fruity flavor. It is, quite simply, sublime. Each time I cook a dish with a Poblano it feels like a celebration, as if I were right there in Puebla, but the party just happens to unfold inside of my home.
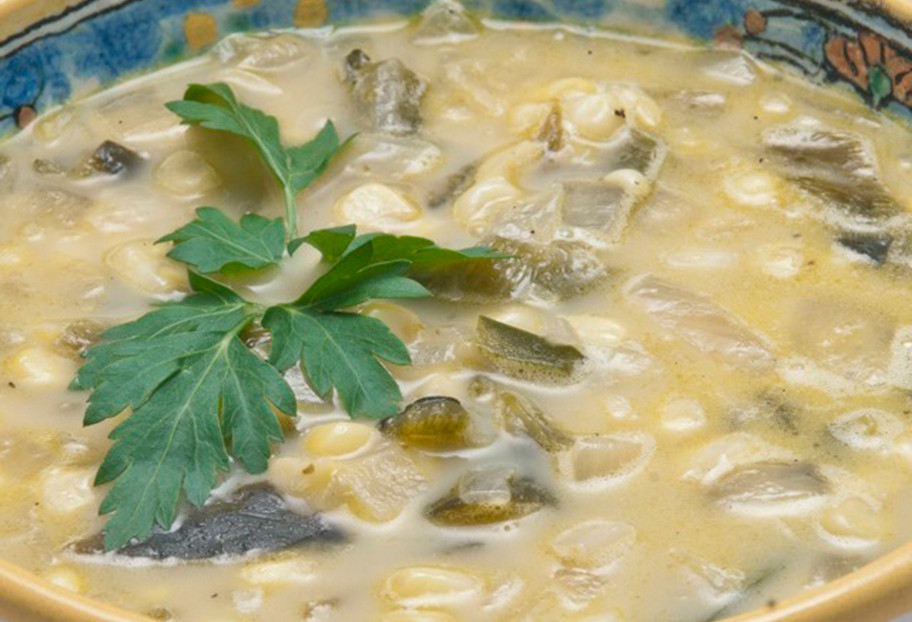
If you can’t get to Puebla anytime soon, try this soup for a Cinco de Mayo moment, be it Cinco or not.
Article written for and published by NBC Latino, poblano soup photo by Jack Foley.
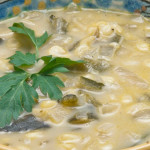
Creamy Poblano Soup
This key ingredient has never ceased to charm me, from the moment I get it at the store to the moment I taste its exuberant, fruity flavor. It is, quite simply, sublime. Each time I cook a dish with a Poblano it feels like a celebration, as if I were right there in Puebla, but the party just happens to unfold inside of my home. If you can’t get to Puebla anytime soon, try this soup for a Cinco de Mayo moment, be it Cinco or not.
Servings: 4 to 5 servings
Ingredients
- 2 tablespoons unsalted butter
- 2 tablespoons vegetable oil
- 2 cups chopped white onion
- 5 to 6 poblano chile peppers (about 1 1/2 pounds total) roasted or charred, sweated, peeled, seeded and diced
- 2 cups corn kernels shaved from a cooked fresh ear of corn, or cooked from thawed
- 1/2 teaspoon kosher or coarse sea salt or to taste
- freshly ground black pepper or to taste
- 3 cups chicken broth may substitute for vegetable broth
- 1 cup milk
Instructions
- Place a large soup pot over medium heat; add oil and butter. Once the butter melts and begins to sizzle, add the onion. Cook the mixture, stirring occasionally, until the onions have completely softened, everything is cooked through and the edges turn slightly brown (about 10 minutes total).
- Add the poblano chiles, stir and let them cook along with the onion for 3 to 4 minutes.
- Make some room in the middle of the pot; add the corn and sprinkle the salt and pepper. Let everything cook, stirring occasionally, for another 3 to 4 minutes.
- Pour in the chicken broth. Let it come to a simmer and cook for 3 to 4 additional minutes so the flavors start to blend. Reduce the heat to low, wait for about a minute, and slowly pour in the milk.
- Heat the soup thoroughly for about 6 to 8 minutes, without letting it simmer or boil (if you do, it will appear curdled but still taste fine). Serve hot. Makes about 5 cups.
Notes
Crema Poblana
Mexican Chocolate
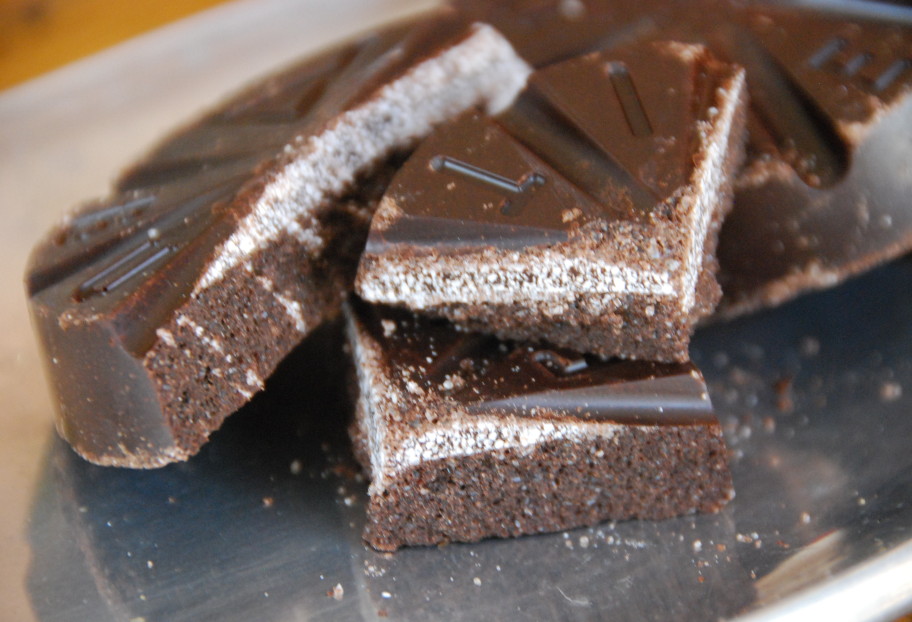
Mexican chocolate is quite different from regular bittersweet chocolate sold throughout the world.
It is sweeter, yet with contrasting layers of flavor that seem to sweep your tongue in waves as you take a bite. It is also grainy, practically gritty. It is traditionally made from a mixture of toasted cacao beans, ground almonds, regular sugar and cinnamon.
Native from Mexico, in pre-hispanic times cacao beans were transformed into a chocolate paste. In that form, chocolate was combined with water and drank every day, by the liters, by Aztec Emperor Moctezuma. It was served for him, in hand carved precious mugs and spiced up with ground chiles and sometimes honey. Only the high tier of the Aztec hierarchy had access to it, on special occasions. It was only after the Spaniards arrived that it turned into a sweeter ingredient by adding the sugar, cinnamon and almonds.
From the many stories told about chocolate, one of the most amusing, is the one about a rebellious group of women in the state of Chiapas during Colonial times: The bishop gave them a warning to stop drinking hot chocolate during mass. The women claimed they needed it for sustenance through the long sermons. The bishop found the practice a nuisance and banned it. The bishop died poisoned, after drinking hot chocolate.
Books have been written about how chocolate was taken to the Old World and conquered the Spanish palates first and then the French. The process of producing the chocolate bars as are sold in the general market, originated in the Old World as well.
Yet there is something so charming about chocolate tablets made the traditional Mexican way. You have to take a bite into one, to be mesmerized.
In Mexico there are special mills, where people and small companies bring their own ingredients and secret recipes, to be ground and turned into tablets. The aroma as one walks in the streets were these mills are located, is addicting. You do not want to go anywhere for a while… Tablets usually have the shape of balls or disks. As a little girl, and still today, I used to love to sit on the sidewalk, and carve one of these tablets slowly, with my teeth. It takes a – lovely – while to finish one.
The most common way to use Mexican style chocolate is to make hot chocolate. Sometimes made with water and sometimes made with milk. Cooks that make it the traditional way, use a clay pot and use a Molinillo that is placed between the palms of both hands and quickly made to spin, as if rubbing your hands when it is really cold outside. This back and forth spinning of the molinillo, produces a thick layer of foam on the chocolate, which is most prized and enjoyed by people, as it is drank in individual mugs.
There are many brands available in the US these days, that sell versions of Mexican style chocolate tablets, such as Chocolate Abuelita and Ibarra. There are even less commercial and artisanal brands like El Mayordomo and others, which come directly from Oaxaca, famous for making the tastiest Mexican chocolate.
Apple, Radish, Watercress Salad with Pistachio and Chile de Arbol
A couple weeks ago, right as I was setting up for one of my classes, “A Culinary Compass of Mexico,” at the Mexican Cultural Institute, Alberto Roblest came over and asked me a great question.
“Pati, do you cook traditional Mexican recipes OR do you create your own?”
Alberto is doing a project with the support of The Office on Latino Affairs. It is called Hola Cultura and explores the contributions of Latinos to DC life and culture, from art to language to sports to cooking.
I think he meant for me to respond with an either or. He really did. Come on Pati, “traditional” OR “new,” he insisted. But I kept answering “BOTH!” As I kept trying to explain why, I realized so wholeheartedly that both traditional and new not only describe my cooking style but also one of the many wonders of Mexican cuisine.
See… I thrive on exploring, traveling, tasting, testing, recreating and passing on traditional Mexican cuisine and recipes. If I get to live to be 120 years old, I won’t have enough time to taste and share all the rich and vibrant regional cuisines and dishes that exist across Mexico.
Mexican cooking has such sturdy pillars and is so strong, partly because generation after generation, tried and true recipes are passed on, sometimes written and sometimes not. When a dish and its traditions somehow get lost in a family, neighborhood, or community… once it is found and recreated again, a lifeline that holds us together suddenly appears! Even if its on the other side of the globe.
When I receive a request for that “much needed but can’t be found” recipe, I jump for joy! I am sent on a serious mission, and I don’t stop until it is completed.
At the same time, Mexican cuisine is so strong because it has a treasure trove of fabulous ingredients that are so accommodating in their use. As long as one understands the ingredient and its genuine nature, there are so many ways to experiment with it. That is also how a cuisine expands, by creating new combinations and testing the limits, sometimes failing and sometimes succeeding. Surely, many of the traditional takes were once new too.
While I dedicate so much of my time researching and passing on what has existed for generations and centuries, I can’t resist creating new dishes. Funny, that it happens many times with salads, like the Watermelon and Tomatillo Salad.
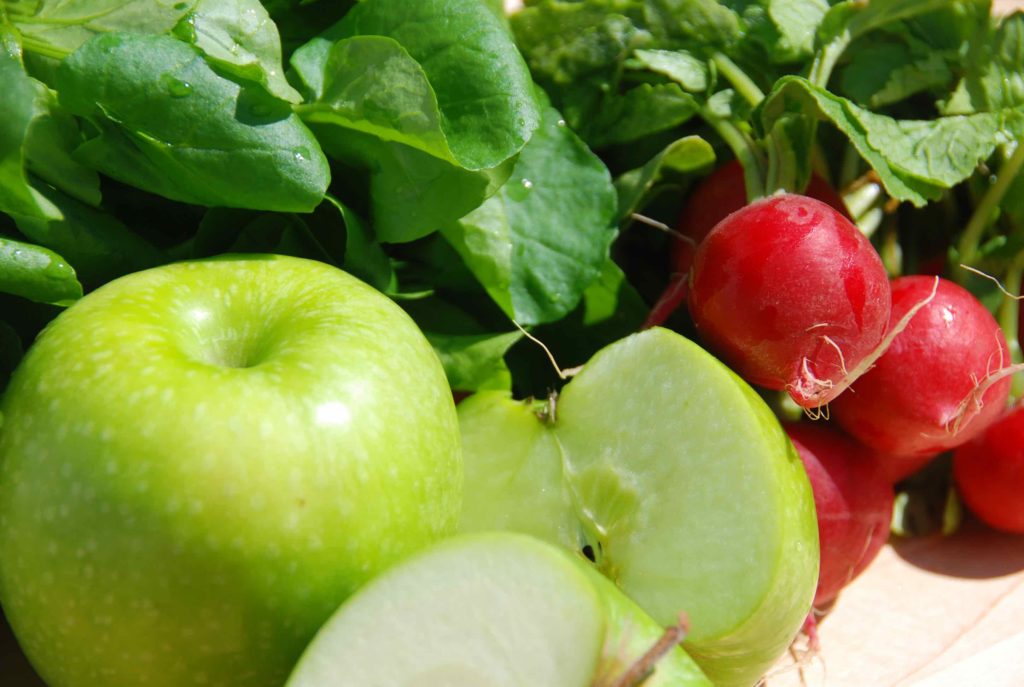
For the one on this post, which I have been obsessively repeating, I use watercress, called “berros” in Mexico (I happen to love that word). They are used tremendously in Mexican kitchens for salads. They are delightful: a bit bitter, made up on thin leaves but packed with flavor and such a nice delicate bite.
On top goes a combination of thinly sliced tart green apples and pungent radishes. One ingredient snapped from a tree and another pulled from the ground! Both ingredients have a bright colorful outer skin, yet, inside are crisp white. I use them both raw, and get the most of their watery crunch and contrasting taste.
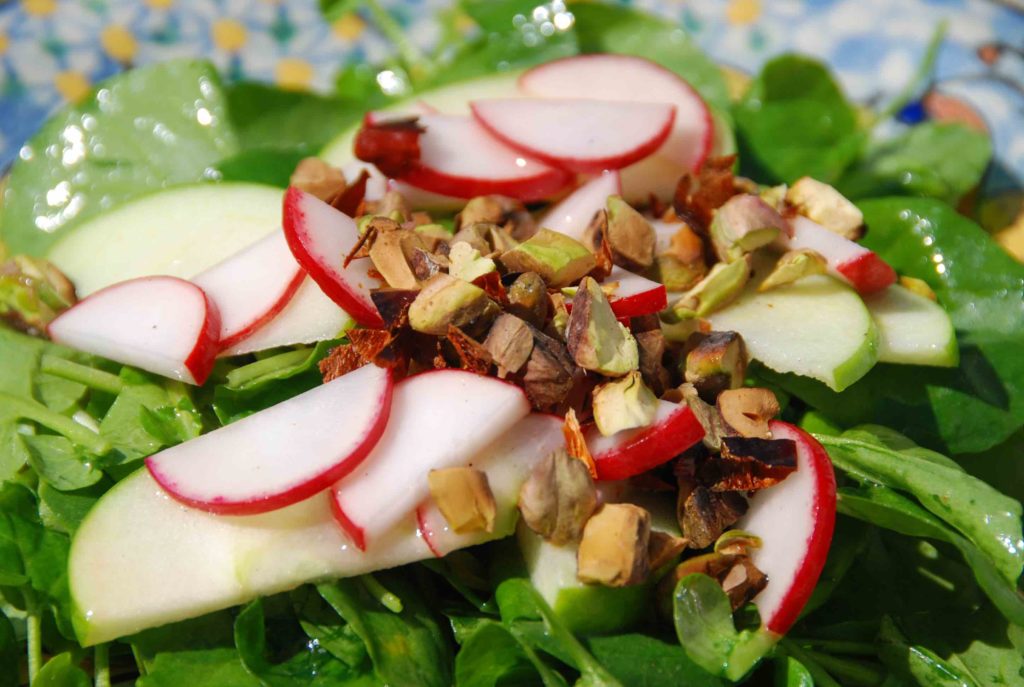
Then it is all covered in a light vinaigrette with a bit of mustard and a bit of honey. Then a stellar topping tries to steal away the show.
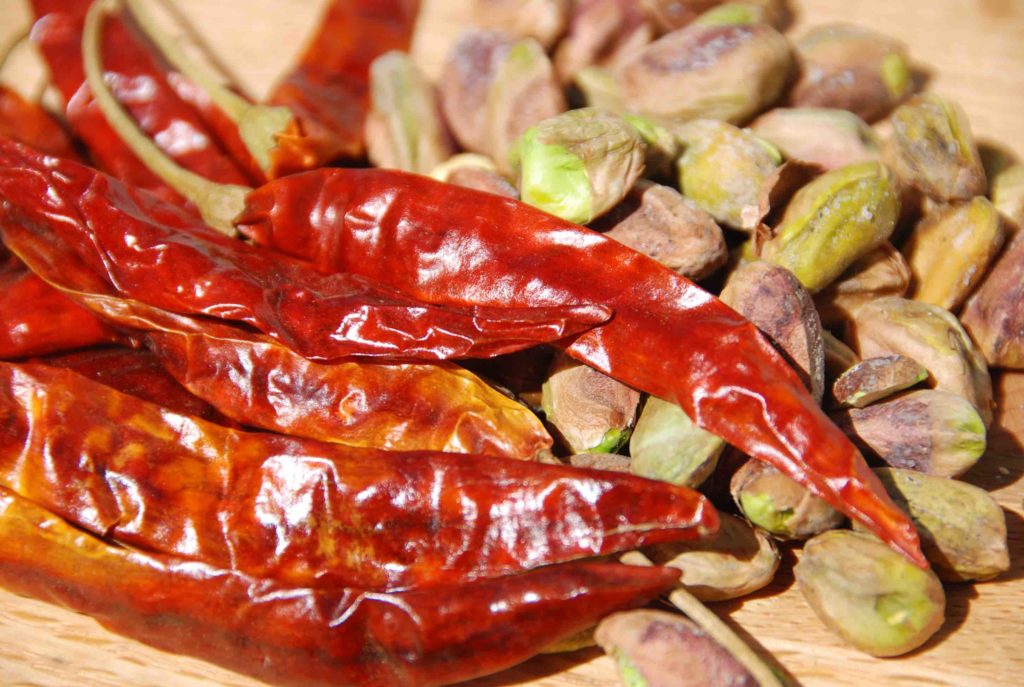
Toasted chile de árbol and pistachios, chopped together. A smoky, lightly spicy, crunchy, nutty and ironically sweet combination.
You won’t believe how sweet the pistachios taste on each bite.
Give it a try!!
Its fresh, its crunchy, lightly tart, with a nice kick and a combination of unexpected flavors that I hope will have you making it time and again as the seasons move on…
p.s. All that said: send along more requests for any more Mexican recipes you are craving at any time.
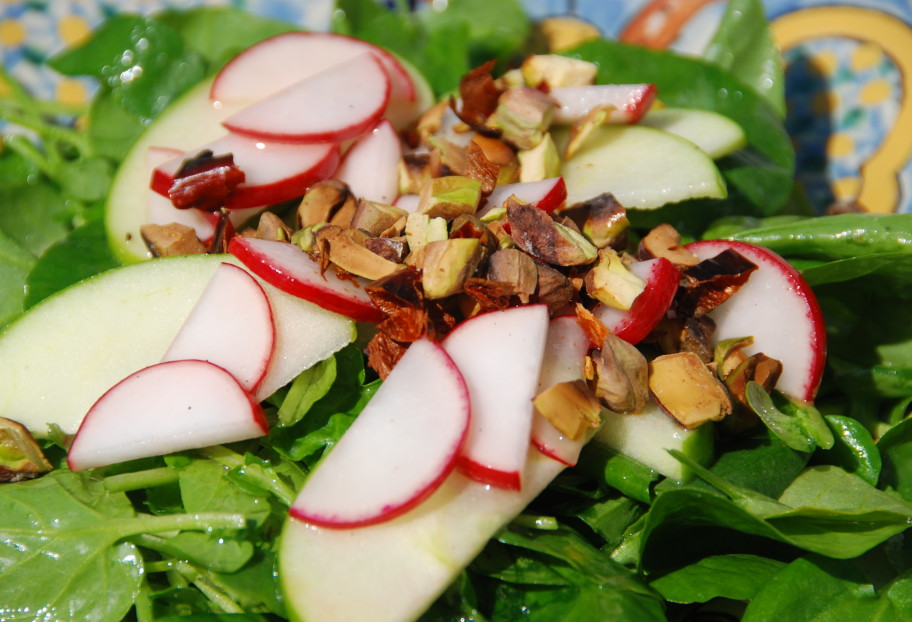
Apple, Radish, Watercress Salad with Pistachio and Chile de Arbol
For the one on this post, which I have been obsessively repeating, I use watercress, called “berros” in Mexico (I happen to love that word). They are used tremendously in Mexican kitchens for salads. They are delightful: a bit bitter, made up on thin leaves but packed with flavor and such a nice delicate bite. On top goes a combination of thinly sliced tart green apples and pungent radishes. One ingredient snapped from a tree and another pulled from the ground!
Servings: 4 servings
Ingredients
- 2 bunches watercress rinsed, dried and the tougher ends of stems removed
- 1 green apple rinsed, and cut into thin wedges
- 1 bunch radishes (or about 4 ounces or 1 cup already sliced), rinsed, stems and roots removed, halved and thinly sliced
- 1/4 cup pistachios lightly toasted and chopped
- 2 chiles de arbol toasted, chopped (seeding optional)
- 1/4 teaspoon dijon mustard
- 1/2 teaspoon honey
- 1/2 teaspoon kosher or sea salt or to taste
- freshly ground black pepper to taste
- 1 tablespoon rice vinegar (natural unseasoned)
- 2 tablespoons freshly squeezed lime juice
- 3 tablespoons olive oil
- 2 tablespoons vegetable oil
Instructions
- Place the apple and the radishes in a bowl. Place the watercress in another bowl.
- Heat a a small 6 inch skillet set over medium low heat, add the pistachios and toast anywhere form 3 to 5 minutes, stirring often, until they are nicely toasted, but don't let them burn. Remove form heat. In the same skillet, toast the chiles de arbol anywhere from 3 to 5 minutes, flipping sides, 1 or 2 times along the way, remove from the heat.
- Remove the stems from the chiles de arbol. In a chopping board, chop the chiles de arbol. You may remove the seeds once they are chopped or keep them. Add the pistachios and chop them along with the chile de arbol creating a pistachio chile de arbol mixture.
- In a small bowl, combine the mustard, honey, salt, pepper, rice vinegar and lime juice with a whisk or fork. Slowly, pour in the oils and whisk or mix very well until thoroughly combined. Pour half onto the apple-radish mix and half onto the watercress.
- To serve, on small appetizer plates, add watercress, top with the apple-radish mixture and sprinkle some of the pistachio-chile de arbol mix on top.
Notes
Ensalada de Berros con Manzana y Rábanos
Piquin Chile
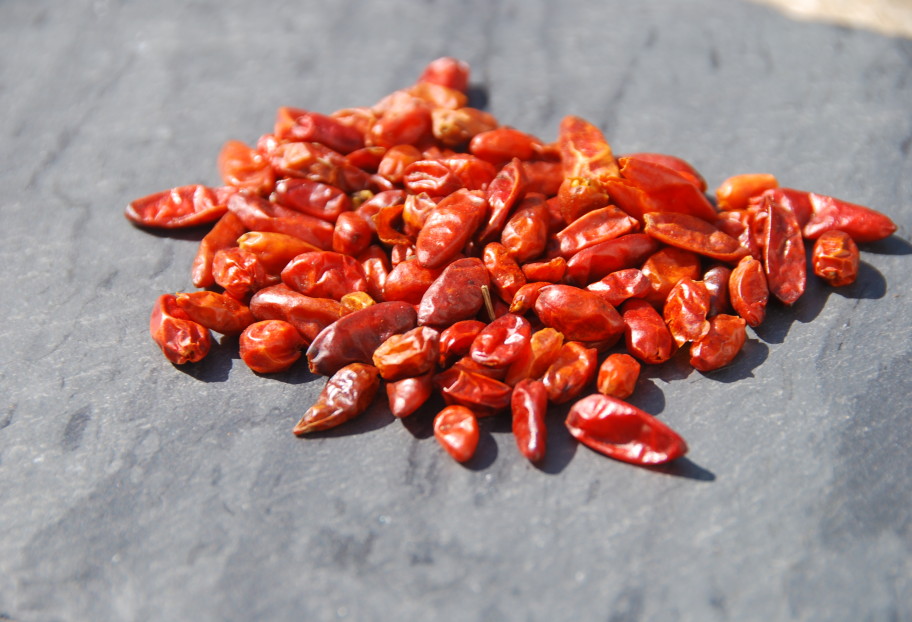
Don’t let their size fool you. These chiles pack a punch of flavor and more importantly, they have been spicing up Mexico’s taste buds for a long time in many ways.
Different varieties of Piquin grow in bushes that have small and pointy leaves. The chiles are adorably cute! They are tiny and grow to be only 1 to 2 centimeters long, round and a bit elongated. When fresh, they start green and as they mature their color turns to a deep red that moves towards brown as they dry, which is how they are mostly consumed. Piquin chiles have a deep flavor with hints of citrus and smoke. They are a bit spicy but incredibly pleasant.
Chile Piquin goes by different names such as Tepín, Chiltepin, Chilito, Chiapas (yes, like the state located in south east Mexico), Diente de Tlacuache (Opposum’s Tooth), Mosquito, Pajarito (little bird), Enano (dwarf), Pulga (flea), Amash, and Chilpaya amongst others.
It’s most common to find Piquin already dried and ground in stores, and that way it can be sprinkled on top of almost everything! In fact, I bet you that any Mexican you may know has eaten Piquin sprinkled on something, if not regularly on many things, from pozoles to soups to salads to sweets to covering the rims of tasty drinks. It is also ever present in street food stands that sell fresh fruits, veggies and crazy corn, where these ingredients are drizzled with lime juice, sprinkled with salt and the ground chile.
Wooden Spoons
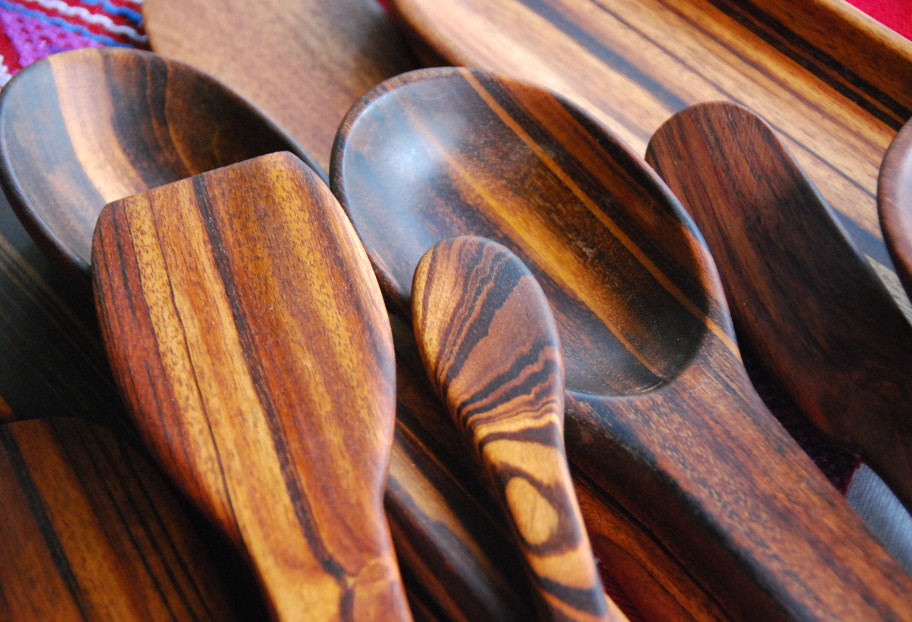
Wooden spoons are much more than essential tools in my kitchen. There is not one but many reasons why wooden spoons have been used for centuries and continue to this day.
Not only are they beautiful, but they are also good natured: they do not scrape or damage pots and pans. What’s more, they don’t absorb flavoring, so you can use them for something salty and then after a wash, use them for something sweet.
The spoons I have, fill my kitchen with meaning, as they tell me stories from where I found them and where they come from. They connect me to those places and age with me, as they last so long.
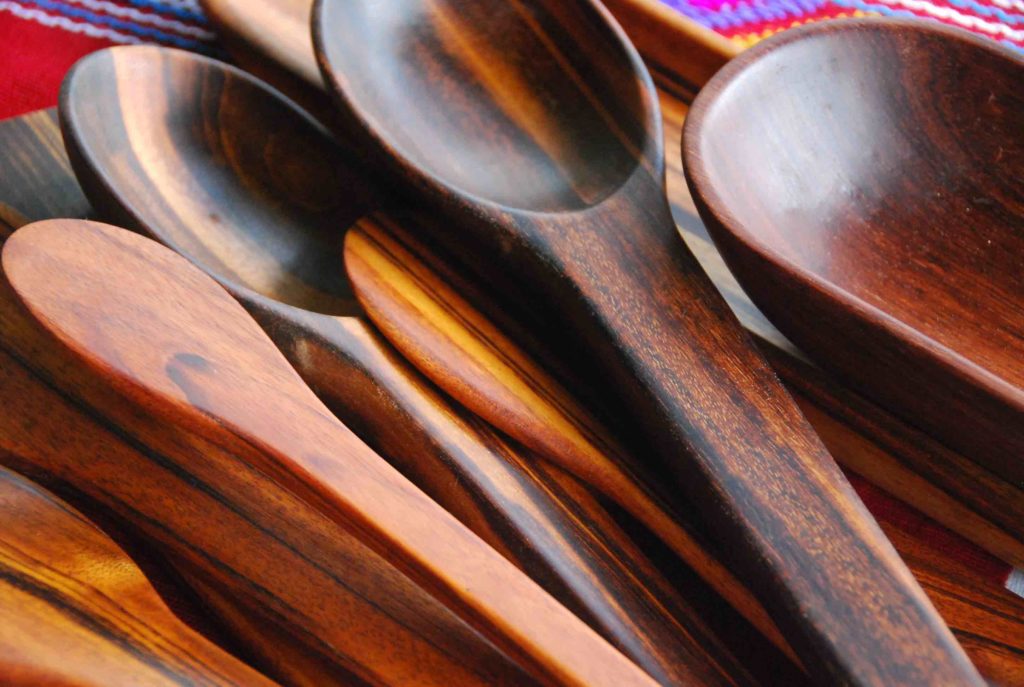
These pictured gorgeous spoons come from the middle of the jungle in the Montes Azules Biosphere Reserve in the Southeastern state of Chiapas. They are handcrafted, made one by one, by the Hernandez family. In 2012, we visited the area and stayed at the Eco-friendly hotel of Las Guacamayas. And there was Sandra Hernandez with her stand of wooden spoons and bowls. I got a couple the first day and then went back the next to get some for my mom and sisters, and the day before we left, I ran back to get some more for my friends.
Mexican wooden spoons come in all shapes and sizes for all cooking needs. Sandra’s family makes theirs from Jobillo and Rokssul wood. Most of them are incredibly practical from big heavy spoons with large handles and deep bowls for making beans and soups, to flat and straight spatulas. There are also some with an inclined edge that aligns with the way the arm moves as it stirs a pan for such things as scrambled eggs.
See the smallest one up there? So small and cute. Sandra recommended for spreading butter or jam. Although that little one may not seem so practical, it is a pleasure to use and it makes me smile each time I do.
Make It, Freeze It, Take It: The Mexican Casserole
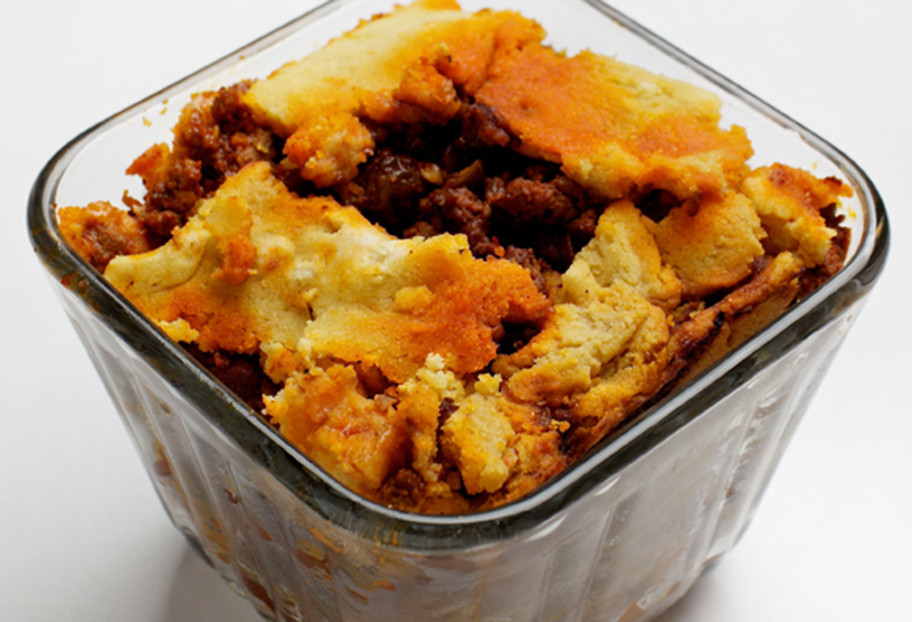
Every few months, my family gets together with a Latin group of friends and their families for a pot luck.
This winter it was our turn. As tradition goes, the host brings the main dishes to the table and the others bring the rest. I eagerly announced my plans to share Mexican casseroles, also called cazuelas, budines or pasteles. The Mexicans couldn’t hide their joy- “Pati! De veras? Budin Azteca? Cazuela de Tamal?!”- and quickly thought of other “very” Mexican sides to pair with them. The Argentines and Costa Ricans tried to understand what “Mexican casserole” meant and whether it was supposed to be any good. The Americans in the group (though they consider themselves Latin) were clearly not excited about it.
No doubt about it, casseroles have had their ups and downs in culinary history. Their weakest stand seems to have been in the United States, after being fashioned into “two-step-many-can” versions in the 1930 and ’40s. But think of all the bright stars in the casserole universe: French cocottes enveloped in mother sauces; British potpies encrusting fillings as wet as British weather; irresistible Italian lasagnas layered with pasta; Peruvian causas with seasoned meat encased in mashed potatos; Greek spanakopitas with an extra-savory cheese-spinach mix covered with phyllo dough; Middle Eastern moussakas stacked with layers of eggplant; and the not-so-well-known, yet gloriously tasty Mexican cazuelas…
All of those casseroles are assembled, baked and served in the same vessel, which makes them convenient, practical and savvy. They are cooked tightly covered without a hurry, giving their fillings time to become succulent with fully blended flavors. Then their messy beauty unravels on your plate. One has to wonder: Why don’t we see more of them around, when we all crave flexible meals that can be made in advance?
In the Old World, casseroles’ prestige may have peaked in the early Renaissance.They were served at royal feasts, with artful decorations fit for competitions and complex fillings; some even had live birds fly out of them with an exhilarating song as the first piece was cut. Such a high-pitched recipe is found in the first British cookbook published during the mid-16th century. It also was recorded as part of one of the most extravagant banquets ever: the wedding of Marie de Medici and Henry IV of France, held in 1600 in Florence. This theatrical dish might have inspired the nursery rhyme “Sing a Song of Sixpence,” in which “four and twenty blackbirds” are baked in a pie.
Fast-forward to 2009: British celebrity chef Heston Blumenthal felt obliged to replicate it in his Medieval episode of “Heston’s Feasts” in England.
Surprisingly, I recently found the nursery rhyme’s muse of a pie in the anonymous 1831 Mexican cookbook “El Cocinero Mexicano.” I am always amazed at how ingredients and recipes hop around the globe. But this I found to be absurdly funny: As if Mexican cooks needed any more outrageous ideas of what to do with casseroles.
Centuries before Old World cooks were trying to impress guests with interactive creations, Mexicans were baking casseroles in underground pits and cooking them over rustic fires. The fillings might not have been able to take flight, but they did contain wild turkey, boar and/ or iguana.
The first version of a Mexican casserole seems to have been the muk-bil (literally, “to put in the ground”). Made by the Mayans on the Yucatan Peninsula since pre-Hispanic times, it is the King Kong of tamales. Truly gigantic. The corn dough wraps around a filling of turkey (after the Spanish arrived, chicken and pork were used as well) rubbed with a pungent paste seasoned with achiote (annatto) seeds, spices and tomatoes. It resembles the flavors of cochinita pibil, a robust Yucatan dish.
So prized was this tamal in ancient times that it was designated meal for major festivities, and it still is. You can bet there will be a lot of muk-bils made this year with all the talk of 2012 marking the end of the Mayan calendar. So it is the right time to head down there if you want a true taste.
This tamal is traditionally wrapped in fragrant banana leaves and baked underground, which gives it a smoky flavor.
Other tamal casseroles throughout Mexico have regional spins, ingredients and salsas. Just across the border in neighboring American states, tamal pie recipes appeared in cookbooks at least a hundred years ago. They called for cornmeal rather than fresh corn masa; the former leads to a much grainier and less fluffy result. That was probably because making masa from scratch involves the ancient nixtamalization process, which takes days (drying, soaking, cooking and grinding) to treat corn so that its nutritious content is fully exploited. It makes a masa so soft that it is practically airy. Today, outstanding instant masa flour that has already gone through that process is widely available, so it’s a snap to put together a real tamal casserole at home.
Here my go-to version: The masa dough is set in two thick layers that hold a rich and baroque filling, typical of the Mexican colonial era, when nuns used to combine Spanish and Mexican ingredients in their convent kitchens. The filling has a sauce made with my preferred pairing of dried chili peppers: sweet, almost chocolaty and prune-flavored ancho and mild, bright-tasting guajillo. It’s seasoned with onion, garlic, oregano, cloves, cinnamon and a pinch of cumin, then made hearty with juicy ground meat that is sprinkled with crunchy almonds, chewy raisins and salty manzanilla olives.
Just like a tamal casserole is a giant version of a tamal, a tortilla casserole is like a hefty stack of open-face tacos with layers of sauce and cheese. It’s a homespun version of tacos, one of the most sought-after street foods in my native country: Taco elements are layered in a cazuela, or earthenware pot. That takes away the hassle of making individual portions and allows for endless filling possibilites, just as with tacos and tamales.
The most popular casserole of them all has an imperial name: Aztec. It is traditionally made with corn tortillas, as they are much more resilient than flour tortillas. Think of a lasagna gone way down south, soaked in a spiced-up tomato sauce with handfuls of exuberant, fruity, addictive roasted poblano peppers and crunchy, sweet corn. Chicken is sometimes added to the mix, which is then bathed with Mexican crema and melty cheese. When I was growing up, and Aztec casserole was a must for successful potlucks.
Some versions use salsa verde or mole sauce instead of a tomato sauce, as well as other kinds of meats and vegetables. Good-quality corn tortillas can be found at the market, so there’s no need to make your own.
The rice casserole is the most modern of the three I’ve offered here. Brought over from Europe by the Spanish, rice has grown deep roots in Mexican cooking. The dish I have been obsessively repeating came about because I wanted to use the bounty of fresh mushrooms found in stores this time of year. Although I don’t have the wild varieties that crop up in Mexico’s rainy season, I have experimented with an accessible mix of mushroom textures and flavors, fresh herbs, epazote, cilantro, parsley, that salty crema and tangy cheese. This stew goes on top of the rice with a topping of grated dry and aged cheese. As the casserole bakes, the rice absorbs the flavored cream, the mushrooms meld with the sauce and the cheese morphs into a perfectly browned crust.
I’m wondering whether Mexican renditions can lend a bit of prestige to the state of casseroles in the United States. They certainly receive a royal welcome from my potluck friends, who heap seconds on their plates.
Article written for and published by The Washington Post. Photo taken by Deb Lindsey Photography www.deblindsey.com.
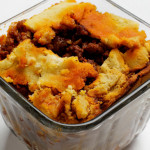
Meaty Tamal Casserole
My go-to version of a tamal casserole: The masa dough is set in two thick layers that hold a rich and baroque filling, typical of the Mexican colonial era, when nuns used to combine Spanish and Mexican ingredients in their convent kitchens. The filling has a sauce made with my preferred pairing of dried chili peppers: sweet, almost chocolaty and prune-flavored ancho and mild, bright-tasting guajillo. It’s seasoned with onion, garlic, oregano, cloves, cinnamon and a pinch of cumin, then made hearty with juicy ground meat that is sprinkled with crunchy almonds, chewy raisins and salty manzanilla olives.
Servings: 10 servings
Ingredients
For the dough:
- 1 1/4 cups vegetable shortening or lard
- 1 teaspoon kosher or coarse sea salt
- 2 teaspoons baking powder
- 1 1/2 pounds (about 5 cups) corn masa flour for tortillas or tamales such as Maseca brand
- 4 1/2 cups homemade or no-salt-added chicken broth may substitute water
For the filling:
- 8 dried guajillo chiles stemmed, halved and seeded
- 8 dried ancho chiles stemmed, halved and seeded
- 2 cups hot water or as needed
- 1 teaspoon dried oregano
- 5 whole cloves
- 1 teaspoon ground cinnamon
- Pinch ground cumin
- 3 tablespoons vegetable oil plus more for the baking dish
- 1 medium white onion chopped (about 1 cup)
- 6 cloves garlic chopped
- 2 1/2 pounds ground meat such as veal, turkey, beef, pork or a combination
- 1 teaspoon kosher or sea salt or to taste
- 1/4 teaspoon freshly ground black pepper
- 2 cups homemade or no-salt-added chicken broth may substitute water
- 1 cup raisins
- 3/4 cup slivered almonds
- 3/4 cup pimento-stuffed manzanilla olives chopped
Instructions
For the dough:
- Place the vegetable shortening or lard in the bowl of a stand mixer; beat on medium speed for about 3 minutes, until it is light and airy. Stop to scrape down the sides of the bowl.
- Add the salt and baking powder; on low speed, gradually add the corn masa flour and the broth in alternating additions, making sure each time that the addition is well incorporated. Beat for about 10 minutes to form a masa dough that is homogeneous and fluffy. Let the dough sit at room temperature while you make the filling.
For the filling:
- Heat a comal (tortilla griddle) or skillet over medium heat. Add the guajillo and ancho peppers; toast them for about 15 seconds per side, until they become more pliable, lightly toasted and fragrant and their inner skin turns opaque. Transfer to a medium saucepan and cover with at least 2 cups of hot water. Cook over medium-low heat for about 15 minutes, or until the peppers have rehydrated, plumped up and softened.
- Transfer the peppers and 2 cups of the liquid to a blender and add the oregano, cloves, cinnamon and cumin. Remove the center knob from the blender lid and cover the opening with a dish towel to contain splash-ups. Puree to form a smooth sauce. The yield is 2 1/2 to 2 3/4 cups.
- Heat the oil in a large, deep skillet over medium-high heat. Add the onions and cook for 4 to 5 minutes, stirring continuously, until the onions are cooked through and beginning to brown at the edges. Add the garlic and cook until fragrant, less than a minute, then add the ground meat, salt and black pepper. Cook for 12 to 15 minutes, stirring occasionally and using a spoon to break up the meat, until it has lightly browned. Add the sauce, the broth, raisins, almonds and olives, stirring to combine; reduce the heat to medium-low, cover the skillet and cook for 20 minutes. Uncover, stir and cook uncovered for 5 minutes.
- Preheat the oven to 400°F. Use a little vegetable oil to grease a 9-by-13-inch baking dish or the equivalent.
- Spoon half of the prepared masa dough into the dish, forming a bit of a lip on the sides and gently leveling it out; don’t press hard. Spoon all of the meat filling on top. Cover evenly with the remaining dough. Cover the dish tightly with aluminum foil and bake for 1 hour or until the masa is completely cooked and the top appears to be firm. Remove from the oven and let it sit, covered, for 10 to 15 minutes before serving.
Notes
Cazuela de Tamal

Chicken and Tortilla Aztec Casserole
The most popular Mexican casserole of them all has an imperial name: Aztec. It is traditionally made with corn tortillas, as they are much more resilient than flour tortillas. Think of a lasagna gone way down south, soaked in a spiced-up tomato sauce with handfuls of exuberant, fruity, addictive roasted poblano peppers and crunchy, sweet corn. Chicken is sometimes added to the mix, which is then bathed with Mexican crema and melty cheese. When I was growing up, and Aztec casserole was a must for successful potlucks.
Servings: 8 servings
Ingredients
For the sauce:
- 3 tablespoons vegetable oil
- 1 medium white onion chopped (about 1/2 cup)
- 2 cloves garlic minced or pressed
- 2 pounds ripe tomatoes cored and pureed, or whole canned tomatoes, drained and pureed (to make about 5 cups tomato puree)
- 1/2 teaspoon dried oregano
- 1 bay leaf
- 1 teaspoon kosher or coarse sea salt
For the tortillas:
- 1 cup vegetable oil or more as needed, for frying the tortillas
- 8 to 10 (9 ounces total) corn tortillas
For assembly:
- 4 cups cooked shredded chicken
- 4 cups fresh corn may substitute frozen (see NOTES)
- 1 pound poblano chiles roasted, peeled, seeded and cut into rajas (see NOTES)
- 1 cup Mexican cream (crema) Latin-style cream, creme fraiche or heavy cream
- 12 ounces (about 3 cups) grated Oaxaca, mozzarella, Monterey Jack or mild white cheddar cheese
Instructions
For the sauce:
- Heat the oil in a large saucepan over medium heat. Stir in the onion and cook until soft and translucent, stirring occasionally, about 6 minutes. Stir in the garlic and cook until fragrant, 30 seconds to 1 minute. Add the tomato puree, oregano, bay leaf and salt and cook for about 10 minutes, stirring occasionally, until the sauce thickens and darkens in color. Remove from the heat and discard the bay leaf.
For the tortillas:
- Cover a large plate or baking sheet with several layers of paper towels. Pour the oil into a medium 10-inch skillet to a depth of 1/4 inch (about 1 cup). Heat over medium-high heat until hot but not smoking, about 2 to 3 minutes. Working with one tortilla at a time, use a pair of tongs to pass the tortilla through the oil for 10 to 15 seconds per side; this will make the it pliable and resistant to the sauce. The tortilla will first appear to be softening and then will become barely crisp, and its color will darken. Drain on the paper towels.
To assemble:
- Spread one-third of the tomato sauce on the bottom of a 9-by-13-inch baking dish or the equivalent. Cover with half of the cooked chicken, half of the corn, half of the poblanos and one-third of the cream and cheese. Top with half of the tortillas, tearing them into large pieces if needed to make an even layer without much overlap. Repeat, adding one-third of the tomato sauce; the remaining half of the cooked chicken, corn and poblanos; and one-third of the cream and cheese. Top with a layer of the remaining tortillas, the remaining one-third of the sauce and the remaining cream and cheese.
- When ready to bake, preheat the oven to 375°F. Cover the casserole dish with a lid or with aluminum foil. Bake for 25 minutes, then remove the lid or foil and bake for 15 minutes or until the top is bubbly and the cheese has melted. Serve hot.
NOTES:
- To create rajas, or strips, char or roast the chiles, either by placing them under the broiler or directly on a grill or hot skillet. Roast for 6 to 9 minutes, turning every 3 to 4 minutes, until they are charred and blistered but not burned. Immediately place in a plastic bag; close the bag tightly and cover with a kitchen towel; this will facilitate skinning. One by one, remove each chili from the bag, peel off the skin and lightly rinse the chili with water. Cut out the stem and cut each pepper in half. Remove and discard the seeds, then cut the peppers into strips 1/2-inch wide and an inch long.
- Frozen corn will make the dish watery if it is not precooked to remove moisture. First, defrost the corn completely. Heat a large skillet or saute pan over medium-high heat. Add 1 teaspoon of unsalted butter; when it has melted, add the corn and cook for 2 minutes, stirring frequently.
Notes
Cazuela Azteca
Mushroom and Rice Casserole
Although I don’t have the wild varieties of mushrooms that crop up in Mexico’s rainy season, I have experimented with an accessible mix of mushroom textures and flavors, fresh herbs, epazote, cilantro, parsley, that salty crema and tangy cheese. This stew goes on top of the rice with a topping of grated dry and aged cheese. As the casserole bakes, the rice absorbs the flavored cream, the mushrooms meld with the sauce and the cheese morphs into a perfectly browned crust.
Servings: 8 servings
Ingredients
- 4 tablespoons (1/2 stick) unsalted butter plus more for the baking dish
- 3 tablespoons vegetable oil
- 2 medium white onions chopped (2 cups)
- 2 cloves garlic minced or put through a garlic press
- 1 jalapeño or serrano pepper finely chopped (seeding optional if you want less heat; may add more to taste)
- 2 pounds mixed mushrooms (such as white button, baby bella, portobello and shitake), cleaned, dry part of stem removed, sliced
- 1 teaspoon kosher or coarse sea salt or more to taste
- 1/4 teaspoon freshly ground black pepper
- 2 tablespoons chopped cilantro leaves and thin part of stems
- 2 tablespoons chopped parsley leaves and thin part of stems
- 1 cup Mexican cream or Latin-style cream, or heavy cream
- 8 ounces (about 2 cups) farmers cheese or queso fresco crumbled
- 6 cups cooked white rice
- 1 cup freshly grated queso anejo Parmigiano-Reggiano, or Romano
Instructions
- Heat the butter and oil in a large, deep 12-inch skillet over medium heat. Add the onions and stir to coat; cook for about 12 minutes, stirring occasionally, until they are translucent and the edges begin to brown. Add the garlic and jalapeño or serrano pepper; cook for 2-3 minutes, until softened. Add all of the sliced mushrooms; sprinkle with salt and pepper, and gently combine with the onions. Cover and cook for 5 to 6 minutes, until the mushrooms have exuded their juices and the flavors have melded. Uncover and cook for 7 to 8 minutes or until the juices have evaporated.
- Add the cilantro and parsley, stirring to combine. Add the cream and the crumbled queso fresco or farmer cheese; stir until the mixture is thoroughly combined and the cheese has melted. Continue cooking for 3 to 4 minutes, adjusting the heat to keep the mixture barely bubbling at the edges. It should still be very saucy. Turn off the heat.
- Preheat the oven to 375°F. Use a little butter to grease a 9-by-13-inch baking dish or the equivalent.
- Spoon the cooked rice into the baking dish and level it out without pressing down hard. Pour the mushroom-cilantro mixture on top and gently spread to level it. Sprinkle with the grated cheese. Bake for 15 to 20 minutes or until the cheese has melted and gently browned.
- Serve hot.
Notes
Cazuela de Arroz con Hongos
Hoja Santa or Hierba Santa
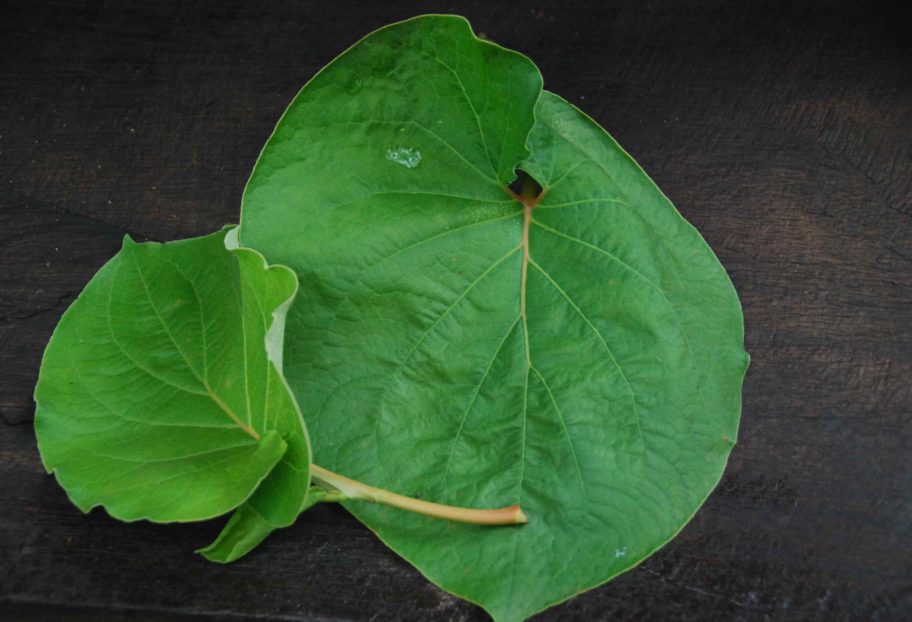
The name Hoja Santa translates to “sacred leaf.” The leaves of the hoja santa plant are heart-shaped with a thick velvety texture. These leaves can grow up to a foot and sometimes more. I find them to be truly beautiful. Though hoja santa is found throughout Mexico, it is mostly used in the south.
Mexican cooks use hoja santa judiciously not only because of it’s strong, unique, unexpected taste, but also because too much of it is not good for you, just like epazote.
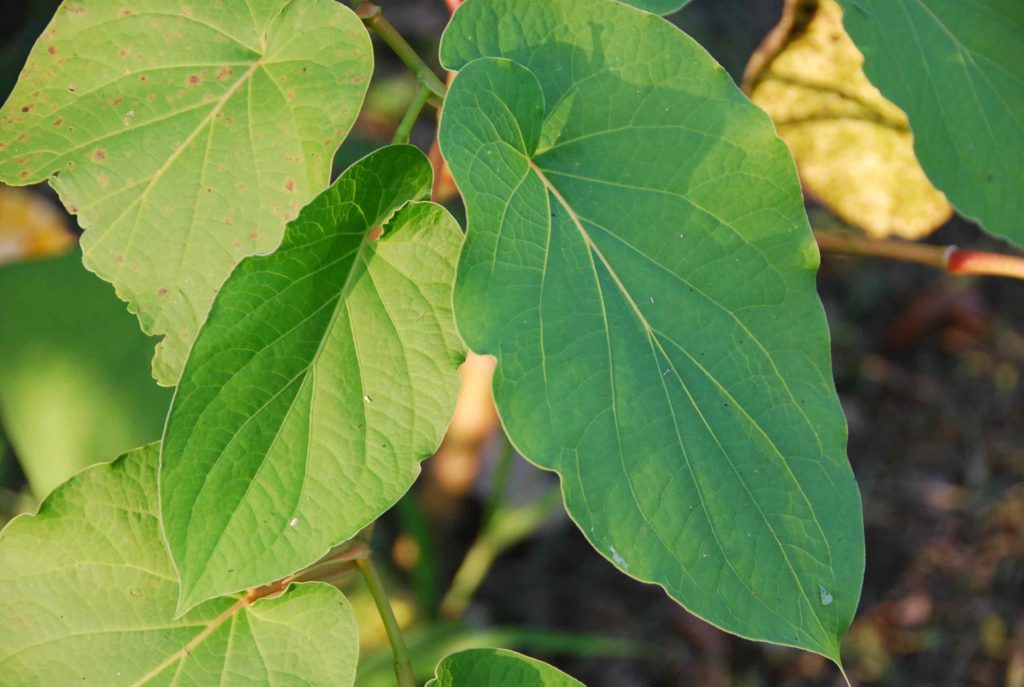
Hoja Santa is used fresh and dried in many different ways in Mexican cooking, from tamales to pozoles to moles to soups. It is also wrapped around meat, seafood and around tamales as an edible wrapper, keeping what’s inside moist but also infusing the filling with its peculiar flavor.
Getting back to it’s flavor: it’s really hard to describe…aromatic, fragrant with a hint of eucalyptus and a whisper of mint. Some people find it similar in taste to anise. I also find a slight echo of black peppercorn and allspice. The only way for you to find out is to give it a try.
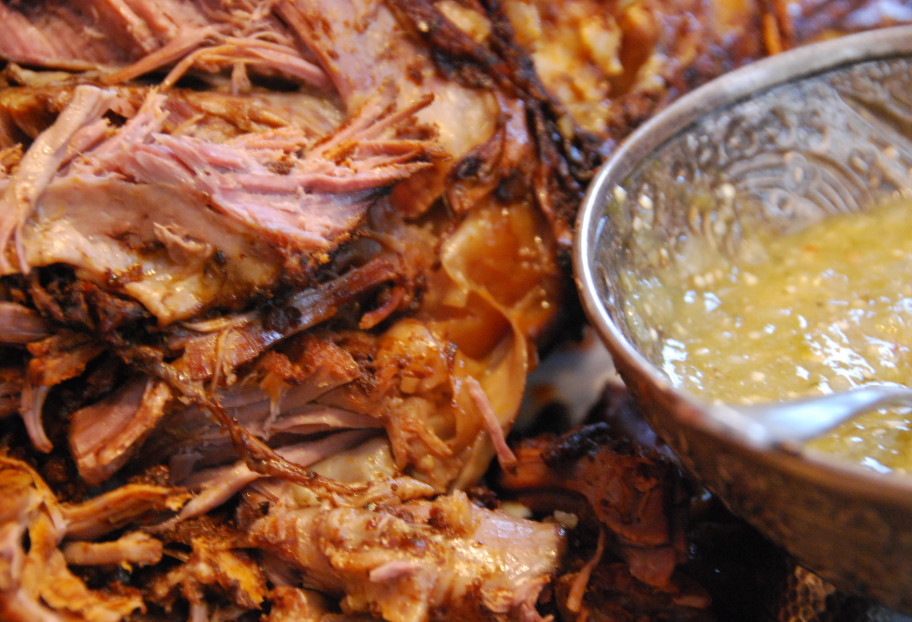
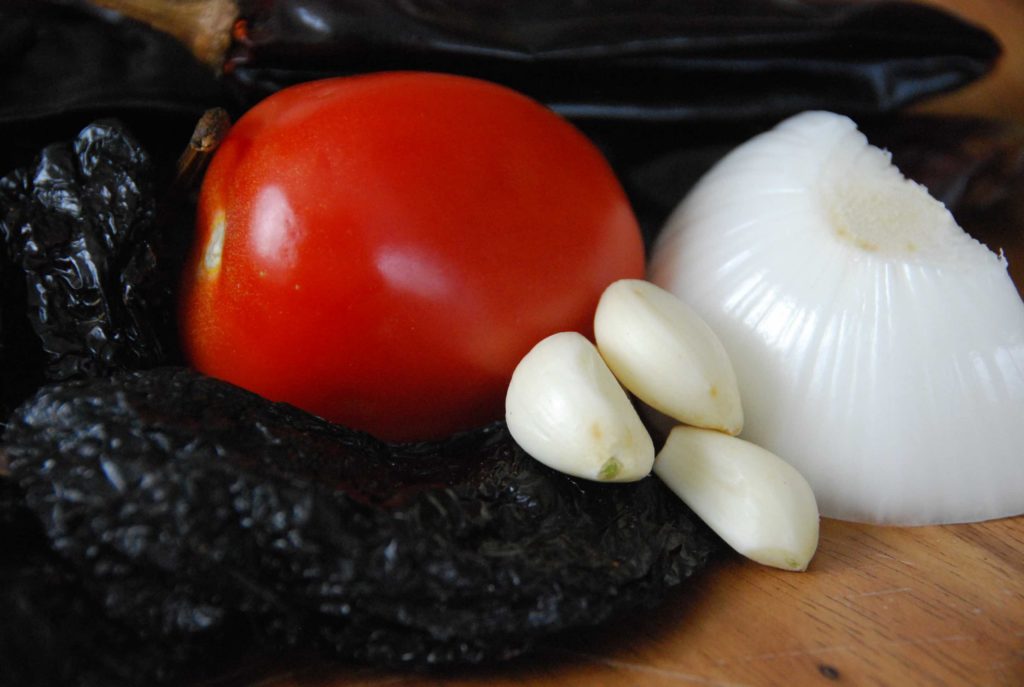
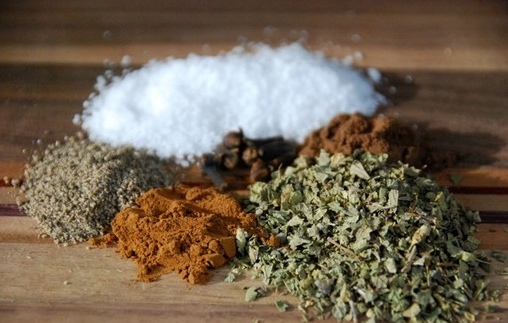
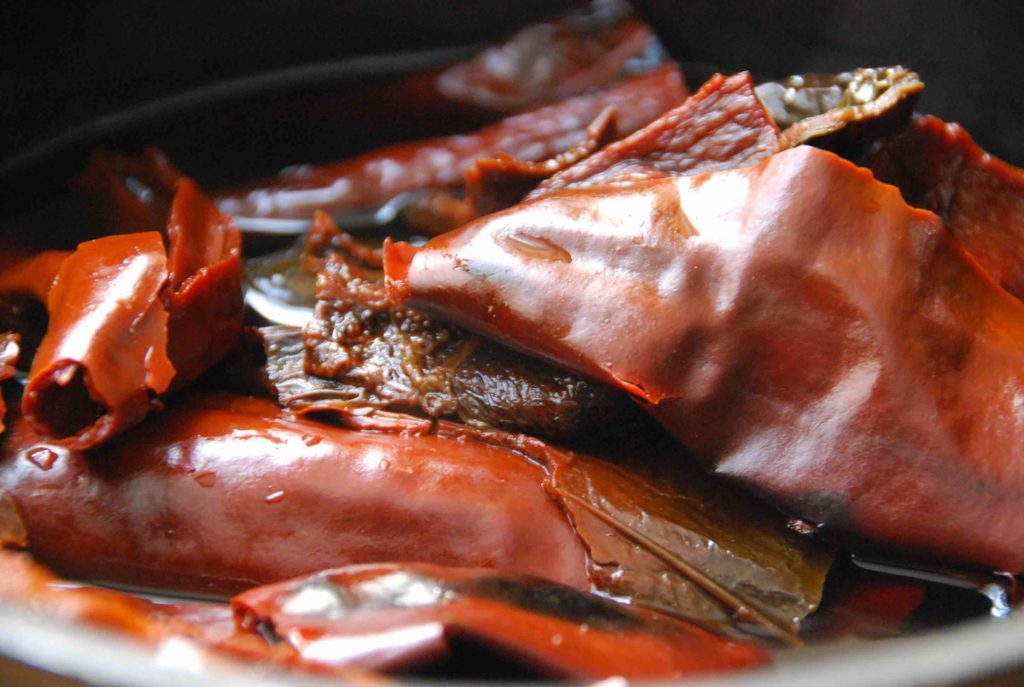
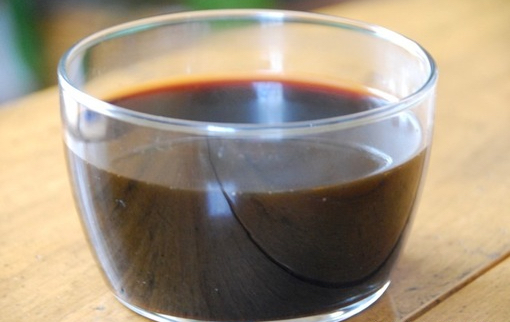
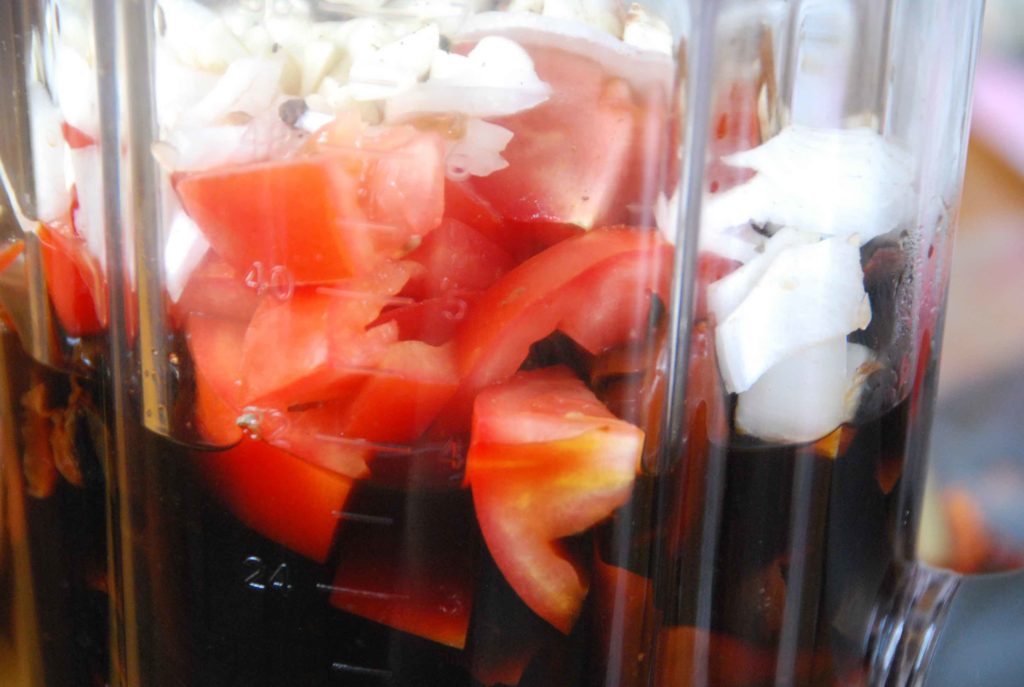
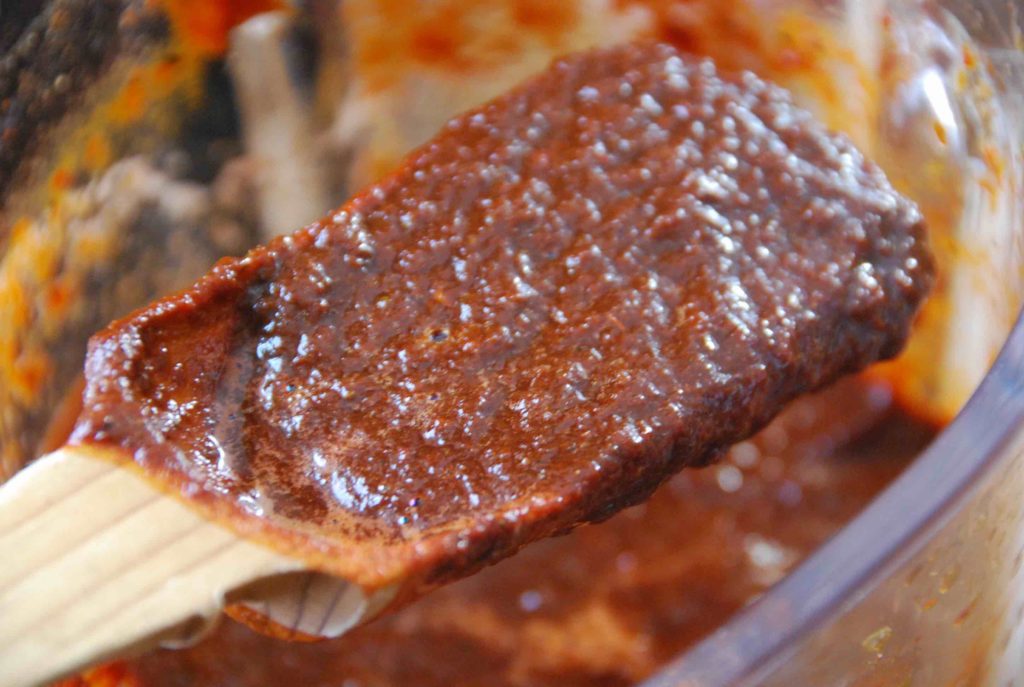
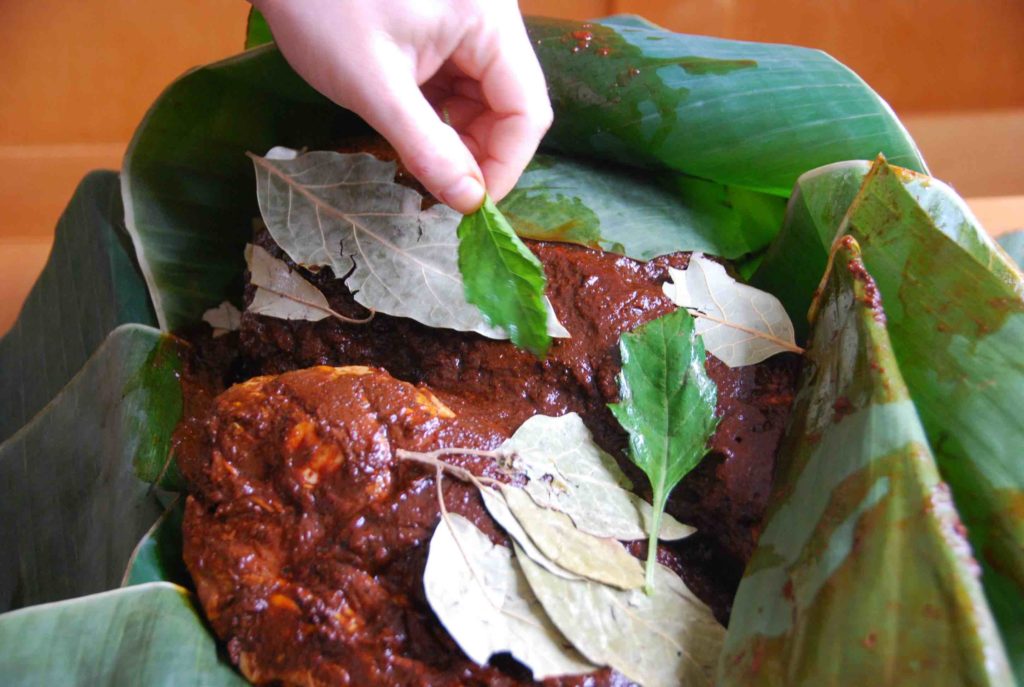
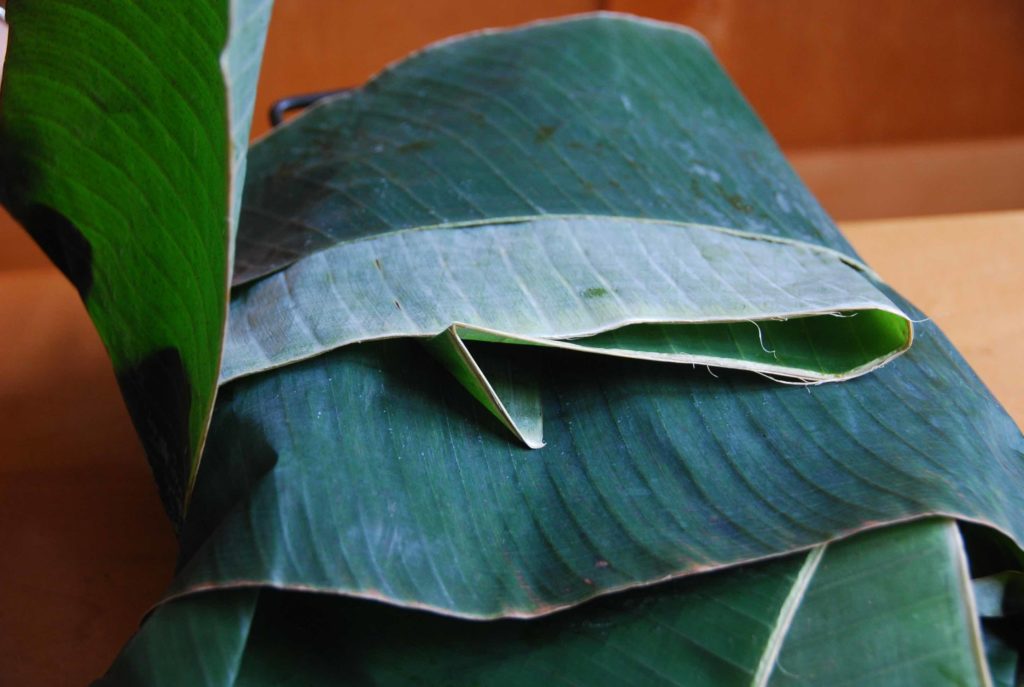
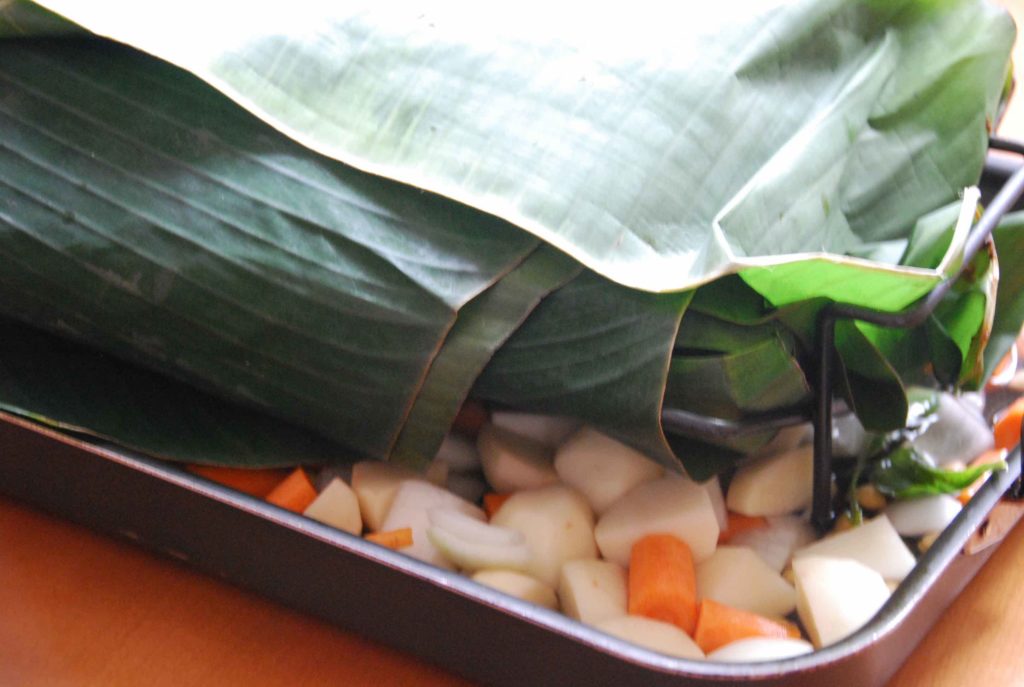
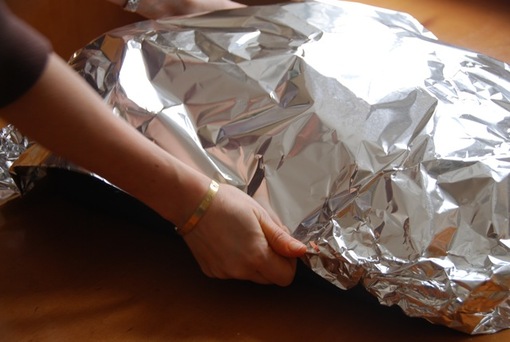
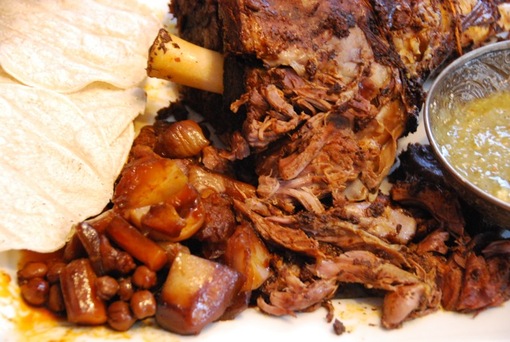
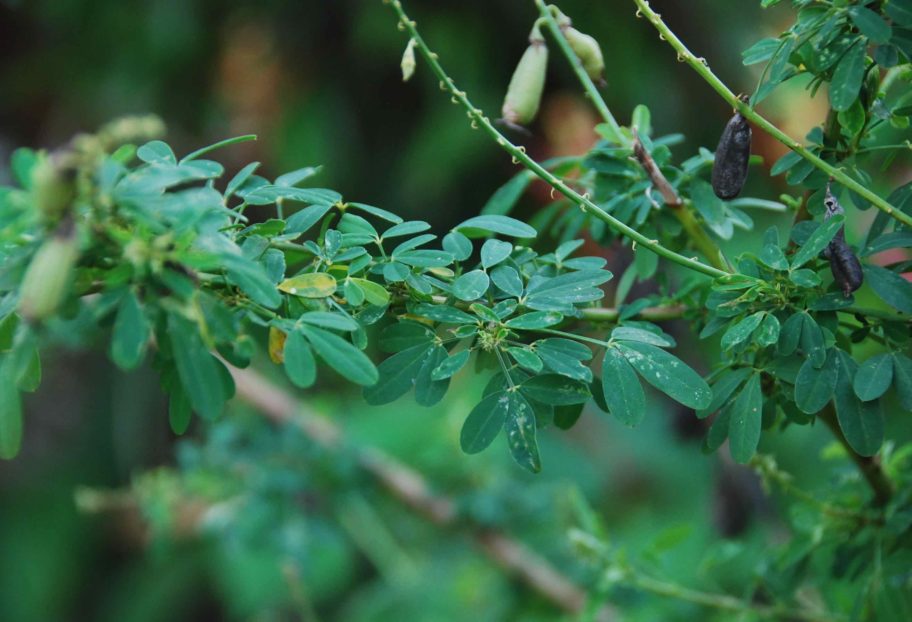
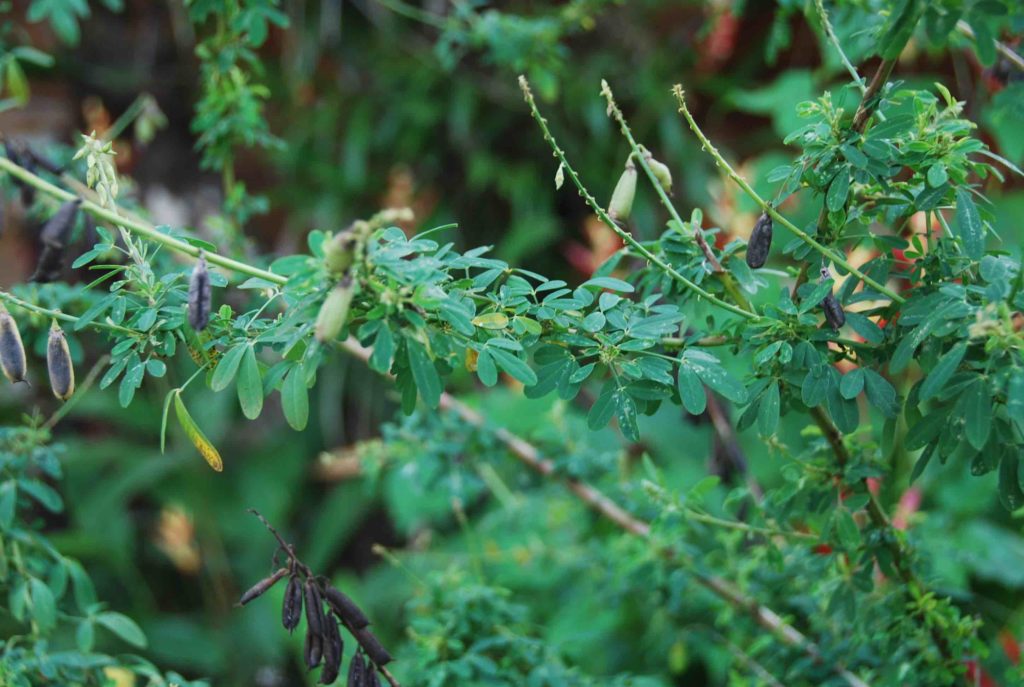
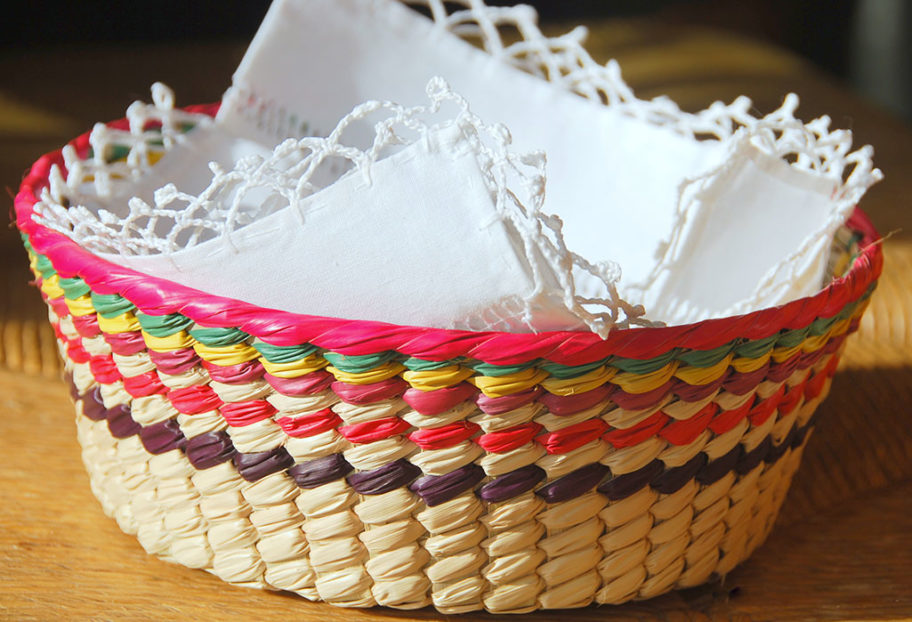
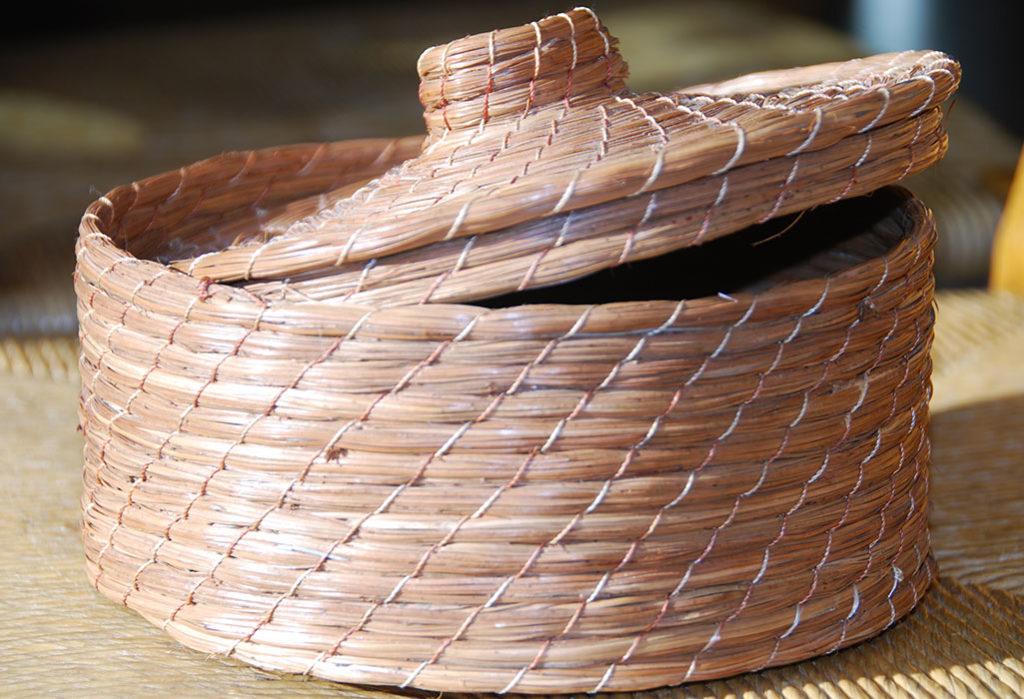
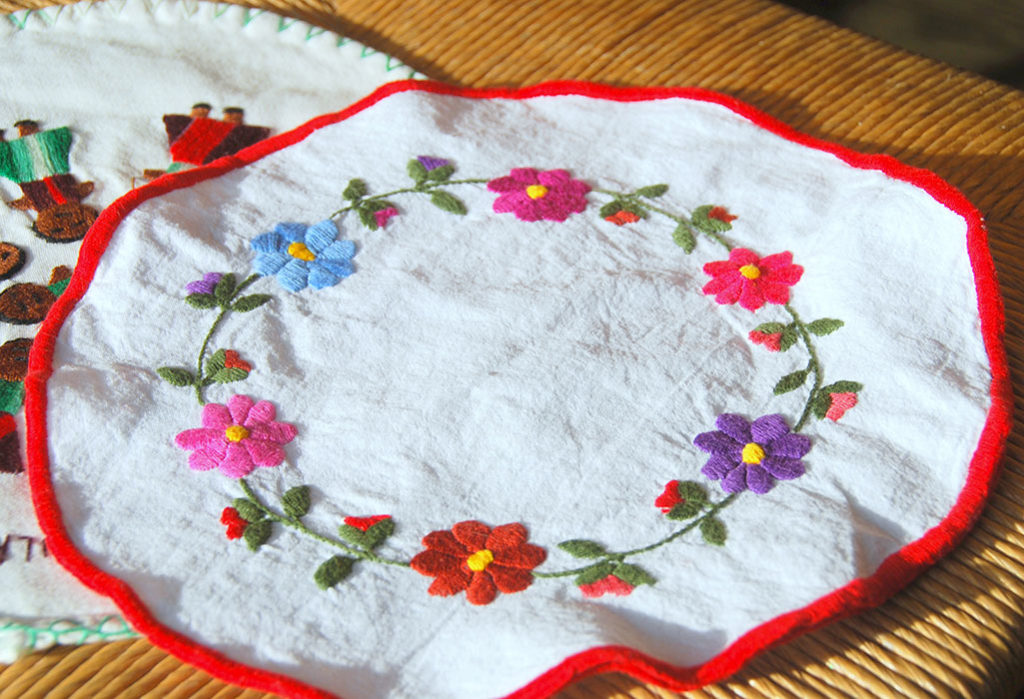
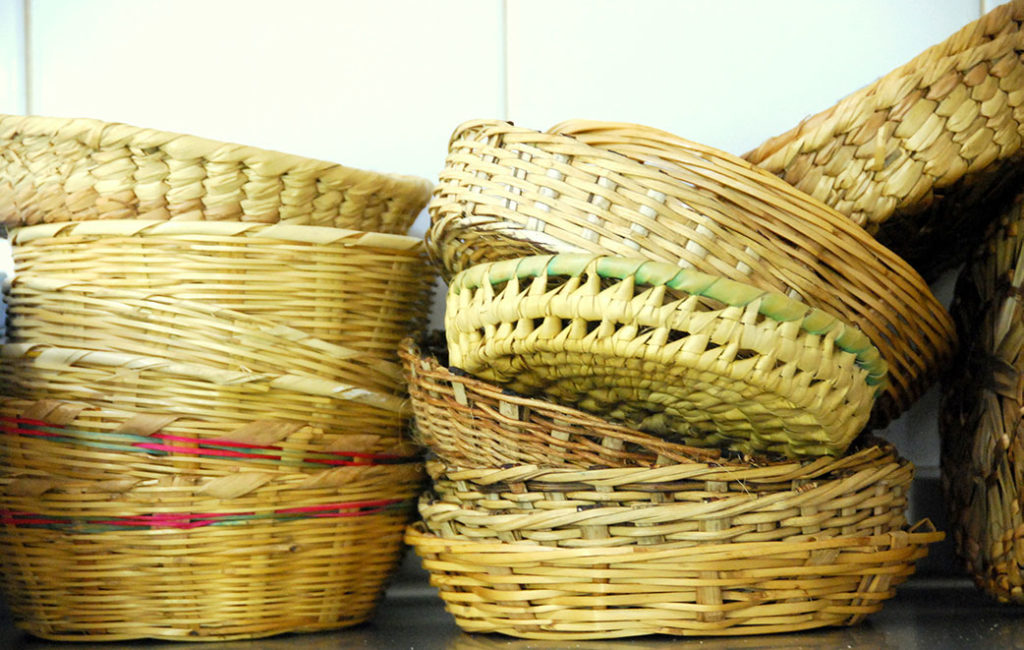
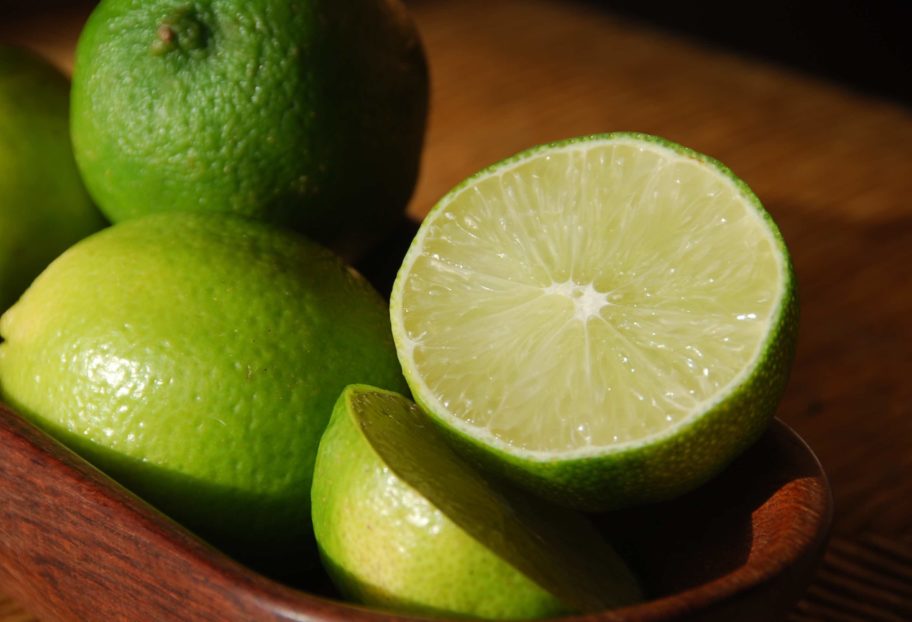
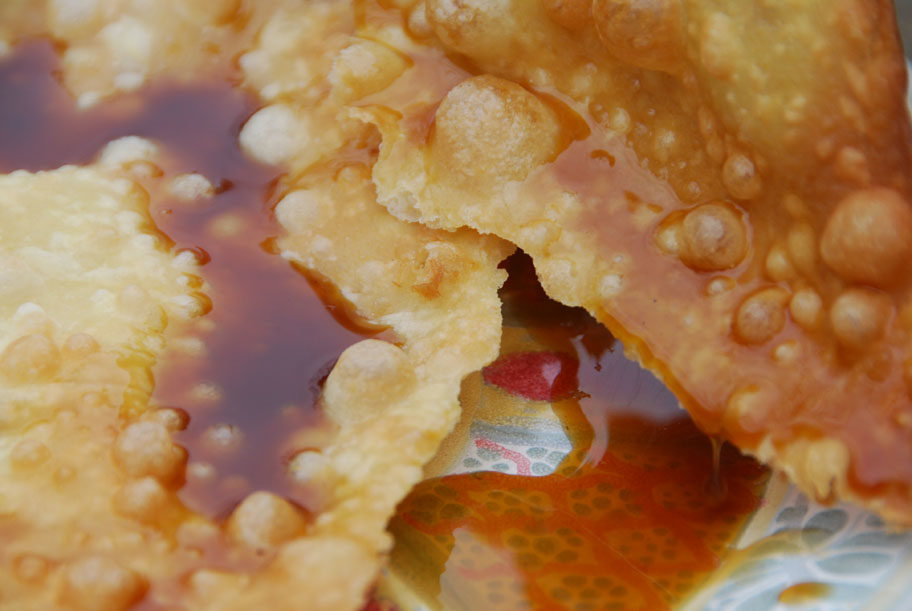
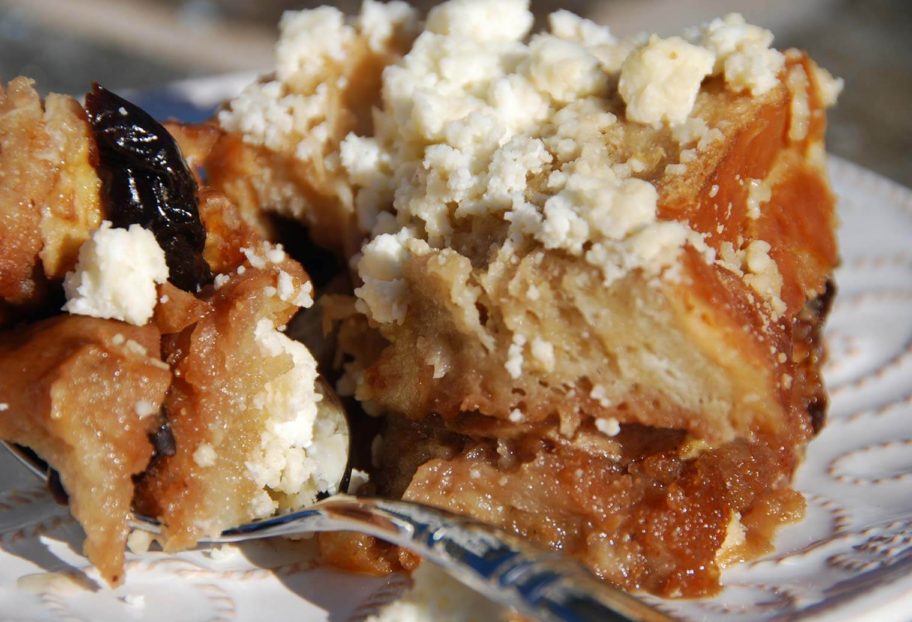
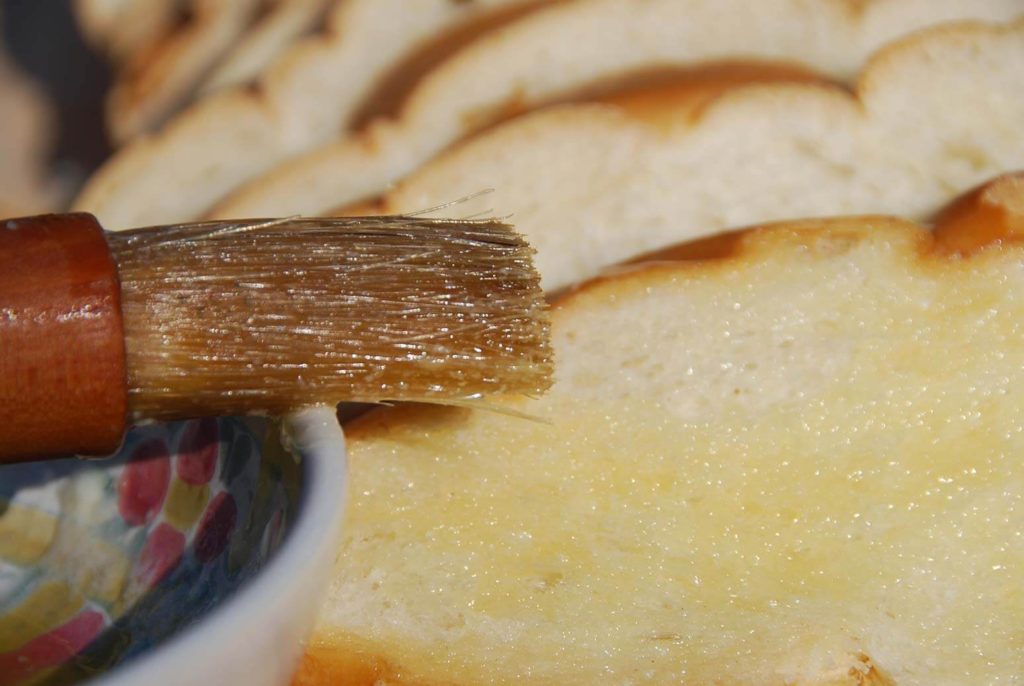
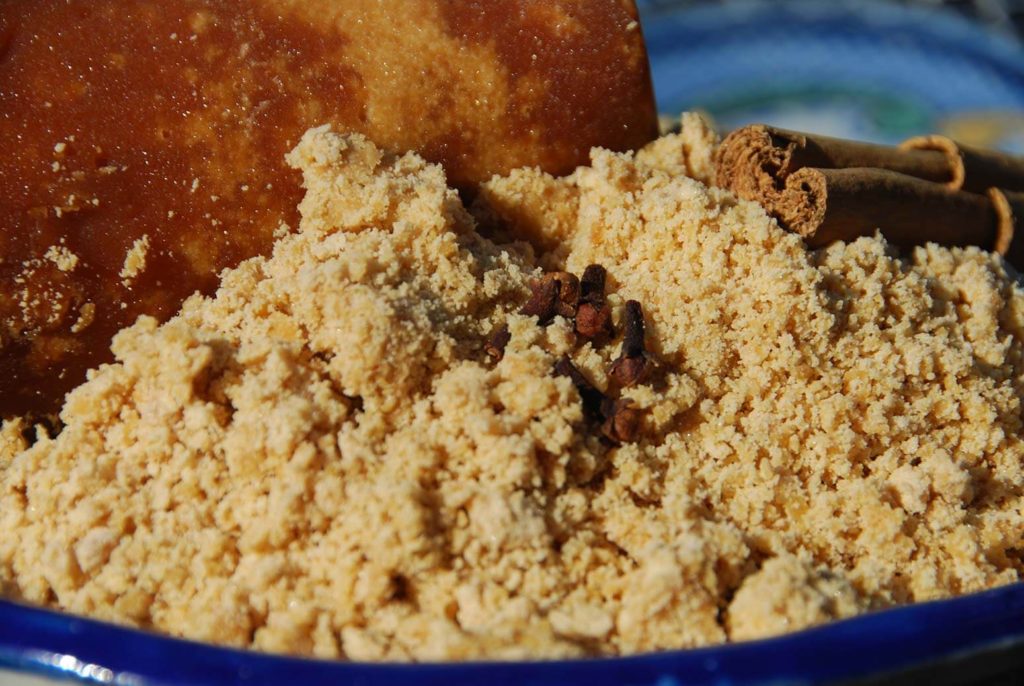
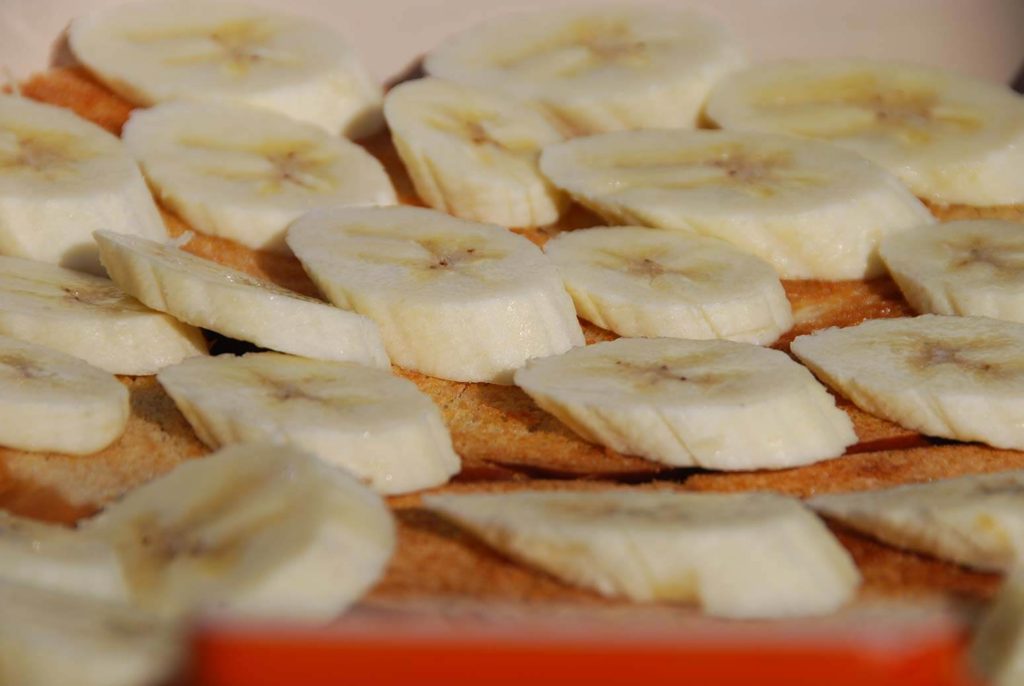
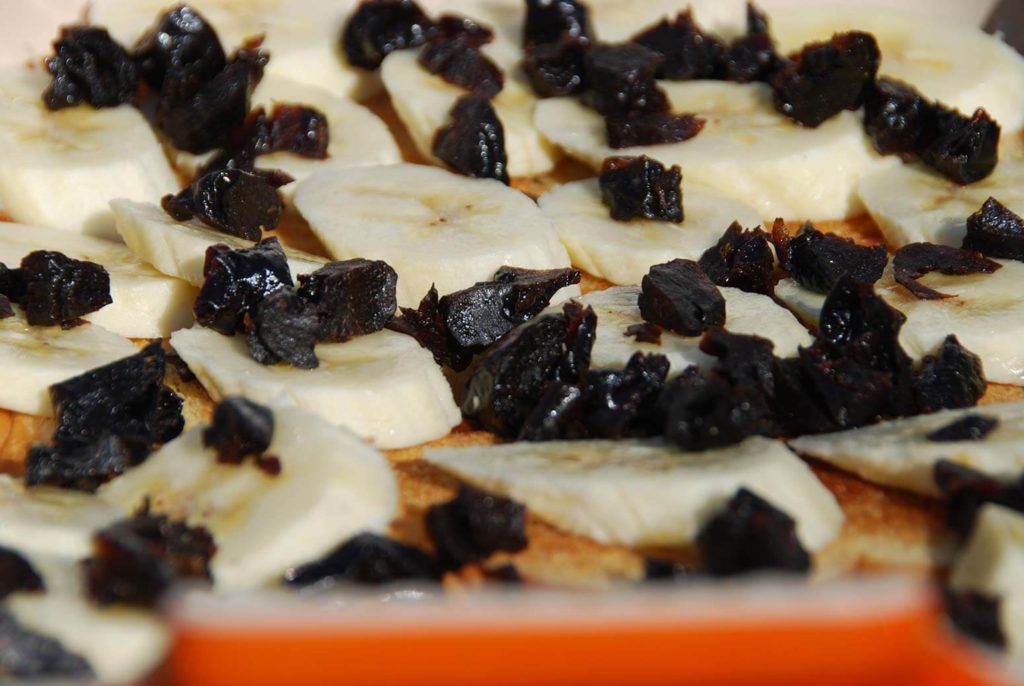
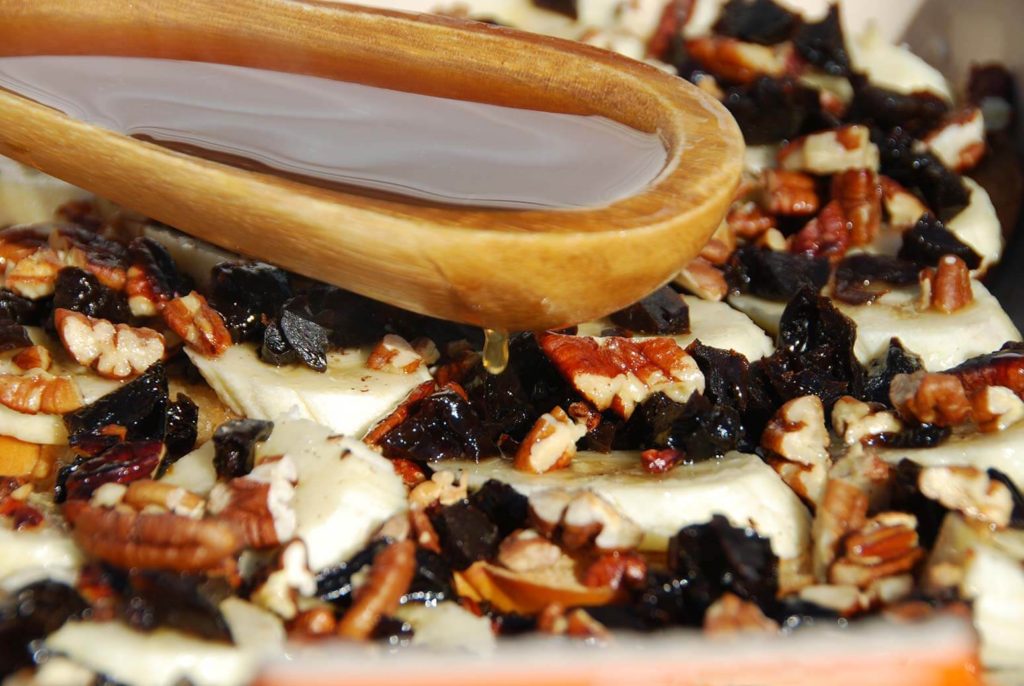
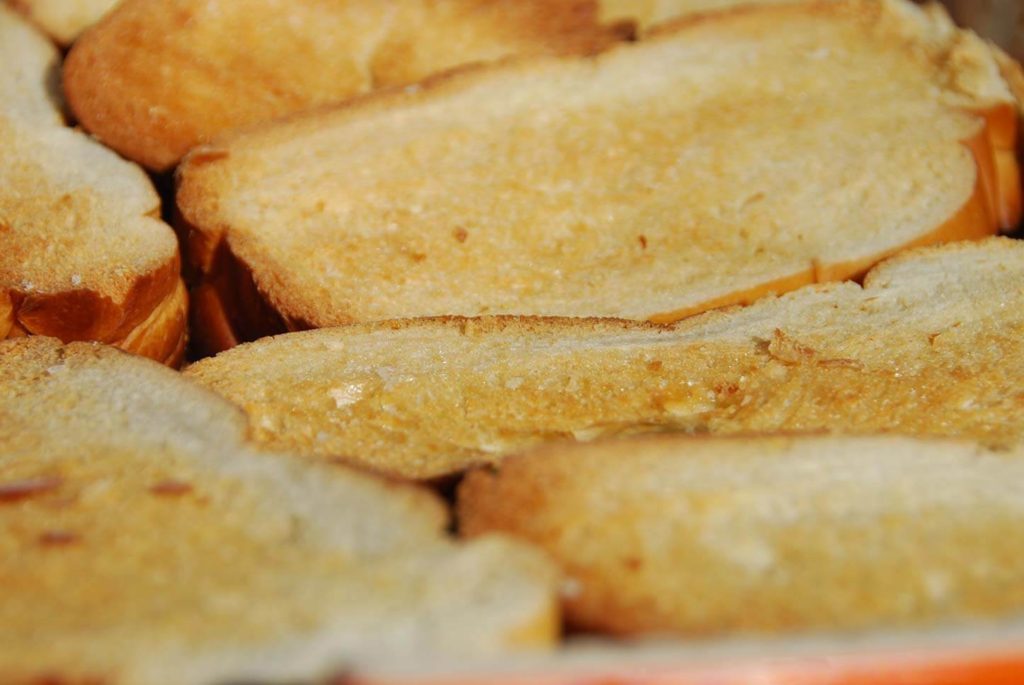
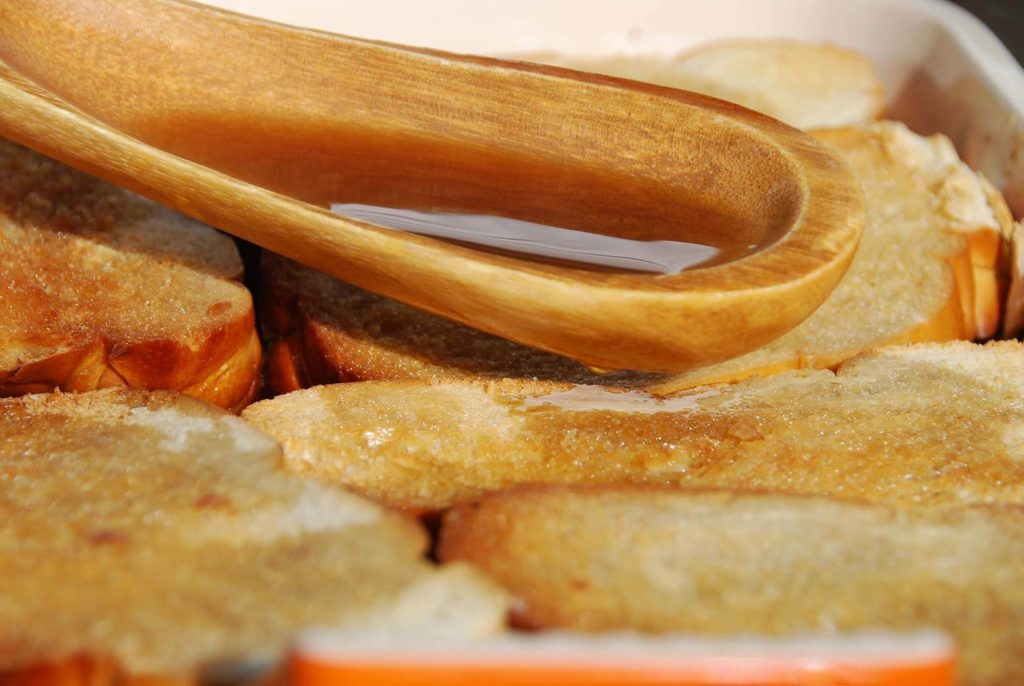

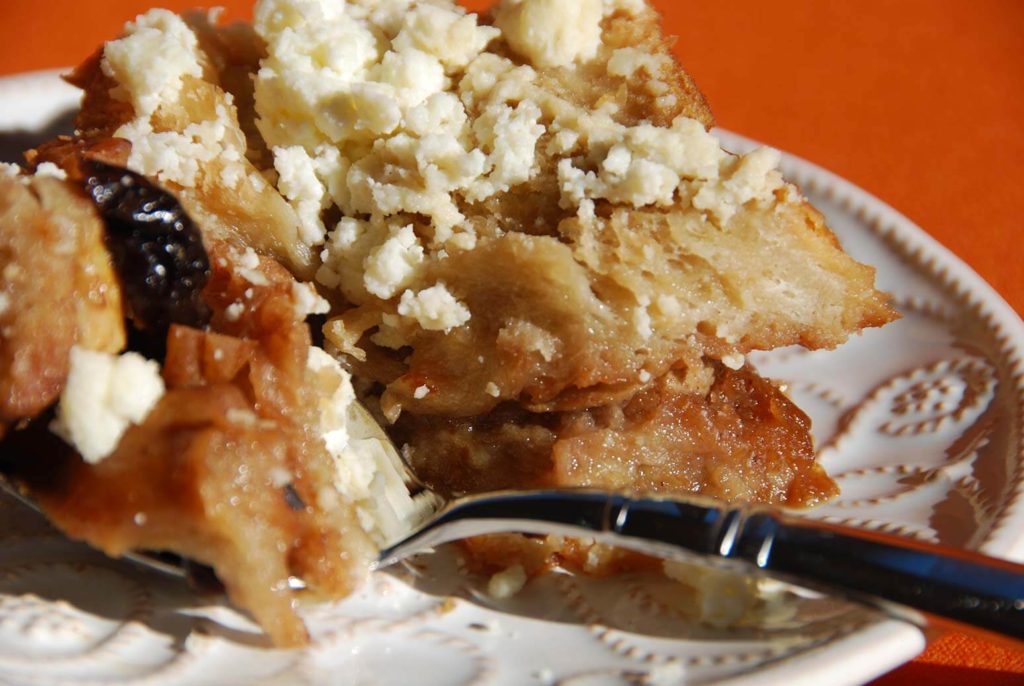


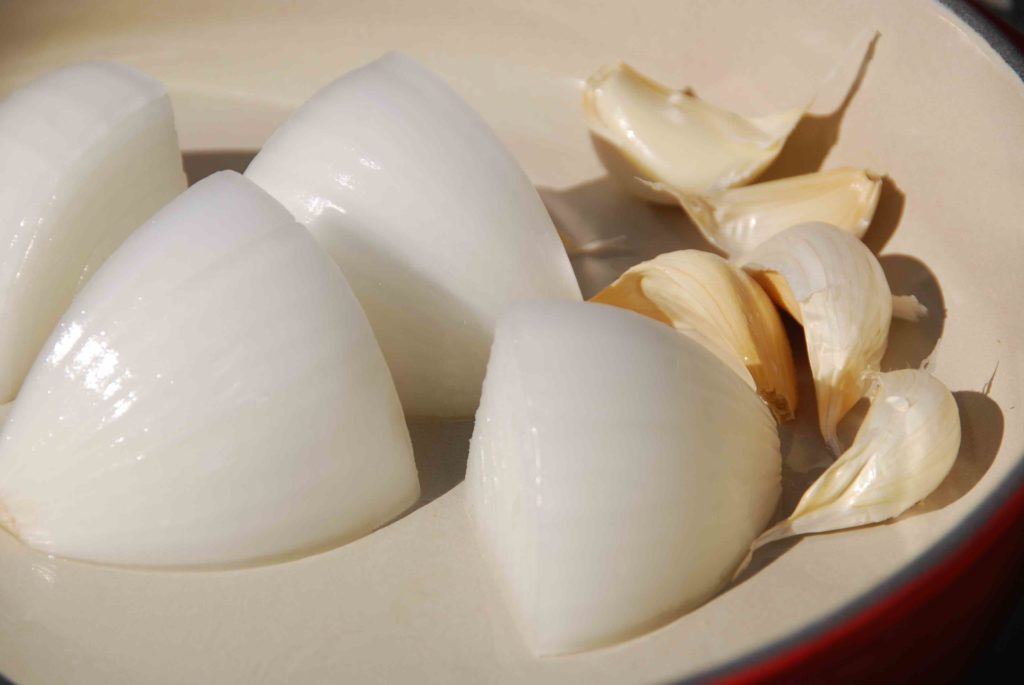
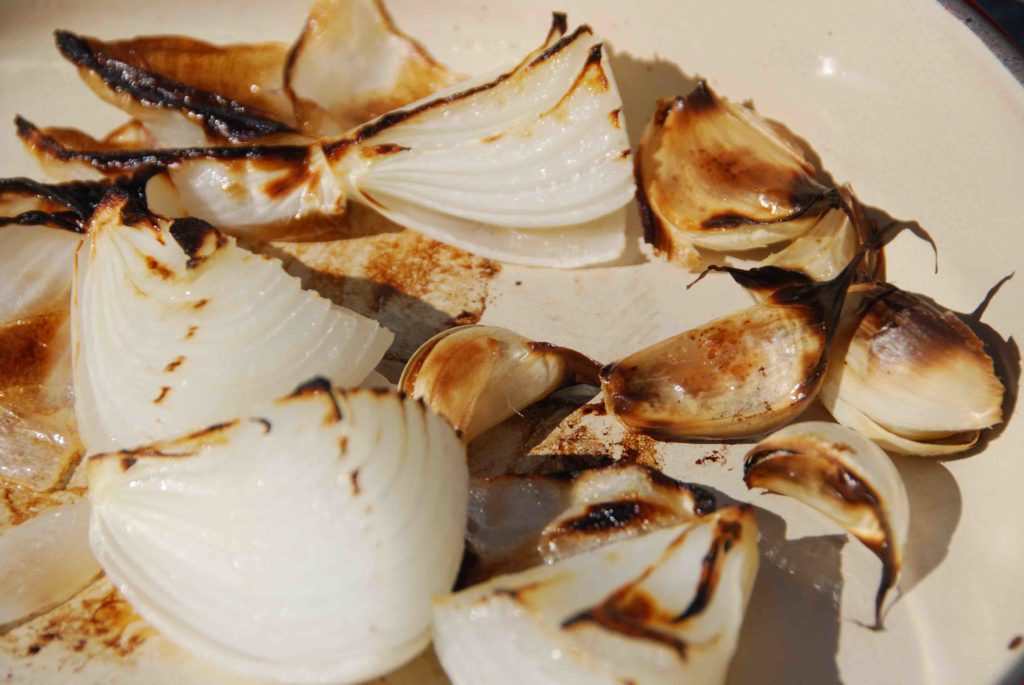
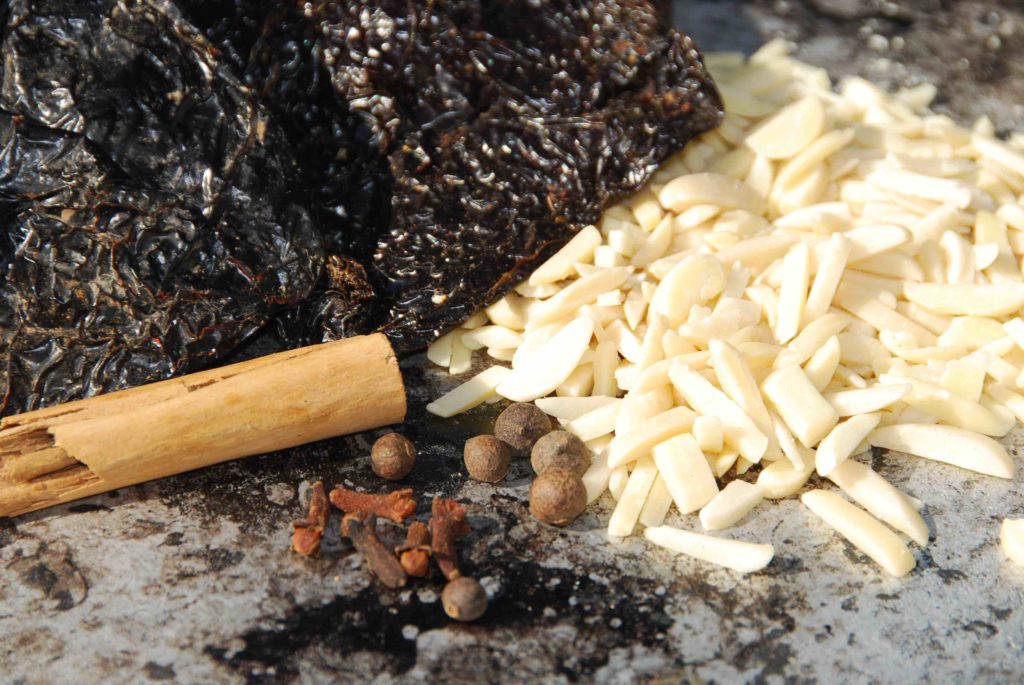
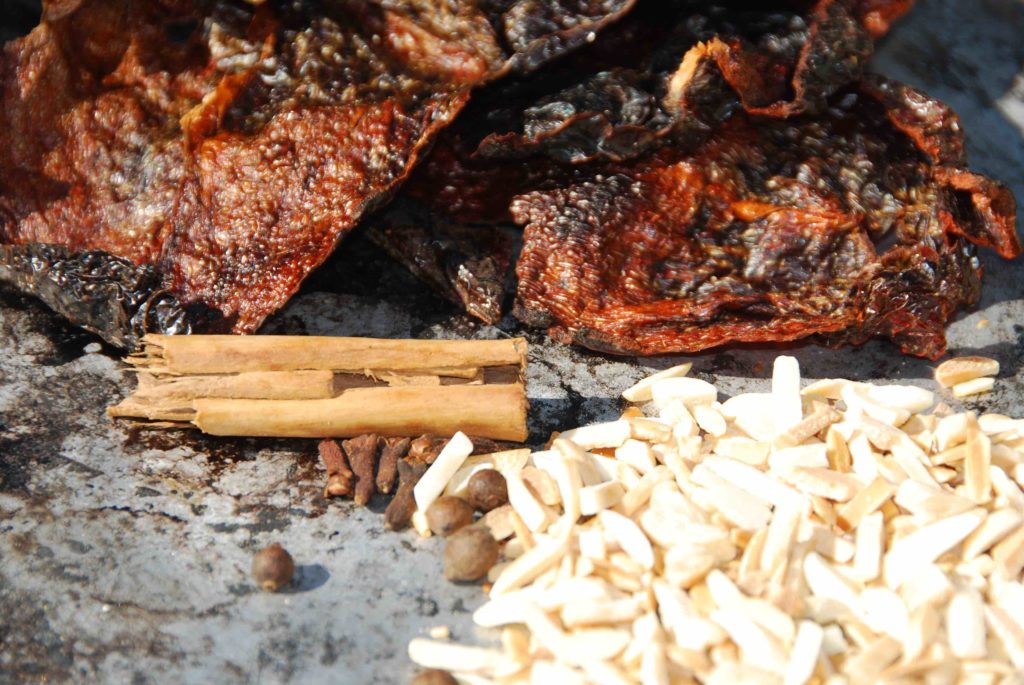
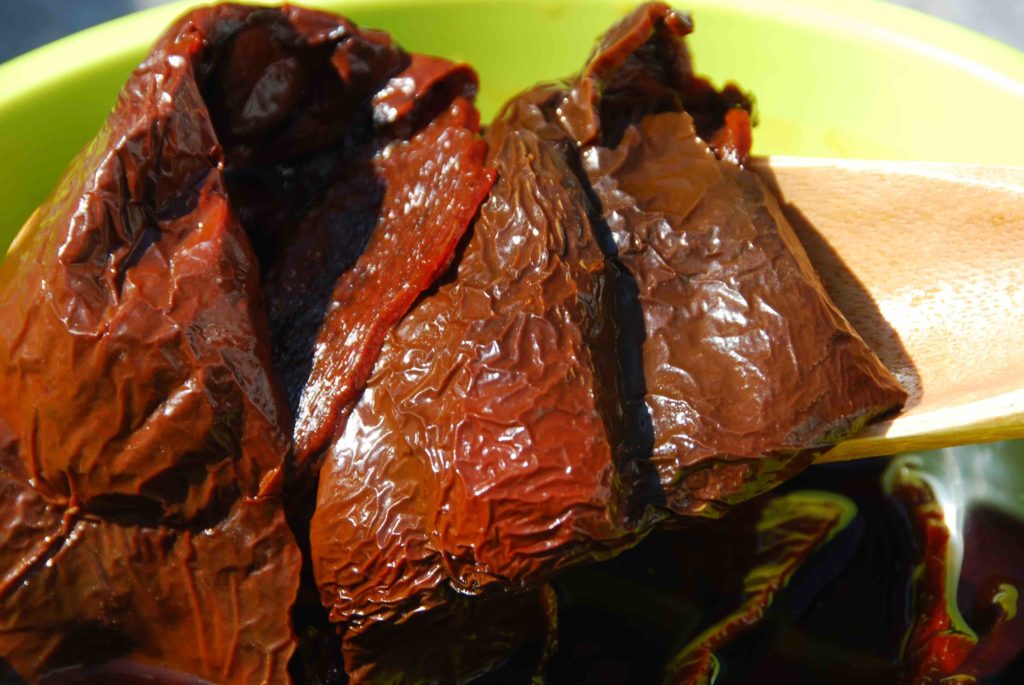
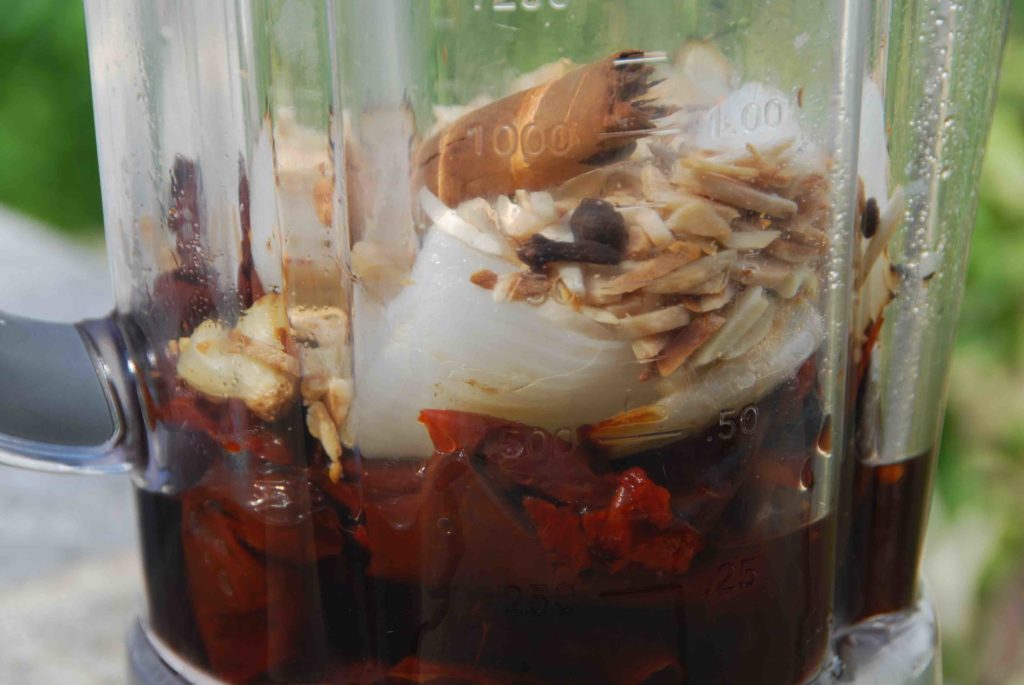
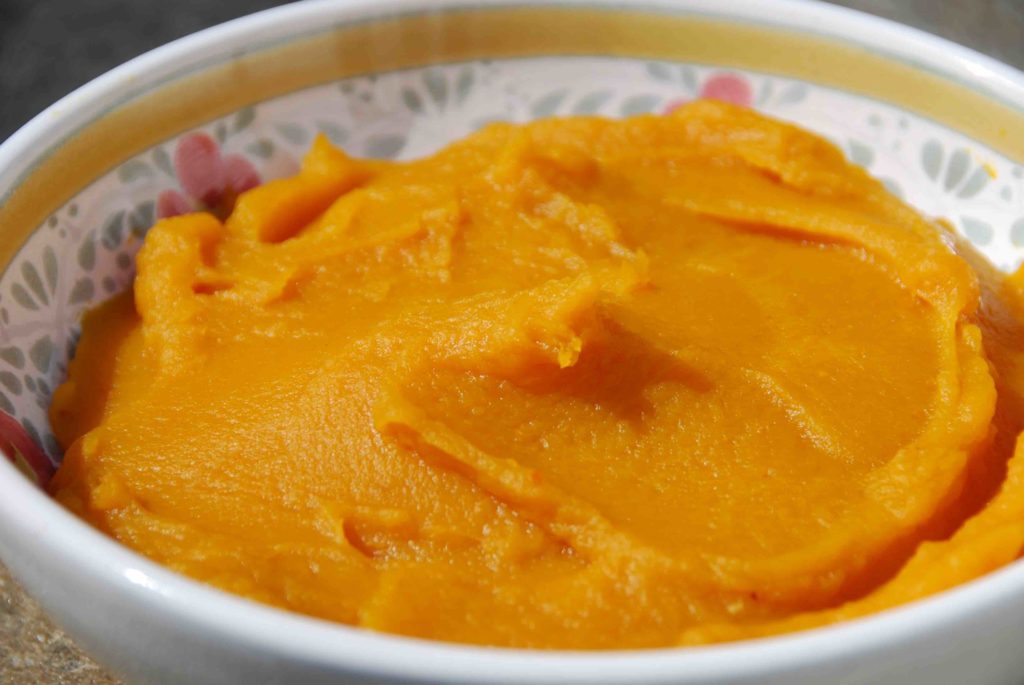
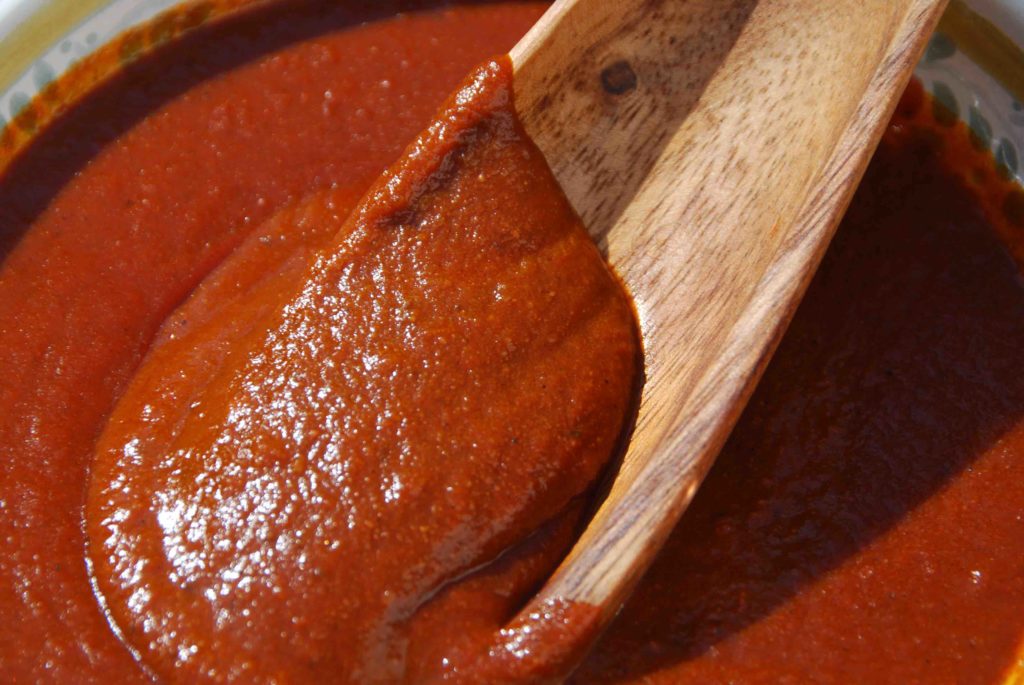
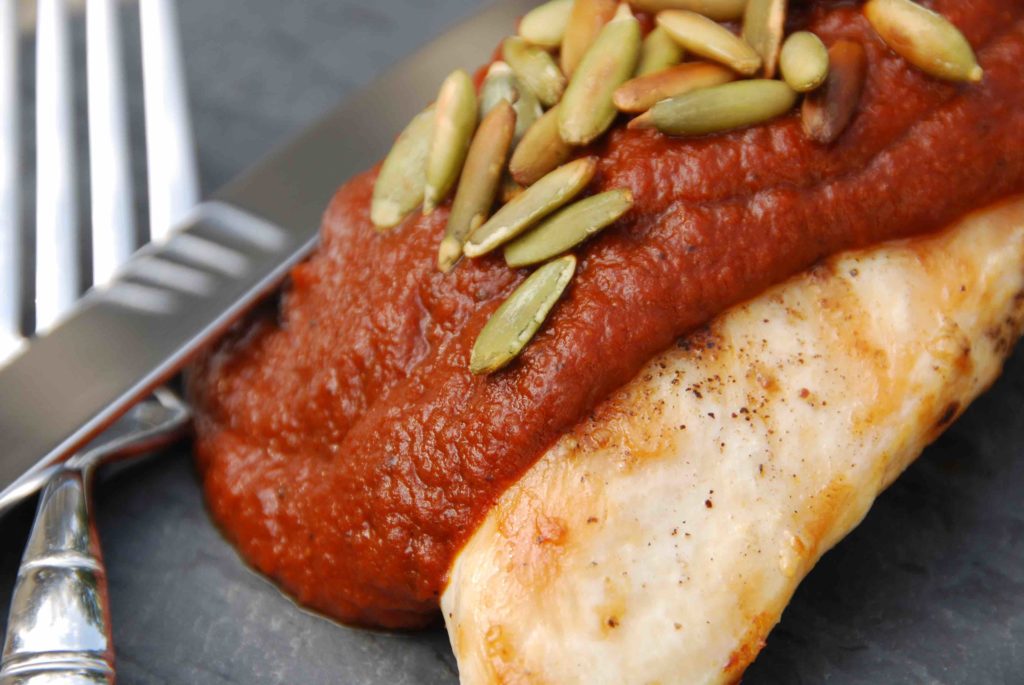
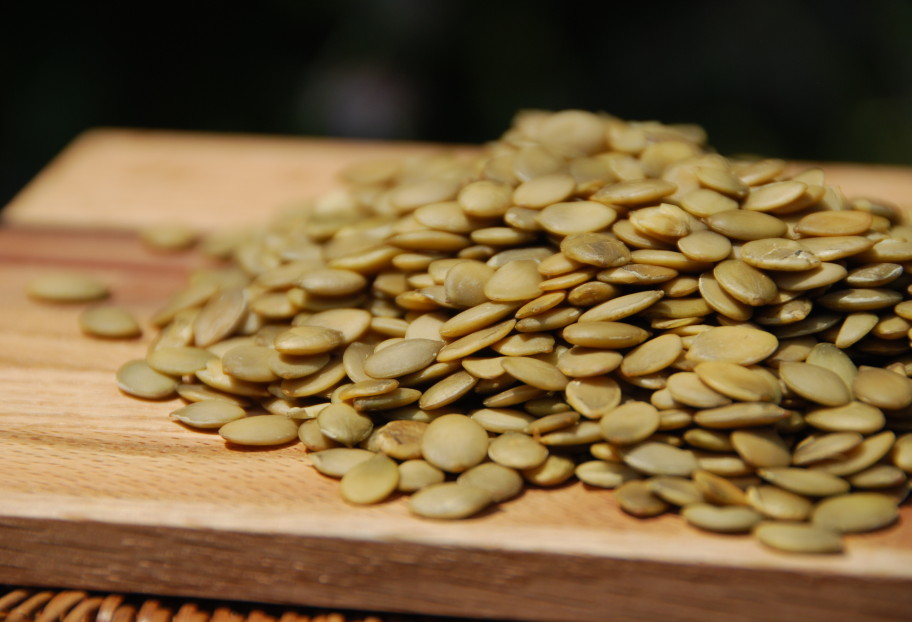
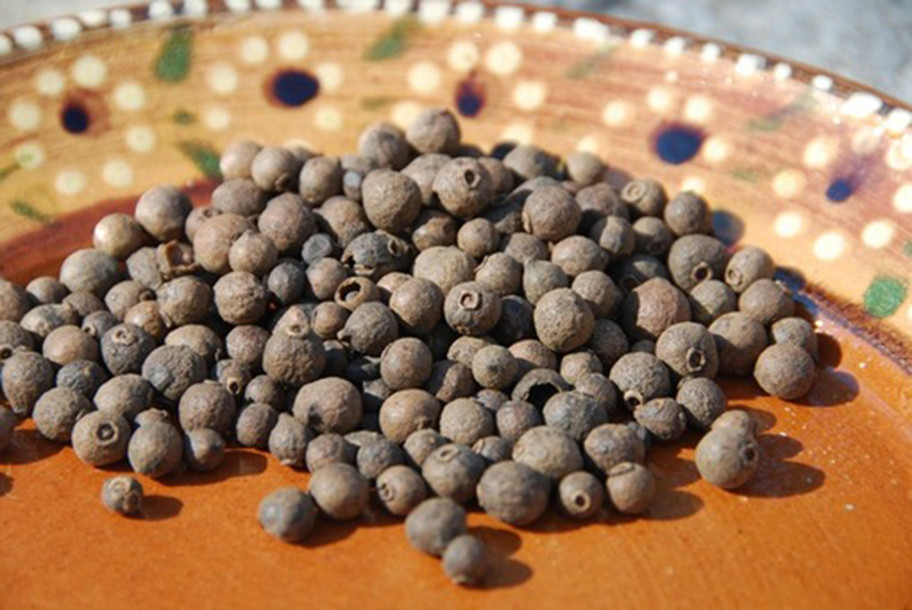
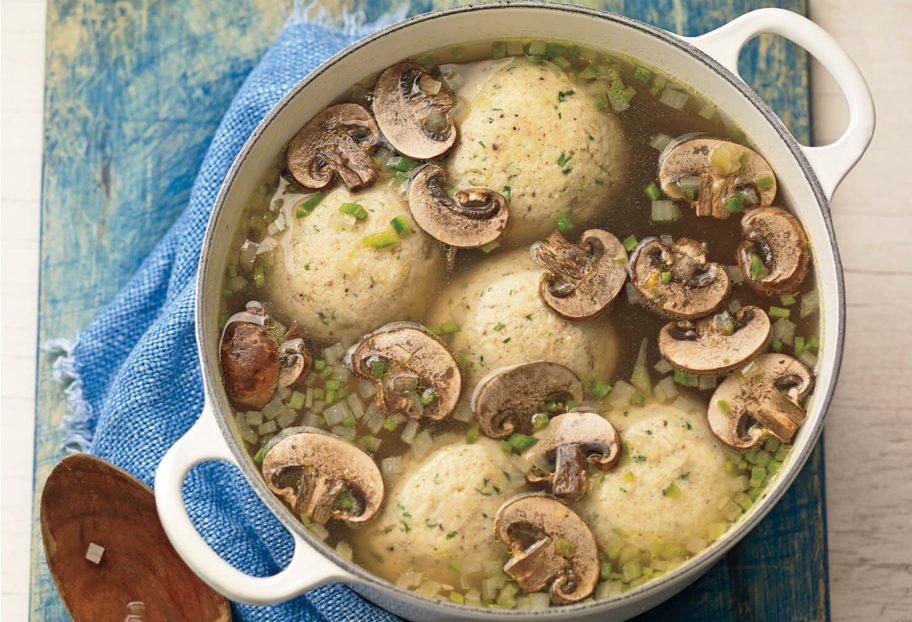


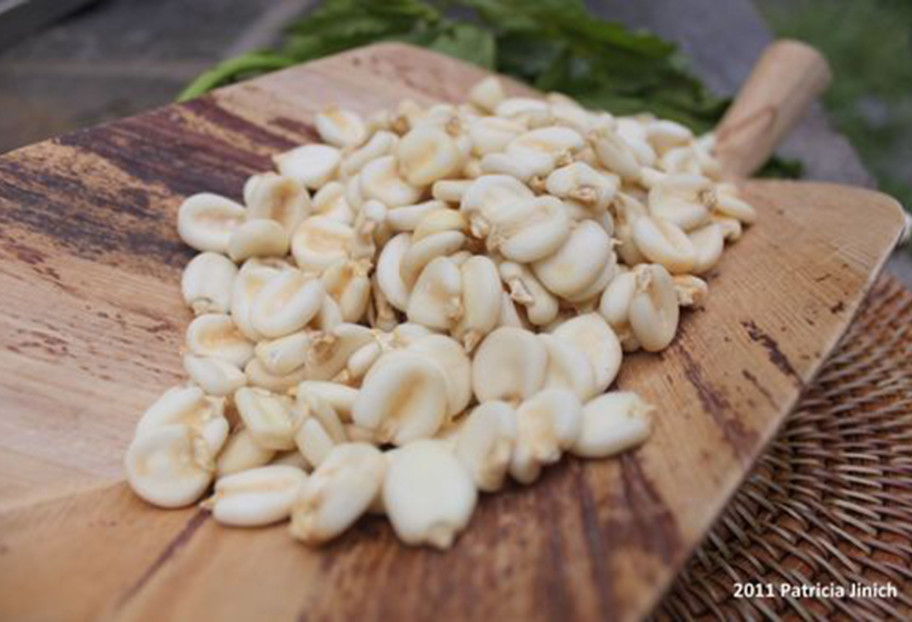
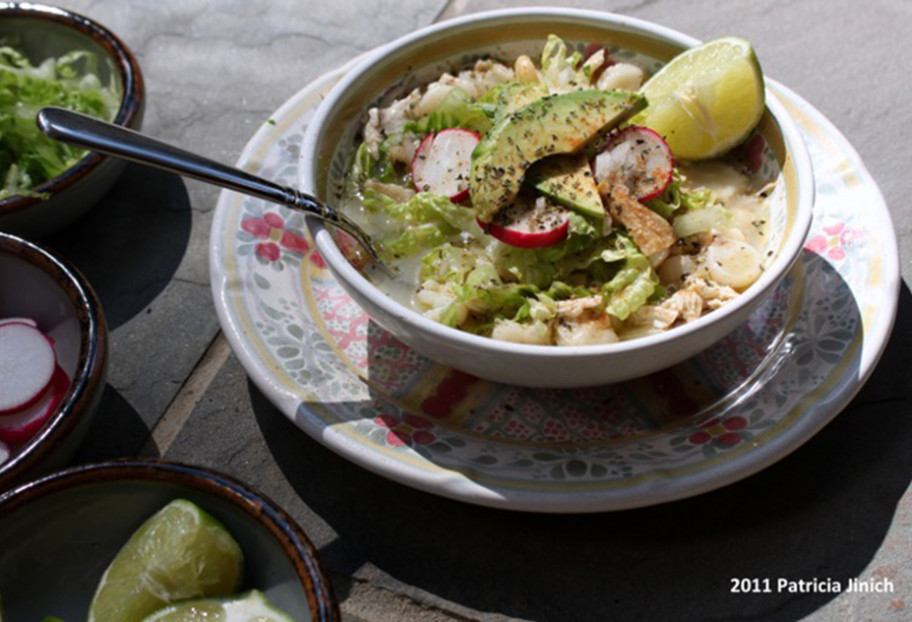

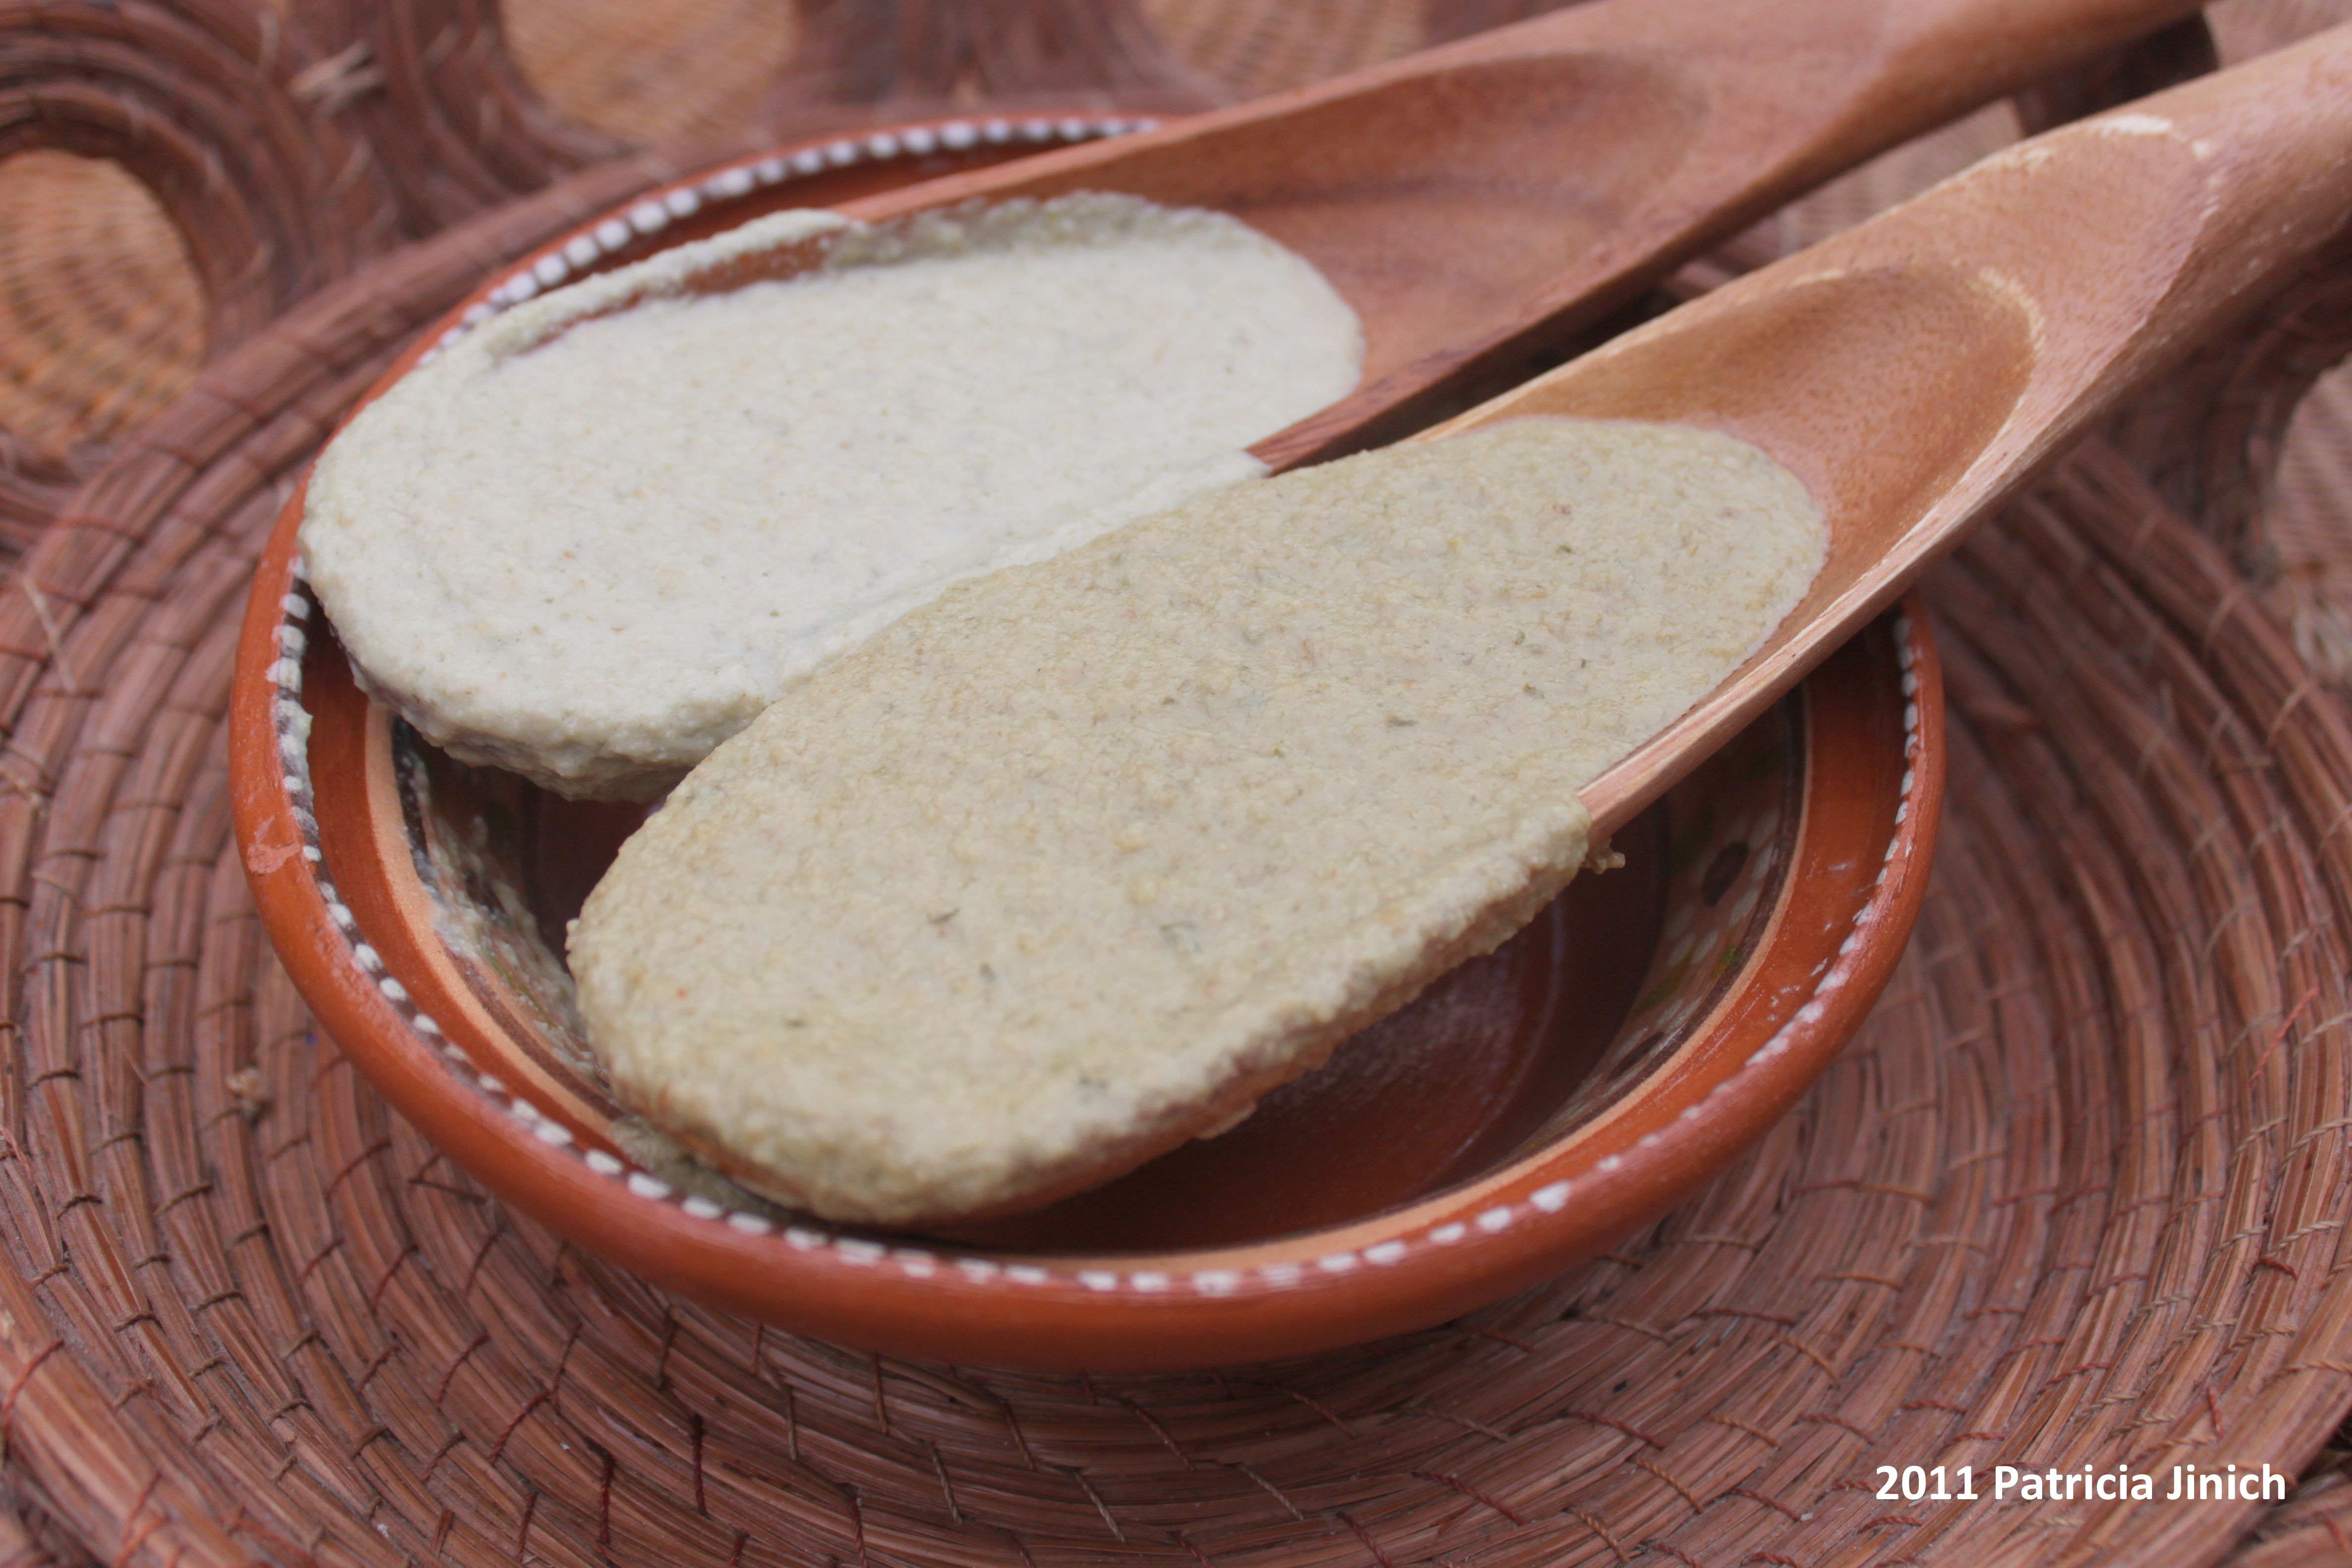
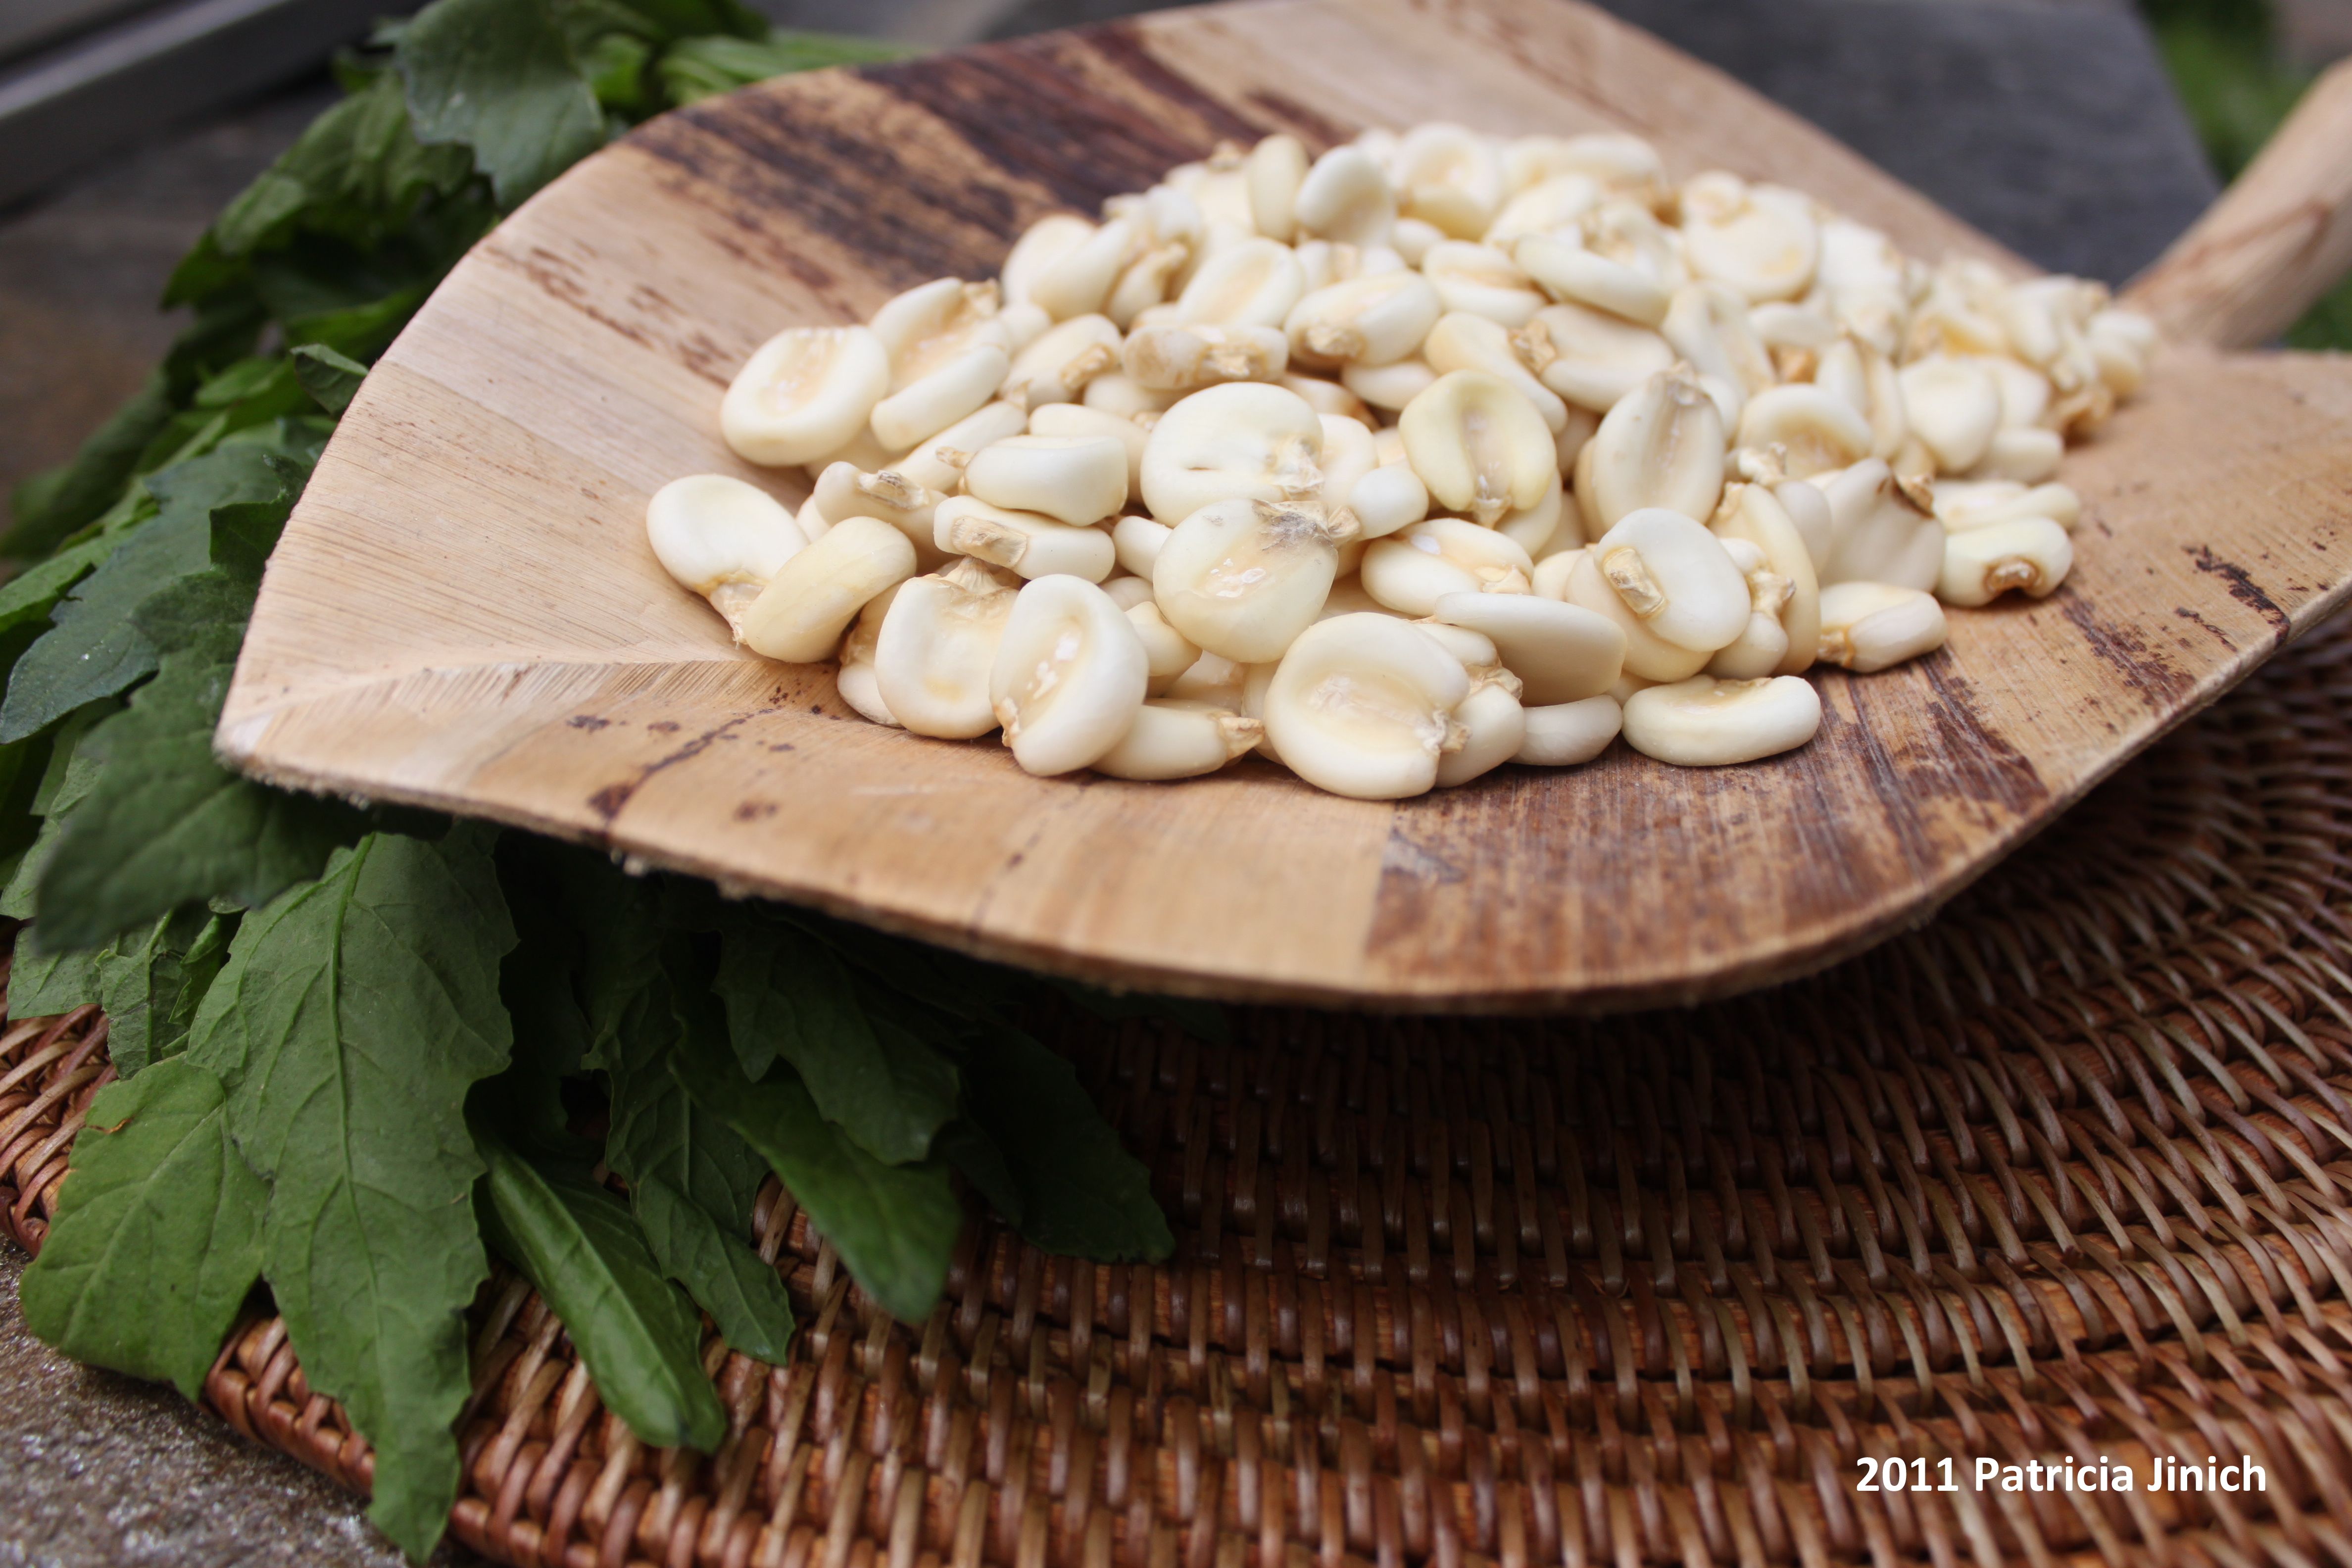
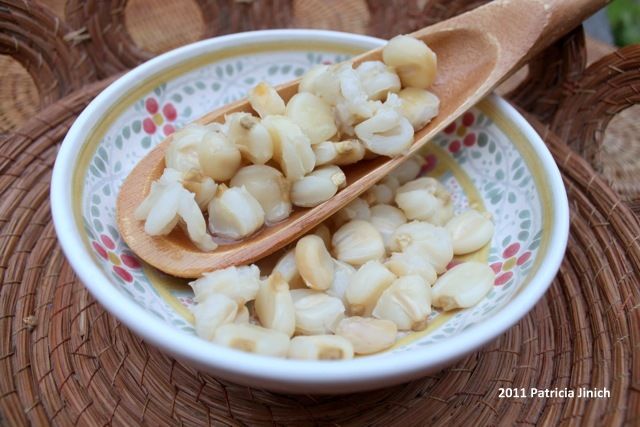
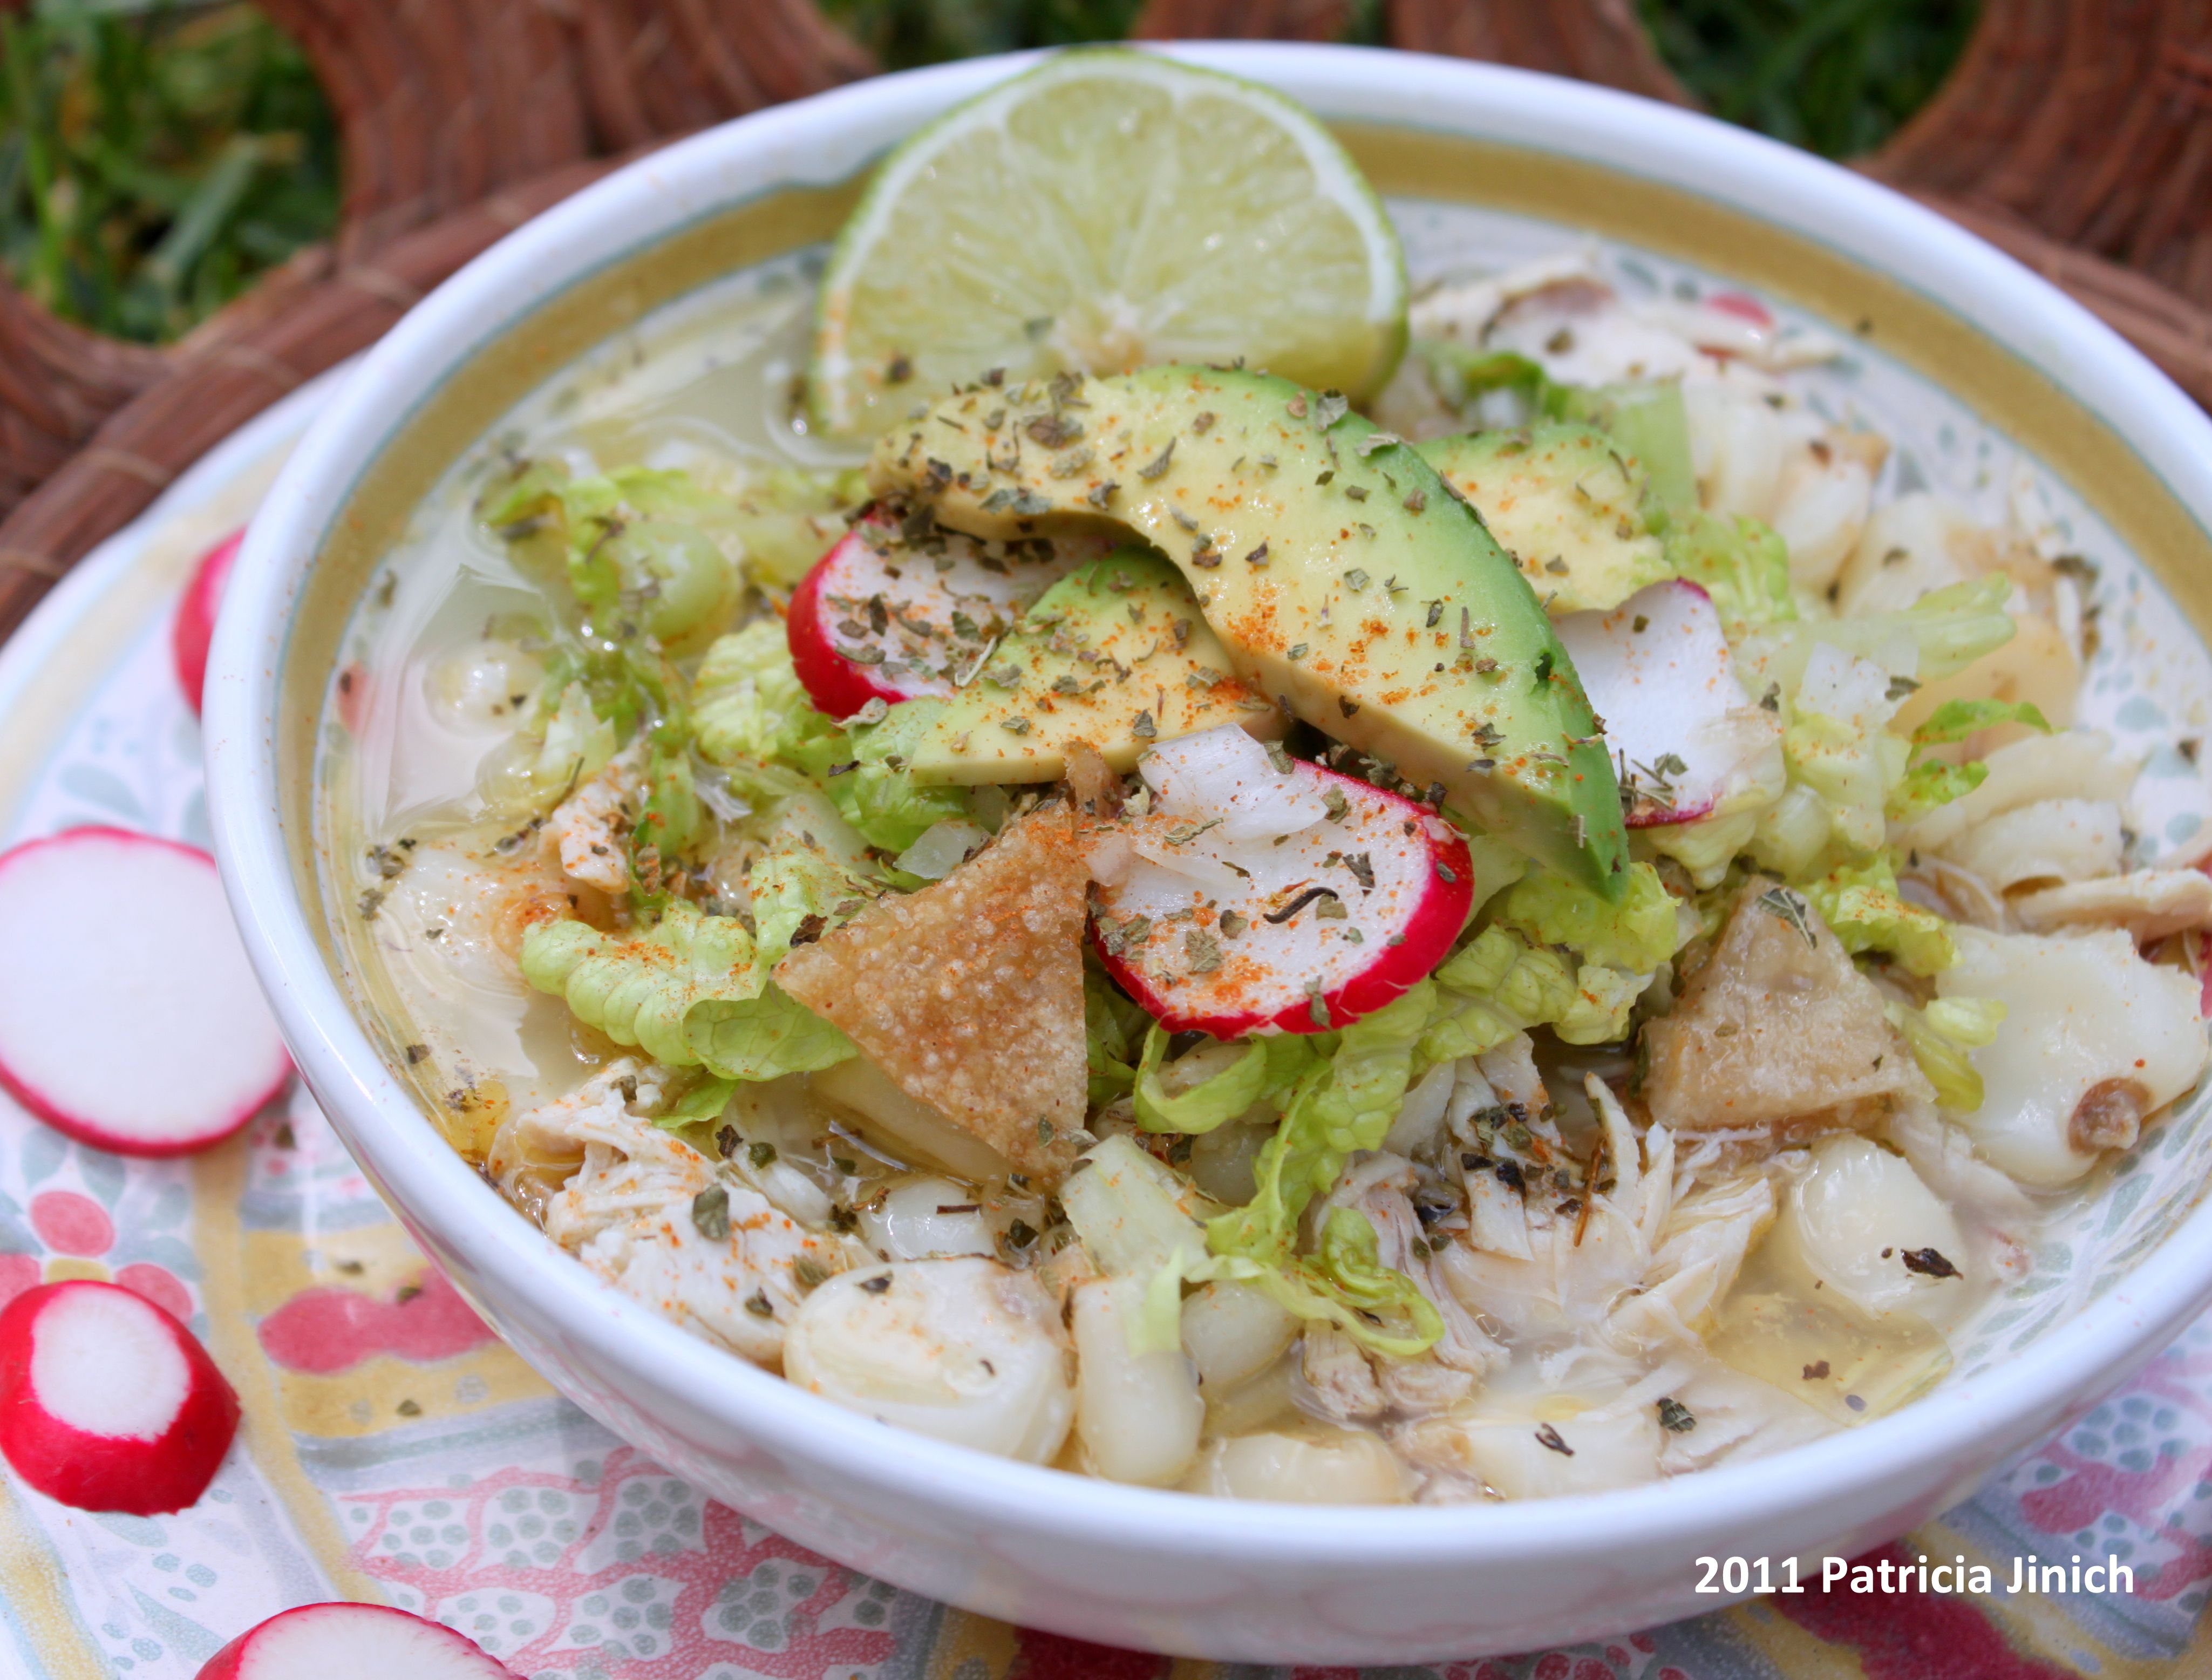

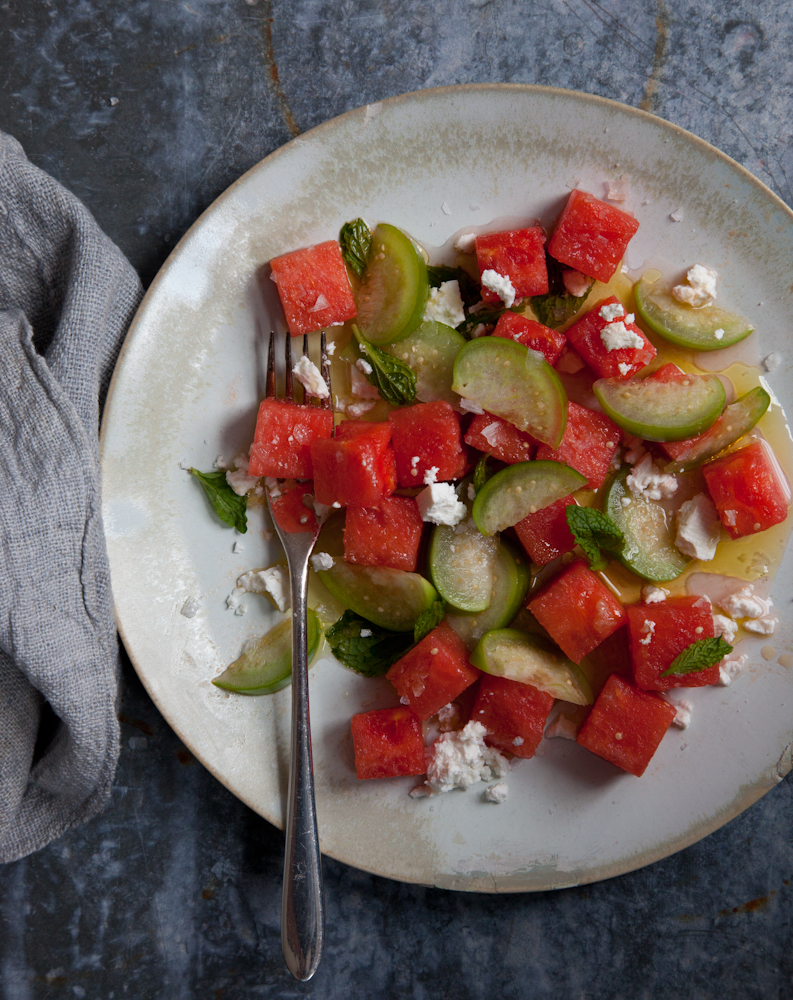
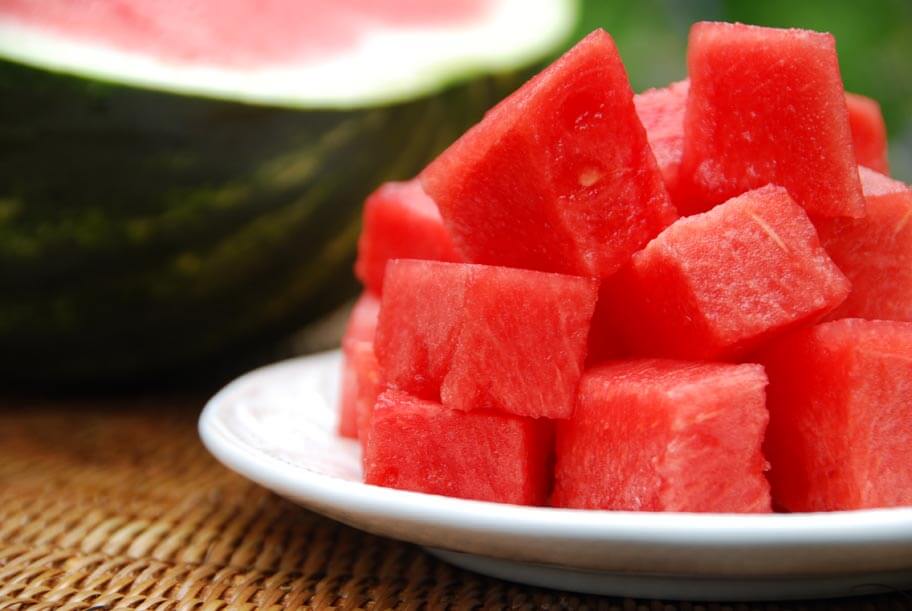
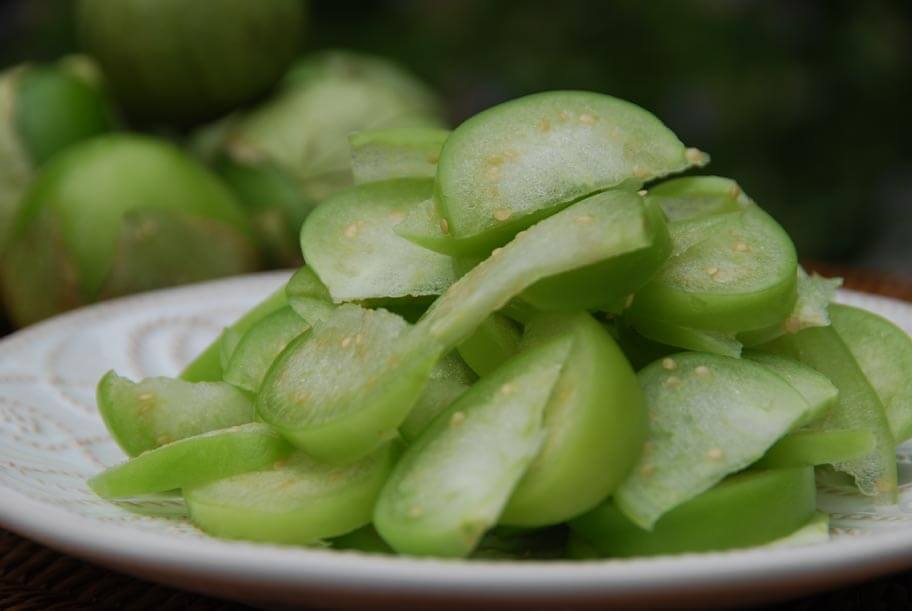
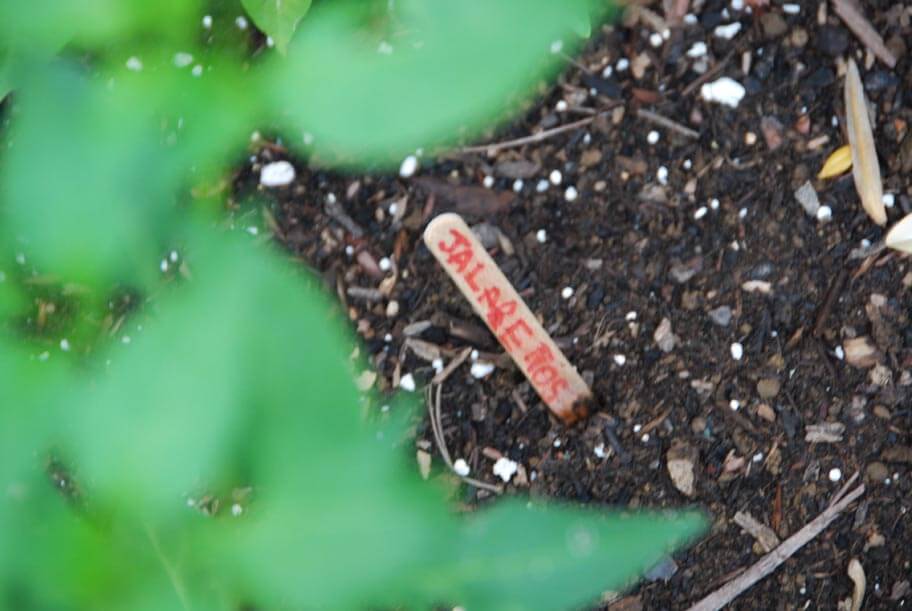
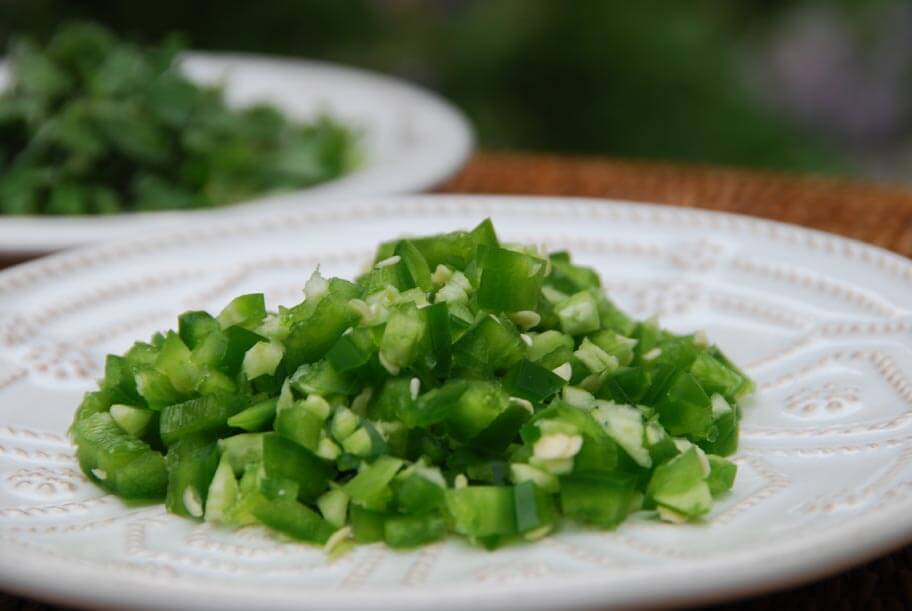
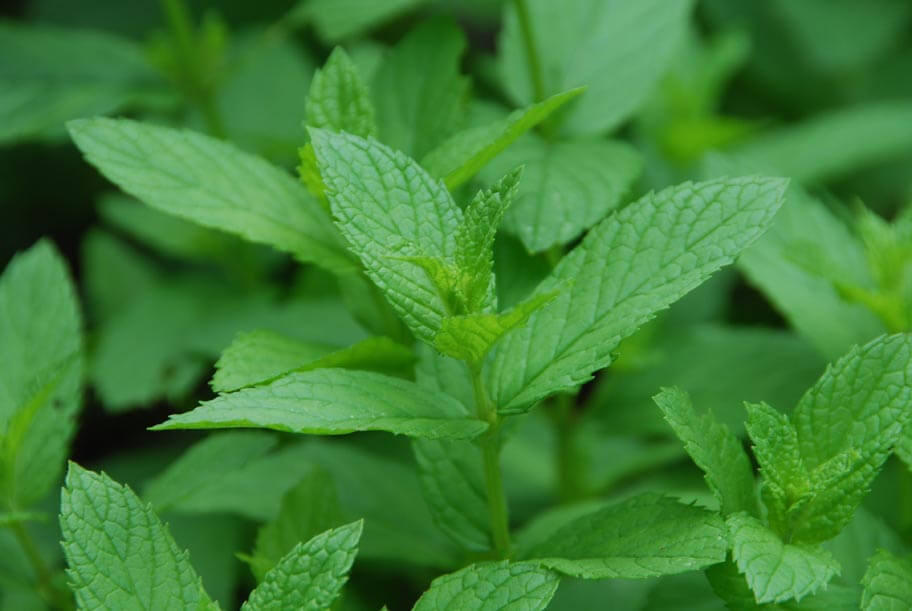
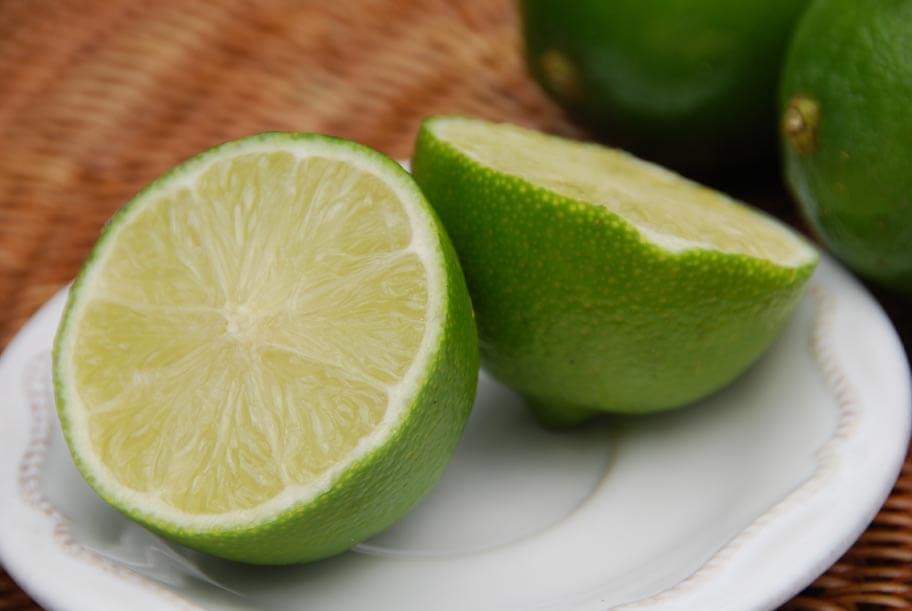
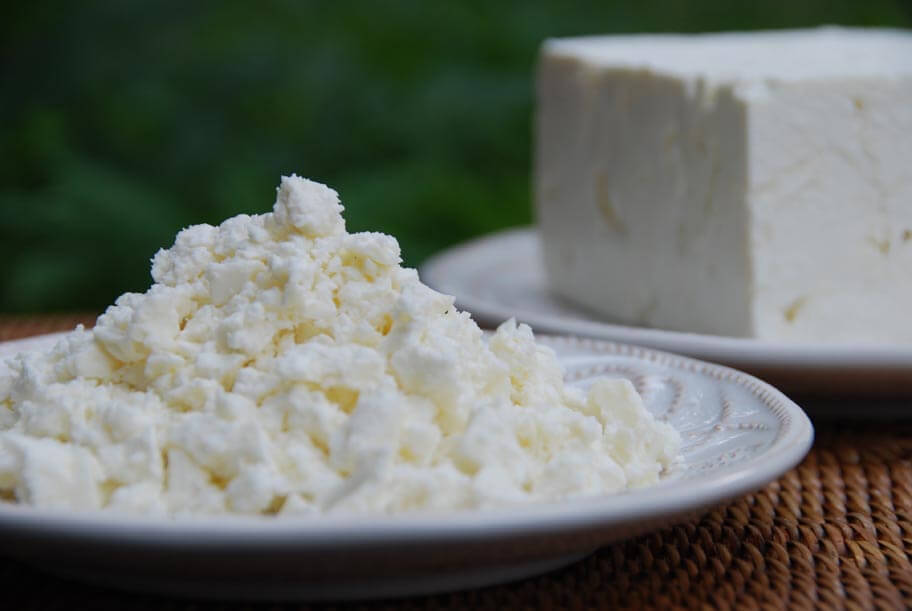
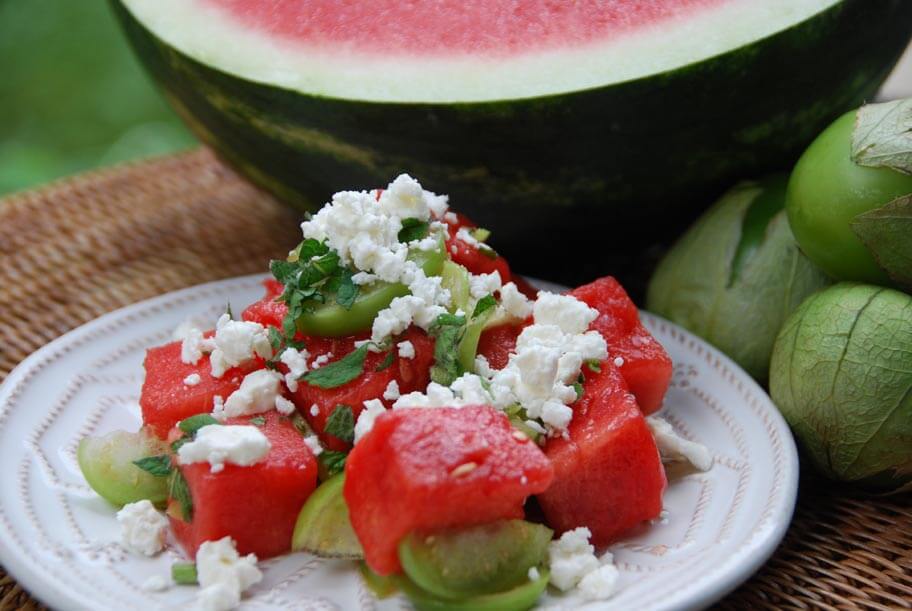