Sides

Mexican Overloaded Double-Baked Potatoes

So, we are about to start another school year. This time around may be one of the most bittersweet for me, yet.

The sweet side: Season 5 of Pati’s Mexican Table premieres nationwide this September (here’s a sneak peek)!

I can’t believe we have gone from a first season, born out of the sheer passion to share everything from my native country with my new home country, to a fifth season that comes right on the heels of two unexpected Emmy nominations and two James Beard nominations.

Super sweet because, I’m guessing that like during past seasons, the boys and I will jump on the couch in front of our TV to watch every new Season 5 episode right after our late Saturday morning breakfast. (The time and day you get the episodes depends on where you are.)

Super duper sweet because the boys have always watched the episodes with me despite knowing them by heart. They know the episodes names, have eaten the recipes (many times, countless times) and when possible they have tagged along with me to Mexico.

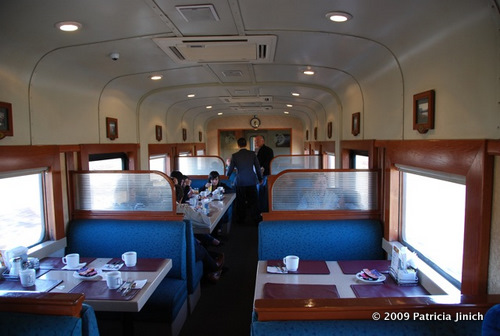
Since this season’s theme is the Maya World, they were able to experience some of the magic of the Yucatán Peninsula: From diving into cenotes, to exploring ancient ruins, to eating the most traditional and the most modern foods from the region.

pati-mexican-table-season-five-yucatan

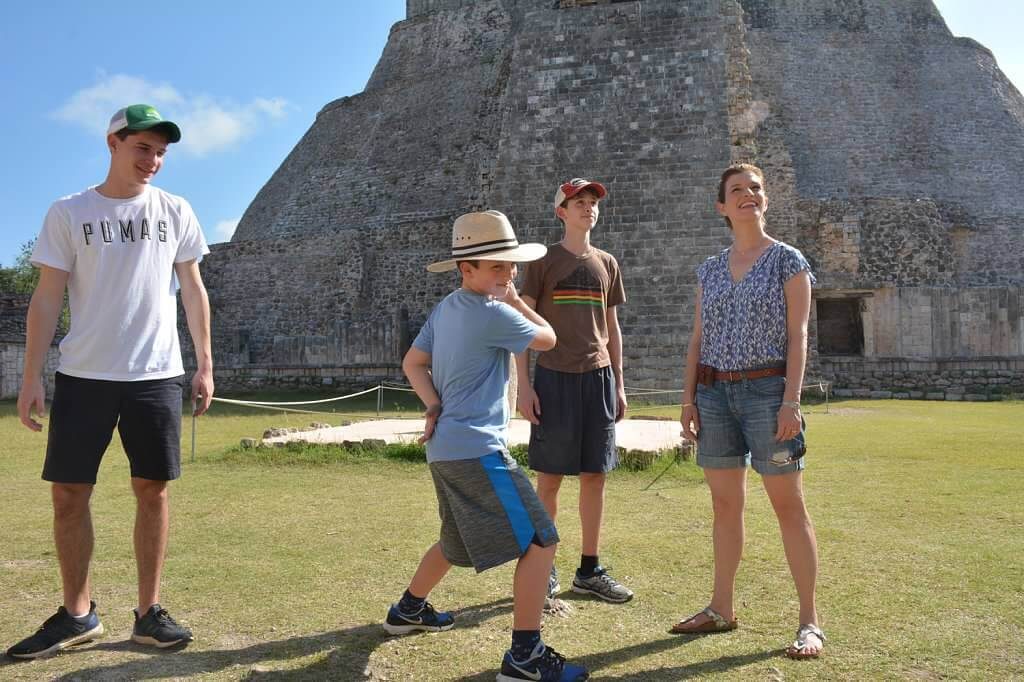
Now, about the bitter: This is the last season Alan will have been a part of while living at home. This is his last year in high school (can you believe it?!?). So I have been worrying about passing on to him as many skills as I can, so he can cook for himself at college.

The truth is I even wondered what it would be like if we moved back to Mexico, where kids tend to stay at home until they finish college, or even until they get married (yeah, that was me, after our wedding my husband and I went back to my mom’s house to pick up the bags I had packed that morning).

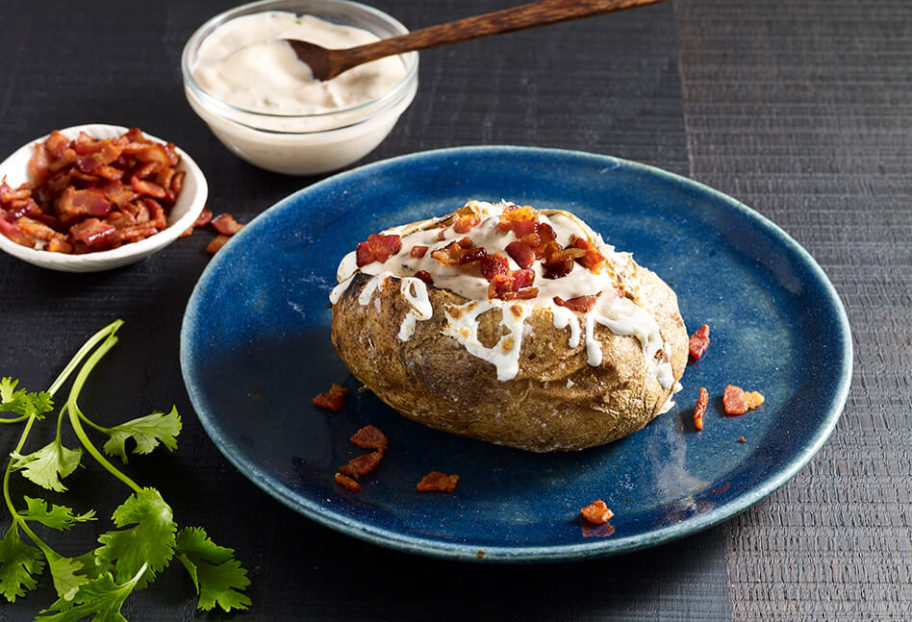
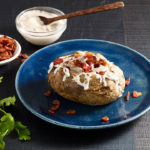
Anyway. I may have already gotten his head spinning trying to explain how to buy every single piece of produce in the market each time we are there. So it was only natural that we ended up with an episode called “Alan Goes to College,” where I tried to show him how easy it is to make some of his favorite things, including these insanely good double-baked potatoes.

It is truly ridiculous how good those potatoes are, with crispy bacon, Mexican crema and melty Oaxaca cheese. You can make them a whole meal on any school night, too!

Pati Jinich with her son before his prom

That’s for the sweet and the bitter in my bittersweet start of this school year. But to end on a more sweet than bitter note…

I recently asked Alan, “when you are off to college, do you think you will want to be part of the next season, if I am lucky enough and work hard enough to continue?” I knew I could get a “nah, ma, it will be complicated,” so I pretended not to be beyond delighted to hear his “of course, ma” with that look of his that really says, “you are the silliest mom ever.”

(P.S. I hope you will go ahead and try these crazy good double-baked potatoes, as a taste of what’s to come in Season 5. If you’re a fan of spicing it up, like me, feel free to add in a couple of chipotle chiles.)

Overloaded Double Baked Potato
Print Recipe
4.23 from 9 votes

Mexican Overloaded Double-Baked Potatoes

This is Alan’s last year in high school. So it is only natural that we ended up with an episode in the new season of Pati’s Mexican Table called “Alan Goes to College,” where I try to show him how easy it is to make some of his favorite things including these Mexican overloaded double-baked potatoes…It is truly ridiculous how good they are, and you can make them a whole meal on any school night.
Prep Time15 minutes
Cook Time1 hour 5 minutes
Course: Side Dish
Cuisine: Mexican
Keyword: bacon, baked potato, chipotles in adobo, mexican crema, Oaxaca cheese, pati's mexican table
Servings: 2 potatoes
Author: Pati Jinich

Ingredients

  • 2 large russet potatoes washed and scrubbed
  • 2 teaspoons olive oil
  • 5 thick slices of bacon coarsely chopped
  • 3/4 cup Mexican crema
  • 3 tablespoons sauce from chipotles in adobo sauce
  • 2 chipotle chiles in adobo sauce minced, optional
  • 1/2 teaspoon kosher or coarse sea salt plus some to season the potatoes
  • 1/2 cup Oaxaca cheese grated

Instructions

  • Preheat oven to 400 degrees.
  • Using a fork, pierce potatoes all around, about 6 to 8 times. Rub potatoes with olive oil, season with salt, and place on a baking sheet. Bake for 1 hour until tender on the inside and crisp on the outside.
  • In a medium skillet set over medium heat, cook the bacon until crisp and lightly browned. Transfer to a paper-towel-lined plate and set aside.
  • In a small bowl, mix the crema with the sauce from chipoltles in adobo and minced chiles, if using (I do!). Set aside.
  • Remove the potatoes from the oven. Using a knife, cut each one open lengthwise and carefully push the ends together, causing the center to open. Scoop out a couple spoonfuls of the cooked potato meat from each and transfer to a bowl. Sprinkle with salt and mix well.
  • Inside the scooped potatoes, layer a spoonful of the chipotle crema mixture, a spoonful of grated cheese and a spoonful of the seasoned potato meat. Repeat with the crema, cheese and potato meat. End with a bit of crema and cheese.
  • Raise the oven temperature to 500 degrees, or turn on the broiler. Place the stuffed potatoes back on the baking sheet. Return to the oven for 5 more minutes until the cheese has completely melted and has started to crisp. Remove from the oven, sprinkle with bacon and serve immediately.

Sweet Potato, Pecan, Chipotle and Crema Puree

It is the Monday before Thanksgiving, and I am hurrying like a mad woman. For a week, I have been testing recipes to give you something new for your Thanksgiving table.

I tested a sweet potato cheesy casserole, a sweet potato hash, a sweet potato soup and a sweet potato torte. I even tried a mash and a soufflé.  Yet, the only one that truly blew my mind and I find worthy of this celebration is this Sweet Potato, Pecan, Chipotle and Crema Puree.

Not only is it so very fabulous, but it can be made in a snap, too. The sweet potatoes are cooked until completely soft, then pureed with nutty pecans that have had the chance to gently simmer with milk, thyme and nutmeg. A dash of chipotle in adobo gives it a smoky and barely spicy backdrop. It is finished with a splash of Mexican style cream, or crema, to make it even more creamy, with a slight tang, and irresistible.
Continue reading “Sweet Potato, Pecan, Chipotle and Crema Puree”

Potato and Poblano Rajas Salad

If you are going to try a new potato salad, it has to be this one.

It’s rich. It’s filling. Yet at the same time, it’s light and bright. How can this happen? You may wonder…

Soft tender potatoes are combined with an exuberant poblano chile rajas, or strips, and lightly caramelized red onion mix. It’s not a creamy salad, but one that has an unexpected vinegary kick, laced with olive and sesame oils.

In my kitchen, it’s a well documented fact that poblano chiles love the company of allspice. And it is no secret that potatoes love to be showered with tarragon. Mix it all up, and I want to eat the entire serves-six-people bowl.

Of course, potato salad is as familiar and old-fashioned as apple pie, but you have never tried one like this. It brings the character of Central Mexico, where the combination of papas con (poblano) rajas has a long history at the table. But this may be the first time you see that combination in a salad form.

I dreamed it up while sitting at my desk wondering how I could bring the legendary combination of potatoes and poblano rajas to your table. Maybe it was the seesawing March forecast teasing spring, after the coldest winter in years here in Washington, DC, that put the idea of potato salad in my head…

Perfect, I thought, if it comes out as I am hoping, to bring this substantial salad to your table for Easter, or Passover, or a cookout, or any occasion you may have in mind this spring, where a big bowl of the best-ever potato salad will come in handy. And: I loved it!

Don’t think about this as a potato salad with chile peppers.

No.

poblano chiles

We are not using a spicy chile for the heat. We are adding the grand poblano chile, which is more like a stunning vegetable with mild heat than what many people consider all chiles to be.

Not only is the poblano a large, shiny, curvy, dark green beauty – it also has the most extraordinary rich, fruity, spirited flavor.

However, the poblano chile is a bit timid in it’s raw form and calls for a little coaxing, or prep work, before it can bring out its finest flavor, color and texture. Though, not to worry, it’s very easy to master the process of charring, sweating, and peeling the chiles.

prepping poblano chiles

Once you prep the poblanos a couple of times, you’ll see it’s no harder than roasting a red bell pepper. And the reward is in the deepened flowery, smoky, mildly spicy flavor of your transformed poblanos.

This salad is versatile, too. I like it warm, but you can eat it any way you prefer or best suits the occasion: warm, room temperature, or cold.

And it’s filling enough to eat as a main course for a quick lunch or as a side dish for a celebration table, for sandwich night, or for a backyard BBQ.

Seriously, give it a try.

potato and poblano rajas salad

Print Recipe
4 from 6 votes

Potato and Poblano Rajas Salad

If you are going to try a new potato salad, it has to be this one. It’s rich. It’s filling. Yet at the same time, it’s light and bright. How can this happen? You may wonder…Soft tender potatoes are combined with an exuberant poblano chile rajas, or strips, and lightly caramelized red onion mix. It’s not a creamy salad, but one that has an unexpected vinegary kick, laced with olive and sesame oils.
Prep Time10 minutes
Cook Time35 minutes
Course: Side Dish
Cuisine: Mexican
Keyword: onion, pati's mexican table, poblanos, potatoes, vinegar
Servings: 6 servings
Author: Pati Jinich

Ingredients

  • 2 pounds baby red potatoes
  • 3 poblano chiles charred, sweated, peeled and cut into strips
  • 1/2 cup olive oil
  • 2 tablespoons sesame oil
  • 1 1/2 cups halved and thinly sliced red onion
  • 1 teaspoon dried tarragon
  • 1/4 teaspoon ground allspice
  • 1/4 cup sesame seeds
  • 3 tablespoons white wine vinegar
  • 1 tablespoon unseasoned rice vinegar
  • 1/2 teaspoon kosher or coarse sea salt

Instructions

  • Bring a large pot of salted water to a rolling boil over medium-high heat. Drop in the red potatoes and cook for about 20 minutes, until they are cooked through and the tip of a knife goes in without much resistance, but the potatoes are not falling apart. When ready, drain into a colander. Once the potatoes are cool enough to handle, cut into halves.
  • In a large deep skillet or casserole, heat the olive oil over medium heat. Once it is hot, add the sesame oil. Stir in the red onion and cook for about 12 minutes, stirring once in a while, until they have completely softened and edges have begun to slightly brown. Incorporate the poblano chile rajas (strips), stir, cook for a minute or two.
  • Add the tarragon, allspice and sesame seeds and cook for a couple minutes. Pour in the white wine vinegar and rice vinegar, stir, cook for another minute and turn off the heat.
  • Place the potatoes in a large bowl, pour the onion, rajas, oil and vinegar mixture on top, and gently toss. Serve warm, at room temperature (how I like them the best) or cold.

Notes

Ensalada de Papitas con Rajas

Potato, Sweet Potato and Granny Smith Latkes

A Mexican immigrant cooking Thanksgiving and Hanukkah on the same night in the cold Eastern region of the United States may sound a bit odd to some. For me, it turns out to be an unexpected opportunity to bring all my pieces together. Which has my mind reeling about the just as unexpected possibilities for the menu.

See… ever since I can remember, I have felt like I am treading between worlds. The Mexican. The Jewish. The immigrant in the U.S. Not from here, not from there. Yet, as time goes by, the different parts of my identity feel increasingly solid, in all those worlds and their intersections. It turns out that where those intersections make the most sense is in the kitchen.

I admit, though, that I am a hopeless romantic. That’s why every year when my husband asks what I want for my birthday, I say: the most passionate love letter, ever. Haven’t seen it, since he has seen me everyday in one way or another for the past 17 years. So, when my birthday comes close, I offer to pack my bags and leave, just to pretend… so he can write that super duper passionate love letter.

Potato, Sweet Potato and Granny Smith Latkes with Salsa Macha and Fennel Crema
That romantic nature of mine may be why little things mean a lot to me. Remember when 12/12/12 happened? I was wild about the beauty of the 1,2,1,2,1,2 pattern and the chances of that happening again being zero. Of course, realists immediately pointed out the fact that every single day in the calendar will never, ever, be repeated again. Yet, it is the highlighted uniqueness of the 1,2,1,2,1,2 pattern that brings us the opportunity to realize just how precious that day, and any other day, is.

No surprise, then, that I am beyond ecstatic about Hanukkah and Thanksgiving happening at the same time. The chances of that happening again are so few and far in between (the next time, in 2070, it will be pretty likely that neither I nor Daniel will be here, so that is another reason for getting to that love letter) that it allows us to see these holidays under a different perspective: an enhanced sense of light, an expanded feeling of gratitude, a new vision of  what sharing at the table can mean, a new chance to continue to build bridges, and what’s best, we can eat it all along the way.

One dish that I came up with, for this once in a lifetime meal, are these Potato, Sweet Potato and Granny Smith Latkes.

Potato, Sweet Potato and Granny Smith Latkes with Salsa Macha and Fennel Crema

It is a recipe that has no fuss. It lets these three ingredients shine through and, at the same time, complement each other with the help of a bit of ancho chile  powder and true cinnamon. You can choose to eat them just like that, on their own, or you can serve them with a thick, chunky, fresh and citrusy Fennel and Lime Crema or with this rustic and nutty Salsa Macha.

Here’s a thought: you can do what I do. Eat them on their own as I am cooking them, and then eat them with both the Crema and the Salsa Macha once they are at the table.

sweet potato and granny smith apple latkes
Print Recipe
4 from 4 votes

Potato, Sweet Potato and Granny Smith Latkes

One dish that I came up with, for this once in a lifetime meal, are these Potato, Sweet Potato and Granny Smith Latkes. It is a recipe that has no fuss. It lets these three ingredients shine through and, at the same time, complement each other with the help of a bit of ancho chile  powder and true cinnamon. You can choose to eat them just like that, on their own, or you can serve them with a thick, chunky, fresh and citrusy Fennel and Lime Crema or with this rustic and nutty Salsa Macha.
Prep Time15 minutes
Cook Time20 minutes
Keyword: Antojo, chile, Jewish Mexican, Potato, Recipe, Salsa, Vegetarian
Servings: 16 to 18 latkes
Author: Pati Jinich

Ingredients

  • 1 1/2 pounds russett potatoes about 2
  • 1 1/2 pounds sweet potatoes about 1
  • 1/2 pound Granny Smith apples about 1
  • 1/2 cup grated white onion about 1
  • 1 1/2 teaspoons kosher or sea salt
  • 2 large eggs well beaten
  • 1/2 teaspoon ancho chile powder preferably, but may substitute with another dried ground chile powder that you may have handy
  • Pinch ground ceylon or true cinnamon
  • 2 teaspoons baking powder
  • 1/4 cup all-purpose flour
  • Fennel & Lime Crema optional
  • Salsa Macha optional

Instructions

  • Wash and peel the potatoes, sweet potatoes, apple and onion and grate them, placing them as you go, into a large bowl filled halfway with ice water. After you are finished, let it all sit for a few minutes and thoroughly drain with a strainer. Wrap all the grated ingredients in cheesecloth or a clean kitchen towel and wring energetically, squeezing out as much liquid as you can.
  • Transfer to a bowl and combine with eggs, ancho chile powder, salt, cinnamon, baking powder and flour. Mix well.
  • Fill a large, heavy casserole or skillet with ½ inch of oil and place over medium-high heat. After 3 to 4 minutes, test the oil by adding a teaspoon of the mix. If it bubbles happily all around the edges, it is ready. Working in small batches, to not crowd the casserole, spoon latkes of about 3 tablespoons each into the hot oil. (I use large serving spoon or my hands and shape them in flattened ovals.)
  • Cook until the first side is crisp and golden brown, about 4 to 5 minutes, and flip to the other side, letting it crisp and brown as well, about 3 to 4 minutes. Transfer to a wire rack set over a baking sheet. Once you are finished, you may keep them warm in a 250-degree oven, or you may cover and reheat later on.

Notes

Tortitas de Papa, Camote y Manzana Verde

A Taste of Barrio Chino: Green Beans with Peanuts and Chile de Arbol

Before she died, my maternal grandmother, whom we called Lali (remember I’ve told you about her before?) gave me Gloria Miller’s Thousand Recipe Chinese Cookbook. She was fascinated with Chinese cookery. She was also very good at it. What she loved the most were the stir-fry dishes: fast, tasty and healthy.

So, she bought herself a wok.

I couldn’t begin to count how many wok-made dishes I ate at her house during those long summers I visited her and my grandfather, after they moved to the Californian desert.

After she passed away, that wok found its way into my kitchen. I’ve cherished it. I’ve prized it. I haven’t used it! I’ve dragged it through so many house moves that I’ve also managed to lose its cord. It’s an electric wok. It’s real pretty, too. It’s hers. And in my mind, it is inseparable from her Miller’s cookbook, so I didn’t try to cook “her” Chinese dishes for years. And here and there, I’ve looked for that cord…

Fast-forward many, many years. You know I am on a continuous mission to find fascinating topics to teach for my culinary program at the Mexican Cultural Institute in Washington, DC. As we planned this year’s classes, the topic came up: Asian Influence in Mexican cooking.

Map of Manila-Galeon trading route
{Photo courtesy, Wikimedia Commons}

As a former Mexican policy analyst, I am very familiar with the history of the 250 year-long Acapulco-Manila trading route, which connected China and Mexico early on. How tasty would it be to build a menu that showcased the influence of Asian populations in Mexico, and the beautiful fusions of their cuisines and ours?

The Chinese and the Filipinos were the first ones to come to Mexico, through that Acapulco-Manila trading route, which was the result of the Spaniards’ thirst for more than gold, for more than silver; it was their thirst to find what they called the “Spice Islands.” Find them, they did, in Manila.

For 250 years, huge Spanish-built Manila Galleon ships (known in Mexico as Naos de China) were the means of an incredibly rich exchange that forever changed the culture and cooking of Mexico and Asia. Through trips that lasted for more than six months and carried more than 600 people, in came silk, porcelain, exotic fruits and herbs, huge amounts of spices and new ways of preserving ingredients and cooking techniques; out went tomatoes, zucchini, corn, chiles, avocados, beans, Mexican herbs and many culinary traditions.

Spanish Galeon ship
{Photo courtesy, Wikimedia Commons}

Like many in the Chinese populations in Mexico, my grandmother was an immigrant. She moved to Mexico City from her native Austria, by boat as well, and in her kitchen, became fluent in bridging Austrian and Mexican food. Much in the same way that Chinese immigrants, have built bridges between their cuisine and Mexican food – adapting dishes to use ingredients from the nearest market (jícama instead of watercress, anyone?) and to please the tastes of their Mexican neighbors (chile peppers, please…). It seems to me that it was an understanding and solidarity amongst immigrants that inspired my grandmother’s great appreciation for Chinese cooking.

Well, not only was my grandmother fascinated with Chinese cooking, but a gazillion other Mexicans are, too. We visit Chinese restaurants and cafes, which are proliferated in Mexico City’s Barrio Chino (Chinatown) but even more in the state of Baja California. They tend to have the red lamps and paper dragons and optional chopsticks (thankfully, because as to this day, I haven’t learned to use them…embarrassing, I know) and they have coffee, if you would rather drink it, instead of tea.

This recipe for Green Beans with Cacahautes and Chile de Arbol is one of its highlights. Thanks to Miller’s basics, I could brush up on my stir-frying technique, so the dish turns out just like my grandmother liked her stir fries: tender, crunchy, fresh and full of flavor.

stir fried green beans with peanuts and chile de arbol

I added a double peanut layer, by using peanut oil, that becomes very nutty as the beans cook, as well as a healthy dose of garlic and chile de árbol. It’s become a staple at home.

And you know what? It turns out you don’t need a wok to make stir fries. You just need a thick pot that can withstand high heat and has a large surface: a la Mexican. I found out because, NO, I have not found that electric cord, and NO, I will not buy another wok. In my kitchen, it is only my grandmother’s wok that will remain king: If only in theory, until I find that electric cord…

stir fried green beans with peanuts and chile de arbol
Print Recipe
4.41 from 5 votes

Green Beans with Peanuts and Chile de Arbol

The topic of Asian influence in Mexican cooking turned out to be so fascinating to research, in and out of my kitchen, that I devoted an entire episode of my upcoming Third Season of Pati’s Mexican Table, on Public TV, to this menu. (Yey! It’s in production now. I will be able to share the sizzle reel soon, and it will air in January!) This recipe for Green Beans with Cacahautes and Chile de Arbol is one of its highlights. Thanks to Miller’s basics, I could brush up on my stir-frying technique, so the dish turns out just like my grandmother liked her stir fries: tender, crunchy, fresh and full of flavor.
Prep Time5 minutes
Cook Time6 minutes
Course: Side Dish
Cuisine: Chinese, Mexican
Keyword: chiles de arbol, green bean, Peanuts, Recipe, scallions, soy sauce, stir fry
Servings: 4 servings
Author: Pati Jinich

Ingredients

  • 1 pound green beans ends cut and diagonally sliced in about 2” pieces, or Chinese long beans
  • 1 tablespoon soy sauce
  • 1/4 cup chicken broth
  • 1/2 teaspoon brown sugar
  • 1/2 teaspoon kosher or sea salt
  • 2 tablespoons peanut oil
  • 1/2 cup roasted peanuts
  • 4 garlic cloves minced or pressed
  • 3 to 4 chiles de arbol stemmed and thinly sliced
  • 4 to 6 scallions thinly sliced, light green and white parts only

Instructions

  • Bring salted water to a boil in a large pot, add the sliced green beans and cook, uncovered for 2 to 3 minutes until al dente, drain and set aside.
  • Combine the soy sauce, chicken broth, sugar and salt in a small bowl and mix well.
  • Heat the peanut oil over high heat in a large heavy skillet until hot but not smoking. Add the peanuts, stirring constantly, as they begin to fry for about 20 seconds. Beware, peanuts burn faster than you would think... so don't wait until they look browned. Add the garlic and the chiles de arbol, stir for about 10 seconds, and add the scallions and stir for another 10 to 15 seconds. Add the green beans, stir to combine all the ingredients and finally pour soy sauce mixture, let it all cook for 3 to 4 minutes. Serve immediately.

Notes

Ejotes con Cacahuates y Chile de Arbol

Sweet Potato Rounds with a Punch

I hadn’t heard about Thanksgiving until I moved to Texas. Yet, I took my first shot at cooking the meal that cold fall of 1997 in the vast yellow plains of Dallas. Inspired by the glossy food magazines, cookbooks and TV shows, and wanting to immerse myself in the American experience, I baked, cooked and stirred while feeling homesick for my family’s home-cooking. It took years of living in the US for me to grasp the depth and warmth of the holiday and the menu, many failed turkeys and side dishes along the way.

It turns out, fifteen years later, the Thanksgiving feast has become such a relevant part of our lives that if we ever moved back to Mexico, I’d have to bring it back with us.

The connection wasn’t instantaneous. Slowly, some elements began to resonate within me. Take the bird: Turkey is an indigenous ingredient in Mexican cookery and a center piece for Christmas and the New Year. Both are holidays which also happen near the end of the year, during the coldest season, and have to do with gathering family and friends around a plentiful table. And being thankful. And hopeful.

Regardless of the many recommended takes on turkey I tried, it wasn’t until I came up with my own Mexican version (it’s in my new cookbook please get it!) that the Thanksgiving turkey felt like part of our home and our home grew deeper roots in the United States.

Now my Mexican turkey is part of the Thanksgiving menu, we eat every year with our same dear American friends, along with Debra’s butternut squash soup; Tamara’s fennel, pear and parmesan salad; Sean’s changing sides (as my turkey replaced his, he is finding his way on the sides territory – sorry Sean, but you’re the one who chose mine…); Viviana and Mario’s very berry sauce; and David’s chocolate pecan pie and home made ice creams.

This year, I have some sweet potato rounds with a punch to share.

Sweet Potato Rounds with a Punch 1

I realize the Thanksgiving menu has a permanent side to it: dishes that become part of it tend to be recurring for decades and very few get added or replaced along the way.

I envision these sweet potato rounds will have the same fate as my turkey: repeated appearances and a big chance of permanent status.

Just like turkey, sweet potatoes are so familiar to me. Called Camote in Spanish, from the náhuatl Camotli, they’ve been part of Mexico’s culinary lingo since pre-Hispanic times.

Mostly eaten cloaked in sugar or with a sweet spin, baked or roasted, they are culturally linked to the figure of the Camotero, a street vendor selling warm and soft sweet potatoes and plantains to order on a pushing cart, that moves around the city on cold evenings, turning people’s cravings on with the tune of its piercing whistle sound.

Sweet Potato Rounds with a Punch 2

Here in the US, I’ve come up with a speedy, savory, irresistible take that can be a companion to whatever you may serve on your Thanksgiving table and will perk up the entire meal.

The best part: this will be a stress-free dish. It takes only four basic ingredients and it can be eaten warm, lukewarm or completely cooled.

Just slice the sweet potatoes into rounds, you can do that ahead of time. Brush them with a combination of melted unsalted butter and olive oil. Yes, please use both, it tastes so good, trust me.


Sweet Potato Rounds with a Punch 3

Generously sprinkle your favorite ground chile blend to cover on both sides.

The rounds will fly off of your platter, so bake plenty: they are thin and soft with a sweet bite on the inside, and lightly crispy on the outside with that lightly spicy, deliciously tart and barely salty seasoning.

Sweet Potato Rounds with a Punch 4

It is during Thanksgiving when I most realize how fully Mexican I can be in the United States, and how much the US has grown on me. And I feel immensely thankful.

Having come from Mexican grandparents who were once immigrants too, who made their home in Mexico, missing my Mexican parents and family, and now raising my Mexican-American family in the US… now I get it!

Just like so many people, I can’t be pigeonholed. And rather than feeling at a loss, I relish in the diversity of it all.

Wishing you a happy and plentiful Thanksgiving (with some punchy bites).

Sweet Potato Rounds with a Punch main
Print Recipe
4.67 from 3 votes

Sweet Potato Rounds with a Punch

Just like turkey, sweet potatoes are so familiar to me. Called Camote in Spanish, from the náhuatl Camotli, they’ve been part of Mexico’s culinary lingo since pre-Hispanic times. Mostly eaten cloaked in sugar or with a sweet spin, baked or roasted, they are culturally linked to the figure of the Camotero, a street vendor selling warm and soft sweet potatoes and plantains to order on a pushing cart, that moves around the city on cold evenings, turning people’s cravings on with the tune of its piercing whistle sound.
Prep Time10 minutes
Cook Time35 minutes
Course: Side Dish
Cuisine: Mexican
Keyword: ancho chiles, Chipotle, Recipe, sweet potato, Vegetarian
Servings: 4 to 6 servings
Author: Pati Jinich

Ingredients

  • 2 pounds sweet potatoes
  • 2 tablespoons unsalted butter
  • 2 tablespoons olive oil
  • 1 tablespoon ground ancho or chipotle chile
  • 1 teaspoon kosher or sea salt
  • 1 teaspoon brown sugar

Instructions

  • Rinse and peel the sweet potatoes. Slice them into thin rounds of about ¼ inch.
  • Place oven racks on lower and upper thirds. Preheat oven to 400 degrees.
  • In a small saucepan melt the butter over low heat. Once it melts pour in the olive oil, combine and remove from the heat.
  • Brush the butter/oil mix onto the bottom of two large baking sheets. Place the sweet potato rounds in a single layer. Brush the tops with more of the butter/oil mix. In a small bowl, combine the ground chile, the salt and the sugar. Sprinkle the sweet potatoes generously with ground chile blend. Flip rounds on to the other side and sprinkle generously with ground chiles. Place in the oven for about 20 minutes, or until they have started to brown. Remove baking sheets. With a set of tongs or a pair of forks, flip the sweet potato rounds. Place back in the oven for 12 to 15 minutes more, until they have browned on both sides. Don't let them burn.
  • Remove them from the oven. As they cool a little, their edges will crisp a bit more. Serve hot or not: either way they are delicious!

Notes

Rueditas de Camote

Old World and New World: Yellow Rice

Though I am no painter, this I know to be true:

Throw in four primary colors onto a painting palette and mix randomly. Whatever combination you come up with, there will be a Mexican rice that catches the spirit of those tones.

Red rice, cooked in a rich base of tomato puree, onion and garlic, and sometimes chopped vegetables.  Depending on the cook and the style, sometimes red rice may end up a bit on the orange side. Green rice, either based on Poblano chile, cilantro, parsley or a combination of those, giving a beautiful range of flavors along those grassy lines.  Black rice, seasoned with cooking broth from beans in the pot. White rice, the classic yet flavorful Mexican take that can be an unpretentious yet comforting side to almost anything. And we are not even getting started.

What many people don’t know is that Mexico also has its versions of Yellow rice.

From the two main kinds of Yellow rice in Mexican cooking, one has a saffron base and the other an achiote or annatto seeds base. Ironically, although saffron was brought to Mexico by the Spaniards almost five centuries ago and achiote seeds are native to Mexico, it is the saffron based rice which is considered to be the Traditional Yellow Rice in regions like Yucatán.

Yellow Rice 1
But given saffron’s high price tag, many cooks opt for achiote which is ridiculously cheap. Although it can be sometimes a bit hard to find in mainstream stores, most Latino, international or ethnic stores have it. You can always opt to click an online button to find it too…

With a similar color, and the same range of flavors, achiote seeds are a great substitute.

Yellow Rice 2
The difference aside from price, is the way in which both ingredients are used to bring out their unique flavors, aromas and colors, when making rice.

Saffron threads are soaked in water…

Yellow Rice 3
…and added to the rice after it has been sauteed in oil and the broth poured on top….

Achiote seeds, instead, are sauteed in oil for 2 to 3 minutes. Once they paint the oil and let out their flavors, they are removed with a slotted spoon before they become too bitter and right before the rice is poured in the pan. Some cooks dilute powdered achiote seeds in water, which can also be found in some stores, and do the same as with saffron. I prefer the version that uses the whole seeds much more.

Both ingredients, one from the Old World and one from the New World, have hard to describe flavors that somehow escape my words. But let me give it a shot: A bit smokey, a bit pungent, a bit bitter and strong, with a defined personality. What’s more, both ingredients help make an exotic, beautiful and tasty Yellow rice.

Here is a take on the saffron based rice that I love and that won over a great crowd. Try it, then you can tell me if it is really that good, or it may very well be that the great crowd had been waiting too long to eat during class, and that’s why they liked it so.

yellow rice
Print Recipe
3.67 from 6 votes

Yellow Rice

From the two main kinds of Yellow rice in Mexican cooking, one has a saffron base and the other an achiote or annatto seeds base. Ironically, although saffron was brought to Mexico by the Spaniards almost five centuries ago and achiote seeds are native to Mexico, it is the saffron based rice which is considered to be the Traditional Yellow Rice in regions like Yucatán.
Cook Time20 minutes
Course: Side Dish
Cuisine: Mexican
Keyword: chicken broth, garlic, onion, Recipe, rice, saffron, Tomato
Servings: 3 to 4 servings
Author: Pati Jinich

Ingredients

  • 1/2 teaspoon saffron threads crumbled, or may substitute achiote seeds
  • 2 tablespoons boiling hot water
  • 1 cup jasmine white rice
  • 2 tablespoons safflower or corn oil
  • 1/4 cup chopped white onion
  • 1/4 cup chopped tomato
  • 1 garlic clove minced or pressed
  • 2 cups chicken broth
  • 3/4 teaspoon kosher or sea salt more or less to taste

Instructions

  • Place saffron threads in a small mixing bowl along with the boiling hot water. Mix and let soak for 10 to 15 minutes.
  • Place rice in a bowl, cover with very hot water, and let soak for 5 to 10 minutes. Drain, rinse with cold water, and drain thoroughly.
  • Heat the oil in a 3 to 4 quart pan over medium-high heat. (If you are using achiote seeds instead of saffron, just let a teaspoon of them cook in the oil for 2 to 3 minutes before adding the rice.) Once the oil is hot, add the dried rice and saute for 1 to 2 minutes. Incorporate the onion, tomato, and garlic, stir, and continue to cook until the rice changes color to a milky white. It should sound and feel heavier, as if you were moving sand in the pot, about 4 to 5 more minutes.
  • Pour in the chicken broth, saffron mix, and salt and stir everything together. When the liquid starts to boil, cover the pot, lower the heat to low and continue cooking for about 20 more minutes, or until the rice is cooked through and the liquid has been mostly absorbed.
  • If the grains don't seem soft and cooked through, add a bit more chicken stock or water and let it cook for another 5 minutes or so. Turn the heat off and let it sit covered for 5 to 10 minutes. Fluff with a fork and serve.
  • Rice can be made ahead of time and reheated later the same day. Before reheating, add 1 tablespoon of water and heat, covered over the lowest heat possible. Once it has cooled down, it can be kept in a closed container in the refrigerator for up to 2 days.

Notes

Arroz Amarillo

More Chorizo to Love

Right off the bat, you must understand: I heart chorizo. Especially the kind I grew up eating in Mexico. It comes in deep-burnt-reddish links of fresh, moist, exotically seasoned ground meat that, once fried, becomes crisp and filling bites with bold flavors and a thousand uses. My oldest son’s quick choice for breakfast is chorizo fried until it browns and crisps, with a side of white toast.  Add some lightly beaten eggs as the chorizo is starting to brown and some ripe and creamy avocado slices on the side, and that’s my kind of rich-tasting brunch dish. Of course chorizo is delicious in sandwiches, in tacos and quesadillas, on top of enchiladas, in mashed potatoes, as a topping for heartier salads, in some of the tastiest bean dishes I have tried, in pastas with a ton of personality and on pizzas with pickled jalapeño peppers on top.

I am really trying to stop myself here…

When I moved to the United States, more than a dozen years ago, I was thrilled to find chorizo in international grocery stores. Lately, I have been intrigued and surprised to see that my Mexican chorizo is now accompanied by many other kinds in the refrigerated sections of bigger, more mainstream stores: Argentine, Colombian, Guatemala, Salvadoran and Honduran chorizos have arrived. Like the Mexican kind, some of those varieties are being made with chicken, turkey or beef in addition to pork. There is even kosher chorizo, made with beef, at Koshermart in Rockville and vegan chorizo at Trader Joe’s (which I haven’t felt the urge to try). Many come in spicy, spicier, spiciest and hotter than hot.

Through Sunday afternoon asados, or grilling parties, at friends’ houses and trips to Argentina, I had become familiar with the garlicky chorizo Argentinians are so proud of. But I was clueless about the other kinds. So I shocked my regular grocer by buying a variety of links, then cooked them at home to sample the differences, filling my kitchen with chorizo-tinged smoke. Later, on a cold and rainy day in November, I set out to explore the chorizo universe, including local manufacturers, in this part of the Americas.

It was clear from the start that Latin chorizos share a common difference from Spanish ones. Most Latin chorizos are made with heavily spiced, freshly ground meat, and the must be cooked. Spanish chorizos typically are dried and smoked cured links of chopped meat, seasoned mainly with garlic and paprika; they tend to be ready-to-eat and have a salami-like soft and chewy bite.

Although Spaniards introduced the pid and the techniques of making chorizo to most of Latin America, through the centuries chorizos were adapted with local flavors and ingredients. (The Spaniards, for their part, borrowed paprika from those new lads and made it one of their signature chorizo seasonings.) Interestingly, the version that took root in Latin soil was raw and uncured, which is the least-common kind in Spain.

Latin chorizos differ greatly from one another in flavor. Mexican is the spiciest of the lot. It also has the most complex layering of flavors, and I won’t deny that it’s my favorite. Mexican chorizos can have variations as well, but they generally contain dried chili peppers such as ancho, pasilla, guajillo and/or chipotle; a mix of spices that might include oregano, cumin, thyme, marjoram, bay leaf, cinnamon, coriander seed, allspice, paprika, achiote and cloves; most times garlic and sometimes onion; and always vinegar, which makes the meat flake or crumble as it browns and gives it a welcome hint of acidity.

If you like really spicy sausage, Chorizo Cabal of Fairfax produces a Mexican one called Perrón, which translates from Mexican-Spanish slang as brave or aggressive. It’s clear as soon as you see the label: A fierce dog looks ready to give you the bite of your life.

For a chorizo that isn’t spicy but has a colorful pungency, the way to go is Salvadoran. That happens to be the favorite of Clifford Logan Jr., vice president of the Logan Sausage Co. in Alexandria. His company sold 50,000 to 60,000 pounds of its Latin-style fresh chorizos in the Washington area last month. Logan is so passionate about chorizos that when asked to describe them, he seemed to be poetically describing bottles of wine: “The Salvadoran,” he began, with a deep romantic sigh and a sudden distant gaze, “has a robust flavor and a subtle finish.”

It seems that around Washington, Mexican and Salvadoran chorizos have been wrestling for bragging rights for a long time. Chorizo Cabal sells more Salvadoran chorizo than Mexican (except in grilling season, when the Argentine chorizo is most popular); Logan Sausage sells twice as much Mexican chorizo as Salvadoran. But the choice has as much to do with flavor and recipes as with the local immigrant population and the popularity of each cuisine. Companies often start to produce chorizos based on where the owner or employees come from; immigrants nostalgic for the flavors of home find a way to replicate their native recipes.

The companies’ Mexican, Honduran and Salvadoran chorizos are made with vinegar, yet the Honduran kind is much more sedate. The Guatemalan, Logan says, is somewhere in between the Salvadoran and Honduran, flavor-wise. Betty Guerrero, who runs Chorizo Cabal, agrees, and revealed to me that a bit of spearmint is added to Cabal’s Guatemalan spice mix. Colombian chorizo is plain and quite salty. The Argentine kind has white wine and a heavy dose of garlic in its mix, as well as oregano, nutmeg and a bit of cayenne or crushed red pepper flakes. It seems to me that Argentine-style chorizo really lets the flavor of the meat shine through. (See “Use this for that,” above.)

Of course, different brands and regions have different variations, which some purists question, especially when borders are crossed. Guerrero says, “My mother tells me that this is not the way chorizo is made in Mexico, that I am changing the ingredients, that I am changing its ways.” But Guerrero, an experienced chorizo maker, says her company sells about 50,000 pounds of chorizo per month.

One thing I have noticed is that chorizos made in the United States have less fat than those I knew and ate in Latin America. Logan and Guerrero confirmed that, saying their chorizos are made with no more than 20 percent fat. Typically, Mexican chorizo contains at least 30 percent fat. Whole Foods Market makes its own chorizo with no more than 15 percent fat, according to company spokeswoman Katie Hunsberger.

Another thing purists might question is why parts of the chorizo-making process are simplified here. For example, chorizo shops in Mexico soak and puree whole dried chili peppers and add fresh garlic and onion. Chorizo makers here, including Cabal and Logan, generally use custom-made prepared spice mixes that come with already-ground chili peppers and dehydrated garlic.

According to these producers, the mixes not only are convenient but also help ensure quality: “Dried garlic imparts flavor and doesn’t turn black as quickly as fresh garlic does,” Clifford Logan says. They also promote consistency. Hunsberger says that Whole Foods works with Barron’s spices to create a spice mix for its house brand.

No wonder chorizo makers are hesitant to share ingredient information. Their recipes are treated as highly classified state secrets that outsourced spice companies are legally forbidden to share. Dealing with such sacred formulas also may explain why many chorizo companies have longstanding and loyal employees.

Or maybe they just heart chorizo, like me.

Article written for and published by The Washington Post click here. 

Cowboy Charro Beans
Print Recipe
4.75 from 8 votes

Cowboy Charro Beans

Cowboy Charro Beans recipe from Pati's Mexican Table Season 1, Episode 2 “Foods of the Mexican Revolution”
Prep Time5 minutes
Cook Time25 minutes
Total Time30 minutes
Course: Side Dish
Cuisine: Mexican
Keyword: bacon, beans, black beans, Chorizo, jalapeno, pati’s mexican table, Peruvian beans, pinto beans, Tomatoes
Servings: 6 servings
Author: Pati Jinich

Ingredients

  • 6 oz sliced uncooked bacon chopped
  • 8 oz fresh uncooked Mexican chorizo casings removed, chopped
  • 1/2 cup white onion chopped
  • 1 jalapeño pepper finely chopped more or less to taste, seeded if desired
  • 1/2 lb roma tomatoes about 2 to 3 tomatoes, chopped
  • 1 tsp kosher or sea salt plus more as needed
  • 5 cups cooked pinto beans and their cooking liquid or substitute with black or Peruvian beans

Instructions

  • Cook the bacon in a large, deep skillet over medium-high heat for 3 to 4 minutes, until it is lightly browned and starting to crisp. Add the chopped chorizo; cook for 4 to 5 minutes, until it starts to brown and crisp. As it cooks, use a wooden spoon or spatula to break it into smaller pieces.
  • Add the chopped onion and jalapeño; mix well and cook for 1 or 2 more minutes, letting them soften a bit. Add the tomatoes and mix well; cook for 3 to 4 minutes, stirring, until the tomatoes soften and appear mushy.
  • Add the cooked beans and their cooking liquid; mix well and reduce the heat to medium. Cook for 8 to 10 minutes, until the beans are moist but not soupy. Add a bit more water if needed. Taste, and add more salt to your taste. Serve hot.

Notes

Frijoles Charros con Tocino y Chorizo
Mexican style pasta
Print Recipe
5 from 4 votes

Mexican Style Pasta with Tomato Sauce, Chorizo & Fresh Cream

Mexican Style Pasta with Tomato Sauce, Chorizo & Fresh Cream recipe from Pati's Mexican Table Season 1, Episode 9 “Chorizo”
Prep Time5 minutes
Cook Time35 minutes
Total Time40 minutes
Course: Main Course
Cuisine: Mexican
Keyword: Avocado, chipotles in adobo, Chorizo, mexican crema, pasta, pati’s mexican table, queso fresco, Tomatoes
Servings: 6 servings
Author: Pati Jinich

Ingredients

  • 1 1/2 lbs ripe Roma tomatoes about 6 to 8 tomatoes
  • 1 medium clove garlic
  • 1/2 cup tomato cooking liquid
  • 1/2 medium white onion coarsely chopped (about 1/2 cup)
  • 3/4 tsp kosher or sea salt
  • 1/4 tsp freshly ground black pepper
  • 8 oz fresh uncooked Mexican chorizo casings removed and coarsely chopped
  • 1 tbsp safflower or corn oil
  • 8 oz dried spaghetti, angel hair or fettuccine broken into smaller pieces
  • 2 cups chicken broth
  • 2 bay leaves
  • 1 to 2 tbsp sauce from canned chipotles in adobo plus 1 whole canned chipotle chile for more heat (optional)
  • 6 oz queso fresco, farmer’s cheese, or a mild feta crumbled
  • Mexican or Latin cream as much as needed (!) or substitute for creme fraiche or sour cream
  • 1 ripe Mexican avocado halved, peeled, cut into slices

Instructions

  • Place tomatoes and garlic in a medium saucepan. Add water to cover and bring to a boil over medium-high heat. Simmer for about 10 minutes, until the tomatoes are thoroughly cooked, they look mushy and the skins have started to come off.
  • Transfer the tomatoes, 1/2 cup of the cooking liquid and garlic to a blender along with the onion, salt and pepper. Let cool slightly and puree until smooth.
  • Cook the chorizo in a large, deep skillet over medium-high heat for 5 to 6 minutes, until it has browned and crisped; use a wooden spoon or spatula to break it into smaller pieces as it cooks. Use a slotted spoon to transfer the cooked chorizo to a bowl.
  • Add oil to the same skillet used to cook the chorizo, over medium-high heat. Add the spaghetti or fettuccine pieces and cook for a few minutes, stirring often, until the pasta changes color and starts to brown. Do not let it burn!!
  • Pour the tomato puree on the pasta. Cook for about 5 minutes, stirring often, until the sauce thickens and the color darkens to a deeper red. Add the chicken broth, bay leaves and adobo sauce, plus a whole chipotle chile in adobo, if desired.
  • Mix well, cook uncovered for 10 to 12 minutes, stirring often to keep the pasta from sticking, until the pasta is cooked through and the tomato sauce has thickened considerably. Discard the bay leaves.
  • Add the chorizo and stir to incorporate. Divide among individual plates; serve hot, topped with crumbled cheese, fresh cream and avocado slices.

Notes

Fideo Seco
Print Recipe
4.86 from 7 votes

Potato, Scallion & Chorizo Crispy Tacos

Potato, Scallion & Chorizo Crispy Tacos recipe from Pati's Mexican Table Season 1, Episode 9 “Chorizo”
Prep Time5 minutes
Cook Time20 minutes
Total Time25 minutes
Course: Main Course
Cuisine: Mexican
Keyword: Chorizo, corn tortillas, pati’s mexican table, potatoes, salsa verde, scallions, Taco
Servings: 5 to 6 servings
Author: Pati Jinich

Ingredients

  • 1 lb red bliss potatoes peeled and cut into 1-inch pieces
  • 8 oz fresh uncooked Mexican chorizo sausage casings removed, coarsely chopped
  • 8 scallions white and light green parts thinly sliced (1/2 cup)
  • 1 tsp kosher or sea salt or more to taste
  • 10-12 Corn tortillas
  • safflower oil for frying
  • Salsa verde or any salsa of your choice

Instructions

  • Bring a medium pot of water to a boil over medium-high heat. Add the potato pieces, once the water returns to a boil, cook for 10 to 12 minutes or until the potatoes are tender. Drain.
  • Place the chorizo in a large skillet over medium-high heat. As it cooks, use a wooden spoon or spatula to crumble it into smaller pieces. Once it browns and crisps, 5 to 6 minutes, add the scallions and stir to combine; cook for about 1 minute or until the scallions begin to soften.
  • Add the cooked potatoes and salt, mashing them into the chorizo mixture with a potato masher or a wooden spoon, for about 1 minute until well combined. Remove from the heat. Taste, add salt as needed.
  • Heat a dry, medium skillet over medium heat. Warm the tortillas in the skillet one at a time for 15 to 30 seconds on each side, to soften them for rolling and so they will not crack as you assemble tacos.
  • Place a few tablespoons of the filling on the center of each heated tortilla, and roll, as tightly as you can, into a taco. Insert a wooden toothpick through taco pairs, through the seams to help them retain their roll shape as they cook. When they have all been rolled, finish the tacos by either frying or toasting them.

To fry the tacos:

  • Pour enough oil into a large skillet to a depth of about 1 inch, place over medium heat. Once the oil is hot, 4 to 6 minutes, fry the tacos in batches, placing them in the skillet, without crowding them. They oil should be bubbling as they cook. Cook for about 2 to 3 minutes on the first side, until the bottom and sides have crisped and turned golden. Use tongs to turn over the tacos, cook for another 2 to 3 minutes. Transfer them to a plate lined with paper towels. Continue until all the tacos have been fried.

To toast the tacos:

  • Heat a large, dry skillet or comal over medium heat. Working in batches, place the tacos in the skillet. Let them toast and heat for about 3 to 4 minutes or until the tacos are browned and crisped, then flip to the other side and toast until evenly browned and crisp.
  • Remove all toothpicks; serve warm.

Notes

Taquitos de Papa, Cebollita y Chorizo
sweet potato salad
Print Recipe
4.60 from 5 votes

Warm Sweet Potato Salad with Chorizo

Warm Sweet Potato Salad with Chorizo recipe from Pati's Mexican Table Season 1, Episode 9 "Chorizo"
Prep Time15 minutes
Cook Time30 minutes
Total Time45 minutes
Course: Main Course, Salad
Cuisine: Mexican
Keyword: Chorizo, cilantro, jalapeno, orange juice, pati’s mexican table, sweet potato
Servings: 4 to 6 servings
Author: Pati Jinich

Ingredients

  • 3 lbs sweet potatoes peeled and cut into bite-size chunks, about 3 large sweet potatoes
  • 3 tbsp olive oil
  • 1 cup orange juice preferably freshly squeezed
  • 1/2 tsp brown sugar
  • 3/4 tsp kosher or sea salt
  • 1/4 tsp freshly ground black pepper
  • 8 oz fresh uncooked Mexican chorizo, casings removed and coarsely chopped
  • 1 jalapeño pepper stemmed and seeded if less heat is desired
  • 1/3 cup red onion chopped
  • 1/3 cup cilantro chopped

Instructions

  • Bring a large pot of salted water to a boil over high heat. Add the sweet potato pieces, once it comes back to a boil, reduce the heat to medium; simmer for about 10 minutes, until almost tender and a knife can go through without breaking a piece. Drain, and transfer to a baking dish large enough to hold the pieces almost in a single layer.
  • Preheat oven to 400 degrees.
  • Whisk together orange juice, oil, sugar, salt and pepper in a medium bowl. Pour the mixture over the sweet potatoes and toss to coat evenly. Roast for about 20 minutes, turning them after about 10 minutes, until the potato pieces have started to brown and the sauce has thickened. Remove from the oven.
  • Meanwhile, cook the chorizo in a medium skillet over medium-high heat; use a wooden spoon of spatula to break it into smaller pieces as it cooks. After 5 to 6 minutes, when it has nicely browned and crisped, use a slotted spoon to top the hot sweet potatoes.
  • Sprinkle the jalapeño, red onion and cilantro on top, and toss gently to combine. Serve warm.

Notes

Ensalada Calientita de Camote y Chorizo

Guest: Cristina Potters’ Refried Beans

In this post, I have invited Cristina Potters to be a guest and share one of her favorite recipes. Cristina is the author of Mexico Cooks!, a culinary and cultural website about all things Mexico. She is also known for giving outstanding tours. 

A Chicago native who arrived in Mexico in 1981, she was first a social worker in Tijuana.  Now, after 30 years, she is a permanent fixture in Morelia, Michoacan.  She learned the cuisines of the central highlands of Mexico from the Mayoras (Michoacan home cooks). Now, without further ado, here is Cristina…

I’d like to offer my personal recipes for frijoles refritos and frijoles de la olla. The following recipe for refried beans is not only simple and delicious; it converts people who turn up their noses at ordinary refried beans into folks who insist on another helping!

Christina Potters Refried Beans 1

In central Mexico, the most commonly eaten bean is the peruano (peh-roo-AH-noh), an oval, yellow bean that cooks to a pale beige color with a creamy consistency.  I like frijoles de la olla (freshly cooked beans, straight from the pot) served with a big spoonful of salsa fresca (chopped tomato, minced onion and chile serrano, salt, and roughly chopped cilantro).  I often steam white rice, fill a bowl with it, add frijoles de la olla, salsa fresca, and crumble cotija cheese and call it comida (main meal of the day).

Cristina Potters Refried Beans 2

For breakfast, I often prepare frijoles refritos (refried beans).  Served with scrambled eggs, sliced Mexican avocado, and a stack of hot tortillas, beans are a great way to start the morning.

Here’s some fun bean trivia: frijoles refritos doesn’t really mean ‘refried’ beans. Mexican Spanish often uses the prefix ‘re-‘ to describe something exceptional.  ‘Rebueno’ means ‘really, really good’.  ‘Refrito’ means–you guessed it–well-fried.

Frijoles de la olla are very easy to cook and the fresh-cooked flavor is a million times better than canned beans! In my kitchen I prepare about a pound of dried beans at a time.  After cooking, I serve some as frijoles de la olla, prepare some as refried beans, and freeze the rest in plastic sandwich bags.  The cooked beans and their pot liquid freeze very well.

To make frijoles de la olla, the traditional cooking method I use has no onions, no garlic, no salt, and no other seasonings–just water and dried beans. First, pick carefully through your beans.  Put the cleaned beans in a strainer and wash well under running water.  Now, to soak or not to soak?  I have tried both soaking and not soaking and have noticed that the cooking time is about the same either way. I never soak my beans.  My olla de barro (clay bean pot) holds about a half kilo of frijol plus enough water to cook them.  If you don’t have an olla de barro, a heavy metal soup pot will work almost as well.  After the beans are in the pot, add 6 to 8 cups of cold water.

Over a high flame, bring the pot of beans to a rolling boil.  Turn the flame to a medium simmer and cover the pot.  Allow the beans to cook for about an hour and check the water level.  If you need to add more water, be sure it is boiling before you pour it into the bean pot; adding cold water can cause the beans to toughen.  Continue to cook the beans until, when you bite into one, it is soft and creamy.  The pot liquid will thicken slightly.

Cristina Potters Refried Beans 3(Frijoles de la Olla, already cooked over the fried chilies, ready to be turned into refried beans)

Now’s the time to salt your beans–after cooking, but while the beans are still hot. I use Espuma del Mar (Mexican sea salt from the state of Colima) for its wonderful sweetly salty flavor, but any salt will do.  Add a little less salt than you think is correct–you can always add more later, and you don’t want to over salt your beans.

If you live in the United States or Canada, you’ll want to order the fabulous heritage dried beans sold by Rancho Gordo.  Its owner, my friend Steve Sando, has nearly single-handedly brought delicious old-style beans to new popularity in home and restaurant kitchens.  If you’ve tasted ordinary beans and said, “So what?”, try Rancho Gordo beans for a huge WOW! of an eye opener.

Following is a recipe for turning these frijoles de la olla into refried beans.

Cristina Potters Refried Beans 4 (Refried beans ready to eat)


Christina Potters Refried Beans Main
Print Recipe
4 from 4 votes

Refried Beans

I’d like to offer my personal recipes for frijoles refritos and frijoles de la olla. The following recipe for refried beans is not only simple and delicious; it converts people who turn up their noses at ordinary refried beans into folks who insist on another helping!
Prep Time2 minutes
Cook Time10 minutes
Course: Side Dish
Cuisine: Mexican
Keyword: beans, Peruvian beans, pinto beans, refried beans, serrano chiles
Servings: 6 servings
Author: Pati Jinich

Ingredients

  • 3 cups recently cooked frijoles peruanos de la olla
  • 1 or 2 chiles serranos depending on your heat tolerance
  • 1 or 2 tablespoons lard or vegetable oil -- preferably lard and definitely NOT olive oil
  • Bean cooking liquid
  • Sea salt to taste

Instructions

  • Melt the lard in an 8-inch skillet. Split the chile(s) from the tip almost to the stem and add to the melted lard. Saute over a medium flame until the chile is dark brown, almost black. Allow the lard or oil and chile to cool a bit before the next step.
  • Now add the beans and a little of the bean liquid. When the beans begin to simmer, mash them and the chile with a potato or bean masher until they are smooth. Add more liquid if necessary to give the beans the consistency you prefer. Add sea salt to taste, stir well, and serve.

Notes

Frijoles Refritos

Sweet potatoes with orange-piloncillo syrup and chile de árbol

Our friends Tamara and Sean are crazy foodies and fans of the richness and versatility of chilies. So after receiving the invitation to join them next week for their Thanksgiving feast, I started playing with options on what to bring; with chilies of course.

This is one of the things I came up with and can’t wait for them to try:  creamy and soft sweet potatoes bathed in a buttery orange-piloncillo syrup sprinkled, with toasted chile de arbol. How good are they? That fork in the picture I just shot accounts for my third consecutive serving today. How easy are they to make? Read below…

sweet potatoes
I am fond of sweet potatoes. Called camotes in Mexico, and eaten since Pre-Hispanic times, they tend to be eaten with a sweet spin. The most popular versions are either steamed and drizzled with sweetened condensed milk, honey or syrup as the plantains I recently posted; or cooked into a sweetened paste, molded, caramelized and turned into addictive candies.

However, they are also cooked in many other ways. Through my travels and research I have tasted them in soups, puddings, warm salads, purees and even flans. Yet one of my favorite versions is how my mother makes them.

syrup ingredients for sweet potatoes with chile de arbol

She boils, peels and slices them. Then she adds chunks of butter, brown sugar or piloncillo, chile de arbol and into the oven they go. I started from her idea, but opted to make a syrup with what you see in the photo above: butter, brown sugar or shredded piloncillo, orange and lime juice for an extra layer of flavor.

Its simple: just place those ingredients in a saucepan over medium-low heat. Once the butter dissolves, let the mix turn into a light syrup, which takes about 4 minutes of gentle simmer. This syrup is so good, it could be drank out of a cup…

Instead of drinking it all…  you can drizzle most of it over the sliced sweet potatoes in a buttered baking dish. For an incredibly earthy, deep and spicy kick, sprinkle some toasted and chopped chile de arbol on top.

If you are not familiar with the chile de arbol, this is what they look like.

chiles de arbol

Chile de arbol have become widely available outside of Mexico. They are thin, elongated, have a beautiful red/orange color, and are spicy with a rich, deep flavor.

To use them for this dish just remove the stems, make a slit down their sides and take the seeds off. See how I am opening them up? The seeds just come right off. It takes a minute.

opening chile de arbol

In an already hot dry skillet or comal set over medium-low heat (takes 3 to 4 minutes to heat up), toast the chilies for about 20 to 30 seconds on each side. Their inner skin will become opaque, they will let some aroma loose, and their outside skin will gain a toasty dark brown tan. Be careful not to let them burn all over.

They should look similar to this…

toasted chiles de arbol

Then, just give them a friendly chop. And after you do, wash your hands with soap and water… you don’t want to rub your eyes with chile de arbol. If you made more than you need, store them in a closed bag or container. They will keep forever.

Once you drizzle the syrup and sprinkle the chopped chile de arbol, add a bit of salt on top. Place in a 425 degree oven for 15 to 20 minutes. And you are set.

sweet potatoes with chile de arbole in baking dish

Ok, that’s before my fork went in!  These are sweet potatoes with a delicious citrusy sweet spin and a flavorful spicy kick.

By boiling the sweet potatoes before placing them in the oven, you are getting a creamy and soft texture that can’t be achieved by just roasting them in the oven. The quick finish in the oven, thickens the syrup further as it gives the already soft sweet potatoes a nicer outer finish. It is a great combination. I might as well finish what’s on the plate…

Pati Jinich sweet potatoes with chile de arbol
Print Recipe
4.80 from 5 votes

Sweet potatoes with orange-piloncillo syrup and chile de árbol

This is one of the things I came up with and can’t wait for them to try:  creamy and soft sweet potatoes bathed in a buttery orange-piloncillo syrup sprinkled, with toasted chile de arbol. How good are they? That fork in the picture I just shot accounts for my third consecutive serving today. How easy are they to make? Read below…
Prep Time10 minutes
Cook Time45 minutes
Course: Side Dish
Cuisine: Mexican
Keyword: chiles de arbol, lime, orange juice, piloncillo, Potato, Recipe, sweet potato, Vegetarian
Servings: 4 to 6 servings
Author: Pati Jinich

Ingredients

  • 3 pounds sweet potatoes
  • 1/2 cup orange juice preferably fresh
  • 2 tablespoons fresh squeezed lime juice
  • 3/4 cup grated piloncillo or brown sugar
  • 1/4 cup 2 ounces unsalted butter
  • 4 to 6 chiles de arbol stems and seeds removed, toasted and chopped
  • 1/4 teaspoon kosher or sea salt more or less to taste

Instructions

  • Rinse and scrub the sweet potatoes. Place them in a large pot, cover them with water, over medium heat. Once it comes to a boil, reduce heat to low, cover the pot, and let it simmer for about 25 to 35 minutes. You will know they are ready, just like with boiling potatoes, when the tip of a knife can easily go through. Drain and let cool.
  • Remove the stems from the chile de arbol, make a slit down their sides and take out the seeds. On a preheated comal or dry skillet over medium-low heat, toast the chiles for about 20 to 30 seconds per side. Their inner skin will have become opaque and the outer skin will achieve a brown tan. Be careful to not let them burn.
  • To make the syrup, place the butter, piloncillo or brown sugar, orange and lime juice in a sauce pan over medium-low heat. Once the butter dissolves, let it simmer 4 to 5 minutes until it gains a light syrupy consistency.
  • Preheat the oven to 425 degrees and butter a baking dish (I use a 9" x 13").
  • Once the sweet potatoes have cooled, peel and slice them into about 1/2 to 1 inch rounds. Layer them in rows, pour the syrup on top, sprinkle the toasted and chopped chile de arbol and sprinkle some salt on top. Place the dish in the oven and bake anywhere from 15 to 20 minutes. Halfway through, spoon some of the syrup on top of the sweet potatoes. Bake them until the syrup has thickened to your liking and they have achieved a glazed crust. They are specially delicious if eaten while still hot.

Notes

Camote con Jarabe de Piloncillo y Chile de Arbol

Zucchini Torte for You and Me (and turns out my mother too)

Each time a vegetable torte is included in the menu of one of my classes, I have noticed a similar trend: tortes have a warm and friendly reception, that turns into a loving embrace once participants make the recipe at home and find out they want to make it again and again.

Not to be confused with the other kind of tortas, (tortes translates to tortas in Spanish…) Mexico’s favorite sandwich made with a crispy bread roll adapted from the baguette; tortes are a cross between a fluffy and moist bread, a savory pudding, and now that I think of it, also a souffle.

Although there are quite a few variations, tortes have a few things in common. For one thing, they are easy to prepare. Next, they are versatile since they can be a side to both dry or saucy entrees, they can become the main dish accompanied by a salad and they can travel solo in grand style. What’s more, and crucial around home, they help eager parents deceive picky eaters who don’t like vegetables that much.

Zucchini Torte 1

(Two kinds of zucchini posing in my backyard)

Tortes swaddle vegetables in a comforting cushion of eggs (sometimes beaten separately), one or another kind of flour, at times milk, cream or cheese and a nice dose of sugar, some salt, and depending on the spin, other spices. Despite the variations, the signature of each torte is typically given by the vegetable that predominates. The most common ones that come to mind are pea, carrot, spinach, zucchini and corn. The last two are the ones I repeat the most and since I found such beautiful zucchini in the market yesterday, that’s what is going in the mixer today.

Zucchini Torte 2
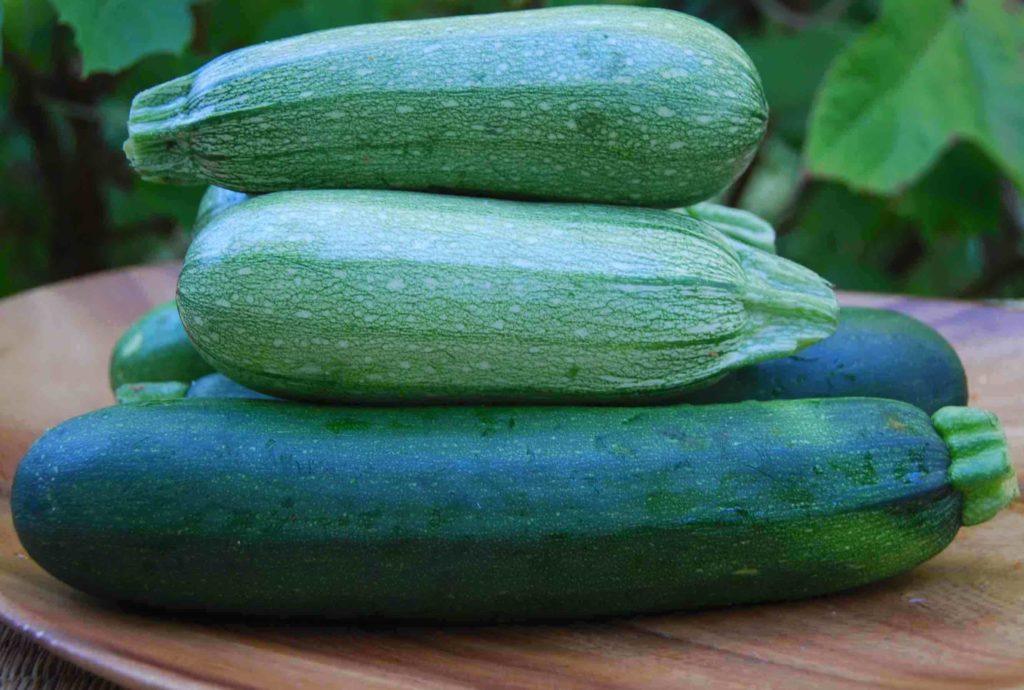
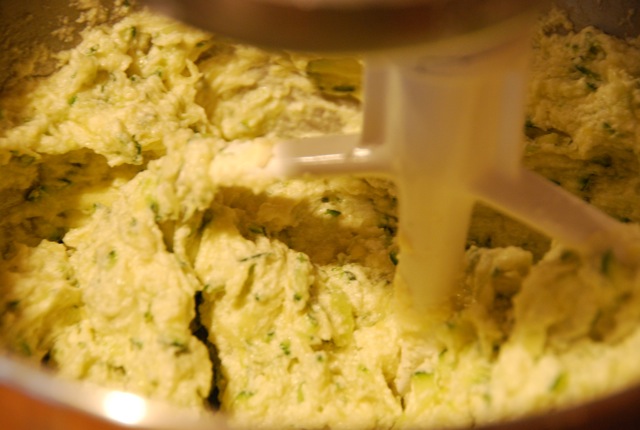
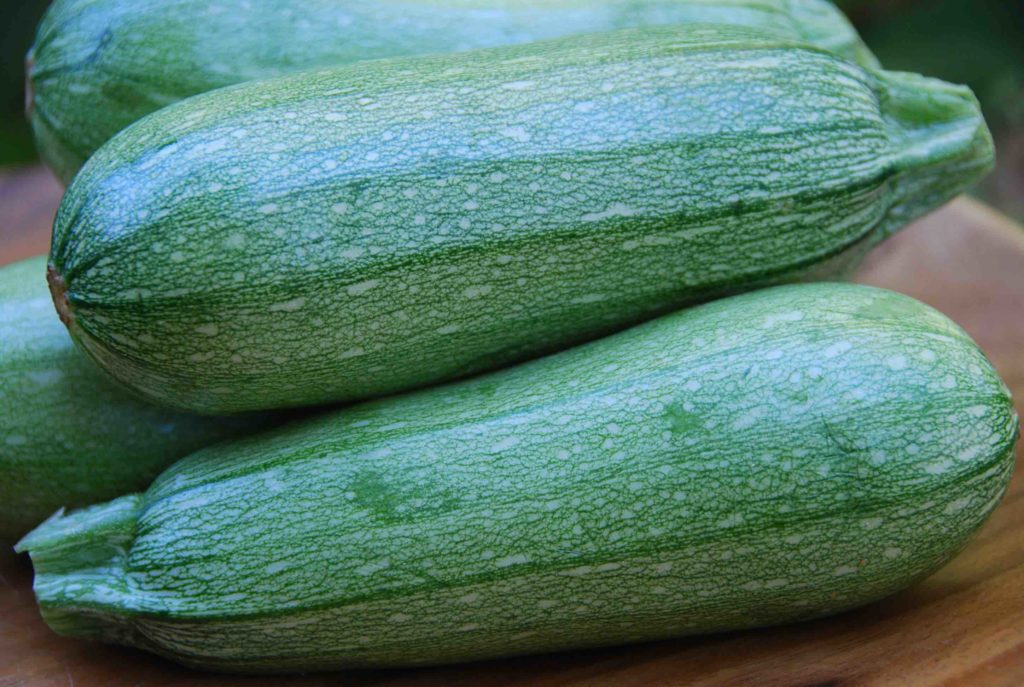
(The zucchini mostly found in Mexican markets, calabacita italiana, sometimes called Pipian in Latin stores throughout the US.)

Though in Mexico the zucchini that is mostly used is the calabacita italiana, which translates to italian zucchini, the one I find most often in the US is the larger, dark green zucchini. The first is smaller, a bit rounder, with a lighter green color speckled with cream. The second tends to be longer and with a deeper, darker and more uniform green color. Both work just as well, but the first tends to be a bit milder and sweeter than the latter.

There are countless ways in which calabacitas, or different kinds of zucchinis, are used. It may just be one of the most used vegetables in Mexican cooking. And all of its parts are used: the vegetable, the shoots (especially in tasty soups) and the seeds.

grating
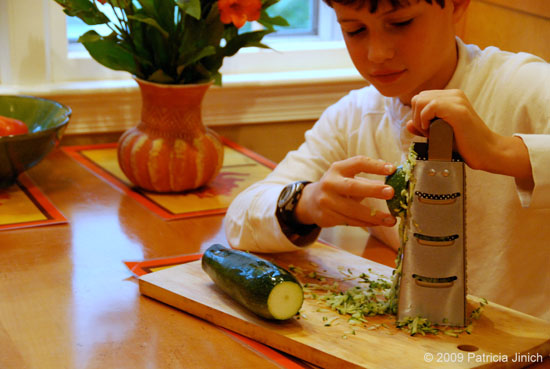
(While my youngest son loves to mash away with the molcajete, or anything else, my oldest has graduated to use the grater, which he does with worldly pride.)

Making this torte is as simple as can be: Grate and drain the zucchini.

grated zucchini
(Grated and drained zucchini. You can use a cheese cloth or a strainer and squeeze the juice out with your hands or a spoon)

Then mix it with the already beaten butter, eggs, a mix of rice flour, baking soda, baking powder, pinch of salt and sugar.

Then, into the oven, and that’s it.
zucchini torte mix
(There you go, a dangerous shot from an unexperienced photographer to give you that close up…)zucchini torte
(The zucchini bread before adding the powdered sugar, my preferred topping.)
I have been making this torte for quite some time now. The original recipe comes from Diana Kennedy’s The Art of Mexican Cooking, but it has gone through some adaptations over time.

And from what I can tell, it is about to go through even more: I was nicely surprised last week when I brought it to Ilana’s dinner. As she asked for details on it, she screamed out loud: Its gluten free! Thanks to the rice flour, which also gives the torte such a welcome grainy texture. So I called my mother to say I had accidentally found something else she can make, as she eats gluten free. As I described it, she decided it would be irresistible with grated Mexican Manchego, a cheese similar to Monterey Jack, on top. Turns out, it makes for a deliciously tanned, crispy cheesy top. Who can say no to that?

Though Diana Kennedy likes to eat it with a spoonful of creme fraiche seasoned with salt and pepper on top, I prefer to eat it with powdered sugar. But please, go ahead and choose what you are in the mood for…

Zucchini Torte main
Print Recipe
4.60 from 5 votes

Zucchini Torte

Each time a vegetable torte is included in the menu of one of my classes, I have noticed a similar trend: tortes have a warm and friendly reception, that turns into a loving embrace once participants make the recipe at home and find out they want to make it again and again. Not to be confused with the other kind of tortas, (tortes translates to tortas in Spanish…) Mexico’s favorite sandwich made with a crispy bread roll adapted from the baguette; tortes are a cross between a fluffy and moist bread, a savory pudding, and now that I think of it, also a souffle.
Prep Time10 minutes
Cook Time40 minutes
Course: Side Dish
Cuisine: Mexican
Keyword: mexican crema, pati's mexican table, Recipe, rice flour, Torta, Vegetarian, Zucchini
Servings: 10 to 12 people
Author: Pati Jinich

Ingredients

  • 1 1/2 pound zucchini ends trimmed, grated and strained, about 4 cups
  • 1/4 pound plus 4 tablespoons unsalted butter
  • 3 eggs at room temperature
  • 1 1/2 cup rice flour
  • 1/2 teaspoon baking powder
  • 1/2 teaspoon baking soda
  • Pinch Kosher or sea salt
  • 1/3 cup sugar
  • Powdered sugar optional
  • Creme fraiche or Mexican style cream seasoned with salt and pepper, optional

Instructions

  • Butter a 9x12 baking pan. Heat the oven to 350 degrees and place the rack in the middle of the oven.
  • Trim the ends off the zucchini and grate. Place in a colander and strain the juice either pushing with your hands or the back of a spoon, set aside.
  • In a bowl combine the rice flour, baking soda, baking powder and salt.
  • In a mixer, beat the butter at medium high speed for a couple minutes until creamy. Reduce the speed to low and incorporate the eggs one by one. After each egg add about 1/3 of the flour mixture, keep beating until thoroughly mixed. Lastly, add the strained zucchini and the sugar. Beat for another minute until the batter is well mixed and pour onto greased baking dish.
  • Place into the oven and bake for 40 minutes or until torte starts to show a nice golden tan and a toothpick comes out a bit moist but not wet. Remove from the oven, cut in squares and serve.
  • It can be eaten with sprinkled powdered sugar on top for a nice sweet spin, or with spoonfuls of creme fraiche or Mexican style cream seasoned with salt and pepper. Can be eaten hot, warm or cold. If there is any left, it can be kept covered outside of the refrigerator for a couple days.

Notes

Torta de Calabacitas

Micheladas and Spiced Up Pepitas: You Are Invited!

For Labor Day, our friends Jeannie and Bill invited us to their farm on the Eastern shore. Jeannie said snacks and grown up drinks are welcome. We can’t wait! Since we are going to be a large crowd, meals there are so leisurely and her family likes to try new things, I want to bring an interesting and friendly snack. Since I’ve been experimenting with pumpkin seeds, spiced up pumpkin seeds came to mind. Micheladas are a great pairing for them, especially since this may be one of the last weekends with enough heat for such drink.

Pumpkin seeds, Pepitas in Spanish, are one of the things I used to stuff in my suitcase when visiting Mexico. That’s because they have a mellow, somewhat nutty, almost sweet, barely chewy and nutritious nature, but also because of its multiple uses in Mexican cooking. They are used hulled and un-hulled, toasted or fried, to make salsas, moles, soups and drinks. There is more to Pepitas than being used for an unnoticeable role as a salad topping. So you can imagine my happiness when I began noticing their appearance in not just one, but many grocery stores here in the US.

pepitas 1
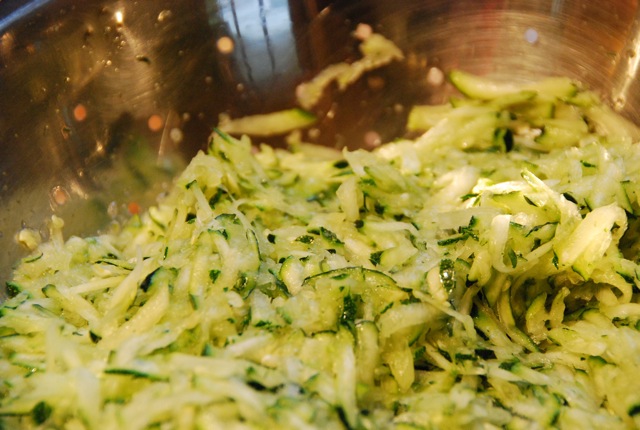
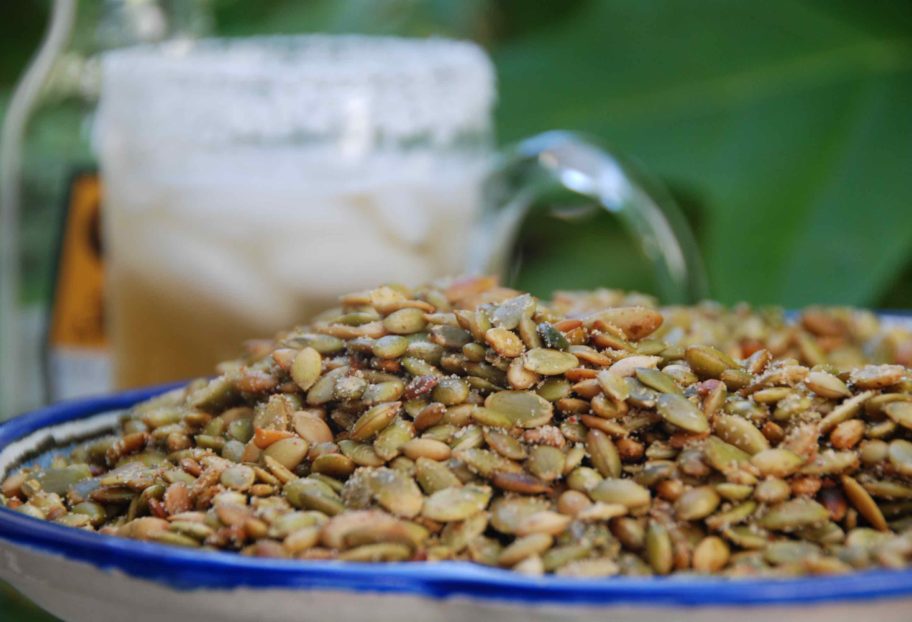
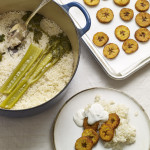
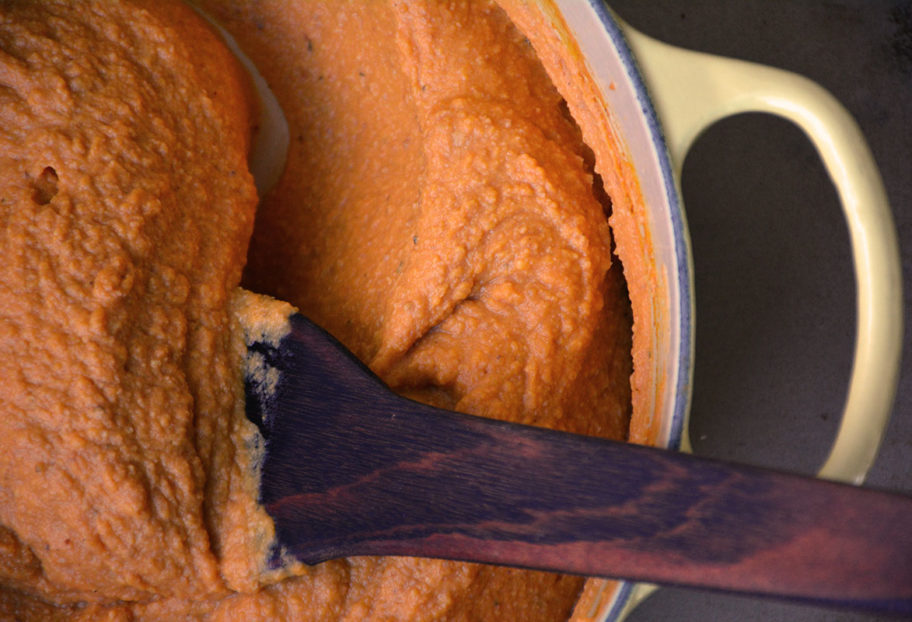
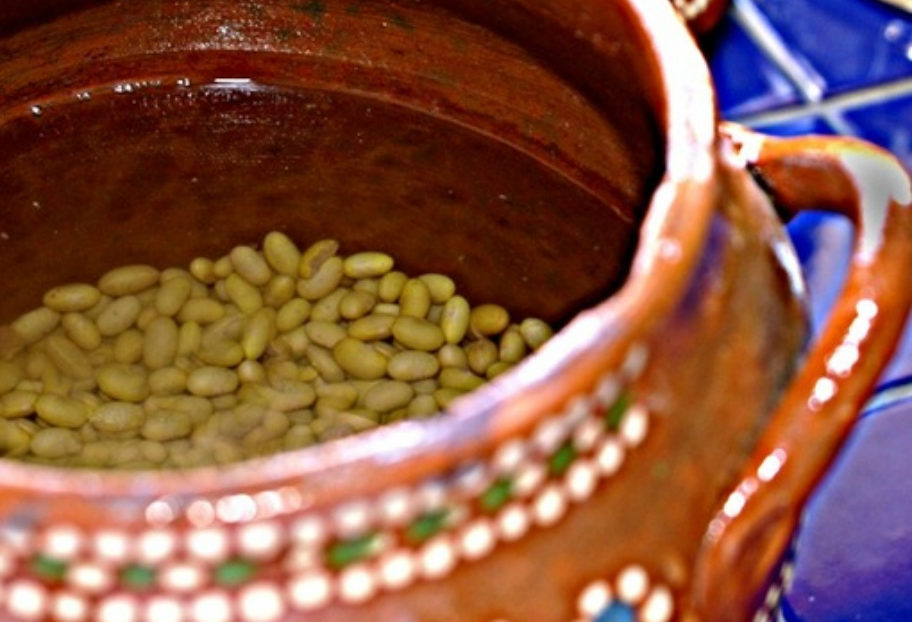
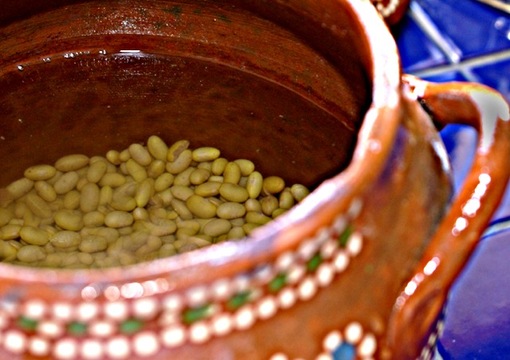
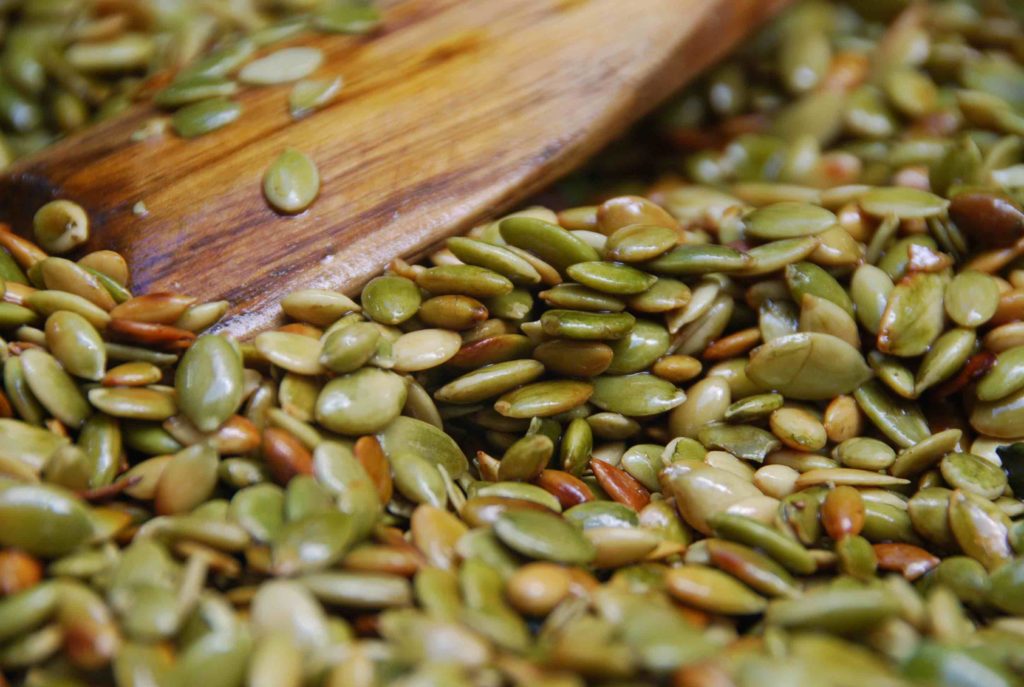
(Pepitas gently frying in my pan, popping and changing from an olive green to a light brown toasted color)

Pepitas are also a craved for snack for many Mexicans, including myself, when going to the movies. Un-hulled, soaked in salted water, dried and toasted, they are sold in little packages in street stands and bring long-lasting entertainment. It takes a couple hours to go through a small bag, as you place one by one between your teeth to crack the salted shell open and then triumphantly pop the hidden and gentle tasting Pepita into your mouth. You get the pleasure of repeating that again and again throughout the ups and downs of the film.

However, one of my favorite ways to eat Pepitas is hulled, toasted or lightly fried and tossed with ground dried Chile Piquí­n (which can be bought ready to use), salt and sugar. It takes five minutes to make this tasty crunchy nibble. If you make plenty, there is extra to use, not for an unnoticeable role but for a stellar one, on top of salads or fish. The mix of chile, salt and sugar makes them come alive in your mouth.

As for the Michelada, it is the ultimate Mexican way to drink beer. Beer purists: do not fear, you will like what you try. Non-beer drinkers: You will love beer this way.

Classic Michelada is made by pouring beer onto a cold or frozen glass mug with a salted rim (previously rubbed with lime) and freshly squeezed lime juice at the bottom. Some people add ice, some people don’t. For the more playful Michelada, a combination of salty ingredients (such as Maggi and Worcestershire sauces) and spicy ones (Tabasco, Valentina, Cholula, or any spicy sauce) are added before pouring the beer.

There is no agreement as to how to pour the beer. I make mine with lime juice, some dashes of Maggi, Worcestershire and Valentina, and pour the beer up to the salted rim. That way I can taste a bit of the salt around the rim with each sip. Some people pour the beer quickly so it goes over the rim and bubbles up with the salt so that the volcano explodes over their hands, and then they drink the top of the delicious disaster and everything is already mixed up (!)

Here are the super easy recipes for the Pepitas and the Micheladas… why work hard on Labor Day?

Spiced Up Pumpkin Seeds
Print Recipe
4.75 from 4 votes

Spiced Up Pumpkin Seeds

One of my favorite ways to eat Pepitas is hulled, toasted or lightly fried and tossed with ground dried chile piquín, salt and sugar. It takes five minutes to make this tasty crunchy nibble.
Prep Time0 minutes
Cook Time5 minutes
Total Time5 minutes
Course: Appetizer, Snack
Cuisine: Mexican
Keyword: chile piquín, pepitas, pumpkin seeds, snack, spiced
Servings: 1 1/2 cups of pepitas
Author: Pati Jinich

Ingredients

  • 1 1/2 cup hulled raw pumpkin seeds
  • 1 tablespoon corn, safflower or vegetable oil
  • 1 teaspoon ground chile piquín or ground Mexican chile, more or less to taste
  • 1 1/2 teaspoon kosher or coarse sea salt more or less to taste
  • 1 1/2 teaspoon sugar more or less to taste

Instructions

  • Heat the oil in a saute pan over medium heat. Once it is hot but not smoking add the pumpkin seeds. Saute, stirring often, for about 4 to 5 minutes, they will have begun making popping sounds and some of them will begin gaining a nice tanned brown color.
  • Transfer to a mixing bowl with a slotted spoon, leaving the remains of the oil behind in the pan. Sprinkle with the ground chile, salt and sugar and toss to coat. As they cool down, they will dry up and become crunchier. Eat or store covered with a lid. They will keep for about a week, if you don’t finish them before then.

Notes

Pepitas
dressed up Mexican beer or michelada
Print Recipe
5 from 4 votes

Dressed Up Mexican Beer

Dressed Up Mexican Beer recipe from Pati's Mexican Table Season 3, Episode 9 “Pot Luck Party”
Prep Time1 minute
Cook Time2 minutes
Total Time3 minutes
Course: Drinks
Cuisine: Mexican
Keyword: beer, hot sauce, lime, Maggi sauce, pati’s mexican table, soy sauce, Worcestershire sauce
Servings: 1 beer
Author: Pati Jinich

Ingredients

  • 1 beer mug chilled
  • Kosher or sea salt for coating the rim
  • 1 lime wedge
  • Ice cubes (optional)
  • 2 to 3 tablespoons freshly squeezed lime juice
  • 1 beer preferably Mexican, chilled
  • Dash of hot sauce like Tabasco Cholula or Valentina (optional)
  • Dash of a salty sauce like soy sauce Worcestershire or Maggi Sauce (optional)
  • Pinch of freshly ground black pepper (optional)
  • Pinch of kosher or coarse sea salt (optional)

Instructions

  • Pour a layer of salt onto a small plate. Rub the rim of a chilled beer mug with the lime wedge and dip the rim gently into the salt to coat. Place the ice cubes, if using, into the mug. If making a basic michelada, add the lime juice on top of the ice, then pour in the beer.
  • If making a michelada especial, salt the rim of a chilled beer mug as directed above, then place the optional ingredients, to taste, into the mug. Stir the mixture lightly then pour in the beer.

Notes

Michelada

Three tasty ways to eat ripe plantains

Ay, ay, ay! Patita, espérate mamacita! My nanny repeated, as she snatched the hot plantain tightly wrapped in aluminum foil, from my hands. Her hands were more resistant, she insisted, as they were older and had cooked so much. She would hold my chosen package with an open hand, so the camotero (sweet potato street cart man, who also sold plantains) could tear up the foil. As the steam flew up to the skies, he poured a more-than-any-child-could-wish-for amount sweetened condensed milk… and so it fell, sweet ounce, by thick ounce, onto that moist, rich, filling and immensely satisfying treat. Sheer joy, that was.

I devoured it in what seemed a couple bites, just to lick the last but yummiest remains from the crumbled foil. There we were, standing on the street corner where my family lived, mischievously laughing: it was already getting dark, almost dinnertime, and no, no, no, I wasn’t supposed to be having any. Oh dear, how I miss that woman! Now every time I eat a plantain, I get a sparkle of that sheer joy.

So I understand my boys when they rush out to the street, their heartbeats pumping so loud I can clap their rhythms, as I scream out wait, wait, wait!, as that annoying ice cream truck song approaches. Yes, right before dinner, thank you Mr. Ice Cream Man. I once felt that too, with an even more shrilling whistle coming out from the camotero street cart.

We used to eat cooked ripe plantains throughout the year, and ironically, they seemed to taste even better during the hot and rainy summer months.  As some people say, sometimes hot, beats the heat…

White Rice and Fried Plantains 1
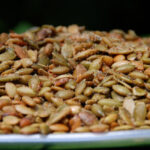
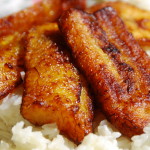
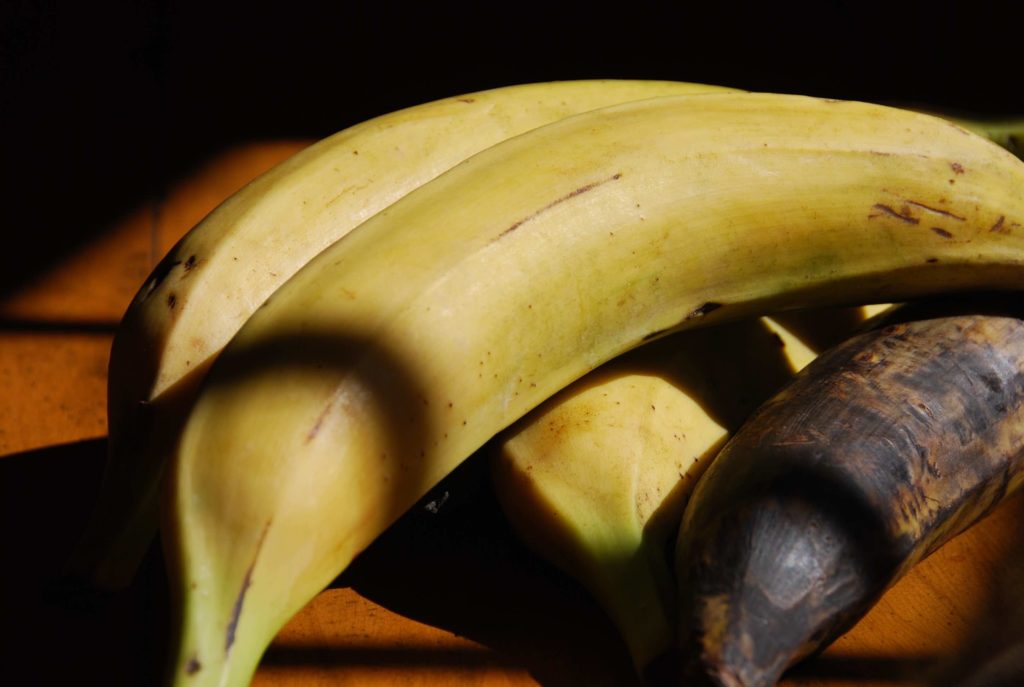
(Plantains on my dining room table, the one covered in black spots is ripe and ready to be cooked)

Plantains, called macho bananas, plátano macho, in many areas of Mexico, can just change gears and move from one course to another. Eaten as described above, they make an original dessert or an anytime sweet treat. Covered in foil and thrown on the grill, and along some grilled meat or chicken with a spicy kick, they make an incredible side. All you need is a simple salad and you have a wholesome tasty meal. If you forgot to eat them and you are already moving to dessert, just drizzle some sweet condensed milk, honey, sugar, Rompope, or ice cream on top! I don’t think one can say this about many other ingredients… maybe sweet potatoes or grilled pineapples…

Another option to eat ripe plantains, which is extremely popular, is to fry them, plátanos fritos. They are peeled, thickly and diagonally sliced (to make them pretty, why not?) and as they brown in the hot oil, their sugar caramelizes. So when you start to bite in, you get a sweet crunch, and when you are deep into the bite, you get a gently mushy and soft finish.

In Mexican cooking, fried plantains are famously eaten on top of white rice, as in the main post photo. This brings a nice contrast of sweet and soft with savory and coarse. If you want to go over the top, drizzle some Mexican or Latin style cream or sour cream as a finishing touch. Try that… and you will have a piece of sheer bliss too.

NOTE: Click here to read about plantains, how to buy them and how to recognize when they are ripe. Of course, there are other ways to eat them when they are not ripe, as they do in the Gulf Coast, but that is a topic for a future post… meanwhile enjoy one of these three ways to eat them ripe, or try them all!

fried plantains
Print Recipe
5 from 3 votes

Baked Plantains for Dessert

Plantains, called macho bananas, plátano macho, in many areas of Mexico, can just change gears and move from one course to another. They make an original dessert or an anytime sweet treat. Just drizzle some sweet condensed milk, honey, sugar, Rompope, or ice cream on top! 
Cook Time25 minutes
Course: Dessert, Snack
Cuisine: Latin American, Mexican
Keyword: Baked, Dessert, Plantains, Sweet, Sweetened Condensed Milk
Servings: 2 to 4 servings
Author: Pati Jinich

Ingredients

  • 2 ripe plantains
  • Sweetened condensed milk to your liking or honey, sugar, ice cream or rompope

Instructions

  • Preheat oven to 400°F. Individually wrap the plantains, with their skin on, in aluminum foil and place in a baking sheet in the oven (some people bake them without the aluminum foil, you can try it both ways).
  • Bake for about 25 minutes, until plantains are completely cooked through, very soft and sugar has begun to caramelize. Carefully open up the foil making a slit down the middle, open it up, and pour the condensed milk on top.

Notes

Platano Macho al Horno
fried plantains
Print Recipe
5 from 1 vote

Grilled Plantains

Plantains, called macho bananas, plátano macho, in many areas of Mexico, can just change gears and move from one course to another. Covered in foil and thrown on the grill, and along some grilled meat or chicken with a spicy kick, they make an incredible side. All you need is a simple salad and you have a wholesome tasty meal.
Prep Time0 minutes
Cook Time20 minutes
Total Time20 minutes
Course: Side Dish
Cuisine: Mexican
Keyword: Plantains, Platanos
Servings: 2 servings
Author: Pati Jinich

Ingredients

  • 2 ripe plantains

Instructions

  • Preheat grill to medium heat. Individually wrap the unpeeled plantains in aluminum foil and place on the grill.
  • Let them cook for about 20 to 25 minutes, until they are soft and cooked through. You may also cook them on the upper rack of the grill at a different temperature, but it may take more or less time.
  • You know they are ready when they feel extremely soft to the touch and the sugar has begin to caramelize.

Notes

Platanitos Fritos
Print Recipe
5 from 4 votes

White Rice and Fried Plantains

White Rice and Fried Plantains recipe from Pati's Mexican Table Season 2, Episode 6 “Fonda Favorites”
Prep Time15 minutes
Cook Time30 minutes
Total Time45 minutes
Course: Side Dish
Cuisine: Mexican
Keyword: celery, chicken broth, onion, pati’s mexican table, Plantains, rice, serrano chiles, sour cream
Author: Pati Jinich

Ingredients

  • 2 cups white rice
  • 3 tablespoons vegetable oil plus more for frying plantains
  • 1/2 cup white onion finely chopped
  • 4 cups chicken stock prepared or homemade
  • 1 celery stalk cut in half
  • 1 fresh parsley sprig
  • 1 tablespoon lime juice or to taste
  • 1 1/2 teaspoons kosher salt or to taste
  • 2 ripe plantains peeled and sliced
  • 1 serrano chile
  • sour cream to garnish, optional

Instructions

To prepare the rice:

  • Place the rice in a large bowl and cover with very hot water; let it soak anywhere from 5 to 10 minutes. Drain, rinse with cold water and drain again.
  • Heat the oil in a saucepan over medium-high heat. Add the rice and cook, stirring softly for 2 to 3 minutes. Incorporate the onion and stir, from time to time, until the rice begins to change to a milky-white color and feels and sounds heavier, as if it were grains of sand; about 3 to 4 more minutes.Pour in the chicken stock, along with the celery, parsley, lime juice, salt and whole chile.
  • When it comes to a rolling boil, cover the pot, reduce the heat to the lowest setting and cook until the rice is cooked through and the liquid has been absorbed, about 15 to 20 minutes. If the rice grains don’t seem soft and cooked through, add a bit more chicken broth or water and let it cook for another 5 more minutes or so.
  • Remove the pan from the heat and let it sit, covered, for 5 to 10 minutes. Fluff with a fork when ready to serve. Place the cooked plantains (below) on top. Place sour cream on the side for people to add to their rice and plantains if they like.

To prepare the plantains:

  • Note: The skin of the plantain should be almost entirely black when it is mature and ready to use in this recipe.
  • Peel the plantains and slice them diagonally into 1/4-inch thick slices.
  • In a sauté pan, over medium heat, add about 1/4-inch of oil. Heat the oil until hot but not smoking. Add the plantain slices and fry until browned but not blackened, about 2 minutes per side, the oil should be bubbling around their edges of the plantain slices as they cook.
  • Remove the plantains from the oil and drain them on a plate covered with paper towels.

Notes

Arroz Blanco con Plátanos Fritos

Unforgettable Rice from El Chepe

I wish each day had ten more hours so I could tell you about so many dishes already.

This is how behind I feel in all I want to share: Six weeks ago our family came back from the Copper Canyon in Mexico. I took notes, pictures, short videos, interviewed cooks, planted myself in their kitchens until forcefully uprooted by my husband, and ate like a mad woman from any interesting sounding dish, which was practically everything (partly with the purpose to come and tell you all about it…).

Then we came home, and life got in the way… I took longer to launch this site because I wanted to add more sections. By the time it was ready, so many weeks had gone by, I was eager to share more recent food excursions from my kitchen.

Yesterday, these red tomatoes reminded me of my delayed purpose. They looked perfectly ripe to become the base for that Mexican Style Rice we ate at the Chepe train (formally known as the Chihuahua al Pací­fico). It was unbelievable. Not only how good it tasted, but where and how it is made, every day.

Unforgettable rice from el chepe 2-thumb-510x342-1914
I expected to find scrumptious food along the Copper Canyon, but not aboard the train.  Used to pre-packaged sandwiches and microwaved hot dogs on the Amtrak, it was such a treat to choose from a full menu of home-style food.

As we sat on the cushy blue seats, we were amazed at how the individual place settings set on the wooden tables jumped without falling as the train rocked on the old wooden tracks.  With the light from the sun peeking through the window, the formally dressed waiters coming out of the kitchen appeared to step out from the Mexican 19th century, with charming mustaches in the like of the long gone Profirian era and all.

Unforgettable rice from el chepe 3-thumb-510x342-1916
More amazement, as they poured coffee, dancing as on a tight rope with the steaming pots at least 10 inches away from the cups they were aiming to fill. But even more amazement, after we tasted the food. Such good food on a train? I had puntas de filete with a side of refried beans, quesadillas and the best ever Mexican style rice. Even before dessert, this felt like a trip within the trip itself.

Each time, I would ask the waiter to introduce me to the cook in turn. There were not one but three cooks in a fully sized and stocked kitchen. Balancing as if on steady ground, up and down bridges, inside tunnels and around curves, they made some of the most comforting foods I can think of.

Unforgettable rice from el chepe 4-thumb-510x342-1918
Here is a tip:  when you go to the Chepe, disregard when train officers say the Restaurant is closed.  It seems to be a technique to help guests avoid long waits (or a bottleneck in the kitchen).  Go check it out yourself, there is typically no line and by the time they announce its open, the train ride may be over.  If you are not planning on going to the Chepe train soon, here is the recipe for that deliciously satisfying Mexican rice, shared by the chef in charge of the Chepe’s food and menu, Jesus Ley.

unforgettable rice from el chepe 5-thumb-510x342-1920
There are of course many variations to this dish. You can substitute fresh tomato puree for 1 1/2 cups of canned puree. Except for few rice dishes, I always add some fresh squeezed lime juice. It makes it crisp and helps the flavors of the other ingredients shine through, but it is optional.You can include the carrots and peas, exclude them or change that vegetable such as by adding green beans and red bell peppers.

And yes, that chile serrano you see in the picture is optional. You can omit it, substitute it for a jalapeño, and can add a couple more if you like. But if you are having Mexicans over, watch out: those chiles that have absorbed the flavors from all the ingredients in that pot, are the rice treasure we all hunt for.

mexican red rice
Print Recipe
4.67 from 6 votes

Mexican Style Rice

Arroz Rojo
Prep Time10 minutes
Cook Time25 minutes
Course: Side Dish
Cuisine: Mexican
Keyword: carrots, chicken broth, lime, Mexican rice, pati's mexican table, peas, rice, serrano chiles, Tomatoes
Servings: 6 to 8 people
Author: Pati Jinich

Ingredients

  • 2 cups white rice
  • 2 tomatoes or about 1 pound, quartered
  • 1/3 cup white onion roughly chopped
  • 2 garlic cloves peeled
  • 1 1/2 teaspoons kosher or sea salt or more to taste
  • 3 tablespoons safflower or corn oil
  • 3 1/2 cups chicken or vegetable broth or water
  • 1 tablespoon fresh lime juice optional
  • 2 parsley sprigs
  • 3/4 cup carrots peeled and diced, optional
  • 1/2 cup shelled green peas fresh of frozen, optional
  • 1 or 2 chiles serranos optional

Instructions

  • In a bowl, soak the rice in hot water for about 5 minutes. Rinse with cold water and drain very well.
  • While the rice soaks, purée the tomatoes in the blender along with the onion, garlic and salt. Pass through a strainer and reserve.
  • Heat the oil in a thick heavy skillet (if you have one with a transparent lid, pick that one) over medium high heat until hot but not smoking. Add the rice and sauté, stirring often, until the color of the rice changes to a strong milky white and it shows more resistance and makes a heavier sound as you stir it around, probably about 3 to 4 minutes.
  • Pour in the strained tomato purée, mix it gently and let it cook until the color of the purée has darkened, thickened and is mostly absorbed, about 3 more minutes.
  • Stir in the chicken or vegetable broth and lime juice, give it a gentle stir and top with the parlsey sprig, the diced carrots, peas and serrano chiles, if so desired.
  • Let it all come to a boil, and when it does, put the cover on and reduce the heat to low and cook for about 20 minutes. Here is where that transparent lid becomes so handy, as you can see what is going on inside the pot without losing steam. You know the rice is ready when it is cooked through and tender, most of the liquid has been absorbed, but there is a lot of moisture in the pot. If the rice is not yet tender and the liquid has dried up, add a couple tablespoons more water, cover again and let it cook for a couple more minutes.
  • Let the rice sit covered for at least 5 minutes before you fluff with a fork and serve. You may also make it beforehand and reheat it covered over low heat with a tablespoon of water.