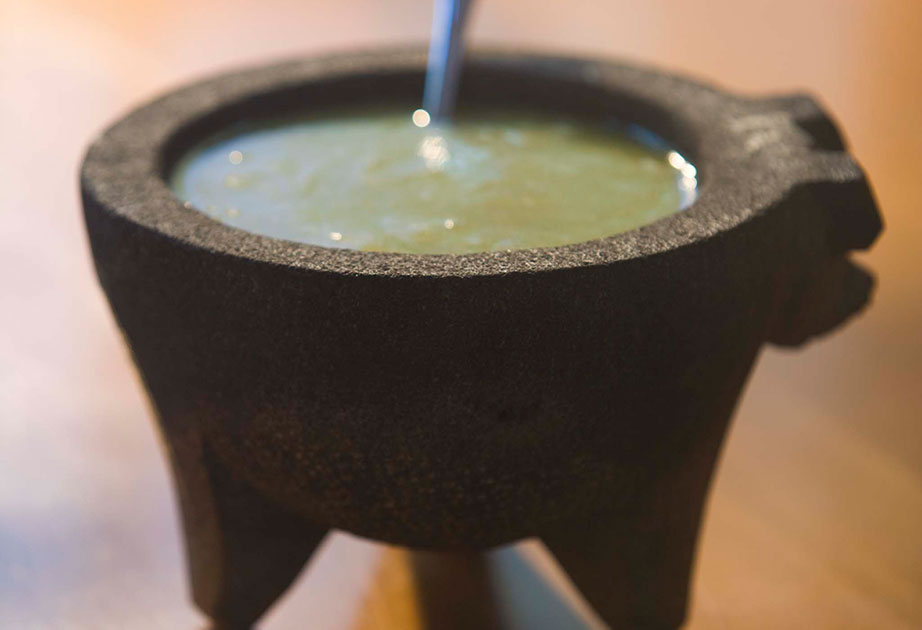
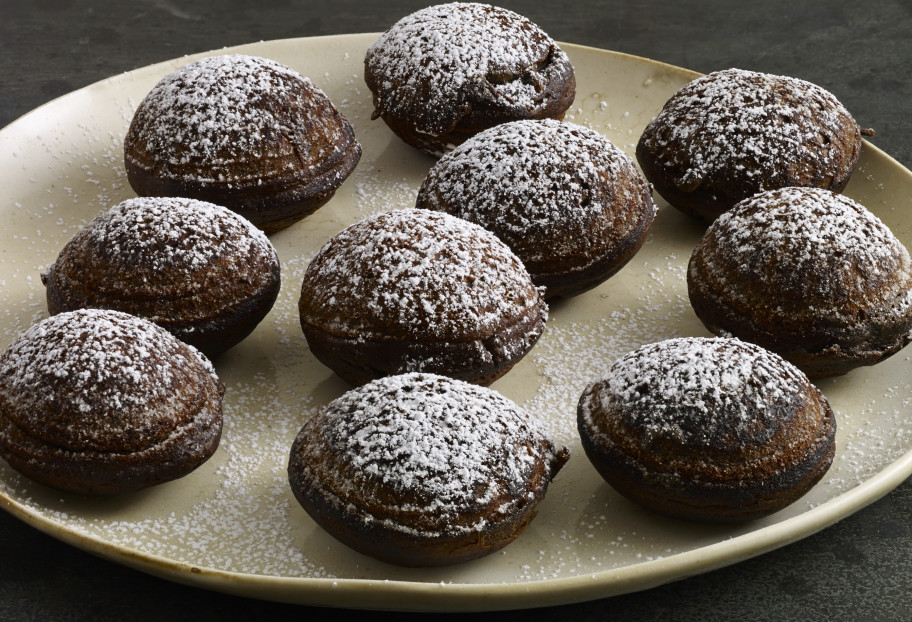
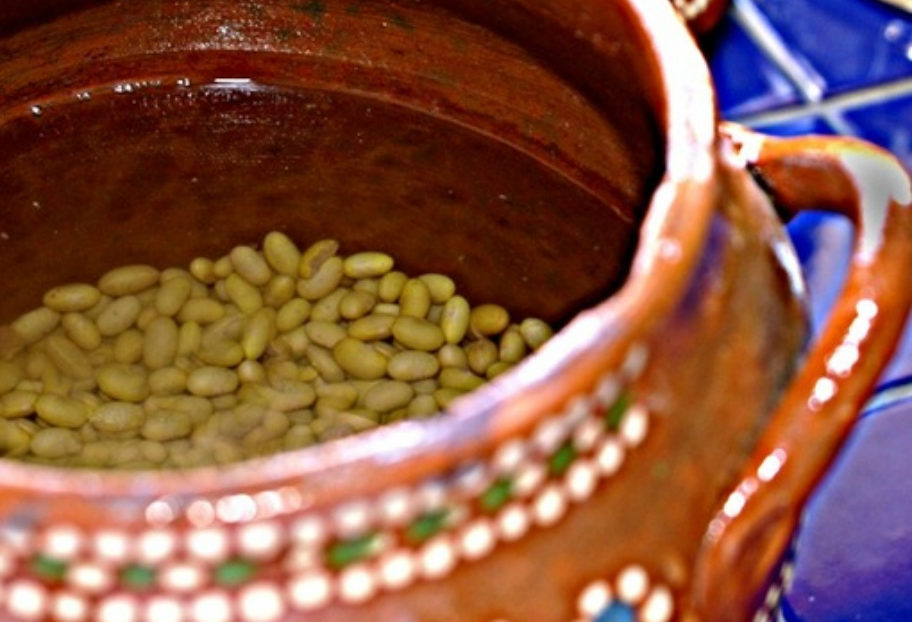
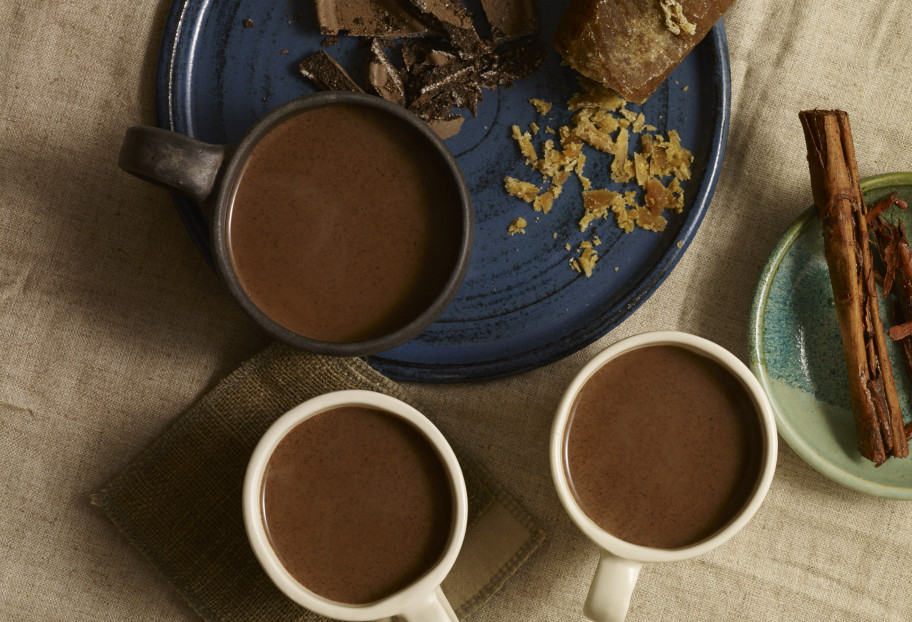
Breakfast & Brunch

Chocolate Atole

Print Recipe
4.58 from 7 votes

Chocolate Atole

Chocolate Atole recipe from Pati's Mexican Table Season 4, Episode 5 “Tamaliza!”
Prep Time5 minutes
Cook Time10 minutes
Total Time15 minutes
Course: Drinks
Cuisine: Mexican
Keyword: atole, Chocolate, cinnamon, masa, mexican chocolate, pati's mexican table, piloncillo
Servings: 8 servings
Author: Pati Jinich

Ingredients

  • 1 cup corn masa flour
  • 4 cups warm water
  • 4 cups milk
  • 8 ounces Mexican chocolate for drinking such as Abuelita, grated or cut into chunks (about 1 cup)
  • 2 ounces grated piloncillo or brown sugar (about 1/4 cup)
  • 1 cinnamon stick about 3-inches long

Instructions

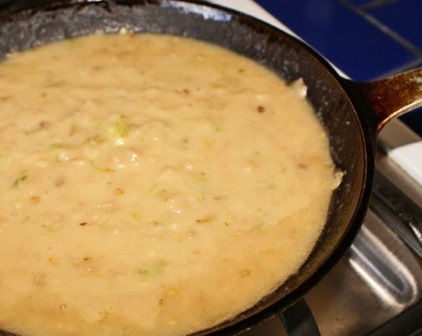
  • Stir the corn masa flour into the warm water. Let it sit for a couple minutes and strain it onto a saucepan set over medium heat. Incorporate the milk and let it simmer for 3 to 4 minutes, so it will begin to thicken. Incorporate the piloncillo or brown sugar, the chocolate and the cinnamon stick. Simmer for about 5 minutes, stirring here and there, until the chocolate and the piloncillo dissolve. Serve hot.

Notes

Champurrado

Juju’s Mango Smoothie

Print Recipe
4.84 from 6 votes

Juju’s Mango Smoothie

Juju’s Mango Smoothie recipe from Pati's Mexican Table Season 4, Episode 1 "Good Morning, Mexico!"
Prep Time5 minutes
Cook Time3 minutes
Total Time8 minutes
Course: Drinks
Cuisine: Mexican
Keyword: banana, breakfast, mango, orange juice, pati's mexican table, smoothie, vanilla
Servings: 3 cups
Author: Pati Jinich

Ingredients

  • 2 cups diced fresh mango or thawed from frozen
  • 1 teaspoon Mexican vanilla extract
  • 2 cups orange juice preferably fresh squeezed
  • 1 ripe banana sliced

Instructions

  • Combine the mango, vanilla, orange juice, and banana in a blender and puree until smooth. Add a couple handfuls of ice cubes and puree until well blended.

Notes

Licuado de Mango de Juju

Big Brunch Enchiladas

Big Brunch Enchiladas
Print Recipe
4.84 from 6 votes

Black Bean Sauce Egg Enchiladas with Chorizo and Queso Fresco

Black Bean Sauce Egg Enchiladas with Chorizo and Queso Fresco recipe from Pati's Mexican Table Season 4, Episode 1 “Good Morning, Mexico!”
Prep Time10 minutes
Cook Time30 minutes
Total Time40 minutes
Course: Breakfast
Cuisine: Mexican
Keyword: Avocado, black beans, chipotles in adobo, Chorizo, corn tortillas, cotija, Eggs, Enchilada, goat cheese, pati's mexican table, Pickled Jalapeños, queso fresco
Servings: 12 enchiladas
Author: Pati Jinich

Ingredients

  • 3 cups cooked black beans and their cooking broth or 2 cans black beans, drained, plus 1 cup water
  • 2 tablespoons adobo sauce from chipotles in adobo sauce
  • 1 chipotle chile in adobo sauce seeded, optional
  • 2 tablespoons vinegary sauce from pickled jalapeños or escabeche
  • 1 pound Mexican chorizo casings removed, roughly chopped
  • 3 tablespoons vegetable oil
  • 1/3 cup chopped scallions plus extra for garnish
  • 8 large eggs beaten with a fork or whisk until foamy
  • 1/2 teaspoon kosher or coarse sea salt or to taste
  • 12 corn tortillas
  • 1 cup crumbled queso fresco cotija, farmer’s cheese, or goat cheese
  • 4 to 6 Pickled jalapeños seeded and chopped, optional as garnish
  • Ripe avocado slices optional

Instructions

  • Place the cooked black beans and their cooking broth, or water if using canned beans, in a blender along with the sauce from the chipotles in adobo and the vinegary sauce from the pickled jalapeños, puree until smooth. Place the puree in a medium saucepan and heat over medium-low heat, stirring occasionally, until very hot. Reduce the heat to the lowest possible setting and keep warm. The puree should have the consistency of heavy cream.
  • Heat a large skillet over medium heat. Once it is hot, add the chorizo and cook, crumbling as it cooks with a wooden spoon or spatula, until it has browned and crisped, about 5 to 6 minutes. Scrape into a bowl, cover and set aside.
  • Pre-heat a comal or cast iron skillet over medium heat.
  • Meanwhile, heat the oil in a medium, or 10-inch, nonstick skillet over medium-high heat until hot but not smoking. Add the scallions and cook until soft and translucent and the edges begin to brown lightly, about 3 minutes. Reduce the heat to medium-low, pour in the beaten eggs, sprinkle with the salt, and cook, stirring often and gently, until desired doneness. I like to stop cooking the eggs when they are still soft and tender, not dry, which takes about 4 to 5 minutes. Remove from the heat.
  • Heat the corn tortillas, a pair at a time, on the pre-heated comal or skillet about 30 seconds to 1 minute per side. You want them to be completely heated and even slightly toasted. (Alternatively, the tortillas can be quickly “passed through hot oil,” that is quickly fried, 10 seconds per side, in pre-heated oil in a medium skillet over medium heat.) One by one, place the heated tortillas on a plate and spoon about 3 tablespoons of the scrambled eggs onto each tortilla. Roll and place on a platter seam side down. Continue with the remaining tortillas.
  • When all the tortillas are stuffed, rolled, and set on the platter, pour the bean puree on top. Cover with the cooked chorizo, crumbled queso and extra scallions. Add as much chopped pickled jalapeño as you like, as well as avocado slices.

Notes

Enchiladas de Huevo con Salsa de Frijol con Chipotle, Chorizo y Queso Fresco

Big Brunch Enchiladas

An intrinsically Mexican dish, enchiladas are not one but a multitude of possibilities that can dress up a corn tortilla. Simply the sound of the word enchilada makes any Mexican’s mouth water in less than a millisecond and is cause for celebration.

One of the dearest antojos or antojitos (translate to whims or little whims), enchiladas are corn tortillas that may be heated up or lightly fried, either folded or rolled, with or without a variety of fillings, always bathed in a salsa or sauce, and garnished with a a few from a long list of possible toppings. From crumbled queso fresco and a drizzle of crema, to raw or pickled onion, chiles or other vegetables, Mexican avocado, chorizo, shredded lettuces and cabbage, just to name some.

Considering the variations of fillings, salsas, and toppings, enchiladas not only embody different regional cuisine’s identities, but also the whims of different cooks…

Here is my latest one; I call it the Big Brunch Enchilada.


Before filling the corn tortillas with soft scrambled eggs, seasoned with sautéed scallions, I opted to quickly fry the tortillas. As we Mexicans say, pasamos las tortillas por aceite caliente: we dip the tortillas in very hot oil for a couple seconds to make them malleable and even more resilient to withhold the sauce and garnishes. If the oil is very hot, the tortilla will not absorb the oil, but will be transformed. You can opt to not fry and instead heat the tortillas on a hot comal, skillet, or griddle, for a minute per side until thoroughly hot and barely crisp.

However, please: for the love of anyone or anything you love the most, don’t use flour tortillas to make enchiladas.

Just, please, don’t? I am begging here.

Flour tortillas are sweeter than corn tortillas, they are less resilient to withhold sauce, fillings, and garnishes and become a mushy mess of the worst sorts if given the enchilada treatment.

Please, please, please, proudly stick to corn tortillas.

big brunch enchiladas
As for the salsa or sauce, the most well known enchiladas are verdes soaked in a salsa verde, enchiladas rojas soaked in a red salsa, and enchiladas de mole. All, of course, with their multiple variations.

For my Big Brunch ones, I am bathing them with a rich, thick and earthy black bean sauce, common in the Mexican Gulf Coast. I tend to have trouble deciding whether to eat my black beans with chipotles in adobo sauce or pickled jalapeños. Truth is, if I use one, I usually end up adding the other one too and mixing them up. So here, I am adding and combining both. The homemade black beans, or store bought ones if you don’t have time to cook them, are seasoned with the smoky, sweet and spicy adobo sauce from chipotles in adobo, as well as the vinegary pickling sauce from the pickled jalapeños. I couldn’t be happier with the result.

Forget about a light garnish, add tons of meaty and crisp bites of Mexican chorizo.

big brunch enchiladas
Fresh, tart and slightly salty crumbled queso fresco.

big brunch enchiladas

Bright fresh scallions (I love scallions…) that contrast with the cooked scallions scrambled with the eggs.

big brunch enchiladas
To finish off, punchy chopped pickled jalapeños go on top.

big brunch enchiladas
I liked these enchiladas so much, I couldn’t even decide on an ending photo for the blog post. So I am showing you the view from the top and from the side.

big brunch enchiladas
These enchiladas ended up being not an antojito but an antojote, a huge antojo of mine. Made to be eaten for a big brunch, they passed the critical approval of all my boys to the point that they were fighting for each piece on this plate. This is the one time when I don’t complain about them fighting.

Since this is a sign of success in my kitchen, the recipe is now yours!

I hope you give it a try for your Cinco de Mayo fiesta, your Mother or Father’s day brunch, or anytime you may want to indulge. As complex as they may sound, they are super easy and fast to make. Here’s how.

big brunch enchiladas
Print Recipe
4.60 from 5 votes

Enchiladas with Chipotle Black Bean Sauce, Chorizo and Queso Fresco

An intrinsically Mexican dish, enchiladas are not one but a multitude of possibilities that can dress up a corn tortilla. Simply the sound of the word enchilada makes any Mexican’s mouth water in less than a millisecond and is cause for celebration. One of the dearest antojos or antojitos (translate to whims or little whims), enchiladas are corn tortillas that may be heated up or lightly fried, either folded or rolled, with or without a variety of fillings, always bathed in a salsa or sauce, and garnished with a a few from a long list of possible toppings. 
Prep Time10 minutes
Cook Time30 minutes
Course: Antojos, Breakfast
Cuisine: Mexican
Keyword: Avocado, black beans, chipotles in adobo, Chorizo, corn tortillas, Eggs, Enchilada, pati's mexican table, Pickled Jalapeños, queso fresco
Servings: 12 enchiladas
Author: Pati Jinich

Ingredients

  • 3 cups cooked beans and 1cup of their cooking broth or 2 drained cans black beans plus 1 cup water
  • 2 tablespoons adobo sauce from chipotle chiles in adobo sauce
  • 2 tablespoons vinegary sauce from pickled jalapeños in vinegar or escabeche
  • 1 pound Mexican chorizo casings removed, roughly chopped
  • 3 tablespoons vegetable oil plus more oil if frying the tortillas
  • 1/3 cup chopped scallions plus extra for garnish
  • 9 large eggs beaten with a fork or whisk until foamy
  • 1/2 teaspoon kosher or coarse sea salt or to taste
  • 12 corn tortillas
  • 1 cup crumbled queso fresco cotija, farmer’s cheese, or goat cheese
  • 6 to 8 pickled jalapeños seeded and chopped, for garnish
  • Ripe Mexican avocado slices optional

Instructions

  • Place the cooked black beans and cooking broth (or water if using canned) in a blender, along with the sauce from the chipotles in adobo and the vinegary sauce from the pickled jalapeños, and puree until smooth. Place in a medium saucepan, heat over medium-low heat, stirring occasionally, until very hot. Reduce the heat to the lowest possible setting and keep warm. The puree should have the consistency of heavy cream.
  • Heat a large skillet over medium heat. Once it is hot, add the chopped chorizo and cook, crumbling as it cooks with a wooden spoon or spatula into small bite sized pieces, until it has browned and crisped, about 5 to 6 minutes. Scrape into a bowl, cover and set aside.
  • Pre-heat a comal or cast iron skillet over medium heat.
  • Heat the oil in a medium 10-inch nonstick skillet over medium heat until hot but not smoking. Add the scallions and cook until soft and translucent and the edges begin to brown lightly, about 4 minutes. Reduce the heat to medium-low, pour in the beaten eggs, sprinkle with the salt, and cook, stirring often and gently, until desired doneness. I like to stop the cooking when the eggs are still soft and tender, not dry, which takes about 4 to 5 minutes. Remove from the heat.
  • Heat the corn tortillas, a pair at a time, in the pre-heated comal or skillet, about 1 minute per side, until completely heated through and even slightly toasted. Alternatively, you can heat enough oil to have 1/2" in a medium skillet set over medium heat, once very hot but not smoking, quickly pass each tortilla through the oil (4 to 5 seconds) and place on a plate or drying rack covered with paper towels. You know the oil is ready if when you dip a tortilla, the oil bubbles actively all around the edges and the tortillas begin to puff up after a few seconds.
  • One by one, place on a plate and spoon about 2 generous tablespoons of the scrambled eggs onto the center of tortilla. Roll it into a soft taco and place in a platter, seam side down.
  • When all the tortillas are stuffed and rolled on the platter, pour the bean puree on top. Cover with the cooked chorizo, crumbled queso and extra scallions. Add as many chopped pickled jalapeños as you like. Decorate with ripe avocado slices if you want to take those enchiladas way over the top.

Notes

Enchiladas de Huevo con Salsa de Frijol con Chipotle, Chorizo y Queso Fresco

Yucatán Style French Toast: Ultra Decadent

It’s ironic. The farthest away from Mexico I’ve been, the closest I’ve felt to my home country and the more I’ve gotten to know it.

Namely, there are 2,419 miles between my home in the DC area and the home I was born and raised in, in Mexico City (I’ve seen it in Google maps a thousand times with my boys), it’s a 44-hour drive if you go non-stop and a 5-hour flight with no connections.

Distance matters. It weighs, in tons of pounds of nostalgia that can be soothed in the kitchen. Distance has made my time in Mexico intense and adventurous, and the foods I am able to replicate in my American kitchen that much more precious.

It has been 15 years since we packed our bags to move from Mexico City to Texas. Since then, I’ve taken every opportunity to go back to visit. There is always something new to learn and something to rediscover. And there is always a dish that sticks with me in such a way that it has me running back home to make it for my boys. If they request it, time and again, it becomes a home staple that I hope to pass on.

That’s the case with the ultra decadent Yucatán style French toast, also known as caballeros pobres. I even included it on an episode called Brunch at the Jinich Home, from Season 3 of my TV series. It is very similar to a dish called Capirotada, in fact, some consider it Yucatan’s version of it.

Pati's Mexican Table shoot
Here’s Dan, our amazing director, showing me how the food looked on camera on the set at home.

We love eating it on Sundays for a late and lazy brunch.  It marks the weekend for us, when we can linger at the table. When I don’t mind making things that may have a few more steps, or may be messier to prepare, all of which the boys love to take on.

Dany and I tasted it for the first time in Yucatán 5 years ago. As we sat down at Los Almendros, a classic restaurant in Mérida, I did what I always do – which drives Dany crazy – and asked the waiter 3 questions:

1. What’s your favorite thing to eat from the menu? I can hear Dany saying “what do you care what he likes to eat Pati, what if he has a completely different taste preference than you, or what if he is pushing things out of the kitchen that aren’t selling?”

2. What is the most traditional food on the menu? I can hear Dany saying “some dishes may be included to show the restaurant’s authenticity regardless of how good they may be…”

3. What is, by far, the best seller here? I can practically see Dany rolling his eyes…

For #1, waiter said “caballeros pobres!” The poetic and contrasting name of the dish hooked me: translates to “poor gentlemen”. For #2, he said “caballeros pobres, it has been on the menu since the restaurant opened in 1962, it’s a dessert that’s existed since anyone in Merida can remember.” By that point I was ready to run to the kitchen to get one. For #3, he said “everybody orders caballeros pobres.” Ok. Done deal.

I am a fan of the French toast food category. The Yucatán style, however, is in a  league of it’s own.

french bread slices

It uses what is known in Mexico as pan francés or French bread, which is like a baguette but a bit thicker. Some versions use bolillos or teleras (just smaller in size). You are safe to use any crusty bread of your choice.

Then the thick slices are entirely soaked, drenched, in a mix of milk, vanilla and sweetened condensed milk. You heard that right: sweetened condensed milk.

pouring sweetened condensed milk

You know you want it.

I made it for a class on Yucatecan food at the Mexican Cultural Institute.  The 120 attendees were all oohs and ahs when I demoed the dipping of the bread in the sweetened condensed milk mix. Practically every one, wanted seconds, which I didn’t plan for.

coating bread slices

There’s more. Instead of dunking the bread in beaten whole eggs, the eggs are separated. The egg whites are beaten until stiff peaks are formed, as in a meringue, then the yolks are gently added to form a thick coating: a capeado.

dipping bread into egg mix

Hence, there may lay the gentlemen status of an everyday bread that is first soaked in a sweetened condensed milk bath, to be then fully dressed in a fluffy cape.

coating bread in egg mixture

Once luxuriously dressed, it is crisped and browned to golden status.

frying the french toast

That is not all: though at home we can happily eat it like that with a bit of honey, maple syrup or confectioner’s sugar.

fried french toast without syrup

The caballeros pobres are then sauced with a simple syrup flavored with true cinnamon, a few whole cloves and raisins.

syrup

You can make the syrup ahead of time and reheat it. You can also make it while you are dressing and browning the bread.

Wait: I am still missing the last garnish: chopped, crunchy, nutty almonds.

finished french toast with syrup and garnishes

Ok, wait, again: Some people add sherry to the syrup. That takes it to adult territory, which would pair well for a grown up brunch.

Of all the versions of Yucatán style french toast this recipe below is my favorite. Crispy, chewy, moist. I prefer to eat it hot and with the warm syrup on top as a main dish for a weekend breakfast or brunch. However, in Yucatán it is traditionally served very cold and for dessert. Then again, I have to admit that I always make extra to have leftovers in the refrigerator, so I can sneak into the kitchen at just about anytime, to eat them cold.

yucatan style french toast
Print Recipe
5 from 2 votes

Yucatán-Style French Toast

Of all the versions of Yucatán style french toast this recipe below is my favorite. Crispy, chewy, moist. I prefer to eat it hot and with the warm syrup on top as a main dish for a weekend breakfast or brunch. However, in Yucatán it is traditionally served very cold and for dessert. Then again, I have to admit that I always make extra to have leftovers in the refrigerator, so I can sneak into the kitchen at just about anytime, to eat them cold.
Prep Time35 minutes
Cook Time10 minutes
Course: Breakfast
Cuisine: Mexican
Keyword: almonds, bread, ceylon, cinnamon, raisins, Sherry, Sweetened Condensed Milk, vanilla
Servings: 6 to 8 servings
Author: Pati Jinich

Ingredients

For the syrup:

  • 4 cups water
  • 1 1/2 cups granulated sugar
  • 1/4 cup raisins or to taste
  • 1 ceylon or true cinnamon stick
  • 3 whole cloves
  • 2 tablespoons Dry Sherry optional

For the toast:

  • 6 eggs separated
  • 1 cup milk
  • 1 14-ounce can sweetened condensed milk
  • 1 tablespoon vanilla extract
  • Vegetable oil for frying
  • 1 large French baguette or thick baguette of your choice cut into 3/4-inch slices
  • 1/2 cup chopped almonds

Instructions

  • Place a medium saucepan with the water, sugar, raisins, cinnamon and cloves over medium heat. Bring to a simmer and let it cook until it achieves the consistency of a light syrup and the flavors from the spices have infused the liquid, about 35 minutes. Turn off the heat. If you like a hint of alcohol in your dessert, add the sherry. Remove the cinnamon stick and cloves. Cover to keep warm.
  • Meanwhile, beat the egg whites in the bowl of an electric mixer or with a hand mixer over medium-high speed until they hold stiff peaks. Reduce the speed to low, add the yolks one by one and continue beating just until incorporated, so the volume will not decrease much.
  • In a large bowl, combine the milk, sweetened condensed milk and vanilla, stir until incorporated.
  • Set the bowl with the milk mixture beside the bowl with the beaten egg whites and yolks.
  • Fill a large sauté pan with about 1/4-inch of oil and heat over medium heat until hot, but not smoking, and you see ripples in the oil when you tilt the pan.
  • One at a time, dunk each piece of bread in the milk mixture until soaked, immediately dip into the egg mixture to completely cover, and place the coated slice in the hot oil. Fry for about a minute on one side, until golden brown, flip to the other side and do the same. Add as many bread pieces as will fit into the pan without over-crowding. When finished frying, place the bread pieces on a baking dish covered with paper towels to drain.
  • Traditionally, the “poor gentleman” pieces are placed on a platter, covered with the syrup and refrigerated. But I think they are a thousand times tastier served hot! Cover the pieces with warm syrup, sprinkle chopped almonds on top and serve.
  • If you have leftovers, cover the battered and fried bread pieces with the remaining syrup and almonds, and store covered in the refrigerator. I admit they are also fabulous cold.

Notes

Caballeros Pobres

Yucatán-Style French Toast

Yucatan style french toast
Print Recipe
4.17 from 6 votes

Yucatán-Style French Toast

Yucatán-Style French Toast recipe from Pati's Mexican Table Season 3, Episode 10 “Brunch at the Jinich House”
Prep Time35 minutes
Cook Time10 minutes
Total Time45 minutes
Course: Breakfast
Cuisine: Mexican
Keyword: almonds, bread, ceylon, cinnamon, cloves, pati's mexican table, raisins, Sherry, Sweetened Condensed Milk
Servings: 6 to 8 servings
Author: Pati Jinich

Ingredients

  • 4 cups water
  • 1 1/2 cups granulated sugar
  • 1/4 cup raisins or to taste
  • 1 ceylon or true cinnamon stick
  • 3 whole cloves
  • 2 tablespoons Dry Sherry optional
  • 6 eggs separated
  • 1 cup milk
  • 1 14-ounce can sweetened condensed milk
  • 1 tablespoon vanilla extract
  • Vegetable oil for frying
  • 1 large French baguette or thick baguette of your choice cut into 3/4-inch slices
  • 1/2 cup chopped almonds

Instructions

  • Place a medium saucepan with the water, sugar, raisins, cinnamon and cloves over medium heat. Bring to a simmer and let it cook until it achieves the consistency of a light syrup and the flavors from the spices have infused the liquid, about 35 minutes. Turn off the heat. If you like a hint of alcohol in your dessert, add the sherry. Remove the cinnamon stick and cloves. Cover to keep warm.
  • Meanwhile, beat the egg whites in the bowl of an electric mixer or with a hand mixer over medium-high speed until they hold stiff peaks. Reduce the speed to low, add the yolks one by one and continue beating just until incorporated, so the volume will not decrease much.
  • In a large bowl, combine the milk, sweetened condensed milk and vanilla, stir until incorporated.
  • Set the bowl with the milk mixture beside the bowl with the beaten egg whites and yolks.
  • Fill a large sauté pan with about 1/4-inch of oil and heat over medium heat until hot, but not smoking, and you see ripples in the oil when you tilt the pan.
  • One at a time, dunk each piece of bread in the milk mixture until soaked, immediately dip into the egg mixture to completely cover, and place the coated slice in the hot oil. Fry for about a minute on one side, until golden brown, flip to the other side and do the same. Add as many bread pieces as will fit into the pan without over-crowding. When finished frying, place the bread pieces on a baking dish covered with paper towels to drain.
  • Traditionally, the “poor gentleman” pieces are placed on a platter, covered with the syrup and refrigerated. But I think they are a thousand times tastier served hot! Cover the pieces with warm syrup, sprinkle chopped almonds on top and serve.
  • If you have leftovers, cover the battered and fried bread pieces with the remaining syrup and almonds, and store covered in the refrigerator. I admit they are also fabulous cold.

Notes

Caballeros Pobres

Huevos Rancheros with Zucchini

huevos rancheros with zucchini
Print Recipe
4.20 from 5 votes

Huevos Rancheros with Zucchini

Huevos Rancheros with Zucchini recipe from Pati's Mexican Table Season 3, Episode 10 “Brunch at the Jinich House”
Prep Time10 minutes
Cook Time30 minutes
Total Time40 minutes
Course: Breakfast
Cuisine: Mexican
Keyword: Eggs, jalapeno, onion, pati's mexican table, Tomatoes, Zucchini
Servings: 4 servings
Author: Pati Jinich

Ingredients

  • 3 tablespoons vegetable oil
  • 1 cup chopped white onion
  • 1 jalapeño finely chopped, more or less to taste
  • 1 1/2 pounds ripe Roma tomatoes cored and chopped, don’t discard the seeds (about 5 to 7 tomatoes)
  • 1 large or 2 medium zucchinis chopped (about 2 cups)
  • 8 eggs
  • 1/2 teaspoon vegetable oil to cook the eggs

Instructions

To make the salsa:

  • In a large skillet, heat 3 tablespoons of oil over medium heat until hot, but not smoking, then add the onion and jalapeño, cook, stirring occasionally, until completely soft and translucent, about 6 to 8 minutes. Raise the heat to medium-high, add the tomatoes and cook until they become soft, juicy and mushy, about 15 minutes.
  • Reduce the heat to low, add the zucchini, cover, and cook for about 6 minutes or until zucchini is cooked through but still with a crisp bite, and the tomatoes are completely mushy. Remove the lid and turn off the heat.

To make the eggs:

  • Heat a small, 6-inch non-stick skillet over medium-low heat for at least 5 minutes. Add half a teaspoon oil, once hot, crack two eggs at a time into the pan, sprinkle with salt to taste, cover with a lid, and cook to your preferred doneness. I give them about 5 minutes, as I like the whites fully cooked and the yolks runny. Serve with a generous amount of salsa on top.

Notes

Huevos Rancheros con Calabacitas

Mexican-Style Gravlax with Cilantro and Tequila

mexican style gravlax with cilantro and tequila
Print Recipe
4.84 from 6 votes

Mexican-Style Gravlax with Cilantro and Tequila

Mexican-Style Gravlax with Cilantro and Tequila recipe from Pati's Mexican Table Season 3, Episode 10 “Brunch at the Jinich House”
Prep Time10 minutes
Cook Time2 days
Total Time2 days 10 minutes
Course: Antojos, Breakfast
Cuisine: Mexican
Keyword: brown sugar, Chipotle, cumin, flour tortillas, lime, pati's mexican table, salmon, tequila
Servings: 24 small toasts
Author: Pati Jinich

Ingredients

  • 1 teaspoon ground cumin
  • 2 teaspoons chipotle chile powder ancho chile powder, or a Mexican mix
  • 2 tablespoons kosher or coarse sea salt plus more for seasoning
  • 1 tablespoon freshly ground black pepper
  • 2 tablespoons dark brown sugar
  • 1 cup finely chopped cilantro
  • Zest of 1 lime
  • 1 pound fresh salmon skin on, bones removed
  • 2 tablespoons silver tequila
  • 6 5-inch Flour tortillas or whole grain bread, toasted
  • 1 cup Mexican crema
  • 1 ripe avocado halved, pitted, chopped
  • 1 lime halved

Instructions

  • Combine the cumin, chile powder, salt, pepper, sugar, lime zest and cilantro in a small bowl. Place the salmon flat, skin-side up, in a long baking dish. Make 10 to 12 1-inch slashes in the skin with the tip of a knife, just deep enough to reach the flesh. Rub 1/3 of the salt mixture into skin, then flip the fish over, spoon the tequila over the fish and rub the remaining 2/3 of the salt mixture on the salmon.
  • Cover the fish tightly with plastic wrap, then place a slightly smaller baking dish directly on top of fish and weigh it down with heavy unopened cans. Refrigerate for 2-3 days, basting with the resulting juices each night and re-covering and weighing back down again.
  • When ready to serve, remove the gravlax from the refrigerator. Thinly slice the salmon flesh, taking care not to cut through the skin and arrange the pieces on a platter. Serve with lightly toasted flour tortillas or toasted whole grain bread (keep warm in a clean kitchen towel, bread basket or tortillero), and let everyone garnish with the crema, avocado and a squeeze of fresh lime juice.

Notes

Gravlax con Cilantro y Tequila

My Favorite Tamal of All Time: Chicken in Green Salsa

Tamales are it. If you’ve eaten one, you know it.

Simple. When ready and steaming hot, unwrap the edible bundle and eat swiftly, no fork, no knife, bite by bite.  So good.

Yet as simple as it may sound to write a post about tamales, I could dedicate an entire series of cookbooks to their endless possibilities, and in the end, not have covered them all.

Ancestral, iconic, yet humble, is each single tamal. And the tamal universe, immense, imagine: tamal refers to anything wrapped and cooked in a husk or leave. Usually made with masa, typically corn masa, either mixed with or swaddling ingredients, or both! As you move through Mexico, and increasingly outside, you find them in different shapes (round, square, flat, puffed up, even triangular like Michoacán corundas); with different wraps (corn husks, either fresh or dried, banana leaves and even fresh edible leafy greens like chaya in Chiapas); with an infinity of ingredients, from savory, like chicken, meat, seafood, vegetables, beans, all sort of grains, salsas and cheese…to sweet ingredients, like fresh and dried fruits, nuts, chocolate, cajeta

The consistency and texture vary greatly, too, from thin and dense like tamales found in Oaxaca; to sticky and gelatinous from Yucatán; to spongy and cakey like the ones from northern and central Mexico, where I grew up.

Tamales are so big in our kitchens that entire meals are devoted to them: the famous Tamaladas! Festive get-togethers we all get very excited about, where all you eat are different kinds of tamales, from beginning to end. Trust me, where there is a variety of tamales, you want to eat them all.

Aside from Tamaladas, tamales are present in all sorts of celebrations and holidays including Quinceañeras, Posadas, Christmas Eve and New Years parties: they have been fiesta food since pre-Hispanic times, when they were considered gifts from the Gods.

But tamales are also everyday food, for an entire country, an entire culture. Accessible to everyone and anyone who can get to the corner stand and has 10 pesos (less than a dollar) in their pocket for a quick breakfast, a filling lunch or an easy merienda (light dinner).

See photo below…. I was with my school friends eating tamales at the tamal stand on the street right outside our middle school. I used to day dream about those tamales; they were so alluring we used to sneak out of school to eat them…

Pati eating tamales with her school friends

Tamales are as fascinating and varied as the stars above. So to land this philosophical rambling about tamales somewhere practical and edible, for you, I will focus on my favorite tamal of all time. The Tamal de Pollo con Salsa Verde.

The easiest way to make tamales is to prepare your filling(s) first. In fact you can make it a day or two in advance. For the ones I feature here, make your cooked salsa verde, pictured in the molcajete below. Combine it with cooked shredded chicken to make a wet mix. No, you don’t want it dry! The tamal masa will soak up some of that salsa. After the tamales cook for almost an hour, you want to bite into a tamal that has a saucy, moist filling.

salsa verde

Then get your hands on dried corn husks, pictured below. You can get them in the Latin aisles of your supermarket, at many a Latin or international store, or online. No excuse. Soak those husks in warm water, so they will become malleable and pliable. You don’t want them to crack as you use them to wrap the dough and roll the tamal. You will also need to place some of the leaves in the tamalera or steamer.

Get the tamalera ready. Pour water and drop a coin in there. That’s a passed down trick from endless generations. It works as an alarm for when the tamales may be running out of water, so you won’t need to open up the pot and let all that precious steam come out: if the water is running out, the coin will start jumping up and down and make loud clinking noises.

dried corn husks

Then you work to make your masa. Or let the mixer help you out! I have the complete recipe below, but let me just highlight a few things…

In Mexico, you can go into the tortillería and buy fresh masa, made from scratch. And wouldn’t it be heavenly if there were tortillerías in all towns and cities in the US, so we could all indulge? But the truth is many, if not most, people in Mexican kitchens make their own masa at home from the instant corn masa flour, and you can get fabulous results.

Traditionally, tamal masa is made with lard. If top quality and fresh, it adds a delicious taste and texture and doesn’t have as much cholesterol as people think. If you ask me, I think it is a matter of moderation. Yet, many people prefer vegetable shortening and you can use it too. Now, vegetable shortening has, as of late, been questioned even more than lard.

If you don’t want to use either, I have a wonderful solution: use vegetable oil, substitute exact amounts, but to maintain depth of flavor and dimension, season the oil by heating it over medium heat and cooking a slice of onion and a couple garlic cloves in it for 15 minutes. Then remove the onion and garlic before using. Great trick for vegetarians as well. In fact, before the Spanish arrived to Mexico, and there was no pork, oils extracted from fruits, vegetables and seeds, were used to moisten and season tamales, so feel free to play around with oils you like!

The most important thing about the masa, aside from being well seasoned, is that it needs to be as fluffy as fluffy can get. It has to be so airy that, if you take a cup of cold water and drop half a teaspoon of the masa in it, it floats!  You can only achieve this by beating it for a long time at a good speed. That’s why I recommend a mixer in the recipe below, but of course, you are welcome to get a good work out from the masa mixing by hand or with a sturdy spatula.

Then, follow my detailed instructions below on how to fill and wrap the tamales, place them in the tamalera and hold your horses for 50 minutes until they are ready.

Hopefully, you make more than what you need. I can think of few foods that have as much warmth, sustenance and meaning than tamales. They are food that is meant to be shared. So I suggest you try a Tamalada gathering! Tamaladas don’t only happen on February 2nd (when according to tradition you must host a Tamalada and invite EVERYBODY, if you got the baby hidden in the Rosca de Reyes eaten on January 6th), they can happen anytime (but I am writing this post before February 2nd, just in case!).

Make many fillings ahead of time. Make your masa. Invite friends over and have a tamal-making party before the Tamalada. Everyone will have gifts to open and eat, as that is what tamales are, indeed. And the best gift of them all will be any leftover tamales that a lucky guest gets to take along. Or be a bit greedy, keep them at home.

Note: I’ve been asked for a quick casserole version in a few emails… All you need to do, is spread half the masa in the recipe below in a large baking dish, then add a layer of the chicken in salsa verde, top with remaining half masa dough. Cover well with aluminum foil, and bake in a 400 degree oven for 1 hour. Remove from the oven and if you want, drizzle with some Mexican crema and crumbled queso fresco. Serve in squares.

Print Recipe
4.86 from 7 votes

Chicken in Salsa Verde Tamales

Tamales are it. If you’ve eaten one, you know it. Simple. When ready and steaming hot, unwrap the edible bundle and eat swiftly, no fork, no knife, bite by bite.  So good. Yet as simple as it may sound to write a post about tamales, I could dedicate an entire series of cookbooks to their endless possibilities, and in the end, not have covered them all.
Prep Time45 minutes
Cook Time50 minutes
Course: Main Course
Cuisine: Mexican
Keyword: chicken, masa, pati's mexican table, salsa verde, Tamales, tomatillos
Servings: 18 tamales
Author: Pati Jinich

Ingredients

For the tamales:

  • 25 dried corn husks soaking in warm water
  • 3/4 cup lard, vegetable shortening or seasoned vegetable oil (to make seasoned oil, heat oil over medium heat and cook a slice of onion and 3 to 4 garlic cloves for 15 minutes, strain before using)
  • 1/2 teaspoon kosher or coarse sea salt or to taste
  • 1 teaspoon cold water
  • 1 teaspoon baking powder
  • 1 pound (about 3 1/4 cups) instant corn masa for tortillas or tamales
  • 3 1/2 cups chicken stock add more if needed

For the filling:

  • 1 recipe for cooked salsa verde
  • 2 cups shredded cooked chicken

Instructions

To make the filling:

  • Make the salsa verde, combine it with the shredded chicken, and set aside or refrigerate, if made ahead of time.

To make masa for the tamales:

  • Place lard, vegetable shortening or seasoned oil in a mixer and beat, until very light, about 1 minute. Add salt and 1 teaspoon cold water, and continue beating until it is white and spongy, a couple more minutes. Add baking powder, and then take turns adding the instant corn masa and the chicken stock. Continue beating until dough is homogeneous and as fluffy as can get.
  • You know the tamal masa is ready if, when you drop 1/2 teaspoon of the masa in a cup of cold water, it floats.

To prepare the tamalera or steamer:

  • Place hot water in the bottom pan of a steamer (only enough so the water is just under the basket with the tamales and not touching them) and bring it to a simmer. Line the steamer basket with one or two layers of soaked corn husks. Use dough to form about 18 cornhusk wrapped tamales.

To make the tamales:

  • Soak dried corn husks in hot water for a couple minutes, or until they are pliable, and drain. Lay out a corn husk with the tapering end towards you. Spread about 3 tablespoons of masa into about a 2- to 3-inch square, the layer should be about 1/4-inch thick, leaving a border of at least 1/2-inch on the sides. Place 1 tablespoon of filling in the middle of the masa square.
  • Pick up the two long sides of the corn husk and bring them together (you will see how the masa starts to swaddle the filling) and fold the folded sides to one side, rolling them on same direction around tamal. Fold up the empty section of the husk with the tapering end, from the bottom up. This will form a closed bottom and the top will be left open.
  • Prepare all the tamales and place them as vertically as you can in a container. When you have them all ready, place them again, as vertically as you can on the prepared steamer, with the open end on top. If there is space left in the steamer, tuck in some corn husks, so the tamales won’t dance around. Cover with more corn husks, and steam covered for 50 minutes to an hour. You know the tamales are ready when they come easily free from the husks. They will still be moist, and as they are released from the husks, you will see the moistness, like when you remove good moist muffins from their paper baking cups.
  • Finished tamales will stay warm for about 1 to 2 hours in the steamer. They can be made ahead several days before and stored in refrigerator, well wrapped. They can also be frozen for months. In either case, reheat in a steamer. For refrigerated tamales, it will take about 15 minutes, and for frozen tamales about 45 minutes.

Notes

Tamales de Pollo con Salsa Verde

Grilled Cheese and Bean Heroes

molletes pati jinich
Print Recipe
4.80 from 5 votes

Grilled Cheese and Bean Heroes

Grilled Cheese and Bean Heroes recipe from Pati's Mexican Table Season 3, Episode 3 “My Three Favorite Boys”
Prep Time5 minutes
Cook Time8 minutes
Total Time13 minutes
Course: Antojos, Main Course
Cuisine: Mexican
Keyword: Avocado, bacon, bolillo, bread, Chorizo, ham, Monterrey Jack cheese, mozzarella, Mushroom, Oaxaca cheese, Pico de Gallo, refried beans, telera, turkey
Servings: 4 to 6 servings
Author: Pati Jinich

Ingredients

  • 4 teleras, bolillos, Portuguese buns, or baguettes cut into 5- to 6-inch pieces
  • 2 cups refried beans homemade or store-bought
  • 2 cups (about 8 ounces) shredded Oaxaca cheese, mozzarella, Monterrey Jack or mild cheddar
  • Traditional pico de gallo or other salsa of your choice

Optional extra toppings:

  • Mexican-style chorizo crumbled and fried
  • Crisped bacon
  • Turkey or ham
  • Sautéed mushrooms
  • Sliced avocado

Instructions

  • Preheat the oven to 350°F. Slice the bread in half lengthwise. Spread each piece with 3 to 4 tablespoons of refried beans and top with 3 to 4 tablespoons of grated cheese. Arrange the molletes on a baking sheet as you make them. If you want to add more toppings like ham, turkey, bacon or chorizo, sprinkle them on top of the cheese.
  • When they are all assembled, bake until the cheese has melted and the bread has a nice toasted crust on the bottom and around the edges, 8 to 10 minutes. Eat while hot. Serve with pico de gallo, or your favorite salsa, on the side.

Notes

Molletes

Mexican Chocolate Donuts

Print Recipe
4.17 from 6 votes

Mexican Chocolate Donuts

Mexican Chocolate Donuts recipe from Pati's Mexican Table Season 3, Episode 2 “Pati’s Texican”
Prep Time15 minutes
Cook Time7 minutes
Total Time22 minutes
Course: Breakfast, Dessert
Cuisine: Mexican
Keyword: Cajeta, Chocolate, Doughnuts, Dulce de Leche, jam, mexican chocolate, pati's mexican table
Servings: 12 mini donuts or pancakes
Author: Pati Jinich

Ingredients

  • 1 cup milk
  • 2 Mexican chocolate bars, 3 ounces each cut into large chunks
  • 1 1/4 cup all-purpose flour
  • 2 tablespoons sugar
  • 2 teaspoons baking powder
  • 1 teaspoon baking soda
  • Pinch of kosher or coarse sea salt
  • 3 tablespoons melted unsalted butter plus more for greasing the pan
  • 1 large egg
  • Special equipment optional – Ebleskiver filled pancake pan
  • Fillings dulce de leche or cajeta, chocolate and hazelnut spread, jams or preserves
  • Confectioners' sugar optional for dusting

Instructions

  • In a medium saucepan, heat milk over medium-low heat. Add chocolate chunks and stir occasionally until it has dissolved, a few minutes. Remove from heat and using a molinillo or whisk, emulsify or foam as much as you can. Set aside.
  • In a mixing bowl, combine the flour with the sugar, baking powder, baking soda and salt. Add the melted butter to the dry ingredients as well as the beaten egg and start to mix with a spatula. Slowly, pour the Mexican chocolate milk, mixing fast so the egg will not cook (!) if the milk is still hot. Continue to combine until you get an even and homogeneous batter, just a minute or so. You should have a shiny and a bit runny batter. Taste it: it’s so good! Let it sit for a few minutes, it will fluff up a bit, which is what you want.
  • Meanwhile, heat your special pan or skillet over low to medium-low heat until very hot, about 4 or 5 minutes. Butter the pan and spoon batter into each hole, about 3/4 of the way up each cup. Once you can move the balloons around (like when pancakes are ready to flip), but the batter in the center can still be runny, you can add a half a teaspoon of a filling of your choice. Cover with a bit more batter to fill the cups just a tad beyond the rim. Using two spoons or two wooden skewers, flip the donuts to the other side. Give them a minute or two and remove from the pan. Dust with confectioners' sugar, if desired, (I always do!) and eat while hot.
  • If making normal pancakes, cook as regular pancakes. Heat the skillet over medium-low heat until very hot. Grease with unsalted butter and ladle batter into the pan. Flip once the top shows bubbles and the bottom is cooked enough to be released from the pan. Cook on the other side for a minute or two and serve. Add the fillings as toppings instead of as a filling.

Notes

Donas de Chocolate Mexicano

Molletes with Pico: No Way not to Fall in Love

It takes three ingredients, plus any extra topping that you fancy, 8 minutes in the toaster or oven and you get one of the most comforting foods I have eaten since I can remember: Molletes.

One of the most popular Mexican anytime antojitos or cravings, that can be eaten for breakfast, brunch, lunch, a hearty afternoon snack or dinner.  It used to be a standard option for breakfast or dinner at my house growing up in Mexico City, just as quesadillas were. But I also used to crave Molletes from my school cafeteria.

So yes, even if I had some at home in the morning, I would have more for lunch at school…

First, you need the earthy and filling refried beans. You can make your own at home -I make a weekly double batch of beans and use it all week long- or buy ready made at the store. I usually go for Pintos, from photo below, or Black beans.

molletes 1

Secondly, you need crispy bread. In Mexico it is always a bolillo or telera, the Mexican adaptation of the baguette (since times of Maximilian in the 1860’s…). But you can use petite baguettes or cut individual portions from a large baguette. Portuguese buns are similar too.

Slice the breads in half lengthwise and slather 2 to 4 tablespoons of refried beans on each half.

Molletes 2

Lastly, add a generous amount of shredded, melting cheese. Something flavorful, but not too overpowering, like Oaxaca, Mozzarella (but not the fresh wet one), Monterey Jack, Light Cheddar or Muenster. In Mexico I would also go for the Chihuahua or Mexican Manchego, but those are hard to come by in the US.

Then in the toaster or oven they go, for about 8 minutes. Until the bread crisps on the outside even more, the earthy beans have heated up and the cheese is oozing on top of it all.

Molletes 3
As with most antojitos, they can be messed around with. You can add extra toppings like crumbled bacon, chorizo, turkey or ham.

My boys love to have those choices! It makes them feel empowered in the kitchen, different from one another and like they are fully enforcing their free will on my territory. Which honestly, is more and more theirs, as the years go by. And I just love that, I can’t begin to tell you how much.

In restaurants and coffee shops Molletes are usually served with a side of Pico de Gallo.

Molletes 4

Talk about a way to make them even more wholesome and colorful. A healthy mix of ripe tomatoes, a bit of onion, cilantro and fresh chile, all mixed with fresh squeezed lime juice. But sometimes I will serve them along a Salsa Verde or Chipotles in Adobo. Delicious as well.

There is no way not to fall in love with this quick, fun and tasty meal. There’s just… none.

Enjoy!

Print Recipe
5 from 4 votes

Grilled Bean and Cheese Heros

It takes three ingredients, plus any extra topping that you fancy, 8 minutes in the toaster or oven and you get one of the most comforting foods I have eaten since I can remember: Molletes.
Prep Time5 minutes
Cook Time8 minutes
Course: Antojos
Cuisine: Mexican
Keyword: Antojo, beans, Monterrey Jack cheese, mozzarella, Oaxaca cheese, pati's mexican table, Pico de Gallo, Recipe, refried beans, telera
Servings: 4 to 6 servings
Author: Pati Jinich

Ingredients

  • 4 teleras bolillos, petite baguettes or large baguettes cut into 6" portions
  • 2 cups refried beans homemade or store bought
  • 2 cups Oaxaca cheese mozzarella or Monterrey jack, grated (any melting cheese of your liking will do)
  • Serve with pico de gallo salsa or another salsa of your choice

Instructions

  • Preheat the oven to 350 degrees.
  • Slice the bread in half lengthwise to have 8 pieces. Spread each piece with 3 to 4 tablespoons of refried beans and add 3 to 4 tablespoons of grated cheese on top. Arrange Molletes on a baking sheet as you make them. If you want, add additional toppings like ham, turkey, bacon or chorizo. Sprinkle them on top of the cheese. When they are all assembled, place the baking sheet into the oven.
  • Bake for 8 to 10 minutes, or until the cheese has melted and the bread has a nice toasted crust around the edges. Serve with Pico de Gallo salsa, or a salsa of your choice, on the side or on top.

Notes

Molletes

Sweet Conchas!

I can finish a normal sized Concha, 4 to 5″ round, in exactly four bites. If it has been a long time since I had one or if I am very hungry, maybe three bites. Ok, I admit it, sometimes two bites. But never one.

Conchas are named after the shape of their sugar topping, which resembles a seashell. Conchas do have a hardened crust, but it is sugary, thick, crispy and crumbles right into your mouth as you take a bite. Right after you brake through that crust, there is a fluffy, soft, sweet roll made with flour, butter, yeast and eggs.  With such a pleasing experience, no wonder it is one of Mexico’s most favorite sweet rolls or pan dulce.

I have seen some in bakery shops around DC, but they just don’t taste like the ones we love at home. So on our most recent trip to Valle de Bravo in Mexico, I ventured with my boys, and many of their cousins and aunts, into a panaderí­a, or bread shop. They make such incredible conchas, it makes me wish I had a bigger mouth  to eat them each in a single bite.

This panaderí­a, named Santa Marí­a, like most in Mexico, has 2 daily shifts for making fresh breads of all sorts. On the second shift of a Monday afternoon, Mrs. Agustina López, who runs the bakery, saw my little battalion and announced that they give baking classes to little cooks.

As the kids got a very hands-on class from her son Félix, master baker there, I soaked up all their secret ingredients and techniques, which they were very happy to share.

Conchas 1

First of all, they have a beautifully aged and seasoned giant mixer. The kids took turns throwing (yeah, throwing) the flour, salt, yeast, water…

Conchas 2

They were attempting to also throw the eggs into the mixer. See? I had to put my camera down to convince them that really, those eggs needed to be cracked first, though it seemed more fun to throw them all in. Just like that.

After, the roaring giant mixer helped knead a soft, gooey, elastic and very moist batter.

Conchas 3

Félix showed them what that dough felt like. Then he left it to rise, and took it to another giant piece of equipment: a batter cutter.

Juju seemed to not believe his luck with those beautiful pre-cut pieces of dough… All the possibilities!

Conchas 4

After the kids shaped them into thick, flattened rounds, Félix demonstrated how to make the sugar cover.

Conchas 5

Which was even more fun to make, because all you do is mix together flour, confectioners sugar and a heaven-full of butter with your hands until soft.

Conchas 6

Half that sugar cover is mixed with cocoa powder, because some people prefer their conchas chocolatey… Or some little cooks like to throw in something else to get even more messy…

Conchas 7
The kids were concentrated on making that sugar cover just about right before layering it on the concha dough flattened balls… Félix’s bakery assistant was so kind and patient with the kids.

Conchas 8

Now that is one charming looking oven. The moment I saw it, I imagined how just about anything baked in there has to taste so yummy…

Conchas 9

With the bottom made out of aged earthenware tiles and brick walls…

Conchas 10

And one can just dream of how many conchas can fit in there…. 500, 1000, 2000… Each one to be eaten in just…. two….  big…. bites.

And some whole milk on the side.

Print Recipe
4.17 from 6 votes

Conchas

Conchas are named after the shape of their sugar topping, which resembles a seashell. Conchas do have a hardened crust, but it is sugary, thick, crispy and crumbles right into your mouth as you take a bite. Right after you brake through that crust, there is a fluffy, soft, sweet roll made with flour, butter, yeast and eggs.  With such a pleasing experience, no wonder it is one of Mexico’s most favorite sweet rolls or pan dulce.
Prep Time4 hours 25 minutes
Cook Time20 minutes
Course: Breakfast, Dessert
Cuisine: Mexican
Keyword: bread, Dessert, dough, pan dulce, pati's mexican table, Recipe, rolls, sugar
Servings: 16 to 18 conchas
Author: Pati Jinich

Ingredients

For the dough:

  • 14 ounces or 2 3/4 generous cups all-purpose flour
  • 2 eggs
  • 1 egg yolk
  • 1/4 teaspoon salt
  • 2 packets (7 grams or .25oz each) dry active yeast
  • 1/2 cup lukewarm water
  • 4 ounces unsalted butter or vegetable shortening at room temperature
  • 5 ounces or 3/4 cup sugar

For the sugar topping:

  • 1/3 pound all-purpose flour
  • 1/3 pound confectioners' sugar
  • 5 ounces unsalted butter or vegetable shortening, at room temperature, diced
  • 1 1/2 tablespoons cocoa powder if you want to make half be chocolate flavored
  • Extra butter or vegetable shortening to assemble the conchas

Instructions

  • Add the all purpose flour to the mixer, set with the dough hook, along with the eggs, egg yolk, and salt. Start the mixer over low speed. Meanwhile, add the active dry yeast to 1/2 cup lukewarm water and stir until creamy and well dissolved. Stir it into the flour mixture, and let it continue beating, now over medium speed, for about 3 to 4 minutes.
  • Incorporate the unsalted butter, keep on beating for 3 to 4 minutes more. Lastly, add the sugar and continue mixing for another 3 to 4 minutes or until the dough is gooey, sticky, elastic and very smooth.
  • With a spatula, push the dough into a mixing bowl greased with butter or vegetable shortening, cover it with a kitchen towel and place it in the warmest area of your kitchen, where there are no wind currents. Let the dough rise for at least 2 and up to 8 hours. It should have doubled in size.
  • For the sugar topping, place the flour and confectioners' sugar in a large bowl. Using your hands, incorporate the diced butter into the flour mixture. Mix and knead it until its smooth and homogeneous. If you want half the conchas to be chocolate flavored, separate half of the mixture in another bowl, and mix it very well with the cocoa powder. Cover the sugar toppings with plastic wrap so they won't dry out.
  • To assemble the conchas, grease thick baking sheets with butter or vegetable shortening and keep your hands greased. They will need to be greased for you to shape the dough. Using your hands, make about 2 inch balls with dough. Then, slightly press them flat, as in a thick disk, but not a tortilla. Leave about 2 inches in between each of the conchas so they will have room to expand.
  • Once your baking sheet is filled with the dough disks, cover them with the sugar coating. To do this, grab about a tablespoon of sugar coating, plain or chocolate. Make a round ball with your hands and then flatten it thin, like a tortilla. Place it on top of the dough disk and slightly press down. It should cover most of the surface.
  • If you have a concha mold, press it on the sugar topping. If you don't have one, cut through the sugar topping making round lines or any decoration that reminds you of a shell.
  • Leave the prepared conchas in a warm area of your kitchen, uncovered, and let them rise again, for about 2 to 4 hours.
  • Preheat the oven to 350 degrees. Place the conchas in the oven for about 20 to 24 minutes, until the conchas are slightly browned around the edges and look fluffed up.

Comfort me with Café de Olla (or Coffee from the Pot)

As we returned from our 10 day vacation to Mexico this December and walked out of the Dulles airport, I felt my bones freeze. Say what? I told my husband, I think I am turning around and catching the next flight back to Mexico.

Now we are home, with the heating so high it seems we moved to the Equator. And I admit that the cold and especially the snow, which I am watching right this minute through my kitchen window starting to magically fall from the night sky, is one of the things I love about living in the Eastern United States. We can experience the full change of seasons.

So instead of complaining, this is what I do: I take out my Piloncillo, or brown sugar, my bark of Ceylon or True cinnamon, some dark roasted coffee and make myself a Café de Olla.

The Café de Olla is one of the most comforting things I can think of. Not only for when its cold outside. It is also wonderful to soothe the end of a rich meal or to start a cold morning with some cookies or toast on the side, or rather, dipped inside the coffee.

It is called Café de Olla because for centuries it was prepared, and still is in some parts of Mexico and Mexican homes, in clay pots. Pot translates to Olla in Spanish, so that explains the funny translation to Coffee from the Pot. The clay pot imparts a peculiar earthy and deep flavor to the coffee. But if you don’t have a clay pot, that should not stop you from making it. The combination of coffee with piloncillo or dark brown sugar and cinnamon is extraordinary by itself as well.

As I am gearing up for an exciting 2010 with fascinating topics to research and recipes to try and test for the next series of classes at the Institute, there is one thing I realize never ever changes in each single menu we offer: there is always Cafe de Olla after the end of the meal for our guests. Our regulars demand it. And me and my cooking team can’t start the day without it.

Comfort Me with Cafe de Olla 2-thumb-510x342-661
With the spirit of continuing to welcome 2010, from my cooking team and myself -we have been so lucky to have been together for almost three years- we wish you a delicious 2010 filled with Café de Olla to warm your soul, your belly, your cold mornings and late nights.

cafe de olla 2
Here I am holding on to one, for dear life, while the winter lasts…

Print Recipe
5 from 5 votes

Café de Olla

The Café de Olla is one of the most comforting things I can think of. Not only for when its cold outside. It is also wonderful to soothe the end of a rich meal or to start a cold morning with some cookies or toast on the side, or rather, dipped inside the coffee.
Cook Time10 minutes
Course: Drinks
Cuisine: Mexican
Keyword: cinnamon, coffee, piloncillo, Recipe
Servings: 6 servings
Author: Pati Jinich

Ingredients

  • 9 cups water
  • 6 tablespoons coarsely ground dark roasted coffee
  • 4 ounces piloncillo or about 8 to 9 tablespoons grated (can substitute for dark brown sugar) and can add more or less to taste, depending on how sweet you like it
  • 1 cinnamon stick

Instructions

  • Heat water in a pot. When it comes to a rolling boil, lower the heat to low and add the coffee, piloncillo and cinnamon stick. Simmer for about 5 minutes, give it a couple stirs and turn off the heat. Let it sit covered for about 5 more minutes. Strain before serving with a fine strainer or cheesecloth. Or then again, pour into a french press, press down and serve.

Guest: Cristina Potters’ Refried Beans

In this post, I have invited Cristina Potters to be a guest and share one of her favorite recipes. Cristina is the author of Mexico Cooks!, a culinary and cultural website about all things Mexico. She is also known for giving outstanding tours. 

A Chicago native who arrived in Mexico in 1981, she was first a social worker in Tijuana.  Now, after 30 years, she is a permanent fixture in Morelia, Michoacan.  She learned the cuisines of the central highlands of Mexico from the Mayoras (Michoacan home cooks). Now, without further ado, here is Cristina…

I’d like to offer my personal recipes for frijoles refritos and frijoles de la olla. The following recipe for refried beans is not only simple and delicious; it converts people who turn up their noses at ordinary refried beans into folks who insist on another helping!

Christina Potters Refried Beans 1

In central Mexico, the most commonly eaten bean is the peruano (peh-roo-AH-noh), an oval, yellow bean that cooks to a pale beige color with a creamy consistency.  I like frijoles de la olla (freshly cooked beans, straight from the pot) served with a big spoonful of salsa fresca (chopped tomato, minced onion and chile serrano, salt, and roughly chopped cilantro).  I often steam white rice, fill a bowl with it, add frijoles de la olla, salsa fresca, and crumble cotija cheese and call it comida (main meal of the day).

Cristina Potters Refried Beans 2

For breakfast, I often prepare frijoles refritos (refried beans).  Served with scrambled eggs, sliced Mexican avocado, and a stack of hot tortillas, beans are a great way to start the morning.

Here’s some fun bean trivia: frijoles refritos doesn’t really mean ‘refried’ beans. Mexican Spanish often uses the prefix ‘re-‘ to describe something exceptional.  ‘Rebueno’ means ‘really, really good’.  ‘Refrito’ means–you guessed it–well-fried.

Frijoles de la olla are very easy to cook and the fresh-cooked flavor is a million times better than canned beans! In my kitchen I prepare about a pound of dried beans at a time.  After cooking, I serve some as frijoles de la olla, prepare some as refried beans, and freeze the rest in plastic sandwich bags.  The cooked beans and their pot liquid freeze very well.

To make frijoles de la olla, the traditional cooking method I use has no onions, no garlic, no salt, and no other seasonings–just water and dried beans. First, pick carefully through your beans.  Put the cleaned beans in a strainer and wash well under running water.  Now, to soak or not to soak?  I have tried both soaking and not soaking and have noticed that the cooking time is about the same either way. I never soak my beans.  My olla de barro (clay bean pot) holds about a half kilo of frijol plus enough water to cook them.  If you don’t have an olla de barro, a heavy metal soup pot will work almost as well.  After the beans are in the pot, add 6 to 8 cups of cold water.

Over a high flame, bring the pot of beans to a rolling boil.  Turn the flame to a medium simmer and cover the pot.  Allow the beans to cook for about an hour and check the water level.  If you need to add more water, be sure it is boiling before you pour it into the bean pot; adding cold water can cause the beans to toughen.  Continue to cook the beans until, when you bite into one, it is soft and creamy.  The pot liquid will thicken slightly.

Cristina Potters Refried Beans 3(Frijoles de la Olla, already cooked over the fried chilies, ready to be turned into refried beans)

Now’s the time to salt your beans–after cooking, but while the beans are still hot. I use Espuma del Mar (Mexican sea salt from the state of Colima) for its wonderful sweetly salty flavor, but any salt will do.  Add a little less salt than you think is correct–you can always add more later, and you don’t want to over salt your beans.

If you live in the United States or Canada, you’ll want to order the fabulous heritage dried beans sold by Rancho Gordo.  Its owner, my friend Steve Sando, has nearly single-handedly brought delicious old-style beans to new popularity in home and restaurant kitchens.  If you’ve tasted ordinary beans and said, “So what?”, try Rancho Gordo beans for a huge WOW! of an eye opener.

Following is a recipe for turning these frijoles de la olla into refried beans.

Cristina Potters Refried Beans 4 (Refried beans ready to eat)

Christina Potters Refried Beans Main
Print Recipe
4 from 4 votes

Refried Beans

I’d like to offer my personal recipes for frijoles refritos and frijoles de la olla. The following recipe for refried beans is not only simple and delicious; it converts people who turn up their noses at ordinary refried beans into folks who insist on another helping!
Prep Time2 minutes
Cook Time10 minutes
Course: Side Dish
Cuisine: Mexican
Keyword: beans, Peruvian beans, pinto beans, refried beans, serrano chiles
Servings: 6 servings
Author: Pati Jinich

Ingredients

  • 3 cups recently cooked frijoles peruanos de la olla
  • 1 or 2 chiles serranos depending on your heat tolerance
  • 1 or 2 tablespoons lard or vegetable oil -- preferably lard and definitely NOT olive oil
  • Bean cooking liquid
  • Sea salt to taste

Instructions

  • Melt the lard in an 8-inch skillet. Split the chile(s) from the tip almost to the stem and add to the melted lard. Saute over a medium flame until the chile is dark brown, almost black. Allow the lard or oil and chile to cool a bit before the next step.
  • Now add the beans and a little of the bean liquid. When the beans begin to simmer, mash them and the chile with a potato or bean masher until they are smooth. Add more liquid if necessary to give the beans the consistency you prefer. Add sea salt to taste, stir well, and serve.

Notes

Frijoles Refritos

Mexican Style Eggs: A la Papi

“All I want is a hamburger, a hot dog, a Pizza, a nice big steak, some Texas style bar-b-q and a big plate of pancakes… no tacos or anything Mexican ok?” My dad said, after devouring the welcoming meal I prepared for him, which happened to be Tacos de Guisado.

Guisados are Mexican style stews, which can be ladled into warm corn tortillas. There are plenty of Fondas or small restaurants that specialize in them throughout Mexico. Since my dad loves them, I received him with three of his favorites: Chicken Tinga heavy on the chipotle, beef cooked in a green salsa with cubed potatoes and nopalitos, cactus paddles, sauteed with onion, Guajillo Chilies and corn. There were also refried beans and white rice, as they are such friendly sides to tacos.

After he made it clear that he didn’t want anything Mexican for the next three days, making me laugh so hard along the way, we set off to satisfy his cravings.

The next morning we were at the pancake place in front of a double stack of buttermilk pancakes with butter, extra maple syrup and bacon. And some grits. It was hard to make him wait for lunch.  When he lost all patience he dragged me to the Pizza place and then had a Hot Fudge Sundae from across the street. Dinner came around soon enough along with steaks, baked potatoes and a Mexican Chayote salad I sneaked in there.

The next morning, after lox and bagels at home, we went for a late Texas style bar-b-q lunch. Dinner was a Reuben with lots of dill pickles and a potato salad. But the last morning he couldn’t help it.

mexican style eggs
Onion, Jalapeño chiles and tomatoes, getting ready to welcome some beaten eggs.

As he tied one of my aprons around his waist, he announced, I am making the best Huevos a la Mexicana that you have ever tried in your life. So we chopped just enough onion, less tomatoes than I would have wanted and a lot of Jalapeños. As he cooked, he used strange and probably non-existing terms to describe what made his eggs so tasty… See how I am un-rawing the onion and mushing the tomato?

There are countless egg dishes in Mexican cooking, one better than the other. But these are the ones I prepare the most at home. They are easy to make, super tasty and dress up a breakfast in a wink. What’s more, I always have oil, eggs, tomatoes, onion and either Jalapeño or Serrano chiles handy.

Although the ingredients are always the same, versions can vary. That is mostly because some people like my dad cook the tomatoes slightly, while others like me cook the tomatoes until they are pasty and smooshy looking (I see where I get my funny use of terms now). The ratio of ingredients also varies. I use more tomatoes than my dad, but we both like it spicy. Whereas I like to eat them with hot corn tortillas, my dad likes to eat them with toasted sandwich bread (some people love these eggs with a side of toast smothered in cream cheese and that is pretty tasty too…).

This just makes me think of how accommodating Mexican food is. You can learn a basic idea and how to make it, and then tweak it to your preference.

Though while we were making breakfast I was craving for more tomatoes in those eggs, and wishing we could cook them a bit more, I have to admit that his version that morning topped off any that I have tried. Maybe it was because of the way he explained why his version was the most incredible in the world, maybe it was because of how much he enjoyed eating them and scooping some into corn tortillas to make some tacos for me (he had said no more tacos but one can only go so many days without tacos, you know?), or maybe it was because I was sad to see him go.

We didn’t get to the hot dogs or the hamburgers. I had thought of the places to take him so he could eat them all, but we ran out of time. But as it’s been said, you have to leave something for the next time if you want that next time to happen. I have until then to recover from all that eating.

Meanwhile, I leave you with a recipe for Huevos a la Mexicana, my father’s style, with some notes on my variations. But you can come up with yours!

Pati's dad looking out the window
My dad looking out the window, almost time for the airport.
Mexican Style Eggs
Print Recipe
5 from 6 votes

Eggs a la Mexicana

There are countless egg dishes in Mexican cooking, one better than the other. But these are the ones I prepare the most at home. They are easy to make, super tasty and dress up a breakfast in a wink. What’s more, I always have oil, eggs, tomatoes, onion and either Jalapeño or Serrano chiles handy.
Prep Time5 minutes
Cook Time15 minutes
Course: Breakfast
Cuisine: Mexican
Keyword: corn tortillas, Eggs, jalapeno, onion, pati's mexican table, serrano chiles, Tomatoes
Servings: 4 people
Author: Pati Jinich

Ingredients

  • 4 tablespoons corn, safflower or vegetable oil
  • 1/2 cup white onion chopped
  • 1 jalapeño or serrano chile seeded if less heat desired and finely chopped, or more to taste ( we went for 3)
  • 3/4 pound ripe tomatoes about 2 cups chopped (I add an extra cup)
  • 8 eggs lightly beaten
  • 1/2 teaspoon kosher or sea salt more or less to taste
  • Hot corn tortillas or pieces of toast

Instructions

  • Heat oil in a skillet over medium heat. Add onions, and cook stirring often for about 4 minutes, until they have softened but not browned. Stir in the chiles, cook for another minute. Incorporate the chopped tomatoes and let the mix cook and season, stirring often, for about 5 minutes (I let them cook about 4 to 5 minutes more until tomatoes are thoroughly cooked, mushy and their red color has deepened).
  • Meanwhile, crack the eggs in a bowl, add some salt, and beat them with a whisk or fork. Lower the heat to medium-low and pour eggs over the tomato mix. Stir as the eggs cook until desired donenness, but don't let them dry up. Serve with a side of refried beans, hot tortillas or a piece of toast.

Notes

Huevos a la Mexicana

Beans: Refried Beans

You will find that refried beans are one of the most common sides for traditional Mexican dishes. From breakfast, to dinner, they are always a welcome companion. You can make them with different kinds of beans, like Black, Pinto,  or Peruvian. The choice in Mexico varies among regions but also among cooks. I tend to use the Pintos more, because they have a creamier consistency and softer flavor. The Black, delicious as well, have a stronger flavor and texture. The Peruvian have a peculiar flavor, that is hard to define, but it is stronger than the Pintos and lighter than the Black.

You can make the Refried beans in a traditional way, which is by mashing the Frijoles de Olla in the pan with onion that has been sauteed in lard, or you can substitute for oil. You can also make quicker and smoother Refried beans, by skipping the mashing part, and placing the Frijoles de Olla in the blender, to make a smooth Bean puree that you can then thicken and season.

Aside from a side, Refried beans are used to make many things like Tortas, Molletes, Tacos, Quesadillas and Dips.

Refried beans are absolutely delicious on their own, with corn tortillas and pickled jalapenos.  They also can be turned into many dishes such as charros beans.

Refried Beans 1

You can choose if you want your beans the traditional way, which takes a little bit more effort as you have to mash them as they season and thicken. Or you can opt for an easier and faster way, which doesn’t have that rough textured feel, but it is much smoother.

Print Recipe
4.50 from 6 votes

Smooth and Easy Refried Beans

You will find that refried beans are one of the most common sides for traditional Mexican dishes. From breakfast, to dinner, they are always a welcome companion. You can make them with different kinds of beans, like Black, Pinto,  or Peruvian. The choice in Mexico varies among regions but also among cooks. I tend to use the Pintos more, because they have a creamier consistency and softer flavor. The Black, delicious as well, have a stronger flavor and texture. The Peruvian have a peculiar flavor, that is hard to define, but it is stronger than the Pintos and lighter than the Black.
Prep Time2 minutes
Cook Time15 minutes
Course: Side Dish
Cuisine: Mexican
Keyword: beans, black beans, onion, Peruvian beans, pinto beans, Recipe, refried beans
Servings: 4 cups
Author: Pati Jinich

Ingredients

  • 6 cups basic bean puree
  • 3 tablespoons safflower or corn oil
  • 1/2 cup white onion chopped

Instructions

  • In a large saute pan over medium high heat, pour the oil and heat until hot but not smoking, about 1 to 2 minutes. Add the onions and let them saute for about 3 to 4 minutes, until they have softened, become translucent and have started to slightly brown along the edges.
  • Add the bean puree over the sauteed onion, and let them season and thicken for about 10 to 15 minutes, stirring occasionally. If the beans are bubbling way too much, lower the heat a little to medium-low heat. Let them continue thickening, until they have achieved a thick puree consistency and are somewhat pasty looking. It depends on your liking, some people like them thicker and some people like them with a softer consistency. While it depends on how you like them, they are mostly cooked until they can hold a shape when scooped with a spoon.