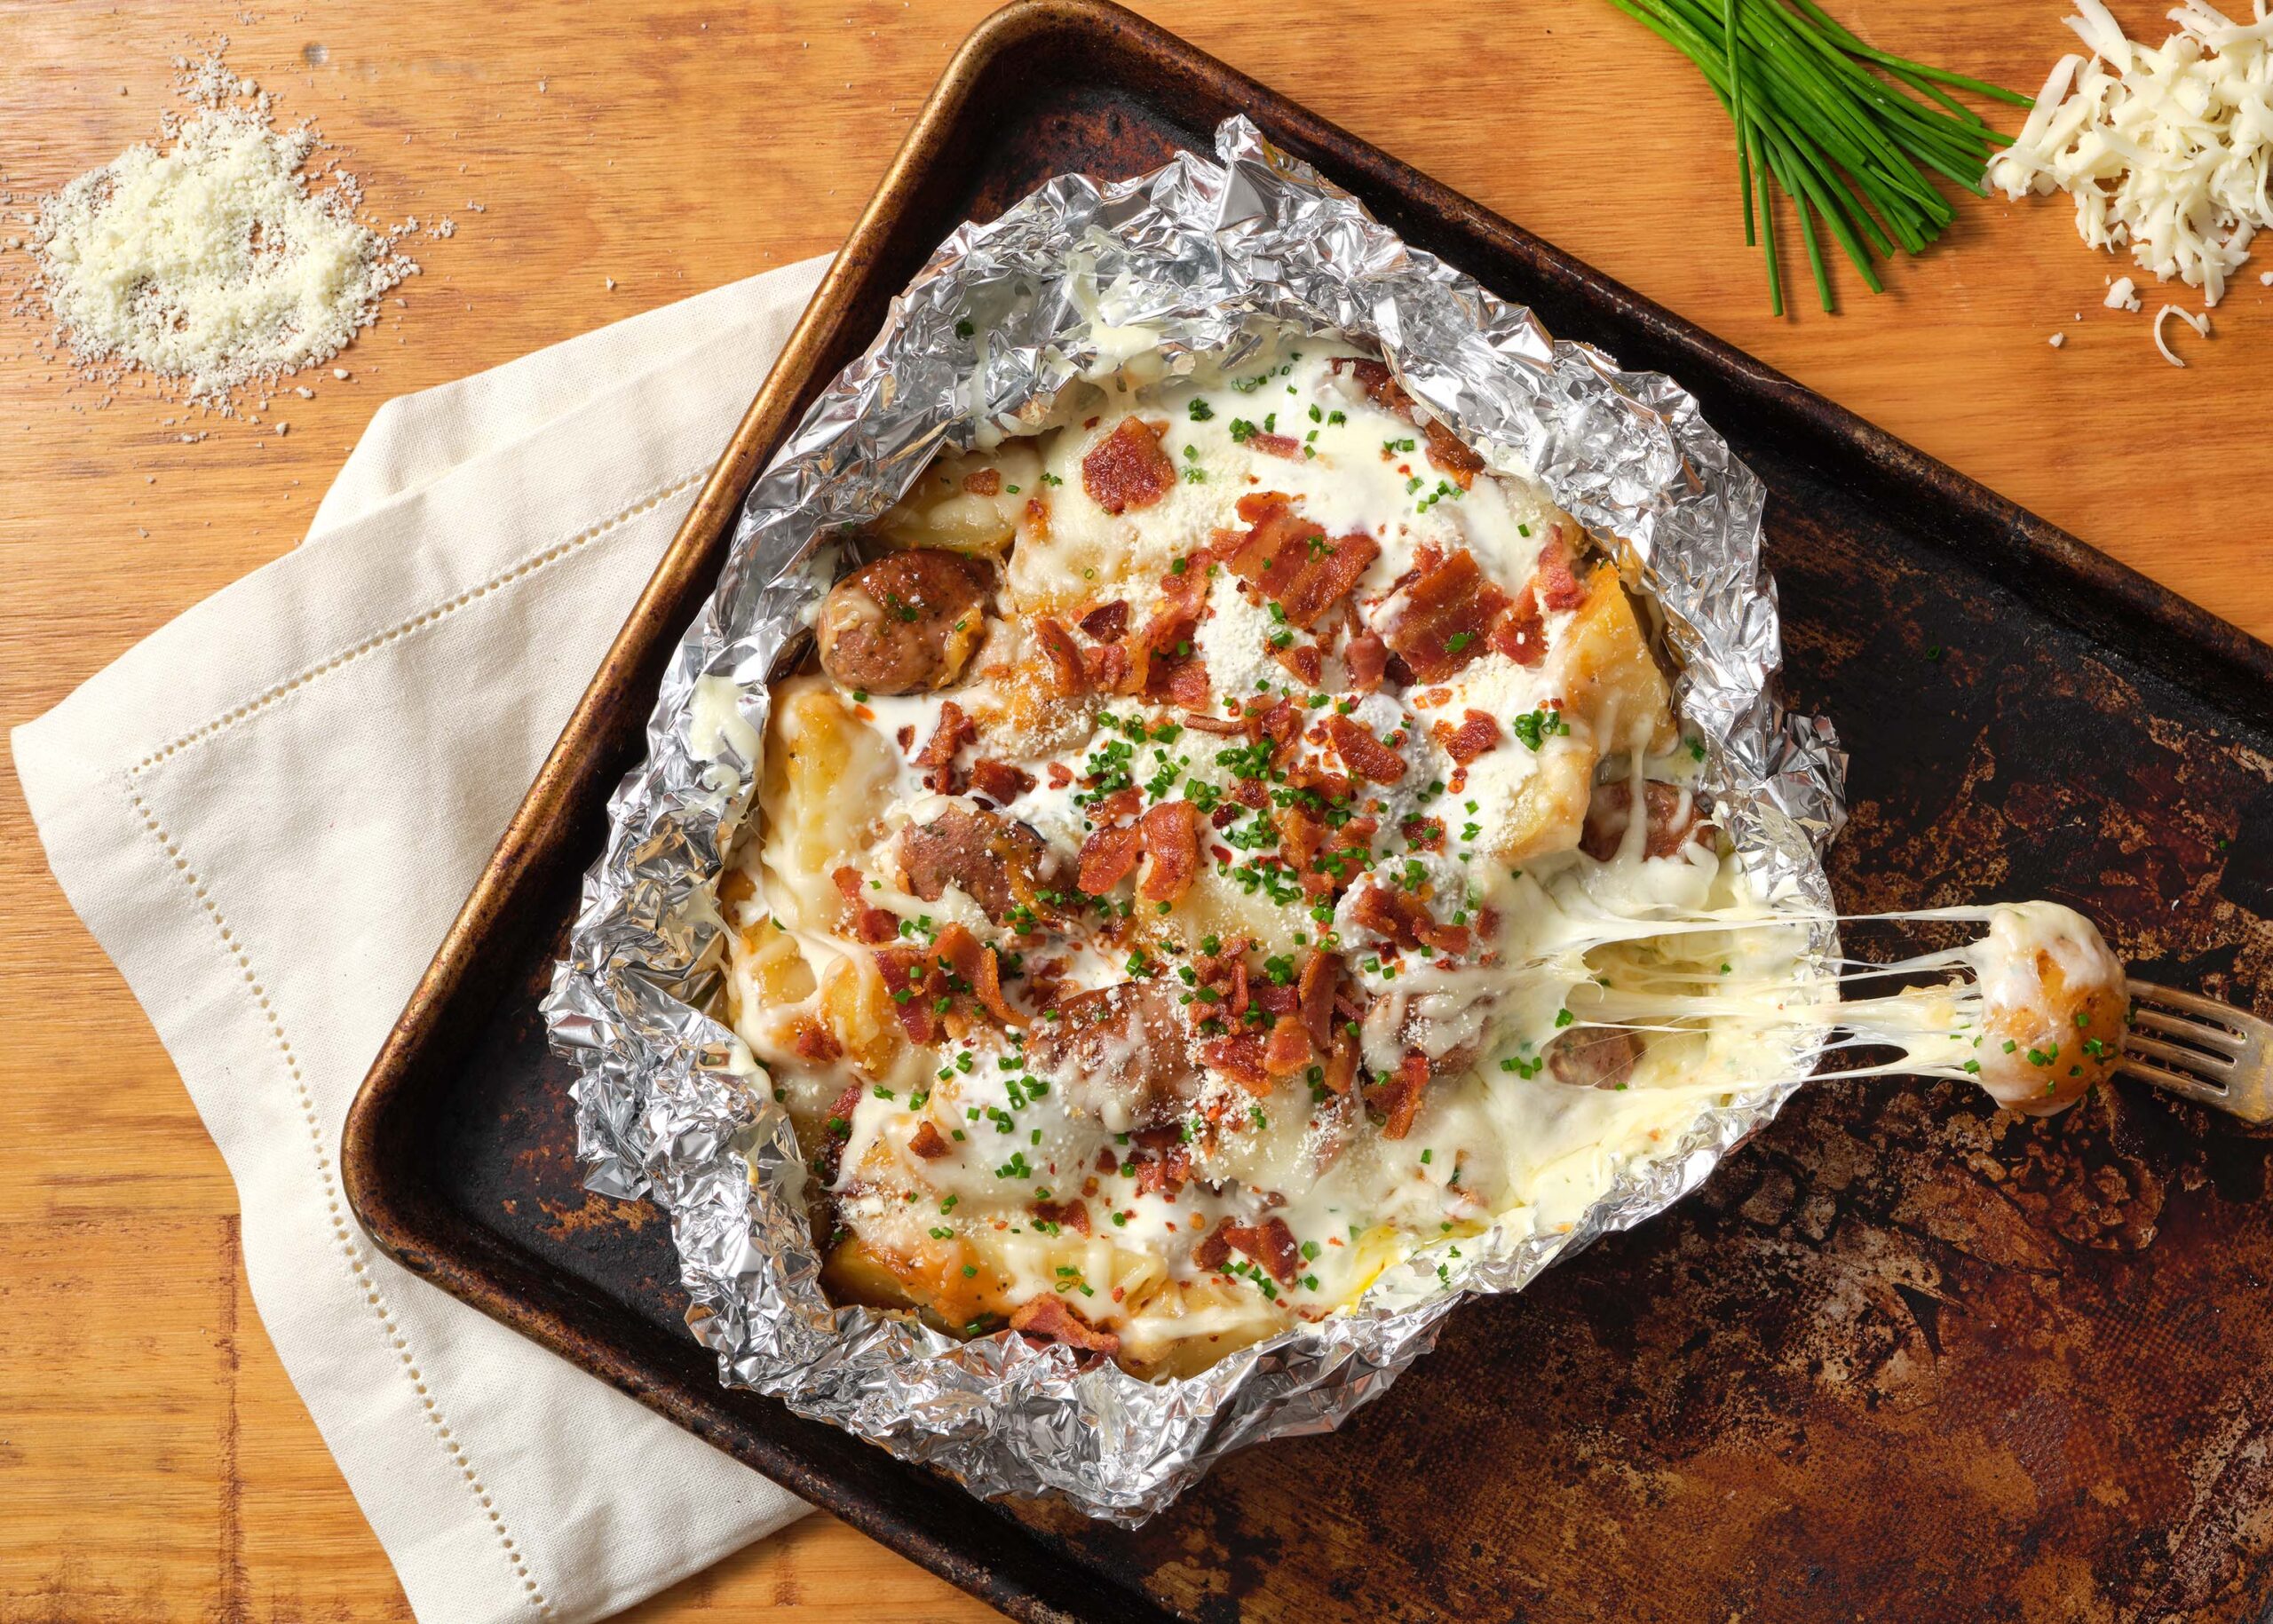

Grilled Queso Fundido Potatoes
Grilled Queso Fundido Potatoes from Pati’s Mexican Table Season 11, Episode 1 “The Fire Kings”
Servings: 4 to 6 servings
Ingredients
- 2 pounds baby potatoes halved
- 4 tablespoons unsalted butter diced
- 1 teaspoon kosher or coarse sea salt or to taste
- ½ teaspoon freshly ground black pepper or to taste
- ½ pound smoked Kielbasa or another cooked sausage
- 1 pound Oaxaca cheese shredded
- ½ cup Mexican crema or to taste
- ¼ cup crumbled Cotija cheese or to taste
- ½ cup crisp and browned chopped bacon
- ¼ cup chopped fresh chives or to taste
- Ground dried piquín chile or chiltepín chile or red chile flakes
Instructions
- Preheat the grill to medium or medium high.
- Place the potatoes in the middle of a large piece of aluminum foil. Top with butter, salt, and pepper. Close the aluminum foil and completely seal the edges as if folding an envelope (or twisting the edges of an empanada). Place on the grill, close the lid, and cook for 15 minutes, until potatoes are cooked, soft and a sharp knife can cut through any one piece.
- Place the Kielbasa on the grill turning until lightly browned on both sides, about 2 to 3 minutes per side. Remove from the grill and cut into bite size pieces.
- Remove the potato packet, open carefully. Add the kielbasa pieces and cover entirely with the Oaxaca cheese. Close the packet again, place on the grill and close the lid. Let it cook for 15 to 20 more minutes, until the cheese has completely melted.
- Remove the packet from the grill, open it and dress it with the crema, Cotija, bacon, chives and ground piquín. Bring it to the center of the table and share!
Notes
Papitas con Queso Fundido