Mexican Style Cream

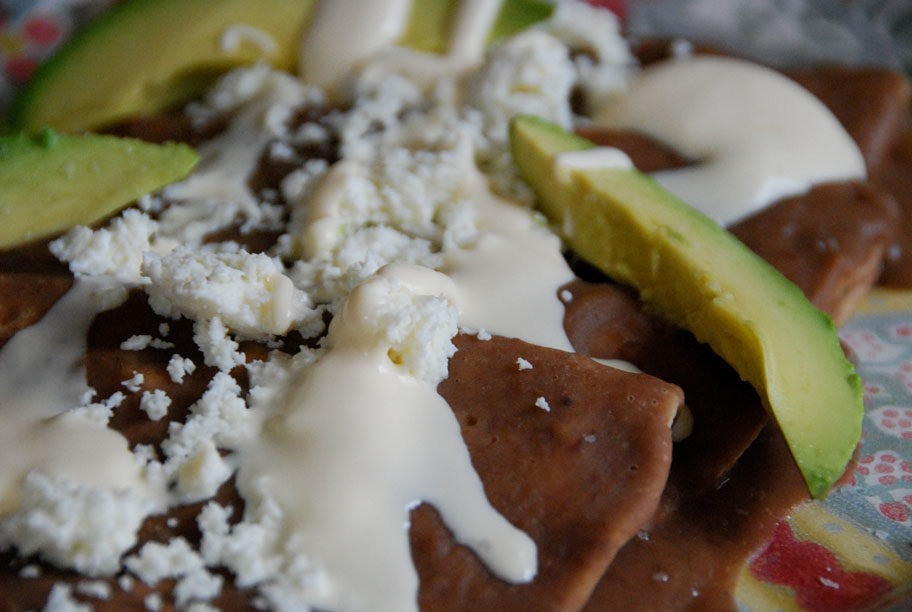
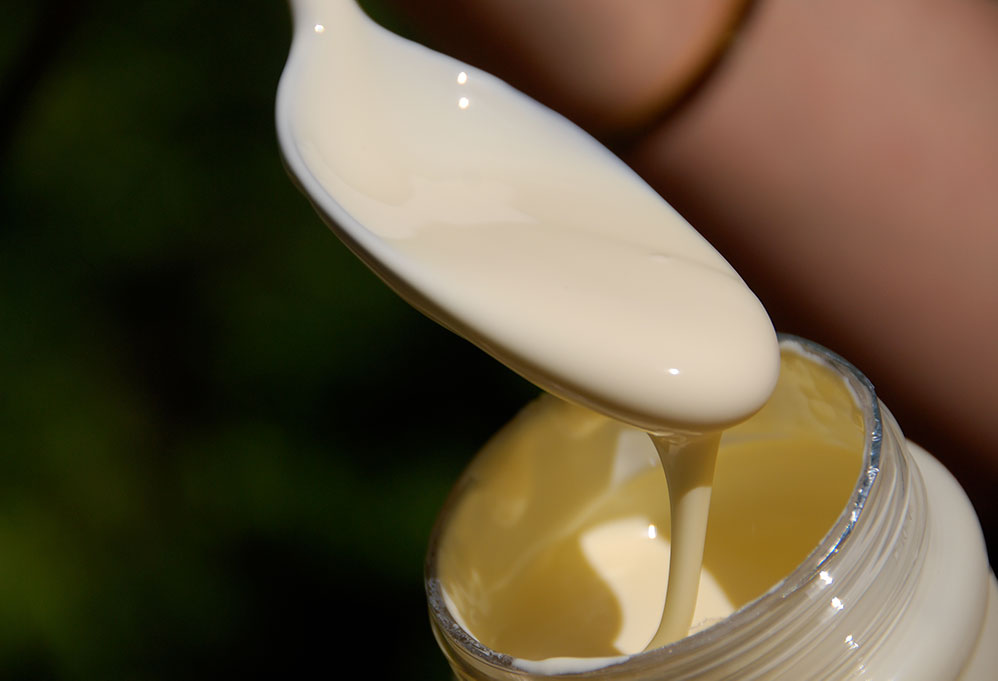
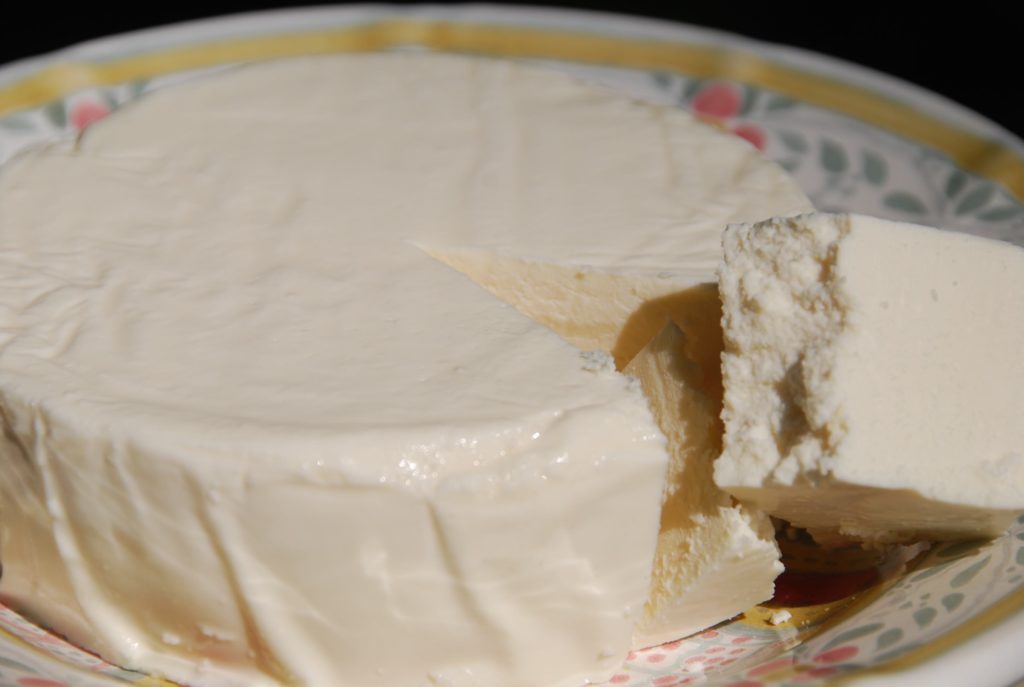
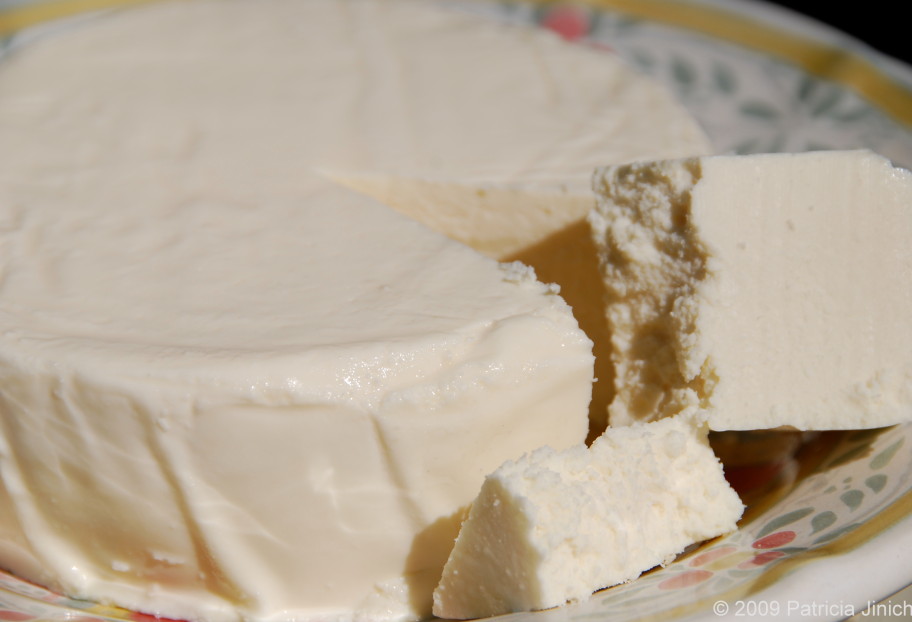
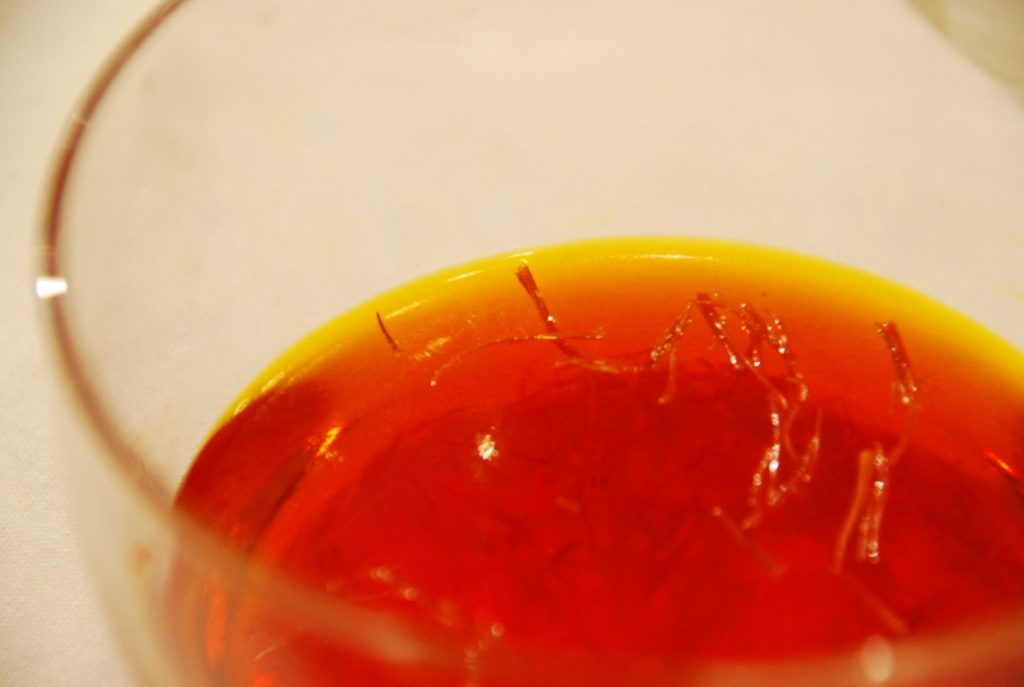
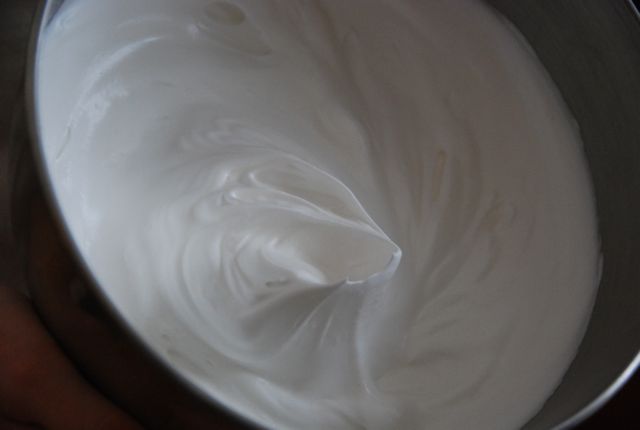
Mexican cream is rich, thick, tangy and slightly salty. It used to be hard to find in the US, but now you can find it in Latin or International supermarkets, but also mainstream stores! In Mexico, you can find it in any grocery store, and there are richer versions in small towns and ranches, where the cream earns its name “Crema Fresca” and I bet you would feel like me: that you can finish a whole pint in spoonfuls.

If you can’t find it, you can substitute it for other kinds of Latin cream, such as the Salvadoran, they are very similar.

You can also opt for French Crème Fraîche if you can’t find Latin style creams. Crème Fraîche and Mexican cream are similar, though the former is thicker and less tangy and salty than the latter. Depending on the dish, if it is used for a topping, you can substitute it for sour cream. Yet if it is used for cooking, I prefer to substitute it for regular heavy cream.

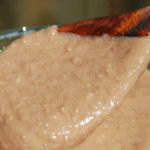
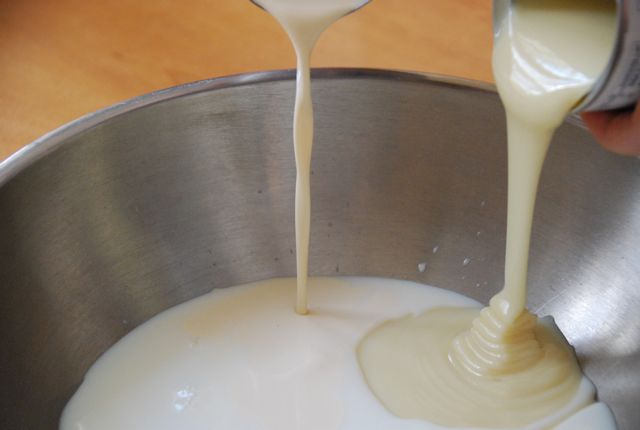
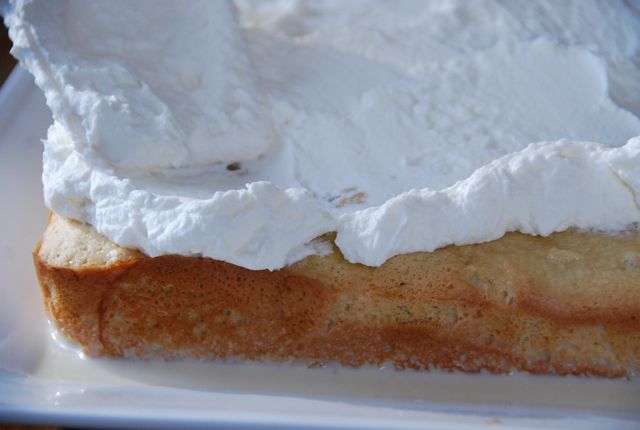
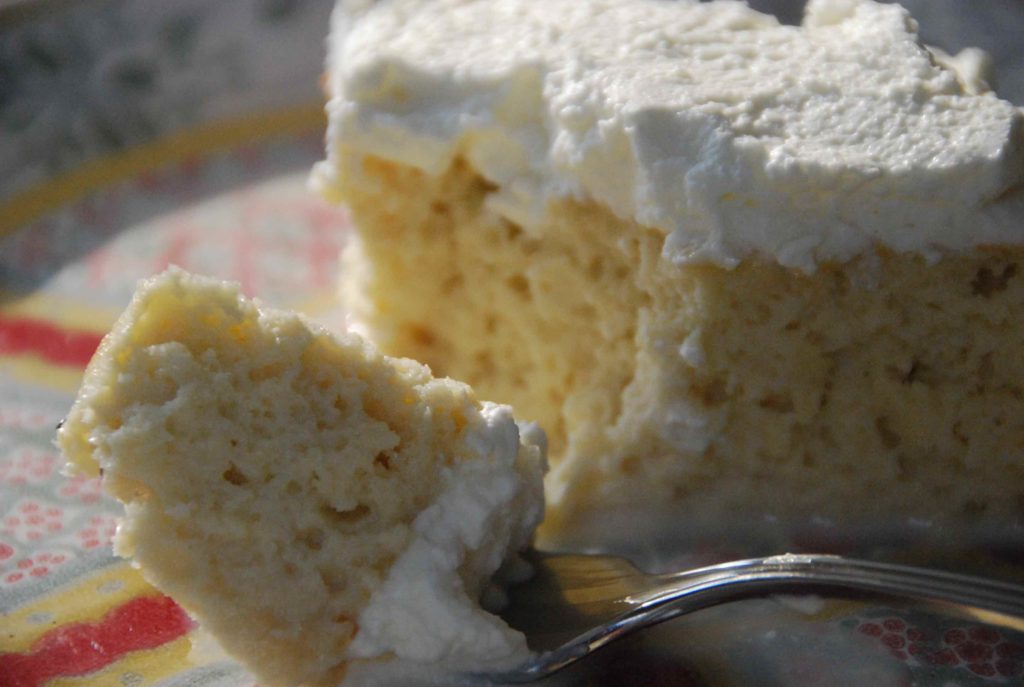
In the photo above, you can see the consistency of Mexican cream, as well as its shine. It really adds another layer or flavor to so many dishes.

Chilorio for Cinco de Mayo!

Memories from growing up in Mexico City revolve around one celebration or another and mostly center on the foods that just had to be there.  If there was no holiday, anniversary, birthday or special occasion for a formal celebration, then we celebrated the food itself.  Just say the magic words and a get together would spring right up.

Nana made tamales? Fiesta!

Mami made mole? Well, what are you waiting for?

Papi brought real quesadillas potosinas? It is Sunday brunch everyone.

However, as much as I can remember, we didn’t celebrate Cinco de Mayo. As kids we reviewed it in passing at school, unless you lived in the state of Puebla.  The place, where on a Cinco de Mayo in 1862, a small Mexican militia won an unexpected victory against the large French army.  It was a short-lived victory, as the French won right back.

But fast-forward almost a couple centuries later: the French and Spaniards are gone, Mexicans proudly celebrate Independence Day every September 16th, and for a reason no Mexican can explain, Cinco de Mayo has become the most celebrated, joyous and colorful holiday for Mexicans living abroad.  It even surpasses the noise we make for Independence Day.

But of course! Any cause is worthy of celebration, especially if it has become the most grandiose occasion to rejoice on Mexican-ness throughout the world.  Thus, at home, we celebrate Cinco de Mayo every year, since we moved to the US more than a dozen years ago.

Pati Jinich with her 3 sons
My food of choice tends to be Chilorio, originally a cowboy dish from the state of Sinaloa, in the North of Mexico.  Chilorio has transcended international boundaries and retained its bold personality.  It is so tasty and popular, that it is even sold in cans inside and outside of Mexico.  But the canned version can’t compare to the home made one, which is very simple to prepare.

Made by cooking meat in orange juice until tender and then finished off in a non-spicy ancho chile sauce, it screams out Fiesta in every single bite.  Not only because of the richness of its colors and flavors, but because of how fun it is to assemble.

Just serve it at the table with a side of warm flour tortillas and your guests can roll their own burritas or burras, however skinny or chubby them want them to be.  You can also serve refried beans and Mexican avocado slices or guacamole that can be eaten inside or on the side of the burritas.  At home we tend to go for eating the beans and guacamole on the side, but it’s up to you!

Say the word Chilorio and I can hear my monsters start to shout out: “Mami made Chilorio, come on over!”

And I say: Roll ’em up boys!

chilorio burritas recipe
Print Recipe
4 from 5 votes

Chilorio

My food of choice tends to be Chilorio, originally a cowboy dish from the state of Sinaloa, in the North of Mexico.  Chilorio has transcended international boundaries and retained its bold personality.  It is so tasty and popular, that it is even sold in cans inside and outside of Mexico.  But the canned version can’t compare to the home made one, which is very simple to prepare.
Prep Time15 minutes
Cook Time1 hour 10 minutes
Course: Main Course
Cuisine: Mexican
Keyword: ancho chiles, garlic, onion, orange juice, pati's mexican table, pork, Recipe, tortilla, vinegar
Servings: 8 servings
Author: Pati Jinich

Ingredients

  • 3 pounds boneless pork butt, shoulder or loin (with some fat on!) cut into 2" chunks, or substitute with chicken
  • 1 1/4 cup orange juice preferably freshly squeezed
  • 1 1/4 cup water
  • 1 teaspoon kosher or sea salt
  • 5 (about 55 grams) dried ancho chiles tops and seeds removed
  • 1 1/2 cup of the chile soaking liquid see below
  • 1/2 cup roughly chopped white onion
  • 4 garlic cloves peeled
  • 1/2 cup fresh parsley leaves
  • 1 teaspoon dried oregano
  • 1/4 teaspoon ground cumin
  • 1/4 teaspoon ground black pepper or more to taste
  • 2/3 cup cider vinegar or distilled white vinegar
  • 3 tablespoons corn oil
  • 1/4 teaspoon kosher or sea salt or more to taste
  • Flour tortillas warmed, optional

Instructions

  • Place rinsed meat chunks in an extended heavy pot. Barely cover with the orange juice and water, add a teaspoon of salt and set over high heat. Once it comes to a boil, bring the heat down to medium and let is simmer for about 40 to 45 minutes, or until most of the liquid has cooked off and the meat is thoroughly cooked and has rendered most of its fat.
  • Meanwhile, remove the stems from the chiles, make a slit down their sides and remove their seeds and veins. Place them in a bowl, cover them with boiling hot water, and let them sit and rehydrate for about 15 minutes. Place the chiles and 1 1/2 cups of their soaking liquid in the blender along with the onion, garlic, parsley, oregano, cumin, black pepper, vinegar, and puree until smooth.
  • Once the meat is ready, place it in a bowl along with any remaining cooking broth. Once it is cool enough to handle, shred it with your hands or with two forks.
  • In the same pot, heat oil over medium heat. Pour in the chile sauce and let it season and simmer for 4 to 5 minutes. Toss in the shredded meat along with any of its remaining cooking broth. Sprinkle 1/4 teaspoon salt and let it cook, stirring often, until the meat has absorbed most of the chile sauce, which will have thickened, seasoned and changed to a darker color. It will take about 20 minutes. Taste for salt and add more if need be.
  • Serve with warmed flour tortillas on the side. If you wish, spoon chilorio on tortillas and roll them into burritas or burras. They are wonderful with refried beans and Mexican avocado or guacamole on the side as well.

Avocado Soup with Queso Fresco

Though there are many kinds of avocado soups, this is my favorite. I tried it at the Mexican Ambassador’s residence a couple months ago. As Doña Rosita, the cook,  heard me mmm, and mmm, and mmmmmmm all over again, she came out of the kitchen with a pen and a piece of paper ready to dictate her recipe.

What a surprise for such a tasty soup: just a handful of ingredients! Seems that what matters, again, is how you use them.

Doña Rosita told me she has tweaked her recipe through time. Also, she sometimes tops it with tortilla crisps, and sometimes with fresh croutons. Depends on the mood. But she always serves it with crumbled Queso Fresco. There you go! Another thing you can do with that Mexican Fresh Cheese, aside from a Green Salad and Enfrijoladas.

It is easy, tasty and sounds oh-so-fancy. Plus, it is wholesome. The only thing I added to Doña Rosita’s recipe, is some fresh lime juice. I couldn’t help it. So check it out, this is how it goes.

Chop a cupful of onion and add it to the already melted butter and hot oil. Cook the onion over low heat, for 12 to 15 minutes, or until it has gone from white, to translucent, to starting to brown around the edges. See the onion down here, it is rendering and deepening its flavors.

Avocado Soup 2

Add some fresh cilantro. Or if you are one of those people that can’t stand cilantro, add another green herb of your choice: parsley, chives, tarragon or a combination, time to play!

Cook the cilantro just until it has begun to wilt. It will be under a minute, just a stir here and there. We don’t want it to brown. 

Then, scoop the fresh Mexican avocado meat out. A main tip to making this recipe be as delicious as it can be, is to use ripe, meaty avocados. So if that avocado is not giving in to your hold as you gently squeeze, it is not ready for you. Let it ripen some more. Make the soup another day.

If you have ripe avocados, cut in half, remove the seed, scoop the meat out and push it into the blender. You could add a bit of Chile too, Jalapeño, or Serrano. Though Doña Rosita doesn’t.Avocado Soup 5

Now go ahead and add all that almost sweetened and browned onion, along with the wilted cilantro into the blender. Yep, along with whatever oil and butter remains too.

Avocado Soup 6
Pour in some chicken broth. Home made or store bought. You can substitute for vegetable broth as well, though I always go for the former.

Avocado Soup 7

For my spin, take out your lime squeezer and add some fresh lime juice right in there too. You can try it without as well and then you get Doña Rosita’s take on the soup.

Avocado Soup 8

Sprinkle some Kosher or Sea salt and puree it all.

If you want the soup “al tiempo”, or lukewarm, pour it right into your bowls. If you want to serve it cold, cover and refrigerate for a couple hours. Now, if you want it hot, you can as well! Just puree it with some hot chicken broth in the prior step. Talk about an accommodating soup.

Avocado Soup 9
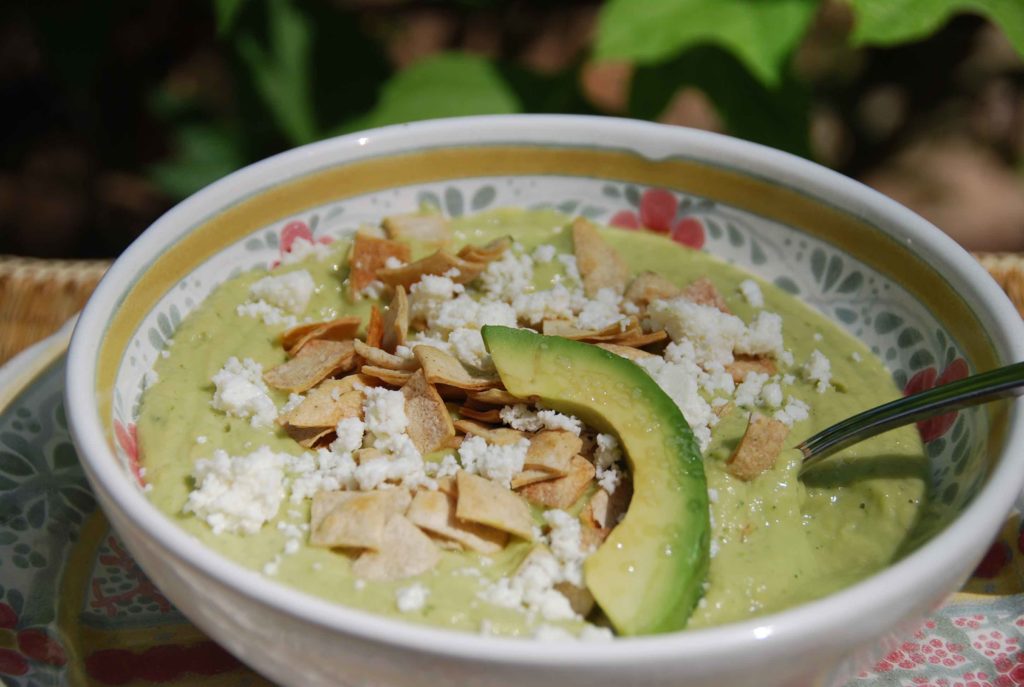
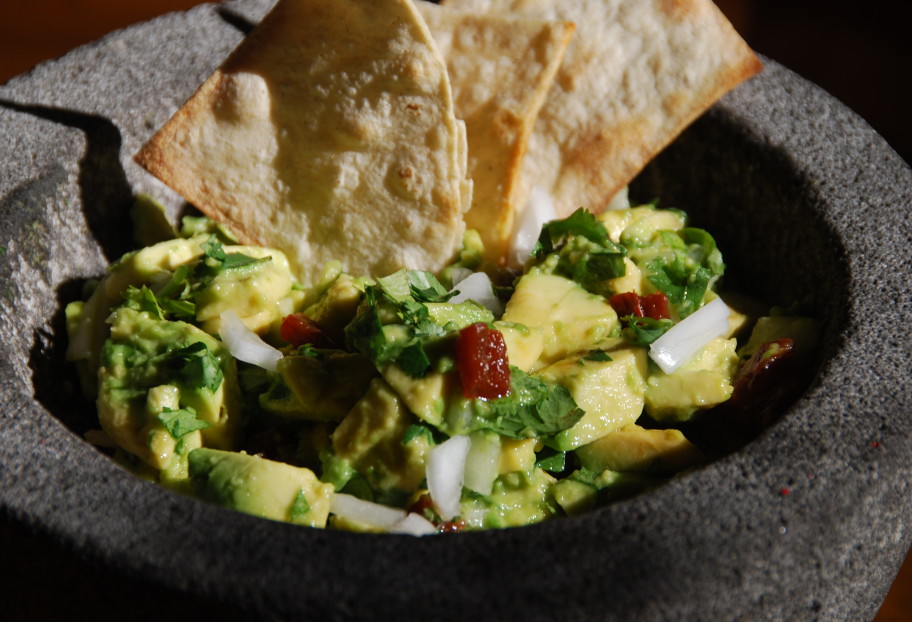
Sprinkle a few, or a ton, corn tortilla crisps.

Avocado Soup 10
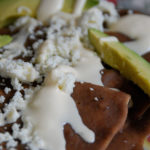
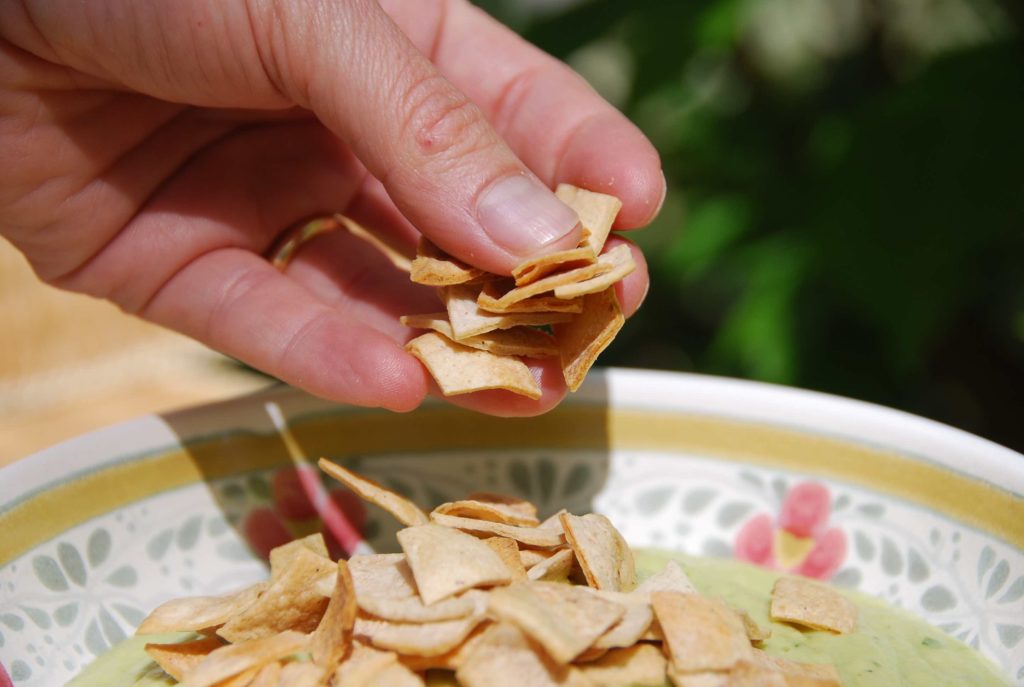
I guess I went for a ton.
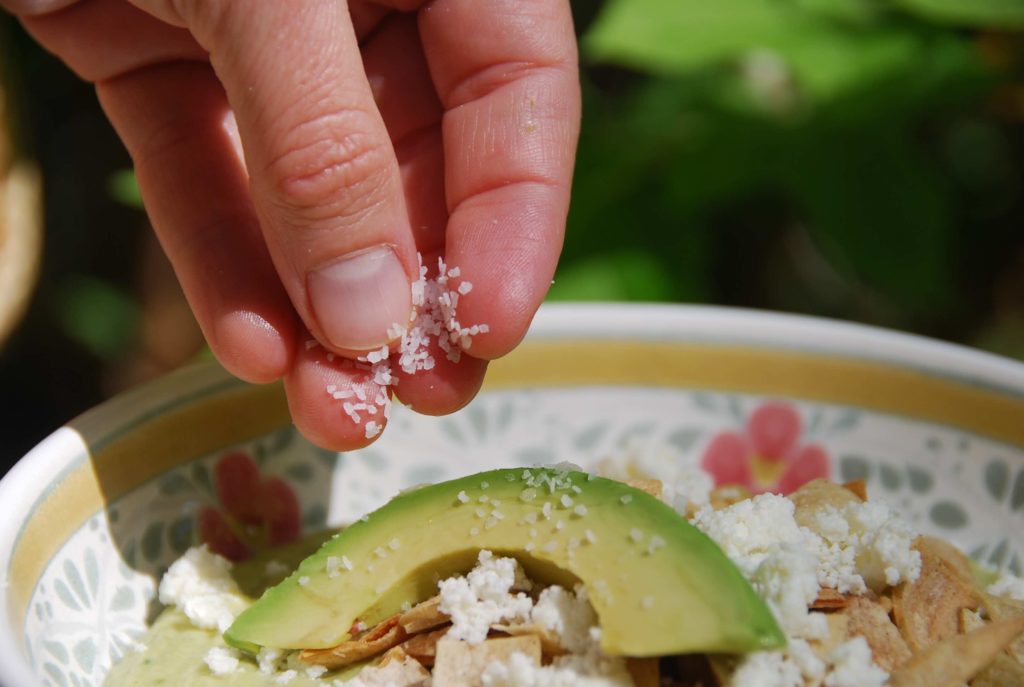
Sprinkle some tangy and salty Queso Fresco, and… why not? You can decorate it with a slice of creamy and ripe avocado right on top.

If you do, sprinkle a bit of salt on it. Fresh avocado always seems to beg for a little salt.

Avocado Soup 11

There you go, a smooth, fresh, wholesome and tasty soup, with some crunchy tortilla crisps and a tangy bite from the Queso Fresco in every bite.

Avocado Soup 12I already had some.

Avocado Soup 13

Print Recipe
4 from 5 votes

Avocado Soup

Though there are many kinds of avocado soups, this is my favorite. I tried it at the Mexican Ambassador’s residence a couple months ago. As Doña Rosita, the cook,  heard me mmm, and mmm, and mmmmmmm all over again, she came out of the kitchen with a pen and a piece of paper ready to dictate her recipe. What a surprise for such a tasty soup: just a handful of ingredients! Seems that what matters, again, is how you use them.
Prep Time5 minutes
Cook Time15 minutes
Course: Soup
Cuisine: Mexican
Keyword: Avocado, chicken broth, cilantro, feta, jalapeno, lime, onion, queso fresco, tortilla chips
Servings: 4 to 6 servings
Author: Pati Jinich

Ingredients

  • 1 tablespoon corn or safflower oil
  • 1 tablespoon unsalted butter
  • 1 1/2 cup white onion roughly chopped
  • 1 cup cilantro leaves rinsed and loosely packed
  • 1 jalapeno chile sliced in half, seeding optional if less heat is desired
  • 3 large ripe Mexican avocados cut in half, seed removed, flesh spooned out, about 3 cups ripe avocado flesh
  • 6 cups chicken broth can substitute vegetable broth
  • 1 tablespoon fresh lime juice
  • 3/4 teaspoon kosher or sea salt more or less to taste
  • 1 1/2 cups tortilla crisps
  • 1 cup queso fresco crumbled, may substitute farmers cheese or a mild feta

Instructions

  • In a medium skillet, set over medium-low heat and add the butter and oil. Once the butter dissolves, stir in the onion and jalapeno. Let them cook, stirring occasionally, until the onion has softened. Its color will become translucent and the edges will begin to turn light brown, about 12 to 15 minutes. Incorporate the cilantro leaves and mix them in with the onions and jalapeno. Once the cilantro has wilted, 30 seconds to a minute later, turn off the heat.
  • Place the peeled and seeded avocados in the blender or food processor along with the cooked onion, jalapeno, cilantro, chicken broth, lime or lima juice and salt. Puree until smooth, taste for salt and add more if need be.
  • You may serve bowls garnished with tortilla crisps and cheese, or let your guests garnish to their liking.

Notes

Sopa de Aguacate

Molinillo

The molinillo is a traditional Mexican kitchen utensil, that has been used for centuries to make froth in hot chocolate. It is made of a single piece of wood. The top part, typically thick and round, has decorations and indentations. A number of loose, movable rings follow. Lastly a round handle that is soft and round making it easy to beat with your hands. All of the decorations, shapes and pieces are made to create the most froth possible.

Though it is not that easy to find molinillos outside of Mexico, any market in any part of Mexico will likely have not only one, but different kinds to choose from.

Enfrijoladas

We came back home exhausted, after being away for a couple weeks in Canada for a big family reunion. Though we had delicious meals, trying all sorts of Canadian fare, as soon as we walked in I was ready to make some comforting, home tasting food.

Few things taste more like home to me, than beans. In Mexico there is always, always, a simmering pot of beans cooking at some point during the week in any kitchen. As beans need to be cooked for a long time, they infuse the kitchen with a moist, earthy and cozy aroma, that remains even after the beans are ready.

Of course one can make more than a thousand things with a batch of Frijoles de Olla, or Beans from the Pot. But one of the things that are the most simple, yet comforting, asides from scooping them with corn tortillas, are Enfrijoladas.

Filling and tasty, Enfrijoladas wrap some of the main flavors and textures from Mexico’s cuisine in their fold.

The soft corn tortillas, that you can make or buy ready made at the stores (if you buy them, go for the unrefrigerated ones). The rich, straightforward and creamy seasoned bean puree, which also goes by frijoles colados, in which they are dipped in and smothered everywhere.

dipping corn tortilla in bean puree
The thick, tangy and fresh taste of the Crema Fresca, or Mexican cream, that you drizzle on them after you fold them on a plate.

mexican crema
The salty, crumbly, Ranchero take of the Queso Fresco (Remember I was going to tell you many things that you can make with Queso Fresco?).

queso fresco
And of course, to top that off, you can slice some ripe luscious Mexican avocado on top. And if you feel like it, have a serving of any salsa, or Chipotles in Adobo on the side to drizzle along.

enfrijoladas
Enfrijoladas, as are most Mexican antojos or cravings, are truly versatile.  They can be eaten for breakfast, lunch or dinner and can be a main dish or a yummy side to grilled chicken or meat.

They are so, so, comforting, that when I was once asked what I would serve the Mexican President in times of distress if I had the opportunity, I said: It has to be Enfrijoladas.

enfrijoladas
Print Recipe
4.20 from 5 votes

Enfrijoladas

Few things taste more like home to me, than beans. In Mexico there is always, always, a simmering pot of beans cooking at some point during the week in any kitchen.O f course one can make more than a thousand things with a batch of Frijoles de Olla, or Beans from the Pot. But one of the things that are the most simple, yet comforting, asides from scooping them with corn tortillas, are Enfrijoladas.
Prep Time5 minutes
Cook Time10 minutes
Course: Main Course
Cuisine: Mexican
Keyword: Avocado, chipotles in adobo, corn tortillas, mexican crema, queso fresco, refried beans
Servings: 8 servings
Author: Pati Jinich

Ingredients

  • 4 cups frijoles colados or seasoned and pureed beans
  • 16 corn tortillas
  • 1 cup Mexican cream or heavy cream
  • 1 cup queso fresco or fresh cheese, or farmers cheese, or a mild feta
  • Mexican avocado slices optional
  • Chipotles in adobo sauce optional

Instructions

  • Heat a comal or dry skillet over medium heat.
  • Heat the pureed beans in a medium cooking pot to a gentle simmer.
  • Taking one tortilla at a time, heat on the comal or skillet for about 30 seconds per side. Take the tortilla with a pair of tongs and immerse it in the bean puree. Place it on a plate, fold it as if it were a quesadilla or a turnover. Drizzle on as much cream and sprinkle on as much cheese as you like.
  • You can also top it with some avocado slices and a bit of chipotles in adobo sauce.

Frijoles de Olla or Beans from the Pot

The uses of beans in Mexican cooking are immense. Although you can buy them already made, if you make them at home they have a much nicer flavor and you will give your kitchen an irresistible smell. You can make a lot of them and refrigerate a batch which should last in the refrigerator for about 4 to 5 days. You can freeze another batch which will last for months.

I will give you two tips, included in the recipe below, if you make them at home:

1. Don’t add the salt in the beginning or it will toughen the beans. Add it at least after an hour of cooking when the beans are already a bit soft.

2. You don’t need to soak them the night before cooking. Yes, that helps to reduce the cooking time, but it is not necessary. If you do soak them, don’t soak them more than 12 to 14 hours, because they may begin to ferment and you will finish with a Chinese rather than Mexican tasting dish.

I like making them with either Black beans, traditional in the South of Mexico, Peruvian beans, which are more used in the Central part of Mexico, or with Pinto beans which are more customary in the North. The latter ones have a creamier feel and more subtle flavor.

Traditionally Frijoles de la Olla are cooked in an earthenware pot. It does impart a special Pueblo style flavor.

Many cooks in Mexican kitchens make them in pressure cookers, as it cuts the time almost in half, but I am a bit weary of them, as I have seen one too many explode! Plus, cooking beans only requires you to be home for a certain amount of time, you don’t need to do anything but peek in every once in a while to make sure that there is still enough liquid.

I cook mine sometimes in an old earthenware pot and sometimes in a normal large cooking pot. They both work very well.

beans from the pot or frijoles de olla
Print Recipe
4.34 from 6 votes

Beans from the Pot

The uses of beans in Mexican cooking are immense. Although you can buy them already made, if you make them at home they have a much nicer flavor and you will give your kitchen an irresistible smell. You can make a lot of them and refrigerate a batch which should last in the refrigerator for about 4 to 5 days. You can freeze another batch which will last for months.
Cook Time1 hour 45 minutes
Course: Side Dish
Cuisine: Mexican
Keyword: beans, onion, pati's mexican table, pinto beans, Recipe, refried beans
Servings: 5 cups beans, 2 cups cooking broth
Author: Pati Jinich

Ingredients

  • 1 pound (or about 2 1/4 cups) pinto peruvian or black beans
  • 1/2 white onion about 1/2 pound, outer skin peeled off
  • 10 cups water may add more if necessary
  • 1 tablespoon kosher or coarse sea salt or to taste

Instructions

  • Rinse the beans in cold water and drain. Place them in a big heavy pot and cover with enough water to come up to at least 3″ above the top of beans, about 10 cups of water. Incorporate the onion and bring to a boil. Let the beans simmer, partially covered, for about 1 1/2 hours, until the beans are soft and then add the salt. Don’t add the salt in the beginning or it will toughen the beans.
  • Let them continue simmering, for about another 15 minutes, or until the beans are so soft they come apart if you hold one between your fingers, and the broth has thickened to a soupy consistency. If the beans are not yet soft and the broth is drying out, add more water. Before eating, remove the cooked onion with a slotted spoon.

Notes

Frijoles de Olla

Pinto Beans

My personal favorite bean, they are lighter in color, creamier in texture and softer than black beans.  In Northern states, the pinto is the most popular bean.

In Sinaloa they cook them with onion, garlic, tomato and serrano chile, those four ingredients that are the basis for many Mexican dishes. There is also a twist on Sinaloa beans called frijoles puercos or piggy style beans which is rather heavy, and served with bacon, chorizo, and cheese.  It is delicious!

Known for its mottled skin, it is also the most common bean in the US.

Frijoles Colados or Strained Beans

The Frijoles Colados or Strained Beans, are what the Yucatecans call Frijoles de Olla that have been pureed and then seasoned by being cooked in sauteed onion. They are cooked just for a couple minutes as they season. So its like a gently seasoned and lightly thickened Bean Puree.

They are like a dish made in between the Bean Puree and the Refried Beans. If you continue to cook the Frijoles Colados, you get to a consistency of a smooth version of Refried Beans.

strained beans or frijoles colados
Print Recipe
5 from 2 votes

Strained Beans

The Frijoles Colados or Strained Beans, are what the Yucatecans call Frijoles de Olla that have been pureed and then seasoned by being cooked in sauteed onion. They are cooked just for a couple minutes as they season. So its like a gently seasoned and lightly thickened Bean Puree.
Prep Time1 minute
Cook Time7 minutes
Course: Side Dish
Cuisine: Mexican
Keyword: beans, beans from the pot, onion, pati's mexican table, pinto beans
Servings: 4 cups
Author: Pati Jinich

Ingredients

  • 1 portion basic bean puree (see basic pureed beans post)
  • 1/2 white onion chopped
  • 3 tablespoons safflower or corn oil
  • Kosher or sea salt to taste

Instructions

  • In a large saute pan over medium heat, pour the oil and heat until hot but not smoking, about 1 to 2 minutes. Add the onions and let them saute for 3 to 4 minutes, until they have softened, become translucent, and have started to slightly brown along the edges.
  • Add a cupful of the basic bean puree at a time, over the sauteed onion, and let them season for 3 to 4 minutes.

Notes

Frijoles Colados

Chilaca Chile

The Chilacas, similar to the American Anaheims, are long, thin chiles, that sometimes twist and have a shinny light green color. Their heat goes from mild to mildly hot, but they are never very spicy.

Chilacas are very meaty and are used many times as a vegetable. Most times charred, peeled, and seeded, like the Poblanos, they are used for side dishes like rajas sauteed with onions and sometimes cream and cheese. I ate this version many times in the state of Chihuahua, in the North of Mexico. They are also used for eggs, sauces, soups, casseroles and fillings, amongst other things.

Chilacas become Pasillas when dried, and turn raisin black in color and interestingly bitter in flavor. They are sometimes confused with the New Mexico chile when dried, as they are and look similar, but the later is hotter.

Queso Fresco: Tri-Color Salad with a Lime-Honey Vinaigrette

Yesterday, right after my blog turned 1 year old, I added a new category under Ingredients: Cheese.

This site is a continuous work in progress. As my husband notes, it is very time consuming, but as I always respond, it is immensely rewarding. Truth is, I can’t wait to keep on adding more. One of the things I have loved the most has been getting your requests, so please, keep them coming! Which brings me back to Mexican cheese, a topic I have gotten many requests for.

The first kind I added is the widely available Queso Fresco.  A deeply white, mild, fresh, light, barely salty, gently tangy and versatile cheese that crumbles right in your mouth the moment you take a bite. Yet, it also holds its shape beautifully if you dice it or cut it into sticks. So it lets you play with it in many ways.

Tri-Color Salad 1

Aside from crumbling Queso Fresco directly on plenty of antojos like tacos, tostadas and enchiladas, one of my favorite ways to use it is on top of salads. I know, Mexican salads are not that well known. That said, I have never, in my life, seen a taco salad on Mexican grounds. There is a universe of wholesome and delicious Mexican salads to be found in Restaurants, but mostly, in people’s homes.

Every Mexican household has a secret vinaigrette that is both regularly used and waiting to be screamed out. But you can rarely get the exact recipe, because they are typically made “al tanteo“, an expression that I love, which means by feel, as you go.

Rather than placing the ingredients in a mixing bowl and emulsifying with a whisk as the French might do, in Mexico ingredients are commonly added in a Tupperware and shaken up until well blended.

Here is the secret vinaigrette from our home, which I measured, so you can make it if you please. You can substitute the honey with brown sugar, the main point being, that you need a bit of sweet to make the rest of the ingredients shine through. I added Boston lettuce, tomato and Mexican avocado here, but you can play with more ingredients that you may have at home: asparagus, scallions, jí­cama, to name some…

Tri-Color Salad 2

Aside from making the salad more hearty and filling, the Queso Fresco adds a nice contrast to the vinaigrette with its subtle salty and tangy notes. I will give you more ideas for using Queso Fresco in upcoming posts, so when you see it in the store, bring some home!

Tri-Color Salad main
Print Recipe
4.25 from 4 votes

Tri-Color Salad with Fresh Cheese and Lime-Honey Vinaigrette

Here is the secret vinaigrette from our home, which I measured, so you can make it if you please. You can substitute the honey with brown sugar, the main point being, that you need a bit of sweet to make the rest of the ingredients shine through. I added Boston lettuce, tomato and Mexican avocado here, but you can play with more ingredients that you may have at home: asparagus, scallions, jí­cama, to name some…
Prep Time5 minutes
Cook Time5 minutes
Course: Salad
Cuisine: Mexican
Keyword: Avocado, boston lettuce, brown sugar, honey, lime, mustard, queso fresco, Recipe, salad, Tomatoes, vinaigrette
Servings: 6 to 8 servings
Author: Pati Jinich

Ingredients

For the salad:

  • 2 heads boston lettuce rinsed and drained
  • 1 pound tomatoes about 2, quartered, seeded and sliced
  • 1 large Mexican avocado halved, pitted, meat scooped out and sliced
  • 8 ounces queso fresco fresh cheese, may substitute with farmers cheese or feta cheese

For the vinaigrette:

  • 2 tablespoons fresh squeezed lime juice
  • 2 tablespoons white distilled vinegar
  • 1/2 teaspoon honey or brown sugar
  • 1 1/2 teaspoons dijon mustard
  • 1 1/2 teaspoons kosher or sea salt
  • 1/2 teaspoons black pepper freshly ground
  • 5 tablespoons vegetable oil
  • 5 tablespoons olive oil

Instructions

To make the vinaigrette:

  • Place lime juice, vinegar, mustard, honey, salt and pepper in a mixing bowl and thoroughly mix with a fork. Slowly pour safflower or vegetable oil and olive oil as you mix with a fork or whisk, emulsifying the ingredients so that they are well combined. You can also place all the ingredients in a tupperware or jar and shake until well mixed.
  • You may make the vinaigrette ahead of time, but be sure to cover and refrigerate. Whisk it again or shake it in a closed container so that it is emulsified before you add it to the salad.

To make the salad:

  • Place the lettuce leaves and tomatoes in a salad bowl. Add some of the vinaigrette and gently toss, so that the salad is moist but not soaked. Place the avocados and crumbled cheese on top. Drizzle some more vinaigrette on top and serve.

Notes

Ensalada Tri Color con Queso Fresco y Vinagreta de Limón y Miel

Queso Fresco

Queso Fresco, which translates to Fresh Cheese, can be found throughout Mexico with slightly different variations. It is also called Queso de Pueblo,  Queso de Rancho and sometimes just Queso Blanco. In some small towns it may be found sold wrapped in banana leaves and if you are lucky, in the small baskets where they are sometimes made.

It generally comes in rounds. Though it appears to be  firm and can hold its shape nicely when cut into sticks or squares, it is very soft and crumbles easily. It is used in many ways, such as a side to guacamole and salsas, crumbled on top of hundreds of antojos like tacos, tostadas, enchiladas, refried beans and even soups. I also love it diced or crumbled in salads. Possibilities are endless.

It is mild, slightly salty, very fresh and a bit tangy. If you can’t find it -though these days it is readily available abroad, not only in Latin stores but also in places like Costco- you can substitute it with a farmers’ cheese or a mild young feta.

One of the wonderful things about Queso Fresco, is that even if you cut it in sticks or squares, once in your mouth, it deliciously crumbles.

Basic Pureed Beans

Pureed beans are made with Frijoles de la Olla that are placed in a blender or food processor and pureed until smooth. They serve many purposes such as bases for soups and enfrijoladas. But also, they can be seasoned and turned into what the Yucatecan people call Frijoles Colados or Strained Beans.

Frijoles Colados are pureed beans that are seasoned by being cooked and thickened a bit over sauteed onion. If you keep on cooking the Frijoles Colados about 15 minutes more, you get to to have a smooth version of the Refried Beans.

basic pureed beans
Print Recipe
4.17 from 6 votes

Basic Pureed Beans

Pureed beans are made with Frijoles de la Olla that are placed in a blender or food processor and pureed until smooth. They serve many purposes such as bases for soups and enfrijoladas. But also, they can be seasoned and turned into what the Yucatecan people call Frijoles Colados or Strained Beans.
Cook Time5 minutes
Course: Side Dish
Cuisine: Mexican
Keyword: beans, beans from the pot, pati's mexican table, pinto beans, refried beans
Servings: 5 cups
Author: Pati Jinich

Ingredients

  • 1 portion Beans from the Pot or 5 cups precooked beans and 2 cups of cooking liquid (including their liquid and enough water to make 2 cups)

Instructions

  • In batches, place beans and their cooking liquid in the blender or food processor and puree until smooth.

The Splendid Table: Jewish Mexican Food Talk

Is there something called Mexican Jewish Food? You bet! Jewish people brought their staple dishes to Mexico since the late 15th century. They became enriched with the exotic ingredients and cooking methods found in Mexico’s kitchens, with fabulous results.

I had the pleasure of talking about it at this week’s Splendid Table. Listen on!

To listen, click here

Mole Poblano: Yes You Can!

The showcase of last week’s class was one of Mexico’s most famous and delicious moles, the Poblano, which originated in the kitchen of the Convent of Santa Rosa, in Puebla. After seeing how much guests enjoyed it, I can’t wait to share it with you.

I know, the word Mole sounds exciting to eat yet intimidating to prepare. As the root of the word describes, from the náhuatl mulli, Mole is a thick sauce or paste made by grinding ingredients together in a molcajete or communal mill. A food processor works as well. This sauce can be thinned out with broth or water when ready to use.

The Poblano with its long ingredients list and its laborious process, is not the best way to introduce Moles. There are some simple Moles with no more than 4 or 5 ingredients that are easier to prepare and just as tasty.

But here I am! I adore the Poblano and I know you will too.

I tested many ways to find the easiest route to make it without compromising its authenticity and flavor. As long as you prep your ingredients and have them in place before you start throwing them in the pot -what the French call Mise en Place and Mexicans Estate Listo!-, it’s a manageable task that takes about an hour. Trust me. Here we go.

As I list the ingredients, we’ll go through some Mole basics.

Four chiles are typically used: The reddish Ancho (6 o’clock) with bittersweet and fruity flavors; the black Mulato (12 o’clock) with much sweeter, chocolaty and fuller tones; the raisin colored Pasilla (3 o’clock) with a deep, strong and bitter bite; and the tobacco looking Chipotle (9 o’clock) smoky, rich and spicy.

Mole Poblano 1

To be worthy of the name Mole, its not enough to be a sauce. You need chiles in there, but adding a Jalapeño doesn’t make it a Mole. Some chiles work together and some don’t. Some work for certain kinds of moles and some don’t. This group of four, is like the Fantastic Four.

The Mole Poblano has the deep clean flavors from the white onion, a judicious use of the pungent garlic, the refreshing punch from the tomato and the tartness of the tomatillo.

Mole Poblano 2

Moles show a deep intermarriage between the native Mexican cuisine and that brought from Spain. Three centuries of Colonial life deeply influenced our food. That’s the case of the onion, garlic and many of the nuts, fruits and spices added below.

Native peanuts and pumpkin seeds which are present as a thickener and flavoring element in many Mexican dishes, add some Mediterranean almonds, a bunch of sweet raisins.

Mole Poblano 3

Chile seeds tend to be discarded in many Mexican dishes, but not in this Baroque concoction from the late 1600s. Seeds do store most of the heat from chiles but also a ton of their flavor.

They are beautiful too, especially in my grandmother’s bowl which photographs so nicely.

Mole Poblano 4

Other seeds and spices included take a ride through Mexico’s history: Sesame seeds brought by African slaves; anise seeds, cloves, cinnamon and black peppercorns from the Orient routes; allspice from the Caribbean; coriander, thyme and marjoram from the Mediterranean.

Mole Poblano 5

To thicken the Mole and to add an earthy base with a small town flavor, corn tortillas are used. As well as Mexican style bread -bolillos or teleras which are the Mexican adaptation of the French baguette from the times of Maximilian.

Mole Poblano 6

To top the balancing act of this dish, and also because it was created by Sor Andrea de la Asunción, a nun with an incredible sweet tooth, Mexican chocolate is added. Made with toasted cacao, cinnamon, sugar and typically ground almonds, it is sweeter and grainier than regular bittersweet chocolate.

Not that much chocolate is added though, so the idea that the Mole Poblano is a chocolate sauce is a bit exaggerated.

Mole Pobalno 7

Now that we ran through the ingredients, let’s cook it. As we do, you will see that another Mole quality is that ingredients are transformed, and their qualities brought out, before they are pureed together. That helps achieve such a smooth layering of complex flavors.

First add lard, vegetable shortening or oil in your pot. Once hot, saute the chiles until crunchy and browned. Remove with a slotted spoon and place in a bowl. They will look something like this.

Mole Poblano 8

In that same pot add the onions and garlic and cook until softened, for about 2 to 3 minutes.

Mole Poblano 9

Make some room and toss in the almonds, peanuts, raisins and pumpkin seeds, cook for another 2 to 3 minutes more.

Some versions of this mole ask that ingredients be charred, broiled, toasted, sauteed, ground one by one, even with different pots and pans. But you can use the same pot as long as it is heavy, large and extended and as long as you give the ingredients enough time before adding the next batch.

So, make some room again to throw in those beautiful reserved chile seeds, AND…

Mole Poblano 10
…sesame seeds, stemmed cloves, anise seeds, coriander seeds, black peppercorns, cinnamon stick, ground allspice, thyme and marjoram. Let it all cook for 4 to 5 minutes.

Make some room again, and add the already charred or broiled tomatoes and tomatillos, the sliced tortillas and bread.

Mole Poblano 11

As you add each additional batch of ingredients, give them time to season and brown together. Don’t let any of them burn though.

Go ahead and add the chiles that you already browned, and mix it all up.

Mole Poblano 12

Pour in some rich tasting chicken broth.

Mole Poblano 13

Once it starts to simmer, drop in the chocolate pieces and stir until they dissolve.

Look at the gorgeous looking mess that we have here below!!!

Mole Poblano 14

Let it all simmer for about 15 minutes. You have quite a diverse group of ingredients in there, so they need a bit of time to get acquainted with each other.

Mole Poblano 15

Turn off the heat and let the mixture stand, so it can make sense of what it will become.

Then, puree in a food processor or blender. Or why not, if you feel like it, take out that molcajete.

Finally, thank Sor Andrea for what you are about to see!!! The tastiest, yummiest…

Mole Poblano 16

Let’s just say: one of my favorite Moles.

Of the many things you can make with this mole such as enchiladas, enmoladas, empanadas, eggs, nopales or potatoes.. there’s of course the traditional: poured over simply boiled chicken or turkey and covered with lightly toasted sesame seeds.

Mole Poblano 17

You can see why I took longer to post this time: I was too busy adding ingredients to the basics section of my blog, just for this recipe!

mole poblano
Print Recipe
4.56 from 9 votes

Mole Poblano

The showcase of last week’s class was one of Mexico’s most famous and delicious moles, the Poblano, which originated in the kitchen of the Convent of Santa Rosa, in Puebla. After seeing how much guests enjoyed it, I can’t wait to share it with you. I know, the word Mole sounds exciting to eat yet intimidating to prepare.
Prep Time10 minutes
Cook Time1 hour
Course: Main Course, Sauce
Cuisine: Mexican
Keyword: almonds, ancho chiles, bread, ceylon, Chipotle, cinnamon, corn tortillas, mexican chocolate, Mole, mulato chiles, pasilla, Peanuts, pumpkin seeds, raisins, tomatillos
Servings: 24 to 25 servings
Author: Pati Jinich

Ingredients

  • 1/2 cup lard vegetable shortening or vegetable oil
  • 3 ounces chiles anchos about 6 or 7, stemmed and seeded
  • 3 ounces chiles pasillas about 12 or 13, stemmed and seeded
  • 3 ounces chiles mulatos about 6, stemmed and seeded
  • 1/3 ounces dried chipotle chiles about 4, stemmed and seeded
  • 1/2 white onion about 1/2 pound, roughly chopped
  • 3 garlic cloves peeled and roughly chopped
  • 3 tablespoons raw almonds with skin
  • 3 tablespoons raw shelled peanuts
  • 3 tablespoons raisins
  • 1 tablespoon pumpkin seeds
  • 4 tablespoons sesame seeds
  • 1/2 cup reserved chile seeds
  • 5 whole cloves stemmed
  • 1/4 teaspoon anise seeds
  • 1/4 teaspoon coriander seeds
  • 1/2 teaspoon whole black peppercorns
  • 1 stick true or ceylon cinnamon
  • 1/4 teaspoon ground allspice
  • 1/8 teaspoon dried thyme
  • 1/8 teaspoon dried marjoram
  • 1/2 pound roma tomatoes about 2 , charred or roaste
  • 1/3 pound tomatillos about 2, husked, rinsed, charred/roasted
  • 2 corn tortillas sliced into 8 pieces
  • 1/2 bolillo telera or baguette, about 2 ounces, thickly sliced (if it is a couple days old, better)
  • 6 ounces Mexican style chocolate or bittersweet chocolate
  • 5 cups chicken broth plus 4 more to dilute later on
  • 1 teaspoon kosher or sea salt or more to taste
  • 1/2 cup sesame seeds toasted, to sprinkle at the end

Instructions

  • In a large extended casserole dish set over medium high heat, add 1/2 cup lard, oil, or vegetable shortening. Once hot, about 2 minutes later, add the chiles in 2 or 3 batches and saute, stirring often, and being careful not to let them completely burn. Remove with a slotted spoon and place in a mixing bowl as you move along.
  • In the same oil, add chopped onion and garlic and saute for 2 to 3 minutes, stirring, until they soften and release their aroma. Stir in the almonds, peanuts, raisins and pumpkin seeds, and let them cook for 2 to 3 minutes.
  • Stir in the sesame seeds, reserved chile seeds, stemmed cloves, anise seeds, coriander seeds, black peppercorns, cinnamon stick, ground allspice, thyme and marjoram. Stir frequently and let it all cook for 3 to 4 more minutes, stirring often. Make room again, and add the tortilla and bread pieces along with the tomatoes and tomatillos. Let it all cook for a couple minutes.
  • Incorporate the already sauteed chiles and pour in the chicken broth. Stir and once it comes to a simmer, add the chocolate pieces and the salt. Mix well, and let it simmer for 12 to 15 minutes. Turn off the heat, cover and let the mix rest for 1/2 hour, so the chiles can completely soften.
  • In batches, puree the mixture in the blender or food processor until smooth. You can store this mole, covered, in the refrigerator for up to a month, or freeze it for up to a year.
  • When ready to eat, dilute a cup of mole with 1/2 cup chicken broth in a saucepan and simmer for 2 to 3 minutes. Serve over cooked chicken or turkey and sprinkle with toasted sesame seeds on top.

Notes

Adapted from Sor Andrea de la Asunción from the Santa Rosa Convent

Mulato Chile

The Mulato chile has similar looks to the Ancho chile but instead of a reddish black skin it has a dark black skin. You can tell the difference much better against the light! The Mulato chile also has a sweeter, fuller and more chocolaty flavor than the Ancho. No doubt they are different as they come from different chiles.

The Ancho chile comes from the dried regular Poblano chile. The Mulato chile comes from a variation of the Chile Poblano that has slightly different genes with a darker color and fuller flavor. It is hard to find the latter Poblano chile variation, as the growers prefer to dry them since they can sell them at a higher price at the markets.

Chipotle Chile

The Chipotle chile is the Jalapeño chile, that has been ripened, dried and smoked.  Its name comes from the náhuatl Chilli or Chile, and Poctli or smoke.

The process of drying and smoking Jalapeños has existed for centuries, even before the Spaniards arrived. It was considered a way to preserve chiles for long periods of time and also bring out their interesting qualities.

There are different kinds of Chipotle chiles, all of which are spicy, smoky and rich.

Chipotle Chile 1


This photo shows two varieties of Chipotles.  On the left we see the longer Chipotles mecos, and in the middle we see medium sized Chipotles mecos. All the mecos come from a larger variety of Jalapeños. On the right we see the smaller Chipotles moritas, which come from smaller varieties of Jalapeños with a slightly different flavor and a bit more fragrant smell.

One of the more popular spins of any Chipotle chiles are when they are pickled and preserved in adobo sauce and turned into Chipotle Chiles in Adobo Sauce.  Another popular take is when they are pickled in vinegar and spices and become Pickled Chipotles.  But they are also used regularly, as they are dried and smoked, for many dishes, stews, soups, sauces and moles.

Flourless Almond and Porto Cake

This cake is a treat. What’s more, being flourless, it is perfect for both gluten free eaters and the coming Passover week.

As a fan of marzipan this cake feels like a fluffy, smooth, tasty piece of marzipan that has turned into a cake to become a bigger, lighter and longer lasting version of itself. It can be served as a dessert, with some whipped cream on top. If you are lucky to have some leftover, it makes for a decadent breakfast with a side of berries and some hot coffee or tea.

The recipe comes from the Mexican convent of San Jerónimo, where Mexico’s most famous nun Sor Juana Inés de la Cruz was settled. It dates to the late 1600’s. Spanish nuns who came to help establish the different convents, had an indomitable sweet tooth, which paired with Mexico’s exotic ingredients, made for some of the country’s dearest and sweetest desserts. Centuries later, these desserts are staples in Mexico’s kitchens.

Flourless Almond and Porto Cake 1
There are many kinds of nut cakes or tortes in Mexican cooking, with pinenuts, pecans, and hazelnuts amongst some. They can be sweetened with sugar or in some cases with sweetened condensed milk. I find that when trying and testing desserts inherited from convents or nuns, I need to pump down the sugar a bit. So if you want the original flavor, add an extra 1/3 cup sugar to the recipe below…

For this cake, almonds are used, and a couple other ingredients. It is a snap to make in the food processor or blender.

Just grind the already slivered almonds and sugar, less than a minute. Once ground, add the butter at room temperature, the eggs, vanilla and if you want a hint of alcohol, like the nuns from San Jerónimo, add some Porto wine.

Flourless Almond and Porto Cake 2
Pulse again, until well combined. Less than a minute too…

Flourless Almond and Porto Cake 3
Pour the batter over a buttered pan with its bottom lined with parchment paper.

Flourless Almond and Porto Cake 4
The batter will look rather thin, barely filling the pan, but that is ok… Put it in the oven…

Flourless Almond and Porto Cake 5
Take it out about 30 minutes later. Once it has a nicely tanned top and a toothpick comes out clean. Let it cool a bit and turn it onto a plate. Remove the parchment paper and turn onto another plate, just to have it right side up.

Flourless Almond and Porto Cake 6
Mix some apricot marmalade with lime juice (the nuns from San Jerónimo only used apricot marmalade, but I wanted to pump up the acidity… up to you) in a sauce pan and let it heat for a couple minutes. Until it dissolves.

Flourless Almond and Porto Cake 7

Brush the glaze, wherever you want to decorate with some lightly toasted sliced almonds… Here is a photo of the decoration process, halfway through…

Flourless Almond and Porto Cake 8
And away you go!

No doubt, one of the tastiest parts of my job, as I research through the history of Mexico’s cuisine, is to test centuries’ old recipes in my kitchen. In this case, the flavors of the convent of the Jerónimas traveled directly to Washington DC, helping me taste a bit of their history. You can get a taste of it in your own kitchen too…

Flourless Almond and Porto Cake main
Print Recipe
4.84 from 6 votes

Flourless Almond and Porto Cake

This cake is a treat. What’s more, being flourless, it is perfect for both gluten free eaters and the coming Passover week. As a fan of marzipan this cake feels like a fluffy, smooth, tasty piece of marzipan that has turned into a cake to become a bigger, lighter and longer lasting version of itself. It can be served as a dessert, with some whipped cream on top. If you are lucky to have some leftover, it makes for a decadent breakfast with a side of berries and some hot coffee or tea.
Prep Time5 minutes
Cook Time35 minutes
Course: Dessert
Cuisine: Mexican
Keyword: almonds, cake, Dessert, jam, lime, port, Recipe, vanilla, whipped cream
Servings: 12 to 15 servings
Author: Pati Jinich

Ingredients

  • 3/4 cup sugar
  • 2 cups slivered almonds
  • 4 eggs
  • 1 tablespoon vanilla extract
  • 1/2 cup butter at room temperature
  • 1 tablespoon Porto wine optional or more to taste
  • 1/4 cup apricot marmalade
  • 1 tablespoon lime juice freshly squeezed
  • 1/4 cup sliced almonds lightly toasted
  • Whipped cream optional

Instructions

  • Butter a round 9 to 10 inch spring-form pan, and cover the bottom of the pan with parchment paper.
  • Preheat the oven to 350 degrees.
  • Place the almonds and sugar into a food processor. Pulse until finely ground. Crack the eggs on top of the mixture. Stir in the vanilla extract and Porto wine, if you will use it. Drop in the butter chunks, and process until smooth and thoroughly combined.
  • Pour the batter into the mold. Place on a rack in the middle of the oven and bake for 30 minutes. The top will be nicely tanned, and the cake will feel springy to the touch and a toothpick should come out clean if inserted in the cake.
  • Remove from the oven and let the cake cool for 10 to 15 minutes. Unmold the cake, invert onto a platter and remove the parchment paper. Invert the cake again onto another platter to have the top of the cake right side up.
  • In a small saucepan, mix the apricot glaze with the lime juice. Set over medium heat and simmer for a couple of minutes.
  • With a brush, spread the apricot glaze on the outer circumference, about 1 to 2 inches, on the top of the cake. Sprinkle the glazed area with the toasted sliced almonds. You may serve the cake with whipped cream on the side, or on the top of the cake.

Notes

Pastel de Almendras con Porto

Chayote Squash

Chayote, also called chayote squash (it is from the squash family), choko, vegetable pear, mirliton and christophene, is a beautiful pear like shaped vegetable. Ironically, it has a texture similar to a pear that isn’t ripe, but less grainy. Yet the chayote isn’t wholly sweet, it just has a sweet hint, barely a whisper, really. Its flavor is more neutral, like a cross between a pear, a cucumber and a zucchini. Well, you just have to give them a try.

Crispy, watery, very low-fat, with a clean and wholesome feel, chayote can be used many ways most typically in soups, as a warm vegetable side, a cold salad or very popularly stuffed either with a sweet or savory spin. They are most times cooked and best al dente, unless eaten stuffed.

There are different kinds of chayotes. These here in the photo are probably the most common, and the easiest to find outside of Mexico. They are mild, with a mild green color and a mild, friendly and accommodating flavor. There are some that have a darker green color, and even purple tones, with thick and short thorns throughout their skin.

Chayotes tend to store well. They can last for more than a couple weeks in the refrigerator.

Cilantro

Cilantro is also known by many names like culantro, coriander and even Chinese parsley. Although it didn’t originate in Mexico, it has grown such strong roots in its cuisine, to the point that its hard to think about Mexican cooking without it.

It has delicate, paper thin leaves and tender stems. Its deep green color tends to be shinny too.

It is used for countless foods including being a key ingredients of many salsas, guacamoles and pico de gallo. It is used to flavor beans, rice, salads, and stews amongst some dishes. It is even placed frequently on the table in a bowl, just as an optional garnish for tacos, antojos and soups. In the last couple decades it has even become quite popular for smoothies and juices.

Cilantro has a distinct, strong and pungent flavor. Most people tend to like it. However, the few that don’t, tend to feel so strongly about it: they can’t stand it. Those I have asked about their dislike, usually say that it was since they can remember. A couple have referred to a detergent taste (see I was listening to you Ceci). But most people that like cilantro, don’t recognize those flavors, so it just might be in the genes.

I am part of the group that really likes it. But I try to use it judiciously. A couple sprigs are usually all it takes to add what cilantro can bring.

Old World and New World: Yellow Rice

Though I am no painter, this I know to be true:

Throw in four primary colors onto a painting palette and mix randomly. Whatever combination you come up with, there will be a Mexican rice that catches the spirit of those tones.

Red rice, cooked in a rich base of tomato puree, onion and garlic, and sometimes chopped vegetables.  Depending on the cook and the style, sometimes red rice may end up a bit on the orange side. Green rice, either based on Poblano chile, cilantro, parsley or a combination of those, giving a beautiful range of flavors along those grassy lines.  Black rice, seasoned with cooking broth from beans in the pot. White rice, the classic yet flavorful Mexican take that can be an unpretentious yet comforting side to almost anything. And we are not even getting started.

What many people don’t know is that Mexico also has its versions of Yellow rice.

From the two main kinds of Yellow rice in Mexican cooking, one has a saffron base and the other an achiote or annatto seeds base. Ironically, although saffron was brought to Mexico by the Spaniards almost five centuries ago and achiote seeds are native to Mexico, it is the saffron based rice which is considered to be the Traditional Yellow Rice in regions like Yucatán.

Yellow Rice 1
But given saffron’s high price tag, many cooks opt for achiote which is ridiculously cheap. Although it can be sometimes a bit hard to find in mainstream stores, most Latino, international or ethnic stores have it. You can always opt to click an online button to find it too…

With a similar color, and the same range of flavors, achiote seeds are a great substitute.

Yellow Rice 2
The difference aside from price, is the way in which both ingredients are used to bring out their unique flavors, aromas and colors, when making rice.

Saffron threads are soaked in water…

Yellow Rice 3
…and added to the rice after it has been sauteed in oil and the broth poured on top….

Achiote seeds, instead, are sauteed in oil for 2 to 3 minutes. Once they paint the oil and let out their flavors, they are removed with a slotted spoon before they become too bitter and right before the rice is poured in the pan. Some cooks dilute powdered achiote seeds in water, which can also be found in some stores, and do the same as with saffron. I prefer the version that uses the whole seeds much more.

Both ingredients, one from the Old World and one from the New World, have hard to describe flavors that somehow escape my words. But let me give it a shot: A bit smokey, a bit pungent, a bit bitter and strong, with a defined personality. What’s more, both ingredients help make an exotic, beautiful and tasty Yellow rice.

Here is a take on the saffron based rice that I love and that won over a great crowd. Try it, then you can tell me if it is really that good, or it may very well be that the great crowd had been waiting too long to eat during class, and that’s why they liked it so.

yellow rice
Print Recipe
3.43 from 7 votes

Yellow Rice

From the two main kinds of Yellow rice in Mexican cooking, one has a saffron base and the other an achiote or annatto seeds base. Ironically, although saffron was brought to Mexico by the Spaniards almost five centuries ago and achiote seeds are native to Mexico, it is the saffron based rice which is considered to be the Traditional Yellow Rice in regions like Yucatán.
Cook Time20 minutes
Course: Side Dish
Cuisine: Mexican
Keyword: chicken broth, garlic, onion, Recipe, rice, saffron, Tomato
Servings: 3 to 4 servings
Author: Pati Jinich

Ingredients

  • 1/2 teaspoon saffron threads crumbled, or may substitute achiote seeds
  • 2 tablespoons boiling hot water
  • 1 cup jasmine white rice
  • 2 tablespoons safflower or corn oil
  • 1/4 cup chopped white onion
  • 1/4 cup chopped tomato
  • 1 garlic clove minced or pressed
  • 2 cups chicken broth
  • 3/4 teaspoon kosher or sea salt more or less to taste

Instructions

  • Place saffron threads in a small mixing bowl along with the boiling hot water. Mix and let soak for 10 to 15 minutes.
  • Place rice in a bowl, cover with very hot water, and let soak for 5 to 10 minutes. Drain, rinse with cold water, and drain thoroughly.
  • Heat the oil in a 3 to 4 quart pan over medium-high heat. (If you are using achiote seeds instead of saffron, just let a teaspoon of them cook in the oil for 2 to 3 minutes before adding the rice.) Once the oil is hot, add the dried rice and saute for 1 to 2 minutes. Incorporate the onion, tomato, and garlic, stir, and continue to cook until the rice changes color to a milky white. It should sound and feel heavier, as if you were moving sand in the pot, about 4 to 5 more minutes.
  • Pour in the chicken broth, saffron mix, and salt and stir everything together. When the liquid starts to boil, cover the pot, lower the heat to low and continue cooking for about 20 more minutes, or until the rice is cooked through and the liquid has been mostly absorbed.
  • If the grains don't seem soft and cooked through, add a bit more chicken stock or water and let it cook for another 5 minutes or so. Turn the heat off and let it sit covered for 5 to 10 minutes. Fluff with a fork and serve.
  • Rice can be made ahead of time and reheated later the same day. Before reheating, add 1 tablespoon of water and heat, covered over the lowest heat possible. Once it has cooled down, it can be kept in a closed container in the refrigerator for up to 2 days.

Notes

Arroz Amarillo

Saffron

Saffron native to Asia, was brought to Mexico by the Spaniards, who in turn learned how to use it from the Arabs. Once in Mexico, it took strong roots especially in the Yucatan Peninsula and the South East regions.

However, since it is very expensive, there are seasonings that have been developed trying to approximate its flavor. Also, achiote seeds have been used instead, given how cheap they are, and how similar to saffron their strong taste and deep infusing color is.

To use, saffron threads, sometimes  crumbled, are soaked in boiling hot water until their color is released. Both the liquid and the crumbled softened threads are used.

Ancient Ways for Comfort on Cold Days: Mexican Hot Chocolate

Story goes that for centuries, a woman could find a mate in many Mexican regions if she was able to make a good and considerable amount of foam when making hot chocolate. Otherwise, suitors would not turn their heads to her direction regardless of any other virtue. What’s more, it was the mother of the groom to be, who judged how good the foam was.

Thankfully, my mother in law (who loves to dip Conchas into hot chocolate) didn’t abide by that tradition or I wouldn’t have gotten married. When I met my husband, the best I could whip up were some decent scrambled eggs and an extremely sweet limeade. Forget about a worthy, frothy, delicate, silky foam to top a rich tasting chocolate.

But it turns out that producing an admirable chocolate foam may be a sign of things to come; it may show how hardworking, dedicated, focused, energetic and skilled a person can be. Not only do you have to break a sweat, but also develop an effective technique and then there is also the matter of style.

No easy feat. Think cappuccino foam, with no machine. Using an ancient tool passed down through generations just for this purpose always helped, and does to this day.

molinillo

The molinillo is made from a single piece of wood, with moving rings, shapes and indentations carved into its different parts, a sturdy bottom base to rest on a pot, a soft round handle for an easy rubbing of the hands, plus gorgeous decorations. All with the aim of being able to make the best quality, and most amount of foam.

A whisk is not the same. But if you don’t have a molinillo, you can substitute. Just use it as you would a molinillo, with a vertical tilt and rub it between your hands as if you were trying to warm them up. Photos are sometimes better than words.

frothing Mexican hot chocolate
You have to beat like mad.

Crazy, really.

frothing Mexican hot chocolate

Leaving the foam aside, what matters most is the flavor of Mexican chocolate. Which I want to get to fast, because it is about to snow again, it is cold, and there are few things that are as comforting, filling and soothing as a Mexican hot chocolate.

Mexican style chocolate bars are made with toasted cacao beans ground with white sugar, almonds, cinnamon, and sometimes vanilla. There are other variations, but I think this is the basic one. In Mexico, there are molinos, or mills, that are dedicated to doing only this and they smell like chocolaty heaven.

If you find Mexican chocolate bars already prepared, like the authentic Oaxacan chocolate of El Mayordomo (though there is an increasing number of new makers) or more easily available  and tasty ones like Chocolate Abuelita or Ibarra, you only need to add it to milk or water, heat it, mix it, and if you want some foam, work out a little.

Mexican hot chocolate disc

If you can’t find them, here is how you can get the same rich result.

Grab a couple ounces bittersweet chocolate of good quality, a small piece of true cinnamon, white sugar and almond meal.

Mexican hot chocolate ingredients

Almond meal is the already finely ground almonds. But you can also finely grind your own. Trader Joe’s has an excellent one, which as the label says, its good for baking & breading and I guess they can also add For Mexican Style Hot Chocolate too.

almond meal for Mexican hot chocolate
Place those ingredients in a sauce pan and add milk, which is my preference, or water or a combination of both, and some vanilla extract.

milk and vanilla for Mexican hot chocolate

Set the pan over medium heat, and once the chocolate dissolves remove from the heat. Beat the chocolate with a molinillo or a whisk, I really recommend that part.

In Mexico there are tall pots made specially for beating the chocolate, called chocolateros, but any sauce pan will do.

frothing Mexican hot chocolate

Forget about being worthy of a mate, the satisfaction of drinking that hot, thick, creamy and tasty chocolate, at the same time as the frothy, cloudy and delicate foam touches your lips, is worth the while.

finished cup of Mexican hot chocolate

Mexican hot chocolate
Print Recipe
5 from 5 votes

Mexican Hot Chocolate

Story goes, that for centuries, a woman could find a mate in many Mexican regions if she was able to make a good and considerable amount of foam when making hot chocolate. Otherwise, suitors would not turn their heads to her direction regardless of any other virtue. What’s more, it was the mother of the groom to be, who judged how good the foam was.
Cook Time5 minutes
Course: Drinks
Cuisine: Mexican
Keyword: almond, ceylon, cinnamon, cocktail, Dessert, mexican chocolate, milk, Recipe, vanilla
Servings: 2 cups
Author: Pati Jinich

Ingredients

  • 2 cups milk and/or water
  • 2 ounces Mexican style chocolate such as Abuelita, Ibarra, Mayordomo

If you can’t find Mexican chocolate substitute for:

  • 4 ounces bittersweet chocolate of good quality
  • 1 true cinnamon stick of about 2 inches
  • 1 teaspoon vanilla extract
  • 4 tablespoons almond meal or finely ground almonds
  • 4 tablespoons sugar more or less to taste

Instructions

  • In a saucepan add the milk or water with the Mexican chocolate or the substituting ingredients.  Set over medium heat until the chocolate has completely dissolved and the liquid is simmering. 
  • Remove the pan from heat, and if you so are inclined, beat with a whisk or molinillo, until the hot chocolate has a thick layer of foam on top. Serve while very hot. 

Notes

Chocolate Caliente

Tres Leches Cake

Pastel de Tres Leches or Three Milk’s Cake, is one of the most, if not the most popular and sold cake throughout Mexico. It is also amongst the most requested recipes I have been asked for after Pickled Jalapeños and Piggie cookies. So dear readers, I am sorry it has taken this long but here it goes! I promise to get to the other requests, which I love getting on your emails, as soon as possible.

Tres Leches is a sweet, practically wet, homey cake. Its base is a vanilla sponge cake, completely soaked in a sauce traditionally made with three kinds of milk: sweetened condensed milk, evaporated milk and regular milk. Some versions substitute regular milk with heavy cream. The cake will sometimes have a topping like fresh whipped cream, which I seriously consider of utmost necessity. Sometimes the topping turns out to be meringue or even chocolate ganache.

Growing up in Mexico City, there was a bakery called La Gran Via, which sold such delicious Tres Leches that even though it was far from home, we used to drive many Sundays to get one. These days La Gran Via has become a large chain store of bakeries… it has been years since I have eaten one of  their cakes. This recipe, is as close as I get to my nostalgic memories.

To make the sponge cake as fluffy as can be, start by beating the egg whites until they hold soft peaks. Add the sugar and keep on beating until they hold stiff peaks.

EggWhites.jpg

Separately beat the egg yolks until thick, creamy and very pale in color and add some vanilla.

I really feel the need to take a photo of the vanilla and show it to you. It’s Mexican vanilla from Papantla, the place where vanilla originated. Vanilla grown and harvested in Papantla, really blows me away. And just look how pretty the bottle is…

Vanilla Bottle-thumb-510x342-531

Then pour the egg yolks (look at how thick and pale the egg yolks are after beating them for 4 to 5 minutes, that’s what you want) with that hint of vanilla, onto the egg white mixture.

Yolks into Whites-thumb-510x342-535
Pour it all on top…

YolksintoWhites2.jpg
Gently, with a spatula, in evolving motions, combine the yellow with the white, being careful not to lose much of the volume and fluffiness already achieved.

CombiningYolksintoWhites2.jpg
Once well combined, add the flour and incorporate it in evolving motions.

addingtheflour.jpg
Pour that batter onto the prepared pan, buttered and lined with parchment paper.

It is a simple cake batter: just egg whites, sugar, egg yolks, vanilla and flour. But it turns out fluffy, homey and spongy because of the way these ingredients are used.

intothepan.jpg
Into the oven for about 25 minutes, until the cake has a nice tanned crust, it is spongy to the touch and a toothpick comes out clean.

tantopofcake.jpg
After you get the cake out of the oven, invert it onto a plate and poke all over with a fork, or two forks. You want to help the cake find ways to absorb the sauce you are about to make.

pokingwithforks.jpg
There goes the condensed milk and the evaporated milk into the regular milk, and a bit more vanilla.

makingthetopping.jpg
Some modern versions of the cake add other kinds of flavors into the sauce, like chocolate, cajeta (Mexican goat’s milk version of dulce de leche) or Rompope (Mexican eggnog). If you like a hint of alcohol in your desserts, go ahead and pour in some Rum or Kahlua.

Pour all the sauce on top…

pouringonthetopping.jpg
Though not all versions of the cake have whipped cream on top I think it is of the most absolute necessity. Life or death. NEED it. Spoon it. Spread it.

icing.jpg
The cake tastes much better when it has had a chance to soak in all of that sauce and when it is cold. So it is a good idea to cover it and refrigerate it for at least an hour.

It is simple to eat, simple to see, simple to make. It is a simply unfussy and tasty dessert that is somewhat neutral, so it can take many variations. Of course you can add some fruit on top or in between, fresh strawberries work really nice here, its your choice.

The fluffy yet completely wet cake holds its shape as it gives in to the flavor of the sauce. The whipped cream, as you can see, just needs, needs, needs to go on top. It makes such a nice contrast with the wetness and sweetness of the cake. After you try it, let me know what you think. Whipped cream on top?

Tres Leches Cake 13

Tres Leches Cake main
Print Recipe
4.17 from 12 votes

Tres Leches Cake

Pastel de Tres Leches or Three Milk’s Cake, is one of the most, if not the most popular and sold cake throughout Mexico. It is also amongst the most requested recipes I have been asked for after Pickled Jalapeños and Piggie cookies. So dear readers, I am sorry it has taken this long but here it goes! I promise to get to the other requests, which I love getting on your emails, as soon as possible.
Prep Time20 minutes
Cook Time22 minutes
Course: Dessert
Cuisine: Mexican
Keyword: cake, Dessert, evaporated milk, mexican vanilla, milk, Recipe, Sweetened Condensed Milk, tres leches, whipped cream
Servings: 10 to 12 pieces
Author: Pati Jinich

Ingredients

For the cake:

  • 9 eggs separated
  • 1 cup sugar
  • 1 tablespoon vanilla extract
  • 2 cups all-purpose flour

For the sauce:

  • 1 14-ounce can sweetened condensed milk
  • 1 12-ounce can evaporated milk
  • 1 cup milk
  • 1 tablespoon vanilla extract

For the topping:

  • 2 cups heavy whipping cream
  • 1/4 cup confectioners' sugar

Instructions

  • Preheat oven to 350 degrees. Butter a 9 x 13 inch pan, lining the bottom with a piece of parchment paper cut to fit the pan.
  • Pour the egg whites into the bowl of your mixer and beat on medium-high speed for 4 to 5 minutes, or until they hold soft peaks. Slowly stir in the sugar and continue beating until they hold hard or more stiff peaks. Turn off the mixer and with a spatula, move the egg white mixture onto a large mixing bowl.
  • Rinse the bowl of the mixer and its whisk. Now pour the egg yolks into the bowl of the mixer and beat on medium-high speed for about 5 to 6 minutes, or until the egg yolks become creamy, puffy and their color has toned down to an almost cream color rather than a loud yellow. Stir in the vanilla and continue beating for another minute. Turn off the mixer.
  • Pour the egg yolk mixture onto the egg white mixture and with a spatula, in evolving motions, combine them into a homogeneous single batter. Do so gently trying not to lose much volume from the mixture. When fully combined, fold in the flour, scraping the bowl with the spatula so that all the flour is well mixed.
  • Pour the batter into the prepared cake pan and place into the oven for 22 to 25 minutes, or until a toothpick comes out clean. It can be a bit moist, but not wet. The top of the cake should be tanned and feel fluffy if you touch it. Remove it from the oven and let it cool.
  • Once it cools down, turn it onto a platter. Remove the parchment paper and cover the top with an upside down platter and invert again. The platter should be large enough to hold the cake and the vanilla sauce you are about to prepare. Using a fork, or two, poke wholes all over the cake so that it will better absorb the vanilla sauce.
  • In a mixing bowl, combine the sweetened condensed milk, evaporated milk, milk, and vanilla extract. Pour the vanilla sauce over the cake.
  • In the bowl of your mixer, whip up the heavy cream with the confectioners’ sugar on medium-high speed until the mixture holds up stiff peaks, about 1 to 2 minutes. Spread the whipped cream all over the already wet cake. Then yum, eat it all up.

Notes

Pastel de Tres Leches

Tortilla Press

If you are into the habit, like me, of making your own home made corn tortillas, a tortilla press comes in really handy.

It’s true that tortillas can be made in many different ways such as simply flattening round corn masa or dough balls with your hands or rolling out the masa with a rolling pin. However, the tortilla press makes the process be a speedy, consistent, fun and even therapeutic one (it is!).

Moreover, look at what a pretty tool it is.

Here is what a tortilla press looks like when closed. Sitting on my chair. Mine is cast iron, but you can also find aluminum and wooden ones. I prefer cast iron, but don’t mind aluminum as long as it is heavy and sturdy. I find the wooden ones a bit tricky to use.

This is what one looks open, ready for you to use. As you see, there are some pieces of plastic cut in rounds -from produce bags is perfect.

A plastic round is placed in the bottom of the opened press, so you can place a corn dough or masa ball, top with another plastic round and then simply close the press, and press it down.

You can make many more things than tortillas on tortilla presses too, like chalupas (oval shaped corn dough patties) and sopes (thicker than tortillas round corn dough patties with a rim) just to name a few. What’s more, kids love to use tortilla presses and make shapes with the corn masa, which can actually make some of the speediness of the process achieved with a tortilla press, slow down a bit too. Oh well, there is always a trade-off.

Romancing The Avocado

Avocados are, to me, amongst the most sensuous, luscious and luxurious of ingredients. Add how delicious, soft and subtly flavored they are, and you get a clear winner for Valentine’s Day. Despite the many pounds of avocados we go through at home each week, regardless of the infinite number of cases I use for events at Washington, DC’s Mexican Cultural Institute, and  notwithstanding that my sisters and I used them for hair and face treatments as we were growing up (all those nurturing natural oils and vitamins), I still find avocados to be wow-inducing.

If there’s an avocado dish on a restaurant menu, it lands on my table. If I am planning a menu, especially with a hint of romance, avocados will be there.

I am not unique thinking that avocados are something special. To the Aztecs, who ate avocados in Mexico for centuries before the Spaniards arrived, they were revered fruit considered to have strong fertility and aphrodisiac powers. Indeed, the Spanish word aguacate comes from the Nahuatl ahuacatl, or “testicles,” presumbly in reference to their shape. The avocado was warmly welcomed in the countries where it was introduced. And thanks in part to its accomodating nature – its meat can be smashed, diced, pureed, stuffed or sliced, or it can be part of a filling or a centerpiece – it has been creatively adopted in many cuisines.

It is true that many people think of guacamole when they hear “avocado.” And there must be more than a thousand reasons to love guacamole. Fast and easy to make, and so fun to eat, it screams out fiesta with each bite. My favorite way to make guacamole is to mix diced avocado with chopped onion and cilantro, squeeze fresh lime juice on top, sprinkle with sea salt and top it off with chopped chipotle chilis in adobo.

Guacamole, though, is just the tip of the avocado iceberg, both inside and outside Mexican cuisine.

Think about eel-and-avocado sushi, a French salad with layers of avocado sprinkled with Roquefort cheese, or an Italian salad with layers of ripe avocado and ash-coated goat cheese, olive oil, coarse salt and basil leaves. It’s hard to imagine a vegetarian sandwich without avocados.

I have tried eight varieties of avocados, and though I like most of them, the one I prefer is the Hass variety.  It is available year round and it is creamy and rich rather than fibrous like other kinds, such as El Fuerte.

Avocados are a fruit that ripens off the tree, so they are often sold unripe. If you are in a hurry to use an avocado, you can hasten the ripening process by wrapping it in newspapers or keeping it in a paper bag in a warm area of the kitchen. If you can wait, it will ripen at a nice pace uncovered in the kitchen.

When ripe, the Hass, with the pebbly skin completely blackened, will give a bit with a gentle squeeze of your hand. If it doesn’t, then it needs a bit more time to mature. You can keep a ripe avocado in the refrigerator for up to a week. It is apparently a myth that keeping the seed in a cut avocado keeps it from darkening. What does seem to help is to squeeze fresh lime juice on top.Here are four of my favorite takes on avocado: an elegant-looking appetizer, a retro mousse, an exotic-sounding soup and a hearty sandwich. Regardless of which way you use it, including avocado in your romantic dinner – as long as it’s not in a hair or skin treatment –  will show your Valentine that you really care.

Article written for and published by National Public Radio’s Kitchen Window.
stuffed avocados
Print Recipe
5 from 3 votes

Stuffed Avocados with Hearts of Palm and Artichoke Salad

When I was growing up, my mother often served stuffed avocados for an elegant dinner. They were such a statement of a well-planned menu. There were many variations: stuffed with sauteed shrimp with chilies, crab salad or red snapper ceviche (a seafood cocktail "cooked" in citrus juice and other spices). The version I make most often, though, mixes artichoke hearts and hearts of palm. I think these ingredients just love to be together and make a smashing combination with the smooth avocado.
Prep Time20 minutes
Cook Time0 minutes
Total Time20 minutes
Course: Appetizer
Cuisine: Mexican
Keyword: agucate, Alcachofa, artichoke, Avocado, hearts of palm, Palmitos, rellenos, stuffed
Servings: 6 servings
Author: Pati Jinich

Ingredients

  • 14 ounces (1 1/3 cups) hearts of palm drained, rinsed and sliced
  • 14 ounces (1 1/2 cups) artichoke hearts drained, rinsed and sliced
  • 2 tablespoons chopped red onion
  • 4 tablespoons chopped red bell pepper
  • 2 tablespoons chopped parsley
  • 1 tablespoon tarragon vinegar
  • 3/4 teaspoon kosher or sea salt or more to taste
  • 1/4 teaspoon sugar or more to taste
  • 1/4 teaspoon ground black pepper or more to taste
  • 2 tablespoons olive oil
  • 2 tablespoons safflower or vegetable oil
  • 3 ripe Mexican avocados halved and seeded just before stuffing

Instructions

  • In a bowl, mix the hearts of palm, artichoke hearts, red onion, red bell pepper and parsley.
  • To prepare the vinaigrette, pour the tarragon vinegar in a small bowl and mix it with the salt, sugar and black pepper. Pour the oils in a slow stream, whisking with a whisk or fork to emulsify. Pour it over the vegetables. Toss well to cover.
  • You may prepare the hearts of palm and artichoke salad ahead of time, cover and refrigerate for up to 2 days.
  • When ready to eat, halve and seed the avocados. Scoop the hearts of palm and artichoke salad on top and serve.

Notes

Aguacates Rellenos de Palmitos y Corazón de Alcachofa
stuffed avocados
Print Recipe
5 from 1 vote

Avocado, Pistachio and Watercress Mousse

As I was describing this dish to a dear friend, she explained that the word I was looking for to describe it was "retro." Though I have tasted many avocado mousses, this one seems to be whimsical and addicting. Make this mousse ahead of time for a party or brunch and serve it with pieces of toast, crackers, smoked salmon or shrimp, and you will have an ongoing conversation piece as it disappears.
Prep Time30 minutes
Chilling Time3 hours
Total Time3 hours 30 minutes
Course: Appetizer, Dip, Spread
Cuisine: Mexican
Keyword: aguacate, Avocado, Berros, gelatin, Pistache, pistachios, watercress
Servings: 14 servings
Author: Pati Jinich

Ingredients

  • 3 (about 2 1/4 pounds) ripe Mexican avocados halved and seeded
  • 2 tablespoons freshly squeezed lime juice
  • 8 ounces cream cheese
  • 1 bunch (about 1 cup) watercress leaves and top parts of stems chopped
  • 2 tablespoons (about 6) sliced scallions white and light green parts only
  • 1 8-ounce can (2/3 cup) water chestnuts drained and roughly chopped
  • 2/3 cup pistachios shelled and roughly chopped
  • 1/4 teaspoon cayenne pepper or more to taste
  • 1/4 teaspoon ground black pepper or more to taste
  • 1/2 teaspoon Worcestershire sauce
  • 1 1/4 teaspoons kosher or sea salt or more to taste
  • 2/3 cup cold water
  • 3 1/4 ounces (1 envelope) unflavored gelatin
  • 1/3 cup boiling water
  • Olive oil to grease the mold
  • Toasted bread or crackers optional
  • Smoked salmon optional

Instructions

  • Scoop out meat from avocados and mash it in a bowl with a fork. Pour in lime juice and combine well with a spatula. Incorporate the cream cheese, mixing it thoroughly with the avocados. Add the watercress, scallions, water chestnuts, pistachios, cayenne, black pepper, Worcestershire sauce and salt. Mix well.
  • Measure 2/3 cup cold water in a cup. Stir in the gelatin, mix and let it rehydrate for a minute or two. Add 1/3 cup boiling water and stir until it dissolves. Pour gelatin into the avocado mix, incorporating it with a spatula.
  • Lightly grease a ring mold with olive oil. Pour the avocado mix into the mold. Shake the mold softly a couple of times to level the mix. Cover it well and place it in the refrigerator until it is set, for at least 3 hours. You can leave it overnight or until you are ready to unmold. The avocado mousse will last beautifully in the refrigerator for 2 days. When ready to unmold, remove from the refrigerator, run the tip of a knife along the edges and flip onto a plate. You may need to shake the mold a couple of times, holding onto the plate as you do so.
  • You may serve it on a platter, retro style, with some watercress leaves in the center of the ring or on top. Or serve it already sliced with a side of smoked salmon and pieces of toast.

Notes

Mousse de Aguacate, Pistache y Berros
Print Recipe
4 from 5 votes

Avocado Soup

Though there are many kinds of avocado soups, this is my favorite. I tried it at the Mexican Ambassador’s residence a couple months ago. As Doña Rosita, the cook,  heard me mmm, and mmm, and mmmmmmm all over again, she came out of the kitchen with a pen and a piece of paper ready to dictate her recipe. What a surprise for such a tasty soup: just a handful of ingredients! Seems that what matters, again, is how you use them.
Prep Time5 minutes
Cook Time15 minutes
Course: Soup
Cuisine: Mexican
Keyword: Avocado, chicken broth, cilantro, feta, jalapeno, lime, onion, queso fresco, tortilla chips
Servings: 4 to 6 servings
Author: Pati Jinich

Ingredients

  • 1 tablespoon corn or safflower oil
  • 1 tablespoon unsalted butter
  • 1 1/2 cup white onion roughly chopped
  • 1 cup cilantro leaves rinsed and loosely packed
  • 1 jalapeno chile sliced in half, seeding optional if less heat is desired
  • 3 large ripe Mexican avocados cut in half, seed removed, flesh spooned out, about 3 cups ripe avocado flesh
  • 6 cups chicken broth can substitute vegetable broth
  • 1 tablespoon fresh lime juice
  • 3/4 teaspoon kosher or sea salt more or less to taste
  • 1 1/2 cups tortilla crisps
  • 1 cup queso fresco crumbled, may substitute farmers cheese or a mild feta

Instructions

  • In a medium skillet, set over medium-low heat and add the butter and oil. Once the butter dissolves, stir in the onion and jalapeno. Let them cook, stirring occasionally, until the onion has softened. Its color will become translucent and the edges will begin to turn light brown, about 12 to 15 minutes. Incorporate the cilantro leaves and mix them in with the onions and jalapeno. Once the cilantro has wilted, 30 seconds to a minute later, turn off the heat.
  • Place the peeled and seeded avocados in the blender or food processor along with the cooked onion, jalapeno, cilantro, chicken broth, lime or lima juice and salt. Puree until smooth, taste for salt and add more if need be.
  • You may serve bowls garnished with tortilla crisps and cheese, or let your guests garnish to their liking.

Notes

Sopa de Aguacate
stuffed avocados
Print Recipe
4.60 from 5 votes

Tortilla Crisps

How to make homemade tortilla crisps, either by frying or baking.
Prep Time5 minutes
Cook Time20 minutes
Total Time25 minutes
Course: Garnish
Cuisine: Mexican
Keyword: Baked, corn tortillas, crisps, crunchy, fried, tortilla chips, traditional
Author: Pati Jinich

Ingredients

  • 5 corn tortillas (5- to 6-inches wide)
  • Safflower or corn oil
  • 1/2 teaspoon salt more or less to taste

Instructions

  • On a chopping board, slice tortillas in half and then vertically in half again. Then slice across in strips of 1/4 to 1/2 inch, depending on how thick you like them.

Traditional (fried):

  • In a medium skillet, add 1/4 inch oil and place over medium-high heat. Once it is hot, anywhere from 4 to 6 minutes, add tortilla pieces. When you add a tortilla to the oil, it should immediately start to bubble. Fry, stirring and flipping occasionally, until they achieve a golden tan and slightly brown color and are hard and crispy. Remove with a slotted spoon and place on a plate covered with paper towel. Sprinkle with salt to taste.

Baked:

  • Preheat oven to 350°F. Spray or gently brush a baking sheet with corn or safflower oil. Place tortilla pieces on top and spray or gently brush a light layer of oil. Judiciously sprinkle with salt to taste. Place in oven and bake for about 20 minutes, stirring and flipping once or twice until they achieve a golden tan and slightly brown color and appear hard and crisp.Remove from oven, let them cool and place in a bowl or container.

Notes

Tiritas de Tortilla
stuffed avocados
Print Recipe
5 from 1 vote

Chopped Egg and Avocado Sandwich

My grandmother, who came from Poland but was raised in Mexico, used to make chopped egg salad and chopped seasoned avocados as table starters for special occasions. Then one day she decided to mix up the two, altered the spices a bit, and created a family hit. I have adapted her recipe by adding the Dijon and dill, and scooping a ton of it into a sandwich. The cheese is a caprice that I couldn't help adding, and I love how it tastes, but feel free to try it without it.
Prep Time20 minutes
Cook Time0 minutes
Course: Antojos, Main Course
Cuisine: Mexican
Keyword: aguacate, Avocado, egg salad, Eggs, huevo, Recipe, salad, Sandwich
Servings: 3 to 4 servings
Author: Pati Jinich

Ingredients

  • 3 large hard-boiled eggs peeled and chopped
  • 3 tablespoons chopped white onion
  • 2 tablespoons chopped parsley leaves
  • 1 teaspoon chopped fresh dill or 1/4 teaspoon dry dill
  • 1/2 teaspoon dijon mustard
  • 2 teaspoons mayonnaise
  • 1 (about 3/4 pound) large ripe Mexican avocado halved, seeded, meat scooped out and diced
  • 1/4 teaspoon kosher or coarse salt or to taste
  • Ground black pepper to taste
  • 6 to 8 slices brioche or challah or any bread of your choice, lightly toasted
  • 4 slices Muenster Mexican manchego, or chihuahua, or Monetery Jack cheese (optional)

Instructions

  • In a bowl, mix the eggs, onion, parsley, dill, Dijon and mayonnaise together. Toss in the avocado, sprinkle with salt and pepper and gently mix well.
  • Lightly toast the bread slices. Scoop a generous amount of the chopped egg and avocado on a slice of bread, add a slice of cheese and top with another slice of bread.

Notes

Sandwich de Huevo y Aguacate

Chipotle Guacamole for any Party (or Disaster)

I am not one to prepare for disasters.

People can tell me a thousand times that severe thunderstorms are approaching, that a dry spell is forecasted or that a shortage of something essential like water (or coffee) will happen, and no, I will not be among the first to run for shelter nor stock up on provisions. I don’t know if it is my continuous belief that despite humps and downs eventually things turn out OK or if I am lacking an alarm button, I just don’t panic.

When I took it as a serious matter to go to the grocery store in the middle of my work day, at a rather inconvenient time, it wasn’t because there is a strong snowstorm coming (though my boys did give me an absurdly long grocery list to prepare for it), it was because we ran out of Mexican avocados.

The grocery store was wild; an insane crowd was moving around the isles, lines like I have never seen at the cashiers and empty shelves throughout. But oh! There they were… some beautiful ripe Mexican Hass avocados waiting for me to bring them home.

Although we use avocados at home for an infinity of things, we also love guacamole. It just never gets old around here, nor I think, anywhere. Yet, one of the versions I like the most uses Chipotle Chiles in Adobo instead of fresh Jalapeños or Serranos.

Chipotle Guacamole 1

The creamy, silky and mild nature of the avocados takes a jump into the sky when paired with the smoky, spicy, rich and complexly flavored Chipotles in Adobo.

It may be that avocados work so well with chiles, because avocados are one of their natural soothing counterpart; the spicy element in chiles called capsaicin which is an oily substance, dissolves best in other oily elements, alcohol or milk products. Avocados, being oily in such a wholesome way are the remedy to the heat in the same bowl. This being said, if you feel like pumping up the heat and flavor by adding more chipotle chiles, you may want to pair this guacamole with a nice cold beer. And while you are at it, why not scoop some Mexican style cream or sour cream on top of the guacamole too. YUM.

Needless to say, this recipe takes less than 5 minutes to prepare. But most importantly given the date, this is my loved contribution for your Super Bowl gathering, whether it turns out to be a disaster or a party (!).

Make extra portions as it flies as soon as you mix it all up. And since no guacamole is complete without corn tortilla totopos or chips, here is a link to help you make some at home.

Print Recipe
5 from 1 vote

Chipotle Guacamole

Although we use avocados at home for an infinity of things… we also love guacamole. It just never gets old around here, nor I think, anywhere. Yet, one of the versions I like the most uses Chipotle Chilies in Adobo instead of fresh Jalapeños or Serranos.
Prep Time5 minutes
Course: Antojos, Side Dish
Cuisine: Mexican
Keyword: Antojo, Avocado, chile, chipotles in adobo, cilantro, guacamole, lime, onion, Recipe, Salsa, tortilla chips, Vegetarian
Servings: 6 servings
Author: Pati Jinich

Ingredients

  • 2 large ripe Mexican avocados about 1 1/2 lb, halved, seeded, meat scooped out and diced
  • 1/3 cup white onion chopped
  • 1/3 cup roughly chopped cilantro
  • 2 tablespoons lime juice freshly squeezed
  • 1 teaspoon kosher or sea salt
  • 2 tablespoons Chipotles in adobo sauce seeded and chopped, more if desired
  • Tortilla chips toast squares, pita chips, crackers or vegetable sticks, optional

Instructions

  • Gently mix ingredients in a bowl and serve.
  • Guacamole can be prepared up to 12 hours in advance if covered and stored in the refrigerator. Eat on its own, as a side, as a topping, or scooped with tortilla chips, toast squares, pita chips, crackers or vegetable sticks.

Notes

Guacamole al Chipotle

Sweet Conchas!

I can finish a normal sized Concha, 4 to 5″ round, in exactly four bites. If it has been a long time since I had one or if I am very hungry, maybe three bites. Ok, I admit it, sometimes two bites. But never one.

Conchas are named after the shape of their sugar topping, which resembles a seashell. Conchas do have a hardened crust, but it is sugary, thick, crispy and crumbles right into your mouth as you take a bite. Right after you brake through that crust, there is a fluffy, soft, sweet roll made with flour, butter, yeast and eggs.  With such a pleasing experience, no wonder it is one of Mexico’s most favorite sweet rolls or pan dulce.

I have seen some in bakery shops around DC, but they just don’t taste like the ones we love at home. So on our most recent trip to Valle de Bravo in Mexico, I ventured with my boys, and many of their cousins and aunts, into a panaderí­a, or bread shop. They make such incredible conchas, it makes me wish I had a bigger mouth  to eat them each in a single bite.

This panaderí­a, named Santa Marí­a, like most in Mexico, has 2 daily shifts for making fresh breads of all sorts. On the second shift of a Monday afternoon, Mrs. Agustina López, who runs the bakery, saw my little battalion and announced that they give baking classes to little cooks.

As the kids got a very hands-on class from her son Félix, master baker there, I soaked up all their secret ingredients and techniques, which they were very happy to share.

Conchas 1

First of all, they have a beautifully aged and seasoned giant mixer. The kids took turns throwing (yeah, throwing) the flour, salt, yeast, water…

Conchas 2

They were attempting to also throw the eggs into the mixer. See? I had to put my camera down to convince them that really, those eggs needed to be cracked first, though it seemed more fun to throw them all in. Just like that.

After, the roaring giant mixer helped knead a soft, gooey, elastic and very moist batter.

Conchas 3

Félix showed them what that dough felt like. Then he left it to rise, and took it to another giant piece of equipment: a batter cutter.

Juju seemed to not believe his luck with those beautiful pre-cut pieces of dough… All the possibilities!

Conchas 4

After the kids shaped them into thick, flattened rounds, Félix demonstrated how to make the sugar cover.

Conchas 5

Which was even more fun to make, because all you do is mix together flour, confectioners sugar and a heaven-full of butter with your hands until soft.

Conchas 6

Half that sugar cover is mixed with cocoa powder, because some people prefer their conchas chocolatey… Or some little cooks like to throw in something else to get even more messy…

Conchas 7
The kids were concentrated on making that sugar cover just about right before layering it on the concha dough flattened balls… Félix’s bakery assistant was so kind and patient with the kids.

Conchas 8

Now that is one charming looking oven. The moment I saw it, I imagined how just about anything baked in there has to taste so yummy…

Conchas 9

With the bottom made out of aged earthenware tiles and brick walls…

Conchas 10

And one can just dream of how many conchas can fit in there…. 500, 1000, 2000… Each one to be eaten in just…. two….  big…. bites.

And some whole milk on the side.

Print Recipe
4 from 6 votes

Conchas

Conchas are named after the shape of their sugar topping, which resembles a seashell. Conchas do have a hardened crust, but it is sugary, thick, crispy and crumbles right into your mouth as you take a bite. Right after you brake through that crust, there is a fluffy, soft, sweet roll made with flour, butter, yeast and eggs.  With such a pleasing experience, no wonder it is one of Mexico’s most favorite sweet rolls or pan dulce.
Prep Time4 hours 25 minutes
Cook Time20 minutes
Course: Breakfast, Dessert
Cuisine: Mexican
Keyword: bread, Dessert, dough, pan dulce, pati's mexican table, Recipe, rolls, sugar
Servings: 16 to 18 conchas
Author: Pati Jinich

Ingredients

For the dough:

  • 14 ounces or 2 3/4 generous cups all-purpose flour
  • 2 eggs
  • 1 egg yolk
  • 1/4 teaspoon salt
  • 2 packets (7 grams or .25oz each) dry active yeast
  • 1/2 cup lukewarm water
  • 4 ounces unsalted butter or vegetable shortening at room temperature
  • 5 ounces or 3/4 cup sugar

For the sugar topping:

  • 1/3 pound all-purpose flour
  • 1/3 pound confectioners' sugar
  • 5 ounces unsalted butter or vegetable shortening, at room temperature, diced
  • 1 1/2 tablespoons cocoa powder if you want to make half be chocolate flavored
  • Extra butter or vegetable shortening to assemble the conchas

Instructions

  • Add the all purpose flour to the mixer, set with the dough hook, along with the eggs, egg yolk, and salt. Start the mixer over low speed. Meanwhile, add the active dry yeast to 1/2 cup lukewarm water and stir until creamy and well dissolved. Stir it into the flour mixture, and let it continue beating, now over medium speed, for about 3 to 4 minutes.
  • Incorporate the unsalted butter, keep on beating for 3 to 4 minutes more. Lastly, add the sugar and continue mixing for another 3 to 4 minutes or until the dough is gooey, sticky, elastic and very smooth.
  • With a spatula, push the dough into a mixing bowl greased with butter or vegetable shortening, cover it with a kitchen towel and place it in the warmest area of your kitchen, where there are no wind currents. Let the dough rise for at least 2 and up to 8 hours. It should have doubled in size.
  • For the sugar topping, place the flour and confectioners' sugar in a large bowl. Using your hands, incorporate the diced butter into the flour mixture. Mix and knead it until its smooth and homogeneous. If you want half the conchas to be chocolate flavored, separate half of the mixture in another bowl, and mix it very well with the cocoa powder. Cover the sugar toppings with plastic wrap so they won't dry out.
  • To assemble the conchas, grease thick baking sheets with butter or vegetable shortening and keep your hands greased. They will need to be greased for you to shape the dough. Using your hands, make about 2 inch balls with dough. Then, slightly press them flat, as in a thick disk, but not a tortilla. Leave about 2 inches in between each of the conchas so they will have room to expand.
  • Once your baking sheet is filled with the dough disks, cover them with the sugar coating. To do this, grab about a tablespoon of sugar coating, plain or chocolate. Make a round ball with your hands and then flatten it thin, like a tortilla. Place it on top of the dough disk and slightly press down. It should cover most of the surface.
  • If you have a concha mold, press it on the sugar topping. If you don't have one, cut through the sugar topping making round lines or any decoration that reminds you of a shell.
  • Leave the prepared conchas in a warm area of your kitchen, uncovered, and let them rise again, for about 2 to 4 hours.
  • Preheat the oven to 350 degrees. Place the conchas in the oven for about 20 to 24 minutes, until the conchas are slightly browned around the edges and look fluffed up.

Hibiscus or Jamaica Flowers

Originally from Africa or India, hibiscus flowers arrived in Mexico in colonial times and have become deeply integrated into Mexican cuisine. Often used to prepare agua de jamaica, or freshly flavored water, fruit popsicles or Jell-O, the dried flowers infuse the liquid with a deep, vivid red color.

They are not just any Hibiscus flower though. These are “Hibiscus Sabdariffa” also known as Roselle. In Mexico known as Jamaica, it is well known that the flowers contain helpful diuretic and digestive properties, as well as high levels of vitamin C and other minerals. These days it is easy to get them in many stores in the US or online. They can be incorporated into many other dishes to add a peculiarly tangy taste, similar to cranberries.

When I was younger, I used to enjoy playing with the flowers and pretending to make magical potions in my family’s kitchen.  Now that I am grown up, I keep on playing with them in my own kitchen! More modern takes of Jamaica include it in sauces for meats, vinaigrettes for salads and different kinds of desserts.

Do You Dare? Habanero Salsa!

This salsa does hurt.

But just a little.

Yet it goes oh-so-well with the Pollo Pibil, which together with red pickled onions makes for a delicious Yucatecan meal. A bowl of this Habanero salsa is standard on just about every table in Yucatán. Around there, people drizzle some spoonfuls, or drops, on just about everything.

I recently found this salsa is heavenly combined with Louisiana style Bar-b-que and some baked beans (!). While it can make people very unhappy if not given a warning of how spicy it is, for the Yucatan class we had in December, the 20 batches made were gone before the middle of the meal. We did give our guests a warning… While my cooking team kept saying I was making too much, we made some bets, and much to my surprise, I won. I have learned now, that the American and international palate is much more open, than say a decade ago, for spicy foods.

Market pics-thumb-510x342-403
So Habaneros have become wildly popular throughout the world. Aside from their cute, happy and beautiful appearance, they are one incredible source of heat and are used to make many hot sauces that heat aficionados, like my uncle, crave for.

The photo above shows some Habaneros my husband shot at the market in Mérida, Yucatán. The photo below, are Habaneros I found here in the DC area.

Habanero2.JPG
This wickeldy hot sauce is really easy to make at home. Just char the chiles and garlic cloves either in a broiler, a dry skillet or a hot comal (as I did below for the 20 batches of salsa for the Yucatán cooking class and dinner).

Habanero4.JPG
Then, please seed the chiles.

Believe me.

You must!

While I have gotten many requests for very spicy hot sauces from some of you, dear friends… please seed the Habaneros. If not, instead of wickedly-spicy salsa, you will have a somebody-please-help-me-or-I shall-die-from-this-heat salsa.

Once charred and soft, place the seeded chiles and peeled garlic cloves in the blender or your molcajete, and puree or mash away with some salt and either bitter orange or its substitute (1/4 orange juice, 1/4 grapefruit juice, 1/4 lime juice and 1/4 vinegar).

Habanero7.JPG
One of the nice things about using a molcajete, aside of exercising your arm a bit, is that the molcajete stores oils, flavors and aromas of the ingredients previously used. The molcajete adds a hint of those flavors, and its stored memories, into future concoctions.

If you dare try this salsa (hey! come on, why not?), please let me know, after you get over the shock.

Print Recipe
4.50 from 6 votes

Habanero Salsa

This salsa does hurt. But just a little. Yet it goes oh-so-well with the Pollo Pibil, which together with red pickled onions makes for a delicious Yucatecan meal. A bowl of this Habanero salsa is standard on just about every table in Yucatán. Around there, people drizzle some spoonfuls, or drops, on just about everything.
Prep Time5 minutes
Cook Time5 minutes
Course: Sauce
Cuisine: Mexican
Keyword: bitter orange juice, chile, garlic, habanero, Recipe, Salsa, Vegetarian
Servings: 1 cup
Author: Pati Jinich

Ingredients

  • 4 habanero chilies charred (seeded if you want to try to reduce the heat)
  • 6 garlic cloves toasted or roasted and then peeled
  • 1 cup bitter orange juice or its substitute (1/4 cup grapefruit juice, 1/4 cup orange juice, 1/4 cup lime juice and 1/4 cup white distilled vinegar)
  • 2 teaspoons kosher or sea salt more or less to taste

Instructions

  • Char the habanero chiles and garlic cloves with their skin on either a comal or dry skillet over medium heat, on the grill or under the boiler. In either case, it will take anywhere from 4 to 9 minutes, flipping once or twice in between. You know they are ready when their skins are charred and toasted and they have softened, without having burnt the flesh.
  • For the traditional take, peel the garlic cloves and place, along with the chiles, in a molcajete or mortar. Smash until fairly smooth. Add the salt and the bitter orange, or its substitutes, and mix until well combined.
  • Alternatively, place the ingredients in the blender or food processor and puree until smooth.

Notes

Salsita de Chile Habanero Tumulada o Kut

Habanero Chile

Habanero chiles are one happy looking bunch. They have super bright colors that go from green to yellow, and then orange to red as they mature. They are small, cute, shinny and have a waxy skin. But as much as their looks are inviting, they are the spiciest chiles in Mexican cuisine. They are incredibly fierce. With a rating of 300,000 to 350,000 on the Scoville scale for measuring hotness of a chili pepper, you can get an idea of how hot they are: Jalapeños go around 10,000 to 15,000.

Habaneros are a crucial ingredient for the regional cuisine of the Yucatan Peninsula. They are native of that region, though ironically, they are named after the Cuban city of Habana as they were traded there, heavily, centuries ago.

They are very easy to grow indoors and are beautiful to look at, so it is quite common to find them in kitchen pots, not only in Mexico!

Banana Pepper or Chiles Güeros

Banana peppers are called chiles güeros in many regions of Mexico. Güero, translates to blond, name given because of their pale, yellowish color. There are different varieties or banana peppers, but they are pale and light in looks, have waxy skin, and a similar flavor to Jalapeños. Their heat level can range from mild to hot.

There is a variety of banana peppers different from the one in this photo, that is a bit more elongated in shape, which is very popular for pickling. Banana peppers are sold in many stores in the DMV area, but if you are unable to find them, you can substitute with Jalapeños.

More Chorizo to Love

Right off the bat, you must understand: I heart chorizo. Especially the kind I grew up eating in Mexico. It comes in deep-burnt-reddish links of fresh, moist, exotically seasoned ground meat that, once fried, becomes crisp and filling bites with bold flavors and a thousand uses. My oldest son’s quick choice for breakfast is chorizo fried until it browns and crisps, with a side of white toast.  Add some lightly beaten eggs as the chorizo is starting to brown and some ripe and creamy avocado slices on the side, and that’s my kind of rich-tasting brunch dish. Of course chorizo is delicious in sandwiches, in tacos and quesadillas, on top of enchiladas, in mashed potatoes, as a topping for heartier salads, in some of the tastiest bean dishes I have tried, in pastas with a ton of personality and on pizzas with pickled jalapeño peppers on top.

I am really trying to stop myself here…

When I moved to the United States, more than a dozen years ago, I was thrilled to find chorizo in international grocery stores. Lately, I have been intrigued and surprised to see that my Mexican chorizo is now accompanied by many other kinds in the refrigerated sections of bigger, more mainstream stores: Argentine, Colombian, Guatemala, Salvadoran and Honduran chorizos have arrived. Like the Mexican kind, some of those varieties are being made with chicken, turkey or beef in addition to pork. There is even kosher chorizo, made with beef, at Koshermart in Rockville and vegan chorizo at Trader Joe’s (which I haven’t felt the urge to try). Many come in spicy, spicier, spiciest and hotter than hot.

Through Sunday afternoon asados, or grilling parties, at friends’ houses and trips to Argentina, I had become familiar with the garlicky chorizo Argentinians are so proud of. But I was clueless about the other kinds. So I shocked my regular grocer by buying a variety of links, then cooked them at home to sample the differences, filling my kitchen with chorizo-tinged smoke. Later, on a cold and rainy day in November, I set out to explore the chorizo universe, including local manufacturers, in this part of the Americas.

It was clear from the start that Latin chorizos share a common difference from Spanish ones. Most Latin chorizos are made with heavily spiced, freshly ground meat, and the must be cooked. Spanish chorizos typically are dried and smoked cured links of chopped meat, seasoned mainly with garlic and paprika; they tend to be ready-to-eat and have a salami-like soft and chewy bite.

Although Spaniards introduced the pid and the techniques of making chorizo to most of Latin America, through the centuries chorizos were adapted with local flavors and ingredients. (The Spaniards, for their part, borrowed paprika from those new lads and made it one of their signature chorizo seasonings.) Interestingly, the version that took root in Latin soil was raw and uncured, which is the least-common kind in Spain.

Latin chorizos differ greatly from one another in flavor. Mexican is the spiciest of the lot. It also has the most complex layering of flavors, and I won’t deny that it’s my favorite. Mexican chorizos can have variations as well, but they generally contain dried chili peppers such as ancho, pasilla, guajillo and/or chipotle; a mix of spices that might include oregano, cumin, thyme, marjoram, bay leaf, cinnamon, coriander seed, allspice, paprika, achiote and cloves; most times garlic and sometimes onion; and always vinegar, which makes the meat flake or crumble as it browns and gives it a welcome hint of acidity.

If you like really spicy sausage, Chorizo Cabal of Fairfax produces a Mexican one called Perrón, which translates from Mexican-Spanish slang as brave or aggressive. It’s clear as soon as you see the label: A fierce dog looks ready to give you the bite of your life.

For a chorizo that isn’t spicy but has a colorful pungency, the way to go is Salvadoran. That happens to be the favorite of Clifford Logan Jr., vice president of the Logan Sausage Co. in Alexandria. His company sold 50,000 to 60,000 pounds of its Latin-style fresh chorizos in the Washington area last month. Logan is so passionate about chorizos that when asked to describe them, he seemed to be poetically describing bottles of wine: “The Salvadoran,” he began, with a deep romantic sigh and a sudden distant gaze, “has a robust flavor and a subtle finish.”

It seems that around Washington, Mexican and Salvadoran chorizos have been wrestling for bragging rights for a long time. Chorizo Cabal sells more Salvadoran chorizo than Mexican (except in grilling season, when the Argentine chorizo is most popular); Logan Sausage sells twice as much Mexican chorizo as Salvadoran. But the choice has as much to do with flavor and recipes as with the local immigrant population and the popularity of each cuisine. Companies often start to produce chorizos based on where the owner or employees come from; immigrants nostalgic for the flavors of home find a way to replicate their native recipes.

The companies’ Mexican, Honduran and Salvadoran chorizos are made with vinegar, yet the Honduran kind is much more sedate. The Guatemalan, Logan says, is somewhere in between the Salvadoran and Honduran, flavor-wise. Betty Guerrero, who runs Chorizo Cabal, agrees, and revealed to me that a bit of spearmint is added to Cabal’s Guatemalan spice mix. Colombian chorizo is plain and quite salty. The Argentine kind has white wine and a heavy dose of garlic in its mix, as well as oregano, nutmeg and a bit of cayenne or crushed red pepper flakes. It seems to me that Argentine-style chorizo really lets the flavor of the meat shine through. (See “Use this for that,” above.)

Of course, different brands and regions have different variations, which some purists question, especially when borders are crossed. Guerrero says, “My mother tells me that this is not the way chorizo is made in Mexico, that I am changing the ingredients, that I am changing its ways.” But Guerrero, an experienced chorizo maker, says her company sells about 50,000 pounds of chorizo per month.

One thing I have noticed is that chorizos made in the United States have less fat than those I knew and ate in Latin America. Logan and Guerrero confirmed that, saying their chorizos are made with no more than 20 percent fat. Typically, Mexican chorizo contains at least 30 percent fat. Whole Foods Market makes its own chorizo with no more than 15 percent fat, according to company spokeswoman Katie Hunsberger.

Another thing purists might question is why parts of the chorizo-making process are simplified here. For example, chorizo shops in Mexico soak and puree whole dried chili peppers and add fresh garlic and onion. Chorizo makers here, including Cabal and Logan, generally use custom-made prepared spice mixes that come with already-ground chili peppers and dehydrated garlic.

According to these producers, the mixes not only are convenient but also help ensure quality: “Dried garlic imparts flavor and doesn’t turn black as quickly as fresh garlic does,” Clifford Logan says. They also promote consistency. Hunsberger says that Whole Foods works with Barron’s spices to create a spice mix for its house brand.

No wonder chorizo makers are hesitant to share ingredient information. Their recipes are treated as highly classified state secrets that outsourced spice companies are legally forbidden to share. Dealing with such sacred formulas also may explain why many chorizo companies have longstanding and loyal employees.

Or maybe they just heart chorizo, like me.

Article written for and published by The Washington Post click here. 

Cowboy Charro Beans
Print Recipe
4.23 from 9 votes

Cowboy Charro Beans

Cowboy Charro Beans recipe from Pati's Mexican Table Season 1, Episode 2 “Foods of the Mexican Revolution”
Prep Time5 minutes
Cook Time25 minutes
Total Time30 minutes
Course: Side Dish
Cuisine: Mexican
Keyword: bacon, beans, black beans, Chorizo, jalapeno, pati’s mexican table, Peruvian beans, pinto beans, Tomatoes
Servings: 6 servings
Author: Pati Jinich

Ingredients

  • 6 oz sliced uncooked bacon chopped
  • 8 oz fresh uncooked Mexican chorizo casings removed, chopped
  • 1/2 cup white onion chopped
  • 1 jalapeño pepper finely chopped more or less to taste, seeded if desired
  • 1/2 lb roma tomatoes about 2 to 3 tomatoes, chopped
  • 1 tsp kosher or sea salt plus more as needed
  • 5 cups cooked pinto beans and their cooking liquid or substitute with black or Peruvian beans

Instructions

  • Cook the bacon in a large, deep skillet over medium-high heat for 3 to 4 minutes, until it is lightly browned and starting to crisp. Add the chopped chorizo; cook for 4 to 5 minutes, until it starts to brown and crisp. As it cooks, use a wooden spoon or spatula to break it into smaller pieces.
  • Add the chopped onion and jalapeño; mix well and cook for 1 or 2 more minutes, letting them soften a bit. Add the tomatoes and mix well; cook for 3 to 4 minutes, stirring, until the tomatoes soften and appear mushy.
  • Add the cooked beans and their cooking liquid; mix well and reduce the heat to medium. Cook for 8 to 10 minutes, until the beans are moist but not soupy. Add a bit more water if needed. Taste, and add more salt to your taste. Serve hot.

Notes

Frijoles Charros con Tocino y Chorizo
Mexican style pasta
Print Recipe
5 from 5 votes

Mexican Style Pasta with Tomato Sauce, Chorizo & Fresh Cream

Mexican Style Pasta with Tomato Sauce, Chorizo & Fresh Cream recipe from Pati's Mexican Table Season 1, Episode 9 “Chorizo”
Prep Time5 minutes
Cook Time35 minutes
Total Time40 minutes
Course: Main Course
Cuisine: Mexican
Keyword: Avocado, chipotles in adobo, Chorizo, mexican crema, pasta, pati’s mexican table, queso fresco, Tomatoes
Servings: 6 servings
Author: Pati Jinich

Ingredients

  • 1 1/2 lbs ripe Roma tomatoes about 6 to 8 tomatoes
  • 1 medium clove garlic
  • 1/2 cup tomato cooking liquid
  • 1/2 medium white onion coarsely chopped (about 1/2 cup)
  • 3/4 tsp kosher or sea salt
  • 1/4 tsp freshly ground black pepper
  • 8 oz fresh uncooked Mexican chorizo casings removed and coarsely chopped
  • 1 tbsp safflower or corn oil
  • 8 oz dried spaghetti, angel hair or fettuccine broken into smaller pieces
  • 2 cups chicken broth
  • 2 bay leaves
  • 1 to 2 tbsp sauce from canned chipotles in adobo plus 1 whole canned chipotle chile for more heat (optional)
  • 6 oz queso fresco, farmer’s cheese, or a mild feta crumbled
  • Mexican or Latin cream as much as needed (!) or substitute for creme fraiche or sour cream
  • 1 ripe Mexican avocado halved, peeled, cut into slices

Instructions

  • Place tomatoes and garlic in a medium saucepan. Add water to cover and bring to a boil over medium-high heat. Simmer for about 10 minutes, until the tomatoes are thoroughly cooked, they look mushy and the skins have started to come off.
  • Transfer the tomatoes, 1/2 cup of the cooking liquid and garlic to a blender along with the onion, salt and pepper. Let cool slightly and puree until smooth.
  • Cook the chorizo in a large, deep skillet over medium-high heat for 5 to 6 minutes, until it has browned and crisped; use a wooden spoon or spatula to break it into smaller pieces as it cooks. Use a slotted spoon to transfer the cooked chorizo to a bowl.
  • Add oil to the same skillet used to cook the chorizo, over medium-high heat. Add the spaghetti or fettuccine pieces and cook for a few minutes, stirring often, until the pasta changes color and starts to brown. Do not let it burn!!
  • Pour the tomato puree on the pasta. Cook for about 5 minutes, stirring often, until the sauce thickens and the color darkens to a deeper red. Add the chicken broth, bay leaves and adobo sauce, plus a whole chipotle chile in adobo, if desired.
  • Mix well, cook uncovered for 10 to 12 minutes, stirring often to keep the pasta from sticking, until the pasta is cooked through and the tomato sauce has thickened considerably. Discard the bay leaves.
  • Add the chorizo and stir to incorporate. Divide among individual plates; serve hot, topped with crumbled cheese, fresh cream and avocado slices.

Notes

Fideo Seco
Print Recipe
4.86 from 7 votes

Potato, Scallion & Chorizo Crispy Tacos

Potato, Scallion & Chorizo Crispy Tacos recipe from Pati's Mexican Table Season 1, Episode 9 “Chorizo”
Prep Time5 minutes
Cook Time20 minutes
Total Time25 minutes
Course: Main Course
Cuisine: Mexican
Keyword: Chorizo, corn tortillas, pati’s mexican table, potatoes, salsa verde, scallions, Taco
Servings: 5 to 6 servings
Author: Pati Jinich

Ingredients

  • 1 lb red bliss potatoes peeled and cut into 1-inch pieces
  • 8 oz fresh uncooked Mexican chorizo sausage casings removed, coarsely chopped
  • 8 scallions white and light green parts thinly sliced (1/2 cup)
  • 1 tsp kosher or sea salt or more to taste
  • 10-12 Corn tortillas
  • safflower oil for frying
  • Salsa verde or any salsa of your choice

Instructions

  • Bring a medium pot of water to a boil over medium-high heat. Add the potato pieces, once the water returns to a boil, cook for 10 to 12 minutes or until the potatoes are tender. Drain.
  • Place the chorizo in a large skillet over medium-high heat. As it cooks, use a wooden spoon or spatula to crumble it into smaller pieces. Once it browns and crisps, 5 to 6 minutes, add the scallions and stir to combine; cook for about 1 minute or until the scallions begin to soften.
  • Add the cooked potatoes and salt, mashing them into the chorizo mixture with a potato masher or a wooden spoon, for about 1 minute until well combined. Remove from the heat. Taste, add salt as needed.
  • Heat a dry, medium skillet over medium heat. Warm the tortillas in the skillet one at a time for 15 to 30 seconds on each side, to soften them for rolling and so they will not crack as you assemble tacos.
  • Place a few tablespoons of the filling on the center of each heated tortilla, and roll, as tightly as you can, into a taco. Insert a wooden toothpick through taco pairs, through the seams to help them retain their roll shape as they cook. When they have all been rolled, finish the tacos by either frying or toasting them.

To fry the tacos:

  • Pour enough oil into a large skillet to a depth of about 1 inch, place over medium heat. Once the oil is hot, 4 to 6 minutes, fry the tacos in batches, placing them in the skillet, without crowding them. They oil should be bubbling as they cook. Cook for about 2 to 3 minutes on the first side, until the bottom and sides have crisped and turned golden. Use tongs to turn over the tacos, cook for another 2 to 3 minutes. Transfer them to a plate lined with paper towels. Continue until all the tacos have been fried.

To toast the tacos:

  • Heat a large, dry skillet or comal over medium heat. Working in batches, place the tacos in the skillet. Let them toast and heat for about 3 to 4 minutes or until the tacos are browned and crisped, then flip to the other side and toast until evenly browned and crisp.
  • Remove all toothpicks; serve warm.

Notes

Taquitos de Papa, Cebollita y Chorizo
sweet potato salad
Print Recipe
5 from 5 votes

Warm Sweet Potato Salad with Chorizo

Warm Sweet Potato Salad with Chorizo recipe from Pati's Mexican Table Season 1, Episode 9 "Chorizo"
Prep Time15 minutes
Cook Time30 minutes
Total Time45 minutes
Course: Main Course, Salad
Cuisine: Mexican
Keyword: Chorizo, cilantro, jalapeno, orange juice, pati’s mexican table, sweet potato
Servings: 4 to 6 servings
Author: Pati Jinich

Ingredients

  • 3 lbs sweet potatoes peeled and cut into bite-size chunks, about 3 large sweet potatoes
  • 3 tbsp olive oil
  • 1 cup orange juice preferably freshly squeezed
  • 1/2 tsp brown sugar
  • 3/4 tsp kosher or sea salt
  • 1/4 tsp freshly ground black pepper
  • 8 oz fresh uncooked Mexican chorizo, casings removed and coarsely chopped
  • 1 jalapeño pepper stemmed and seeded if less heat is desired
  • 1/3 cup red onion chopped
  • 1/3 cup cilantro chopped

Instructions

  • Bring a large pot of salted water to a boil over high heat. Add the sweet potato pieces, once it comes back to a boil, reduce the heat to medium; simmer for about 10 minutes, until almost tender and a knife can go through without breaking a piece. Drain, and transfer to a baking dish large enough to hold the pieces almost in a single layer.
  • Preheat oven to 400 degrees.
  • Whisk together orange juice, oil, sugar, salt and pepper in a medium bowl. Pour the mixture over the sweet potatoes and toss to coat evenly. Roast for about 20 minutes, turning them after about 10 minutes, until the potato pieces have started to brown and the sauce has thickened. Remove from the oven.
  • Meanwhile, cook the chorizo in a medium skillet over medium-high heat; use a wooden spoon of spatula to break it into smaller pieces as it cooks. After 5 to 6 minutes, when it has nicely browned and crisped, use a slotted spoon to top the hot sweet potatoes.
  • Sprinkle the jalapeño, red onion and cilantro on top, and toss gently to combine. Serve warm.

Notes

Ensalada Calientita de Camote y Chorizo

Tomatillos

Although they are widely available in the US, I don’t think I have met a lot of people here who use fresh tomatillos in their cooking. It may be partly because people are not familiar with them or how to cook them, but…. they are not an appealing ingredient as far as looks go with the first impression! But let me tell you why you should definitely give them a try.

They are from the tomato family, but are much firmer than red tomatoes and less juicy. They are green and covered with a papery husk, that tends to be speckled with dirt and sometimes randomly torn or stuck to the flesh of the tomatillo. This is because the skin of the tomatillo is a bit sticky and waxy. They also have a somewhat humid aroma, from the moisture caught in between the skin and the husk along their travels and storage time.

However, don’t let yourself be deceived by their cover and first appearance. Once you bring them home, peel the husk and rinse them off, you will see what a beautiful ingredient they are. They have a sensuous shape and a deep green shiny color. You will see even more beauty once you try their flavor and see all the things you can use them for.

In my opinion, they are one of the most unique ingredients in Mexican cooking. A bit tart, in a very peculiar way, they work wonderfully along spicy and sweet ingredients.

To buy them, don’t be shy about touching them. You have to confirm they are firm, with a bright green color and not mushed, wrinkled or colorless, signs of being old and bitter. They should be fresh and you can tell by the husk which should be papery, regardless if it sticks to the tomatillo or not. So grab the tomatillo and peek inside the husk to see what you are getting before you put it in your basket!

Calabacita Italiana or Italian Zucchini

I think the most commonly used zucchini in Mexican cooking is either what in Mexico is called the calabacita italiana, or Italian zucchini, or the calabacita bola or round squash, which is similar to the Italian but rounder and smaller and used a lot in French cooking. Italian zucchini is different from the regular green zucchini found in most US stores, in that the later is large, thick and has a uniform dark green color. The Italian zucchini is smaller, a bit rounder with a chubbier appearance, and has a lighter green color that is randomly speckled with a cream color and is milder and sweeter in flavor.

See the Italian zucchini pictured above. As the years have gone by, I have seen them more frequently at international and Latino stores as well as some Farmers Markets here in the US.

Below see the Italian zucchini on top of the regular green zucchini so you can compare its looks. Now you have to bring them home to taste the differences! Though you can substitute one for the other in recipes, the Italian is a bit milder and sweeter.

Calabacita italiana 1

Comfort me with Café de Olla (or Coffee from the Pot)

As we returned from our 10 day vacation to Mexico this December and walked out of the Dulles airport, I felt my bones freeze. Say what? I told my husband, I think I am turning around and catching the next flight back to Mexico.

Now we are home, with the heating so high it seems we moved to the Equator. And I admit that the cold and especially the snow, which I am watching right this minute through my kitchen window starting to magically fall from the night sky, is one of the things I love about living in the Eastern United States. We can experience the full change of seasons.

So instead of complaining, this is what I do: I take out my Piloncillo, or brown sugar, my bark of Ceylon or True cinnamon, some dark roasted coffee and make myself a Café de Olla.

The Café de Olla is one of the most comforting things I can think of. Not only for when its cold outside, it is also wonderful to soothe the end of a rich meal or to start a cold morning with some cookies or toast on the side, or rather, dipped inside the coffee.

It is called Café de Olla because for centuries it was prepared, and still is in some parts of Mexico and Mexican homes, in clay pots. Pot translates to Olla in Spanish, so that explains the funny translation to Coffee from the Pot. The clay pot imparts a peculiar earthy and deep flavor to the coffee. But if you don’t have a clay pot, that should not stop you from making it. The combination of coffee with piloncillo or dark brown sugar and cinnamon is extraordinary by itself as well.

As I am gearing up for an exciting 2010 with fascinating topics to research and recipes to try and test for the next series of classes at the Institute, there is one thing I realize never ever changes in each single menu we offer: there is always Café de Olla after the end of the meal for our guests. Our regulars demand it. And me and my cooking team can’t start the day without it.

Comfort Me with Cafe de Olla 2-thumb-510x342-661
With the spirit of continuing to welcome 2010, from my cooking team and myself -we have been so lucky to have been together for almost three years- we wish you a delicious 2010 filled with Café de Olla to warm your soul, your belly, your cold mornings and late nights.

cafe de olla 2
Here I am holding on to one, for dear life, while the winter lasts.

Print Recipe
4.60 from 5 votes

Café de Olla

The Café de Olla is one of the most comforting things I can think of. Not only for when its cold outside. It is also wonderful to soothe the end of a rich meal or to start a cold morning with some cookies or toast on the side, or rather, dipped inside the coffee.
Cook Time10 minutes
Course: Drinks
Cuisine: Mexican
Keyword: cinnamon, coffee, piloncillo, Recipe
Servings: 6 servings
Author: Pati Jinich

Ingredients

  • 9 cups water
  • 6 tablespoons coarsely ground dark roasted coffee
  • 4 ounces piloncillo or about 8 to 9 tablespoons grated (can substitute for dark brown sugar) and can add more or less to taste, depending on how sweet you like it
  • 1 cinnamon stick

Instructions

  • Heat water in a pot. When it comes to a rolling boil, lower the heat to low and add the coffee, piloncillo and cinnamon stick. Simmer for about 5 minutes, give it a couple stirs and turn off the heat. Let it sit covered for about 5 more minutes. Strain before serving with a fine strainer or cheesecloth. Or then again, pour into a french press, press down and serve.

My Three Little Piggies

Piggies can be found in many places under different names: marranitos, puerquitos, cerditos, cochinitos. All these words are used to describe a Piggie in endearing ways. In some places, they are given different animal shapes, but still called in one way or another “Piggy.” That may be because that was their original shape.

They really should be called Flying Piggies and have wings attached given how fast they fly away from my kitchen each time I make them.  Sometimes it is even hard to bake them, since my boys find the dough irresistible: its gooey, sticky, and deliciously sweet.

Piggies 1
Now, don’t think I didn’t see that little Piggie…

Piggies 2After they sneak away and find ways to eat some dough, they have a hard time waiting for it to harden in the refrigerator, so it can be easy to roll it out and give it fun shapes.

More often than not, the Piggies end up looking like fierce lions or magical dragons.

One of the reasons I love these cookies, is because my middle Piggy, my pickiest eater, loves them. He enjoys every part of the process to make them, except waiting for the dough to be ready.

Piggies 3
He takes brushing them with lightly beaten egg incredibly seriously.

Piggies 4
No easy task, you see?

And oops! There are some dinosaur shaped Piggies there too…

Piggies 5
He loves adding confectioners’ sugar. Especially after I have said, “I think that’s enough baby.”

Most of all, he loves eating them. Which makes me happy because I know all the good stuff that’s in them.

With firm and clean edges, Piggies are deceiving.  You can’t tell that their texture is so soft and almost bread-like until you take a bite. They also have a wholesome and small Pueblo flavor.  I think that’s because the main ingredient, Piloncillo is simply sugar cane juice, typically shaped into cones.  It’s easy to find, but you can also substitute it with brown sugar and get the same charming feeling.  Combine all the above characteristics and you get an incredibly comforting cookie.

Piggies 6
There goes my oldest Piggy, jumping in to get one, even before they have cooled down…

P.S. Piggies are perfect to accompany a hot cup of coffee or tea… Also, keep them covered, so they will remain soft and fluffy.

Print Recipe
4.80 from 5 votes

Piggies

Piggies can be found in many places under different names: marranitos, puerquitos, cerditos, cochinitos. All these words are used to describe a Piggie in endearing ways. In some places, they are given different animal shapes, but still called in one way or another “Piggie”. That may be because that was their original shape.
Cook Time7 minutes
Course: Dessert
Cuisine: Mexican
Keyword: ceylon, cinnamon, cookies, Dessert, honey, piloncillo, Recipe
Servings: 30 medium-sized cookies
Author: Pati Jinich

Ingredients

  • 12 ounces piloncillo chopped or grated, or substitute for 1 3/4 cup packed brown sugar
  • 3/4 cup water
  • 1 true or ceylon cinnamon stick about 2-inch to 3-inch length
  • 2 sticks or 1 cup unsalted butter at room temperature
  • 2 tablespoons honey
  • 4 1/4 cups all-purpose flour may need a bit more
  • 1 teaspoon baking powder
  • 1 teaspoon baking soda
  • 1/2 teaspoon salt
  • 2 eggs at room temperature lightly beaten
  • Butter to grease cookie/baking sheet
  • 2 to 3 tablespoons all-purpose flour to roll out the dough
  • 1 egg lightly beaten to be used as glaze
  • Confectioners' sugar to sprinkle on top optional

Instructions

  • In a saucepan, combine the grated piloncillo or dark brown sugar with the water and cinnamon. Heat over medium heat, once it simmers, adjust and lower heat to keep it at a low-medium simmer for about 15 minutes, or until it thickens to a light syrup consistency. Turn off the heat and remove the cinnamon stick. You should have now about 1 1/4 cups piloncillo liquid. Add the butter and the honey into the hot liquid, and stir until it dissolves.
  • In a mixing bowl, mix the flour, baking powder, baking soda and salt. Make a whole in the center and pour the piloncillo mixture. With a spatula mix it all together in a circular motion until it is well incorporated. Lightly beat 2 eggs and incorporate them into the dough. The dough will be sticky and gooey.
  • Place enough plastic wrap in the bottom of a mixing bowl to have wings on the sides. With a spatula, push the dough onto the plastic wrap, wrap the dough, and refrigerate anywhere from 3 hours to overnight.
  • When ready to make the cookies, preheat oven to 375℉ degrees. Grease a couple cookie/baking sheets with butter. If using one sheet you may need to do a couple batches.
  • Remove dough from the refrigerator. On a counter top, sprinkle a couple tablespoons of flour. Rub a bit of flour on the rolling pin as well. Roll dough until you have about 1/4" thickness. Using piggy cookie cutters (or other shapes, but then you may need to change the name!), press down on dough, moving a bit on the counter top, to make it easier to lift the shaped dough.
  • Place Piggies on the baking sheet as you shape them along. Gently brush cookie tops with the lightly beaten egg. Roll the extra already used dough, wrap with plastic wrap, and place in the freezer for at least 10 minutes before using again, or it will be too soft and sticky. Repeat to make remaining cookies.
  • Bake cookies in the middle rack of the oven anywhere from 7 to 9 minutes. Remove from the oven and place on a cooling rack. You may sprinkle confectioner's sugar on top. Keep them covered so they remain soft.
  • Kids love to eat them with a tall glass of milk, I like them with a hot cup of coffee.

Notes

Chochinitos: Galletas de Piloncillo y Canela

Pickled Red Onions a la Yucateca

As promised, and right before the year ends, here is a recipe for pickled red onions or cebollas encurtidas or en escabeche, so you can try them with Pollo Pibil. Please do! You will see why it’s no wonder pickled red onion has been Pibil’s faithful and enlightened companion for centuries: they both taste great separately, but blissful when paired together.

Pickled red onions are also a permanent fixture at every single table in Yucatan. As they are mildly spicy, deliciously tangy and surprisingly crunchy they go well with so many things. These past couple weeks I learned first hand why they are such a fabulous pickle to have handy.

Since one of its main ingredients, the bitter orange, is hard to come by around here, I had 16 takes with different bitter orange substitutes. There are well-known versions for substitutes, but I am not crazy about any of them. 16 pickled red onion batches later: I found one I love! It is equal parts grapefruit, orange, lime juice and white distilled vinegar. Without the vinegar it’s not acid enough and the pickle loses its color and crunch, it faints quickly.

Pickled Red Onions 1
But since I am not one to throw away tasty things, those 16 batches found their way into toasted sandwiches, on top of rice and cous cous, along tacos and quesadillas, as a capricious side to enchiladas and scrambled eggs in the morning, sprinkled on refried beans. The last batch, which was destined to complement broiled flank steak a couple nights ago was gone before I finished slicing the meat.

And you will like this: takes 10 minutes to make them and they last weeks in your refrigerator. Just mix the marinade ingredients in a bowl, slice the onions (which some cooks like to quickly blanche in hot water or desflemar before pickling, I don’t because the onion loses that strength that I like, but you can try…), then add one, or why not two, charred banana peppers, let it all sit and get comfortable together, and you are set.

Pickled Red Onions 2
There are banana peppers in many stores in the DC-MD-VA area, but if you can’t find them, just substitute for Jalapeños. They work great as well.

The pickled red onions will be sitting in your refrigerator ready to give a spin to almost anything you may put together, no matter how fast or slow, simple or complicated. I am always amazed at how accommodating salsas and pickles can be.

So for this 2010, aside for hoping you all have a wholesome and sweet year, I hope you can always have a tasty pickled side handy to give you a bit of a spunk, whenever you need one. It has worked for me at times when I have needed some. And when I really need a kick, I leave the pickled onions aside and give that pickled pepper a big bite.

Pickled Red Onions main
Print Recipe
5 from 5 votes

Pickled Red Onions a la Yucateca

Pickled red onions are also a permanent fixture at every single table in Yucatan. As they are mildly spicy, deliciously tangy and surprisingly crunchy they go well with so many things. These past couple weeks I learned first hand why they are such a fabulous pickle to have handy.
Prep Time10 minutes
Cook Time30 minutes
Course: Side Dish
Cuisine: Mexican
Keyword: allspice, banana chiles, bitter orange juice, pickled red onions, Recipe, red onion, Vegetarian
Servings: 2 cups
Author: Pati Jinich

Ingredients

  • 1 cup bitter orange juice or substitute: 1/4 cup each grapefruit juice, orange juice, lime juice and white distilled vinegar
  • 1/4 teaspoon ground black pepper
  • 1/4 teaspoon ground allspice or pimienta gorda
  • 1/2 teaspoon kosher or sea salt or more to taste (I add more... but I am keen on salt)
  • 1 large red onion thinly sliced (cortada en pluma), about 2 cups
  • 1 banana pepper guero or x'catik, roasted, broiled or charred (may substitute for Jalapeño)
  • 2 bay leaves

Instructions

  • Place the bitter orange (or its substitute or plain vinegar) in a mixing bowl along with the black pepper, allspice and salt. Mix well. Incorporate the red onions and bay leaves.
  • Char or broil the banana pepper in the broiler, on the grill, on a hot comal or dry skillet set over medium heat or directly on an open flame, for 3 to 6 minutes. Turn it once or twice, until its skin has lightly charred. Incorporate to the onion mix.
  • Toss well and let the mix pickle at room temperature anywhere from 1/2 hour to 2 hours, cover and refrigerate. It will keep in the refrigerator in great shape for 2 weeks.

Notes

Cebollas Encurtidas Yucatecas

Bitter Orange

The bitter orange or naranja agria is a citrus fruit that has a peculiar bitter flavor and a very high acidity that works very well for marinades and to tenderize meats and seafood. It also has a distinct look. It is not very pretty; it’s small, with a pale, somewhat dull colored pebbly textured skin that appears to be speckled with sand or dust. However, slice it down the middle, and you will find a shinny, juicy, deep orange and wonderfully flavored pulp.

It found its way to Mexico through the Spaniards, who got them from the Arabs, who got them from the Persians. In any case, bitter oranges found a wonderful reception in Mexican soil, especially in some regions such as the Yucatan Peninsula and Veracruz. It is used in many ways: to prepare ceviches, sauces, soups, marinades, salsas, and pickles to name some.

So much for ingredients traveling from one place to another around the globe, bitter oranges are very hard to find in many places -and one big reason why I am considering planting a tree in my backyard. That’s also why many cooks have come up with different substitutes such as part orange juice and part vinegar or different percentages of different citrus fruits.

The substitute that I like the most, is equal parts grapefruit, orange, lime juice and white distilled vinegar. I find that the substitutes that only use citrus juices tend to faint quickly and don’t reach the high acidic content of the bitter orange.

Pollo Pibil

Last December, Daniel and I went to Yucatán. I was swept off my feet by the grandiose nature and history of the old Haciendas, but mostly by the uniqueness of the cuisine. It stands out from the rest of the country; with its aromatic, pungent, citrus flavors, charred and toasted ingredients and elements not found anywhere else.

Since at the Institute we established topics for the 2009 program in January and I left Yucatán as a December closing session, by the time class came around I was desperate to share these flavors. What a tortuous self imposed wait!

Of course Pollo Pibil had to be included, as it is one of the most loved dishes of the area. The rest of the menu was built around: Dzotobi-chay tamales, Mexican avocado soup, strained beans, a yellow rice, and old fashioned flan for dessert.

Chicken Pibil 1(One of the views inside of Hacienda San José)

Pollo Pibil is made with one of the pillars of Yucatecan cuisine, recado rojo or achiote paste,  which can now be found in many stores or online. If you walk into any market in Yucatán, you will see countless stands boasting colorful mountains of the main recados or pastes: black or chilmole, brown or de bistek, green or pepita and red or achiote.

The word Recado translates to message. In a way, each of the recados has a unique combination of ingredients, which makes a distinct bouillon of sorts, that translates a particular message of flavors into the dishes it is being used in.

They will sell you as much as you want.

Chicken Pibil 2

Or have it ready in previously measured bags.

Chicken PIbil 3

A couple of things distinguish anything cooked Pibil style:

First is the marinade. With achiote paste as a base, it has a rusty brick-like color and a pungent and sort of permanent flavor. That’s because of the achiote seeds it is made with. Then the paste is mixed with oregano, cumin, allspice, black pepper, salt and charred garlic; and diluted with bitter orange, which has a peculiar a flavor, quite different from regular oranges.

Since bitter orange can be hard to come by, many cooks have found substitutes such as a mix of orange juice and vinegar or a mix of different citrus juices. After testing for a while in my kitchen, I found the substitute I like the most to be equal parts of grapefruit, orange and lime juices and white distilled vinegar. The marinade is flavorful and aromatic and, as it has a high acidic content, it tenderizes the meat beautifully.

Chicken Pibil 4
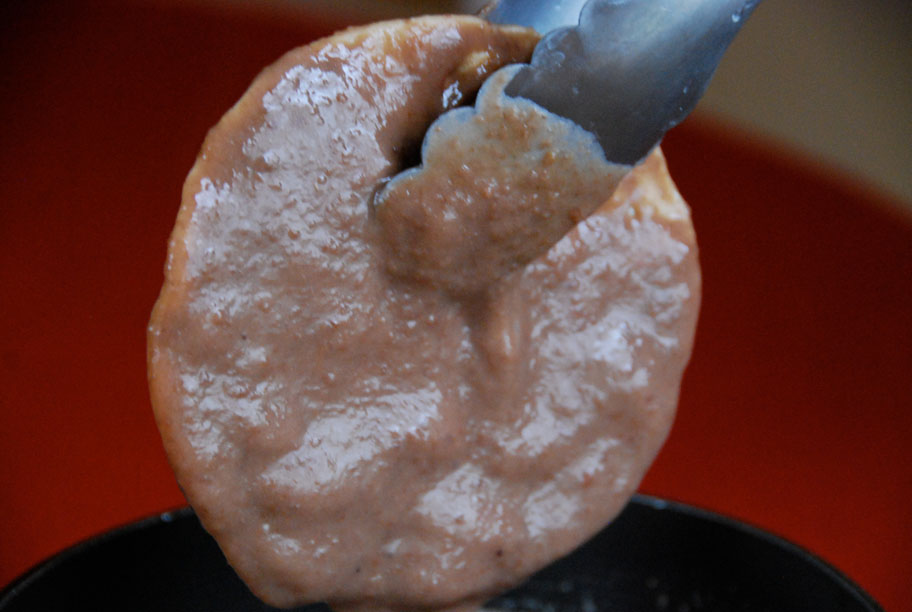
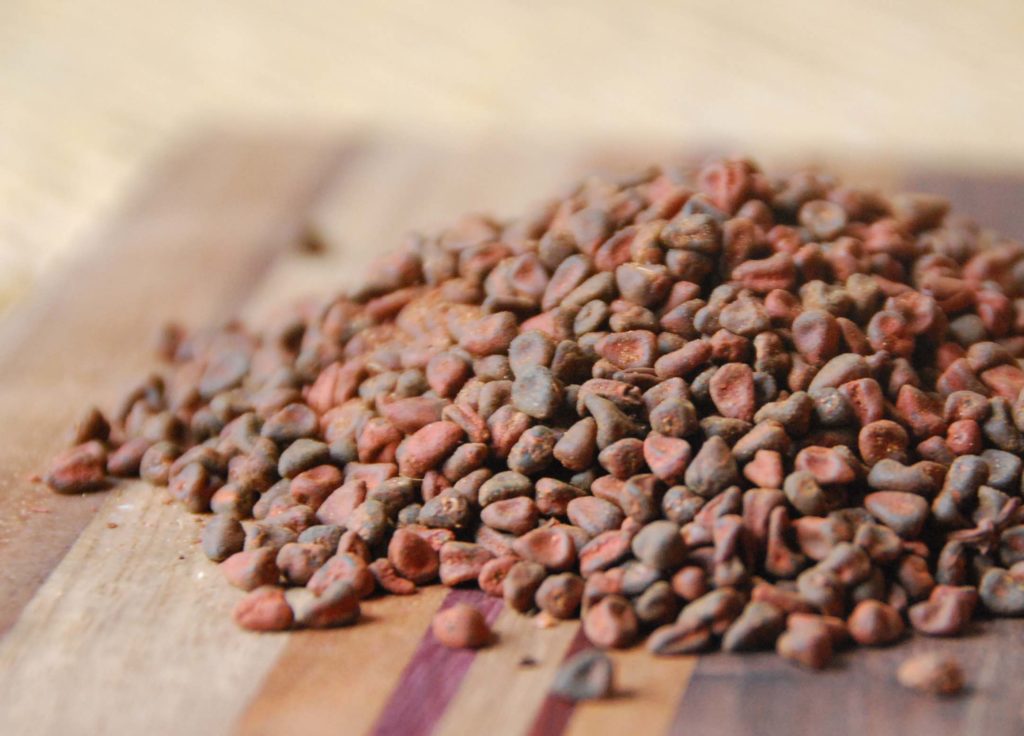
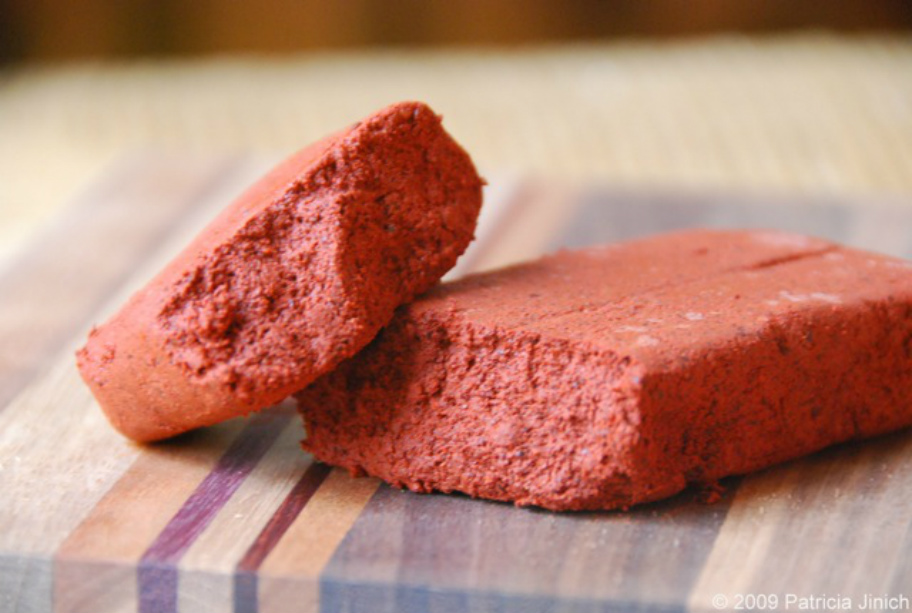
(A freshly opened bar of achiote paste, posing for my camera so you can take a look)
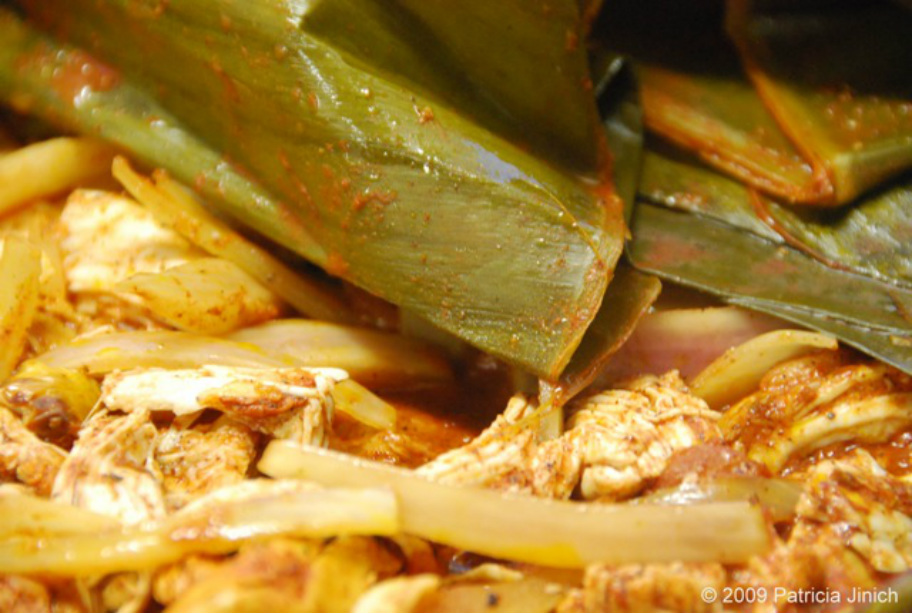
The second thing that distinguishes a Pibil is the cooking technique, which is what gave it its name. Traditionally, Pibil meats were marinated, wrapped in banana leaves and placed in “Pibs”- roasting pits buried underground layered with stones and pieces of wood. The “Pib” gave the dish a rustic, earthy and ashy feel while the banana leaves infused the meats with a grassy fragrant flavor and kept them moist.

Since it’s not likely that we are going to dig roasting pits on any given workday in our backyards anytime soon, many cooks have tried to find a method that can accomplish similar results.  Some wrap the chicken or meat in leaves and cook it in a steam bath in a large covered pot, while others do the same in the oven.  However, the dish becomes way too juicy and you are missing that earthy, roasted, ashy flavor.  When you cook in an earthen pit, although the chicken is wrapped, the excess moisture escapes through the pit, so the final dish is not that wet.

Here again, restless me, kept testing in the kitchen. And later then, very happy me, found a great and quick method to obtain similar results. First roast the chicken in the oven (detailed recipe below)  for that charred earthen flavor with the plus of nice browned skin and a thickening and seasoning of the marinade. Then bundle with banana leaves (if you have them) and/or aluminum foil to give it that final cooking that will make the meat come off the bones. Chicken Pibil 5

Chicken Pibil is an absolute hit paired with pickled red onions and a fiery and feisty habanero chile sauce. Yes, its spicy, but it is a welcome shock.

Print Recipe
4.29 from 7 votes

Chicken Pibil Style

Pollo Pibil is made with one of the pillars of Yucatecan cuisine, recado rojo or achiote paste,  which can now be found in many stores or online. If you walk into any market in Yucatán, you will see countless stands boasting colorful mountains of the main recados or pastes: black or chilmole, brown or de bistek, green or pepita and red or achiote.
Prep Time4 hours 10 minutes
Cook Time2 hours
Course: Main Course
Cuisine: Mexican
Keyword: achiote paste, allspice, banana leaves, bitter orange juice, chicken, chicken broth, cumin, onion, red onion, Tomatoes
Servings: 5 to 6 servings
Author: Pati Jinich

Ingredients

  • A 5 to 6 pound chicken cut in pieces
  • 2 tablespoons seasoned achiote paste or recado rojo
  • 2 cups of bitter orange juice or substitute (1/2 cup orange juice, 1/2 cup grapefruit juice, 1/2 cup lime juice and 1/2 cup white distilled vinegar)
  • 2 cups chicken broth
  • 5 garlic cloves charred, broiled or toasted and then peeled
  • 1 teaspoon oregano
  • 1/4 teaspoon ground cumin
  • 1/4 teaspoon ground allspice
  • 1/2 teaspoon kosher or sea salt or more to taste
  • 1/2 teaspoon ground black pepper
  • 1 red onion roughly chopped
  • 2 tomatoes roughly chopped
  • Banana leaves optional

Instructions

  • To make the marinade, place the achiote paste, bitter orange or its substitute, chicken broth, charred garlic cloves, oregano, cumin, allspice, salt and pepper in the blender or food processor and puree until smooth.
  • Rinse chicken pieces and pat dry. Place in a zip lock bag or container and pour the marinade on top. Make sure all the chicken pieces have been bathed in the marinade. Close or seal the bag or container and place in the refrigerator for 4 to 24 hours. Flip and move around the chicken pieces once or twice along the way.
  • Remove the chicken from the refrigerator. Preheat the oven to 450 degrees.
  • Spread the roughly chopped red onion and tomatoes on a large baking dish/pan. Place the chicken pieces on top of that layer and pour the marinade on top, making sure the pieces are not on top of each other. Place in the oven and roast for 25 to 30 minutes or until the skin has nicely browned and crisped.
  • Remove the baking dish from the oven. Flip the chicken pieces to the other side and baste with the marinade. If using banana leaves, wrap them around the chicken making a bundle. Cover the whole baking dish with aluminum foil, securing it around the edges. The less steam that is able to escape, the better.
  • Lower the oven temperature to 350 degrees. Place the baking dish back in the oven and let the chicken bake for about 1 1/2 hours. The chicken should be completely cooked through and almost coming apart from the bones. Remove the baking dish from the oven and let it rest for 10 to 15 minutes.
  • Place the chicken on a platter. You may serve whole chicken pieces or remove the meat from the bones. Ladle the remaining sauce into a bowl and either drizzle the sauce over the chicken or serve it on the side. This dish is also delicious with a side of pickled onions and habanero salsa.

Notes

Pollo Pibil