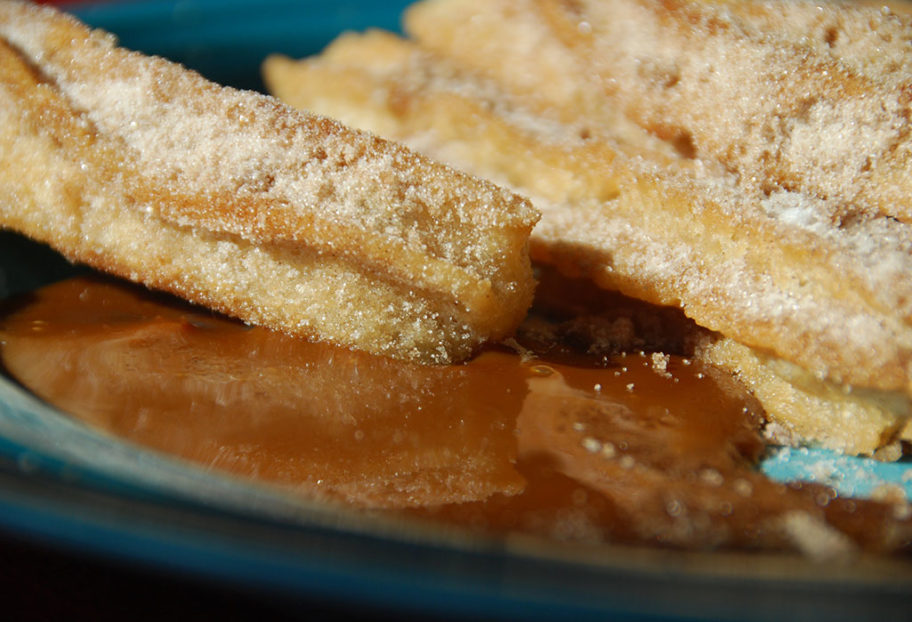
Desserts

Hard Waffer Rolls

Hard Waffer Rolls or Marquesitas recipe
Print Recipe
4.13 from 8 votes

Hard Waffer Rolls

Hard Waffer Rolls recipe from Pati's Mexican Table Season 5, Episode 9 “Isla Mujeres Inspired”
Prep Time15 minutes
Cook Time5 minutes
Total Time20 minutes
Course: Dessert
Cuisine: Mexican
Keyword: cheese, Chocolate, Crepes, marquesitas, pati's mexican table, Yucatán Peninsula
Servings: 6 to 8 rolls
Author: Pati Jinich

Ingredients

For the batter:

  • 4 eggs plus 2 egg whites
  • 2/3 cup granulated sugar
  • 3/4 cup canola oil
  • 1 cup all-purpose flour
  • 1/2 teaspoon kosher or coarse sea salt
  • 2/3 cup whole milk
  • 1 teaspoon vanilla extract

For the filling:

  • 2 cups Edam cheese shredded, optional
  • 1 cup chocolate hazelnut spread optional
  • Jam of your choice optional

Instructions

  • Add all of the batter ingredients to a blender and puree until smooth. Set aside and let rest for 10 minutes, or cover and refrigerate up to 12 hours. Stir before using.
  • Heat a 10” crepe pan or flat bottomed non-stick skillet over medium-high heat. Once hot, pour about 1/4 cup of batter and spread out in a circular shape to cover the entire pan. You want to create a very thin layer. Once the bottom begins to become toasted and golden, loosen the edges with a spatula and flip to toast the other side. Continue to flip another 2 times until the batter starts to crisp.
  • Add desired filling - chocolate hazelnut spread and Edam cheese are traditional to the Yucatán Peninsula. Roll up into a big and wide roll. As soon as, you remove it from the heat it will begin to crisp up like a wafer cone. Enjoy!

Notes

Marquesitas

Pepita Brittle

pepita brittle recipe
Print Recipe
4.17 from 6 votes

Pepita Brittle

Pepita Brittle recipe from Pati's Mexican Table Season 5, Episode 7 “Izamal: Gold & God”
Prep Time5 minutes
Cook Time40 minutes
Total Time45 minutes
Course: Dessert
Cuisine: Mexican
Keyword: pati's mexican table, pepitas, piloncillo, pumpkin seeds, Sweet, Yucatán Peninsula
Servings: 10 to 12 servings
Author: Pati Jinich

Ingredients

  • 2 cups raw hulled pumpkin seeds or pepitas, lightly toasted
  • 1 tablespoon unsalted butter at room temperature divided
  • 1/2 cup water
  • 1 cup brown sugar
  • 1 cup granulated sugar
  • 2 tablespoons piloncillo grated or more brown sugar
  • 2 tablespoons corn syrup
  • Vegetable oil to grease the spatula
  • 1/2 teaspoon baking soda
  • Sprinkle of kosher or coarse sea salt optional

Instructions

  • Heat a medium skillet over medium-low heat. Add the pumpkin seeds and let them toast, slightly, until they start making popping sounds and have begun to darken, 3 to 4 minutes. Scrape onto a bowl and let cool.
  • Use 1/2 tablespoon of the butter to grease a 6” x 10” nonstick rimmed baking sheet.
  • In a medium saucepan set over medium-low heat, combine the water, brown sugar, granulated sugar, piloncillo and corn syrup. Stir with a wooden spoon or spatula until the sugars dissolve. After 15 minutes or so, the mixture will have achieved a very thick syrup consistency and will be actively bubbling. Check with a candy thermometer to make sure it reaches 290 degrees Fahrenheit (but no more than 300 degrees), or the sugar is at “punto de bola” or “hard crack” stage, then, turn off the heat.
  • Now you have to move fast: Grease a spatula with vegetable oil. Remove the saucepan from the heat, add the baking soda, the remaining butter, and the pumpkin seeds, and quickly stir as fast as you can. The mixture will be bubbling for a few seconds. Stir well and immediately scrape the mixture onto the buttered baking sheet, as it hardens incredibly fast. Spread evenly with the greased spatula to about 1/4" thickness. Sprinkle salt on top if desired.
  • Let cool for 20 to 25 minutes and break into pieces. If you want to cut the brittle in even square or rectangle shapes, use a moist knife to do so a few minutes after you poured, before it really hardens. Leave it to further cool, dry and harden.
  • The brittle will keep for a month in an air-tight container.

Notes

Palanqueta de Pepita

Mango Pound Cake

mango pound cake
Print Recipe
4.88 from 8 votes

Mango Pound Cake

Mango Pound Cake recipe from Pati's Mexican Table Season 5, Episode 2 “Mérida: Exploring with the Locals”
Prep Time20 minutes
Cook Time55 minutes
Total Time50 minutes
Course: Dessert
Cuisine: Mexican
Keyword: buttermilk, cake, mango, pati's mexican table, pound cake
Servings: 9 to 10 servings
Author: Pati Jinich

Ingredients

  • 1/2 cup unsalted butter at room temperature, plus extra for buttering pan
  • 1 1/3 cups granulated sugar
  • 2 large eggs
  • 2 1/2 cups all-purpose flour plus extra for dusting pan
  • 1 teaspoon baking powder
  • 1 teaspoon baking soda
  • 1/4 teaspoon kosher or coarse sea salt
  • 1 3/4 cups diced mango fresh or thawed from frozen
  • 1/4 cup buttermilk
  • 1 teaspoon almond extract
  • 1 teaspoon vanilla extract
  • Confectioners' sugar for dusting optional
  • Berries of your choice for garnish, optional

Instructions

  • Preheat oven to 350 degrees Fahrenheit. Grease a 9"x 13" baking pan with butter and dust with flour.
  • In a stand mixer fitted with the paddle attachment, beat the butter on medium speed until soft, about 2 minutes. Add the granulated sugar and continue to beat until well mixed and creamy, about another 5 minutes. One at a time, beat in the eggs on medium speed until completely smooth and creamy, about 2 minutes.
  • In a large bowl, combine the all-purpose flour, baking powder, baking soda and salt.
  • Put the diced mango, buttermilk, and almond and vanilla extracts in a blender, and puree until completely smooth.
  • In four additions, gradually beat the mango puree and the dry ingredients into the butter mixture, alternating wet and dry ingredients. Mix until completely combined. Scrape the batter into the greased and dusted baking pan and place in the oven. Bake for 50 to 55 minutes, or until the cake is golden brown on top, springy to the touch, and a wooden toothpick comes out dry when inserted.
  • Remove from the oven and let cool. Turn the cake out upside down onto a board, and then flip right side up onto a platter. Dust liberally with confectioners’ sugar before serving, and garnish with berries of your choice.

Notes

Panqué de Mango

Coconut Cream

Crema de Coco
Print Recipe
4.70 from 10 votes

Coconut Cream

Coconut Cream recipe from Pati's Mexican Table Season 5, Episode 1 “Chachi’s Champotón Kitchen”
Prep Time10 minutes
Cook Time15 minutes
Total Time25 minutes
Course: Dessert
Cuisine: Mexican
Keyword: canela, cinnamon, coconut, coconut milk, pati's mexican table, Sweetened Condensed Milk
Servings: 8 to 10 servings
Author: Pati Jinich

Ingredients

  • 3/4 cup sweetened coconut flakes or angel flakes
  • 1/4 teaspoon fleur de sal or sea salt
  • 1/2 teaspoon ground canela or true cinnamon
  • 2 14-ounce cans coconut milk
  • 1 14-ounce can sweetened condensed milk
  • 1/2 cup cornstarch
  • 1 cup milk

Instructions

  • Preheat oven to 325 degrees Fahrenheit.
  • Spread the sweetened coconut flakes on a small baking sheet, sprinkle with the salt and cinnamon, and mix and spread again. Bake 7 to 8 minutes, or until the coconut flakes barely begin to toast (don't let them brown entirely). They should be slightly crisp and still chewy. Remove from the oven and immediately transfer to a small bowl.
  • Pour the coconut milk and sweetened condensed milk into a medium saucepan.
  • In a small bowl, mix the cornstarch with the regular milk and stir until completely dissolved. Pour it into the pan with the coconut milk and sweetened condensed milk.
  • Place the saucepan over medium heat and cook, stirring continuously, until the mixture begins to simmer and thicken, about 8 to 10 minutes, until it coats the back of a wooden spoon. Remove from heat.
  • Immediately ladle into custard bowls or ramekins, sprinkle with the toasted coconut. Serve warm right away. Or serve cold later on by letting cool completely, then covering with plastic wrap and chilling in the refrigerator for a couple of hours.

Notes

Crema de Coco

Tequileras

It is getting close to Father’s Day and, yes, I am thinking about mi padre.

My dad is not your typical guy. No, no, no.

In order to prepare my sisters and me to start going out on dates, he wanted to teach us how to hold our liquor. Let no man ever get us drunk!

He taught us how to play Backgammon. And cards.  And Dominoes and Blackjack and Rummikub and Crazy Dice.

He taught me how a single taco, made with a fresh corn tortilla and a sprinkle of the right amount of salt, can be the best meal of your life.

But, maybe most importantly of all, he taught me to get up no matter how many times life whirls you around and throws you down.

PatiwFather

A few years ago, he came to visit and stayed with my boys, while my husband and I went on a trip. After three nights away, I came back to find boys who knew how to play Backgammon, cards, Dominoes, Blackjack, Rummikub and Crazy Dice.

And, also, boys who started swearing in Spanish at bad drivers (which I reversed right back!). He knew better than to teach them how to hold their liquor…He knows that, just like him, I am an Aries who can show my temper. Or maybe he just didn’t have enough time.

I know my dad would love to have these Tequileras on the Backgammon table. Or as he plays cards, Dominoes, Blackjack, Rummikub or Crazy Dice.

These Tequileras, as I baptized them, are a grown up sandwich cookie with deep chocolate flavored biscuits that aren’t too sweet, and the gentle bitterness of the cocoa comes through the slightest bit. Between the two crunchy, chocolatey biscuits is a rich, sweet buttercream made sophisticated by a dash of orange tequila liquor.

These cookies are sweet, complex, and full of life…kind of like the guy I had in mind when I was creating them.

Pati's Dad
One of hundreds of weekends I spent with my dad in Valle de Bravo, getting some serious Backgammon training!

This one is for you, Pa, I know you read all my blog posts by now.

chocolate and tequila sandwich cookies

chocolate tequila sandwich cookies
Print Recipe
5 from 4 votes

Tequileras

I know my dad would love to have these Tequileras on the Backgammon table. They are a grown up sandwich cookie with deep chocolate flavored biscuits that aren’t too sweet, and the gentle bitterness of the cocoa comes through the slightest bit. Between the two crunchy, chocolatey biscuits is a rich, sweet buttercream made sophisticated by a dash of orange tequila liquor.
Prep Time45 minutes
Cook Time15 minutes
Course: Dessert
Cuisine: Mexican
Keyword: Chocolate, cookies, Orange Liqueur, pati's mexican table, vanilla
Servings: 20 to 24 sandwich cookies
Author: Pati Jinich

Ingredients

For the cookies:

  • 9 tablespoons unsalted butter at room temperature
  • 1/3 cup brown sugar plus 1 tablespoon
  • 1/4 cup granulated sugar plus 2 tablespoons for sprinkling
  • 1 teaspoon vanilla
  • 1 large egg at room temperature
  • 1/2 cup cocoa powder
  • 1 cup all-purpose flour
  • Pinch of salt

For filling:

  • 3 ounces bittersweet chocolate cut into chunks
  • 8 tablespoons unsalted butter at room temperature
  • 1 cup confectioners' sugar
  • 1 tablespoon Agavero Orange Liqueur

Instructions

To make the cookies:

  • In the bowl of a mixer, beat the butter with the brown sugar and ¼ cup of the granulated sugar at medium speed until soft. Add the vanilla and the egg, reduce the speed, and incorporate the cocoa powder. Scrape the sides of the bowl if need be, add the salt and the flour, and continue beating until it is all thoroughly combined. The dough should be soft and a bit cakey. Gather into a ball, wrap in plastic and place in the fridge anywhere from 20 to 30 minutes.
  • Preheat oven to 350 degrees. Line 2 baking sheets with parchment paper and set the oven racks in the upper and lower thirds of the oven.
  • Flour the countertop and a rolling pin generously. Roll out the dough into a rectangle of about 1/8” thick. Cut into rectangles of about 2” by 1½”. With the help of a metal spatula, place on the baking sheets. With the tip of a pencil or a toothpick, mark a “T” with 3 to 4 dots going up and then 1 to 2 on each side of the top of the line to mark a T. Sprinkle with the remaining 2 tablespoons of granulated sugar. You can reuse any scraps of dough and roll out again.
  • Bake anywhere from 7 to 8 minutes, until firm. Remove from the oven and let cool.

To make the filling:

  • Place the chocolate in bowl in a double boiler over simmering water until it melts.
  • In the bowl of a mixer set with the paddle attachment, beat the butter until creamy. Incorporate the confecioners’ sugar and beat until completely mixed. Add the melted chocolate and the Agavero and continue beating until completely mixed and very creamy.
  • To assemble: Turn half the cookies upside down so sugar coating is on the bottom, cover with a dollop of filling, and top with half of cookies upside down. Store covered at room temperature.

Notes

Galletas Tequileras

Malted Tequila Milkshake

Why a malted tequila milkshake, you may ask? Because we can!

And because it is outrageously delicious and silky and smooth and a true treat.

And because we have so much to celebrate: Mexican cuisine is stepping out of the “ethnic” denomination and proudly stepping into the mainstream as people’s appetite has increased to the point of wanting to get to know it better…

And because misconceptions about Mexicans, Mexican food and Mexican ingredients continue to be broken, and the beauty, diversity, richness and wealth of what “Mexican” encompasses is being acknowledged.

And because the myth that tequila is only worthwhile for being drunk as shots during Spring Break no longer holds true. There is not only good, but phenomenal quality tequila that can be sipped as the finest of whiskeys. To boot, it can also be used as a fine ingredient for mixed drinks, and it has so much versatility that there is even exquisite tequila liqueur that can be sipped as an apéritif or used for desserts.

And because we have the freedom to play in our kitchens, with much respect for our heritage and the ingredients that come along with it, I have taken the liberty of creating this glorious grown up milkshake! I wish I could have made it in time for inclusion in my upcoming cookbook Mexican Today. But every single recipe in there is a recipe I am proud of, whether a rediscovered classic or a new dish. My hope is you will savor every bite of what you try from it, as we do at home.

And because I want to make a toast to you all, with all my gratitude, for coming to this site to visit, for watching any or many of the episodes of my PBS series and  letting me come into your home. Hopefully, I will get to meet many of you during my upcoming 20-plus city book tour.

And because my promise to you is to keep on working as hard as I can to make every single recipe you try here completely worth it.

With much love,

Pati

malted tequila milkshake
Print Recipe
5 from 5 votes

Malted Tequila Milkshake

Why a malted tequila milkshake, you may ask? Because we can! And because it is outrageously delicious and silky and smooth and a true treat. And because we have so much to celebrate: Mexican cuisine is stepping out of the “ethnic” denomination and proudly stepping into the mainstream as people’s appetite has increased to the point of wanting to get to know it better…
Cook Time5 minutes
Course: Dessert, Drinks
Cuisine: Mexican
Keyword: ice cream, malted milk, milkshake, pati's mexican table, tequila, vanilla
Servings: 1 serving
Author: Pati Jinich

Ingredients

  • 1/2 cup whole milk
  • 1 teaspoon vanilla extract
  • 3 tablespoons Agavero Tequila Liqueur
  • 2 tablespoons malted milk powder
  • 1 1/4 cup good quality vanilla bean ice cream

Instructions

  • Pour the milk, vanilla extract, Agavero tequila liqueur, and malted milk powder in the blender and puree until completely blended. Incorporate the ice cream and blend on low speed, just until combined. Pour into a milkshake glass and serve along with a straw or large spoon.

Notes

Malteada de Tequila

Blackberry and Pecan Tamales

Print Recipe
5 from 6 votes

Blackberry and Pecan Tamales

Blackberry and Pecan Tamales recipe from Pati's Mexican Table Season 1, Episode 13 “Wrapped Treats”
Prep Time30 minutes
Cook Time50 minutes
Total Time1 hour 20 minutes
Course: Dessert, Main Course
Cuisine: Mexican
Keyword: blackberry, cinnamon, corn husks, masa, pati's mexican table, pecans, Tamales
Servings: 20 tamales
Author: Pati Jinich

Ingredients

  • 25 dried corn husks
  • 1 cup vegetable shortening or good quality lard
  • Pinch of salt
  • 1 tbsp cold water
  • 1 tsp baking powder
  • 1 lb instant corn masa mix for tamales or about 3 1/4 cups, such as Maseca
  • 3 cups warm water
  • 1 1/2 cup sugar
  • 1/2 tsp cinnamon
  • 1/2 cup pecans roughly chopped
  • 12 oz blackberries rinsed

Instructions

To make masa for tamales:

  • Place the vegetable shortening or lard with 1 tablespoon of cold water in a mixer and beat, until very light and spongy, about 1 minute. Add the baking powder and salt, and then take turns adding the instant corn masa mix and the water. Continue beating until the dough is homogeneous and fluffy.
  • Mix in the sugar and cinnamon and continue beating until everything is well mixed. You may also do it by hand.
  • You know the tamal masa is ready if: 1. When you lift a big spoon with masa, drop it into the dough it falls “de golpe” or heavy. 2. It has the consistency of a medium thick cake batter. 3. If you place 1/2 teaspoon of masa in a cup of cold water and it floats.

To prepare the steamer:

  • Place water in the pan of a steamer and bring it to a simmer. Line the steamer with one or two layers of corn husks. Use the dough to form about 20 corn husk wrapped tamales.

To make tamales:

  • Soak the dried corn husks in hot water for a couple of minutes, until they are pliable and drain. Lay out a corn husk with the tapered ends facing towards you. Spread 3 to 4 tablespoons of the masa into a 2 to 3 inch square, the layer should be about 1/4 inch, leaving a boarder of at least 1/2 inch on the sides. Place 1 to 2 blackberries in the middle of the masa filling and sprinkle about a teaspoon of the pecans on top.
  • Pick up the two long sides of the corn husk and bring them together, causing the masa to surround the berries and pecans and fold them to one side, rolling them in the same direction around the tamal. Fold up the empty section of the husk with the tapering end, from the bottom up. This will form a closed bottom and the top will be left open.
  • Prepare the tamales and then place them vertically in a container. When you have them all ready, place them as vertically as you can in the prepared steamer, with the open end on top. If there is space left in the steamer, tuck in more corn husks so the tamales will not dance around. Cover with more corn husks and steam, covered for 50 minutes to an hour over medium heat. You know the tamales are ready when the tamales come easily free from the husks.
  • Finished tamales will stay warm for about 1 to 2 hours in the steamer. They can be made ahead several days before and stored in the refrigerator, well wrapped. They can also be frozen for months. In either case, reheat in the steamer. For refrigerated tamales it will take about 15 minutes, and for frozen tamales about 45 minutes.

Notes

Tamales de Zarzamora y Nuez

Grandma Lali’s Floating Islands

Print Recipe
5 from 2 votes

Grandma Lali’s Floating Islands

Grandma Lali’s Floating Islands recipe from Pati's Mexican Table, Season 1, Episode 12 "Vanilla"
Prep Time15 minutes
Cook Time35 minutes
Total Time50 minutes
Course: Dessert
Cuisine: Mexican
Keyword: almond extract, Caramel, custard, floating islands, Meringue, mexican vanilla, pati's mexican table
Servings: 10 servings
Author: Pati Jinich

Ingredients

For the floating islands:

  • 12 egg whites at room temperature
  • 1/8 tsp salt
  • 1/2 tsp cream of tartar
  • 3/4 cup sugar
  • 1 tsp vanilla extract
  • 1/2 tsp almond extract

For the caramel:

  • 1 1/2 cups sugar

For the vanilla sauce:

  • 3 egg yolks at room temperature
  • 1/3 cup sugar
  • 1 tsp all-purpose flour
  • 1 1/2 cup milk
  • 1-inch piece of vanilla bean
  • 10 strawberries, sliced optional for garnish, or any other fruit of your choice

Instructions

To make the caramel:

  • Place sugar in a saucepan over medium-low heat. Cook until the sugar melts, moving the pan so it will not burn, until it has a caramel consistency. Turn off the heat and pour the caramel quickly into individual flan or custard molds as you tilt them, so the caramel covers the bottom of each mold. The caramel will quickly cool and set.

To make the floating islands:

  • Preheat oven to 250 degrees.
  • Place egg whites in a mixer with the salt and cream of tarter and beat until stiff peaks are formed. Add in the extracts and the sugar and mix until combined. Then top each of the molds with the egg white mixture.
  • Place molds in a large baking pan. Pour about an inch of boiling water into the pan to create a water bath. Bake in the oven for about 25 minutes. The top of the islands will look browned and crispy. Turn the oven off, open the door oven slightly and let the islands cool inside of the oven for about 10 minutes, then remove them from the oven.

To make the vanilla sauce:

  • In a saucepan, lightly beat the egg yolks with 1/3 cup sugar and 1 teaspoon of all purpose flour.
  • In another saucepan, heat the milk and vanilla bean (make a slit on its side and free the seeds into the milk). Let it heat until very hot but not boiling. Slowly, in a very thin stream, add the hot milk into the yolk mixture, emulsifying with a whisk until it is all incorporated. Place over low heat and stir until the sauce almost reaches a boil, and coats the back of a wooden spoon. Turn the heat off and keep on whisking slowly, for about a minute or so. The sauce can be served hot, warm or cold. It can be stored in the refrigerator for up to a month once cooled.
  • Once the molds have cooled to room temperature, you can unmold them. Use a knife to go around the edge of the molds and carefully turn them onto a plate. Drizzle the caramel from the bottom of the molds on top of the islands. Add a couple tablespoons of the vanilla sauce on top. You may garnish with strawberries or any other fruit of your liking.
  • Islands can be refrigerated in their molds, covered, for up to 4 days.

Notes

Islas Flotantes de Vainilla de mi Abuela Lali

Orange and Almond Flan

orange almond flan
Print Recipe
4.67 from 9 votes

Orange and Almond Flan

Orange and Almond Flan recipe from Pati's Mexican Table Season 1, Episode 11 “Middle Eastern Influences”
Prep Time20 minutes
Cook Time50 minutes
Total Time1 hour 10 minutes
Course: Dessert
Cuisine: Mexican
Keyword: almond, Caramel, flan, Grand Marnier, orange, orange juice, pati's mexican table
Servings: 12 servings
Author: Pati Jinich

Ingredients

  • 1 cup sugar for caramel
  • 1 1/2 cups peeled and slivered almonds
  • 3/4 cup sugar for flan
  • 10 eggs
  • 1 3/4 cups orange juice
  • Grated zest of an orange
  • 2 tbsp quince liquor or Grand Marnier, optional

Instructions

  • Preheat the oven to 360 degrees.
  • In a pan, heat the cup of sugar over low heat until it achieves the consistency of caramel. It takes a while, but don’t leave it unattended and move the pan as it begins to melt. Once it looks like caramel and is melted, decide how dark and strong you want the caramel to be. The lighter the color of the caramel, the lighter flavor. But be careful because if it gets too dark it can taste bitter and can burn quickly. Take it off the heat and pour it into the bottom of a flan or round tube mold or into 10 individual custard cups. Do so quickly, since caramel hardens fast.
  • Place the almonds and remaining sugar into the blender or food processor and finely grind. Add the orange juice, orange zest and blend. Add in the eggs and quince liquor or Grand Marnier and puree until combined. Pour the flan mixture on top of the hardened caramel in the molds.
  • Place the molds in a hot water bath in a deep baking pan. Make sure the water comes up to about half the height of the molds and that the water is very hot. Slide the baking pan with the molds into the oven. Bake 50 to 55 minutes, or until a toothpick inserted in the middle of a flan comes out clean. When ready, take them out of the oven, out of the water bath and allow to cool.
  • If flans will not be eaten on the same day, they can be covered and refrigerated, for up to a week. Before unmolding, you can place the molds in a container with very hot water for 5 to 10 seconds, so that the sugar will melt a bit, and help the flan come out. You can also run the tip of the knife around the rim of the flan. Then turn the flans onto a plate, but wait a bit until most caramel pours on top of each flan.

Notes

Flan de Naranja y Almendra

Cinnamon and Piloncillo Piggies

piggy cookies
Print Recipe
4.72 from 7 votes

Cinnamon and Piloncillo Piggies

Cinnamon and Piloncillo Piggies recipe from Pati's Mexican Table Season 1, Episode 10 “Cinnamon”
Prep Time2 hours 40 minutes
Cook Time7 minutes
Total Time2 hours 47 minutes
Course: Dessert
Cuisine: Mexican
Keyword: ceylon, cinnamon, cookies, honey, pati's mexican table, piloncillo
Servings: 30 medium-sized cookies (with a 4-inch cookie cutter)
Author: Pati Jinich

Ingredients

  • 12 oz piloncillo chopped or grated, or substitute for 1 3/4 cup packed brown sugar
  • 3/4 cup water
  • 1 true or ceylon cinnamon stick about 3″ long
  • 2 stick, or 1 cup, unsalted butter at room temperature
  • 2 tbsp honey
  • 4 1/4 cups all-purpose flour you may need a bit more
  • 1 tsp baking powder
  • 1 tsp baking soda
  • 1/2 tsp salt
  • 2 eggs at room temperature, lightly beaten
  • Butter to grease a cookie/baking sheet
  • 2 to 3 tbsp all-purpose flour you may need a bit more or less, to roll out the dough
  • 1 egg lightly beaten to be used as a glaze
  • Confectioners' sugar to sprinkle on top optional

Instructions

  • In a saucepan, combine grated piloncillo or dark brown sugar with water and cinnamon. Place over medium heat, once it simmers, lower the heat to keep it at a medium-low simmer for about 15 minutes, until it thickens to a light syrup consistency. Turn off the heat and remove the cinnamon stick. You should have now about 1 1/4 cups piloncillo liquid, need not be exact! Add butter and honey into the hot liquid and stir until it dissolves.
  • In a mixing bowl, combine flour, baking powder, baking soda and salt. Make a hole in the center and pour in the piloncillo mixture. Mix it all together with a spatula until it is well incorporated. Combine the eggs into the dough, which will be sticky and gooey. Seriously: it will be GOOEY and that is OK.
  • Place plastic wrap in the bottom of a mixing bowl to have wings on the sides. With a spatula, push the dough onto the plastic wrap, wrap the dough, and refrigerate anywhere from 2 hours to a couple days.
  • When you are ready to make the cookies, preheat the oven to 375 degrees. Grease a couple cookie or baking sheets with butter.
  • Remove the dough from the refrigerator and sprinkle a couple tablespoons of flour on a countertop. Rub a bit of flour on the rolling pin as well. Roll out the dough which will now be firmer, until you have about 1/4 -inch thickness. Using piggie cookie cutters (or other shapes, but then you may need to change the name!) press down on the dough, moving it a bit on the counter top, to make it easier to lift the shaped dough.
  • Place the piggies on the baking sheet as you shape them along. Gently brush the cookie tops with the remaining egg. Roll the leftover dough into a ball, wrap it with the plastic wrap, and place it in the freezer for at least 10 minutes before using it again, or it will be too soft and sticky. Repeat to make the remaining cookies.
  • Bake the cookies anywhere from 7 to 9 minutes. Remove them from the oven and place on a cooking rack. You may sprinkle confectioners’ sugar on top. Keep them covered so they remain soft.
  • My boys love to eat them with a tall glass of milk, I like them with a hot cup of coffee.

Notes

Chochinitos de Piloncillo y Canela

Pound Cakes with Lime-Apricot Glaze and Sprinkles

apricot mini pound cakes
Print Recipe
4.17 from 6 votes

Pound Cakes with Lime-Apricot Glaze and Sprinkles

Pound Cakes with Lime-Apricot Glaze and Sprinkles recipe from Pati's Mexican Table Season 1, Episode 8 “Mexican Brunch”
Prep Time15 minutes
Cook Time12 minutes
Total Time27 minutes
Course: Breakfast, Dessert
Cuisine: Mexican
Keyword: apricot, Brunch, lime, pati's mexican table, pound cake
Servings: 60 mini pound cakes and about 30 medium-sized ones
Author: Pati Jinich

Ingredients

For the pound cakes:

  • 1 lb butter at room temperature
  • 1 1/4 cup sugar
  • 5 eggs at room temperature
  • 4 cups all-purpose flour
  • 1 tbsp baking powder
  • Pinch of salt
  • 3/4 cup heavy whipping cream

For the glaze:

  • 1 cup soft apricot preserve
  • 5 tbsp fresh squeezed lime juice
  • 1 tbsp sugar
  • 1 cup sprinkles

Instructions

  • Preheat oven to 375 degrees. Butter a set of muffin or mini muffin molds.
  • Cream the butter in a mixer at high speed. Incorporate the sugar and keep on beating until it is well incorporated. Add the eggs, one by one, making sure each one is well incorporated into the mix.
  • In a mixing bowl, combine the all purpose flour with the baking powder and a pinch of salt. Bring the speed of the mixer to low, and slowly add the flour mix, alternating with the heavy cream until well combined.
  • Spoon the batter into the molds up under the rim, as they will puff. Place molds in the oven and bake for 12 to 15 minutes for normal muffin molds and about 10 minutes for mini muffin molds. A toothpick should come out clean when they are ready. Remove from the oven. Once cool enough to handle, remove them from the molds and place them on a plate or cooling rack.
  • In a saucepan set over medium heat, combine apricot preserve, sugar and lime juice. Stir occasionally for a couple minutes until the ingredients are well dissolved. Place chochitos or sprinkles in a large plate or bowl. Holding one pound cake at a time, dunk the top, up to half their height, into the apricot glaze, then gently roll the glazed part with the chochitos or sprinkles. Place them on a platter, let cool and cover. They taste even better the day after!

Notes

Garibaldis

Scribble Cookies

scribble cookies or garabatos
Print Recipe
4.13 from 8 votes

Scribble Cookies

Scribble Cookies recipe from Pati's Mexican Table Season 1, Episode 7 “Mexican Picnic”
Prep Time40 minutes
Cook Time15 minutes
Total Time55 minutes
Course: Dessert
Cuisine: Mexican
Keyword: Chocolate, cookies, pati's mexican table, sandwich cookies
Servings: 16 to 18 cookies
Author: Pati Jinich

Ingredients

  • 1 1/4 cups unsalted butter at room temperature
  • 1/2 cup sugar plus 2 tablespoons for chocolate filling
  • 2 eggs at room temperature
  • 4 cups all-purpose flour
  • Pinch of salt
  • 1 cup heavy cream
  • 8 oz bittersweet chocolate chopped

Instructions

  • In a mixer, at medium-high speed beat the butter until soft. Add the sugar and keep on beating until fluffy. One by one, add the eggs until well combined. Lower the speed to low, and add the flour half a cup at a time, along with the salt, thoroughly mixed. Remove from the mixer, turn into a ball, wrap with plastic wrap and refrigerate anywhere from 1/2 hour to overnight.
  • Preheat the oven to 350 degrees.
  • Lightly dust all-purpose flour on your countertop and roll out the dough to about 1/4″ thickness. Cut circles of about 3″ round. Place them in a buttered and floured cookie sheet. Bake anywhere from 15 to 20 minutes or until they appear lightly tanned. Let them cool on a cooling rack.
  • In a saucepan over low heat, combine the cream, 2 tablespoons of sugar, and the chopped chocolate. Stir constantly, until the chocolate is well dissolved. Turn off the heat and let it cool.
  • Once the cookies and chocolate filling have cooled, add a couple tablespoons of chocolate on top of half the cookies. Top with another cookie without pressing down on it. Then with a spoon or fork, drizzle more chocolate on top of the cookies, making your own scribble designs.
  • Once the cookies are set, you may cover and refrigerate. I love them cold!

Notes

Galletas Garabato

Jamaica Popsicles

jamaica popsicles
Print Recipe
5 from 7 votes

Jamaica Popsicles

Jamaica Popsicles recipe from Pati's Mexican Table Season 1, Episode 6 “Hibiscus Flowers”
Prep Time15 minutes
Cook Time4 hours
Total Time4 hours 15 minutes
Course: Dessert
Cuisine: Mexican
Keyword: Chocolate, coconut, flowers, hibiscus, jamaica, mango, Paleta, Popsicle, rum
Servings: 8 popsicles
Author: Pati Jinich

Ingredients

To make Jamaica Concentrate (makes about 5 cups):

  • 8 cups water
  • 2 cups, about 2-3 ounces, dried hibiscus flowers depending on how tightly you pack the cups
  • 1 1/2 cups sugar or to taste
  • 2 tbsp fresh lime juice or to taste

To make Jamaica Popsicles:

  • 2 cups hibiscus flower/jamaica concentrate
  • 3/4 cup mango peeled, pitted diced
  • Chocolate morsels to taste optional
  • Shredded coconut to taste optional
  • For adult fun you can make them grown up and add some Rum!

Instructions

To make the concentrate:

  • In a saucepan, pour 8 cups of water and place over high heat. Once it comes to a boil, add the jamaica flowers, simmer at medium heat for 10 minutes and turn off the heat. When cool, strain into a heat proof glass or plastic water jar. Add the sugar and lime juice, mix well, cover and refrigerate.

To make the popsicles:

  • Pour 2 cups of jamaica concentrate into 8, 4 ounce molds. Add pieces of mango, chocolate and coconut. Place in freezer until set and frozen, about 4 to 5 hours. Enjoy!

Notes

Paletas de Jamaica

Flourless Almond and Porto Cake

flourless almond porto cake
Print Recipe
4.84 from 6 votes

Flourless Almond and Porto Cake

Flourless Almond and Porto Cake recipe from Pati's Mexican Table Season 1, Episode 5 “Convent Food”
Prep Time10 minutes
Cook Time30 minutes
Total Time40 minutes
Course: Dessert
Cuisine: Mexican
Keyword: almond, apricot, cake, flourless cake, pati's mexican table, port, vanilla, whipped cream
Servings: 12 to 15 servings
Author: Pati Jinich

Ingredients

  • 2 cups slivered almonds
  • 3/4 cup sugar
  • 4 eggs
  • 1/2 cup butter at room temperature
  • 1 tbsp vanilla extract
  • 1 tbsp Porto wine optional or more to taste
  • 1/4 cup apricot marmalade
  • 1 tbsp lime juice freshly squeezed
  • 1/4 cup sliced almonds lightly toasted
  • Whipped cream optional
  • Fruit of your choice optional (I love it with berries!)

Instructions

  • Butter a round 9 to 10 inch spring-form pan, and cover the bottom of the pan with parchment paper.
  • Preheat the oven to 350 degrees.
  • Place the almond and sugar into a food processor. Pulse until finely ground. Crack the eggs on top of the mixture. Pulse until well combined. Stir in the vanilla extract and Porto wine, if you will use it. Drop in the butter chunks, and process until smooth and thoroughly combined.
  • Pour the batter into the cake pan. Place on a rack in the middle of the oven and bake for 30 minutes. The top will be nicely tanned, the cake will feel springy to the touch and a toothpick should come out clean if inserted in the cake.
  • Remove from the oven and let the cake cool for 10 to 15 minutes. Unmold the cake, invert onto a platter and remove the parchment paper. Invert the cake again onto another platter to have the top of the cake right side up.
  • In a small saucepan, mix the apricot glaze with the lime juice. Set over medium heat and simmer for a couple minutes, just until it dissolves.
  • With a brush, spread the apricot glaze on the outer circumference, about 1 to 2 inches in depth, on the top of the cake. Sprinkle the glazed area with the toasted almonds. You may serve the cake with whipped cream on the side, or on the top of the cake. Any fruit of your choice will be lovely too!

Notes

Pastel de Almendras con Porto

Avocado and Coconut Ice Cream

Print Recipe
4.72 from 7 votes

Avocado and Coconut Ice Cream

Avocado and Coconut Ice Cream recipe from Pati's Mexican Table Season 1, Episode 3 “Avocado”
Prep Time10 minutes
Cook Time2 hours
Total Time2 hours 10 minutes
Course: Dessert
Cuisine: Mexican
Keyword: Avocado, coconut, coconut milk, ice cream, lime, pati's mexican table
Servings: 6 servings
Author: Pati Jinich

Ingredients

  • 1 1/2 cups coconut milk
  • 3/4 cups sugar or more to taste
  • 3 large ripe avocados halved, pitted, meat diced (about 3 cups)
  • 3 tablespoons freshly squeezed lime juice
  • 1/4 cup dried shredded coconut or sweetened coconut flakes lightly toasted, optional for garnish, or toasted almonds, pine nuts or pistachios

Instructions

  • Pour the coconut milk in a sauce pan along with the sugar and place over medium heat. Stir, once the sugar dissolves, turn off heat. Cut the avocados in half, remove the pit and scoop the pulp out. Cut the pulp into chunks and place it in the blender or food processor. Add the coconut milk mixture and lime juice, and puree until completely smooth.
  • Process the avocado-coconut puree in you ice cream maker, according to the manufacturers instructions. Place in the freezer for a couple hours for firmer ice cream. If you don’t have an ice cream maker you can serve it as a cold mousse, or you can also freeze it and serve it as ice cream, but it will be a little less fluffy. But its still good!
  • Lightly toast the shredded coconut on a small saute pan set over medium-low heat, stirring constantly so it does not burn. It will take less than a minute. Once the coconut becomes fragrant and acquires a tan, remove and set aside. Sprinkle over the ice cream.

Notes

Helado de Aguacate y Coco

Anise Cookies

sweet anise ropes or rosquitas
Print Recipe
3.88 from 8 votes

Anise Cookies

Anise Cookies recipe from Pati's Mexican Table Season 1, Episode 2 “Foods of the Mexican Revolution”
Prep Time20 minutes
Cook Time20 minutes
Total Time40 minutes
Course: Dessert
Cuisine: Mexican
Keyword: anise, cookies, pati's mexican table
Servings: 24 cookies
Author: Pati Jinich

Ingredients

  • 3 cups all-purpose flour
  • 1 tsp baking powder
  • A pinch of salt
  • 1 tsp anise seeds
  • 4 oz, or 1/2 cup, butter cut into chunks
  • 4 oz, or 1/2 cup, vegetable shortening
  • 1/2 cup sugar
  • 2 egg yolks
  • 1/3 cup warm water
  • confectioners' sugar optional

Instructions

  • Mix the all purpose flour, baking powder, salt and anise seeds in a large mixing bowl. Toss in the butter chunks and the vegetable shortening in spoonfuls. Begin to mix it with your hands, until the butter and vegetable shortening are mixed in with the rest of the ingredients.
  • Add the sugar, egg yolks and warm water, working everything together with your hands. In less than a minute, the dough should be soft and malleable enough to be turned into a ball. Don’t knead it more than necessary, as soon as it all comes together in a homogeneous mass it is good enough.
  • Butter a large cookie sheet. Preheat the oven to 350 degrees.
  • One by one, make cookie balls with the palms of your hands, of about 1 1/2″. Then roll it out either with your hands or on a lightly floured surface, into a short rope form, of about 3 to 4″ long and less than 1″ wide. Twist the rope a bit and close the two ends making a loop. It is very easy! Like a doughnut shape!
  • Place the finished rosquitas on a buttered cookie sheet until you have finished the dough. Place them in the oven anywhere from 20 to 25 minutes, or until cooked and lightly browned on top. Remove them from the oven, let them cool, and sprinkle with confectioners’ sugar.

Notes

Rosquitas de Anís

Fluffy Plantain and Pecan Bread

fluffy plantain bread
Print Recipe
4.50 from 6 votes

Fluffy Plantain and Pecan Bread

Fluffy Plantain and Pecan Bread recipe from Pati's Mexican Table Season 2, Episode 13 “Naturally Vegetarian Mexican”
Prep Time10 minutes
Cook Time55 minutes
Total Time1 hour 5 minutes
Course: Breakfast, Dessert
Cuisine: Mexican
Keyword: banana bread, pati's mexican table, pecans, Plantains, vanilla
Servings: 1 10-inch loaf
Author: Pati Jinich

Ingredients

  • 1 1/2 sticks or 6 oz unsalted butter plus more for the pan
  • 2/3 cup granulated sugar
  • 4 large eggs at room temperature
  • 1 pound ripe plantains peeled, sliced, and roughly mashed (about 1 1/2 cups mashed)
  • 1 teaspoon vanilla
  • 1 1/2 cups all-purpose flour
  • 1 tablespoon baking powder
  • 1 teaspoon baking soda
  • 1 pinch of salt
  • 1 cup roughly chopped pecans

Instructions

  • Preheat oven to 350 degrees.
  • Butter sides and bottom of the loaf pan and lightly dust it with flour; set it aside.
  • In the bowl of an electric mixer, beat the butter on medium-high speed for about 3 to 4 minutes, or until soft. Stir in the sugar and keep beating until fluffy. Beat in the eggs until well mixed.
  • In a large bowl, sift together the flour, baking powder, baking soda and salt. Lower the speed on the mixer. Alternate between adding the plantains and the sifted dry ingredient mixture.
  • Add the vanilla and pecans and mix until thoroughly combined.
  • Pour the batter into the prepared loaf pan and gently place a piece of aluminum foil on top. Place the pan in the oven and cook for 40 minutes. Remove the foil and cook for an additional 15 to 18 minutes, or until the top of the bread looks golden brown and puffed-out. If you inset a toothpick, it should come out moist but not wet.

Notes

Pan de Plátano Macho y Nuez

Glazed Santa Clara Cookies

santa clara cookies
Print Recipe
4.50 from 4 votes

Glazed Santa Clara Cookies

Glazed Santa Clara Cookies recipe from Pati's Mexican Table Season 2, Episode 11 “Puebla: Food From a Colonial Jewel”
Prep Time50 minutes
Cook Time10 minutes
Total Time1 hour
Course: Dessert
Cuisine: Mexican
Keyword: almonds, cookies, dough, pati's mexican table, pepitas, pumpkin seeds
Servings: 24 3-inch round cookies
Author: Pati Jinich

Ingredients

For the dough:

  • 1 stick unsalted butter (4 oz)
  • 1 cup confectioners' sugar
  • 1/4 teaspoon baking powder
  • 3 cups flour plus more for rolling out dough
  • 3 egg yolks
  • 1/2 cup lukewarm water

For the glaze:

  • 2 cups sugar
  • 1/2 cup water
  • 3 cups raw and hulled pumpkin seeds or slivered almonds
  • 1/2 cup milk

To blanch the pumpkin seeds:

  • 1/2 teaspoon baking powder or baking soda

Instructions

To prepare the cookies:

  • In the bowl of a mixer, beat the butter on medium speed until creamy. Reduce speed to lowest setting and gently add the confectioners’ sugar and baking powder. Continue mixing until everything is incorporated.
  • Add the flour, one cup at a time, and then the egg yolks, one at a time; continue beating for a minute. Pour in the water and continue mixing until the dough is smooth and can form a ball. Wrap the dough in plastic wrap and place it in the refrigerator. Let it cool until it hardens enough to be manageable, at least 1/2 hour (can refrigerate up to a couple of days).
  • When ready to bake, preheat the oven to 375 degrees and cover a baking sheet with parchment paper.
  • Place half the dough on a piece of lightly floured parchment paper, sprinkle some flour over it and then place another piece of parchment paper on top. Use a rolling pin to gently roll out the dough, to about 1/4-inch thick. Remove the top piece of parchment paper and cut out circles with a round, 3-inch cookie cutter. With a smaller cookie cutter, make a circular indention in the middle of each cookie, without cutting all the way through the dough (there should be about a 1/4-inch space between the indentation and the edge). Press the edges of each cookie with a fork, as if marking the edges of a pie. Repeat the process with the remaining dough and roll it out again, making as many cookies as possible.
  • Space the cookies at least 1/4-inch apart on a cookie sheet and bake for about 10 minutes, until they are fully cooked and the bottoms are lightly browned. Remove from the oven and let cool; repeat with the remaining cookies.

To prepare the base for the glaze:

  • To make the candied pumpkin seed glaze white, as the nuns of the Santa Clara convent traditionally used to, prepare the pumpkin seeds this way:
  • Bring water to a boil in a small saucepan, add pumpkin seeds, simmer about 5 minutes and turn off the heat. Let it cool, stir in baking soda or powder and let it sit overnight. With your hands, rub the pumpkin seeds between your fingers and thumbs to try to release their skins. The skins will float in the water. Carefully pour off the water, cover again with clean water and drain again. With a slotted spatula, place the pumpkin seeds on a clean kitchen towel, rubbing them so that the remaining skins come entirely off. Place the seeds in a bowl, cover them with water, rinse and place them on a cloth towel or paper towels to dry.

To make the pumpkin seed glaze:

  • To make the candied pumpkin seed glaze green, which is a lot less work, prepare the seeds this way:
  • Place hulled, unsalted pumpkin seeds in the jar of a blender or food processor and grind completely.

To make the a almond glaze:

  • To make the a white glaze that’s even easier, just:
  • Place already-blanched, slivered almonds in the jar of a blender or food processor and grind completely.

To prepare the glaze:

  • In a medium saucepan, place the sugar and 1/4 cup of water over medium low heat. Cook until the sugar has completely melted into the water, is no longer granulated and appears to be light syrup, 8 to 10 minutes.
  • Add the ground pumpkin seeds or almonds and stir well, creating a thick paste. Let the mixture cook for another 3 to 4 minutes — it will thicken and become even more pasty. Turn off the heat, pour in the milk and stir well. It should be thick yet shiny and a bit more liquid.
  • Remove the mixture from the heat and let it cool until it slightly thickens and can top the cookie without spilling all over. It will spread as it settles, but if it has cooled enough it will not be too runny. Yet, before it completely cools and hardens. If it does harden, just heat the mixture over low heat with a tablespoon of water until it becomes runny again.

To assemble the cookies:

  • Once the cookies have cooled, add about one tablespoon glaze to each cookie.

Notes

Tortitas de Santa Clara

Impossible Chocoflan

impossible chocoflan
Print Recipe
4.34 from 6 votes

Impossible Chocoflan

Impossible Chocoflan recipe from Pati's Mexican Table Season 2, Episode 10 “Lip-Smacking Mexican Meal”
Prep Time15 minutes
Cook Time55 minutes
Total Time1 hour 10 minutes
Course: Dessert
Cuisine: Mexican
Keyword: Cajeta, cake, Chocolate, chocolate cake, Dulce de Leche, flan, pati's mexican table, pecans, Sweetened Condensed Milk, vanilla
Servings: 12 servings
Author: Pati Jinich

Ingredients

For the Molds or Ramekins:

For the cake:

  • 4 oz or 1 stick of unsalted butter
  • 3/4 cup granulated sugar
  • 1 egg
  • 3/4 cup all-purpose flour
  • 1/3 cup cocoa
  • 1/2 teaspoon baking powder
  • 1/2 teaspoon baking soda
  • Pinch of salt
  • 3/4 cup buttermilk

For the Flan:

  • 1 12- oz can evaporated milk
  • 1 14- oz can sweetened condensed milk
  • 4 eggs
  • 1 teaspoon vanilla

For the Garnish:

  • 1/3 cup toasted pecans chopped

Instructions

  • Set the oven to 350 degrees. Butter the bottom and sides of each ramekin or mold until evenly spread. Pour the cajeta into the buttered molds, distributing evenly between all 12.

To Make the Cake Base:

  • In a mixing bowl, beat the butter and sugar with an electric mixer at medium-high speed until fluffy. Then, beat in the egg. In a separate bowl, mix the flour, cocoa, baking powder, baking soda and salt.
  • At medium-low speed, beat in half of the flour mixture and half of the buttermilk into the butter/sugar mixture. Then, beat in the remaining halves. Make sure you scrape the side of the bowl so all of the ingredients mix evenly. Put the mixer on medium-high speed and beat for an additional minute.

To Make the Flan:

  • Place the eggs, vanilla, evaporated milk and sweetened condensed milk in a blender and puree until smooth.

To Prepare the Entire Dish:

  • Pour the cake batter into each ramekin or mold. Then, pour the flan mixture on top, it will look messy, but don’t worry, that’s how it’s supposed to be! Place the ramekins in a large pan or baking dish. Pour hot water into the dish up to halfway the height of the molds. Cover the dish with aluminum foil and seal.
  • Place the in the oven and bake for about 50 to 55 minutes, or until the surface of each cake feels solid, looks baked and a wooden toothpick comes out moist but not wet.
  • Remove from the oven. Be careful when you open the aluminum foil as the steam will be very hot. Once cool enough to handle, remove the ramekins out of the water bath. Once cool, cover with plastic and refrigerate at least 2 hours before eating.
  • When ready to serve, run the tip of a knife around the ramekin and place it cake-side down onto a plate. Lift the mold up. Drizzle with any cajeta from the mold and decorate with chopped pecans.

Notes

Chocoflan Imposible

Rose Petal, Marshmallow, Mango and Pistachio Ice Cream

rose petal marshmallow mango and pistachio ice cream
Print Recipe
4.67 from 3 votes

Rose Petal, Marshmallow, Mango and Pistachio Ice Cream

Rose Petal, Marshmallow, Mango and Pistachio Ice Cream recipe from Pati's Mexican Table Season 2, Episode 9 “Xochimilco: Cooking with Flowers”
Prep Time30 minutes
Cook Time2 hours
Total Time2 hours 30 minutes
Course: Dessert
Cuisine: Mexican
Keyword: flowers, ice cream, mango, marshmallow, pati's mexican table, pistachios, rose
Servings: 10 servings
Author: Pati Jinich

Ingredients

  • 2 1/2 cups whole milk
  • 1/2 cup heavy cream
  • 1 1/2 cups loosely packed rose petals rinsed
  • 1 10-oz bag mini-marshmallows
  • 3 cups diced mango (about 3 mangoes)
  • 6 egg yolks
  • 1/2 cup roughly chopped pistachios toasted

Instructions

  • Pour the milk and heavy cream into a medium-sized saucepan; set it over medium-low heat. Once hot, add the rose petals, marshmallows and mangos, cooking for about 10-15 minutes until the marshmallows have dissolved, stirring occasionally, but don’t let mixture come to a boil. Remove the saucepan from the heat.
  • In a large mixing bowl, whisk the egg yolks until they become thick and spongy.
  • Slowly stir 1/3 of the milk/cream mixture into the egg yolk, whisking, until thoroughly combined. Pour the egg mixture back into the saucepan with the remaining milk/cream mixture.
  • Set the saucepan over low to low-medium heat, stirring frequently with a whisk or spoon until the mixture thickens, about 15 minutes. Remove the saucepan from the heat. Once it cools, refrigerate.
  • Once chilled, process in an ice cream maker following the manufacturer’s instructions, and add the toasted pistachios 5 to 10 minutes before the ice cream is ready. Alternatively, freeze the entire mix.

Notes

Helado de Pétalos de Rosa, Malvavisco, Mango y Pistache

Coffee Flan with Tequila Whipped Cream

coffee flan
Print Recipe
4.67 from 6 votes

Coffee Flan with Tequila Whipped Cream

Coffee Flan with Tequila Whipped Cream recipe from Pati's Mexican Table Season 2, Episode 8 “Tequila!”
Prep Time10 minutes
Cook Time48 minutes
Total Time58 minutes
Course: Dessert
Cuisine: Mexican
Keyword: coffee, flan, mexican vanilla, pati's mexican table, Sweetened Condensed Milk, tequila, whipped cream
Servings: 10 servings
Author: Pati Jinich

Ingredients

For the flan:

  • 1 cup sugar
  • 1 14oz can sweetened condensed milk
  • 1 12oz can evaporated milk
  • 1 cup whole milk
  • 6 large eggs
  • 1 teaspoon pure vanilla extract
  • 2 tablespoons Mexican instant coffee dissolved in 2 tablespoons boiling water

For the whipped cream:

  • 1 1/2 cups cold heavy cream
  • 1 tablespoon confectioners' sugar
  • 1/2 teaspoon pure vanilla extract
  • 2 tablespoons white or silver tequila

Instructions

To prepare the flan:

  • In a heavy medium saucepan, cook the sugar over medium heat, stirring frequently, until melted and golden brown, 6 to 8 minutes. Quickly pour the caramelized sugar syrup into individual molds. Set aside. Preheat the oven to 350 degrees.
  • Place all three milks, the eggs, vanilla and coffee in a blender. Mix until completely blended and smooth. Pour into the caramel-lined molds or ramekins. Set the molds into a larger baking dish or pan. Carefully pour boiling water (it is very important that the water already be very hot) into the larger holding pan up to at least half the height of the molds. Place on the middle rack of the oven.
  • Bake, uncovered, about 40 minutes, or until the center comes out moist but clean. Remove the individual molds from the water bath and let them cool completely. Refrigerate the molds, covered with plastic.
  • To serve, run a thin knife around the edge of the pan between the custard and the pan. Invert the flans onto plates to unmold them. Carefully lift up the molds to allow the syrup to run over the flan.

To prepare the whipped cream:

  • Whip the cold cream in the bowl of an electric mixer. When it starts to hold peaks, add the confectioners’ sugar, vanilla, and tequila. Continue to whip until it forms stiff peaks. Serve flan with a generous dollop of whipped cream; serve cold.

Notes

Flan de Café con Crema Batida al Tequila

Alisa’s Marbled Pound Cake

marbled pound cake
Print Recipe
4.38 from 8 votes

Alisa’s Marbled Pound Cake

Alisa’s Marbled Pound Cake recipe from Pati's Mexican Table Season 2, Episode 7 “Family-Style Breakfast”
Prep Time15 minutes
Cook Time1 hour
Total Time1 hour 15 minutes
Course: Breakfast, Dessert
Cuisine: Mexican
Keyword: Chocolate, pati's mexican table, pound cake, sour cream, vanilla
Servings: 1 10-inch loaf
Author: Pati Jinich

Ingredients

  • 1/2 pound unsalted butter plus more to butter the pan
  • 1 1/4 cups granulated sugar
  • 1 teaspoon vanilla extract
  • 4 large eggs
  • 1 1/2 cups all-purpose flour
  • 1 teaspoon baking powder
  • 1/4 teaspoon kosher or coarse sea salt
  • 1/2 cup sour cream
  • 1/4 cup hot water
  • 1/4 cup unsweetened cocoa powder
  • confectioners' sugar optional

Instructions

  • Preheat the oven to 350°F. Butter the sides and bottom of a loaf pan. Line the bottom with parchment paper cut to fit.
  • In the bowl of an electric mixer, using the paddle attachment, beat the butter on medium-high speed until creamy, about 3 minutes. Add the sugar and continue beating until well combined and fluffy, another 2 minutes. Pour in the vanilla and continue beating until well incorporated and smooth, about another minute.
  • Combine the flour, baking powder and salt in a bowl. Break the eggs into another bowl. Add half of the eggs and half of the sifted flour mixture to the butter mixture, beating on medium-low speed until well combined, scraping down the side of the bowl with a rubber spatula as needed. Repeat with the remaining eggs and flour.
  • Add the sour cream and continue beating until the mixture is smooth. Set the batter aside. In a small bowl, combine the hot water with the cocoa powder.
  • Pour half the cake batter into another bowl and fold in the cocoa-water mixture with a rubber spatula until thoroughly mixed.
  • Spread the “white” batter from the mixer bowl in the bottom of the loaf pan. Pour the chocolate batter on top, in a straight line down the center. Make a design with a knife or fork, so it will look “marbled.”
  • Bake the cake for about 1 hour, or until a toothpick inserted into the center comes out clean. Remove the cake from the oven and transfer to a rack to cool. Invert the cooled cake onto a plate, remove the parchment paper, and invert again onto another plate.
  • Dust the top of the cake with confectioners’ sugar, and it is ready to slice. To store, keep it covered.

Notes

Panqué Marmoleado de Alisa

Mexican French Toast Rolls

Mexican French toast rolls
Print Recipe
4 from 4 votes

Mexican French Toast Rolls

Mexican French Toast Rolls recipe from Pati's Mexican Table Season 2, Episode 7 “Family-Style Breakfast”
Prep Time10 minutes
Cook Time5 minutes
Total Time15 minutes
Course: Breakfast, Dessert
Cuisine: Mexican
Keyword: Cajeta, cinnamon, Dulce de Leche, french toast, nutella, pati's mexican table
Servings: 8 French toast rolls
Author: Pati Jinich

Ingredients

  • 8 slices white or wheat sandwich bread
  • Cajeta dulce de leche, nutella, almond or peanut butter, or any preserves
  • 1 egg
  • 1/2 cup milk
  • 1/8 teaspoon vanilla extract
  • Pinch kosher or sea salt
  • 1/2 cup granulated sugar
  • 1 teaspoon ground cinnamon
  • 1 tablespoon unsalted butter

Instructions

  • Trim the crust from the bread. Flatten the slices slightly with a rolling pin. In the center of each bread slice, add about 1 teaspoon of the filling of your choice and spread.
  • Roll the bread like a cigar or a rolled taco; set aside until you finish all of the slices.
  • In a bowl mix the egg, the cup of milk, vanilla, and salt, and whisk until well combined. In another bowl, mix the sugar with the cinnamon.
  • Set a skillet over medium heat. Once hot, add a tablespoon of butter.
  • Soak the bread rolls in the milk mixture until fully coated. Add them to the hot pan, which should have the butter already melted. Cook the rolls until they’re golden brown and look fully cooked, flipping a few times as they cook to brown on all sides. Roll the fingers in the sugar and cinnamon mixture; they are ready to eat!

Notes

Dedos Gitanos

Tres Leches Cake

Print Recipe
3.56 from 9 votes

Tres Leches Cake

Tres Leches Cake recipe from Pati's Mexican Table Season 2, Episode 6 “Fonda Favorites”
Prep Time20 minutes
Cook Time22 minutes
Total Time42 minutes
Course: Dessert
Cuisine: Mexican
Keyword: cake, evaporated milk, mexican vanilla, milk, pati's mexican table, Sweetened Condensed Milk, tres leches, whipped cream
Servings: 10 to 12 servings
Author: Pati Jinich

Ingredients

For the cake:

  • 9 eggs separated
  • 1 cup sugar
  • 1 tablespoon vanilla extract
  • 2 cups all-purpose flour
  • Sauce Ingredients:
  • 1 14oz can sweetened condensed milk
  • 1 12oz can evaporated milk
  • 1 cup milk
  • 1 tablespoon vanilla extract

For the topping:

  • 2 cups heavy whipping cream
  • 1/4 cup confectioners' sugar

Instructions

  • Preheat the oven to 350 degrees. Butter a 9×13-inch pan, lining the bottom with a piece of parchment paper cut to fit the pan.
  • Pour the egg whites into the bowl of your mixer and beat on medium-high speed for 4 to 5 minutes, or until they hold soft peaks. Slowly stir in the sugar and continue beating until they hold harder or stiffer peaks. Turn off the mixer and, with a spatula, move the egg white mixture into a large mixing bowl.
  • Rinse the mixer bowl and its whisk. Now, pour the egg yolks into the bowl and beat on medium-high speed for about 5 to 6 minutes, or until the yolks become creamy and puffy and their color has toned down to an almost cream color rather than a loud yellow. Stir in the vanilla and continue beating for another minute.
  • Pour the egg yolk mixture onto the egg white mixture and, with a spatula, in circular motions, combine them into a homogeneous single batter. Do so gently, trying not to lose too much volume gained from beaten egg whites. Fold in the flour, scraping the bowl with the spatula so that all the flour is well mixed.
  • Pour batter into the prepared cake pan and place into the oven for 22 to 25 minutes, or until a toothpick comes out clean. It can be a bit moist, but not wet. The top of the cake should be tanned or golden brown.
  • Once it cools down, turn it onto a platter. Remove parchment paper, cover the top with an upside-down platter and invert again. The platter should be large enough to hold the cake and the vanilla sauce you are about to prepare. Using a fork, or two, poke holes all over the cake so that it will better absorb the vanilla sauce.
  • In a mixing bowl, combine the sweetened condensed milk, evaporated milk, milk, and vanilla extract. Pour the vanilla sauce over the cake. It may appear like too much sauce, but it will all be absorbed!
  • In the bowl of your mixer, whip up the heavy cream with the confectioners’ sugar on medium-high speed until the mixture holds up stiff peaks. Spread the whipped cream all over the already-wet cake and place it in the refrigerator. You can decorate the cake with berries or any other topping of your choice.

Notes

Pastel de Tres Leches

Chocolate and Dulce de Leche Caramel Cupcakes

chocolate and cajeta cupcakes
Print Recipe
4.17 from 6 votes

Chocolate and Dulce de Leche Caramel Cupcakes

Chocolate and Dulce de Leche Caramel Cupcakes recipe from Pati's Mexican Table Season 2, Episode 5 “Mexican-Style Kids’ Party”
Prep Time10 minutes
Cook Time20 minutes
Total Time30 minutes
Course: Dessert
Cuisine: Mexican
Keyword: Cajeta, Chocolate, cupcakes, Dulce de Leche, mexican vanilla, pati's mexican table
Servings: 12 cupcakes
Author: Pati Jinich

Ingredients

For the cupcakes:

  • 1/2 cup unsalted butter
  • 1 cup granulated sugar
  • 1 large egg
  • 1 teaspoon vanilla extract
  • 1 1/2 cups all-purpose flour
  • 1 teaspoon baking soda
  • 1/2 teaspoon salt
  • 1/2 cup buttermilk
  • 1/2 cup cocoa powder
  • 1/2 cup hot water
  • 3/4 cup dulce de leche caramel or cajeta

For the ganache:

  • 1 cup heavy whipping cream
  • 14 oz semi-sweet chocolate chopped
  • 2 tablespoons sugar
  • 1 tablespoon unsalted butter

Instructions

To prepare the cupcakes:

  • Place oven rack in the center position. Preheat oven to 350 degrees. Butter the cupcake molds.
  • In the mixer, cream the butter and sugar together until soft and creamy. Add the egg and vanilla extract and mix until well combined.
  • In a separate bowl, add flour, baking soda and salt. Mix it up and add it to the butter mixture. Pour the buttermilk and continue beating. In a small bowl, combine hot water and cocoa powder and stir into the mix, beat until combined. Pour the batter into the cupcake molds.
  • Bake for 20 to 25 minutes, until the cupcakes rise, are cooked and tanned on top. Transfer to a wire rack and let them cool completely. Using a paring knife, cut a 1-inch piece from the top of each cupcake. Save the cut pieces. Fill each hole with one tablespoon of dulce de leche or cajeta and replace the cut-out pieces. Top the cupcakes with the chocolate ganache.

To prepare the ganache:

  • Mash the butter until it’s creamy and has no lumps. Heat the chopped chocolate in a double boiler water bath and let it melt. Warm the heavy whipping cream slightly
  • Slowly fold the whipping cream into the melted chocolate. Finish off the ganache by folding in the softened butter and adding sugar until everything is well combined.

Notes

Cupcakes de Chocolate con Dulce de Leche, recipe from my sister Alisa Romano

Cajeta Crepes with Toasted Pecans

cajeta crepes
Print Recipe
4.25 from 4 votes

Cajeta Crepes with Toasted Pecans

Cajeta Crepes with Toasted Pecans recipe from Pati's Mexican Table Season 2, Episode 3 “A French Twist on Mexico”
Prep Time1 hour 45 minutes
Cook Time5 minutes
Total Time1 hour 50 minutes
Course: Breakfast, Dessert
Cuisine: Mexican
Keyword: Cajeta, Crepes, Dulce de Leche, ice cream, pati's mexican table, pecans, rum
Servings: 10 12 9-inch crêpes
Author: Pati Jinich

Ingredients

  • 1 cup all-purpose flour
  • 2 large eggs
  • 1 egg yolk
  • 1 cup milk
  • 1/3 cup unsalted butter melted
  • Pinch Kosher or sea salt or to taste
  • 2 tablespoons sugar
  • 1/2 cup water
  • Extra butter to oil the pan
  • 2 cups Cajeta or dulce de leche
  • 1 1/2 cups milk
  • 1 tablespoon rum optional
  • 1/2 cup pecans chopped and toasted, to garnish
  • Vanilla ice cream optional

Instructions

To make the Crepes:

  • In a small pan, heat the butter over low heat until it melts. Set it aside. Place flour, eggs, milk, sugar, salt and melted butter in the blender and purée until smooth, for about 10 seconds. Add water and blend again until smooth. You can also mix the ingredients by hand, following the same order.
  • Place batter in a container, cover and refrigerate for at least half an hour, up to 12 hours. Once ready to make the crêpes, whisk the batter well with a fork or a whisk.
  • Set a crêpe pan or nonstick skillet over medium-high heat for a couple of minutes. Butter the bottom of the pan and ladle about ¼ cup of batter onto it. Instead of working from the center to the sides, tilt the pan and pour the batter over one side and spread it as quickly as possible to the rest of the pan, so that it covers the entire surface.
  • Cook for about 20 to 25 seconds, until edges are cooked and begin to dry out and the bottom of the crêpe is lightly browned. With a small spatula or fork, lift one edge of the crêpe and turn it over quickly with your fingers. Cook the second side for about 10 to 15 seconds, or until it has lightly browned. Flip the crêpe onto a plate.
  • Repeat with the rest of the batter. After 3 or 4 crêpes, you may need to butter the pan again. If it isn’t a nonstick pan, you may need to do it for every one. Stack crêpes on top of each other with the first, darker side down. That darker side will become the outer layer of the crêpe once you fill them up or fold them.
  • If you aren’t going to use all of the crêpes at once, or if you are making them ahead of time, wrap them in plastic wrap and place them in a closed plastic bag and store in the refrigerator up to 4 days, or in the freezer for weeks.

To make the Sauce:

  • Pour the cajeta and the milk in a saucepan. Heat over medium heat, stirring and gently simmering it for a couple of minutes until it is completely mixed together and well dissolved.

To Assemble:

  • Place a crêpe on a plate and spread a couple tablespoons cajeta sauce all over the surface. Fold crêpe in half, add a couple more tablespoons of sauce into the middle of the half-moon shape. Fold the crêpe again to make a triangle shape (with a rounded bottom) and pour a few more tablespoons of sauce on top.
  • Garnish with the toasted pecans and serve. You may want to add a scoop of vanilla ice cream too…

Notes

Crepas de Cajeta con Nuez

Mexican Wedding Cookies

Mexican wedding cookies or polvorones
Print Recipe
4.60 from 10 votes

Mexican Wedding Cookies

Mexican Wedding Cookies recipe from Pati's Mexican Table Season 2, Episode 1 “Classic Mexican Food Battles”
Prep Time15 minutes
Cook Time15 minutes
Total Time30 minutes
Course: Dessert
Cuisine: Mexican
Keyword: confectioners' sugar, cookies, pati's mexican table, pecans, powdered sugar
Servings: 30 cookies
Author: Pati Jinich

Ingredients

  • 2 cups all-purpose flour
  • 1/8 teaspoon kosher or sea salt
  • 1/2 cup cold unsalted butter cut into chunks
  • 1/2 cup vegetable shortening or double the butter
  • 1/2 cup pecans ground or finely chopped
  • 3/4 cup confectioners' sugar plus more for dusting
  • 1 egg

Instructions

  • Preheat the oven to 350 degrees. Butter a large cookie sheet.
  • In a food processor fitted with the steel blade, pulse the pecans until they are finely chopped. Add the powdered sugar, flour and salt, and pulse again. Scrape down the sides of the bowl with a spatula if necessary.
  • Drop in the butter and shortening chunks, and pulse a couple of times. Add the egg and pulse again, just until the mixture starts to come together. Roll the dough into 1- to 1 1/2″ balls with your hands.
  • Place the balls on the baking sheet, spacing them 1″ apart; give them a light pat on the top. Bake until the cookies are golden brown, about 15 minutes. You may need to bake two batches.
  • Generously, really super generously, dust extra confectioners’ sugar over the top of the cookies.

Notes

Polvorones

Reinventing a Classic: Marbled Tres Leches Cake

Tres Leches is a classic. But a classic from where, you may ask?

Ask an Argentinean: From Argentina, of course. Ask a Cuban: Sin duda from Cuba. Ask an Ecuadorian: Claro que from Ecuador. A Venezuelan? Por supuesto que es de Venezuela. Ask a Mexican…Of course, sin duda, claro que por supuesto que es Mexicano. No doubt, it is Mexican. ¡Si señor!

You can go on and on…

It would seem that each and every single Latin American country claims the Tres Leches Cake as its very own. Not only does everyone absolutely love it, it is also a dessert that is deeply ingrained in that nation’s gastronomy and culture.

From here or from there, it is that much adored.

No matter where you are in Latin America, or which country you or your family came from, the traditional way to make a Tres Leches Cake is to make a sturdy sponge cake and then completely bathe it in a tres leches sauce. The three milks in the sauce are the fresh tasting regular milk, the lightly savory evaporated milk and the charmingly sweet sweetened condensed milk.

As the decades have gone by, many other variations have appeared in attempts to dress up and reinvent this classic. With cajeta or dulce de leche, different kinds of nuts, coconut, spiked with rum, exotic fruits, coffee… to name some. Indeed, the cake lends itself to be played with: it is basic, it is easy, and it can be easily transformed.

At home, we absolutely adore chocolate.  And, since my boys have a hard time making up their minds as to when to make the Tres Leches Cake vanilla and when to make it chocolate, one day I decided to go marbled. That was it: we rarely go back.

In my marbled version, the vanilla cake has fudgy chocolate swirls that go wild when soaked in the tres leches sauce. I garnish with copious amounts of grated Mexican chocolate all over the top and a sprinkle of ground canela.

If you want to make it even more decadent, grab some cajeta or dulce de deche and drizzle liberally over the top.

p.s. To boot, the Tres Leches Cake can be made ahead of time, it gets better and better as it soaks and chills bathed in the sauce. It is also perfect to bring along.

marbled tres leches cake

marbled tres leches cake
Print Recipe
3.88 from 8 votes

Marbled Tres Leches Cake

At home, we absolutely adore chocolate.  And, since my boys have a hard time making up their minds as to when to make the Tres Leches Cake vanilla and when to make it chocolate, one day I decided to go marbled. That was it: we rarely go back. In my marbled version, the vanilla cake has fudgy chocolate swirls that go wild when soaked in the tres leches sauce. I garnish with copious amounts of grated Mexican chocolate all over the top and a sprinkle of ground canela.
Prep Time20 minutes
Cook Time2 hours 25 minutes
Course: Dessert
Cuisine: Mexican
Keyword: Cajeta, cake, cinnamon, Dulce de Leche, evaporated milk, mexican chocolate, pati's mexican table, Sweetened Condensed Milk, tres leches, vanilla, whipped cream
Servings: 12 to 15 servings
Author: Pati Jinich

Ingredients

For the cake:

  • Unsalted butter to butter the pan
  • 9 large eggs separated, at room temperature
  • 1 cup sugar
  • 1 tablespoon vanilla extract
  • 2 cups all-purpose flour
  • 1/2 cup hot water
  • 1/3 cup unsweetened cocoa powder

For the sauce:

  • 1 14-ounce can sweetened condensed milk
  • 1 12-ounce can evaporated milk
  • 1 cup whole milk
  • 1 tablespoon vanilla extract

For the whipped cream topping:

  • 2 cups heavy cream
  • 3 tablespoons confectioners' sugar
  • 1 disk (about 3 ounces) Mexican-style chocolate such as Abuelita grated, for garnish
  • Cajeta or dulce de leche optional, for garnish

Instructions

  • Preheat the oven to 350 degrees fahrenheit with a rack in the middle. Butter a 9x13-inch baking pan and line the bottom with a piece of parchment paper.

To make the cake:

  • In a stand mixer fitted with the whisk attachment, beat the egg whites on medium-high speed until they hold soft peaks, about 4 to 5 minutes. Reduce the speed to medium and slowly add the sugar, beating until the whites hold stiff, shiny peaks. Transfer to a large bowl and set aside.
  • Pour the egg yolks into another large bowl and beat with a whisk or fork, until fluffy and pale yellow. Add the vanilla and continue beating until fully incorporated. Gently fold the egg yolk mixture into the egg white mixture with a rubber spatula, taking care not to deflate the whites. Fold in the flour 1/4 cup at a time and mix well. The batter will look a bit streaky.
  • In a small bowl, combine the hot water with the cocoa powder. Pour half the cake batter into another bowl and fold in the cocoa-water mixture with a rubber spatula until thoroughly mixed.
  • Spread the vanilla batter in the prepared pan. Pour the chocolate batter on top, in a straight line down the center. With a knife or spoon, make a whirling design from one side of the pan to the other. Bake for 22 to 25 minutes, until the top of the cake has lightly browned and feels spongy to the touch. Remove from the oven and let cool.
  • Invert the cake onto a large platter or board and remove the pan and parchment paper. Cover the cake with an upside-down platter large enough to hold the cake and the vanilla sauce and invert again so the cake is right side up. Using a fork, poke holes all over the top of the cake, so it will absorb the sauce.

To make the sauce:

  • In a large bowl, combine the three milks and vanilla and stir to blend well. Pour about 2/3 of the sauce over the cake. Don’t worry if it looks like there is too much sauce—the cake will absorb it. Cover and refrigerate for at least 2 hours or overnight. Reserve the remaining vanilla sauce.
  • When you are ready to finish the cake, remove the cake from the refrigerator and spoon the remaining sauce on top of the cake.

To make the whipped cream:

  • In a stand mixer fitted with the whisk attachment, whip the cream and the confectioners’ sugar on medium speed until it holds well formed peaks, about 6 minutes. Spread the whipped cream over the top and sides of the cake. Garnish with the grated Mexican-style chocolate.

Notes

Pastel de Tres Leches Marmoleado

Vanilla Ice Cream with Cajeta Swirls & Mexican Chocolate Chunks

Pancho Villa, one of the most renowned generals from the Mexican Revolution was wild about ice cream. It is even said he was most fond of vanilla ice cream covered in chocolate. This historic photo, published in the El Paso Times, shows him sitting at the famous El Paso confectionery The Elite, right after having an ice cream.

Pancho Villa at Elite Confectionary

History has judged him both harshly and heroically. Yet, from the account of my husband’s great grandmother Regina, he was a true gentleman.

The true story goes that in the early years of the Revolution, around 1913, Regina and her husband Alfredo lived in Parral, Chihuahua. In the midst of the Revolution, a very brave and very pregnant Regina asked for una audienca, a meeting, with the general who was governor of Chihuahua. She walked into the meeting to ask for the general’s troops not to loot their family’s small store, one of the common ways the troops re-stocked.

General Villa agreed and allowed Regina to close the store so it would not be looted, securing their family’s means of survival. “A true gentleman,” the family, all of whom couldn’t believe Regina had not only asked for an audience but gone to the meeting and reached such outcome, recalls her saying.

Pati's three boys Sami, Juju, and Alan

A few years ago we visited Pancho Villa’s house in Chihuahua. There behind the boys, with an evidently saddened Sami after hearing the story of Villa’s assassination, is the car where he was shot.

The house has a central open courtyard. One of the main sides leads to the dining room…

Pancho Villa's dining room

…which opens directly to the kitchen…

Pancho Villa's Kitchen

As a visitor you can’t walk into the kitchen, so you can only see from the side door. Of course, I was dying to walk in, but I am sharing the best view that I got. That was it, because there was a rope one couldn’t cross.

Pancho Villa's Kitchen

I think it can be said that just like Pancho Villa – whose image, from a gorgeous al fresco hung inside his home, is here courtesy of my husband’s camera – most Mexicans are wild about ice cream.

Pancho Villa

Juju, with his big sweet tooth, is crazy about it too.

Juju eating ice cream

As Mexicans, we have our ways of making ice cream irresistible and exotic. We are fortunate to have some ingredients that just go nuts when turned into ice cream.

Some of my favorite: Mexican vanilla, Mexican chocolate and cajeta or dulce de leche. This summer, I decided to make a wild combo out of the three and was thrilled with the results. So much so, I think you should give it a go (my photo of the ice cream above has the ice cream desperately melting, waiting for me to get a good shot…).

It has the creamy vanilla base, the silky thick feel and charming taste of  cajeta (which becomes delightfully chewy when frozen), and grainy chunks of cinnamon flavored Mexican chocolate.

I think Pancho Villa would approve, with ingredients that are Mexican to the core.

vanilla ice cream with cajeta swirls and Mexican chocolate chunks

vanilla ice cream with cajeta swirls and Mexican chocolate chunks
Print Recipe
5 from 1 vote

Vanilla Ice Cream with Dulce de Leche (aka Cajeta) Swirls and Mexican Chocolate Chunks

As Mexicans, we have our ways of making ice cream irresistible and exotic. We are fortunate to have some ingredients that just go nuts when turned into ice cream. Some of my favorite: Mexican vanilla, Mexican chocolate and cajeta or dulce de leche. This summer, I decided to make a wild combo out of the three and was thrilled with the results. So much so, I think you should give it a go (my photo of the ice cream above has the ice cream desperately melting, waiting for me to get a good shot…).
Prep Time5 minutes
Cook Time12 hours 35 minutes
Course: Dessert
Cuisine: Mexican
Keyword: Cajeta, Chocolate, Dulce de Leche, ice cream, mexican chocolate, vanilla
Servings: 6 servings
Author: Pati Jinich

Ingredients

  • 2 cups heavy cream
  • 1 1/2 cups whole milk
  • 1 vanilla bean split open, seeds scraped out and reserved
  • 1/4 teaspoon kosher or coarse sea salt
  • 10 large egg yolks
  • 2/3 cup sugar
  • 1 cup Cajeta or dulce de leche
  • 2 Mexican chocolate rounds about 3.15 ounces or 90 grams each, coarsely chopped

Instructions

  • Pour the heavy cream and milk in a medium saucepan. Add the vanilla bean, seeds from the vanilla bean and salt; stir and place over medium heat. Stirring constantly, bring to a simmer, about 8 to 10 minutes. Remove from heat immediately after it reaches a simmer, cover and let rest of at least 5 minutes.
  • Meanwhile, in a medium bowl, using a whisk or fork, beat the egg yolks with the sugar until the mix turns from bright to pale yellow, it thickens and loses its graininess. It will take a couple minutes.
  • Uncover the milk mixture, remove the vanilla bean, pressing any remaining seeds into the milk. Discard the bean. Slowly, using a ladle, pour half the milk mixture into the yolk mixture, whisking as you go to temper the egg yolks.
  • Pour the tempered egg yolk mixture into the saucepan with the remaining milk mix. Set over medium heat again, and let it come to a gentle simmer, constantly stirring, until it coats the back of a wooden spoon, about 5 minutes. Remove from the heat and let it cool slightly, stirring now and then.
  • Using a fine strainer, mesh or cheesecloth, strain the mixture into a metal container. Cover and place in the refrigerator until it is completely chilled, at least a couple hours and preferably up to 12 hours.
  • Process the ice cream in your ice cream machine according to the manufacturer’s instructions. A couple minutes before it is ready, add the chocolate chunks. Lastly, drizzle in the dulce de leche or cajeta and immediately turn the machine off, so that you create a swirled effect and not a complete mix.

Notes

Helado de Vainilla con Cajeta y Chocolate Mexicano

Mango Puff

Print Recipe
5 from 7 votes

Mango Puff

Mango Puff recipe from Pati's Mexican Table Season 4, Episode 13 “Backyard Picnic”
Prep Time10 minutes
Cook Time1 hour 10 minutes
Total Time1 hour 20 minutes
Course: Dessert
Cuisine: Mexican
Keyword: gelatin, lime, mango, pati's mexican table, Sweetened Condensed Milk
Servings: 12 individual gelatins
Author: Pati Jinich

Ingredients

  • 1 cup lukewarm water
  • 2 envelopes unflavored gelatin about 2 tablespoons
  • 1 14-ounce can sweetened condensed milk
  • 4 cups cubed mango fresh or thawed from frozen
  • 1 tablespoon fresh squeezed lime juice
  • 2 cups heavy whipping cream
  • 1 cup diced fresh mango or berries (optional for garnish)

Instructions

  • Pour 1 cup lukewarm water into a medium heatproof bowl and add 2 envelopes of unflavored gelatin. Stir and let rest until mixture puffs up, it will increase slightly in volume, about 3 minutes. Meanwhile, fill a small saucepan (that can hold the heatproof bowl) with 2 to 3 inches of water and bring to a simmer over medium-low heat. Place bowl with the gelatin mixture on top the saucepan, creating a water bath or double boiler. Let the bowl rest there, stirring occasionally, until gelatin completely dissolves, approximately 2 to 3 minutes. Remove from heat.
  • Pour the sweetened condensed milk into a blender along with the mango chunks and lime juice, puree until completely smooth. Add the diluted gelatin and blend on low speed for a few seconds to combine. Pour into a large mixing bowl. Let it begin to set as you whip up the cream.
  • In a stand mixer fitted with the whisk attachment, beat the heavy whipping cream until it holds soft peaks. Fold the whipped cream with the mango gelatin until fully combined.
  • Pour into individual gelatin molds or ramekins, cover tightly with plastic wrap, and refrigerate until completely chilled and set, at least an hour. Alternatively you can pour it onto a container, and let it chill and spoon onto bowls later.
  • When ready to serve, remove from the refrigerator and decorate with diced fresh mango or berries of your choice, if desired. Or if chilled in a large bowl, spoon onto individual bowls.

Notes

Gelatina de Mango

Cajeta & Pecan Cinnamon Rolls

Print Recipe
5 from 9 votes

Cajeta & Pecan Cinnamon Rolls

Cajeta & Pecan Cinnamon Rolls recipe from Pati's Mexican Table Season 4, Episode 12 “Baked!”
Prep Time1 hour 45 minutes
Cook Time30 minutes
Total Time2 hours 15 minutes
Course: Breakfast
Cuisine: Mexican
Keyword: bread, Cajeta, canela, cinnamon, dough, pati's mexican table, pecans, Sweetened Condensed Milk, vanilla
Servings: 12 generous sized rolls
Author: Pati Jinich

Ingredients

For the starter:

  • 1/2 cup lukewarm water
  • 3/4 cup lukewarm milk
  • 1/4 packet (2 1/4 teaspoons) active dry yeast
  • 1 tablespoon sugar

For the dough:

  • 2 eggs lightly beaten
  • 4 cups all-purpose flour plus more to knead the dough
  • 1/2 cup sugar
  • Pinch of kosher or coarse sea salt
  • 1/2 cup unsalted butter melted, plus more to butter the bowl

For the filling:

  • 1/4 cup unsalted butter cut into 1/4 -inch dice
  • 3/4 cup Cajeta or dulce de leche
  • 1 teaspoon ground cinnamon or canela
  • 3/4 cup roughly chopped pecans

For the glaze:

  • 2 tablespoons unsalted butter melted
  • 2 teaspoons vanilla extract
  • 2 teaspoons freshly squeezed lime juice
  • 1/3 cup sweetened condensed milk
  • 1/3 cup confectioners' sugar

Instructions

To make the starter:

  • Place the lukewarm milk and water in a small bowl. Be careful as it shouldn’t be hot or cold, or the yeast will not react. Sprinkle the yeast over the liquid along with a tablespoon of sugar. Stir and let rest until it puffs up and becomes foamy, about 10 minutes.

To make the batter:

  • Place the flour in a large mixing bowl. Make a hole in the middle and pour in the beaten eggs, foamy yeast starter, sugar, and salt. Start combining the ingredients with a rubber spatula or wooden spoon. After a few strokes, add the melted butter. Mix with energy, until fully combined. The dough will be very sticky and gooey.
  • Sprinkle your counter or work surface very generously with all-purpose flour. Turn the sticky dough onto the surface, and knead until it transforms from being sticky and gooey to soft and elastic, about 3 to 4 minutes. Add a bit more flour to the counter, if needed, and use a bench scraper to gather the sticky dough from the counter as you knead the dough, and it becomes malleable and soft. Shape the dough into a ball.
  • Butter a large bowl, place the ball of dough in it, cover it with a clean kitchen towel, and let it rest in a warm area of your kitchen with no drafts or air currents, for about 1 to 1 1/4 hours, or until it doubles in size.

To make the rolls:

  • Butter a 9x13-inch baking pan.
  • Sprinkle your counter or working surface generously with all-purpose flour. Place the dough on the floured counter and knead gently to begin to form a rectangle. Sprinkle a rolling pin with flour and use it to roll the dough into a long rectangle of about 10-inches wide by 24-inches long.
  • Leaving a 1-inch frame around the rectangle spread the dulce de leche across the length of the dough to form a centered and long 6-inch stripe. Sprinkle the chopped pecans, the cinnamon, and the butter chunks all over the surface, except for that 1-inch frame.
  • Preheat the oven to 350 degrees.
  • Working lengthwise, roll up the rectangle tightly. Brush the top 1 inch edge of the rectangle, with water, and close the roll up. Cut into 12 rolls: I like to cut the log in half first, then that half in half, and each of those quarters into 3 rolls. Place them in the buttered baking dish. Cover the baking dish with a kitchen towel, and let them rest in a warm area of your kitchen with no drafts or air currents, until they double in size, about an hour.
  • Bake the cinnamon rolls for 27 to 30 minutes, until they are fully cooked and golden brown on top. Remove from the oven.

To make glaze:

  • In a medium bowl, combine the melted butter with the vanilla, lime juice, and sweetened condensed milk and mix with a whisk or spatula. Incorporate the confectioners sugar and mix until fully combined. Pour freely all over the rolls.
  • If you add the glaze while the rolls are still hot, they will turn out even better. Eat as soon as glaze has set, or at least try; it will be just a few minutes.

Notes

Roles de Canela y Cajeta

Meringue Cake

strawberry meringue cake
Print Recipe
4.46 from 11 votes

Meringue Cake

Meringue Cake recipe from Pati's Mexican Table Season 4, Episode 11 “Family Favorites”
Prep Time15 minutes
Cook Time1 hour
Total Time1 hour 15 minutes
Course: Dessert
Cuisine: Mexican
Keyword: cake, egg whites, lime, mascarpone, Meringue, mexican vanilla, pati's mexican table, requesón, strawberries, whipped cream
Servings: 10 to 12 servings
Author: Pati Jinich

Ingredients

For the meringues:

  • 7 large egg whites
  • 1 teaspoon freshly squeezed lime juice
  • 1 1/4 cup granulated sugar
  • 2 tablespoons cornstarch sifted

For the whipped cream filling:

  • 1 1/2 cups heavy cream
  • 8 ounces (1 cup) mascarpone or requeson cheese chilled
  • 1 teaspoon Mexican vanilla extract
  • 2 cups sliced strawberries plus more for garnish

Instructions

  • Preheat oven to 200 degrees.
  • Line two baking sheets with parchment paper and trace two circles, 8-inches in diameter, on each piece of parchment paper, four circles altogether between the two pans.
  • In the bowl of a standing mixer with the whisk attachment, beat the egg whites and lime juice on medium speed until frothy, about 3 to 4 minutes. Continue beating and start adding the granulated sugar slowly, about 2 tablespoons at a time, until completely combined and the mixture holds stiff peaks, about 2 to 3 more minutes. The meringue should appear white and glossy.
  • Remove the bowl from the stand, sift the cornstarch into the meringue, and use a rubber spatula to gently fold and completely incorporate the cornstarch. Transfer the meringue to the prepared baking sheets, dividing evenly between the 4 8-inch measured circles. Use the spatula to spread it into even circles; you will be able to make some nice wavy shapes.
  • Bake for 1 hour, then reduce the temperature to 175 degrees. Let the meringue dry in the oven for another 4 to 6 hours. The outside should be crisp, and they should be easy to remove from the parchment. Set aside to cool completely.
  • In the bowl of a standing mixer with the whisk attachment, whip the heavy cream and mascarpone cheese until soft peaks form. Add the vanilla and continue to beat until stiff peaks form.
  • Transfer 1 1/4 cups of the whipped mascarpone cream to a medium bowl and fold in the sliced strawberries. Set aside.
  • To assemble the cake, place a round of meringue on platter and spoon about 1 1/4 cup whipped cream onto the center, then spread to cover. Top with the second meringue and spread on the strawberry and whipped cream mixture. Top with the third meringue and another 1 1/4 cup whipped cream. Top with the final meringue. Serve in slices with more fresh strawberries.

Notes

Pastel de Merengue

Chocolate Cookies with Hibiscus Flowers

Print Recipe
4.43 from 7 votes

Chocolate Cookies with Hibiscus Flowers

Prep Time40 minutes
Cook Time12 minutes
Course: Dessert
Cuisine: Mexican
Keyword: Chocolate, cookies, flowers, hibiscus, jamaica, mexican vanilla, pati’s mexican table
Servings: 18 to 20 cookies
Author: Pati Jinich

Ingredients

  • 1/2 cup all-purpose flour
  • 1/2 teaspoon baking powder
  • 1/4 teaspoon baking soda
  • 1 tablespoon cocoa powder
  • 1/2 teaspoon kosher or course sea salt
  • 12 ounces roughly chopped semi-sweet chocolate or chocolate chips
  • 4 tablespoons unsalted butter
  • 3 large eggs
  • 1 large egg white
  • 1 1/4 cup granulated sugar
  • 2 teaspoons Mexican vanilla extract
  • 2 ounces rehydrated hibiscus flowers from Hibicus Flower Concentrate finely chopped

Instructions

  • Make the Hibiscus Flower Concentrate (recipe linked in ingredients list).
  • Preheat oven to 350℉ and place racks in the top and bottom third of the oven. Line 2 baking sheets with parchment paper and set aside.
  • In a medium bowl, combine the flour, baking powder, baking soda, cocoa powder and salt. Set aside.
  • In a bain marie, or in a heat-proof bowl set on a pot with simmering water over medium-low heat, melt the chocolate along with the butter, until completely melted and smooth. Stir with a spatula a few times as it melts. Make sure not to overheat it, and stop once it is all melted. Set aside.
  • In the bowl of a standing mixer, using the whisk attachment, whisk the whole eggs and egg white along with the sugar on medium high speed until frothy, about 2 to 3 minutes. Incorporate the melted chocolate and butter mixture as well as the vanilla extract and whisk until completely combined.
  • Remove the bowl from the stand and add the flour mixture. Use a rubber spatula to stir and fold until completely combined. Fold in the chopped rehydrated hibiscus flowers. Cover the bowl with plastic wrap and chill the batter in the refrigerator for 20 to 30 minutes.
  • Using a tablespoon or 2-inch scoop, place the batter in heaping tablespoons onto prepared baking sheets, about 2 inches apart. Bake for 12 to 14 minutes, cool on sheet pans for about 5 minutes and then transfer to cooling racks.

Notes

Galletas de Chocolate con Flores de Jamaica

Homemade Cookies

Print Recipe
4.75 from 8 votes

Homemade Cookies

Homemade Cookies recipe from Pati's Mexican Table Season 4, Episode 9 “Sami’s Big Day”
Prep Time15 minutes
Cook Time10 minutes
Total Time25 minutes
Course: Dessert
Cuisine: Mexican
Keyword: Cajeta, Chocolate, cookies, Dulce de Leche, pati's mexican table, peanut butter, pretzels, Sweetened Condensed Milk
Servings: 34 cookies
Author: Pati Jinich

Ingredients

  • 2 3/4 cups all-purpose flour
  • 1 teaspoon baking powder
  • 1 teaspoon baking soda
  • 1/2 teaspoon kosher or coarse sea salt
  • 1 3/4 cups (3 1/2 sticks) butter at room temperature, cut into pieces
  • 1 14-ounce can sweetened condensed milk
  • 1 cup dark chocolate chips
  • 1/2 cup peanut butter chips
  • 1 cup pretzels broken into about 1/2-inch pieces
  • Cajeta or dulce de leche to drizzle on top optional

Instructions

  • Preheat oven to 350 degrees.
  • Whisk together the flour, baking powder, baking soda, and salt in a medium bowl. Set aside.
  • In a stand mixer fitted with the paddle attachment, beat the butter over medium speed. Add sweetened condensed milk and beat until fully combined and fluffy. Reduce mixer speed to low and slowly add the flour mixture, 1/2 cup at a time, stopping to scrape down the sides of the bowl if need be. Continue to mix until it is all incorporated and the dough is smooth, about 1 minute. Fold in the chocolate chips, peanut butter chips, and pretzel pieces by hand with a rubber spatula.
  • Line a baking sheet with parchment paper. Form 1-inch balls and place them at least 1-inch apart on the baking sheet. Bake for 10 to 12 minutes until the bottoms of the cookies are lightly browned. Remove from the oven and let cool.
  • For an extra treat, you may drizzle cajeta or dulce de leche on top.

Notes

Galletas Caseras

Homemade Cajeta or Dulce de Leche

homemade cajeta
Print Recipe
4.50 from 6 votes

Homemade Cajeta or Dulce de Leche

Homemade Cajeta or Dulce de Leche recipe from Pati's Mexican Table Season 4, Episode 8 “Street Food Favorites”
Prep Time5 minutes
Cook Time1 hour 30 minutes
Total Time1 hour 35 minutes
Course: Dessert, Sauce
Cuisine: Mexican
Keyword: Cajeta, Caramel, goat milk, milk, piloncillo, vanilla
Servings: 3 cups
Author: Pati Jinich

Ingredients

  • 8 cups or 2 liters goat's milk you can substitute or combine with cow’s milk
  • 2 1/2 cups dark brown sugar or shredded piloncillo
  • 1 tablespoon vanilla extract
  • 1/2 teaspoon baking soda

Instructions

  • Place a large pot (I use my new copper one!) over medium heat. Pour milk, vanilla, sugar and baking soda, give it a good stir and let it come to a simmer. Keep it at a steady medium simmer for about one hour and a half, stirring occasionally, every 15 to 20 minutes or so, with a wooden spatula or spoon. The mix will gradually thicken and darken.
  • After about an hour and a half, the liquid will have thickened and reduced and the simmer will become stronger. Reduce the heat to medium low, to keep it at that constant medium simmer. You want active bubbling, but not over the top angry bubbles. Stir a bit more frequently, as you don’t want the bottom to develop a thicker layer.
  • You know the cajeta is ready when: It achieves a caramel brown color; it is thick as liquid caramel or syrup, much like a chocolate syrup consistency; it envelops the back of the spoon; when you gently stir across the pot with your wooden spoon, a slightly delayed trail behind the spoon appears, revealing the bottom of the pot if only for a few seconds; as you slowly lift up the wooden spoon or spatula, cajeta takes it’s time to drop and lastly, the sides of the pot show how the cajeta has cooked down and if you run your spoon across that side, you get a fudgy (and delicious) residue.
  • Turn off the heat and let cool (it will thicken considerably as it cools).
  • Place in a glass jar, cover tightly with a lid. It will keep in refrigerator for up to 6 months.

Notes

Cajeta Casera

Churros

Print Recipe
4.63 from 8 votes

Churros

Churros recipe from Pati's Mexican Table Season 4, Episode 8 “Street Food Favorites”
Prep Time10 minutes
Cook Time15 minutes
Total Time25 minutes
Course: Dessert
Cuisine: Mexican
Keyword: Cajeta, cinnamon, dough, Dulce de Leche, fried, pati's mexican table, vanilla
Servings: 16 churros
Author: Pati Jinich

Ingredients

  • Canola oil for frying plus 1/4 cup
  • 1 cup sugar plus 1/4 cup
  • 1 tablespoon ground cinnamon plus 1/2 teaspoon
  • 2 cups water
  • 2 teaspoons vanilla extract
  • 1 teaspoon kosher or coarse sea salt
  • 2 cups all-purpose flour
  • Cajeta or dulce de leche optional dipping sauce

Instructions

  • In a large, heavy and extended casserole, or cast iron, high-sided skillet, heat about 1 1/2-inches of canola oil over medium heat until the oil temperature reaches 350 degrees (or test with a piece of tortilla or bread; it’s ready when the oil bubbles actively all around it). It will take awhile to heat, so get this started before making the dough.
  • On a large plate, combine 1 cup sugar and 1 tablespoon ground cinnamon. Set aside.
  • In a medium saucepan, combine the water, 1/4 cup oil, vanilla extract, 1/4 cup sugar, 1/2 teaspoon cinnamon and salt. Bring to a boil over medium-high heat. Add the flour all at once, turn off the heat and use a wooden spoon to stir vigorously until the mixture forms a dough as smooth as possible with no flour lumps. It will take about 2 minutes. Set aside to cool slightly.
  • Transfer to a pastry bag fitted with a large star tip or a churro press. Pipe the dough into about 6 to 8-inch pieces (or if you want to replicate a churro store, pipe a rope-like dough of about 24-inches) and carefully place in oil. Fry for about 3 to 4 minutes, until golden and crisp, flipping in between. Use tongs to remove them and place on a paper towel lined baking sheet or drying rack.
  • While the churros are still very hot, toss them in the sugar and cinnamon mixture to coat. If desired, serve with cajeta or dulce de leche as a dipping sauce and Mexican hot chocolate on the side.

Marbled Tres Leches Cake

marbled tres leches cake recipe
Print Recipe
3.25 from 8 votes

Marbled Tres Leches Cake

Marbled Tres Leches Cake recipe from Pati's Mexican Table Season 4, Episode 7 “Cooking with the Fans”
Prep Time20 minutes
Cook Time2 hours 25 minutes
Total Time2 hours 45 minutes
Course: Dessert
Cuisine: Mexican
Keyword: cake, Chocolate, evaporated milk, mexican chocolate, milk, pati's mexican table, Sweetened Condensed Milk, tres leches, vanilla, whipped cream
Servings: 12 to 15 servings
Author: Pati Jinich

Ingredients

For the cake:

  • Unsalted butter to butter the pan
  • 9 large eggs separated, at room temperature
  • 1 cup sugar
  • 1 tablespoon vanilla extract
  • 2 cups all-purpose flour
  • 1/2 cup hot water
  • 1/3 cup unsweetened cocoa powder

For the sauce:

  • 1 14-ounce can sweetened condensed milk
  • 1 12-ounce can evaporated milk
  • 1 cup whole milk
  • 1 tablespoon vanilla extract

For the whipped cream topping:

  • 2 cups heavy cream
  • 3 tablespoons confectioners' sugar
  • 1 disk Mexican-style chocolate, such as Abuelita grated, for garnish, about 3 ounces

Instructions

  • Preheat the oven to 350 degrees with a rack in the middle. Butter a 9x13-inch baking pan and line the bottom with a piece of parchment paper.

To make the cake:

  • In a stand mixer fitted with the whisk attachment, beat the egg whites on medium-high speed until they hold soft peaks, about 4 to 5 minutes. Reduce the speed to medium and slowly add the sugar, beating until the whites hold stiff, shiny peaks. Transfer to a large bowl and set aside.
  • Pour the egg yolks into another large bowl and beat with a whisk or fork, until fluffy and pale yellow. Add the vanilla and continue beating until fully incorporated. Gently fold the egg yolk mixture into the egg white mixture with a rubber spatula, taking care not to deflate the whites. Fold in the flour 1/4 cup at a time and mix well. The batter will look a bit streaky.
  • In a small bowl, combine the hot water with the cocoa powder. Pour half the cake batter into another bowl and fold in the cocoa-water mixture with a rubber spatula until thoroughly mixed.
  • Spread the vanilla batter in the prepared pan. Pour the chocolate batter on top, in a straight line down the center. With a knife or spoon, make a whirling design from one side of the pan to the other. Bake for 22 to 25 minutes, until the top of the cake has lightly browned and feels spongy to the touch. Remove from the oven and let cool.
  • Invert the cake onto a large platter or board and remove the pan and parchment paper. Cover the cake with an upside-down platter large enough to hold the cake and the vanilla sauce and invert again so the cake is right side up. Using a fork, poke holes all over the top of the cake, so it will absorb the sauce.

To make the sauce:

  • In a large bowl, combine the three milks and vanilla and stir to blend well. Pour about 2/3 of the sauce over the cake. Don’t worry if it looks like there is too much sauce—the cake will absorb it. Cover and refrigerate for at least 2 hours or overnight. Reserve the remaining vanilla sauce.
  • When you are ready to finish the cake, remove the cake from the refrigerator and spoon the remaining sauce on top of the cake.

To make the whipped cream:

  • In a stand mixer fitted with the whisk attachment, whip the cream and the confectioners’ sugar on medium speed until it holds well formed peaks, about 6 minutes. Spread the whipped cream over the top and sides of the cake. Garnish with the grated Abuelita chocolate.

Notes

Pastel de Tres Leches Marmoleado

Jericalla

jericalla or vanilla custard
Print Recipe
3.86 from 7 votes

Jericalla

Jericalla recipe from Pati's Mexican Table Season 4, Episode 4 “Summer Evening Party”
Prep Time5 minutes
Cook Time27 minutes
Total Time32 minutes
Course: Dessert
Cuisine: Mexican
Keyword: ceylon, cinnamon, custard, Jericalla, pati's mexican table, Sweetened Condensed Milk, vanilla
Servings: 10 to 12 individual custards
Author: Pati Jinich

Ingredients

  • 4 cups whole milk
  • 2 teaspoons vanilla extract
  • 1 stick true or ceylon cinnamon about 2 1/2-inches long
  • 1 14-ounce can sweetened condensed milk
  • 10 egg yolks use the whites to make an egg white omelet!

Instructions

  • Place the milk, vanilla extract and cinnamon stick in a medium saucepan over medium heat. Once it begins to bubble and simmer around the edges, reduce the heat to low, and cook 1 to 2 minutes. Remove from the heat and let it sit until it cools down. Once it has cooled down, remove the cinnamon stick.
  • Preheat the oven to 350 degrees.
  • In a medium bowl, beat the egg yolks with a fork or whisk, until pale yellow and thick, about a minute. Add the sweetened condensed milk in a stream, and beat along with the fork or whisk, incorporating as you do. Add the cooled milk mixture, a ladle at a time, incorporating with the fork or whisk. Try not to make too many bubbles.
  • Prepare a water bath using a roasting pan, adding about 1/2-inch of already hot water. Place 10 ramekins, or flan or custard molds, in the water bath. With a ladle, pour the mixture into the ramekins, dividing evenly among all 10.
  • Carefully place into the oven. Bake for about 25 minutes, or until the custard has begun to set and the top has created an evident thick layer. It should not be crispy or have browned, if anything just a few spots here and there. Remove the pan from the oven and the ramekins from the water bath.
  • The jericalla should be creamy and smooth, like pudding. Let cool. Serve at room temperature, or chill in the fridge before serving.

Churros Don’t Need Translating Anymore

Some Latin foods don’t need translating anymore. That is the case of churros. Crisp and golden on the outside, soft and almost moist in the center, and covered in a gritty mix of sugar and cinnamon. They have to be some of the most, if not the most, irresistible fritters.

Mexicans don’t get the credit for inventing them though. That battle is still disputed between the Portuguese and the Spanish. But we do owe the Spanish for helping churros find their way to our Mexican kitchens, where we have found a way to make them our very own. More than five centuries later, so rooted they have become, it is hard to find a town, small or large, that doesn’t sell them.

You can find churros being sold by street vendors in little paper bags, in baskets, or in stands that have a heating light to keep them warm – people tend to underestimate how chilly Mexican nights can get. But there are also churrerías, places that only sell churros and different kinds of hot chocolate to accompany them.

Then there are extra dipping sauces that, of late, have become fillings. Some industrial churro press machines pump out churros with an inner tunnel that can be filled with dulce de leche or cajeta, chocolate or fruit jams. I go for the traditionally plain ones, without the inner tunnel, with cajeta or dulce de leche on the side to dip as I please.

churros

Just like other extremely popular street food goodies, many people have the misconception that something so good must be impossible to make at home. Well, wrong and wrong. All you need is a good recipe – and my boys and I did the legwork for you – and a churro-making tool.

On the recipe, it was a team effort. You know how many takes my boys sampled? The dough was too thick, then too sweet, then too crackly. Or once shaped into churros, it hardened too fast, its center dried too soon and the grooves didn’t stay smooth.

Finally, we nailed down the most irresistible and fool-proof one. With the recipe nailed down, the issue became the tool. As the perfect masa needs to be heavy and thick, it resists being pushed around in a cookie cutter or in a pastry bag. Ask my oldest son, he came to the kitchen to my rescue one too many times to help push the dough out from a cookie cutter press, we ended up breaking, and the pastry bag attempts were too much of a work out.

I finally caved. Though I am usually one to complain about stores trying to sell you special tools for certain cooking tasks, or for dealing with ingredients that do not require a special tool at all. Take the egg slicer, for example. Not only does it not work, it is messy and it does not make impeccable slices. Or the nutmeg grinder, nothing a normal grater can’t handle. I have to admit, the humble plastic churro press (less than $20 and many brands available online), is a great thing to have if you want fresh churros at home just about any afternoon.

Since the dough can be made in just a few minutes, you can have churros pressed and fried, seamlessly in less than a half hour.

Print Recipe
5 from 4 votes

Churros con Cajeta or Dulce de Leche

Some Latin foods don’t need translating anymore. That is the case of churros. Crisp and golden on the outside, soft and almost moist in the center, and covered in a gritty mix of sugar and cinnamon. They have to be some of the most, if not the most, irresistible fritters.
Prep Time10 minutes
Cook Time15 minutes
Course: Dessert
Cuisine: Mexican
Keyword: Cajeta, Churros, cinnamon, dough, Dulce de Leche, fried, pati's mexican table
Servings: 16 churros
Author: Pati Jinich

Ingredients

  • Vegetable oil for frying plus ¼ cup
  • 2 cups water
  • 2 teaspoons vanilla extract
  • 1 cup sugar plus ¼ cup
  • 1 tablespoon cinnamon plus ½ teaspoon
  • 1 teaspoon kosher or coarse sea salt
  • 2 cups flour
  • Cajeta or dulce de leche optional dipping sauce

Instructions

  • In a large, heavy and extended casserole, or cast iron, high-sided skillet, heat about 1 1/2-inches of canola oil over medium heat until the oil temperature reaches 350 degrees (or test with a piece of tortilla or bread; it’s ready when the oil bubbles actively all around it). It will take awhile to heat, so get this started before making the dough.
  • On a large plate, combine 1 cup sugar and 1 tablespoon ground cinnamon. Set aside.
  • In a medium saucepan, combine the water, 1/4 cup oil, vanilla extract, 1/4 cup sugar, 1/2 teaspoon cinnamon and salt. Bring to a boil over medium-high heat. Add the flour all at once, turn off the heat and use a wooden spoon to stir vigorously until the mixture forms a dough as smooth as possible with no flour lumps. It will take about 2 minutes. Set aside to cool slightly.
  • Transfer to a pastry bag fitted with a large star tip or a churro press. Pipe the dough into about 6 to 8-inch pieces (or if you want to replicate a churro store, pipe a rope-like dough of about 24-inches) and carefully place in oil. Fry for about 3 to 4 minutes, until golden and crisp, flipping in between. Use tongs to remove them and place on a paper towel lined baking sheet or drying rack.
  • While the churros are still very hot, toss them in the sugar and cinnamon mixture to coat. If desired, serve with cajeta or dulce de leche as a dipping sauce and Mexican hot chocolate on the side.

Mango Pecan Tart

chardonnay mango tart
Print Recipe
4.43 from 7 votes

Mango Pecan Tart

Mango Pecan Tart recipe from Pati's Mexican Table Season 4, Episode 2 "Adventures in San Miguel"
Prep Time25 minutes
Cook Time25 minutes
Total Time50 minutes
Course: Breakfast, Dessert
Cuisine: American, Latin American, Mexican
Keyword: apricot, champagne, jamaica, Kent, mango, pastry cream, Pecan, Pie, tart
Servings: 10 servings
Author: Pati Jinich

Ingredients

  • 3 large, ripe champagne or Kent mangoes

For the crust:

  • 1 1/2 cups pecans
  • 1 cup all-purpose flour
  • 1/4 cup dark brown sugar
  • Pinch kosher or coarse sea salt
  • 1 large egg
  • 4 tablespoons cold butter

For the Pastry Cream:

  • 1 cup milk
  • 1 tablespoon vanilla extract
  • 3 egg yolks
  • 1/4 cup sugar
  • 2 tablespoons cornstarch

For the glaze:

  • 1/4 cup apricot jam
  • 1/4 cup white wine from a bottle that you would like to drink

Instructions

For the crust:

  • Preheat the oven to 375°F. Place the pecans in the bowl of a food processor. Pulse a few times until finely ground. Add the flour, sugar and salt and pulse again a few times until combined. Add an egg and the butter, pulse again a few times until thoroughly mixed and the butter has broken into the smallest of pieces, making it hard to distinguish it from the mix. The mix should resemble a coarse meal; it will not appear to be a homogeneous dough, but it will be all crumbles. That’s what you want.
  • Turn all the pecan mix into a tart pan with a removable ring. Press into bottom of the pan with your hands, leveling it all around. As you press, the mix will start looking like dough. Press a bit to the sides to form a 1/4-inch border all around.
  • Bake for 15 minutes, until cooked through and appears to be lightly golden. Let it cool completely.

For the pastry cream:

  • In a medium saucepan, set over medium heat, pour in the milk and vanilla, stir well with a whisk and let it come to a simmer. Just until it begins bubbling around the edges. Remove from heat.
  • In a medium bowl, beat the egg yolks along with the sugar and the cornstarch. Slowly, in a thin stream and with the help of a ladle, pour the milk into the beaten eggs, whisking along to combine thoroughly until all the milk mixture has been poured. Transfer it all back into saucepan. Set over medium heat, stirring occasionally and keeping a good eye on it, let it come to a simmer. Simmer for about 1 to 2 minutes, until it thickens to thick cream consistency. You may stir with a spatula as it simmers so it doesn’t stick to the bottom. Remove from heat. Let it cool, wrap with plastic wrap and place in refrigerator until ready to use.

For the glaze:

  • In a small saucepan, combine the jam with the wine. Set it over medium heat. Stir or whisk a couple times, until it dissolves and it begins to simmer. Let it simmer 1 to 2 minutes. Set aside.

To assemble the tart:

  • When ready to assemble the tart, vertically slice the cheeks of the mangoes. With a small knife, cut around the cheeks to make it easy to remove from the skin, and scoop out with a spoon. Cut the cheeks into slices.
  • Pour the pastry cream onto the crust. Place the mango slices, going around the tart until you reach the center. With a pastry brush, brush the glaze all over the mangoes. If the glaze has cooled, heat for a few seconds until it becomes liquid again.
  • Place the tart in the refrigerator at least for an hour to set and chill.

Notes

Tarta de Nuez con Mango