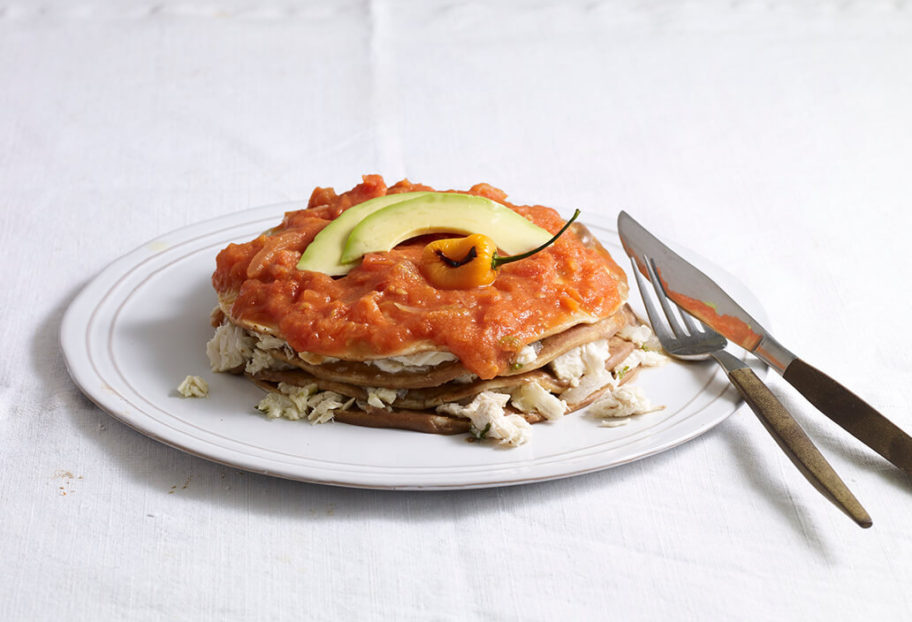
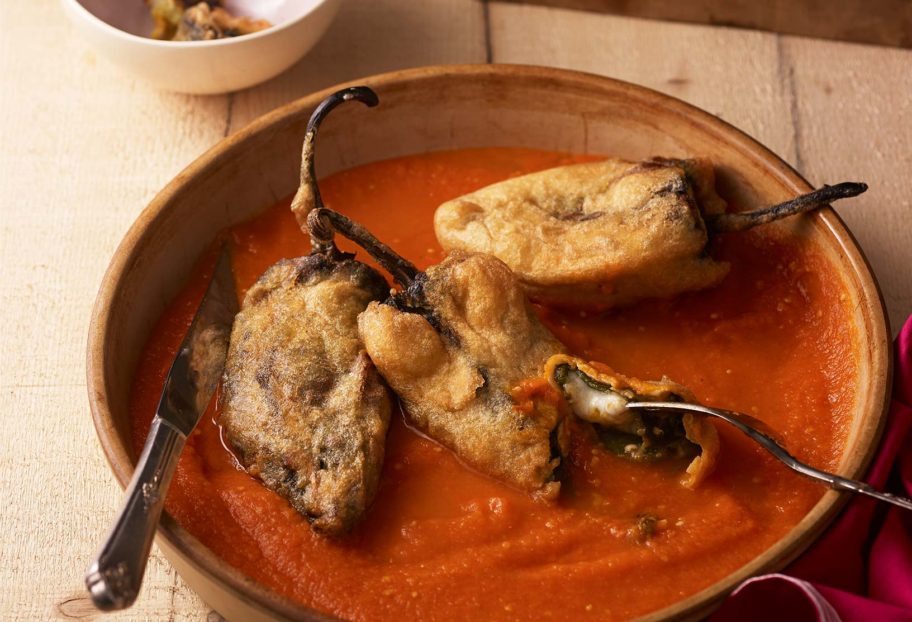
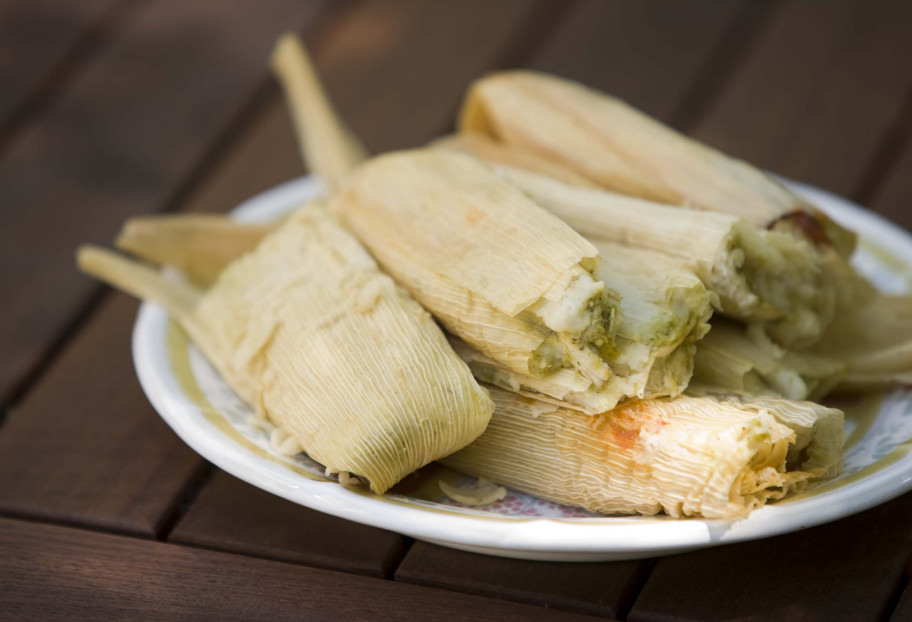
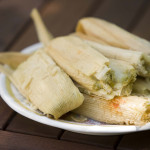
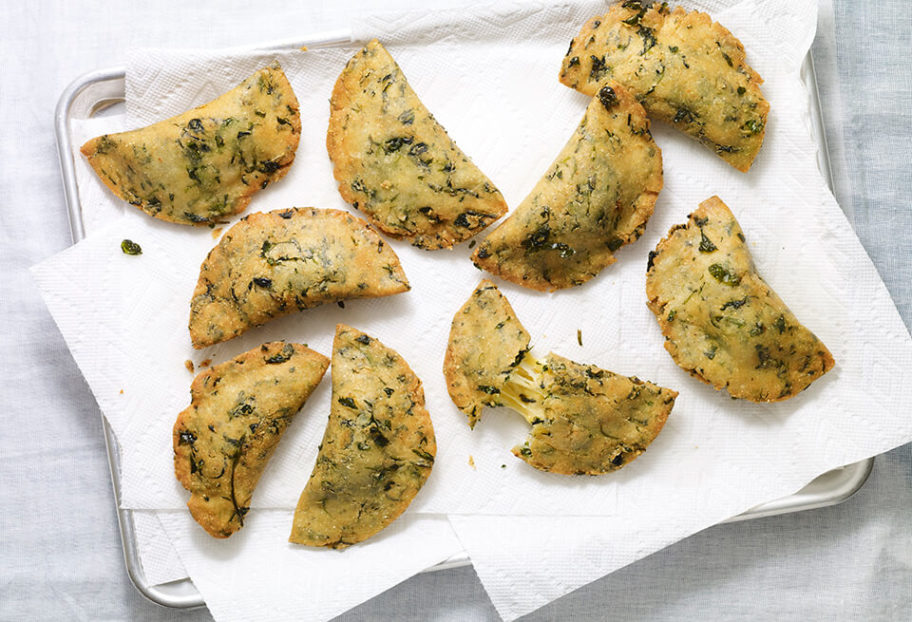
Chaya Empanadas

chaya empanadas
Print Recipe
4.29 from 7 votes

Chaya Empanadas

Chaya Empanadas recipe from Pati's Mexican Table Season 5, Episode 2 “Mérida: Exploring with the Locals”
Prep Time15 minutes
Cook Time12 minutes
Total Time27 minutes
Course: Antojos, Main Course
Cuisine: Mexican
Keyword: chaya, edam cheese, Empanadas, masa, pati's mexican table, salsa roja, Yucatán Peninsula
Servings: 8 empanadas
Author: Pati Jinich

Ingredients

  • 2 cups fresh corn masa
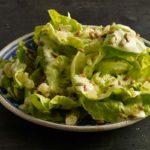
  • 1/2 cup chopped chaya leaves (may substitute spinach or watercress)
  • 1 teaspoon kosher or coarse sea salt
  • 4 cups grated Dutch edam cheese (may substitute Gouda or Muenster)
  • Vegetable oil for frying
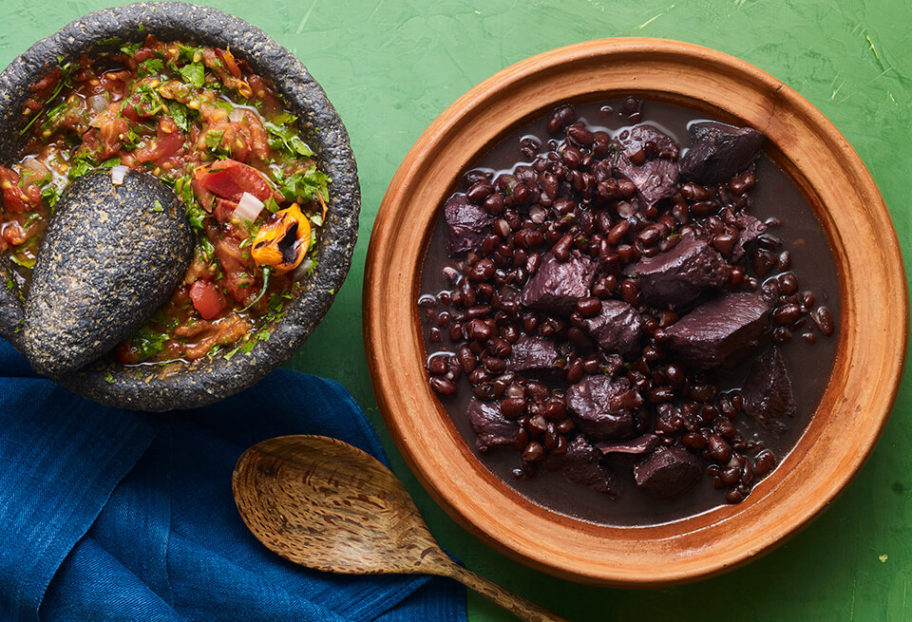
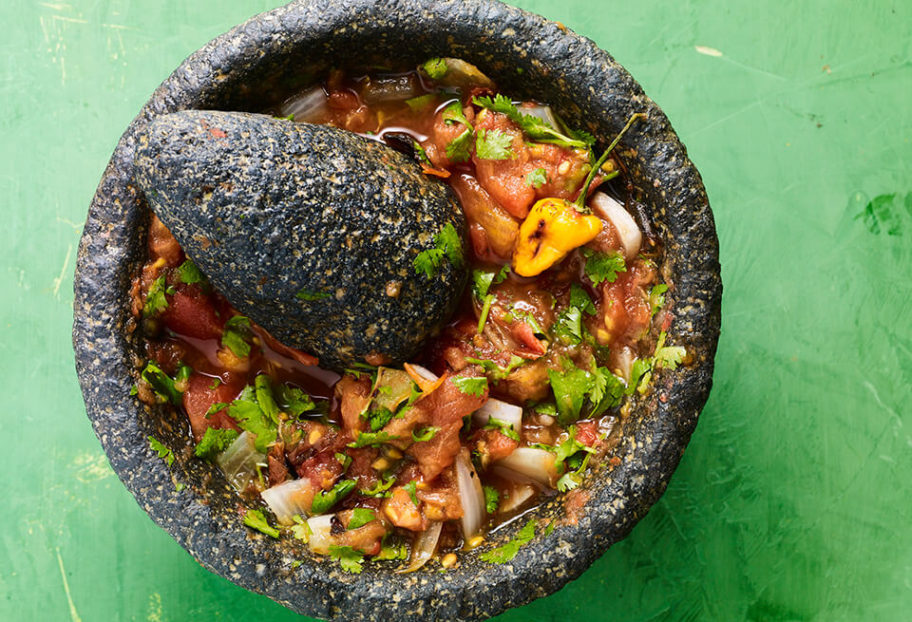
  • Salsa roja of your choice, warmed, optional

Instructions

  • In a large bowl, combine the masa, chaya, and salt by kneading with your hands.
  • Pinch off a large, golf-ball sized piece of masa and roll it into a ball, then gently flatten with your palms. Place the flattened masa on a piece of plastic wrap and use your fingers to press it into a flat round tortilla about 1/8" thick (alternatively, use a tortilla press). Repeat until all of the remaining masa has been used up.
  • Place 1/2 cup of the grated cheese on one side of the masa round, then fold over to make a half-moon shape. Press around the edges with your fingers to close, using the plastic to help you out. Repeat with all the masa rounds.
  • In a large casserole or heavy bottomed pan, heat ½” of oil to 325 degrees Fahrenheit. If you don't have a fry thermometer, test by dropping a small ball of masa in the oil; if the oil actively bubbles around it, it's ready.
  • Working in batches, fry the empanadas in the oil until crisp, about 2 to 3 minutes per side. Place the fried empanadas on a paper towel lined plate to drain off the excess oil. You may serve them with a side of warm salsa roja or salsa of your choice.

Notes

Empanadas de Chaya, recipe courtesy Chef David Cetina

Pork and Beans

pork and beans
Print Recipe
4.15 from 7 votes

Pork and Beans

Pork and Beans recipe from Pati's Mexican Table Season 5, Episode 2 “Mérida: Exploring with the Locals”
Prep Time10 minutes
Cook Time2 hours 15 minutes
Total Time2 hours 25 minutes
Course: Main Course
Cuisine: Mexican
Keyword: Avocado, black beans, chiltomate, corn tortillas, epazote, habanero, lime, pati's mexican table, pork, radish, Yucatán Peninsula
Servings: 8 servings
Author: Pati Jinich

Ingredients

  • 2 pounds black beans rinsed and drained
  • 4 pounds pork shoulder, butt, or country-style ribs (or a combination) cut into 2" chunks
  • 1 white onion outer peel removed and cut in half crosswise without cutting ends off
  • 4 fresh epazote sprigs or 15 cilantro sprigs, tied with kitchen twine
  • 1 tablespoon kosher or coarse sea salt
  • 8 to 10 radishes julienned or cut into thin strips
  • 1 cup coarsely chopped cilantro leaves and upper stems
  • 1 ripe avocado halved, pitted, meat scooped out and diced
  • 4 limes quartered
  • Yucatecan tomato sauce or Chiltomate to taste, optional
  • Habanero chiles to taste, either "dipped" or finely chopped optional
  • Warm corn tortillas

Instructions

  • Add 6 liters of water and the rinsed beans to a large casserole or Dutch oven. Bring to a simmer over medium heat and cook at a steady rolling simmer, with the lid slightly ajar, for 45 minutes.
  • Incorporate the pork chunks, halved white onion, epazote or cilantro sprigs, and salt and stir. Continue simmering for another hour and a half, partially covered, until the pork is completely cooked and tender, making sure the broth does not dry out – I add another 4 cups of boiling water after I add the pork. Turn off the heat. Taste for salt and add more if need be.
  • Serve with garnishes of julienned radishes, chopped cilantro, diced avocado, lime quarters, Chiltomate, and habaneros (they can just be cut and dipped into individual bowls to add a bit of heat, called "chuk" or "remojar"). Each person can “puuch” or mash and mix the garnishes of their choice in their bowl. It is customary to serve along with warm corn tortillas.

Notes

Frijol con Puerco

Basic Yucatecan Tomato Sauce

basic yucatecan tomato sauce
Print Recipe
5 from 6 votes

Basic Yucatecan Tomato Sauce

Basic Yucatecan Tomato Sauce recipe from Pati's Mexican Table Season 5, Episode 2 “Mérida: Exploring with the Locals”
Prep Time5 minutes
Cook Time15 minutes
Total Time20 minutes
Course: Sauce
Cuisine: Mexican
Keyword: chiltomate, cilantro, habanero, onion, pati's mexican table, Tomatoes, Yucatán Peninsula
Servings: 2 cups
Author: Pati Jinich

Ingredients

  • 1 pound ripe tomatoes
  • 1/4 white onion
  • 1 whole habanero chile optional
  • 1 cup coarsely chopped cilantro leaves and upper stems
  • 1/2 teaspoon kosher or coarse sea salt or to taste

Instructions

  • Heat a comal over medium heat and place the tomatoes, quarter onion and whole habanero (if using) on it, and toast for 10 to 12 minutes, flipping once in between, until completely charred. Alternatively, place on a baking sheet under the broiler, and broil for 10 to 12 minutes, flipping once, until completely roasted. Remove from the heat and let cool.
  • Chop the charred onion, as well as the habanero, removing its seeds.
  • Completely mash the tomatoes in a molcajete, and incorporate the onion, cilantro, and salt.
  • First, add half of the habanero and mash until well mixed. Taste for heat and add more habanero if desired.
  • Alternatively, put the ingredients in a blender or food processor and process until fully combined but still chunky.

Notes

Salsa de Chiltomate

Mango Pound Cake

mango pound cake
Print Recipe
4.13 from 8 votes

Mango Pound Cake

Mango Pound Cake recipe from Pati's Mexican Table Season 5, Episode 2 “Mérida: Exploring with the Locals”
Prep Time20 minutes
Cook Time55 minutes
Total Time50 minutes
Course: Dessert
Cuisine: Mexican
Keyword: buttermilk, cake, mango, pati's mexican table, pound cake
Servings: 9 to 10 servings
Author: Pati Jinich

Ingredients

  • 1/2 cup unsalted butter at room temperature, plus extra for buttering pan
  • 1 1/3 cups granulated sugar
  • 2 large eggs
  • 2 1/2 cups all-purpose flour plus extra for dusting pan
  • 1 teaspoon baking powder
  • 1 teaspoon baking soda
  • 1/4 teaspoon kosher or coarse sea salt
  • 1 3/4 cups diced mango fresh or thawed from frozen
  • 1/4 cup buttermilk
  • 1 teaspoon almond extract
  • 1 teaspoon vanilla extract
  • Confectioners' sugar for dusting optional
  • Berries of your choice for garnish, optional

Instructions

  • Preheat oven to 350 degrees Fahrenheit. Grease a 9"x 13" baking pan with butter and dust with flour.
  • In a stand mixer fitted with the paddle attachment, beat the butter on medium speed until soft, about 2 minutes. Add the granulated sugar and continue to beat until well mixed and creamy, about another 5 minutes. One at a time, beat in the eggs on medium speed until completely smooth and creamy, about 2 minutes.
  • In a large bowl, combine the all-purpose flour, baking powder, baking soda and salt.
  • Put the diced mango, buttermilk, and almond and vanilla extracts in a blender, and puree until completely smooth.
  • In four additions, gradually beat the mango puree and the dry ingredients into the butter mixture, alternating wet and dry ingredients. Mix until completely combined. Scrape the batter into the greased and dusted baking pan and place in the oven. Bake for 50 to 55 minutes, or until the cake is golden brown on top, springy to the touch, and a wooden toothpick comes out dry when inserted.
  • Remove from the oven and let cool. Turn the cake out upside down onto a board, and then flip right side up onto a platter. Dust liberally with confectioners’ sugar before serving, and garnish with berries of your choice.

Notes

Panqué de Mango

Pan de Cazón

Pan De Cason
Print Recipe
4.41 from 5 votes

Pan de Cazón

Pan de Cazón recipe from Pati's Mexican Table Season 5, Episode 1 “Chachi’s Champotón Kitchen”
Prep Time10 minutes
Cook Time45 minutes
Total Time55 minutes
Course: Main Course
Cuisine: Mexican
Keyword: bitter orange juice, black beans, cazon, Cod, corn tortillas, dogfish, epazote, habanero, mahi mahi, pati's mexican table, swordfish, Yucatán Peninsula
Servings: 4 servings
Author: Pati Jinich

Ingredients

  • 2 pounds cazon or dogfish fillets cut into 2-inch pieces (may substitute cod, swordfish or mahi mahi)
  • 3 sprigs fresh epazote
  • 1 teaspoon kosher or coarse sea salt
  • 6 tablespoons lard divided, may substitute vegetable oil
  • 2 whole white onions 1 chopped and 1 havled and sliced thin
  • 1 cup fresh epazote leaves roughly chopped, plus another 1/4 cup for tomato sauce
  • 2 tablespoons bitter orange juice or its substitute
  • 8 large tomatoes chopped
  • 16 corn tortillas warmed
  • 2 cups black bean puree warmed
  • 4 habanero chiles roasted or charred
  • 1 ripe avocado pitted and sliced

Instructions

  • To prepare the cazon filling, bring a large pot of water to a boil and add the fish, epazote sprigs and salt. Simmer on low until the fish is cooked through, about 10 to 12 minutes. Drain the fish and set aside to cool slightly, then remove the skin and shred. Set aside.
  • Heat 3 tablespoons of the lard in a large sauté pan and cook the chopped onion and chopped epazote leaves until soft, about 5 minutes. Add the shredded fish and the remaining 3 tablespoons of lard, and cover and cook until warmed through, about 5 to 6 minutes. Remove from heat and stir in the bitter orange juice.
  • Meanwhile, prepare the tomato sauce. In a blender, puree 2 cups of the chopped tomatoes. Transfer the puree to a medium pot set over medium-high heat and add the remaining chopped tomatoes, 3 tablespoons of lard, thinly sliced onion, 1/4 cup chopped epazote leaves and salt. Bring to a boil, reduce to a simmer and cook until the onions and tomatoes are soft, about 15-20 minutes.
  • To assemble, dip a tortilla into the black bean puree and coat lightly on both sides. Place in the center of a plate. Top with about 2 tablespoons of the cazon filling, then repeat the process of dipping a tortilla and topping with the cazon filling two more times for a total of 3 layers. ingredients.
  • Coat a fourth tortilla on one side only lightly with bean puree, and place bean-side down on the top of the stack. Ladle about 1 1/2 cups of the tomato sauce over the top. Top with a charred habanero, and garnish with avocado slices on the side. Repeat the process 3 more times for 4 servings.
  • NOTE: The most authentic version of this recipe uses roasted cazón or dog fish. However, substitutes work wonderful, as well.

Notes

Pan de Cazón, recipe Courtesy of Chachi

Mini Pibis

Mini Pibis
Print Recipe
4.75 from 8 votes

Mini Pibis

Mini Pibis recipe from Pati's Mexican Table Season 5, Episode 1 “Chachi’s Champotón Kitchen”
Prep Time1 hour
Cook Time1 hour
Total Time2 hours
Course: Main Course
Cuisine: Mexican
Keyword: achiote paste, banana leaves, chicken, masa, onion, pati's mexican table, Tamales, Tomatoes, Yucatán Peninsula
Servings: 14 to 16 tamales
Author: Pati Jinich

Ingredients

  • 3 1/4 cups (about 1 pound) corn masa flour for tortillas or tamales (masa harina)
  • 2 3/4 cups chicken broth for masa, plus 1/2 cup for chicken filling
  • 1 1/2 teaspoon kosher or coarse sea salt or to taste, divided
  • 1 cup lard or vegetable shortening
  • 3 tablespoons (or 2 ounces) achiote paste
  • 3/4 pound (about 3) ripe Roma tomatoes cut into chunks
  • 4 garlic cloves
  • 1/4 cup white onion coarsely chopped
  • 1 teaspoon dried oregano
  • 1/4 teaspoon ground allspice
  • 1/4 teaspoon freshly ground black pepper
  • 1 tablespoon vegetable oil
  • 3 cups cooked shredded chicken
  • Banana leaves, fresh or thawed from frozen cut into 15 pieces, 10-inches in length, plus more for covering the steamer

Instructions

To make the masa:

  • In a large bowl, combine the masa flour with 2 3/4 cups chicken broth using your hands, kneading the dough until thoroughly mixed and very smooth, not “grainy.”
  • Put 1 1/2 cups water and 1/2 teaspoon of the salt in a large casserole or pot and set over medium heat. Once it begins to simmer, reduce heat to low and add the masa in batches, working it as you go with the wooden spatula to blend with the water, until it is all incorporated. Add the lard, and work it with the wooden spatula for about 3 to 4 minutes until it is all incorporated and the masa appears “cooked." The masa should smell like cooked corn tortillas and appear to be lightly browning and very thick. Remove from heat.

To make the filling:

  • In a blender, add the remaining 1/2 cup chicken broth, achiote paste, tomatoes, garlic cloves, white onion, oregano, allspice, remaining teaspoon of salt, and black pepper. Puree until completely smooth.
  • Heat the oil in a pot or casserole over medium heat. Once hot, carefully add the puree (because it will splatter) and cook partially covered for about 10 minutes, stirring frequently, until it thickens and darkens. Add the shredded chicken, stir, and continue to cook for 8 to 10 minutes more, stirring occasionally, until the mixture is very moist but not wet – like a sloppy Joe - and most liquid has been absorbed. Set aside.

To make the tamales:

  • Turn a burner on to low heat. Using tongs, slowly pass each banana-leaf piece over the flame on both sides and set aside (so they will be resilient, malleable and not break).
  • One by one, set each leaf piece on your counter with the shiny, outer side down. Spoon about 1/4 cup of masa into the center and spread to form a rectangle of about 4”x 3”. With the spoon, make a shallow channel down the middle, creating a stripe in the masa. Spoon a couple tablespoons of the seasoned shredded chicken right down the middle. Gently close each tamal by folding the longer sides first and then the sides as if making a flat and tight package, but being careful not to press on the tamal too much.
  • Prepare your tamalera or steamer: Add just enough water to touch the bottom of steaming basket and a coin (it will jump and make noise to let you know if water runs out). Line the steaming basket with a few banana-leaf pieces to gently cover the base. One by one, add the tamales, stacking them as evenly as you can, staggered in the same position as when you made them: laying them flat, with opening side on the top. Once you are done, cover with a few more pieces of banana leaves.
  • Set the steamer uncovered over high heat, once there is a bit of steam coming out and the water starts boiling a few minutes later, cover, reduce heat to medium, and cook for 50 minutes to an hour. The leaves will have changed to a much darker color and will have completely wilted to wrap themselves as a second skin over the tamales, and the tamales should feel firm. Turn off the heat.
  • Let the tamales sit covered for 10 to 15 minutes - so they firm up - or until ready to serve. The tamales can be made ahead of time, and reheated in steamer. They can be refrigerated up to 5 days, or frozen in sealed plastic bags for 6 months, and reheated the same way.

Notes

Tamales Colados de Pollo

Coconut Cream

Crema de Coco
Print Recipe
4 from 10 votes

Coconut Cream

Coconut Cream recipe from Pati's Mexican Table Season 5, Episode 1 “Chachi’s Champotón Kitchen”
Prep Time10 minutes
Cook Time15 minutes
Total Time25 minutes
Course: Dessert
Cuisine: Mexican
Keyword: canela, cinnamon, coconut, coconut milk, pati's mexican table, Sweetened Condensed Milk
Servings: 8 to 10 servings
Author: Pati Jinich

Ingredients

  • 3/4 cup sweetened coconut flakes or angel flakes
  • 1/4 teaspoon fleur de sal or sea salt
  • 1/2 teaspoon ground canela or true cinnamon
  • 2 14-ounce cans coconut milk
  • 1 14-ounce can sweetened condensed milk
  • 1/2 cup cornstarch
  • 1 cup milk

Instructions

  • Preheat oven to 325 degrees Fahrenheit.
  • Spread the sweetened coconut flakes on a small baking sheet, sprinkle with the salt and cinnamon, and mix and spread again. Bake 7 to 8 minutes, or until the coconut flakes barely begin to toast (don't let them brown entirely). They should be slightly crisp and still chewy. Remove from the oven and immediately transfer to a small bowl.
  • Pour the coconut milk and sweetened condensed milk into a medium saucepan.
  • In a small bowl, mix the cornstarch with the regular milk and stir until completely dissolved. Pour it into the pan with the coconut milk and sweetened condensed milk.
  • Place the saucepan over medium heat and cook, stirring continuously, until the mixture begins to simmer and thicken, about 8 to 10 minutes, until it coats the back of a wooden spoon. Remove from heat.
  • Immediately ladle into custard bowls or ramekins, sprinkle with the toasted coconut. Serve warm right away. Or serve cold later on by letting cool completely, then covering with plastic wrap and chilling in the refrigerator for a couple of hours.

Notes

Crema de Coco

Pati’s Bitter Orange Juice Substitute

Bitter Orange Substitute
Print Recipe
4.34 from 6 votes

Pati’s Bitter Orange Juice Substitute

Pati’s Bitter Orange Juice Substitute recipe from Pati's Mexican Table Season 5, Episode 1 "Chachi’s Champotón Kitchen"
Prep Time10 minutes
Cook Time1 minute
Total Time11 minutes
Course: Sauce
Cuisine: Mexican
Keyword: bitter orange juice, pati's mexican table, Yucatán Peninsula
Servings: 2 cups
Author: Pati Jinich

Ingredients

  • 1/2 cup freshly squeezed lime juice
  • 1/2 cup freshly squeezed orange juice
  • 1/2 cup freshly squeezed grapefruit juice
  • 1/2 cup white distilled vinegar

Instructions

  • In a bowl, combine all ingredients and mix well. If not using all of the mixture, cover tightly and refrigerate (it will keep for up to two weeks).

Notes

Substituto de Naranja Agria de Pati

Black Bean Puree

Print Recipe
4.80 from 5 votes

Black Bean Puree

Black Bean Puree recipe from Pati's Mexican Table Season 5
Prep Time5 minutes
Cook Time1 hour 40 minutes
Course: Side Dish
Cuisine: Mexican
Keyword: black beans, epazote, pati's mexican table
Servings: 2 servings
Author: Pati Jinich

Ingredients

  • 1 pound dried black beans
  • 1/2 white onion
  • 2 sprigs fresh epazote (may substitute fresh cilantro)
  • Kosher or coarse sea salt to taste
  • 1/4 cup lard (may substitute with vegetable oil)

Instructions

  • Rinse the black beans and place in a large pot, along with the onion and epazote. Cover with 10 cups of water and bring to a boil over medium-high heat. Reduce heat to low and simmer partially covered until the beans are tender, about 1 1/2 hours. Check periodically to make sure beans are covered with enough water, adding more if necessary.
  • Allow the beans to cool slightly, then carefully drain the beans over a large bowl or pot to reserve the cooking liquid.
  • Using a blender or food processor, puree the cooked beans with 1/2 cup of the reserved cooking liquid and the lard. Add more cooking liquid, as needed, to achieve a thick but moist puree. Season to taste with salt.

Mexican Overloaded Double-Baked Potatoes

So, we are about to start another school year. This time around may be one of the most bittersweet for me, yet.

The sweet side: Season 5 of Pati’s Mexican Table premieres nationwide this September (here’s a sneak peek)!

I can’t believe we have gone from a first season, born out of the sheer passion to share everything from my native country with my new home country, to a fifth season that comes right on the heels of two unexpected Emmy nominations and two James Beard nominations.

Super sweet because, I’m guessing that like during past seasons, the boys and I will jump on the couch in front of our TV to watch every new Season 5 episode right after our late Saturday morning breakfast. (The time and day you get the episodes depends on where you are.)

Super duper sweet because the boys have always watched the episodes with me despite knowing them by heart. They know the episodes names, have eaten the recipes (many times, countless times) and when possible they have tagged along with me to Mexico.

Since this season’s theme is the Maya World, they were able to experience some of the magic of the Yucatán Peninsula: From diving into cenotes, to exploring ancient ruins, to eating the most traditional and the most modern foods from the region.

pati-mexican-table-season-five-yucatan

Now, about the bitter: This is the last season Alan will have been a part of while living at home. This is his last year in high school (can you believe it?!?). So I have been worrying about passing on to him as many skills as I can, so he can cook for himself at college.

The truth is I even wondered what it would be like if we moved back to Mexico, where kids tend to stay at home until they finish college, or even until they get married (yeah, that was me, after our wedding my husband and I went back to my mom’s house to pick up the bags I had packed that morning).

Anyway. I may have already gotten his head spinning trying to explain how to buy every single piece of produce in the market each time we are there. So it was only natural that we ended up with an episode called “Alan Goes to College,” where I tried to show him how easy it is to make some of his favorite things, including these insanely good double-baked potatoes.

It is truly ridiculous how good those potatoes are, with crispy bacon, Mexican crema and melty Oaxaca cheese. You can make them a whole meal on any school night, too!

Pati Jinich with her son before his prom

That’s for the sweet and the bitter in my bittersweet start of this school year. But to end on a more sweet than bitter note…

I recently asked Alan, “when you are off to college, do you think you will want to be part of the next season, if I am lucky enough and work hard enough to continue?” I knew I could get a “nah, ma, it will be complicated,” so I pretended not to be beyond delighted to hear his “of course, ma” with that look of his that really says, “you are the silliest mom ever.”

(P.S. I hope you will go ahead and try these crazy good double-baked potatoes, as a taste of what’s to come in Season 5. If you’re a fan of spicing it up, like me, feel free to add in a couple of chipotle chiles.)

Overloaded Double Baked Potato
Print Recipe
4 from 9 votes

Mexican Overloaded Double-Baked Potatoes

This is Alan’s last year in high school. So it is only natural that we ended up with an episode in the new season of Pati’s Mexican Table called “Alan Goes to College,” where I try to show him how easy it is to make some of his favorite things including these Mexican overloaded double-baked potatoes…It is truly ridiculous how good they are, and you can make them a whole meal on any school night.
Prep Time15 minutes
Cook Time1 hour 5 minutes
Course: Side Dish
Cuisine: Mexican
Keyword: bacon, baked potato, chipotles in adobo, mexican crema, Oaxaca cheese, pati's mexican table
Servings: 2 potatoes
Author: Pati Jinich

Ingredients

  • 2 large russet potatoes washed and scrubbed
  • 2 teaspoons olive oil
  • 5 thick slices of bacon coarsely chopped
  • 3/4 cup Mexican crema
  • 3 tablespoons sauce from chipotles in adobo sauce
  • 2 chipotle chiles in adobo sauce minced, optional
  • 1/2 teaspoon kosher or coarse sea salt plus some to season the potatoes
  • 1/2 cup Oaxaca cheese grated

Instructions

  • Preheat oven to 400 degrees.
  • Using a fork, pierce potatoes all around, about 6 to 8 times. Rub potatoes with olive oil, season with salt, and place on a baking sheet. Bake for 1 hour until tender on the inside and crisp on the outside.
  • In a medium skillet set over medium heat, cook the bacon until crisp and lightly browned. Transfer to a paper-towel-lined plate and set aside.
  • In a small bowl, mix the crema with the sauce from chipoltles in adobo and minced chiles, if using (I do!). Set aside.
  • Remove the potatoes from the oven. Using a knife, cut each one open lengthwise and carefully push the ends together, causing the center to open. Scoop out a couple spoonfuls of the cooked potato meat from each and transfer to a bowl. Sprinkle with salt and mix well.
  • Inside the scooped potatoes, layer a spoonful of the chipotle crema mixture, a spoonful of grated cheese and a spoonful of the seasoned potato meat. Repeat with the crema, cheese and potato meat. End with a bit of crema and cheese.
  • Raise the oven temperature to 500 degrees, or turn on the broiler. Place the stuffed potatoes back on the baking sheet. Return to the oven for 5 more minutes until the cheese has completely melted and has started to crisp. Remove from the oven, sprinkle with bacon and serve immediately.

Mexican Dreamboat Hot Dogs

The first time (there’s been two…) my PBS TV series director saw me cry, it was over a Mexican hot dog.

We were filming for Season 3 in Morelia, the capital of the state of Michoacán. We had heard from many locals that the best Mexican-style hot dogs in the city were the ones at Richard’s.

You shouldn’t be surprised about Mexican-style hot dogs in the Mexican culinary repertoire. We love our hot dogs! In every city or town in Mexico, no matter how small or big, a few feet away from the top-selling taco stand, you are likely to find a top-selling hot dog stand. And once you try one, I bet that’s how you will want to prepare them in the future.

So anyway, we headed to Richard’s to meet him, film how he makes his hot dogs and try them. When we travel, I can’t help but share the food I love with my production team. I ask the sound guy, Dave, to take a bite, hoping he understands why I moan so much… I ask the camera guy, James, to take a bite too, so he can see why I keep on insisting that things are this or that good… The same goes for the director, Dan, the producer, Allie, and, well, pretty much everyone on board. If I taste something magnificent, I really want to share it with my team, mostly because I want them to experience it along with me. But this time it was different.

We got to Richard’s, he was super friendly, and he made an insane hot dog. Different from usual, I was not sharing a single bite with anyone and was very quiet. Not my normal self for sure. To the point that the director started asking, “Hey Pati, are you ok…?” And “why aren’t you showing it to camera,” and “…do you want to give James or Dave a bite?” I was zoned out. I was just shaking my head and eating the hot dog, so very slowly.

See, Mexican hot dogs and I go a long way back, as most Mexicans I guess. But in my case, rewind like 30 years ago. I was a girl, and my oldest sister started driving my sisters and me to school. Enjoying our newly found freedom, we started stopping at El Galán hot dog stand on our way back home. Though our intention was to have just one, it ended up being at least two or three. And, con todo, with all the trimmings.

El Galán translates to dreamboat or a hunk, which he was not, but his hot dogs were to die for. He would drizzle some oil on his hot plancha, or griddle, and throw on some chopped white onions, pickled jalapeños, and tomatoes. Then, as they sizzled, he’d squirt on some yellow mustard and ketchup with a secret sweet ingredient (we later found out it was orange soda!) and mix everything up. Onto that delicious mess, he threw a slice of American cheese and, once it melted, he piled everything onto a soft bun and topped it with a steaming turkey hot dog wrapped in crisp bacon. If you wanted your hot dog extra especial, a couple more crispy bacon slices would also show up at the party.

Then we would head home. Once there, we weren’t that hungry anymore. Once my dad figured out our shenanigans, he took out a $100 MN pesos bill, gave it to my oldest sister and announced that since we weren’t eating my mom’s planned home made meals, we were to eat at El Galán every day for that month. We were delighted to hear that, though we really tried not to show it… Now, I know what it feels like to be a parent that takes a disciplining measure that does nothing but fail, and then doesn’t know how to take it back.

In any case, we soon stopped going every day and left that hot dog rendez vous for Fridays, not to make my mom sad. It was a truly special time in our lives. And I am telling you those hot dogs were INSANE.

Then life happened. Then our parents divorced. Then we grew up.

Fast forward 30 years and I am eating Richard’s hot dog in Morelia. After a few minutes later, I snapped out of it, and we started filming again. I showed my hot dog to camera and ate some and shared most.  As we wrapped the day up, I asked Richard for an extra hot dog. I walked to the van, sat in the back, closed the door, and ate it by myself. A few minutes later, the director opened the door to find me weeping. When I saw his concerned look, I just said, “it is nothing really, it was just the hot dog.”

Here is the recipe as good as I remember it, minus the orange soda which I find to be really not necessary. Do try it at home!

p.s. Oh… pictured to the left of the dreamboat hot dog is a hot dog del mercado or market style hot dog, which is also phenomenal, and it is included in my new cookbook Mexican Today.

Mexican Dreamboat Hot Dog with bacon and cheddar by Pati Jinich
Print Recipe
4.75 from 4 votes

Mexican Dreamboat Hot Dogs

You shouldn’t be surprised about Mexican-style hot dogs in the Mexican culinary repertoire. We love our hot dogs! In every city or town in Mexico, no matter how small or big, a few feet away from the top-selling taco stand, you are likely to find a top-selling hot dog stand. And once you try one, I bet that’s how you will want to prepare them in the future.
Prep Time15 minutes
Cook Time15 minutes
Course: Main Course, Snack
Cuisine: American, Mexican
Keyword: bacon, cheddar, cheese, Hot Dog, Pickled Jalapeños, Turkey Hot Dog
Servings: 6 to 8 hot dogs
Author: Pati Jinich

Ingredients

  • 6 to 8 slices bacon
  • 6 to 8 turkey hot dogs
  • 2 tablespoons canola or safflower oil
  • 1 white onion chopped
  • 1 tomato seeded and chopped
  • 1/4 cup chopped pickled jalapeños or to taste
  • 1 cup ketchup
  • 1/4 cup yellow mustard
  • 6 to 8 hot dog buns
  • 6 to 8 thick slices cheddar cheese

Instructions

  • On a cutting board, roll one slice of bacon around each hot dog. Place the tip of the hot dog over one end of the bacon slice, then roll the sausage around and around on the diagonal so that the bacon wraps around it and covers it entirely. If you get to the end of the hot dog and there is still some bacon left, roll back in the other direction until the whole strip of bacon is rolled around the hot dog.
  • Heat a large skillet over medium heat. Add the bacon-wrapped hot dogs and cook, turning every 2 to 3 minutes, until crisped and browned on all sides. Remove from the heat.
  • To make the salsa especial, heat the oil in a medium skillet over medi-um heat. Add the onion and cook, stirring occasionally, until it is tender and the edges are beginning to brown, 5 to 6 minutes. Stir in the tomato and cook for another minute or so, until the tomato has softened a bit. Stir in the jalapeños, ketchup, and mustard and cook just until heated through, about 1 minute. Remove from the heat.
  • Preheat the oven or a toaster oven to 350°F.
  • Open the buns but try not to separate the tops from the bottoms. Top the bottom or both halves (to taste) with cheese (break up the cheese if desired) and place on a baking sheet. Bake for 2 to 3 minutes, until the cheese has melted and the buns are lightly toasted.
  • Place a bacon-wrapped hot dog on the bottom half of each bun and top with a generous amount of salsa especial. Cover with the top halves and serve right away.

Notes

Hot Dogs del Galán

Tequileras

It is getting close to Father’s Day and, yes, I am thinking about mi padre.

My dad is not your typical guy. No, no, no.

In order to prepare my sisters and me to start going out on dates, he wanted to teach us how to hold our liquor. Let no man ever get us drunk!

He taught us how to play Backgammon. And cards.  And Dominoes and Blackjack and Rummikub and Crazy Dice.

He taught me how a single taco, made with a fresh corn tortilla and a sprinkle of the right amount of salt, can be the best meal of your life.

But, maybe most importantly of all, he taught me to get up no matter how many times life whirls you around and throws you down.

PatiwFather

A few years ago, he came to visit and stayed with my boys, while my husband and I went on a trip. After three nights away, I came back to find boys who knew how to play Backgammon, cards, Dominoes, Blackjack, Rummikub and Crazy Dice.

And, also, boys who started swearing in Spanish at bad drivers (which I reversed right back!). He knew better than to teach them how to hold their liquor…He knows that, just like him, I am an Aries who can show my temper. Or maybe he just didn’t have enough time.

I know my dad would love to have these Tequileras on the Backgammon table. Or as he plays cards, Dominoes, Blackjack, Rummikub or Crazy Dice.

These Tequileras, as I baptized them, are a grown up sandwich cookie with deep chocolate flavored biscuits that aren’t too sweet, and the gentle bitterness of the cocoa comes through the slightest bit. Between the two crunchy, chocolatey biscuits is a rich, sweet buttercream made sophisticated by a dash of orange tequila liquor.

These cookies are sweet, complex, and full of life…kind of like the guy I had in mind when I was creating them.

Pati's Dad
One of hundreds of weekends I spent with my dad in Valle de Bravo, getting some serious Backgammon training!

This one is for you, Pa, I know you read all my blog posts by now.

chocolate and tequila sandwich cookies

chocolate tequila sandwich cookies
Print Recipe
5 from 4 votes

Tequileras

I know my dad would love to have these Tequileras on the Backgammon table. They are a grown up sandwich cookie with deep chocolate flavored biscuits that aren’t too sweet, and the gentle bitterness of the cocoa comes through the slightest bit. Between the two crunchy, chocolatey biscuits is a rich, sweet buttercream made sophisticated by a dash of orange tequila liquor.
Prep Time45 minutes
Cook Time15 minutes
Course: Dessert
Cuisine: Mexican
Keyword: Chocolate, cookies, Orange Liqueur, pati's mexican table, vanilla
Servings: 20 to 24 sandwich cookies
Author: Pati Jinich

Ingredients

For the cookies:

  • 9 tablespoons unsalted butter at room temperature
  • 1/3 cup brown sugar plus 1 tablespoon
  • 1/4 cup granulated sugar plus 2 tablespoons for sprinkling
  • 1 teaspoon vanilla
  • 1 large egg at room temperature
  • 1/2 cup cocoa powder
  • 1 cup all-purpose flour
  • Pinch of salt

For filling:

  • 3 ounces bittersweet chocolate cut into chunks
  • 8 tablespoons unsalted butter at room temperature
  • 1 cup confectioners' sugar
  • 1 tablespoon Agavero Orange Liqueur

Instructions

To make the cookies:

  • In the bowl of a mixer, beat the butter with the brown sugar and ¼ cup of the granulated sugar at medium speed until soft. Add the vanilla and the egg, reduce the speed, and incorporate the cocoa powder. Scrape the sides of the bowl if need be, add the salt and the flour, and continue beating until it is all thoroughly combined. The dough should be soft and a bit cakey. Gather into a ball, wrap in plastic and place in the fridge anywhere from 20 to 30 minutes.
  • Preheat oven to 350 degrees. Line 2 baking sheets with parchment paper and set the oven racks in the upper and lower thirds of the oven.
  • Flour the countertop and a rolling pin generously. Roll out the dough into a rectangle of about 1/8” thick. Cut into rectangles of about 2” by 1½”. With the help of a metal spatula, place on the baking sheets. With the tip of a pencil or a toothpick, mark a “T” with 3 to 4 dots going up and then 1 to 2 on each side of the top of the line to mark a T. Sprinkle with the remaining 2 tablespoons of granulated sugar. You can reuse any scraps of dough and roll out again.
  • Bake anywhere from 7 to 8 minutes, until firm. Remove from the oven and let cool.

To make the filling:

  • Place the chocolate in bowl in a double boiler over simmering water until it melts.
  • In the bowl of a mixer set with the paddle attachment, beat the butter until creamy. Incorporate the confecioners’ sugar and beat until completely mixed. Add the melted chocolate and the Agavero and continue beating until completely mixed and very creamy.
  • To assemble: Turn half the cookies upside down so sugar coating is on the bottom, cover with a dollop of filling, and top with half of cookies upside down. Store covered at room temperature.

Notes

Galletas Tequileras

Spinning Top Cocktail

spinning top cocktail
Print Recipe
4.58 from 7 votes

Spinning Top Cocktail

Spinning Top Cocktail recipe from Pati's Mexican Table Season 3, Episode 12 "Girls Just Wanna Have Fun"
Cook Time5 minutes
Total Time5 minutes
Course: Drinks
Cuisine: Mexican
Keyword: chile powder, cocktail, grapefruit, mezcal, mint, pati's mexican table, pineapple, tequila
Servings: 1 cocktail
Author: Pati Jinich

Ingredients

For rimming the glass:

  • 1 lime wedge (about 1/4 of a fresh lime)
  • 3 tablespoons granulated sugar
  • 2 tablespoons ground chile powder such as chile piquín, ancho, chipotle or a Mexican mix, or to taste
  • 2 tablespoons kosher or coarse sea salt

For the drink:

  • 11/2 cups Ice cubes
  • 4 tablespoons (2 ounces) mezcal or tequila
  • 3/4 cup grapefruit soda
  • 1/4 cup pineapple juice
  • 1 to 2 fresh mint leaves

Instructions

  • Run the lime wedge around the rim of a glass. Place the sugar, chile powder and salt on a small plate and dip the rim of the glass in the salt to coat.
  • Add the ice cubes to the glass, then pour in the mezcal, grapefruit soda and pineapple juice, stir gently. Tear the mint leaves into several pieces and drop them into the glass, stirring gently so they release their flavor into the drink.

Notes

Trompo Zacatecano

Tacos HOLA “El Güero”

By Eduardo | @cazadordelomejor

Large clay casseroles filled with some of the tastiest guisados in Mexico City crowd this tiny taco shop on one of Colonia Condesa’s major avenues, Amsterdam. Small and narrow, with only a refrigerator to grab a cold drink and a small table outside, Tacos HOLA is the most popular taco shop in the area.

Since 1968, Tacos HOLA has been making traditional guisados, which are delicious stews that can be made with different types of meat, fresh vegetables, grains or any combination of the three with one or another kind of salsa. Strangely, at the beginning, their specialty, and the only guisado they served, was higaditos encebollados – chicken liver and onion stew. Today, their menu consists of 15 different guisados, ranging from chorizo and potato to chicken tinga, all prepared by the third generation of the family.

Condesa locals that work close by make up most of the clientele. Everyone who goes, knows that they’ll soon be eating a really delicious taco, really fast, for only 18 pesos apiece.

The tacos here are big, heavy, and you’ll most likely be eating them while standing up. Before you order, make your way to the front, where all the guisados are stacked up, and watch as the hungry locals walk in and out with different tacos in their hands. It’ll be hard to make up your mind.

service at Tacos HOLA in Mexico City

While ordering, you’ll have the option to choose any guisado on one tortilla or a double tortilla. I normally pick two, as it helps hold the heaping guisado. Finish by adding the creamiest guacamole, fresh cheese, beans and green or red salsa. The guacamole is unreal and necessary.

My ultimate taco combination is two warm tortillas with chicken and green mole, rice, beans, creamy guacamole, cheese and red salsa. You will find me there twice a week. It’s impossible to drive by and not stop for the best taco de guisado. Oh and by the way, they still have higaditos encebollados on the menu, in case you are up for their classic.

Eduardo's favorite taco at Tacos HOLA

Tacos HOLA, Amsterdam #135, Colonia Hipódromo Condesa, Ciudad de México

To Die For Ceviche

My present career began with ceviche.

After years as an academic, with two degrees and many policy research papers under my belt, with a husband, two kids and one on the way, I resigned from a prestigious think tank to walk a completely uncharted path.

I had been professionally frustrated for over a year and just continued to get involved in more projects in the office thinking I just had to work harder.

What triggered my career change was this: I had been asked to write a research paper comparing the democratic transitions of Mexico and Peru. Yet something was really off with me. Instead of doing my research on the political processes and crisis resolution tactics, I felt myself pulled to research the differences between Mexican and Peruvian ceviche.

Both countries boast to have the best ceviches, and both countries insist that they came up with the dish. I wondered about the true origins of ceviche in both countries. It has been recorded that the people of both countries had been eating raw fish since pre-Hispanic times…

But who got citrus first? How did their people come to use citrus to “cook” the fish, since citrus is native to neither country? What about chiles? Why is the spelling “ceviche” in one country and “cebiche” in the other, and what is the meaning and origin of the word? Why do Mexicans marinate their fish for a while, whereas Peruvians serve the citrus-dressed fish right away?

All I wanted to do was research, write about, and cook Mexican food – the food I missed so much. I knew it was time to pursue my passion in a more serious way.

My dad was perplexed about this change of direction. “After so many years of study, Pati, you are going into a kitchen to rinse pots and pans?”

Now I give him a hard time and respond, “…and to make the best ever ceviches.”

I have made many a ceviche over the course of the more than a decade since I switched careers. And I’ve liked each and every one.

But this one is truly special. And it is my very favorite one.

Red Snapper Ceviche with Mango, Avocado and Tomatillo
Print Recipe
4.84 from 6 votes

To Die For Ceviche

I have made many a ceviche over the course of the more than a decade since I switched careers. And I’ve liked each and every one. But this one is truly special. And it is my very favorite one.
Prep Time10 minutes
Cook Time25 minutes
Course: Main Course
Cuisine: Mexican
Keyword: Avocado, cacao nibs, Ceviche, flounder, grouper, jalapeno, mango, pati's mexican table, red snapper, rock fish, sole, tomatillos, tortilla chips, trout
Servings: 2 to 4 servings
Author: Pati Jinich

Ingredients

  • 1 pound red snapper filet (or another mild flavored fish like grouper, trout, flounder, sole or rock fish), cut in small (about 1/2 inch) dice
  • 3/4 cup freshly squeezed lime juice
  • 3/4 cup freshly squeezed orange juice
  • 1/4 cup olive oil
  • 1 jalapeno chile stemmed and coarsely chopped, or to taste, seeding optional
  • 1/2 cup celery sliced
  • 1/2 cup red onion halved and thinly sliced
  • 1/2 cup cilantro leaves and upper part of stems, chopped
  • 1 cup (about 1 large) ripe mango diced
  • 1 cup (about 1 large) ripe avocado diced
  • 1/3 cup (about 2) tomatillos husked and scrubbed, and diced
  • 2 tablespoons cacao nibs optional
  • 1 teaspoon kosher or coarse salt or to taste
  • Tortilla chips or tostadas

Instructions

  • Combine the lime juice, orange juice, olive oil, jalapeño, celery, 1/4 cup of the sliced red onion, 1/4 cup of the chopped cilantro, and the salt in a blender and puree until completely smooth.
  • Place the fish in a bowl, add the pureed mixture, and toss well. Cover and let marinate for 20 to 25 minutes outside the refrigerator before serving, stirring from time to time. If marinating for more than 25 minutes, cover and refrigerate.
  • When ready to serve, add the rest of the onion and cilantro, the mango, avocado, tomatillo and cacao nibs if using. Toss well, taste for salt and add more as needed. Serve with tortilla chips (totopos) or tostadas.

Notes

Ceviche Que Te Mueres

Houston Chronicle

“Pati Jinich is in need of a reality check. On herself.

How else to explain why she couldn’t believe the accolades recently afforded her PBS cooking show Pati’s Mexican Table? When the prestigious James Beard Awards nominations were announced last month, her show was tapped as a finalist for Outstanding Personality/Host and Best Television Program in Studio or Fixed Location.

Just one nomination is a huge deal in the food world; two in the same year is epic…

A week later, more unbelievable news. This time, she found herself in a burger joint with her son when her phone started blowing up. After five missed calls, she finally answered, and it was her director telling her she show was up for two Daytime Emmy Awards (Outstanding Culinary Program and Outstanding Culinary Host)…”

To read the rest of the article, click here.


Examiner

“[Mexican Today] is what happens when a historian writes a cookbook. But the funny thing is, you’ll recognize all of these dishes – that’s how integral they have become to the Mexican table. And you’ll relate to the recipes, because at the end of the day, Jinich – like the rest of us – has to come home and get dinner on the table – this is the food she cooks at home.

And it’s not just the same old stuff. Matzo Ball Soup goes Mexican. There’s an amazing chopped egg, avocado and shrimp sandwich. A prune salsa. A chipotle/peanut/sesame seed salsa. Plantain tacos. Pizzas and casseroles, stews, sides, and a slew of sweet, fresh, cool desserts.

Mexican Today delivers the kind of authenticity for these foods that you’ll never get from Betty Crocker. And along with the recipes, Jinich includes great sidebars to help you distinguish between peppers and the various types of Mexican breads, tutorials for unusual ingredients, cooking tips, substitutions and the secrets of cheese.

These are wonderful recipes. You’ll want them not only for themselves, but also for the new ideas they’ll inspire in your own kitchen…”

To read the rest of the review, click here.

Forward: A Mexican Passover

“For five seasons, Pati Jinich has cooked her heart out on Pati’s Mexican Table, a PBS series in which this Mexican-Jewish chef, cooking teacher, food writer and mom devotes each episode to the evolution of Mexican food and Mexico’s rich history and culture.

This month, with the release of her newest book, Mexican Today: New and Rediscovered Recipes for Contemporary Kitchens, Jinich, a former policy analyst focused on Latin American politics and history, is all about sharing her heritage — and her twists on beloved Jewish foods.

Talk to Jinich about Passover and she animatedly describes a family favorite: matzo ball soup with jalapeños. Adding a little heat to this traditional starter may give your mother-in-law a shock, but for Jinich it’s all about connecting to her Mexican and European roots: Both sets of her grandparents escaped from Europe, were turned away from the United States and ended up in Mexico, where her parents and she were born.”

To read the rest of the article, click here.

Shrimp, Mango, and Avocado Rolls in Mexican Today!

This recipe and its accompanying photo make me so very happy, and I think that they will make you so very happy, too. Here’s why in case you are in need of a list of reasons to make such a beautiful looking and yummy thing.

  1. These shrimp rolls are gorgeous! And if I may say, this is a gorgeous photo too, isn’t it? It is bright and bold and colorful, and it has so much life and texture. Of course, I did not take the photo. Credit goes to Ellen Silverman, who I was lucky to work with on my upcoming cookbook Mexican Today which is out April 12th, that is: in a matter of hours!
  2. These rolls are so delicious it is almost ridiculous! Wait until you bite into one! Tender shrimp gets quickly seared in the rendered fat from bacon, until browned outside yet still plump and juicy inside. Then, that crisp and meaty bacon is broken into pieces and mixed with diced smooth avocados and tangy mangoes in a super tasty vinaigrette. Grab a soft bun or a hard roll, open it up, add the shrimp, generously spoon on some of that bacon, avocado, mango mix and you are set for one after another bite of bold flavors. Plus, brunch, lunch or dinner is ready in 15 minutes.
  3. These rolls help break misconceptions about what Mexican food is. They showcase the evolution of Mexican cuisine north and south of the border and the beautiful place where we stand today. Mexican cuisine has such strong pillars to stand on that it welcomes playful uses of its ingredients.
  4. I am taking these rolls on book tour! I will be making these rolls, and many other new recipes from my new book, and giving you all a taste in some of the 20+ cities I am headed to for the tour!  I hope you will be able to come meet me at some of these events! There are still some cities and events in the works, so please check back to see what cities have been added.

Mexican Today is a book three years in the making that I am so proud to share with you. It is a book that I am dying for you to see, to read and to cook from. I was so excited about it as I was working on it that I over delivered the number of recipes to my editor! I cannot wait to hear what you think of the tacos, enchiladas, tortas, soups, stews, salads, casseroles, sides, desserts and drinks. There are many traditional recipes and many new takes that are part of this new collection, which is fun and super accessible too.

Every single one of the recipes is a favorite at home, and I can’t wait for them to be part of yours. Please do tag #MexicanToday on social media, so I can connect with you and see what you are whipping up in your kitchen either from my book or from your own Mexican cooking inspiration.

Warmest, always,

Pati

shrimp mango and avocado rolls
Print Recipe
4.34 from 3 votes

Shrimp, Mango, and Avocado Rolls

Tender shrimp gets quickly seared in the rendered fat from bacon, until browned outside yet still plump and juicy inside. Then, that crisp and meaty bacon is broken into pieces and mixed with diced smooth avocados and tangy mangoes in a super tasty vinaigrette. Grab a soft bun or a hard roll, open it up, add the shrimp, generously spoon on some of that bacon, avocado, mango mix and you are set for one after another bite of bold flavors.
Prep Time20 minutes
Cook Time15 minutes
Course: Main Course, Snack
Cuisine: Mexican
Keyword: Avocado, bacon, mango, Roll, Sandwich, Shrimp, Torta
Servings: 6 rolls
Author: Pati Jinich

Ingredients

  • 12 bacon slices
  • 1/4 cup finely chopped shallot
  • 2 garlic cloves finely chopped
  • 1 tablespoon, plus 1 teaspoon, sherry vinegar
  • 1/2 teaspoon honey
  • 1/2 teaspoon dijon mustard
  • Kosher or sea salt to taste
  • Freshly ground black pepper to taste
  • 2 large ripe Mexican avocados halved, pitted, flesh scooped out and diced
  • 2 ripe Champagne or Kent mangoes peeled, sliced off the pits, and diced
  • 1 tablespoon olive oil
  • 1 tablespoon unsalted butter
  • 1 1/2 pounds fresh or thawed frozen medium shrimp shells and tails removed
  • 6 hot dog buns or soft rolls

Instructions

  • Heat a large skillet over medium heat. Add the bacon and cook for 3 to 4 minutes per side, until browned and crisp. Transfer the bacon to a paper towel–lined plate, leaving the fat in the skillet, and set aside.
  • Return the pan with the fat to medium heat, add the shallot and garlic and cook for about 2 minutes, until fragrant, tender, and just beginning to brown. Scrape the garlic and shallot into a medium heatproof bowl, along with the fat. Don’t wash the pan; just set it aside.
  • To prepare the vinaigrette: Add the vinegar, honey, mustard, ½ tea-spoon salt, and pepper to taste to the bowl with the garlic and shallot. Whisk or mix with a fork until well emulsified. Add the avocados and mangoes, gently toss together, and set aside.
  • Heat the oil and butter over high heat in the skillet you used for the bacon until the oil is hot but not smoking and the butter has begun to foam. Add the shrimp, without crowding the pan (cook them in two batches if necessary). Season with ½ teaspoon salt and pepper to taste, and cook, flipping them over once, until seared and browned, no more than 2 minutes. Transfer to a bowl.
  • Open the buns or rolls, trying not to separate the tops from the bot-toms, and arrange a layer of cooked shrimp on the bottom of each one. Top the shrimp with the avocado and mango mix and crown each with a couple of slices of bacon. Close the sandwiches and serve.

Notes

Rollos de Camarones al Ajillo, Mango, y Aguacate

Traditional Refried Beans

Print Recipe
3.84 from 6 votes

Traditional Refried Beans

Cook Time15 minutes
Course: Side Dish
Cuisine: Mexican
Keyword: beans, onion, pati's mexican table, pinto beans, refried beans
Servings: 4 cups
Author: Pati Jinich

Ingredients

  • 5 cups Beans from the Pot along with 2 cups of their cooking liquid (or 5 cups precooked beans with 2 cups their liquid and water to make 2 cups)
  • 1/2 cup white onion chopped
  • 3 tablespoons safflower oil
  • Kosher or sea salt to taste

Instructions

  • In a large saute pan over medium heat, pour the oil and heat until hot but not smoking, about 1 to 2 minutes. Add the onions and let them saute for about 3 to 4 minutes, until they have softened, become translucent and have started to slightly brown along the edges.
  • Add a cupful of beans at a time, over the sauteed onion, and mash with a masher, like a potato masher, until you have added all of the beans.
  • Let them season and thicken for about 8 to 10 minutes, and continue mashing and stirring, until they have achieved a thick puree consistency and are somewhat pasty looking.

Chiles Rellenos

chile rellenos pati jinich
Print Recipe
3.84 from 6 votes

Chiles Rellenos

Chiles Rellenos recipe from Pati's Mexican Table Season 4, Episode 11 "Family Favorites"
Prep Time45 minutes
Cook Time15 minutes
Total Time1 hour
Course: Main Course
Cuisine: Mexican
Keyword: ancho chiles, cheese, chiles rellenos, chilis, chillis, fried, poblanos, stuffed
Servings: 6 to 8 chiles rellenos
Author: Pati Jinich

Ingredients

  • 6 to 8 poblano chiles (about 2 pounds)
  • 1 batch red sauce or salsa roja
  • 3 to 4 cups grated melty cheese such as Oaxaca, Monterey Jack, mozzarella or Muenster
  • 4 eggs separated
  • 1/2 cup all-purpose flour
  • Vegetable oil for frying

Instructions

To prepare the poblano chiles:

  • Place chiles on a tray under the broiler, directly on the grill, or directly over the open flame. I prefer to broil them. Whatever method you choose, turn them every 2 to 3 minutes for a total of 6 to 9 minutes. They must seem charred and blistered on the outside, while the flesh must be cooked but not burnt. Place them immediately in a plastic bag, close it tightly and let them sweat for 10 to 20 minutes. Lastly, under a thin stream of cold water, remove the charred skin, which should come right off. Make a slit down one side of the pepper and remove the cluster of seeds and veins. Once cleaned, pat them dry.
  • Stuff each of the poblano chiles with about 1/2 cup grated cheese, or as much as will fit, allowing them to close. You may seal with a toothpick. Place 1/2 cup flour on a plate, roll the stuffed chiles in the flour and let them sit. The flour coating will help the batter coat and stay on the chiles.

To prepare the batter:

  • In a stand mixer, beat the egg whites until they hold stiff peaks. Gently, on low speed, fold in the egg yolks and only beat enough so that they are incorporated, a few seconds.

To cook the chiles:

  • In a large casserole, heat about 1/2-inch of oil over medium to medium-high heat. Once hot, test the oil, by dipping a teaspoon of batter into the oil; if there are active bubbles all around it, it’s ready. Dip each of the stuffed and floured chiles into the egg batter, making sure that they are entirely covered in batter.
  • In batches, place them in the hot oil without overcrowding, trying to have the side that was open or sealed with the toothpick facing up. Spoon some of the hot oil on top, so that it will seal the chile. Fry for about 2 minutes per side, flipping genly with a slotted spoon, until golden brown. Transfer to a paper-towel covered drying rack or platter.

To serve:

  • Heat the salsa roja. Serve the chiles with a generous amount of salsa roja spooned on top. Alternatively, you can place the chiles in a casserole and top with the heated salsa roja. Eat while hot and melty!

Boston Lettuce Salad

Print Recipe
4.34 from 6 votes

Boston Lettuce Salad with Avocado Dressing

Boston Lettuce Salad with Avocado Dressing recipe from Pati's Mexican Table Season 4, Episode 10 “Modern Mexico"
Prep Time10 minutes
Cook Time5 minutes
Total Time15 minutes
Course: Salad
Cuisine: Mexican
Keyword: Avocado, boston lettuce, garlic, lime, mexican crema, pati's mexican table, pineapple, pumpkin seeds
Servings: 6 servings
Author: Pati Jinich

Ingredients

  • 2 ripe Mexican avocados halved, pitted and meat scooped out
  • 1/2 cup milk
  • 1/2 cup Mexican crema Latin-style cream, crème fraîche, or sour cream
  • 1 garlic clove
  • 3 tablespoons freshly squeezed lime juice
  • 1/2 teaspoon kosher or coarse sea salt or more to taste
  • 2 heads boston lettuce leaves separated, washed, dried, and torn into pieces
  • 1/2 cup chopped candied pineapple or other candied fruits like papaya or mango
  • 1/2 cup spicy pumpkin seeds

Instructions

  • Combine the avocado, milk, cream, garlic, lime juice and salt in a blender or food processor and puree until smooth.
  • Place the lettuce in a generous-sized serving bowl, and toss with the dressing until the leaves are lightly coated. Sprinkle with the pineapple and pumpkin seeds and serve.

Notes

Ensalada con Aderezo de Aguacate

Carne Asada and Cebollitas Pizza

carne asada pizza
Print Recipe
4 from 5 votes

Carne Asada and Cebollitas Pizza

Carne Asada and Cebollitas Pizza recipe from Pati's Mexican Table Season 4, Episode 6 “Mexamericana”
Prep Time2 hours 30 minutes
Cook Time25 minutes
Total Time2 hours 55 minutes
Course: Main Course
Cuisine: American, Mexican
Keyword: Avocado, beef, carne asada, chiles de arbol, Maggi sauce, pati's mexican table, pizza, steak
Servings: 1 10- to 12-inch pizza
Author: Pati Jinich

Ingredients

  • 1 chile de arbol stemmed
  • 2 garlic cloves roughly chopped
  • 2 tablespoons Worcestershire sauce
  • 1/2 cup Maggi sauce or soy sauce
  • 1/2 cup freshly squeezed lime juice
  • 8 ounces flank steak or skirt steak
  • 3 spring onions or 1 bunch scallions (5 to 6), trimmed to bite size pieces, including white and light green part of stems, plus more for garnish
  • 8 ounces pizza dough
  • All-purpose flour for dusting work surface
  • 1/2 cup tomato pizza sauce
  • 1 1/2 cups shredded mozzarella cheese divided
  • 1/2 ripe Mexican avocado pitted, meat scooped out and sliced, for garnish
  • cilantro leaves for garnish
  • 1 lime cut into wedges, for garnish

Instructions

  • To make the marinade, toast the chile on a small skillet over medium heat for less than a minute per side, until toasted but not burnt. In a blender or food processor, puree the chile with the garlic, Worcestershire sauce, Maggi sauce and lime juice. Divide marinade, reserving 1/4 cup for the onions and the rest for the steak.
  • Place the steak in a zip-lock bag or shallow dish and pour all but 1/4 cup marinade over it to coat. Cover (if in a dish) and refrigerate for at least 2 hours and up to overnight, turning the meat once.
  • Remove the steak from the marinade. Place in an oven-proof dish and broil for 3 minutes per side. Alternatively, you can grill it for the same amount of time over medium-high heat. You want to cook the meat to somewhere between rare and medium rare. Set aside to rest for 5 to 10 minutes, then slice and cut into 1 to 2-inch pieces, across the grain.
  • Place the spring onions or scallions in a medium bowl with remaining 1/4 cup marinade.
  • Preheat the oven to 425 degrees. On a lightly floured surface, stretch dough into a 10 to 12-inch circle and place on a pizza stone or in a cast-iron pan. Bake for 10 minutes. Remove from the oven and spead on 1/2 cup of the pizza sauce leaving a 1/2-inch border all the way around. Top with 3/4 cup mozzarella cheese, place the meat and onions (without their marinade) all over. Reserve the onion marinade for people to add as extra sauce once the pizza is done. Add the remaining mozzarella cheese. Transfer back to the oven and bake until cheese is melted and crust is crisp, about 12 to 14 more minutes.
  • Transfer to a cutting board and serve the pizza topped with sliced avocado, cilantro leaves, sliced scallions and lime wedges. Drizzle on some reserved onion marinade, too.

Notes

Pizza de Carne Asada con Cebollitas

Foolproof Pizza Dough

Print Recipe
4.84 from 6 votes

Foolproof Pizza Dough

Foolproof Pizza Dough recipe from Pati's Mexican Table Season 4, Episode 6 “Mexamericana”
Prep Time5 minutes
Cook Time30 minutes
Course: Main Course
Cuisine: American, Mexican
Keyword: dough, pati's mexican table, pizza
Servings: 2 10- to 12-inch pizzas
Author: Pati Jinich

Ingredients

  • 1 teaspoon active dry yeast
  • 1 tablespoon extra virgin olive oil
  • 1 cup lukewarm water (110-115 degrees)
  • 1/2 teaspoon sugar
  • 2 2/3 cups all-purpose flour plus more for work surface
  • 2 teaspoons kosher or coarse sea salt

Instructions

  • In a medium bowl, combine the yeast with the olive oil and the lukewarm water. Once it is well mixed, add the sugar and stir well.
  • In a large mixing bowl, combine the flour with the salt. Make a well in the middle and add the yeast mix. Use your hands to incorporate it all together until it is fully combined, about 2 minutes. Let the dough rest for 15 to 20 minutes.
  • Flour your counter and your hands generously, remove the dough from the bowl and knead until the dough goes from being sticky and gooey to very elastic, smooth and malleable. It will take anywhere from 3 to 5 minutes. Add more flour to your counter and hands as need be.
  • Divide the dough in half, form into two balls and wrap them each in plastic wrap. Place the dough in the refrigerator for at least 2 hours before using, or up to 3 days.
  • Bring the dough back to room temperature, without removing the plastic wrap, before using.

Notes

Masa para Pizza Fácil

Poblano, Corn and Zucchini Pizza

poblano corn zucchini pizza
Print Recipe
4.75 from 4 votes

Poblano, Corn and Zucchini Pizza

Poblano, Corn and Zucchini Pizza recipe from Pati's Mexican Table Season 4, Episode 6 “Mexamericana”
Prep Time15 minutes
Cook Time25 minutes
Total Time40 minutes
Course: Main Course
Cuisine: American, Mexican
Keyword: Corn, pati's mexican table, pizza, poblanos, requesón, ricotta, Zucchini
Servings: 1 10- to 12-inch pizza
Author: Pati Jinich

Ingredients

  • 1 poblano chile roasted, sweated, peeled and cut into 1 inch strips
  • 1 small zucchini shaved into zucchini ribbons with a peeler or mandoline (about 1 1/4 cups)
  • 1/3 cup corn kernels fresh or thawed from frozen
  • 1/4 cup slivered red onion
  • 2 tablespoons extra virgin olive oil
  • 2 teaspoons freshly squeezed lime juice
  • 1/4 teaspoon chipotle or ancho chile powder
  • 1/4 teaspoon kosher or coarse sea salt or to taste
  • All-purpose flour for dusting work surface
  • 1/2 pound pizza dough
  • 1/2 cup tomato pizza sauce
  • 1 1/2 cups shredded mozzarella cheese divided
  • 1/4 cup fresh ricotta cheese or requesón
  • 2 tablespoons roughly chopped Italian flat-leaf parsley for garnish

Instructions

  • Preheat oven to 425 degrees.
  • In a medium bowl, toss to combine the poblano chile strips, zucchini ribbons, corn, red onion, olive oil, lime juice, chile powder and salt.
  • On a lightly floured surface, stretch the dough into a 10 to 12-inch circle and place on a pizza stone or in a cast-iron pan. Bake for 10 minutes. Remove from the oven and spread on 1/2 cup pizza sauce, leaving a 1/2-inch border all the way around. Top with 3/4 cup mozzarella cheese, then using a slotted spoon to leave the juices in the bowl, spoon on the poblano, zucchini and corn mixture. Add the remaining mozzarella cheese, and then place about 8 mounds, about a heaping teaspoon each, of ricotta cheese on top. Transfer back to the oven and bake until the cheese is melted and the crust is crisp, about 12 to 14 more minutes.
  • Transfer to a cutting board, sprinkle with chopped parsley if desired, and serve.

Notes

Pizza de Chile Poblano, Elote y Calabacitas

Chicken in Green Salsa Tamales

chicken in green salsa tamal
Print Recipe
4.72 from 7 votes

Chicken in Green Salsa Tamales

Chicken in Green Salsa Tamales recipe from Pati's Mexican Table Season 4, Episode 5 “Tamaliza!”
Prep Time45 minutes
Cook Time35 minutes
Total Time1 hour 20 minutes
Course: Main Course
Cuisine: Mexican
Keyword: chicken, masa, pati's mexican table, salsa verde, Tamales
Servings: 18 tamales
Author: Pati Jinich

Ingredients

For the tamal dough or masa:

  • 3/4 cup lard, vegetable shortening, or seasoned oil (see note at end of recipe)
  • 1/2 teaspoon kosher or coarse sea salt or to taste
  • 1 teaspoon cold water
  • 1 teaspoon baking powder
  • 1 pound (about 3 1/4 cups) instant corn masa flour (masa harina) for tortillas or tamales
  • 3 1/2 cups homemade chicken broth add more if needed

For the filling:

  • 1 batch salsa verde
  • 2 cups shredded cooked chicken from homemade chicken broth

To assemble the tamales:

  • 25 dried corn husks soaking in hot water

Instructions

To make the tamal dough or masa:

  • Place lard, vegetable shortening or seasoned oil in an electric mixer and beat until very light, about 1 minute. Add salt and 1 teaspoon of cold water and continue beating until it is white and spongy, a couple more minutes. Add the baking powder and then alternate adding the instant corn masa and the chicken broth a little at a time. Continue beating until dough is homogeneous and as fluffy as can get. You know the tamal masa is ready when you can drop 1/2 teaspoon of the masa in a cup of cold water and it floats.

To make the filling:

  • Combine the salsa verde with the cooked shredded chicken.

To assemble the tamales:

  • Soak the dried corn husks in hot water for a couple minutes, or until they are pliable, and drain. Lay out a corn husk with the tapering end towards you. Spread about 3 tablespoons of masa into about a 2 to 3-inch square, the layer should be about 1/4-inch thick, leaving a border of at least 1/2-inch on the sides. Place 1 tablespoon of filling in the middle of the masa square.
  • Pick up the two long sides of the corn husk and bring them together (you will see how the masa starts to swaddle the filling) and fold the folded sides to one side, rolling them in same direction around tamal. Fold up the empty section of the husk, with the tapering end, from the bottom up. This will form a closed bottom and the top will be left open.
  • Assemble all the tamales and place them as vertically as you can in a container.

To prepare the tamalera or steamer:

  • Place water in the bottom pan of a steamer (so that water is under the steamer) and bring it to a simmer. Line the steamer with one or two layers of soaked corn husks.

To cook the tamales:

  • When you have all tamales ready, place them, again as vertically as you can, into the prepared steamer with the open end on top. If there is space left in the steamer, tuck in some corn husks, so the tamales won’t dance around. Cover with more corn husks, and steam covered with a lid for 50 minutes to an hour. You know the tamales are ready when they come easily free from the husks. They will still be moist, and as they are released from the husks, you will see the moisture, like when you remove good moist muffins from their paper baking cups.
  • Finished tamales will stay warm for about 2 hours in the steamer. They can be made ahead several days before and stored in refrigerator, well wrapped. They can also be frozen for months. In either case, reheat in a steamer. For refrigerated tamales, it will take about 20 minutes and about 45 minutes for frozen tamales.
  • Note: To make seasoned oil, in a medium saucepan, heat 1 cup vegetable oil over medium heat, add a thick slice of onion and 4 garlic cloves. Cook for 15 minutes until completely browned. Remove onion and garlic before using the oil.

Notes

Tamales de Pollo en Salsa Verde

Tacos al Pastor

Pati Jinich Tacos al Pastor
Print Recipe
4 from 7 votes

Tacos al Pastor

Tacos al Pastor recipe from Pati's Mexican Table Season 4, Episode 3 “Taco Night”
Cook Time15 minutes
Total Time15 minutes
Course: Main Course
Cuisine: Mexican
Keyword: achiote paste, cheese, cilantro, corn tortillas, lime, pati's mexican table, pineapple, pork, tacos
Servings: 12 to 14 tacos
Author: Pati Jinich

Ingredients

  • 3 pounds pork shoulder or butt sirloin cutlets or butterfly chops, cut into 1/2-inch slices
  • 3 cups achiote adobo marinade
  • Half of a pineapple peeled, cut into 1/2-inch slices
  • 2 tablespoons vegetable oil divided
  • To taste kosher or coarse sea salt
  • 12 to 14 corn tortillas (or flour tortillas to make them “gringas” style)
  • Shredded queso asadero, Mexican Oaxaca or Chihuahua or mozzarella, Monterey Jack, or any melty cheese of your choice (optional, for making them “gringas” style)
  • 1 cup cilantro roughly chopped, to garnish
  • 1 cup white onion roughly chopped, to garnish
  • 2 limes cut into quarters, to garnish
  • Serve with a salsa of your choice

Instructions

  • Marinate the meat in the adobo marinade for at least 3 hours, or up to 48 hours, in the refrigerator. Reserve 3/4 cup of marinade to brush on the pineapple before grilling/cooking and to finish off meat.
  • When ready to make tacos, remove the meat from the refrigerator. Brush some of the reserved marinade on the pineapple slices. Reserve the remaining marinade.
  • Heat a large heavy skillet over medium-high heat. Once hot, add a tablespoon of oil. Place as many pineapple slices as will fit on the skillet and sear for about 3 minutes per side, until juicy and lightly charred on both sides. Remove from heat. When cool enough to handle, cut the pineapple into thin slices about 1 to 2-inches long and 1/4-inch wide, removing the core. Place in a bowl and cover.
  • Drizzle another tablespoon of oil onto the skillet. Lightly sprinkle the meat with salt to taste. Sear as many slices of meat as will fit in the pan, without over crowding, for about 2 minutes per side until browned on both sides. Cook in batches if necessary. Place the meat on a chopping board. Cut it crosswise into thin slices about 1/4-inch thick and 1-inch wide.
  • Once done with all the meat, reduce the heat to medium, place the meat back in the skillet and pour the rest of the unused marinade on top. Stir and cook for another minute. Cover and set on the table.
  • On a pre-heated cast iron skillet or comal set over medium heat, heat the corn tortillas 1 to 2 minutes per side until thoroughly cooked, lightly browned and crisp on the outside. Place them in a tortilla warmer and bring to the table along with the meat, pineapple, chopped cilantro, chopped onion, lime wedges, and salsa of your choice. Let everyone assemble their own tacos.
  • Note: If you want to offer some “gringas,” heat flour tortillas on the comal and, once hot, add the melty cheese, fold, and let it melt as if it were a quesadilla. Once melted, re-open the tortilla, add a generous tablespoon or two of the sliced meat, fold again and serve.

Vanilla Bean Simple Syrup

Print Recipe
5 from 1 vote

Vanilla Bean Simple Syrup

You can make a vanilla bean go a long way. You can extend its exuberant properties and multiply its uses by flavoring other basic ingredients with it, such as a simple syrup.
Prep Time2 minutes
Cook Time3 minutes
Course: Dessert, Preserve, Sauce
Cuisine: Mexican
Keyword: Jarabe Simple, mexican vanilla, simple syrup, Vainilla, vanilla, vanilla bean
Servings: 1 1/4 cup
Author: Pati Jinich

Ingredients

  • 1 cup granulated sugar
  • 1 cup water
  • 1 vanilla bean

Instructions

  • In small saucepan, combine the sugar with the water.
  • Using a small sharp knife split the vanilla bean from top to bottom, without going through the other side, and then cut it in half. Open the slit in each vanilla half and scrape the seeds into the water/sugar mix. Drop in the scraped vanilla pieces as well.
  • Set the saucepan over medium heat. Stirring occasionally, heat for 2 to 3 minutes or until sugar is completely dissolved. Remove it from the heat once it does. Let it cool and pour it along with the vanilla bean pieces into a small glass jar. Close the lid. Refrigerate up to 6 months.

Notes

Jarabe Simple de Vainilla

Vanilla Bean Vinegar

Print Recipe
4.80 from 5 votes

Vanilla Bean Vinegar

You can make a vanilla bean go a long way. You can extend its exuberant properties and multiply its uses by flavoring other basic ingredients with it, such as vinegar.
Prep Time2 minutes
Cook Time0 minutes
Resting Time7 days
Total Time7 days 2 minutes
Course: Preserve, Sauce
Cuisine: Mexican
Keyword: mexican vanilla, Vainilla, vanilla, vanilla bean, Vinagre, vinegar, white wine vinegar
Servings: 1 cup
Author: Pati Jinich

Ingredients

  • 1 cup white wine vinegar
  • 1 vanilla bean

Instructions

  • Pour the vinegar into a small glass jar.
  • Using a small sharp knife cut the vanilla bean and then split the halves lengthwise. Open each half and scrape the seeds from top to bottom into the vinegar, as thoroughly as you can. Add the vanilla pieces to the vinegar as well.
  • Put the lid on the bottle and close tight. Shake it for a good 30 seconds. Leave it at room temperature. For the first couple days, shake it a couple times a day. Let it sit for at least a week before using.

Notes

Vinagre de Vainilla

Vanilla Bean Sugar

Print Recipe
5 from 1 vote

Vanilla Bean Sugar

You can make a vanilla bean go a long way. You can extend its exuberant properties and multiply its uses by flavoring other basic ingredients with it, such as sugar.
Prep Time2 minutes
Cook Time0 minutes
Resting Time2 days
Total Time2 days 2 minutes
Course: Dessert, Preserve
Cuisine: Mexican
Keyword: brown sugar, mexican vanilla, sugar, Vainilla, vanilla, vanilla bean
Servings: 1 cup
Author: Pati Jinich

Ingredients

  • 1 cup granulated sugar
  • 1 whole vanilla bean

Instructions

  • Pour the sugar in a medium mixing bowl. Using a small sharp knife cut the vanilla bean and then split the halves lengthwise. Open each half and scrape the seeds from top to bottom into the sugar. Mix well to make sure the seeds don’t stay clumped but are well distributed. Pour the mixed sugar into a small glass jar and insert the vanilla pieces. Let it sit for at least 48 hours before using, the more it sits the stronger the vanilla presence it will have. Store at room temperature.

Notes

Azúcar de Vainilla

Vanilla Bean Salt

Print Recipe
5 from 1 vote

Vanilla Bean Salt

You can make a vanilla bean go a long way. You can extend its exuberant properties and multiply its uses by flavoring other basic ingredients with it, such as salt.
Prep Time2 minutes
Cook Time0 minutes
Resting Time2 days
Total Time2 days 2 minutes
Course: Preserve
Cuisine: Mexican
Keyword: kosher salt, mexican vanilla, sal, salt, sea salt, vanilla, vanilla bean
Servings: 1 cup
Author: Pati Jinich

Ingredients

  • 1 cup kosher or coarse sea salt
  • 1 whole vanilla bean

Instructions

  • Pour the salt in a medium mixing bowl. Using a small sharp knife cut the vanilla bean and then split the halves lengthwise. Open each half and scrape the seeds from top to bottom into the salt. Mix them up with the salt, making sure the seeds don’t stay clumped up but are well distributed. Pour the salt into a small glass jar and insert the vanilla pieces. Let it sit for at least 48 hours before using, the more it sits the stronger the vanilla presence it will have. Store at room temperature.

Notes

Sal de Vainilla

Meaty Tamal Casserole

Meaty Tamal Casserole
Print Recipe
4.41 from 5 votes

Meaty Tamal Casserole

My go-to version of a tamal casserole: The masa dough is set in two thick layers that hold a rich and baroque filling, typical of the Mexican colonial era, when nuns used to combine Spanish and Mexican ingredients in their convent kitchens. The filling has a sauce made with my preferred pairing of dried chili peppers: sweet, almost chocolaty and prune-flavored ancho and mild, bright-tasting guajillo. It’s seasoned with onion, garlic, oregano, cloves, cinnamon and a pinch of cumin, then made hearty with juicy ground meat that is sprinkled with crunchy almonds, chewy raisins and salty manzanilla olives.
Prep Time30 minutes
Cook Time1 hour 45 minutes
Total Time2 hours 15 minutes
Course: Main Course
Cuisine: Mexican
Keyword: ancho chiles, Casserole, Cazuela, guajillo chiles, masa, meat, tamal, Tamales, veal
Servings: 10 servings
Author: Pati Jinich

Ingredients

For the dough:

  • 1 1/4 cups vegetable shortening or lard
  • 1 teaspoon kosher or coarse sea salt
  • 2 teaspoons baking powder
  • 1 1/2 pounds (about 5 cups) corn masa flour for tortillas or tamales such as Maseca brand
  • 4 1/2 cups homemade or no-salt-added chicken broth may substitute water

For the filling:

  • 8 dried guajillo chiles stemmed, halved and seeded
  • 8 dried ancho chiles stemmed, halved and seeded
  • 2 cups hot water or as needed
  • 1 teaspoon dried oregano
  • 5 whole cloves
  • 1 teaspoon ground cinnamon
  • Pinch ground cumin
  • 3 tablespoons vegetable oil plus more for the baking dish
  • 1 medium white onion chopped (about 1 cup)
  • 6 cloves garlic chopped
  • 2 1/2 pounds ground meat such as veal, turkey, beef, pork or a combination
  • 1 teaspoon kosher or sea salt or to taste
  • 1/4 teaspoon freshly ground black pepper
  • 2 cups homemade or no-salt-added chicken broth may substitute water
  • 1 cup raisins
  • 3/4 cup slivered almonds
  • 3/4 cup pimento-stuffed manzanilla olives chopped

Instructions

For the dough:

  • Place the vegetable shortening or lard in the bowl of a stand mixer; beat on medium speed for about 3 minutes, until it is light and airy. Stop to scrape down the sides of the bowl.
  • Add the salt and baking powder; on low speed, gradually add the corn masa flour and the broth in alternating additions, making sure each time that the addition is well incorporated. Beat for about 10 minutes to form a masa dough that is homogeneous and fluffy. Let the dough sit at room temperature while you make the filling.

For the filling:

  • Heat a comal (tortilla griddle) or skillet over medium heat. Add the guajillo and ancho peppers; toast them for about 15 seconds per side, until they become more pliable, lightly toasted and fragrant and their inner skin turns opaque. Transfer to a medium saucepan and cover with at least 2 cups of hot water. Cook over medium-low heat for about 15 minutes, or until the peppers have rehydrated, plumped up and softened.
  • Transfer the peppers and 2 cups of the liquid to a blender and add the oregano, cloves, cinnamon and cumin. Remove the center knob from the blender lid and cover the opening with a dish towel to contain splash-ups. Puree to form a smooth sauce. The yield is 2 1/2 to 2 3/4 cups.
  • Heat the oil in a large, deep skillet over medium-high heat. Add the onions and cook for 4 to 5 minutes, stirring continuously, until the onions are cooked through and beginning to brown at the edges. Add the garlic and cook until fragrant, less than a minute, then add the ground meat, salt and black pepper. Cook for 12 to 15 minutes, stirring occasionally and using a spoon to break up the meat, until it has lightly browned. Add the sauce, the broth, raisins, almonds and olives, stirring to combine; reduce the heat to medium-low, cover the skillet and cook for 20 minutes. Uncover, stir and cook uncovered for 5 minutes.
  • Preheat the oven to 400°F. Use a little vegetable oil to grease a 9-by-13-inch baking dish or the equivalent.
  • Spoon half of the prepared masa dough into the dish, forming a bit of a lip on the sides and gently leveling it out; don't press hard. Spoon all of the meat filling on top. Cover evenly with the remaining dough. Cover the dish tightly with aluminum foil and bake for 1 hour or until the masa is completely cooked and the top appears to be firm. Remove from the oven and let it sit, covered, for 10 to 15 minutes before serving.

Notes

Cazuela de Tamal

Mushroom and Rice Casserole

Meaty Tamal Casserole
Print Recipe
3.84 from 6 votes

Mushroom and Rice Casserole

Although I don’t have the wild varieties of mushrooms that crop up in Mexico’s rainy season, I have experimented with an accessible mix of mushroom textures and flavors, fresh herbs, epazote, cilantro, parsley, that salty crema and tangy cheese. This stew goes on top of the rice with a topping of grated dry and aged cheese. As the casserole bakes, the rice absorbs the flavored cream, the mushrooms meld with the sauce and the cheese morphs into a perfectly browned crust.
Prep Time10 minutes
Cook Time45 minutes
Total Time55 minutes
Course: Main Course
Cuisine: Mexican
Keyword: arroz, Casserole, Cazuela, cheese, cheesy, Hongos, Mushroom, queso, rice
Servings: 8 servings
Author: Pati Jinich

Ingredients

  • 4 tablespoons (1/2 stick) unsalted butter plus more for the baking dish
  • 3 tablespoons vegetable oil
  • 2 medium white onions chopped (2 cups)
  • 2 cloves garlic minced or put through a garlic press
  • 1 jalapeño or serrano pepper finely chopped (seeding optional if you want less heat; may add more to taste)
  • 2 pounds mixed mushrooms (such as white button, baby bella, portobello and shitake), cleaned, dry part of stem removed, sliced
  • 1 teaspoon kosher or coarse sea salt or more to taste
  • 1/4 teaspoon freshly ground black pepper
  • 2 tablespoons chopped cilantro leaves and thin part of stems
  • 2 tablespoons chopped parsley leaves and thin part of stems
  • 1 cup Mexican cream or Latin-style cream, or heavy cream
  • 8 ounces (about 2 cups) farmers cheese or queso fresco crumbled
  • 6 cups cooked white rice
  • 1 cup freshly grated queso anejo Parmigiano-Reggiano, or Romano

Instructions

  • Heat the butter and oil in a large, deep 12-inch skillet over medium heat. Add the onions and stir to coat; cook for about 12 minutes, stirring occasionally, until they are translucent and the edges begin to brown. Add the garlic and jalapeño or serrano pepper; cook for 2-3 minutes, until softened. Add all of the sliced mushrooms; sprinkle with salt and pepper, and gently combine with the onions. Cover and cook for 5 to 6 minutes, until the mushrooms have exuded their juices and the flavors have melded. Uncover and cook for 7 to 8 minutes or until the juices have evaporated.
  • Add the cilantro and parsley, stirring to combine. Add the cream and the crumbled queso fresco or farmer cheese; stir until the mixture is thoroughly combined and the cheese has melted. Continue cooking for 3 to 4 minutes, adjusting the heat to keep the mixture barely bubbling at the edges. It should still be very saucy. Turn off the heat.
  • Preheat the oven to 375°F. Use a little butter to grease a 9-by-13-inch baking dish or the equivalent.
  • Spoon the cooked rice into the baking dish and level it out without pressing down hard. Pour the mushroom-cilantro mixture on top and gently spread to level it. Sprinkle with the grated cheese. Bake for 15 to 20 minutes or until the cheese has melted and gently browned.
  • Serve hot.

Notes

Cazuela de Arroz con Hongos

Immaculate Conception Empanadas

Print Recipe
4 from 2 votes

Immaculate Conception Empanadas

Empanadas de la Inmaculada Concepción
Author: Pati Jinich

Ingredients

  • 8 ounces (185 grams) fresh nata or cream cheese at room temperature
  • 1 cup unsalted butter at room temperature
  • 2 1/3 cups all-purpose flour
  • 1/2 teaspoon salt
  • 4 cups picadillo, or preferred filling, recipe below
  • 1 egg
  • 1/2 cup sesame seeds

Instructions

  • To make the dough, beat the cream cheese with the butter in the mixer at medium speed until creamy and well blended. Gently add the flour and salt and continue mixing for one minute more. Turn dough onto a lightly floured counter top and knead for a minute. Place dough into a bowl, wrap in plastic wrap and refrigerate for 15 minutes up to 12 hours.
  • Sprinkle flour over the counter top and roll out half of the dough until it's slightly less than 1/4 inch think. For medium sized empanadas, cut out rounds of 4 to 5 inches in diameter. Continue until all the dough is used.
  • Grease a baking sheet with butter. Preheat oven to 375 degrees.
  • Brush a thin layer of lightly beaten egg on the edges of the dough rounds. Spoon about 1 1/2 tablespoons Picadillo filling into the center of each round. Fold a side of the circle over the filling across the other side. Pressing with your fingers as you close the dough. Without breaking the dough, press the edges with a fork to seal and make a design.
  • Place the empanadas on the baking sheet. When you fill the baking sheet, lightly brush their tops with the lightly beaten egg and sprinkle with sesame seeds.
  • Bake the empanadas for 20 to 25 minutes, until the top have a golden tan color and the dough is cooked through. Serve hot.