Chia Seeds

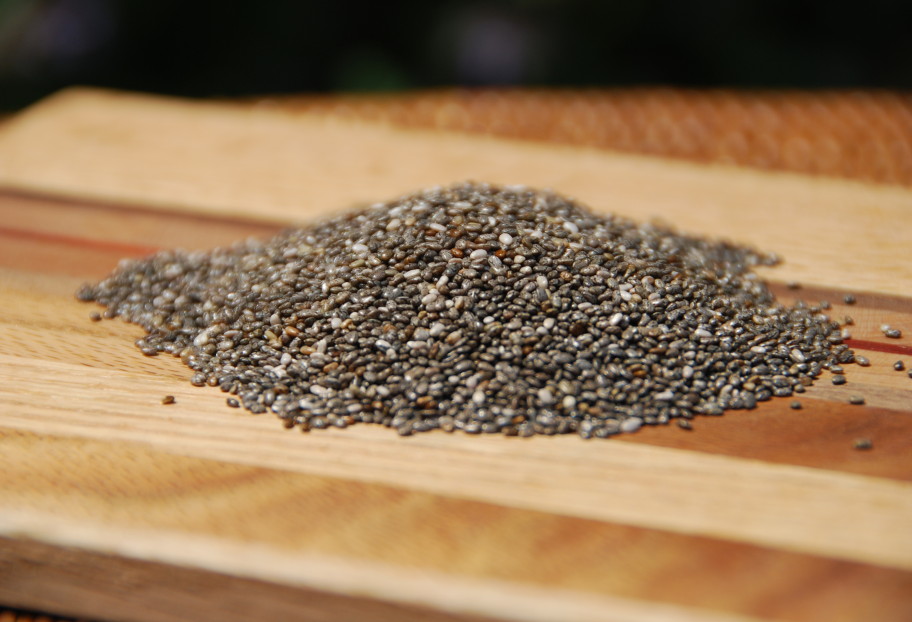
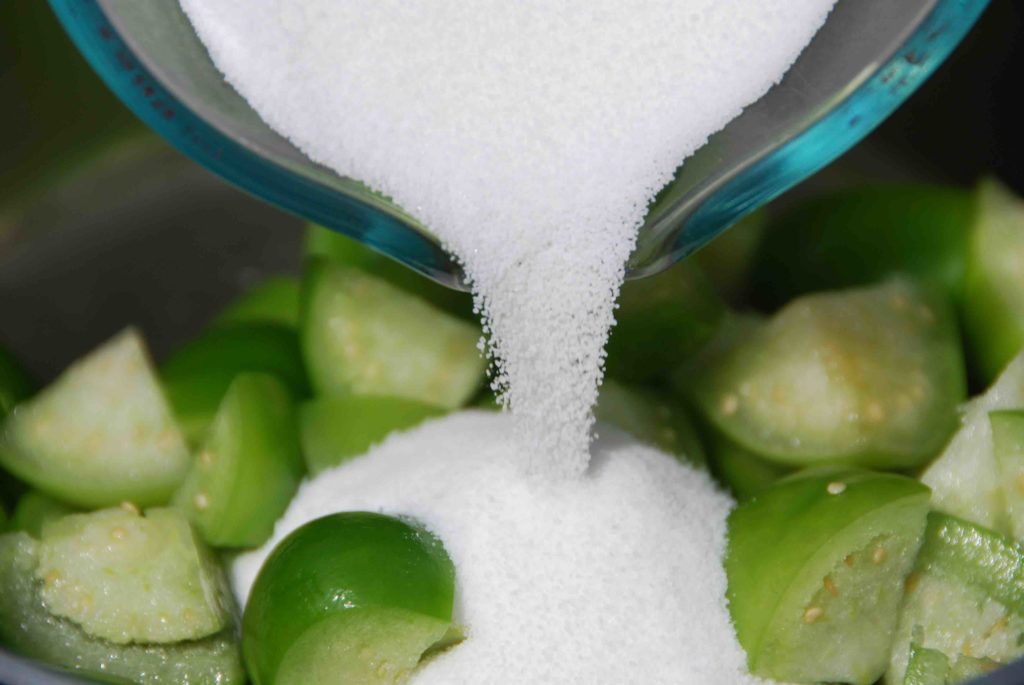
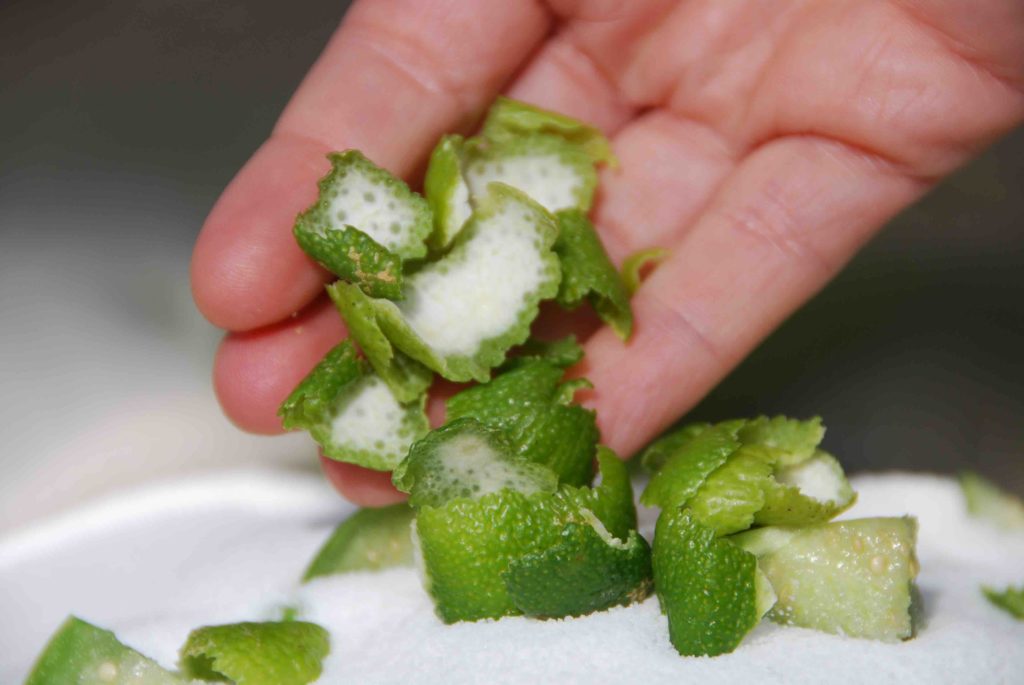
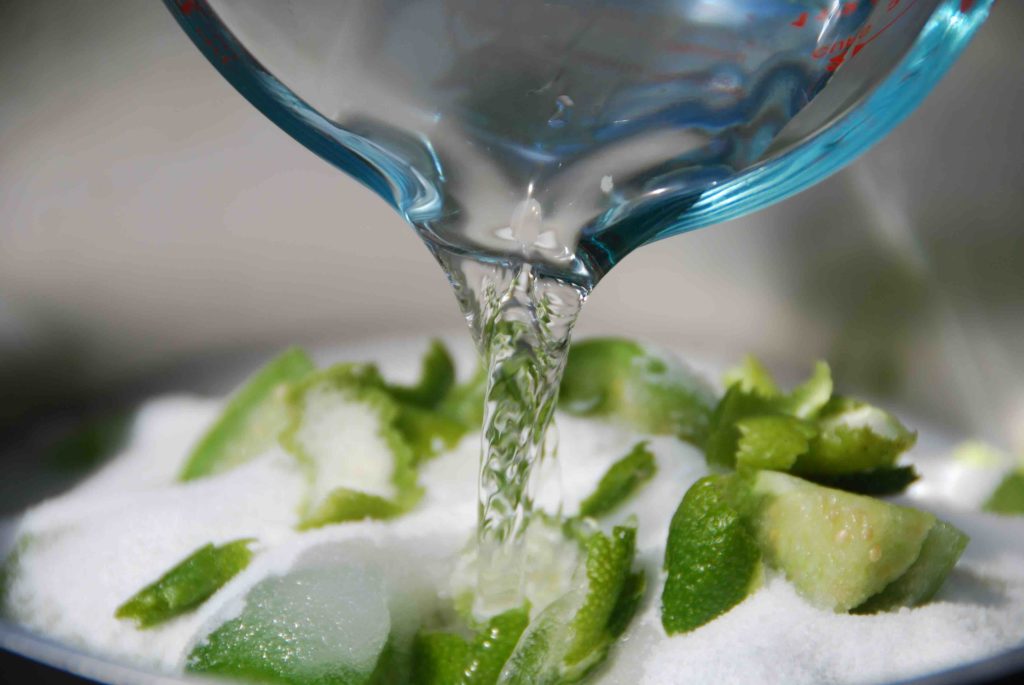
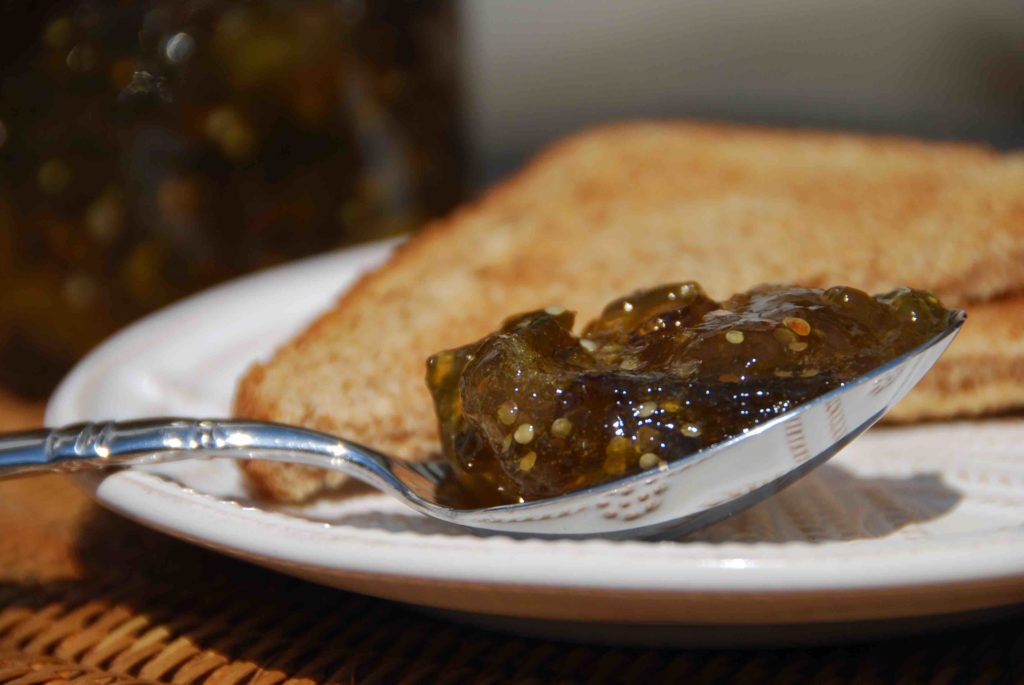
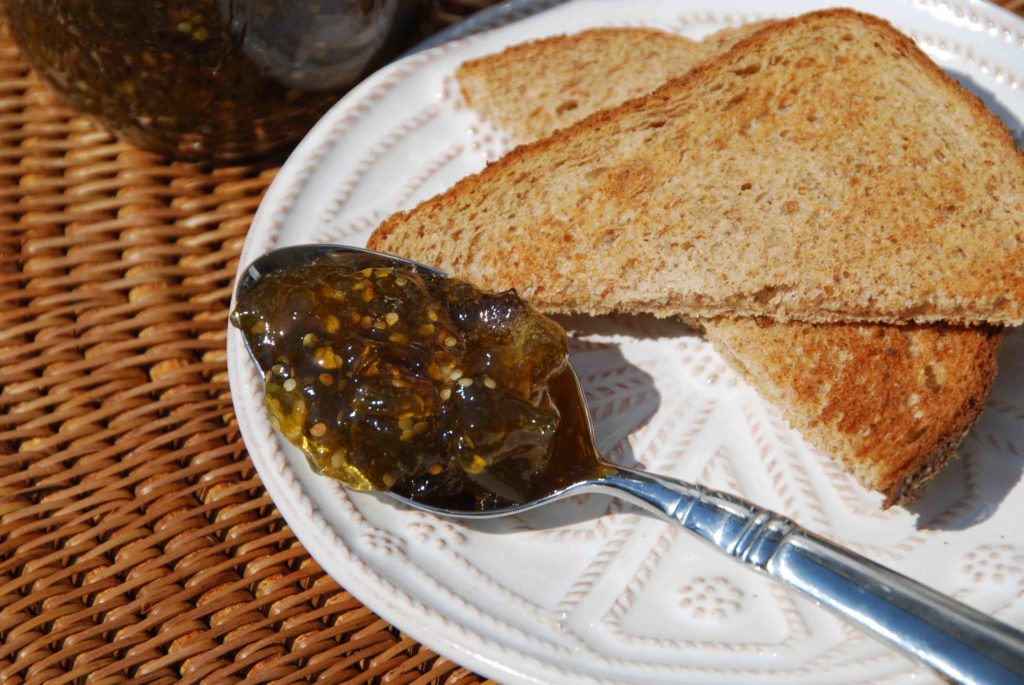
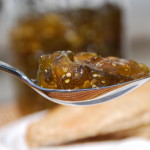
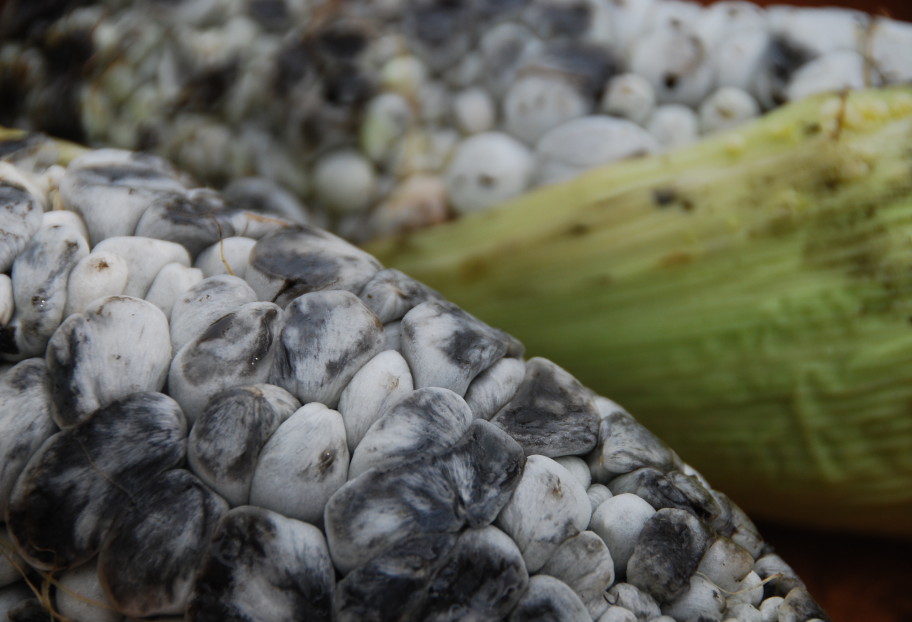
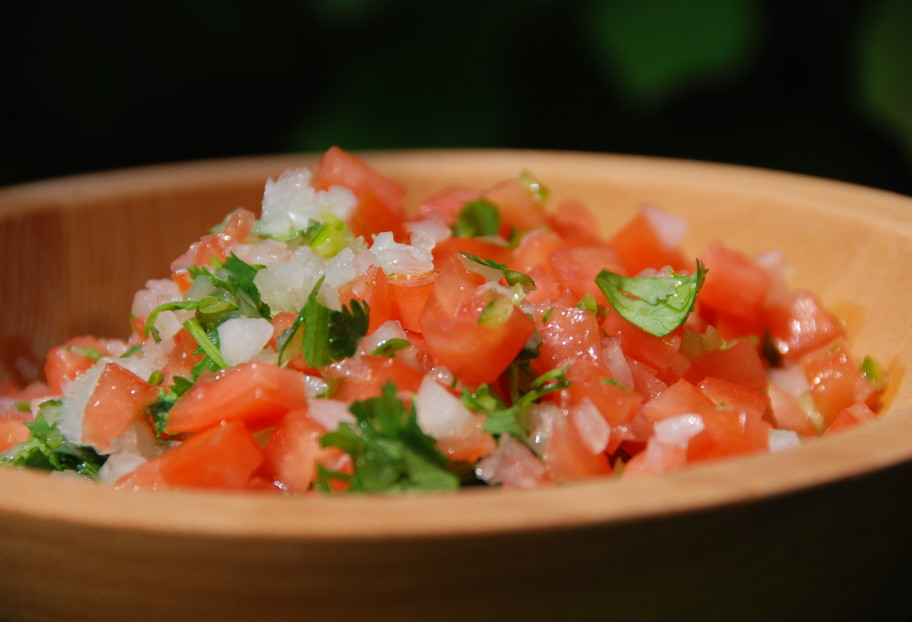
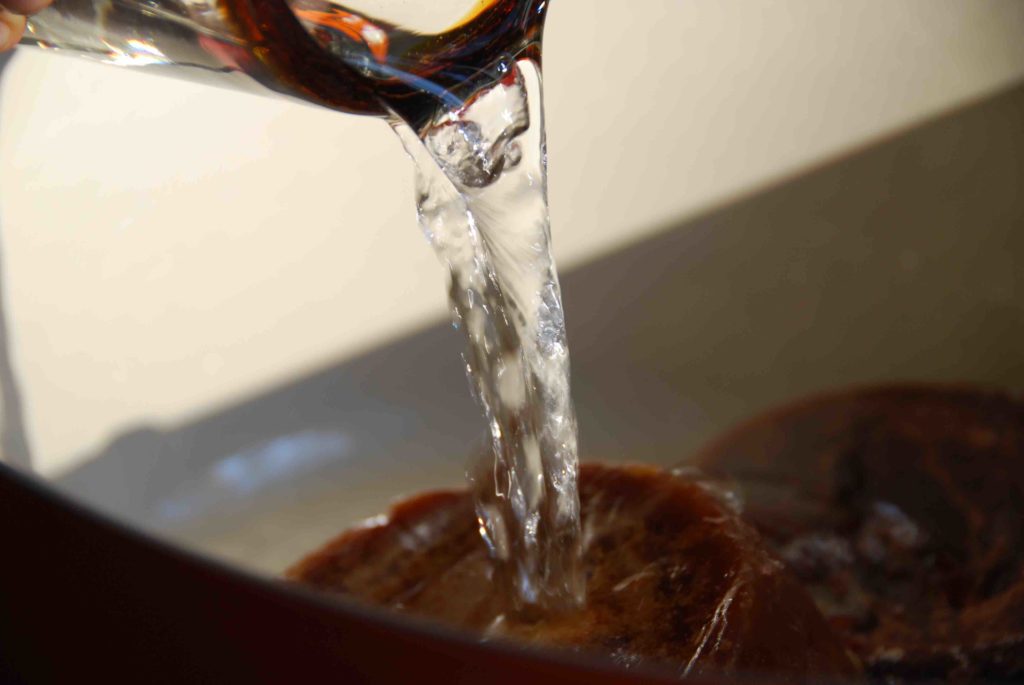
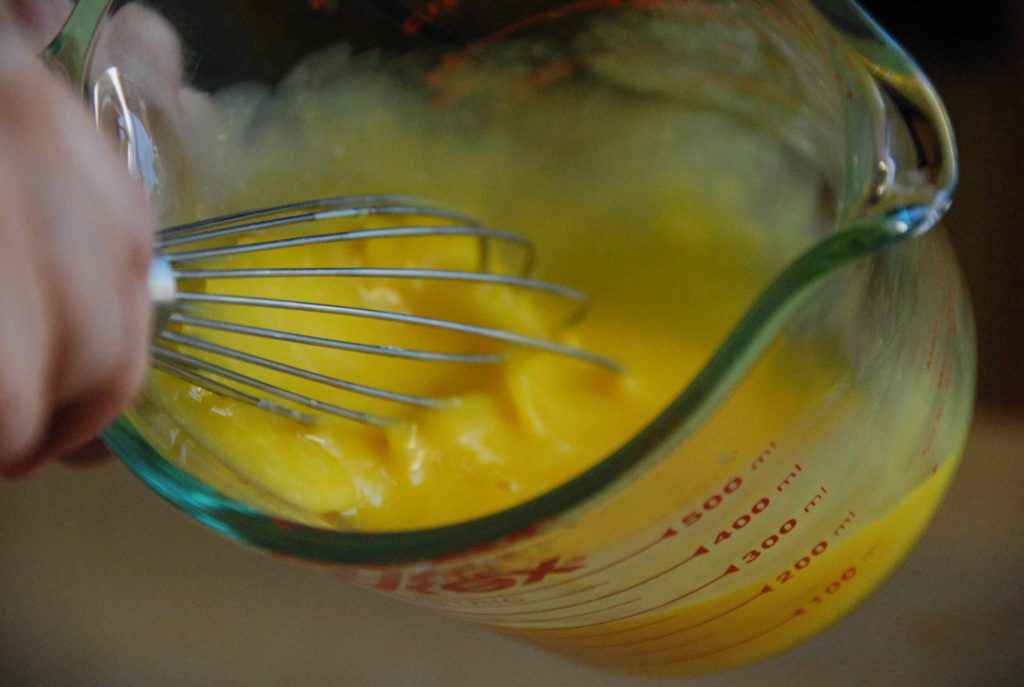
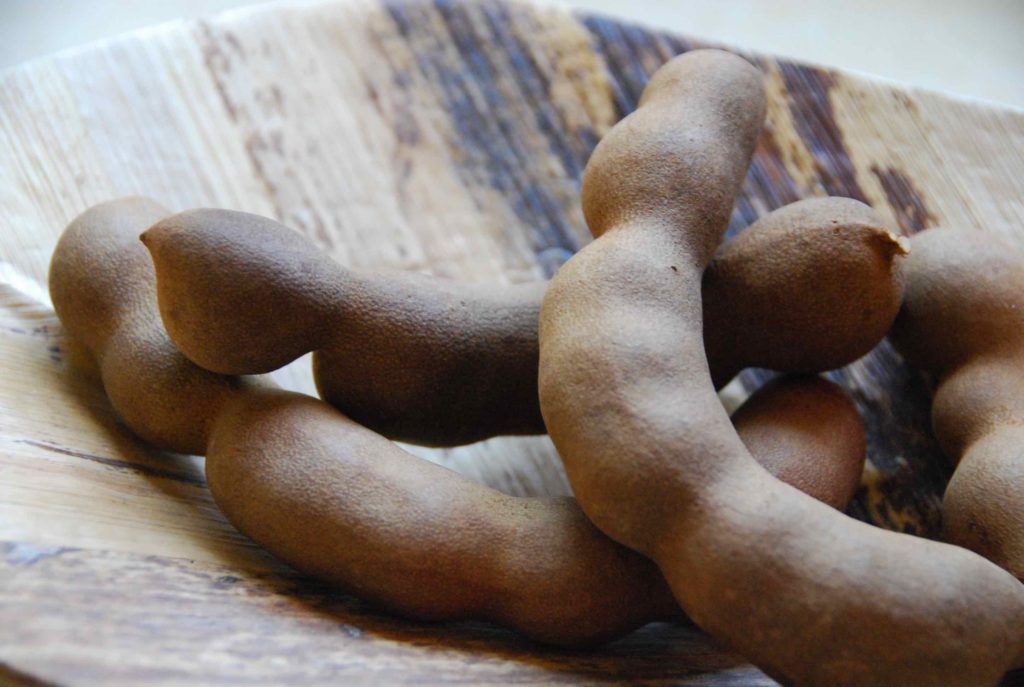
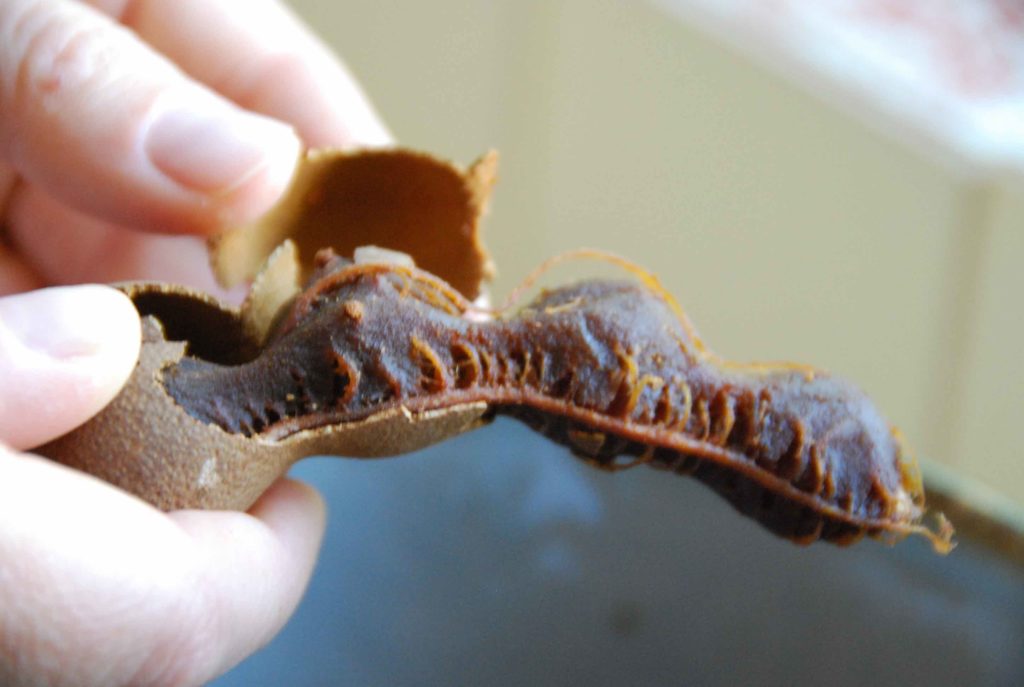
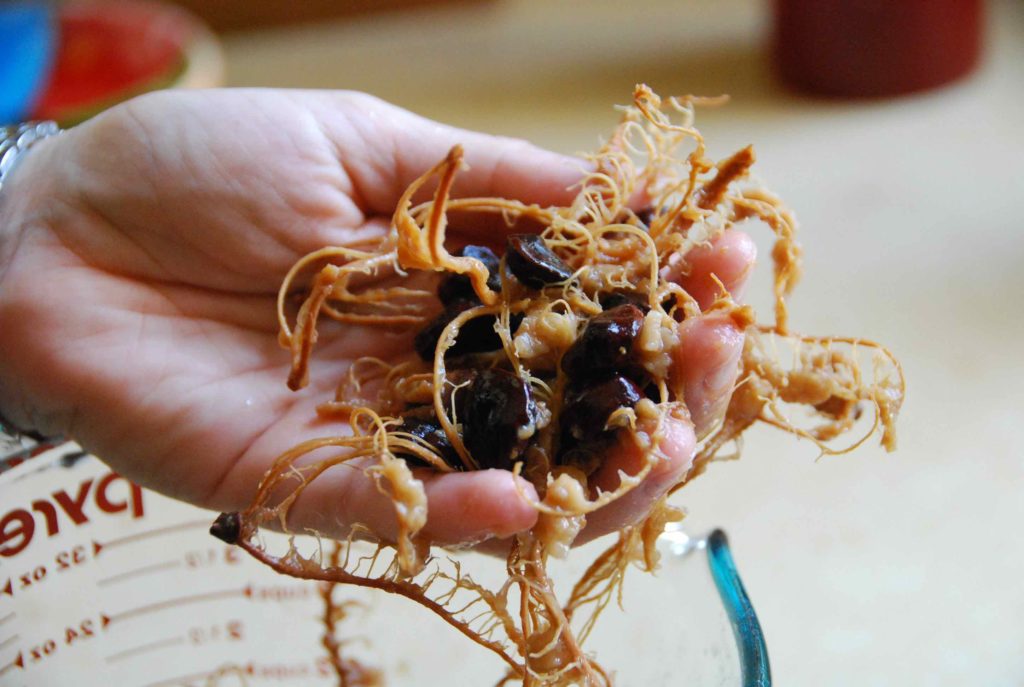
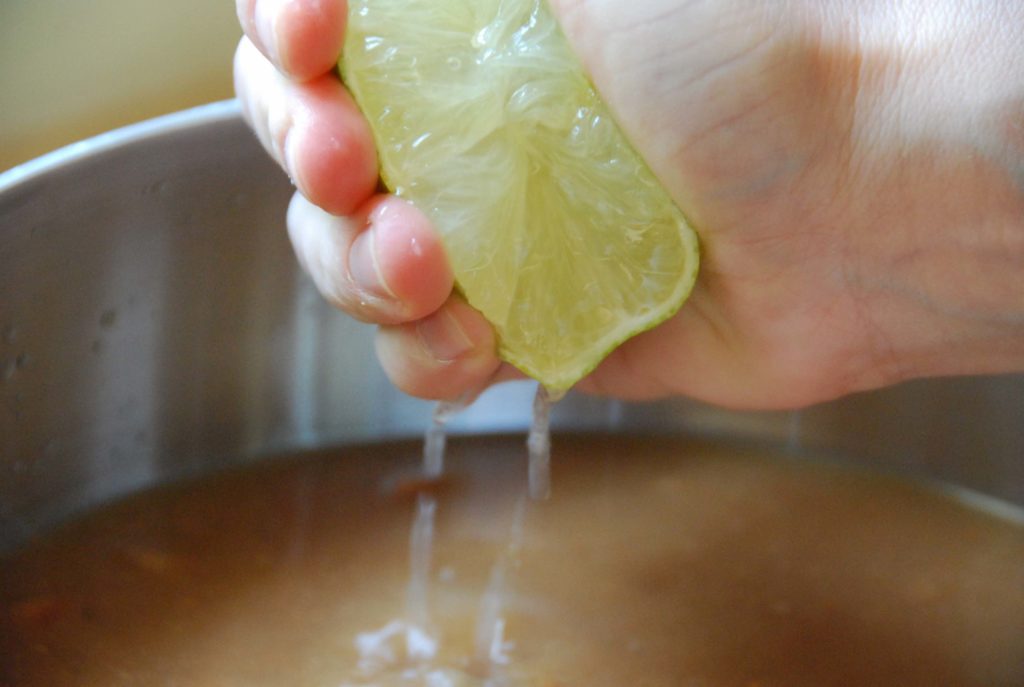
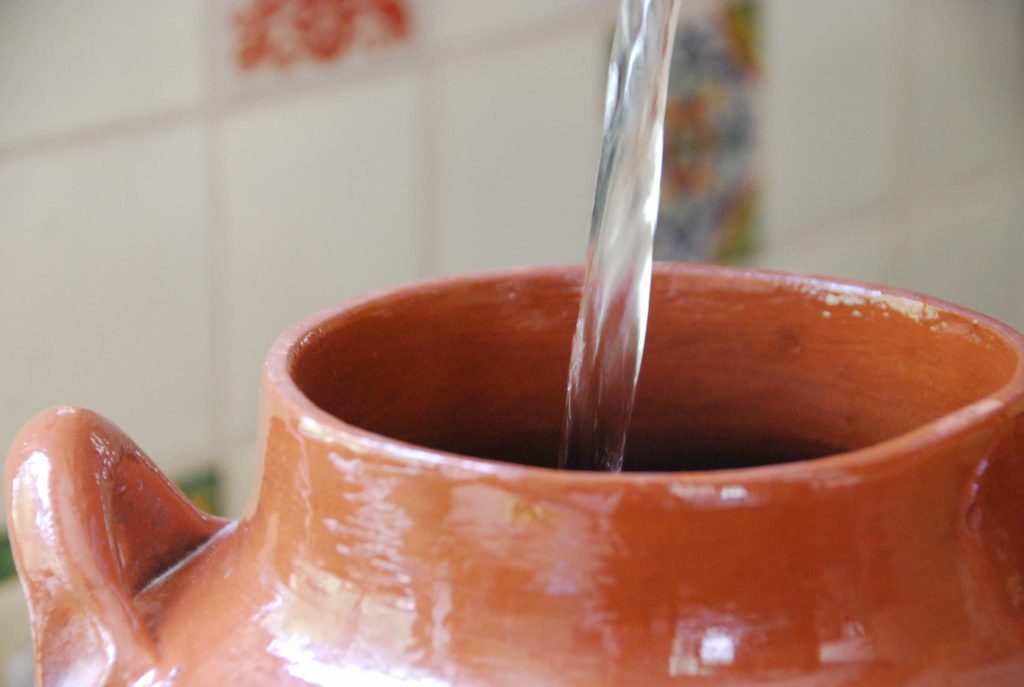
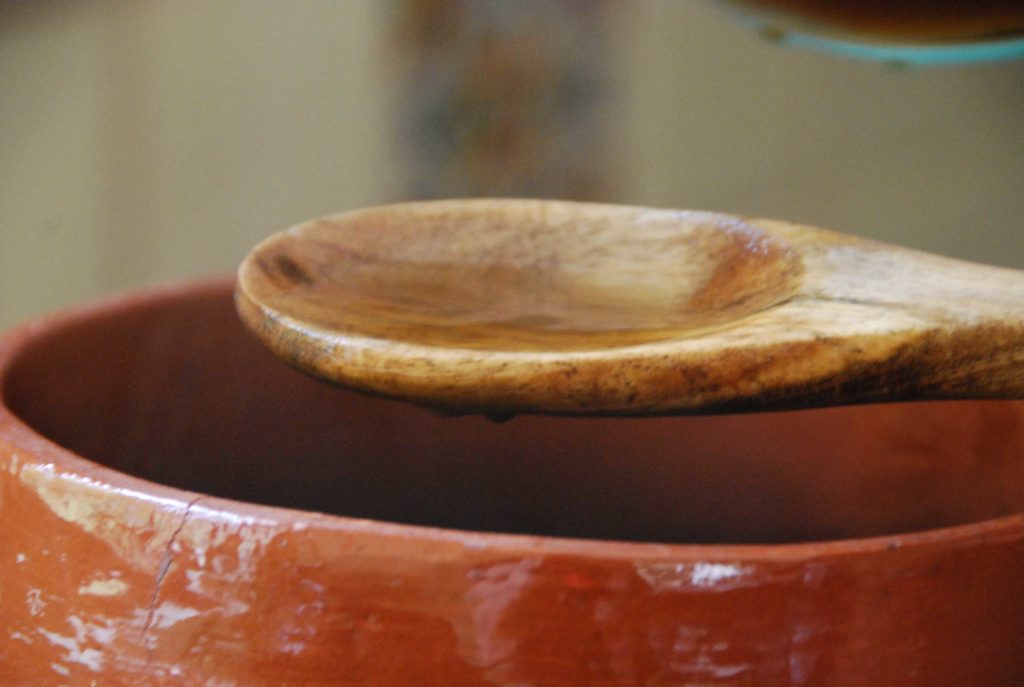
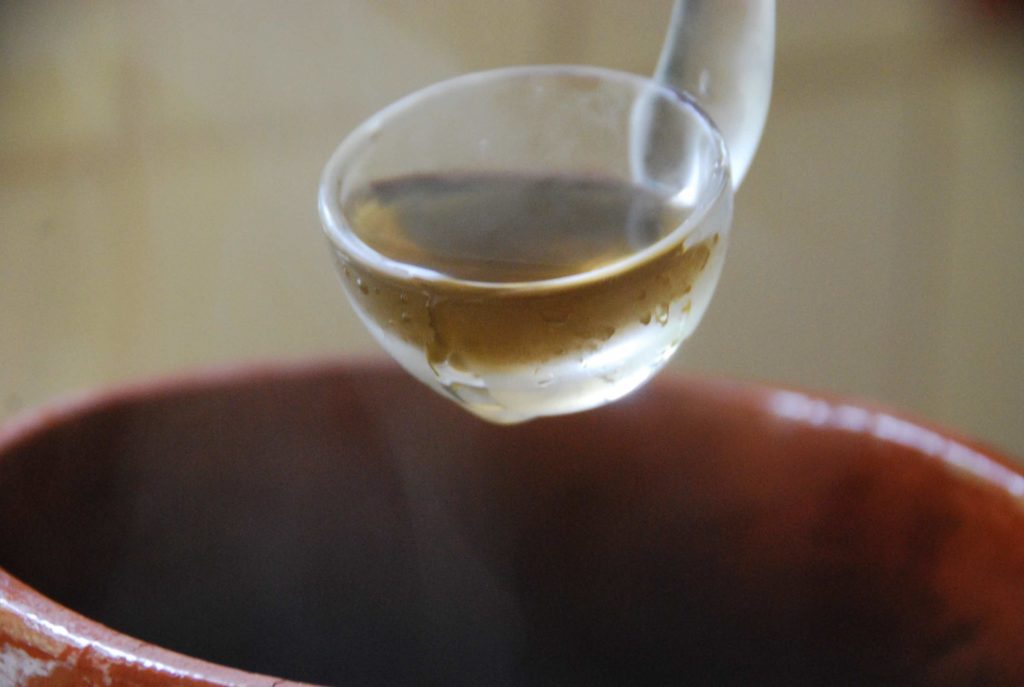
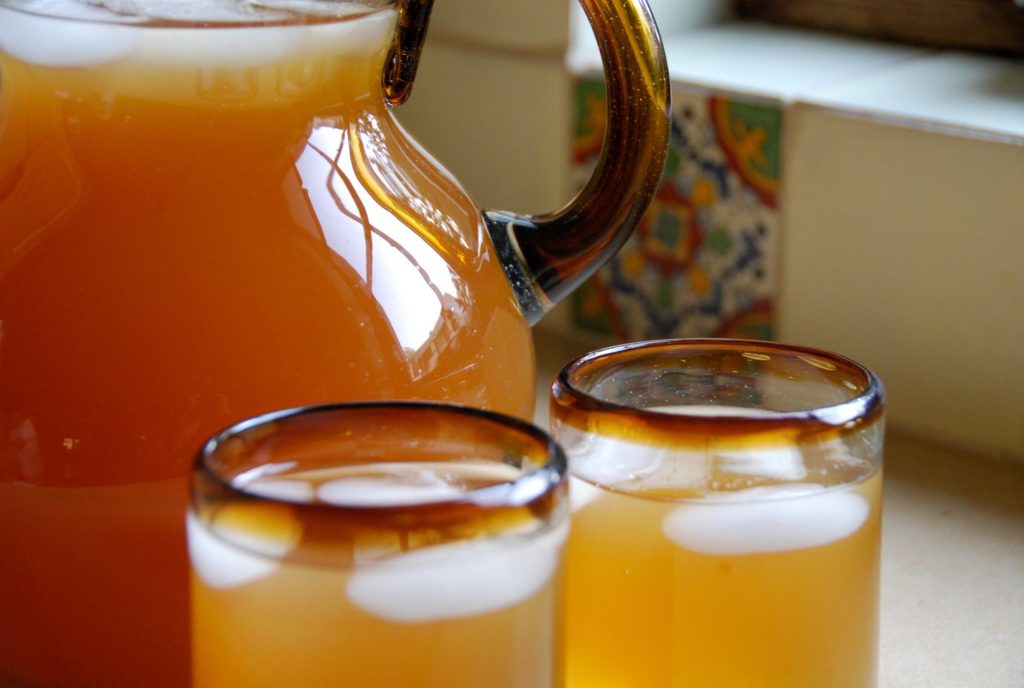
With a metallic dark color and mottled skin, Chia seeds are delightfully crunchy. Once you rehydrate them in water, as  the popular Lime based Agua Fresca, they become covered in an irresistible gelatinous layer. No wonder the word chia comes from the náhuatl name chian, which means oily.

Scientifically, Salvia Hispanica, they come from a flowering plant from the mint family. Some new wave health oriented groups, call it “the Miracle seed”. They are indeed miraculous for good digestion and some say weight loss.

In Mexico they have been used for centuries. In Aztec times, aside from eating, they were one of the main means of exchange and also used for religious rituals.

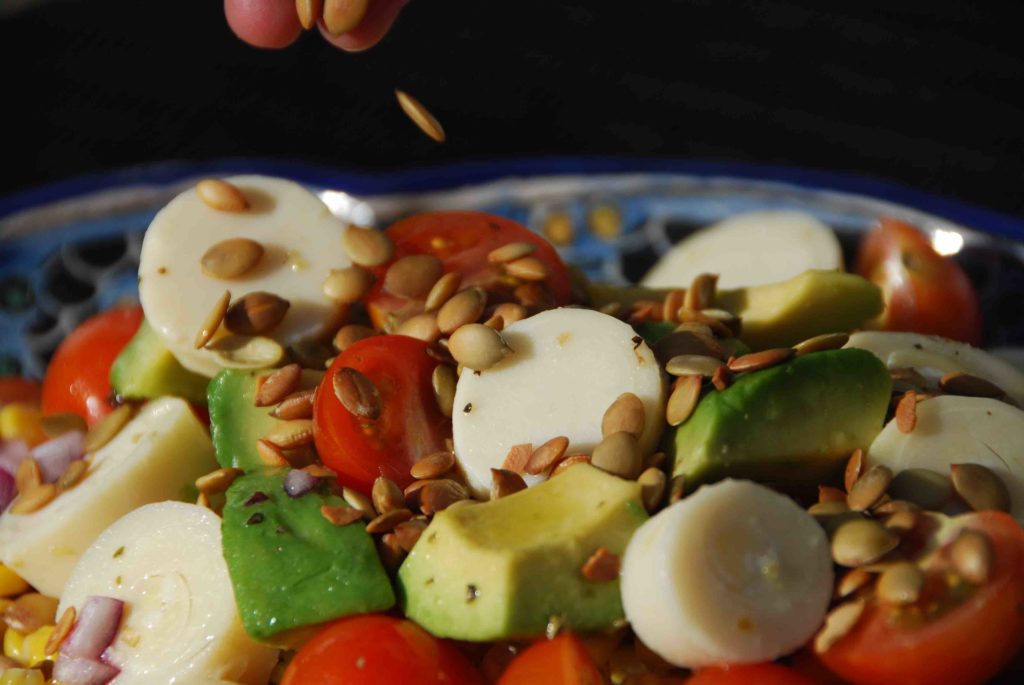
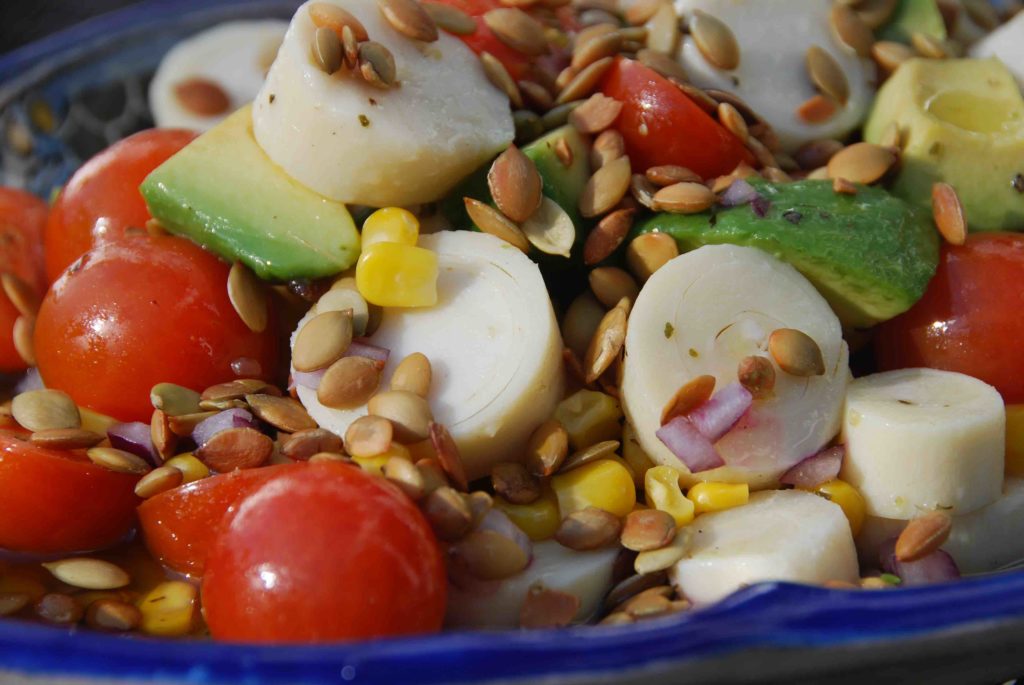
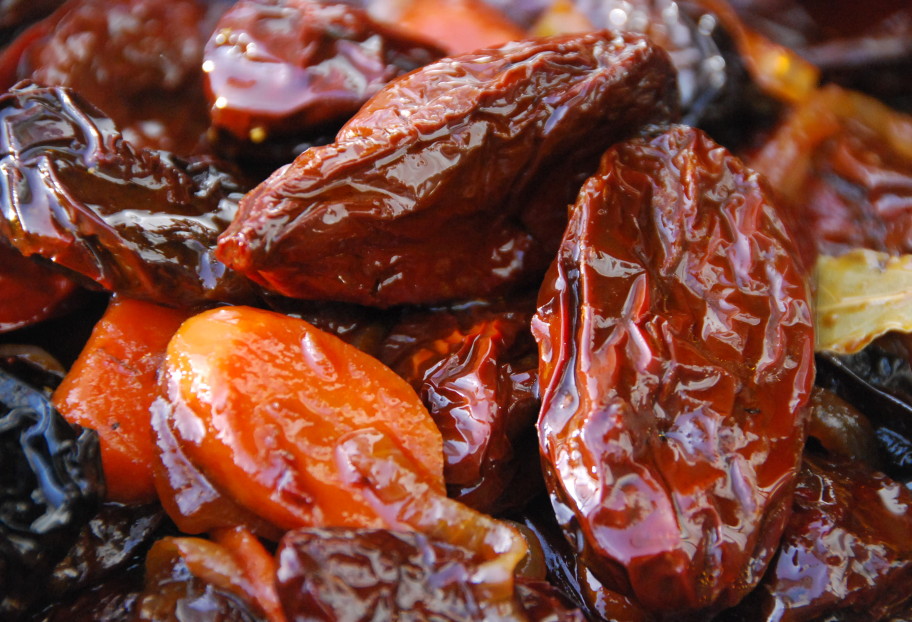
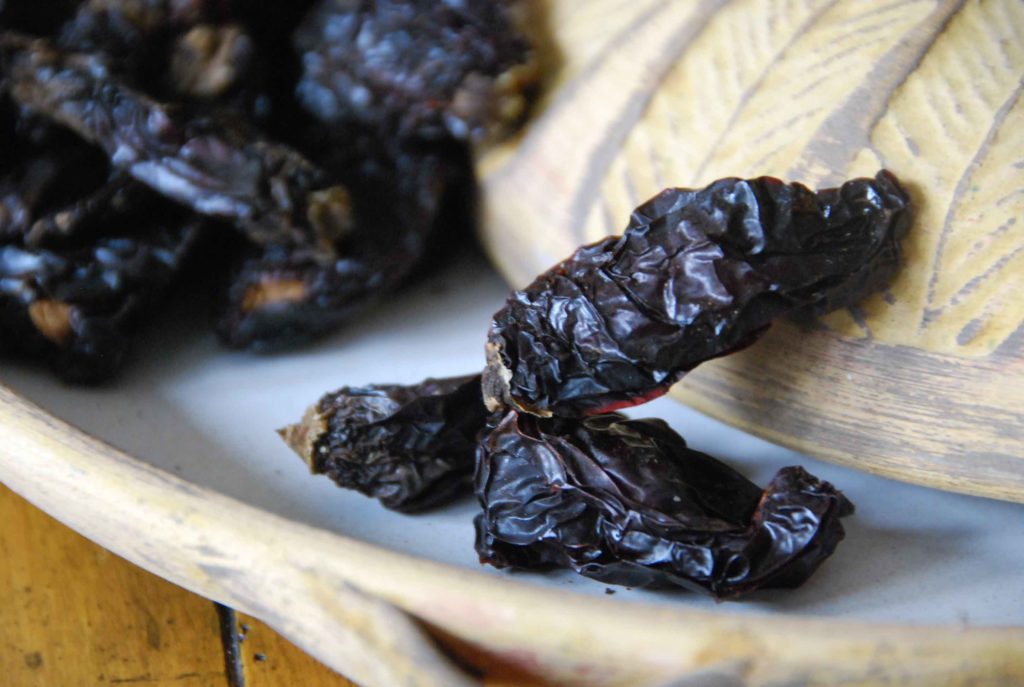
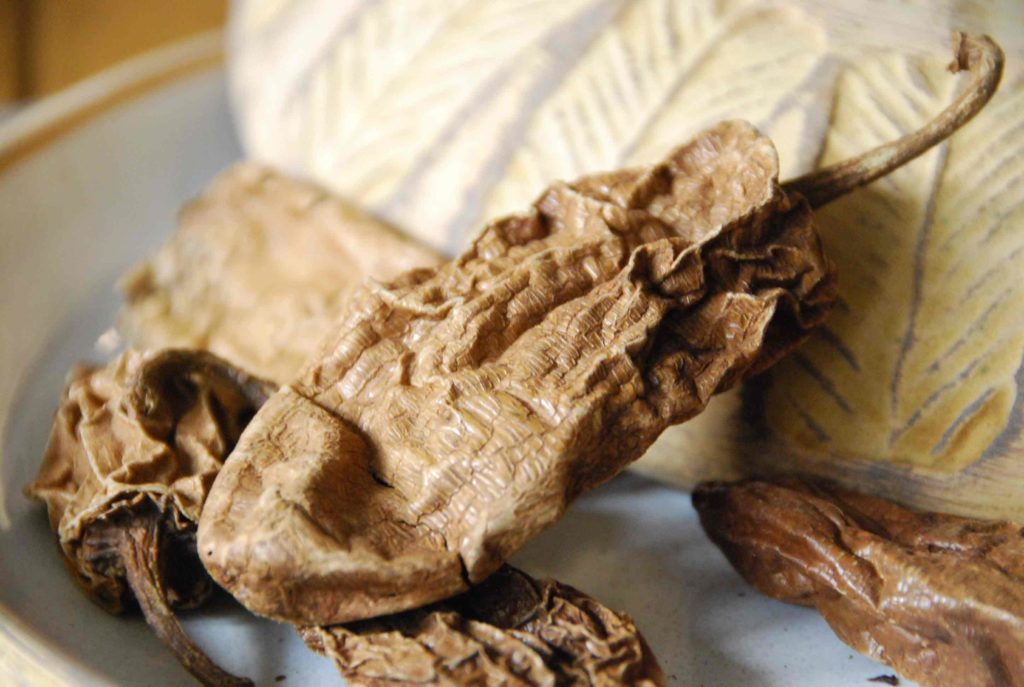
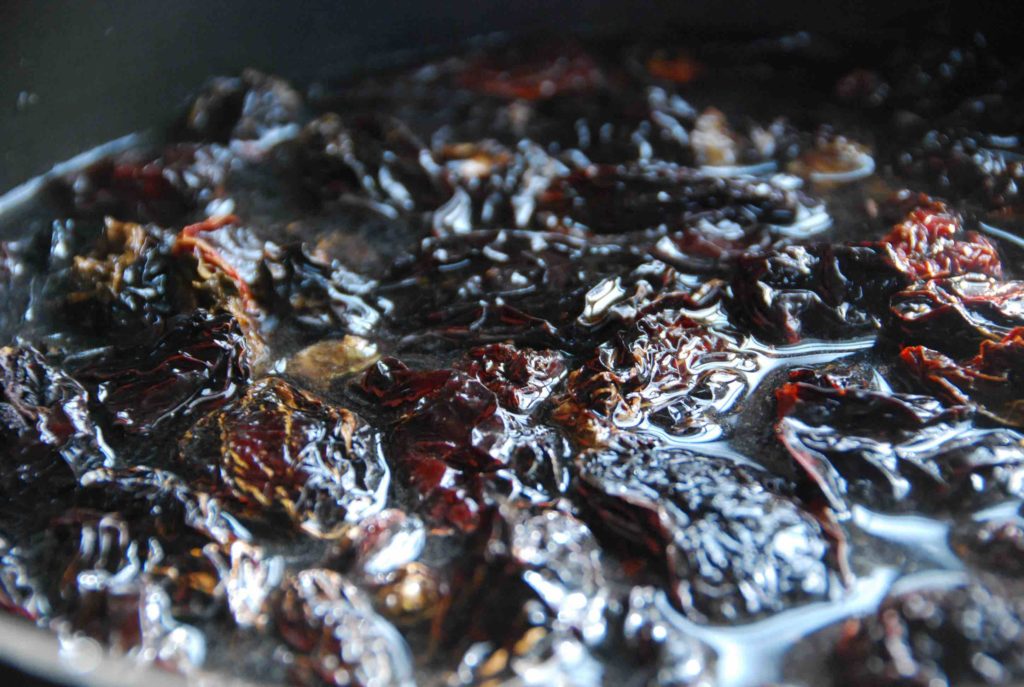
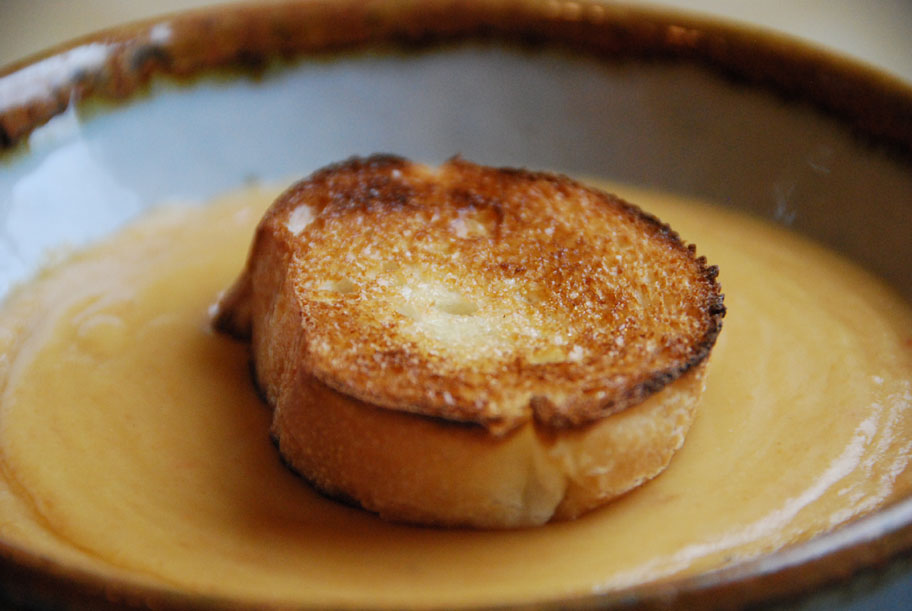
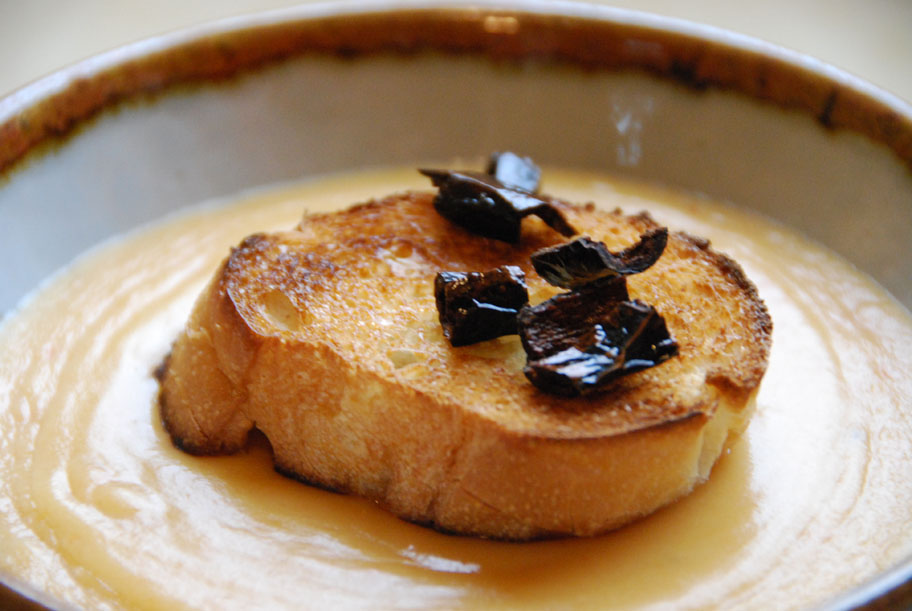
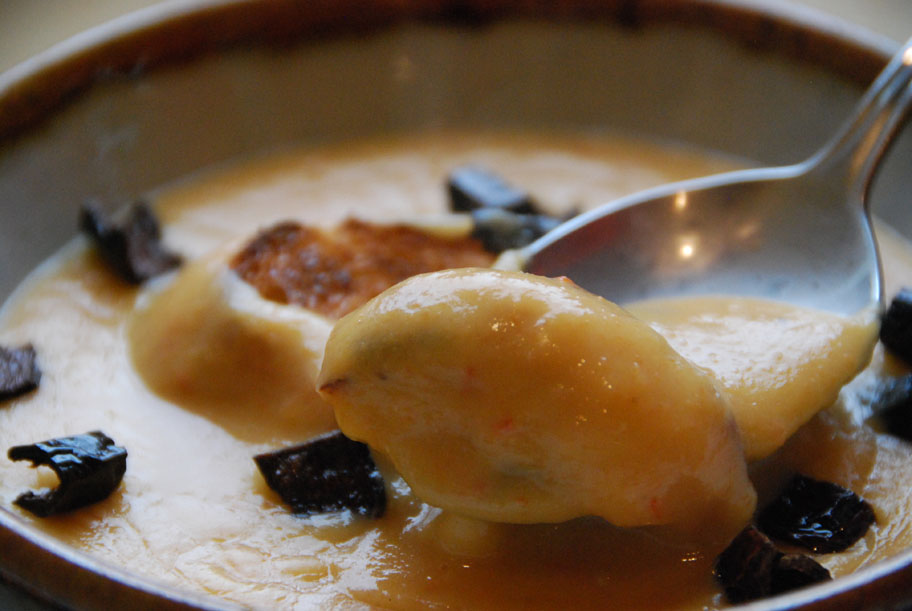
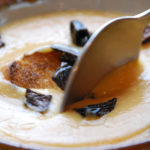
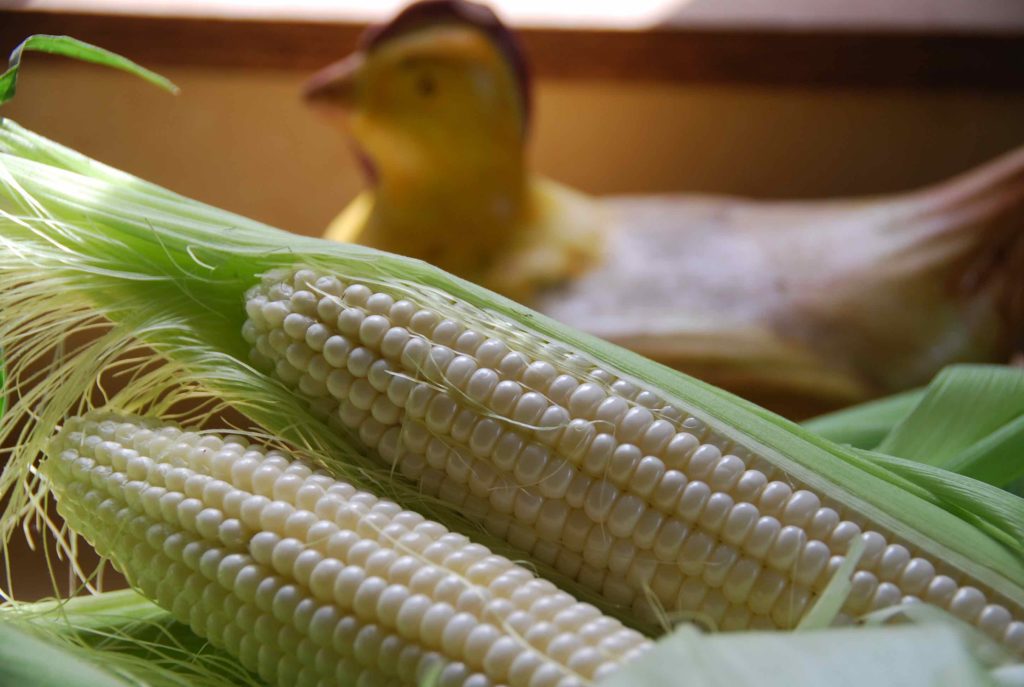
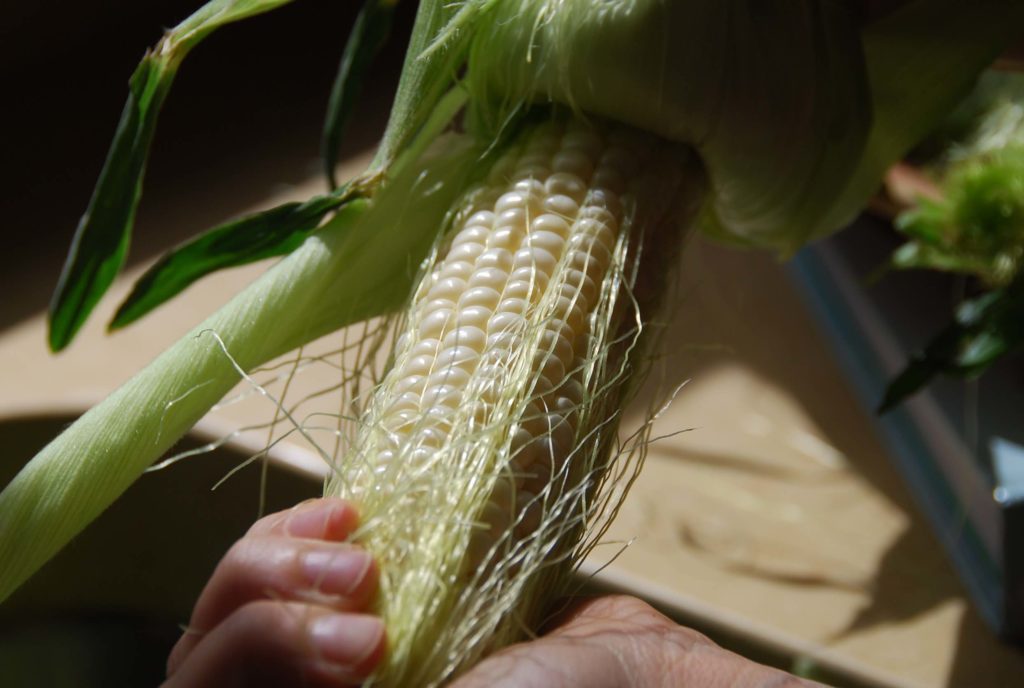
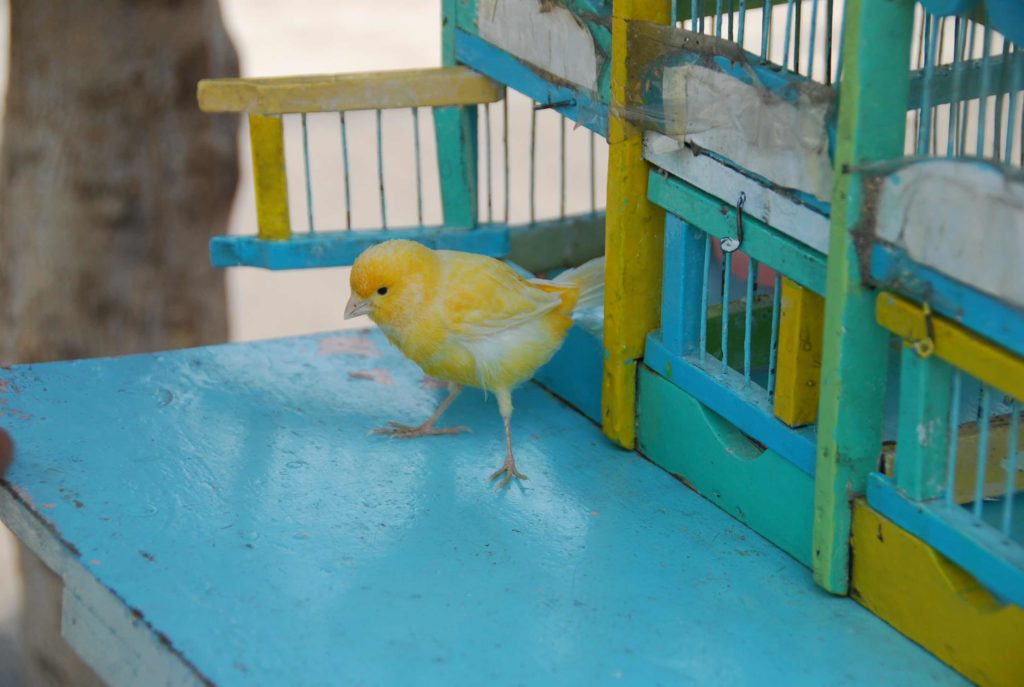
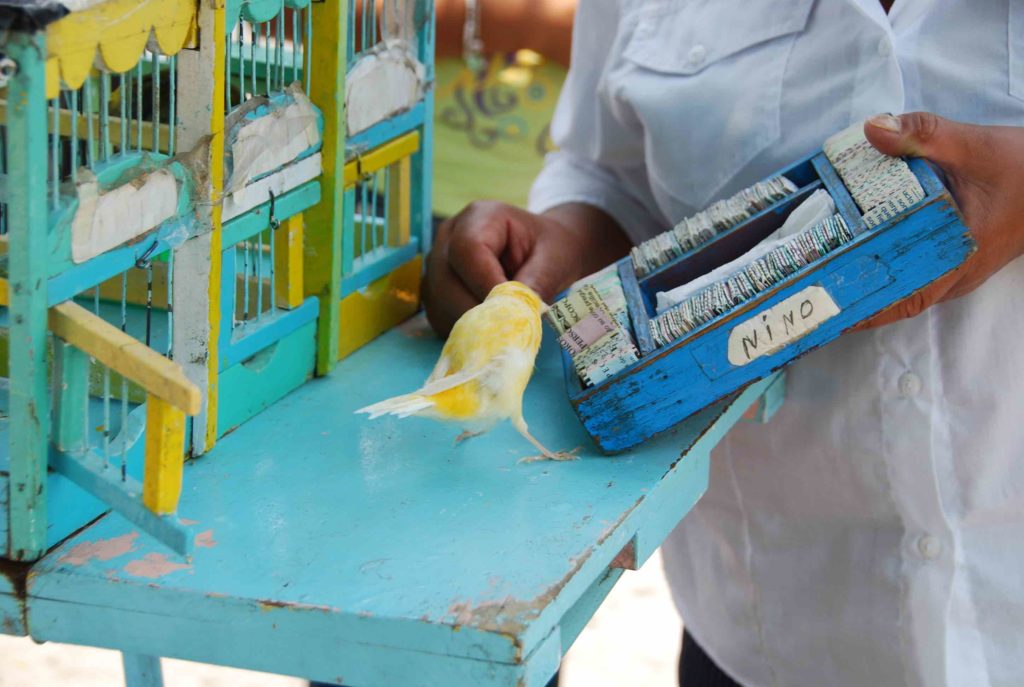
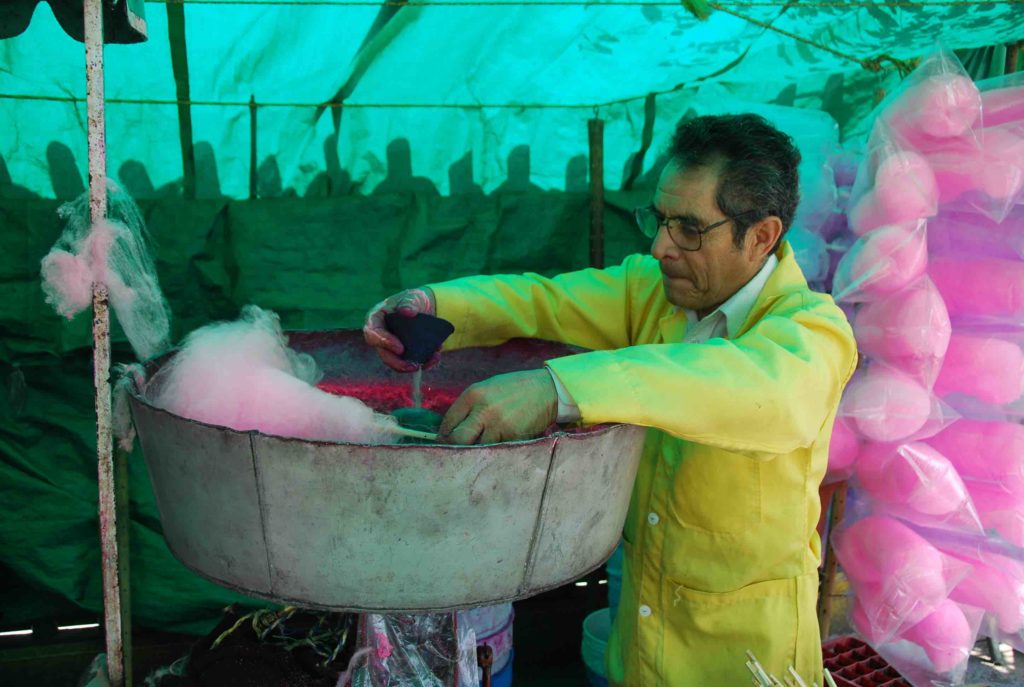
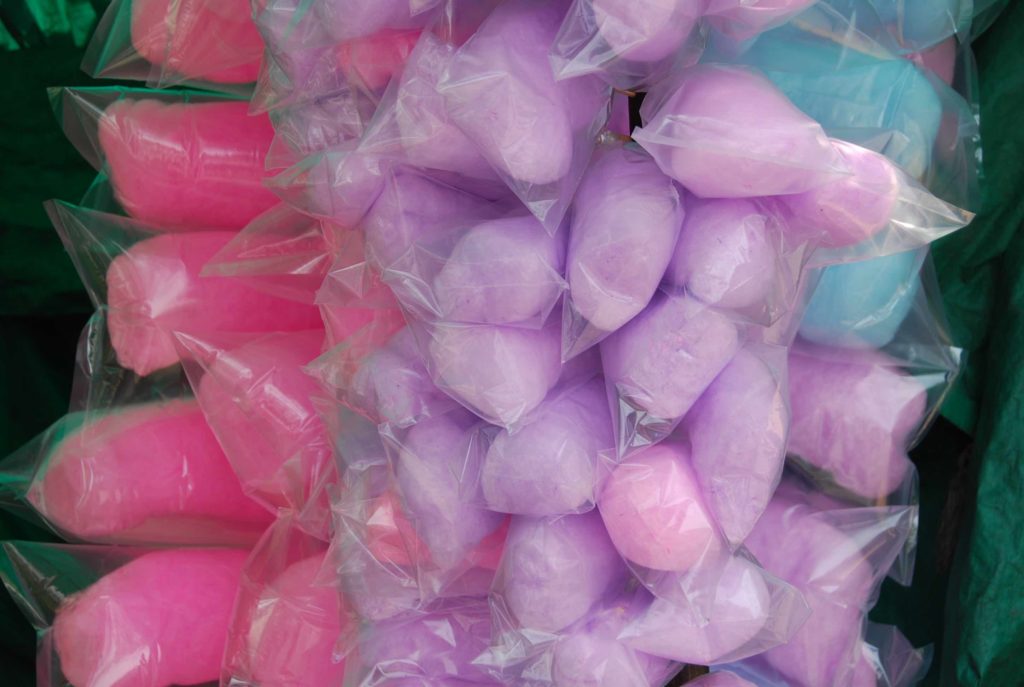
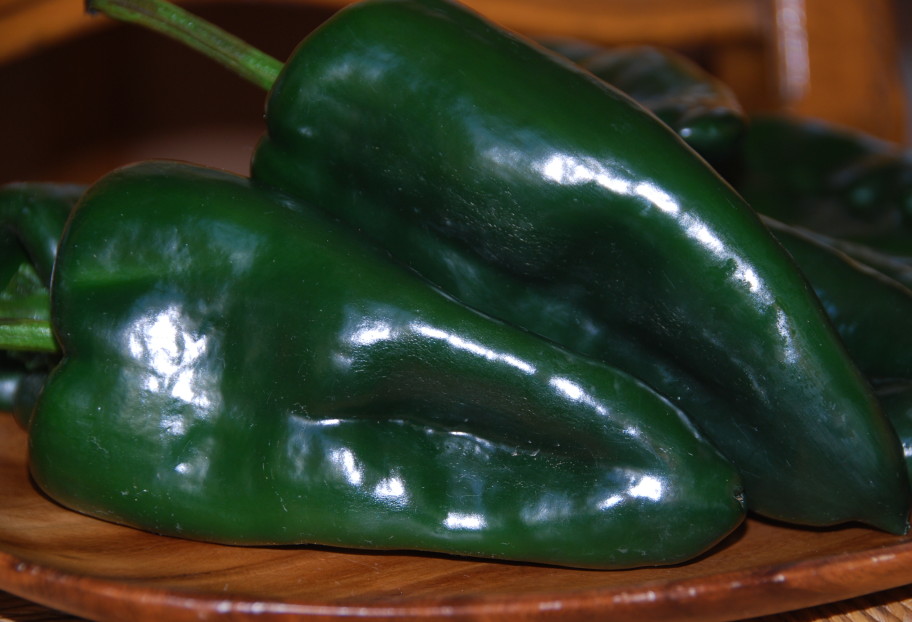
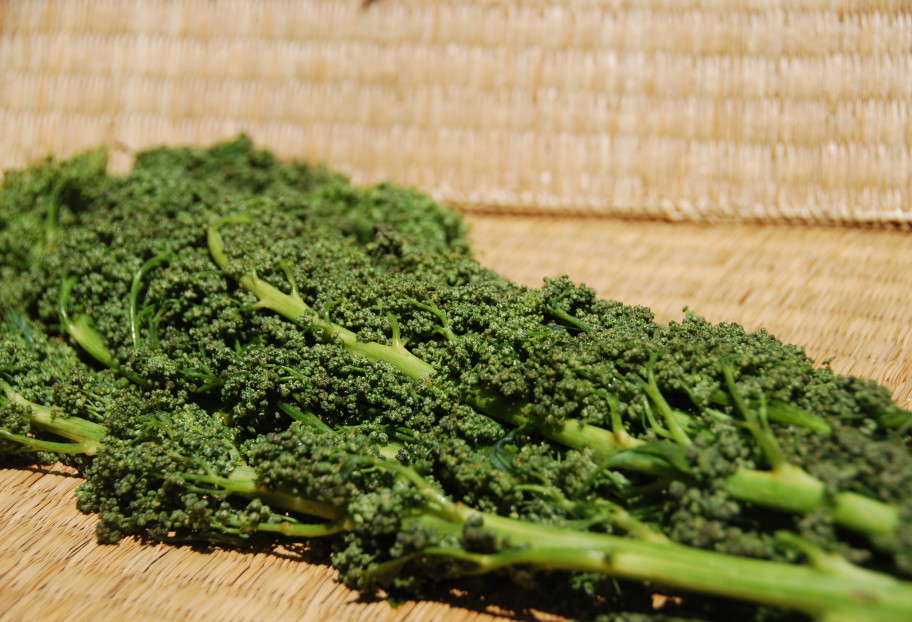
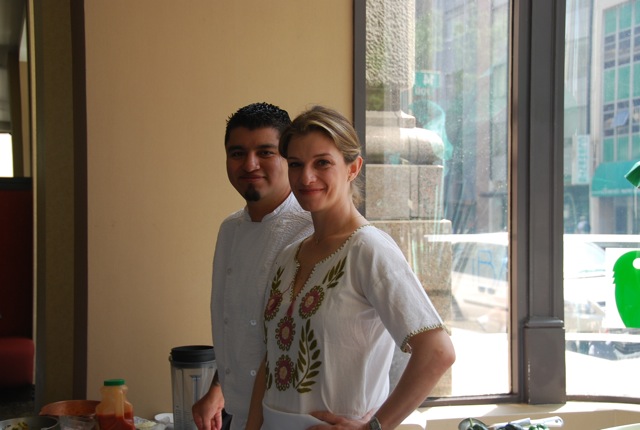
Take a peek, they are quite lovely.

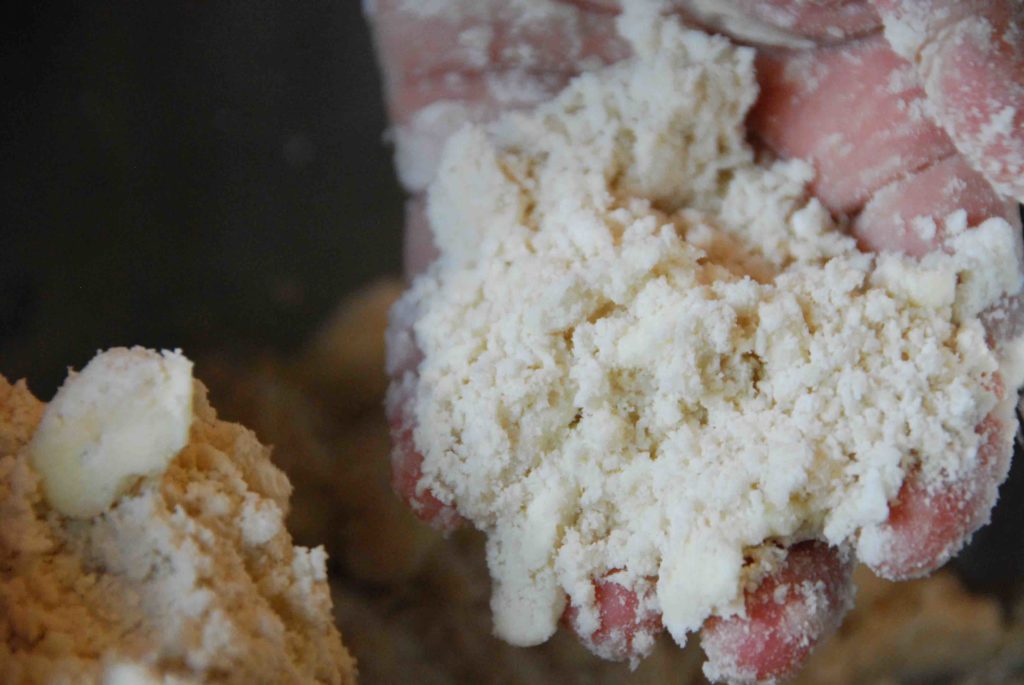
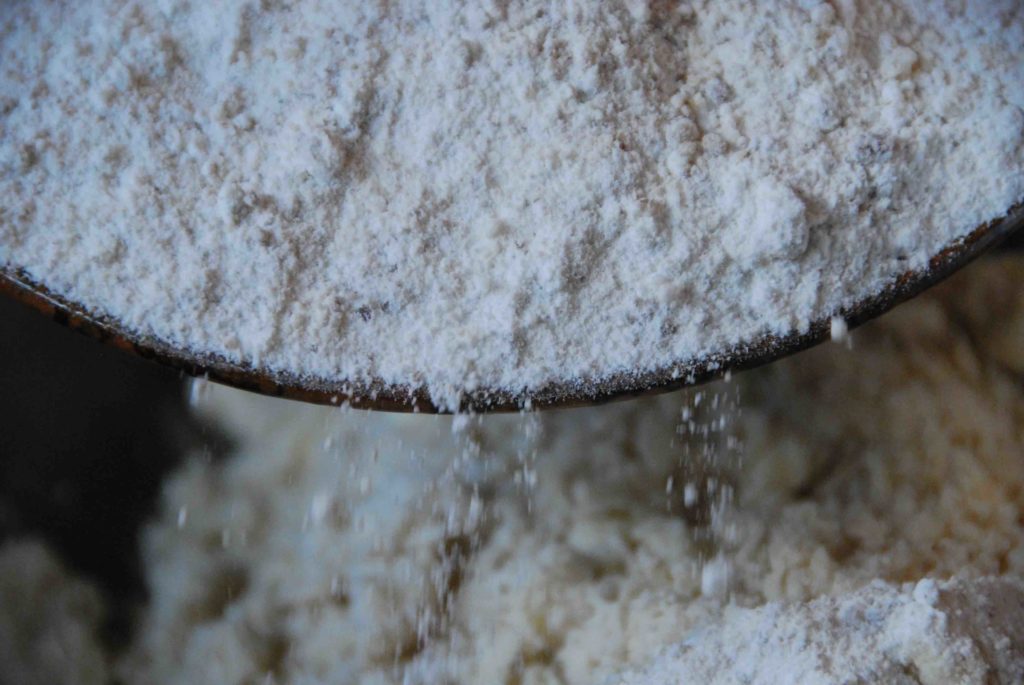
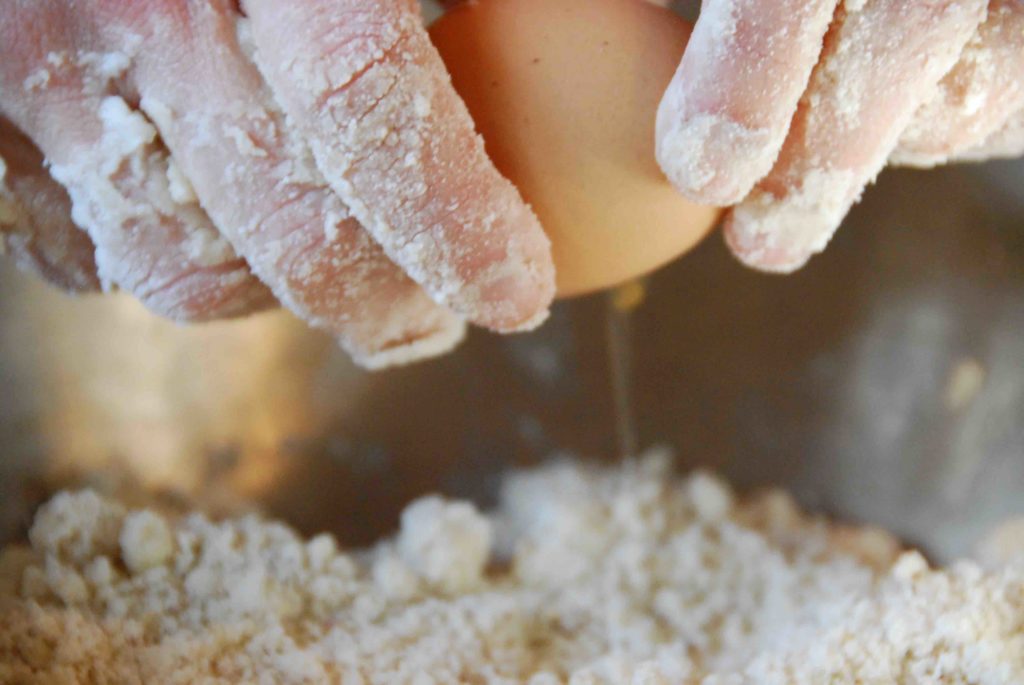
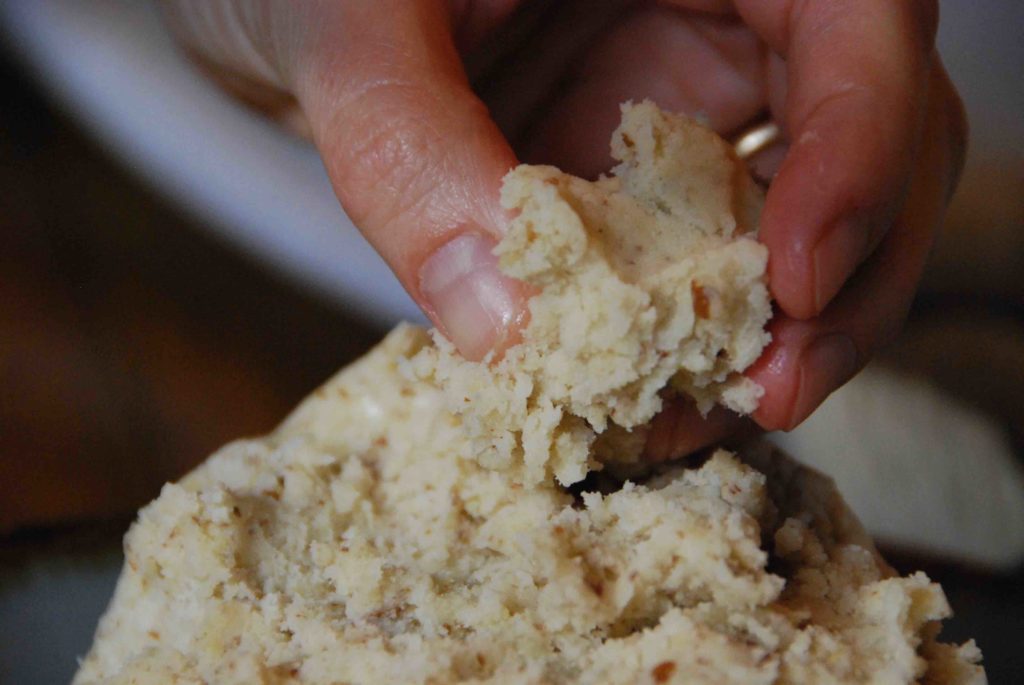
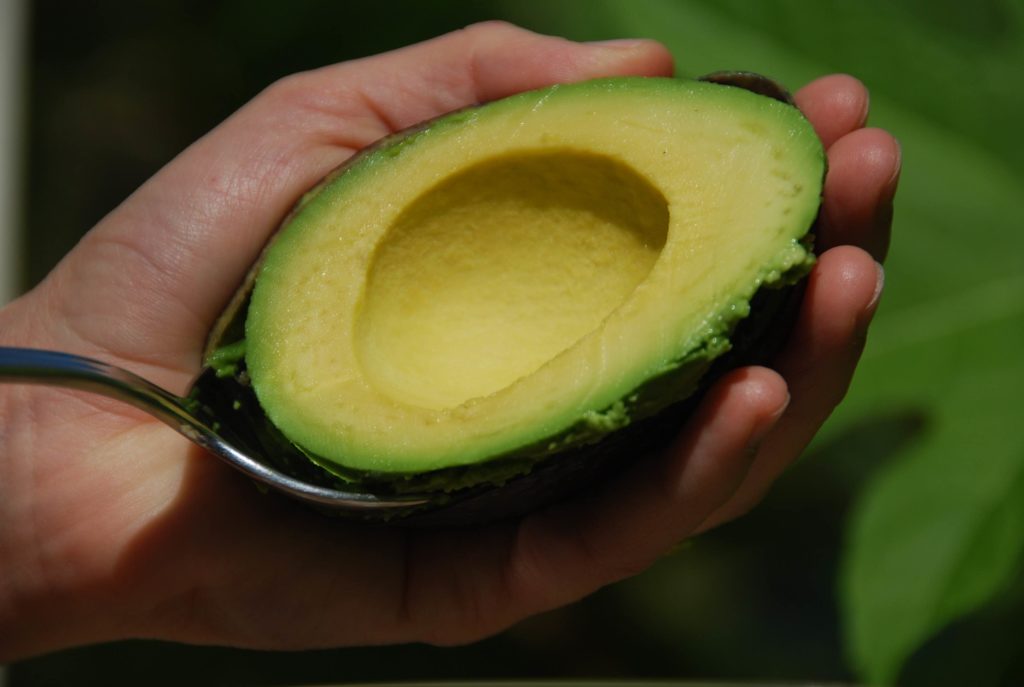
They are also a great source of protein and fiber.  When ground, Chia can be used to make baked goods like breads, cakes and cookies.  You can also eat the sprouts, as they are very similar to alfalfa sprouts, and are delicious in salads.

I know what you may say, as many American friends have told me when I hand a glass of Limonada with Chia seeds… are these the same as the Chia Pets?

Well, yes they are, you can have them as pets too!

Go Wild, Munch On Your Crazy Corn!

The Mexican way to wildly dress simply cooked corn drives me wild.

Crunchy sweet corn on a stick, brushed with butter and mayo, coated in tangy and salty crumbled queso fresco, sprinkled with chile powder, typically chile piquí­n, coarse salt and a liberal squeeze of lime juice.

It doesn’t matter if I am hungry. The mere site of a street food corn stand makes me stop dead in my tracks and zoom over for one. Like a wild woman. I need one. Well, the truth is one is not enough, ever.

In Mexico you find corn stands all over, in little towns and big cities. Locals know what day of the week and at what times they show up. If you are not from there, it takes a while to figure it out.

Crazy Corn 1
Last time we went to Chihuahua, after asking around for a while, we found the 3 Hermanos cart with Mauro in charge.

And does that man know how to dress that corn! He spoiled me and added an extra squeeze of lime juice.

Crazy Corn 2
Corn can be simmered in water, many times with fresh epazote. Or it can be grilled on a griddle or comal. If the kernels are shaved off, then the dish is called Esquites. But the traditional trimmings are the same for all.

Yet, some people can get even wilder, you won’t believe this! When Mauro was dressing our corn, a pregnant lady asked for her Esquites with all the trimmings to be poured inside a bag of Doritos. Yes she did. But if you ask me, about to have a baby, she was entitled to whatever kind of craving she felt like.

Crazy Corn 3

Last week, thinking of the many things to do with summer corn for an appearance on the Today Show, I included Crazy Corn. But I opted for the grilled take, because as the corn chars, its natural sugar comes out and caramelizes, giving it an extra layer of rustic and sweet flavor.

Crazy Corn 4
Thanks to the most professional, talented and fabulous food prep styling team, that of the Today Show, the Mexican street style corn that Mexicans love so much, looked so beautiful on the set.

Crazy Corn 5
They had all the trimmings with alternatives and options. Different kinds of dried ground chiles: Ancho, Chipotle and a smoky mix. They also had the queso fresco and its seamless substitutes: queso Cotija and its Mediterranean cousin, the Mild Feta.

Crazy Corn 6
Crazy Corn is Mexican street food at its best, and it happens to be perfect for summer barbecues.

Crazy Corn 7
Here goes one for you! Messy goodness, conveniently placed on a stick ready for you to munch on.

Print Recipe
3.67 from 3 votes

Crazy Corn

The Mexican way to wildly dress simply cooked corn drives me wild: Crunchy sweet corn on a stick, brushed with butter and mayo, coated in tangy and salty crumbled queso fresco, sprinkled with chile powder, typically chile piquí­n, coarse salt and a liberal squeeze of lime juice…
Prep Time1 minute
Cook Time9 minutes
Course: Antojos, Side Dish
Cuisine: Mexican
Keyword: Antojo, chile piquín, Corn, cotija, elotes, lime, mayonnaise, queso fresco, Recipe
Servings: 6 servings
Author: Pati Jinich

Ingredients

  • 6 ears of fresh corn husked and rinsed
  • 1 tablespoon vegetable oil
  • unsalted butter
  • mayonnaise
  • 1 cup crumbled cotija or queso fresco farmers cheese or a mild Feta
  • 3 limes halved to squeeze on top
  • Salt to taste
  • Dried ground chile piquin or a Mexican mix or to taste

Instructions

  • Brush the ears of corn with a bit of oil. Place over a grill or grill pan, set over medium heat, and let the corn cook and char slightly, turning them every 3 minutes or until the corn is down, anywhere from 9 to 12 minutes. Remove from the heat. Alternatively, you can simmer the corn in water until tender.
  • Let everyone decide what they want on their crazy corn. You can stick the corn on corn holders or a wooden stick.
  • The traditional way is to spread butter and a layer of mayonnaise. Then the corn is thoroughly "breaded" with the crumbled cheese, sprinkled with salt and ground chile and finally, drizzled with freshly squeezed lime juice.

Notes

Elotes

NBC Today: Going Wild with Corn

I had such a lovely tome visiting the Today Show, their food prep team is beyond amazing and the cast is so friendly and oh so much fun.

Here is a clip of the cooking segment, where we made three totally different recipes with corn: the wild and fun Crazy Corn, a chunky, hearty and fresh Chop Chop Salad, and a comforting Corn Torte that you can top with Poblano Rajas.

Click here, to get the full recipes

Visit msnbc.com for breaking news, world news, and news about the economy

Tomatillo and Lime Jam

I began to see the exotic side of the tomatillo once in the US.

Growing up in Mexico, they were a standard at every market, part of our weekly mandado, present in our family meals at least half a dozen times a week: in salsa verde to pour on top of almost everything, in enchiladas, chilaquiles, bathing fish, covering a shredded meat and potato stew, and sometimes cactus paddles.

Think something like salt … how odd it is to find a kitchen without salt?

Once we moved to Texas, the only place I could find them was in Latino stores. As the years moved on, there was no one I met without a Mexican connection who had ever cooked with a tomatillo or even dared to bring one home.

Sure, many people love salsa verde and eat it in restaurants or buy a jar at the store, but few know that its star ingredient, is the tomatillo.

Tomatillo and Lime Jam 1

Ok, I get it.

It’s hard to tell what a gorgeous creature the tomatillo is from the outside. With its papery husk specked with dust that sticks to the sticky and seemingly mossy skin…  So fifteen years later, now that they are not only in Latino stores but also in mainstream ones, its no surprise to see that not many people place them in their baskets.

But, husked and rinsed, stripped down to their natural glory, tomatillos are a stunner. Bright and crisp, smooth and shinny, with a firmer flesh than the tomato and with an unmatchable tart flavor, they are stars undercover waiting to be discovered.

Tomatillo and Lime Jam 2

Amazing it is, that I realized how unique they are once outside of Mexico. Moreover, how versatile they can be. Not only for salty spins, but for sweet ones too. And always, so easy to use. I’ve now used them cooked and raw, in sauces, stews, salads and one of my favorites: Jam.

The brilliant and adventurous Mexican Chef Enrique Olvera first introduced me to the sweet spin of tomatillos, when he came to DC to cook for a special event at the Institute. He and his sous chef, prepared a quick tomatillo jam made with water, vinegar and sugar and served it with a variety of cheeses and crackers. Heavenly!

Playing with his idea, being a fan of the combination of the tartness of the tomatillo with the tangy taste from citrus, after quite a few tries I found what has now become a staple in our home. A tomatillo and lime jam.

Tomatillo and Lime Jam 3

All you do is dice those tomatillos, place them in a medium sauce pan along with the sugar, and the lime rind. You can add the rind in a long single piece or you can cut it into little pieces, which I am now getting fond of as you can enjoy those delicious bites later on.

Cover with water…

Tomatillo and Lime Jam 4

Add a pinch of salt, to balance things out in that pan…

Tomatillo and Lime Jam 5

Bring it all to a medium simmer, and let it thicken until it has a thin and loose jam consistency. Keep an eye on it as it does, and stir here and there… Don’t let it thicken too much because it will thicken as it cools.

Tomatillo and Lime Jam 6

That’s all there is to it!

See how amazed I am by its beauty and flavor, that I can’t help but keep on adding more and more photos in here…

Well, I also love that set of plates my sister Alisa gave me for my birthday and think they photograph so beautifully.

Tomatillo and Lime Jam 7

You can have the jam with a piece of toast as you sip your morning coffee (fine, or tea too…), spoon it over a piece of pound cake, serve it as an exotic side to your appetizer cheese platter…

Or, why not? Just spoon it right into your mouth. Like I do. You will bite not only those delicious tomatillo seeds covered in that sweet, tart, tangy jam, but you will also get those irresistibly bitter caramelized pieces of lime rind.

The beauty of the tomatillo, becomes increasingly exposed…

Print Recipe
4.80 from 5 votes

Tomatillo and Lime Jam

The brilliant and adventurous Mexican Chef Enrique Olvera first introduced me to the sweet spin of tomatillos, when he came to DC to cook for a special event at the Institute. He and his sous chef, prepared a quick tomatillo jam made with water, vinegar and sugar and served it with a variety of cheeses and crackers. Heavenly! Playing with his idea, being a fan of the combination of the tartness of the tomatillo with the tangy taste from citrus, after quite a few tries I found what has now become a staple in our home. A tomatillo and lime jam.
Prep Time10 minutes
Cook Time35 minutes
Course: Sauce
Cuisine: Mexican
Keyword: jam, lime, Recipe, Salsa, tomatillos
Servings: 1 1/4 cup
Author: Pati Jinich

Ingredients

  • 1 pound tomatillos husks removed, rinsed and roughly chopped
  • 1 1/2 cups sugar
  • 1 cup water
  • 4 tablespoons fresh squeezed lime juice
  • Rind of a lime
  • Pinch of salt

Instructions

  • Place all of the ingredients in a saucepan set over medium-high heat. Let the mixture come to a simmer and stir occasionally, letting it cook until it has thickened and achieved a soft jam consistency.

Notes

Mermelada de Tomate Verde con Limón

Huitlacoche

Whenever it starts pouring down rain in late Spring, I hanker for huitlacoche.

A true Mexican delicacy, also called cuitlacoche, it is a form of fungus, similar to some mushrooms, that grows on fresh corn. In the Mexican rainy season, which starts in April (some say March) and ends sometime in September (some say October), you can find huitlacoche at its peak.

It doesn’t look that pretty. It grows in an oversize and disproportionate manner on ears of corn, producing huge kernels that are black inside and covered with a somewhat silvery-white, sparkly and velvet textured skin.

Its flavor is intense and unmatchable: mushroomy, earthy, woody, and a bit inky; it reminds me of calamari ink.

Huitlacoche 1

In Mexico, it was considered a treat long before the Spaniards arrived. Corn being such a sacred crop, anything that grows on it, especially as delicious, was considered a true gift from the Gods. You can find it throughout the country in the markets, and it costs more than your regular pieces of corn.

It is hard to find it fresh in the US as many farmers have considered it a pest, although restaurants, cooks and chefs are increasingly calling for it. Even the James Beard Foundation held a huitlacoche dinner in 1989 to try to familiarize Americans with it. They called it the Mexican truffle.

If you can’t find it fresh, you can surely find it in cans of very good quality and also frozen. Go for it!

There is so much you can do with it: from soups, to taco and quesadilla fillings, savory rice, and stuffed in crepes, chicken and fish, just to name some. I especially like it cooked with a bit of onion, jalapeño and epazote.

Enchiladas Verdes in a Tomatillo Sauce

When Cinco de Mayo is around the corner, friends start asking me what we will be eating to celebrate… and what I am craving most are Enchiladas Verdes. The perfect yummy family food that stays messy on the casserole.

Even though most native Mexicans know that Cinco de Mayo isn’t a big celebration in Mexico (as a matter of fact, it is mostly celebrated in Puebla), we embrace it outside of Mexico with all our hearts without really knowing why. I guess it is a great excuse to celebrate what we love and miss about Mexico- like the tomatillo, a native Mexican ingredient that is the corner stone of so many dishes.

Enchiladas Verdes 1
The tomatillo, like Cinco de Mayo, has been adopted in the U.S. It can now be found in most supermarkets and it seems to me it will grow big time in American kitchens as it is such a spectacular ingredient.

While on the outside it isn’t the most appealing ingredient because of the papery and dusty husk, but once you peel it, rinse it and try it, you will see what a gorgeous jewel it is, both in looks and in flavor!  Most people know it from being used to make salsa verde, which is exactly what these enchiladas are covered in. You can also find cans and jars of ready made salsa, but it is so easy to make at home, that you should give it a try. It’s tastier too.

To make the salsa, simmer the tomatillos in water with the garlic, until they are soft and pale green.  Then transfer the tomatillos and garlic to the blender and puree with the jalapeño or serrano chiles, cilantro leaves, onion and salt.

Enchiladas Verdes 2

Then to make your enchiladas the best they can be, one at a time, pass each corn tortilla through already hot oil until they change color and soften.  This will prevent them from breaking as you roll them.  The oil also makes the tortillas resilient, so they will hold on to that yummy tomatillo sauce.

Enchiladas Verdes 3

Place some of the shredded chicken into each of the corn tortillas and roll them up.  I like them chunky. You can cook the chicken at home or use a store-bought rotisserie chicken, they both work great here!

Place the rolled tortillas seam side down in a casserole dish.  Pour the tomatillo sauce, generously, over the top. Then bake them for 10 to 15 minutes.

Enchiladas Verdes 4

When they are out of the oven, drizzle Mexican crema over the top, it has a tangy flavor, and when it hits the warm enchiladas, it will warm up, become melty, and become even more creamy, and at the same time it will add some fresh notes to the dish.

Enchiladas Verdes 5

Crumble up some queso fresco on top too. It will keep on crumbling right in your mouth as you eat it.  Add some onion for a nice crunch, and then they are ready to go!

Enchiladas can be made with many different sauces and fillings.  This take has the traditional salsa verde or green tomatillo sauce and chicken, but you can play with the fillings.

Enchiladas Verdes 6

If you have extra tomatillo salsa left over…  Try serving it over tilapia filets, baked in the oven; or serve on top of sunny side up eggs in the morning.  This tomatillo sauce is truly limitless.

You can eat Enchiladas Verdes like me, to celebrate Cinco de Mayo. But you can also eat them everyday. After all, everyday is worthy of being celebrated, with a Mexican excuse or not.

Print Recipe
4.75 from 8 votes

Enchiladas Verdes in a Tomatillo Sauce

Enchiladas can be made with many different sauces and fillings. This take has the traditional salsa verde or green tomatillo sauce and chicken, but you can play with the fillings.
Prep Time20 minutes
Cook Time30 minutes
Course: Antojos, Main Course
Cuisine: Mexican
Keyword: Antojo, chicken, Enchilada, Recipe, salsa verde
Servings: 6 to 8 servings
Author: Pati Jinich

Ingredients

For the sauce:

  • 2 pounds green tomatillos husks removed and rinsed
  • 2 cloves garlic
  • 2 serrano chiles or to taste
  • 1 cup cilantro leaves
  • 1/4 cup white onion roughly chopped
  • 1 teaspoon kosher or sea salt more or less to taste
  • 1 tablespoon safflower or corn oil

For the enchiladas:

  • 2 cups shredded cooked chicken home cooked or rotisserie works great!
  • Oil for frying the tortillas
  • 12 corn tortillas
  • 1/2 cup Mexican style cream can substitute for heavy cream
  • 1/2 cup crumbled queso fresco farmers cheese, cotija or mild feta
  • 1/3 cup white onion chopped, for garnish

Instructions

To make the sauce:

  • Place the tomatillos and garlic cloves in a pot and cover with water. Place over medium-high heat until it comes to a boil. Simmer on medium heat for about 10 minutes, or until tomatillos change their color from bright to pale green, are cooked through, and are soft but not coming apart.
  • Place the tomatillos, garlic and 1/2 cup of the cooking liquid in the blender and puree. Add the chiles serranos, cilantro leaves, onion and salt, and puree again until smooth. Heat a tablespoon of oil in a pot over medium-high heat. Once it is hot, but not smoking, pour in the sauce and bring to a simmer. Let it simmer over medium heat for about 6 minutes, until it thickens and deepens in color. Taste for salt and add more if need be.

To make the enchiladas:

  • In a large saute pan over medium heat, add enough oil to have about 1/2 inch depth. Let it heat about 3 minutes. Gently "pass each tortilla through the oil," one by one, for about 15 seconds on each side, they will soften and become resilient. You should be able to fold them without breaking them. Transfer them to a paper towel covered plate.
  • Preheat the oven to 375°F.
  • Place about 2 to 3 tablespoons chicken inside of each tortilla and roll them up. Place them, seam side down on a baking dish. Cover, generously, with the green sauce. Place them in the oven for 10 to 15 minutes. Remove them from the oven, sprinkle with the crumbled cheese, the cream, and the chopped onion. They are very satisfying with a side of rice and/or beans, as well as with a light green salad.
  • Eat the enchiladas while they are hot!

Notes

Enchiladas Verdes

Molletes with Pico: No Way not to Fall in Love

It takes three ingredients, plus any extra topping that you fancy, 8 minutes in the toaster or oven and you get one of the most comforting foods I have eaten since I can remember: Molletes.

One of the most popular Mexican anytime antojitos or cravings, Molletes can be eaten for breakfast, brunch, lunch, a hearty afternoon snack or dinner.  It used to be a standard option for breakfast or dinner at my house growing up in Mexico City, just as quesadillas were. But I also used to crave Molletes from my school cafeteria.

So yes, even if I had some at home in the morning, I would have more for lunch at school.

First, you need the earthy and filling refried beans. You can make your own at home -I make a weekly double batch of beans and use it all week long- or buy ready made at the store. I usually go for Pintos, from photo below, or Black beans.

molletes 1

Secondly, you need crispy bread. In Mexico it is always a bolillo or telera, the Mexican adaptation of the baguette (since times of Maximilian in the 1860’s). But you can use petite baguettes or cut individual portions from a large baguette. Portuguese buns are similar too.

Slice the breads in half lengthwise and slather 2 to 4 tablespoons of refried beans on each half.

Molletes 2

Lastly, add a generous amount of shredded, melting cheese. Something flavorful, but not too overpowering, like Oaxaca, Mozzarella (but not the fresh wet one), Monterey Jack, Light Cheddar or Muenster. In Mexico I would also go for the Chihuahua or Mexican Manchego, but those are hard to come by in the US.

Then in the toaster or oven they go, for about 8 minutes. Until the bread crisps on the outside even more, the earthy beans have heated up and the cheese is oozing on top of it all.

Molletes 3
As with most antojitos, they can be messed around with. You can add extra toppings like crumbled bacon, chorizo, turkey or ham.

My boys love to have those choices! It makes them feel empowered in the kitchen, different from one another and like they are fully enforcing their free will on my territory. Which honestly, is more and more theirs, as the years go by. And I just love that, I can’t begin to tell you how much.

In restaurants and coffee shops Molletes are usually served with a side of Pico de Gallo.

Molletes 4

Talk about a way to make them even more wholesome and colorful. A healthy mix of ripe tomatoes, a bit of onion, cilantro and fresh chile, all mixed with fresh squeezed lime juice. But sometimes I will serve them along a Salsa Verde or Chipotles in Adobo. Delicious as well.

There is no way not to fall in love with this quick, fun and tasty meal. There’s just… none.

Enjoy!

Print Recipe
5 from 4 votes

Grilled Bean and Cheese Heros

It takes three ingredients, plus any extra topping that you fancy, 8 minutes in the toaster or oven and you get one of the most comforting foods I have eaten since I can remember: Molletes.
Prep Time5 minutes
Cook Time8 minutes
Course: Antojos
Cuisine: Mexican
Keyword: Antojo, beans, Monterrey Jack cheese, mozzarella, Oaxaca cheese, pati's mexican table, Pico de Gallo, Recipe, refried beans, telera
Servings: 4 to 6 servings
Author: Pati Jinich

Ingredients

  • 4 teleras bolillos, petite baguettes or large baguettes cut into 6" portions
  • 2 cups refried beans homemade or store bought
  • 2 cups Oaxaca cheese mozzarella or Monterrey jack, grated (any melting cheese of your liking will do)
  • Serve with pico de gallo salsa or another salsa of your choice

Instructions

  • Preheat the oven to 350 degrees.
  • Slice the bread in half lengthwise to have 8 pieces. Spread each piece with 3 to 4 tablespoons of refried beans and add 3 to 4 tablespoons of grated cheese on top. Arrange Molletes on a baking sheet as you make them. If you want, add additional toppings like ham, turkey, bacon or chorizo. Sprinkle them on top of the cheese. When they are all assembled, place the baking sheet into the oven.
  • Bake for 8 to 10 minutes, or until the cheese has melted and the bread has a nice toasted crust around the edges. Serve with Pico de Gallo salsa, or a salsa of your choice, on the side or on top.

Notes

Molletes

Chorizo

I grew up eating chorizo in Mexico, and I love it.  It comes in deep-burnt-reddish links of fresh, moist, exotically seasoned ground meat, that once, fried, becomes crisp and filling bites with bold flavors and a thousand uses.

When I moved to the United States, more than a dozen years ago, I was thrilled to find chorizo in international grocery stores.  Lately, I have been intrigued and surprised to see that my Mexican chorizo is now accompanied by many other kinds in the refrigerated sections of bigger, more mainstream stores.

Latin chorizos differ greatly from Spanish ones. Spanish chorizos typically are dried and smoked cured links of chopped meat, seasoned mainly with garlic and paprika; they tend to be ready to eat and have a salami-like soft and chewy bite. Latin ones however, are raw and need to be cooked before eating.

Mexican is the spiciest of all the Latin chorizos, and I won’t deny that it’s my favorite.  Mexican chorizos can have variations as well, but they generally contain dried chile peppers like ancho, pasilla, guajillo and/or chipotles; a mix of spices that might include oregano, cumin, thyme, marhoram, bay leaves, cinnamon, coriander seeds, allspice, paprika, achiote and cloves; most times garlic and sometimes onion, and always vinegar, which makes the meat flake or crumble as it brown and give it a welcome hint of acidity.

Toluca, a city in Mexico known as The Chorizo Capital, also has a delicious Green Chorizo. That has green fresh chiles and herbs in the mix.

For different ways to try use chorizo, check out the ideas and recipes, like the Mexican style pasta below, on my chorizo episode. And if you feel like making your own Mexican chorizo, you may want to give Mrs.Wheelbarrow’s recipe a try.

Black Beans

Beans are a crucial part of any Mexican meal, where the black bean is the most common bean used generally speaking. However, speaking regionally, it is favored in the Southern states and also in Veracruz.  In the northern areas of Mexico, the lighter colored beans such as the Pinto are more common, and in the center areas, both kinds are eaten as well as Peruvian beans.

With shiny black skins, they have an intense, sort of inky, flavor that develops while cooking.

The Washington Post: Pati Jinich: Made for TV

“When chef and writer Pati Jinich warms up to a subject on Mexican cooking, any subject on Mexican cooking, she’ll start talking fast, her musical words barely keeping up with the thoughts racing through her head.  Her hands will become animated, as much to make a connection as to punctuate a point.  She likes to tough people lightly on the arm or, more emphatically, point at them when they say something she likes.  She laughs as if everything you say is comedic gold.

Sometimes it seems as if Pati Jinich — she prefers the informal name — could turn a misanthrope into butter or, perhaps more surprising…”

To continue reading, click here.

A National Public Television Series and an Avocado Chop Chop Salad: Take a Peek!

I’ve been wanting to write this post for days. Every time I try, it feels like hundreds of flowers bloom in my head, clouding my thoughts. My tongue gets tied too. Which is not common. I usually don’t hesitate to express my thoughts.

So, pushing aside the flowers and the thing with the tongue…

Dearest friends, here’s the news: if you like Mexican food, if you like Public Television, if you like my approach to cooking, then… I hope you’ll like to hear that Pati’s Mexican Table is premiering on National Public Television, this spring.

I can tell you so many things about how the series came together and why I am so passionate about it. It’s been a fascinating journey: radically switching careers, launching the Culinary Program at the Institute, starting the blog, and now, embarking on the TV series.

What a wild zigzag. But with each turn I’ve confirmed that I want to keep on sharing and exploring Mexican food and all that surrounds it for as long as I can.

Avocado Chop Chop Salad 1

It pleases me to no end to watch my students devour the food at the Institute’s events, and more so when they write to say they’ve made the recipes at home. I love the stories you’ve shared in the blog’s comments and your requests for different cravings. I try to give you the most reliable recipe for that special cookie, dish, soup, or drink that brings you good memories or that you’ve been dying to try. Your filled and happy tummies, stories and requests, fuel my appetite to cook and share more.

See… there is a side of Mexican cuisine that is yet to be fully savored and appreciated: home-style Mexican food.  And for that, thankfully, many preconceptions become broken.

Take this Avocado, Tomato, Corn and Hearts of Palm Chop Chop Salad. One of the first recipes I thought of including in the series.

Avocado Chop Chop Salad 2

The buttery and luxurious Mexican avocados, the plump and fresh tomatoes, the sweet and crunchy corn, are all native Mexican ingredients. The hearts of palm are not, but its an ingredient that has been popular in Mexican kitchens for ages. Called palmitos, or little palm trees, when I was growing up in Mexico city, my grandmother and mother used to pair Palmitos and avocado for special occasions, just like many restaurants do.

See the mix! It is colorful, it is fresh, it is wholesome. Not many adjectives given to Mexican food outside of Mexico.

This salad is not laborious, as many consider good Mexican food to be. Ingredients here have to be simply, roughly chopped. Just like that!

Avocado Chop Chop Salad 3

The vinaigrette has crisp and clear ingredients: olive and safflower oils, the always straight forward apple cider vinegar, the lively fresh squeezed lime juice, salt, pepper, oregano (commonly used to season Mexican food, though not that well known) and brown sugar to help all of those flavors shine.

Simple, but layered flavors that feel so smooth when you take a bite.

And no. This salad isn’t spicy. Though I am wild about fresh and dried chiles, like most Mexicans (we need them! we do! there is sooo much one can do with each different kind!), and they are a staple in Mexican cooking (you will see some of my favorite ones in the series…) not all Mexican food is spicy nor has chiles.

What gives this salad a bit of pungency is a bit of chopped red onion.

Avocado Chop Chop Salad 4

There is nothing here battered or fried. Nor is this salad stuffed inside a giant tortilla with a gazillion other ingredients (OK, my boys do like U.S.-style burritos and I have come to appreciate them, but we also love Mexican-style ones… which I share in one of the show’s episodes).

Avocado Chop Chop Salad 5

What tops the salad, and gives it a healthy, crunchy and lightly nutty flavored bite are the toasted pumpkin seeds. An ingredient that since long before the time of the Aztecs, has been the base of moles, stews, sauces and pastes. They are used for all that, and for this too.

Avocado Chop Chop Salad 6

So of course I will share traditional dishes that have been passed down in families for generations, the pepitos, the soups, the tacos, the stews, the salsas, the practical moles, the flans and the panes dulces. But I will also share some of the modern spins made within the genuine boundaries of Mexican cooking: so you can explore along with me, a cuisine that keeps on evolving, inside and outside of Mexico.

Avocado Chop Chop Salad 7

So tune in!! And please, keep on sharing what you like and what you don’t, and mostly: send me your requests, I will try to keep on honoring them all.

p.s. The series premieres on WETA TV 26 Saturday April 2nd at 11:30 am in DC/MD/VA. Check your local public television station for their schedule this Spring!

Print Recipe
5 from 4 votes

Avocado and Hearts of Palm Chop Chop Salad

The buttery and luxurious Mexican avocados, the plump and fresh tomatoes, the sweet and crunchy corn, are all native Mexican ingredients. The hearts of palm are not, but its an ingredient that has been popular in Mexican kitchens for ages. Called palmitos, or little palm trees, when I was growing up in Mexico city, my grandmother and mother used to pair Palmitos and avocado for special occasions, just like many restaurants do.
Prep Time10 minutes
Cook Time5 minutes
Course: Salad
Cuisine: Mexican
Keyword: apple cider vinegar, Avocado, Corn, hearts of palm, lime, pumpkin seeds, Recipe, red onion, salad, Tomatoes, Vegetarian, vinaigrette
Servings: 4 to 6 servings
Author: Pati Jinich

Ingredients

For the salad:

  • 3 ripe Mexican avocados about 2 pounds, pulp cut into large chunks
  • 14 ounces hearts of palm drained, rinsed and thickly sliced, about 1 1/3 cups
  • 1 cup corn kernels from freshly cooked ears of corn or thawed and cooked from frozen
  • 1 tablespoon red onion chopped
  • 6 ounces cherry tomatoes or about 1 cup, whole or halved according to your preference
  • 3 tablespoons pumpkin seeds toasted

For the vinaigrette:

  • 2 teaspoons apple cider vinegar
  • 1 tablespoon lime juice
  • 1/4 teaspoon oregano
  • 3/4 teaspoon sea salt
  • 1/4 teaspoon brown sugar
  • 1/4 teaspoon black pepper
  • 2 tablespoons olive oil
  • 2 tablespoons safflower oil

Instructions

To make the vinaigrette:

  • Pour the vinegar and lime juice in a small bowl. Add oregano, salt sugar and black pepper. Pour the oils in a slow stream, whisking with a whisk or fork to emulsify. The vinaigrette can be made a day ahead of time, just emulsify before using.

To toast the pumpkin seeds:

  • Place the pumpkin seeds in an already hot small saute pan, set over medium heat. Stir often, being careful not to burn them, until you start to hear popping sounds (similar to pop corn), and they begin to acquire a nice tanned color, about 4 to 5 minutes later. Remove from heat and place in a bowl.

To make the salad:

  • In a separate bowl, gently mix the avocado chunks, hearts of palm slices, corn kernels, cherry tomatoes and red onion with the vinaigrette. Sprinkle with the toasted pumpkin seeds and serve.
  • This salad can be served as a main salad with a side of toast or pita bread, or it can be served as a side salad to grilled chicken, fish or meat.

Notes

Ensalada de Aguacate y Palmitos

Ham and Cheese Quesadillas

Ham and Cheese Sincronizadas with Flour Tortillas
Print Recipe
4 from 7 votes

Ham and Cheese Quesadillas

Ham and Cheese Quesadillas recipe from Pati's Mexican Table Season 1, Episode 1 “Quesadillas”
Prep Time5 minutes
Cook Time10 minutes
Total Time15 minutes
Course: Antojos, Main Course
Cuisine: Mexican
Keyword: Avocado, Chihuahua cheese, flour tortillas, ham, Monterrey Jack cheese, Muenster cheese, Oaxaca cheese, pati's mexican table, Quesadilla, turkey
Servings: 6 sincronizadas
Author: Pati Jinich

Ingredients

  • 12 flour tortillas
  • Safflower or corn oil optional
  • 8 ounces Chihuahua, Oaxaca, Monterey Jack, Muenster or melty cheese of your choice
  • 6 to 12 thin slices ham or turkey
  • Mexican avocado slices optional
  • Salsa of your choice

Instructions

  • Heat a non-stick sauté pan or a comal over medium heat. Place a couple flour tortillas, many as will fit in the pan or comal, top with a generous amount of shredded cheese and one or two slices of ham or turkey. Cover with a second flour tortilla.
  • Heat until the flour tortillas in the bottom become lightly toasted and cheese starts melting. With the help of a spatula, flip them to the other side and let it heat and crisp a bit. I like to wait until the cheese oozes out, browns and crisps a little! Transfer to a plate and slice in half or quarters.
  • Serve with a salsa of your choice and slices of ripe avocado on the side.

Notes

Sincronizadas de Jamón con Queso

You Asked for It: Chipotle Chiles in Adobo Sauce

Shortly after posting one of my first Basic Ingredients posts, on Chipotles in Adobo Sauce, Cath Kelly from Australia commented: “I’ve been desperately looking for a recipe to make Chipotles in Adobo. We smoke our own Jalapeños which turn out beautiful, and this is the next step in my cooking process. Please hurry up and cook them up for us!”

Australia… An exotic place for someone to wonder how to make this addicting and versatile Mexican chile pickle. What’s more, as much as Chipotles in Adobo are a basic staple in Mexican cooking, most Mexicans buy them ready-made in cans in stores and of extraordinary quality.

Think mustard, do you buy it or make your own?

Then again, time has proved there are more people into making things from scratch than what I thought: The most visited Post on my site, by far, is the one to make Pickled Jalapeños. Another chile pickle devoured by Mexicans from morning ’til night, from north to south, also usually bought ready-made in cans.

Well, Cath, it has taken me a while. I am sorry. It has not been because I didn’t have your request in mind. On the contrary, I’ve been testing and tweaking my recipe here and there, for over a year (!) so that when you make it, it can be better than what you get in the stores.

Chipotles in Adobo 1
There are different types of Chipotle Chiles. All Chipotles are Jalapeños that have been ripened, dried and smoked. They all turn out to be spicy, rich and smoky. But different varieties of Jalapeños turn into different varieties of Chipotles.

The smaller kind of Jalapeños, more intensely flavored and fragrant than the rest, turn into Chipotles Moritas, pictured above. Dark in color and deep in taste, they’re the ones I prefer. Commercial makers do too, probably because of their flavor and attractive color, but also because being smaller, they work well for the smaller sized cans sold in shops.

You can also use Chipotles Mecos, pictured below. They are bigger than Moritas and with a much lighter color. They are tasty too.

Chipotles in Adobo 2
The perception exists, that it is complicated to make Chipotles in Adobo. It’s not.

Chipotles need to be rinsed and simmered in water for about 15 minutes. This rehydrates and plumps them up, so they can absorb the flavors from the Adobo sauce and have a soft bite.

Chipotles in Adobo 3
Most recipes for pickling Chipotles, don’t include the Adobo element. But it is the Adobo which makes the store bought product so rich and delicious.

To make it, aside from the usual pickling suspects such as vinegar, oil and spices, after a lot of testing, I found out you need Ancho chiles. Some people add tomatoes some people don’t. My palate does call for them. Once the tomatoes and Ancho chiles are cooked in water until soft, and pureed, they make a rich Adobo base.

Chipotles in Adobo 4
Yes… The idea of marinating a Chile in the puree of another Chile is wild. But it is exquisite. Chipotles are spicy, smoky and rich. Anchos are bittersweet, mild and have a prune like flavor. Trust me, they like each other’s company.

The Ancho chile base is cooked and seasoned over sauteed carrots, onion and garlic in olive oil.

Chipotles in Adobo 5

With the addition of marjoram, thyme and bay leaves.

Chipotles in Adobo 6


Then those chiles beg for salt and a generous amount of brown sugar, or piloncillo. What it does to those Chipotles is blissful.

No.

Maybe sinful.

You be the judge…

Chipotles in Adobo 7
To finish the Adobo, pour rice vinegar and white distilled vinegar. That combination of vinegars works as if you were using the fruit based home made vinegars traditional in Mexico’s countryside.

Chipotles in Adobo 8


Then you just add the chipotles, cook it all together for 10 minutes. And you are done.

Chipotles in Adobo 9


Once they cool off, place them in pint sized jars.

This recipe will make four pints you can keep in the refrigerator until you finish eating them (they will last months and months and keep getting better).

Chipotles in Adobo 10
There may be a more important reason why most Mexicans don’t make their own Chipotles in Adobo Sauce. Not only is it because the product sold at the shops is so good. Or because there is the perception that it takes a long time to make them. I think its mostly because they are so good, and eaten in such large quantities, that any home cook would need to make Chipotles in Adobo continuously in their kitchen to meet the steady demand for more.

They are eaten with everything! Tortas, sandwiches, quesadillas, tostadas as a pickle… They are also used to season and flavor from soups to stews, to tamales to beans, dressings and casseroles… and so much more…

Here you go Cath Kelly, I hope this recipe pleases you so. Now you got me in trouble, my husband says he will not eat the canned product anymore.

Print Recipe
4.20 from 5 votes

Chipotle Chiles in Adobo Sauce

Shortly after posting one of my first Basic Ingredients posts, on Chipotles in Adobo Sauce, Cath Kelly from Australia commented: “I’ve been desperately looking for a recipe to make Chipotles in Adobo. We smoke our own Jalapeños which turn out beautiful, and this is the next step in my cooking process. Please hurry up and cook them up for us!”
Prep Time25 minutes
Cook Time1 day
Course: Antojos, Sauce
Cuisine: Mexican
Keyword: ancho chiles, carrots, chipotles in adobo, jalapeno, onion, piloncillo, Recipe, Salsa, Tomatoes, vinegar
Servings: 4 pints
Author: Pati Jinich

Ingredients

  • 1/2 pound dried chipotle chiles moritas about 90, or for the mecos, about 45
  • 1 ounce ancho chiles about 2 or 3 chiles, rinsed, stemmed and seeded
  • 4 roma tomatoes about 1 pound
  • 1 1/2 cup ancho chile and tomato cooking liquid see below
  • 1 cup olive oil
  • 3 cups medium carrots peeled and sliced, about 2 1/2 carrots
  • 1 white onion halved and sliced, about 3 cups
  • 6 garlic cloves thickly sliced
  • 1/2 teaspoon dried marjoram
  • 1/2 teaspoon dried thyme
  • 2 bay leaves
  • 3/4 cup dark brown sugar or piloncillo grated
  • 1 tablespoon kosher or sea salt or more to taste
  • 3/4 cup white distilled vinegar
  • 3/4 cup rice vinegar

Instructions

  • Rinse the chipotle chiles and drain. Place in a medium saucepan and cover with water. Set over medium-high heat. Once the water begins to simmer, cook for 15 minutes. Turn off the heat.
  • Place the stemmed and seeded ancho chiles and tomatoes in a pot and cover with water. Simmer for about 6 to 8 minutes until the tomatoes are cooked through and soft. Transfer to a blender with 1 cup of the cooking liquid, and puree until smooth.
  • In a large saute pan, heat the oil over medium-high heat until hot but not smoking, about 1 to 2 minutes. Stir in the carrots and onion, let them season for a couple minutes. Make some room and add the garlic, cook for another minute. Pour in the ancho chile and tomatoe puree, the marjoram, thyme, bay leaves, salt and sugar. Stir, and let the sauce season and thicken for 5 to 6 minutes.
  • Pour in the vinegars, and cook for another 5 minutes. Finally, drain the chipotles, discard their cooking liquid and add to the mix. Let it all cook together for 5 more minutes and turn off the heat. Let them cool off and place in jars.
  • Cover tightly and refrigerate. Give them a day before you eat them, so they will have had time to pickle and thrive in that adobo sauce.
  • They will keep in the refrigerator for 6 months, if you don't eat them all first.

Notes

Chipotles en Adobo

Fava Beans

Fava beans have been around for quite a long time. Ancient Egyptians prized them so much that they were buried with them inside of their tombs! Originally native to Africa and southwest Asia, today Favas are cultivated all over the world. Thanks to the Spaniards, Mexicans have been enjoying them since the XVI century, in may different ways.

Filled with nutrients and vitamins, they are also filled with a deep strong flavor. In Central Mexico, they are  commonly found fresh at markets in the spring time where they range in size from the mini to the large and in colors from the pale green to the deep purple.  When fresh, they come with a shell and a leathery skin underneath it, both of which need to be removed before eating, a process that can be quite laborious. Then they are eaten in soups, stews and salads mostly.

They are also found in the stores and markets dried year round; you can find them hulled and peeled or not peeled, in which case they need to be soaked before cooking, then simmered for hours until soft and peeled. They look pretty, but it is quite laborious too. And they are used to make dishes, year round too.

DSC_0202

That’s why its just easier to get them in the second variation, as below. Already hulled and peeled. In this case, Fava beans just need to be cooked until soft, and then they can be the base of tasty soups, stews and even salads. They are also famously used to make a Fava bean paste that is used in many Mexican antojitos like gorditas and tlacoyos.

Another popular and delicious way to eat this wholesome ingredient, is by toasting or frying them and covering them with chili powder, lime juice, and salt.  They are called habas tostadas, a favorite snack for movie goers.

Where to Find Caldo de Camarón? Make Your Own!

When I was in high school in Mexico City, Tecamacharlie’s was one of the most popular meeting spots. The name came from Tecamachalco, the neighborhood where it sits tucked away in a corner, and the chain of Restaurants it belongs to, Anderson’s Carlos & Charlies. There, my friends and I would meet some Friday afternoons after school, to have a late and long lunch or comida and embrace the weekend.

Even before school started those Friday mornings, there would be one thing in my mind: Tecamacharlie’s top notch Caldo de Camarón. A rich and thick soupy broth made with dried and salted shrimp, and seasoned with a base of Guajillo chile sauce.

A soup so flavorful and filling, it was served as a courtesy as soon as you finally sat down in that incredibly busy and loud place. The waiters brought it out of the kitchen still simmering, served in a little caballito, the little glass shots used to serve Tequila.

There were plump limes already quartered at the table, waiting to be squeezed into the soup before you drank it in one gulp. If you were lucky, the bottom of the shot had a shrimp, and maybe a couple pieces of potato and carrot. Then you could stick your fork or finger in there, to eat those little treasures that tasted like adventures at the sea port. Far away from the City.

Caldo de Camaron 1

That was 20 years ago and I haven’t been back to that Restaurant since those teen years. So I can’t vouch for how good it is these days… Plus, nostalgia has its way of overpowering memories sometimes too.

But one can find that Caldo de Camarón, with slight variations in many restaurants in Mexico city, and it is even more popular throughout the long Mexican coasts.

The latest one I’ve tried and I think even a better one, regardless of the power of nostalgia, is at one of the Guadiana Restaurants, which I always visit each time I go to the city.

Caldo de Camaron 2
As much as I have looked, there is no Caldo de Camarón to be found around DC. But one can find the handful of ingredients that the soup calls for. Although they are just a handful, they have enough personality to power a rock band.

The dried shrimp, of course, pictured above. Which need to be soaked for 5 to 10 minutes, as they have been salted not only to concentrate their flavor but also to preserve them, so the salt is, truly, intense.  Then the shrimp are rinsed and cooked in water, creating a broth which provides the main and matchless flavoring of the soup.

Then, the Guajillo chiles, with their mild heat and crowd pleasing taste. After they are quickly stemmed, seeded and toasted, beautifully toasted, really, look at the color…

Caldo de Camaron 3
They are then simmered with one of Mexico’s workhorse combinations: onion, garlic and tomato. Some people add parsley to the mix. Some add Bay Leaf, like me.

Caldo de Camaron 4
That goes into the blender, and then strained into a pot with some hot oil waiting to season the mix.

Caldo de Camaron 5
Once seasoned, in goes that deep amber colored dried shrimp broth.

Caldo de Camaron 6
The traditional cubed potatoes and carrots…

I like to add more than the usual recipes call for, so that neither me nor my guests have to be hunting those little soft chunks in the soup bowl.

Caldo de Camaron 7
When the shrimp have cooled, remove their heads, tails, and legs. Most cooks keep the shells on. They are a salty and crunchy addition in the soup. However, you can remove the shells if you feel like it. For a softer feel. Then cook for 10 more minutes so all of the flavors can come together.

Caldo de Camaron 8
Do serve the soup really hot. And always, always, always, have fresh limes ready to be squeezed in the soup.

Caldo de Camaron 9
That fresh squeezed lime juice is what makes all of the flavors in the soup, truly shine.

Print Recipe
4.75 from 4 votes

Dried Shrimp Soup

A rich and thick soupy broth made with dried and salted shrimp, and seasoned with a base of Guajillo chile sauce. A soup so flavorful and filling, it was served as a courtesy as soon as you finally sat down in that incredibly busy and loud place. The waiters brought it out of the kitchen still simmering, served in a little caballito, the little glass shots used to serve Tequila.
Prep Time20 minutes
Cook Time45 minutes
Course: Soup
Cuisine: Mexican
Keyword: achiote paste, garlic, guajillo chiles, lime, onion, potatoes, Recipe, seafood, Shrimp, soup, Tomatoes
Servings: 6 to 8 servings
Author: Pati Jinich

Ingredients

  • 1 pound Mexican dried shrimp
  • 3 ounces guajillo chiles about 8-10 chiles
  • 1/4 pound ripe tomatoes
  • 1 clove garlic
  • 2 bay leaves
  • 1 large slice of onion or about 3 tablespoons, roughly chopped
  • 1 pound potatoes rinsed, peeled and cubed
  • 1/2 pound carrots rinsed, peeled and cubed
  • 3 to 4 limes
  • 2 tablespoons oil

Instructions

  • Cover the shrimp with cold water and let sit for 15 minutes. Drain the shrimp, rinse them and place them in a medium pot. Cover the shrimp with 10 cups of water and bring to a simmer over medium-high heat. Once at a simmer, lower the medium heat and simmer for 10 minutes. Strain the broth, reserving both the broth and the shrimp. Allow everything to cool.
  • Once the shrimp have cooled, remove the heads, tails and legs from the shrimp. Be sure to keep the shells on the shrimp if you want them to add some crunch to the soup.
  • Remove the stems and seeds from the chiles and place them on a hot comal. Toast until their color changes to opaque, for about 10 to 15 seconds and flip to the other side.
  • Place the chiles, tomatoes, garlic, bay leaves, and onion into a saucepan and cover with water. Simmer for 10 minutes over medium heat, then puree until smooth.
  • Over medium heat, add two tablespoons of oil to a large soup pot. Strain the puree over the oil and then simmer for 8 to 10 minutes over medium-high heat, allowing the puree to season and thicken.
  • Add the shrimp broth, potatoes, carrots, and shrimp to the puree and simmer for 10 minutes over medium-high heat.
  • Serve the soup with fresh lime to drizzle over the top.

Notes

Caldo de Camarón

Guajillo Chile

The Guajillo chile is one of the most commonly used Mexican dried chiles, and it is now widely available in the United States. It is long and pointy, with a beautiful maroon color. Its skin is quite smooth and shinny on the outside, but it is hard and tougher and less pliable than others, like the Ancho.

It has a pleasant and deep flavor, with mild heat and it tends to be a crowd pleaser.
Continue reading “Guajillo Chile”

Dried Shrimp: Camarón Seco

Dried shrimp are used not only for the Caldo de Camarón, or Shrimp Soup or Broth. They are  also used to make shrimp patties that are then bathed in different mole sauces. Also to prepare tamales, rice, beans and potato dishes.  Even some salsas use them ground as a seasoning and thickening base.

Dried shrimp come in different sizes, from the miniature ones smaller than 1/2″ to much larger ones bigger than 3″. Because they are lightly cooked, then salted and left to dry in the sun, they concentrate their flavor intensely and deeply. They are also quite salty.

In Mexico, you can find them in outdoor markets as well as mainstream grocery stores. Here in the US, I’ve found them in Asian and Latin stores. They are also easy to find online.  However, go for those that have this light pale color. Don’t go for the pink or red kind that seem too lump and meaty. Good quality dried shrimp should be almost flat and colorless. They have been dehydrated, so that’s what they should look like.

They last in the pantry for months and months and are considered, just like dried chiles, almost a spice. To use them, they are typically soaked in water for 5 to 10 minutes, rinsed, drained, heads and legs removed and then cooked. They have an unmistakable and unique strong flavor.

You Say Mexican Wedding Cookies, I Say Polvorones

I had never heard the name Mexican Wedding Cookies.

Ever.

I was born and raised in Mexico City. I lived there all my life until I married my husband, another Mexican, and moved to the U.S.

There were no Mexican Wedding Cookies at our Mexican wedding (though there were a ton of roosters doing their Cock a Doodle Do thing next door, which made it hard for us to say our vows real loud…). Nor were there any of those cookies, at any wedding in Mexico that I have ever attended. None.

The first time I heard the name Mexican Wedding Cookie was once we moved to Washington D.C. Since then, I have been asked about them continuously. What’s more, once I started my blog, I began to receive a lot of requests, via lovely emails, for their recipe.

It took me a while to realize that those Mexican Wedding Cookies, so liked this side of the border, are what I love and know as Polvorones. One of Mexico’s most popular treats, consumed on an every day basis, and found in just about every Panaderí­a (bakery) and any grocery store throughout the whole country.

Mexican Wedding Cookies 1
The name Polvorón seems to come from the word Polvo, which translates to dust or powder. Maybe because these cookies break into the finest of crumbs the moment they touch your mouth. And as you take a bite, they seem to melt and disappear.

They come in many flavors: plain, pecan, peanut, vanilla, cinnamon and even chocolate, to name some. I go for pecans.

Mexican Wedding Cookies 2
Since the cookie is so light, pecans add a nice and nutty depth of flavor, as well as an extra crunch.

Just grind the pecans using a food processor or blender. You can also chop them finely. My mother has an old fashioned nut grinder, which looks like a small mill or molino. It is a real find. I should have convinced her to give it to me as a wedding gift, now that we are talking about weddings….

Whichever way you decide to finely chop or grind them, mix them with the confectioners’s sugar.

Mexican Wedding Cookies 3
It is the addition of this kind of sugar which gives these cookies that airy quality and that peculiar light sweet taste.

They are similar to shortbread cookies, and as such, can be made in a bowl and mixed with your hands. Aside from being a quick and fun method, it is practical in a busy kitchen. Very few things to wash…

So grab a large mixing bowl and stir in the flour and salt. Cut your cold butter into small chunks and spoon in the vegetable shortening in teaspoon amounts.

Mexican Wed 4ding Cookies
Dive in with your hands, and work in the butter and vegetable shortening into the flour with your fingers.

Mexican Wedding Cookies 5
Its therapeutic.

In no time, you will get this nice flaky crumbly dough.

Mexican Wedding Cookies 6
Add in the sugar and pecan mixture. Work it in…

Mexican Wedding Cookies 7
Crack an egg. Mix it in. It will help the dough come together.

Mexican Wedding Cookies 8
Knead the dough until you can turn it into a ball. Don’t overwork the dough. You know that you need to stop as soon as you can turn it into a ball. No need to refrigerate if you stopped in time.

You know you overworked the dough if it becomes very, very greasy. The warmth of your hands will do that if work the dough for too long.

Mexican Wedding Cookies 9
Start making the cookies by grabbing small amounts of the dough and making 1 to 1 1/2″ balls. If you over worked the dough, your hands will be too greasy and it will be hard to make the balls. If that is the case, just place the dough in the refrigerator, covered, for 15 minutes… No worries, that will fix it.

Mexican Wedding Cookies 10
Place the balls on a buttered baking sheet, and gently tap each ball as you lay them out.

Super easy! Kids can do this with you.

Mexican Wedding Cookies 11
Once you are done rolling out enough  cookies to fill a baking sheet or tray, place them into the oven for about 15 minutes.

Mexican Wedding Cookies 12
They will come out all golden and delicious.

See that one that looks a bit burned and not so happy?  That’s because I overworked the dough in that single ball to show you what it would look like.

That’s why its good to know when to stop…

Mexican Wedding Cookies 13
Once out, dust them with extra confectioners’ sugar. The more, the better. Go ahead, go wild and dust until you have had enough… These cookies can take it because the dough is barely sweet and they are meant to be showered in that extra sugar.

Mexican Wedding Cookies 14

In Mexico, you can find them as the original Spanish cookies (Spaniards are to blame you know, they are the ones who brought them to Mexico), which are flatter, bigger and wider. But you can also find them in some small artisanal shops, in that smaller ball shape all wrapped in beautiful thin colored wrapping paper, with the ends twisted. As if they were little candies, or gifts, to unwrap.

Polvorones are deceiving.  They look hard on the outside. But go ahead and take a bite.

You may understand, like I recently did, why they have been called Mexican Wedding Cookies here in the U.S.

That’s how special they are.

Print Recipe
4.50 from 6 votes

Mexican Wedding Cookies

I had never heard the name Mexican Wedding Cookies. Ever. I was born and raised in Mexico City. I lived there all my life until I married my husband, another Mexican, and moved to the U.S. There were no Mexican Wedding Cookies at our Mexican wedding (though there were a ton of roosters doing their Cock a Doodle Do thing next door, which made it hard for us to say our vows real loud…). Nor were there any of those cookies, at any wedding in Mexico that I have ever attended. None.
Prep Time15 minutes
Cook Time15 minutes
Course: Dessert
Cuisine: Mexican
Keyword: cookies, Dessert, pati's mexican table, pecans, Recipe
Servings: 30 cookies
Author: Pati Jinich

Ingredients

  • 2 cups all-purpose flour
  • 1/8 teaspoon salt
  • 1/2 cup cold unsalted butter cut into chunks
  • 1/2 cup vegetable shortening
  • 1/2 cup pecans grounded or finely chopped
  • 3/4 cup confectioners' sugar plus more to dust
  • 1 egg

Instructions

  • Preheat the oven to 350 degrees.
  • Using a food processor, blender, nut mill or knife, finely chop the pecans. Add the powdered sugar to the processor or blender (if that's what you used) and grind or chop. If done by hand, just mix together.
  • Mix the flour and salt together in a large mixing bowl. Drop in the chunks of butter and the vegetable shortening in teaspoon amounts. Begin to mix with your hands, until the butter and vegetable shortening are mixed in with the flour and salt. The mixture will turn into a coarse dough, with chunks of butter and shortening mixed throughout.
  • Add in the sugar and pecan mixture and work it all in. Crack the egg into the mixture thoroughly combine, using your hands. In less than a minute, the dough should be soft and malleable enough to be turned into a ball. Don't knead more than necessary, you just want it to come together into a homogeneous mass.
  • Butter a large cookie sheet. One by one, make small balls of dough with the palms of your hands. The dough ball should be between 1 and 1 1/2 inches wide. Place them on a baking sheet with about 1 inch in between the dough balls. Bake them for about 15 to 16 minutes, until they have a golden brown color.
  • Dust extra confectioners sugar over the top of the cookies and eat and serve.

Notes

Polvorones

Fava Bean Soup: Time to go Mainstream!

When I think about my mother, I think about her fava bean soup (fine, and a couple other things too). That’s how strong an impact that soup has had on me.

But not many people are wild about favas, habas in Spanish. Different from pasta or potatoes, Favas haven’t gone mainstream.

Okay. I can see why.

First, the fact that they come in many forms can be confusing (fresh in their pod, fresh out of the pod, dried with their skin on, or dried and peeled). Also, the ways to cook them in their different forms haven’t been widely publicized. On top of that, favas have a strong flavor that can be overpowering, and to some, hard to bear.

Now, bear with me here. If you know what form of favas to get for which kind of dish, the confusion is almost gone. With the right recipe, the confusion evaporates further and their overpowering flavor is tamed. Thus, beloved cooks, favas become what they must: filling, rich, wholesome and deliciously intense.

dried and peeled favas

Since we are almost in the middle of winter, and I started talking about my mother’s soup, let’s consider dried favas which can be found year round and store forever in your pantry (fresh ones are found from Spring to Summer).

You can find them with shells on, like these on top. They are pretty, but you need to soak them, cook them and peel them. Quoting my mother: “Ay no Pati, eso de pelar una por una es una monserga” (translates to something like: peeling them one by one is a pain).

If you are looking for a relaxing therapy that will take hours, that’s fine. If you are not, go for the already peeled dried favas, like the ones below. They don’t look as pretty, but have more personality.

dried favas skin on
To cook, soak them in cold water anywhere from 2 to 12 hours. If you forgot to soak them, they will take a bit longer to cook, that’s all.

soaking favas
Now, drain them and place them in a pot with chicken broth and let them simmer, with the cover ajar, for about 50 to 55 minutes. They will be soft, thoroughly cooked and coming apart. That’s what you want.

See the broth? Its thick and lightly hay colored. Soothing looking already.

cooked fava beans
Next step, seasoning base: tomatoes, onion and garlic. My mom makes a rustic kind of soup. She chops the tomatoes, onion and garlic, cooks them with a little oil for 5 minutes and adds it to the cooked fava beans and broth.

I prefer a more smooth version of the soup because:
a) It lets me trick my monsters into eating the beans.
b) It looks more fancy if I want to serve it to guests.
c) With this cold, I find it much more comforting.
d) I like creamy things, so let me indulge myself.

So, I puree the fava beans with the broth once they are ready.

pureed fava beans
As for the seasoning base, with the blender in working mode, I puree the tomatoes with the onion and the garlic too.

tomatoes garlic onion
Cook that nice and thick puree over medium high heat for 5 or 6 minutes, until it thickens and darkens its color. Which means that the ingredients have seasoned and transformed from having a raw flavor to a cooked one.

tomato puree
Pour the fava bean and chicken broth puree right on top of that seasoned tomato base. Add salt, pepper, a pinch of cumin and let it all come together and season for about 10 more minutes.

Meanwhile, slice some bolillos, teleras or baguettes.

slicing baguette
Brush them with a light coat of olive oil, on both sides, if you must. Toast them until tanned and crispy.

brushing baguette
With the soup seasoned and thickened, you are ready to pour it into a bowl.

serving soup
Lay a piece of toast right on top…

place bread on soup
Crown it with some Pasilla chile crisps if you want an extra layer of flavorful crunch (see recipe below).

garnish with pasilla crisps
And jump in!

fava bean soup
Just watch as that piece of toast jumps in along with me.

fava bean soup
And if this blog had sound you would have heard the toast crack in the midst of that fava bean bath.

fava bean soup
And yes it is fabulous! What are you waiting for?

Print Recipe
4.50 from 2 votes

Fava Bean Soup with Crunch Toasts and Pasilla Crisps

When I think about my mother, I think about her fava bean soup (fine, and a couple other things too…). That’s how strong an impact that soup has had on me. But not many people are wild about favas, habas in SpanishDifferent from pasta or potatoes, Favas haven’t gone mainstream.
Prep Time2 hours
Cook Time1 hour
Course: Soup
Cuisine: Mexican
Keyword: bolillo, chicken broth, cumin, fava beans, garlic, onion, pasilla, pati's mexican table, Tomatoes
Servings: 6 servings
Author: Pati Jinich

Ingredients

  • 1 pound fava beans peeled and dried
  • 12 cups chicken broth
  • 1 pound ripe Roma tomatoes quartered
  • 1/2 cup white onion roughly chopped
  • 2 garlic cloves peeled
  • 3 tablespoons safflower oil corn or vegetable oil
  • 1 teaspoon salt
  • 1/4 teaspoon black pepper
  • Pinch of cumin
  • 2 pasilla chiles stemmed, seeded, and cut into small strips and quickly fried
  • 6 diagonal slices of bolillo telera or baguette, lightly brushed with oil and toasted
  • Olive oil to brush over the toast

Instructions

  • In a bowl, cover the fava beans with cold water and let them soak anywhere from 2 hours to overnight. Drain. Place the lima beans and chicken broth in a large soup pot set over medium heat. Let it come to a medium simmer with the lid ajar and cook until the beans are thoroughly cooked and tender, about 50 to 55 minutes. Turn off the heat and let them cool a little bit. Puree in batches in the blender. Place in a container or a large bowl.
  • Meanwhile, puree the tomatoes along with the onion and garlic until smooth. In a large soup pot, heat 3 tablespoons oil over medium-high heat. Once it is hot, but not smoking, pour in the tomato puree. Let it cook, stirring occasionally, until it deepens in color and thickens, about 5 to 6 minutes. Pour in the lime bean puree. Sprinkle the salt and black pepper, and continue cooking for about 8 to 10 minutes, until all of the flavors have combined.
  • Ladle the soup in individual bowls. Garnish with a piece of toast, brushed with olive oil, and sprinkle some crunchy chile strips on top.
  • Note: To make the chile crisps, quickly fry the chile pieces in a saute pan with 1/4" oil set over medium heat. Once oil is hot but not smoking, quickly fry the crisps, literally 2 seconds, remove and place on a plate covered with paper towel.

Notes

Sopa de Habas con Pan Tostado y Chile Pasilla

You have a Pumpkin? Turn it into Tacha!

They go hand in hand, Autumn and Pumpkins.

In the US, I see them scary faced on Halloween, and then, sweetly dressed as pumpkin pies for Thanksgiving. Yet to me, one of their best impersonations is as Calabaza en Tacha: Pumpkin cooked in a Piloncillo Syrup.

Craving Tacha, I paired two things: The pumpkin I saved from my boys’ Halloween makeover and my new orange flamed French Oven.

It was a matter of time. The French Oven needed a sweet Mexican ride to become baptized in my kitchen.

Pumpkin in Piloncillo Syrup 1

Making Pumpkin Tacha in a French Oven or heavy pot is a contemporary trend. The original method, as in XVII c., was to cook the whole pumpkin in a Tompiate (woven palm leaves basket) for hours, simmer it in lime water (not lime as in citrus but lime as in slaked lime or calcium hydroxide, so the thick skin of the pumpkin wouldn’t come apart), bathe it in syrup and cook it for hours, and finally, let it bask in the sun for many more hours.

That was a long and messy ordeal for sure. But there was no refrigeration then. Times have changed. No Tompiate nor slaked lime needed anymore.

You can make your Tacha (sounding like Cha Cha Cha) in a fourth of the time and in a simpler way.

First, place the Piloncillo or brown sugar in a large heavy pot.

Pumpkin in Piloncillo Syrup 2

Pour water over the Piloncillo. If you find Piloncillo also called Panela, you will get that old fashioned, deep, rustic and small Pueblo flavor right there. But brown sugar also does a pretty good job.

Pumpkin in Piloncillo Syrup 3

Place the cinnamon sticks in there too. Not all Tachas have cinnamon, but I like it. If you find True or Ceylon cinnamon, which is soft, crumbly and very aromatic it will have a more Mexican feel. If you only find Cassia, no worries, that works too.

Pumpkin in Piloncillo Syrup 4

I like to add the rind of an orange, because it cuts across the sweetness of the Tacha in a stunning way…

Pumpkin in Piloncillo Syrup 5

…as well as the juice.

Pumpkin in Piloncillo Syrup 6

Not all Tacha versions have cinnamon, orange rind or orange juice. Mine does.

Whichever way you go, let the piloncillo or brown sugar dissolve in the water over medium heat before you add the pumpkin.

Pumpkin in Piloncillo Syrup 7

That gives you time to deal with the pumpkin…

Rinse it and cut it into large pieces.

Pumpkin in Piloncillo Syrup 8

Then cut it into individually sized chunks, of about 3″ by 3″.

It is up to you if you want to remove the seeds and strings. Some cooks do, some cooks don’t. I LOVE to leave it all on. It magically transforms into something delicious as you cook i. Plus, those sweetened pumpkin seeds are to die for. Really.

If you do scoop out the seeds and strings, save the seeds so you can rinse, dry and toast them to make Pepitas.

Pumpkin in Piloncillo Syrup 9

There you go…

Pumpkin in Piloncillo Syrup 10

Using a knife, make some slits in the skin of the pumpkin chunks, without cutting all the way through. This will help the thick skin get all soaked up in the sweet citrusy syrup.

Pumpkin in Piloncillo Syrup 11

Once the piloncillo has dissolved into the water, layer the pumpkin chunks.

First, do a layer skin side down…

Pumpkin in Piloncillo Syrup 12

…followed by a layer, skin side up. Don’t worry if it seems like the pumpkin chunks aren’t all covered in the syrup.

Pumpkin in Piloncillo Syrup 13

Once you cover the pot and let it all cook over medium heat, it will ALL get soaked up.

After you place it all in the pot, you have nothing to do but let the heavy pot do its thing.

That’s how it looks after just one hour…

Pumpkin in Piloncillo Syrup 14

See? It all gets soaked up.

Pumpkin in Piloncillo Syrup 15

That’s how it looks after another half hour.

Don’t you dare complain…. you could have been gardening, taking a bath, reading or tweeting all this time. Or something..

Pumpkin in Piloncillo Syrup 16

Then let it simmer uncovered for a half hour and turn off the heat.

The pumpkin will look wet. Really wet. But as it cools down, the chunks will soak most of the syrup and the remaining syrup will thicken. A lot.

You can eat your Tacha still warm.

Or you can let it cool, refrigerate and eat it cold. It will keep in the refrigerator, covered, for months!

Pumpkin in Piloncillo Syrup 17

My favorite way to eat it, is with Mexican style cream or Creme Fraiche.

The contrast between the brown, deep, sweet, meaty, soft pumpkin with the fresh, white, cold, tangy cream is hard to describe.

Tacha is a traditional food for Day of the Dead and quite popular throughout the Christmas season. In fact, in the XVII and XVIII centuries, Pumpkin Tacha was a preferred gift Hacienda owners gave to their friends for Christmas. Though the methods to make Tacha have changed, that practice of giving it as a Holiday gift remains timeless.

Print Recipe
4.80 from 5 votes

Pumpkin in Piloncillo Syrup

They go hand in hand, Autumn and Pumpkins. In the US, I see them scary faced on Halloween, and then, sweetly dressed as pumpkin pies for Thanksgiving. Yet to me, one of their best impersonations is as Calabaza en Tacha: Pumpkin cooked in a Piloncillo Syrup. Craving Tacha, I paired two things: The pumpkin I saved from my boys’ Halloween makeover and my new orange flamed French Oven.
Prep Time10 minutes
Cook Time2 hours 40 minutes
Course: Dessert
Cuisine: Mexican
Keyword: cinnamon, Dessert, orange, orange juice, piloncillo, pumpkin, Recipe
Servings: 12 to 15 people
Author: Pati Jinich

Ingredients

  • 1 medium pumpkin about 8 to 10 pounds
  • 2 cups water
  • 3 pounds piloncillo or about 6 cups packed brown sugar
  • 2 cinnamon sticks
  • Rind of an orange
  • Juice of an orange or about 1/3 cup orange juice

Instructions

  • Place the piloncillo (or brown sugar) into a large, heavy pot. Pour the water on top. Incorporate the cinnamon, orange juice, and orange rind. Place over medium heat and let it come to a simmer, stirring occasionally until the piloncillo has fully dissolved, making a loose syrup. It will take anywhere from 10 to 15 minutes.
  • While the piloncillo is dissolving, rinse the pumpkin clean of any dirt. Cut the pumpkin into large chunks of about 3"x3". Some cooks remove the strings and seeds, some don't, I leave them on. Using a knife, score the skin of the pumpkin chunks, to help the pumpkin absorb the syrup.
  • Once the piloncillo is dissolved into the water, remove the pot from the heat and begin adding the pumpkin pieces. Arrange the pieces of the pumpkin in the pot, with the first layer skin side down and the second layer skin side up.
  • Cover the pot and place it over medium to medium-low heat, for about one and a half hours. Uncover and continue cooking the pumpkin until the it has turned into a rich brown color and has become well soaked in syrup, for about another half hour. Turn off the heat and let the pumpkin cool and finish absorbing all the syrup it can as the rest of the syrup thickens. You may it it warm or let it cool and refrigerate. It will keep in the refrigerator, covered, for months.

Notes

Calabaza en Tacha

On a Soup and a Book

It is partly because of a soup like this, that I want to write a cookbook.

A soup that makes me feel all warm inside when I spoon it into my mouth.

A soup that has the earthiness and simplicity that grounds me.

A soup that, aside from having a comforting base, has layers of surprising life and color and crunch.

A soup that makes me want to eat nothing else for an entire week.

A soup that speaks of centennial traditions and is passed down through generations recipes.

A soup that is a pleasure to think about, to write about, to talk about, to prepare and to savor.

It is mostly because I want to share a soup like this with you, dear friends, that I am jumping to write this cookbook.

So with great news to share: I will be working with the delightful Rux Martin, editor at Houghton Mifflin Harcourt, to make this cookbook come to life.

In this book, I will write about -and tell you how to make- all of those foods that make me want to scream out of joy, along with the stories that revolve around them.

for tomato and bean soup-thumb-510x342-1527

So here you go, for this Fall season, which has already galloped in front of me as I was barely putting away my monsters’ bathing suits: The Sopa Tarasca. One of my favorite soups in the whole entire world.

As with many Mexican dishes, it has a base of tomato, onion and a bit of garlic.

Tarascan Soup 2
But it also has the addition of the prune like, exuberant flavor of the Ancho chile.

After those ingredients are cooked, pureed and seasoned, they are mixed with a bean puree.

Tarascan Soup 3
And chicken broth.

Queso Fresco A1-thumb-510x342-1933
As if that earth shattering base wasn’t enough, this soup is garnished, to your liking with Queso Fresco.

Tarascan Soup 5
Tortilla crisps.

Tarascan Soup 6
Ripe Mexican avocado chunks.

Tarascan Soup 7
And the tangy and salty notes from Mexican cream.

Of course you can toss in some Chile crisps in there too.

Tarascan Soup 8
From the Purépechas -also known as Tarascos- who inhabit the mountainous regions of the soulful state of Michoacán, and after whom this soup was named in its colonial capital of Morelia where I have eaten it one too many times, to the city of Washington DC in the United States of America, where I make it regularly for my Mexican American family: and hopefully it will find a place at your table too.

I lost my breath in that sentence!

Enjoy!

p.s. If you have any Mexican food craving, just name the dish, I will try to make a page for it in that cookbook.

Print Recipe
5 from 5 votes

Tarascan Bean and Tomato Soup

So here you go, for this Fall season, which has already galloped in front of me as I was barely putting away my monsters’ bathing suits: The Sopa Tarasca. One of my favorite soups in the whole entire world. As with many Mexican dishes, it has a base of tomato, onion and a bit of garlic.
Prep Time5 minutes
Cook Time30 minutes
Course: Soup
Cuisine: Mexican
Keyword: ancho chiles, beans, chile, corn tortillas, cotija cheese, garlic, mexican crema, onion, pati's mexican table, queso fresco, Recipe, refried beans, soup, Tomatoes, Vegetarian
Servings: 6 to 8 servings
Author: Pati Jinich

Ingredients

For the soup:

  • 6 cups of bean puree
  • 1 pound ripe plum or roma tomatoes
  • 1 clove garlic
  • 1 ancho chile steam and seeds removed
  • 1/2 cup white onion roughly chopped
  • 2 tablespoons safflower or corn oil
  • 3 cups chicken broth vegetable broth or water

For the garnishes:

  • 4 Corn tortillas cut in half and into strips, fried until lightly golden or toasted
  • 1/2 cup cotija or queso fresco cheese crumbled (farmers cheese, ricotta salata, mild feta or shredded mozzarella cheese may be substituted)
  • 1/2 cup fresh Mexican cream heavy cream or cream fraiche may by substituted
  • 1 ancho chile stem and seeds removed, cut into thin strips, flash fried (optional)
  • 1 Mexican avocado peeled, seeded, flesh scooped out and diced

Instructions

  • Place the tomatoes, garlic, and the seeded and stemmed ancho chile in a saucepan, cover with water and simmer over medium-high heat for 10 to 12 minutes or until tomatoes are completely cooked through. Once the tomato mix cools down, place it in a blender or food processor with a cup of the cooking liquid, the raw white onion and a teaspoon of the salt; puree until smooth.
  • Heat the oil in a large soup pot over medium-high heat. Add the tomato puree and cook for 5 to 8 minutes, stirring occasionally, until it darkens in color and thickens in consistency. Reduce the heat to medium and stir in the bean puree and broth or water, simmer for 10 to 15 minutes, or until the soup has seasoned and has a creamy consistency. Taste for salt and add more if needed. Turn off the heat as it thickens quickly.
  • The soup without the added garnishes may be cooled and stored in a closed container and refrigerated for up to 4 days. Since it thickens a bit as it cools, you may need to add some chicken broth or water to thin it out when you reheat it.
  • Ladle the soup into bowls and drizzle on top a tablespoon each of cream and cheese, a handful of tortilla strips, a few fried chile strips and some diced avocado. You can also place garnishes in bowls on the table to let your guests garnish to their liking.

Notes

Sopa Tarasca

Brisket in Pasilla Chile and Tomatillo Sauce

This is by far, the best brisket I’ve ever had.

The meat chunks gain a nutty brown crust as they cook, yet as you take a bite they fall apart in your mouth. And the sauce, thick, a bit tart, a bit spicy and wholeheartedly rich, enhances the flavor of the meat. It is a dish with a flavor hard to forget: it has loads of personality.

It’s become the trump card I pull out for guests that love unusual and authentic flavors from Mexico. The best part of it is, the hardest part about making it, is waiting for the brisket to cook on its own.

I first tried a version of it in Santa Fé de la Laguna, Michoacán. A popular dish in that region, it goes by the name of Carne Enchilada. A young and knowledgeable Purépecha cook, Berenice Flores, showed me how to make it at her home. When my whole family sat down to eat it, we kept asking her for more corn tortillas to wipe the sauce clean off the plates.

Brisket Extra-thumb-510x383-1500
In Michoacán its typically made with pork, but when I got back home to DC, I couldn’t resist trying it with brisket. As well as adding a layer of seasoned onion to the sauce.

When Cecilia Ramos, Executive Director for Mexico and the Dominican Republic at the IADB, invited me to cook an authentic Mexican menu for the monthly Board of Directors, the first thing that popped into my mind was this dish.

Brisket 2-thumb-510x343-1472
The sauce has a base of two exemplary Mexican ingredients that are now widely available in the US.

First, Pasilla or Black chiles, which are the dried Chilaca chiles, by far the most common chiles grown and used in Michoacán. Their flavor is earthy, a bit bitter and slightly spicy.

If you don’t find Pasillas, you can substitute with New Mexico chiles.

Brisket 3-thumb-510x343-1474
Secondly, the Tomatillos, with their singular tasty tartness. The combination of the Pasillas and the Tomatillos is so good, its even hard to describe.

Brisket 4-thumb-510x342-1476
Aside from having a lot of fun planning the menu, cooking at the kitchens of the IADB under the expert guidance of Chef Craig Psulgi was quite a ride.

Forget about the facility: It’s any cook’s dream. What’s more, the cooking team he directs is a group of international hard working people with the friendliest of dispositions.

Brisket 5-thumb-510x342-1478
They are used to making all sorts of Latin American meals, focusing on different national cuisines to satiate the cravings of the multicultural staff from the IADB. Thus making a unique Mexican menu at the IADB is one big challenge.

In the end, what I really wanted, was to make the Mexican patrons there feel back at home.

Brisket 7-thumb-510x342-1482

Though I had thought of a full menu, I didn’t consider the appetizer for the pre-lunch hour. Since they had some beautiful shrimp, we came up with a tasty appetizer: quickly sauteed shrimp on top of a brioche toast, smothered with an easy Mexican avocado cream, topped with a spicy red bell pepper sauce.

Brisket 6-thumb-510x342-1480
For the salad, we had watercress and spinach with a Jamaica vinaigrette.

Brisket 12-thumb-510x342-1492

We offered a choice between Pasilla and Tomatillo brisket and an Acapulco style fish. Both with a side of a comfy Mexican rice and a pickled chayote side
(sorry about the photo with the fluorescent lighting of the professional kitchen…)

Brisket 9-thumb-510x342-1486
Yes there is always one or another kind of drama in the kitchen.

We almost dropped the entire tray with all of the brisket on the floor.

Brisket 10-thumb-510x342-1488
Chef Psulgi caught it just on time.

And with that extra adrenaline rush, plating away we went.

Brisket 11-thumb-510x342-1490

Always have to put a finishing touch in there…

Brisket 13-thumb-510x342-1494
The waiters, I must say, were quite patient and helpful.

Brisket 14-thumb-510x342-1496
And right before the luncheon started, I was invited to step out to describe what it was that they were all about to eat, that was on their menus…

Brisket 15-thumb-510x342-1498
And…

I’m happy to say that everyone seemed to love the brisket. Yes. Even the ones who opted for fish, because I insisted they try the brisket too…

Brisket 8-thumb-510x342-1484
For dessert we offered black and white Tres Leches Cake
Because it was a soothing end, for the feast of flavors that came beforehand…

Print Recipe
4.80 from 5 votes

Brisket in Pasilla Chile and Tomatillo Sauce

This is by far, the best brisket I’ve ever had. The meat chunks gain a nutty brown crust as they cook, yet as you take a bite they fall apart in your mouth. And the sauce, thick, a bit tart, a bit spicy and wholeheartedly rich, enhances the flavor of the meat. It is a dish with a flavor hard to forget: it has loads of personality.
Prep Time10 minutes
Cook Time4 hours 15 minutes
Course: Main Course
Cuisine: Jewish, Mexican
Keyword: beef, chile, garlic, Jewish Mexican, pasilla, pati's mexican table, piloncillo, Recipe, tomatillos
Servings: 6 to 8 servings
Author: Pati Jinich

Ingredients

  • 3 pounds trimmed brisket of beef rinsed and cut into about 2-inch chunks (leave some fat on!)
  • 5 garlic cloves peeled
  • 5 peppercorns
  • 2 teaspoons kosher or sea salt divided (plus more to taste)
  • 1 pound tomatillos husks removed and rinsed
  • 3 ounces black or pasilla chiles (may sub for New Mexico chiles) stems and seeds removed
  • 3 tablespoons corn or safflower oil
  • 1/2 cup white onion chopped
  • 1 cup boiling water
  • 2 cups meat cooking liquid
  • 2 to 3 tablespoons grated piloncillo or dark brown sugar
  • Chopped white onion and cilantro leaves optional garnish

Instructions

  • Place meat chunks in a large cooking pot along with 5 garlic cloves, peppercorns and salt. Cover with water, bring to a boil, cover partially and simmer over medium heat for 3 hours, or until meat is very soft. Drain and reserve 2 cups of its cooking liquid.
  • Meanwhile, char or roast the tomatillos on a baking sheet under the broiler, or directly on the comal or dry skillet or grill over medium heat, for about 10 minutes, turning 2 or 3 times. Tomatillos are ready when their skin is blistered and lightly charred, and their flesh is soft, mushy and juicy.
  • Toast chiles on a hot comal or dry skillet over-medium heat for 5 to 10 seconds per side. Chiles will release their aroma and become more pliable, and their inner skin will become a bit opaque. Don't let them burn.
  • Place toasted chiles and roasted or charred tomatillos in a bowl and cover with 1 cup boiling water and 2 cups of reserved meat cooking liquid (if you don't have 2 cups, add more water). Let this mixture soak for at least a half-hour and up to 4 hours. Pour the mixture into the blender or food processor, puree until smooth and reserve.
  • Add 3 tablespoons of corn or safflower oil to the same pot in which meat was cooked, and heat over high heat until hot but not smoking. Add cooked meat chunks and brown them, 2 to 3 minutes. Reduce heat to medium, add the chopped onion, and stir as you continue to brown the meat for another 2 to 3 minutes.
  • Incorporate pureed chile mixture, a teaspoon of salt and the piloncillo or brown sugar. Stir and simmer over medium heat for about 10 more minutes. The meat should be completely tender, yet still in chunks. The sauce should be thick enough to coat the back of a wooden spoon, but not pasty. Taste for salt and add more if need be. To serve, you can garnish with some raw chopped onion and cilantro leaves.
  • If there is any meat left over, you can cool, store and refrigerate it in a closed contained and then reheat, covered over a low simmer.

Notes

Carne Enchilada

Outrageous But Necessary: Corn and Cream Ice Cream

Right after savagely taking a bite into a fresh ear of corn, right in front of the cashier at the Farmers Market, I felt compelled to explain that its raw, sweet, flavor reminds me of the Corn and Cream ice cream from the Chiandoni heladerí­a in Mexico City. A staple from my childhood days.

With a bit of nostalgia washing over me and in the mood of snapping that last piece of summer from this year, I brought back a full basket of corn. I would make one last batch of summer flavored ice cream, just as the stores begin to sell Halloween decorations, shockingly early, if you ask me.

So I called Chiandoni. To see if they would share their recipe. Also to talk about those outrageous flavors that I so crave…

Corn and Cream Ice Cream 1
Of course, the exotic and colorful variety of ice cream flavors at Chiandoni is not unique in Mexico. There are many heladerí­as and paleterí­as that have just as wide a variety…

Corn and Cream Ice Cream 2
Like this smaller chain from Valle de Bravo called La Flor de Valle, pictured below. Aside from Zapote, Mamey, Cajeta, Mantecado, Nata and Chongos Zamoranos they have a delicious version of Arroz con Leche. Or the much bigger chain of La Michoacana, famous for its creativity.

Corn and Cream Ice Cream 3
But the Corn and Cream ice cream from Chiandoni, in my memories, had no match. An ice cream shop opened in 1939 by a 14 year old young Italian immigrant from Udine, called Pietro Chiandoni, it began to combine the artistry of Italian ice cream making with wild Mexican ingredients.

Carmen Montaño, who now runs the second Chaindoni of Mexico City, and who has worked there for 40 years, told me that Corn and Cream ice cream, is the most popular from their 30 flavors. And it has nothing more than corn, whole milk, cream and sugar. However, they have always paid a close attention to detail: ingredients matter, but, the process too.

See? Look at the corn. You can see why I needed to take a bite…

Corn and Cream Ice Cream 4
As I was re-testing the Chiandoni recipe, Fany Gerson, a pastry chef born and raised in Mexico City who just came out with an absolutely gorgeous Mexican desserts book, My Sweet Mexico, told me she has a recipe for corn ice cream in there too…

As she says, “The culinary diversity of corn is manifested in the incredible array of preparations. It’s mostly associated and used in savory ways but has sneaked its way into various sweet ones and corn ice cream is absolutely one of the best.”

Corn and Cream Ice Cream 5
Fany, different from Chiandoni’s take, aside from adding milk, cream…

Corn and Cream Ice Cream 6
…sugar…

Corn and Cream Ice Cream 7
…and corn…

Corn and Cream Ice Cream 8
…adds egg yolks in there too. In her view, that custardy base enhances the creaminess of the corn.

Corn and Cream Ice Cream 9
It is an extra step, but it is completely worth it.

You just have to make sure that the eggs don’t curdle, by whisking some of the simmering milk mixture into the yolks and tempering them…

Corn and Cream Ice Cream 10
…before you whisk them right back into the rest of the milk mixture and let it gently simmer…

Corn and Cream Ice Cream 11
Different from Chiandoni, Fany also adds vanilla, giving it a complementing layer of flavors.

Corn and Cream Ice Cream 12
Leaving some corn kernels out of the blender, gives the ice cream a welcoming crunch and texture.

Corn and Cream Ice Cream 13
In the end, the ice cream has a rich feel.

It reminds me of the cookie dough ice cream that you find here in the US. But with a twist. Imagine something along the lines of sweet corn bread dough, and turn it into ice cream…

That’s what it tastes like.

Corn and Cream Ice Cream 14
Luckily for New Yorkers, Fany started a popsicle business, La Newyorkina. Which hopefully will expand to ice cream making and a sibling in DC too…

But while that happens, you can run to the Farmers’ Market stand before they close for the Summer, to grab those remaining pieces of summer corn, and make this ice cream at home.

It’ will help you to transition smoothly and sweetly from Summer to Fall.

P.S. For the ice cream in the photo, I adapted Fany’s recipe. I reduced the number of egg yolks, skipped the straining of the puree of the mixture as I love it with a more rustic feel, and didn’t simmer the cobs (my monsters love to make sculptures with those…).

Print Recipe
4.50 from 2 votes

Outrageous But Necessary: Corn and Cream Ice Cream

Prep Time1 hour 30 minutes
Cook Time2 hours
Course: Dessert
Cuisine: Mexican
Keyword: Corn, ice cream, milk, pati's mexican table, vanilla
Servings: 4 servings
Author: Pati Jinich

Ingredients

  • 3 ears of fresh corn shucked
  • 2 1/2 cups milk
  • 1 1/2 cups heavy cream
  • 3/4 cup granulate sugar
  • 6 egg yolks
  • Pinch of salt
  • 1/2 teaspoon vanilla

Instructions

  • Remove the kernels of the corn by holding the ear with one hand straight up over a kitchen towel (this will help keep the kernels from going all over the place). Be sure to use a very sharp knife or serrated knife to cut them off. Place the kernels of corn in a saucepan with the milk, heavy cream, 1/2 cup sugar and place over moderate heat, stirring until it comes to a boil. Turn off the heat and allow the ingredients to steep for one hour, covered.
  • Remove about one cup of corn but don't throw it out. Puree the mixture in the pot with an immersion mixer or blender. Bring this to a simmer. Meanwhile, whisk the yolks with the remaining 1/4 cup sugar. When the liquid comes to a boil whisk in about half of it to the yolks and stir rapidly so you don't make scrambled eggs. Return to the pot and cook over low heat until the mixture covers the back of a spoon. Add the vanilla. Return the reserved corn to the ice cream base and pour into a container. Let it cool and place a piece of plastic film directly on top and chill in the refrigerator. Freeze according to the manufacturers directions of your ice cream maker.

Notes

Helado de Elote, Adapted from Fany Gerson

Tamarind Concentrate: Basic Recipe

Tamarind concentrate can be purchased from the grocery already made, or you can easily make it yourself. The concentrate is great because of its flavor and uses, and also, because it will keep in the refrigerator for months.

This is what the tamarind seed pod looks like.

Tamarind Concentrate 1

Begin by shelling the pods with your hands, its very easy to do.

Tamarind Concentrate 2

Remove all the shells and add them to a bowl. After shelling, cover the fruit in boiling water and let it sit for several minutes. After soaking it is easy to remove the strings and seeds from the fruit.

Tamarind Concentrate 3

Tamarind needs sugar to counter its strong sour taste. Add some lime for extra flavor.

Tamarind Concentrate 4

Now just simmer for about 45 minutes and it is ready.

Tamarind Concentrate 5

This concentrate is commonly used to make flavored water, all you have to do is strain it, and dilute it with water.  Best of all it keeps in the refrigerator for months and months.

Tamarind Concentrate 6

Tamarind Concentrate Main
Print Recipe
3.75 from 4 votes

Homemade Tamarind Concentrate

Tamarind concentrate can be purchased from the grocery already made, or you can easily make it yourself. The concentrate is great because of its flavor and uses, and also, because it will keep in the refrigerator for a months.
Prep Time8 hours
Cook Time45 minutes
Course: Sauce
Cuisine: Mexican
Keyword: lime, pati's mexican table, sugar, Tamarind
Servings: 1 cup
Author: Pati Jinich

Ingredients

  • 1/2 pound dried tamarind with their peel
  • 2 cups boiling water
  • 3/4 cup sugar
  • 1 tablespoon fresh lime juice

Instructions

  • Peel tamarinds of the peel, large seeds and strains. Soak overnight. Strain in a colander and press with your hands or a spoon. Place tamarind juice in a saucepan. Bring to a boil, add sugar, and simmer over medium heat for 40-45 minutes. Juice should have thickened considerably. Squeeze in the fresh lime juice, let it simmer for a couple more minutes and let it cool.
  • Store in a container with a tight lid in the refrigerator. It will keep for months.

Deliciously Sweet: Chicken with Tamarind, Apricots and Chipotle Sauce

It seems that many people find chicken boring.

I happen to find it fascinating.

Not only because chicken is friendly enough to let you take it wherever your imagination can go and because it can be the juiciest and crispiest meal, but also, because of that story my mother told me when I was growing up.

When my mom was about 10 years old, my grandmother who came to Mexico from Austria in her early twenties having survived years of war, turbulence and the loss of most of her family, taught my mom a serious lesson: you can survive most hardships in life if you know how to cook, she had said, and mostly, if you know how to cook chicken from scratch.

Cooking from scratch really meant from scratch. No nonsense. So my mom learned how to kill, pluck and cook chicken a thousand ways.

I have that dissonant image of them plucking those birds, because if you had met my grandmother, you would have probably thought, like me, that she was one elegant and classy lady. Here’s an old photo I found (do excuse my 80’s bangs and shoulder pads).

Tamarind Chicken 2-thumb-510x353-1397
Ok, now that I was going through old albums, I found this other one. And I think that my mom happens to be a classy lady too (aside from the bangs and shoulder pads, I am wearing one of those Wang Chung vests, remember?)

Tamarind Chicken 3-thumb-510x353-1399

My Lali, as we called my grandmother, was an extraordinary cook. I could write down pages and pages listing the dishes she made that I love. My favorite ones always had a sweet spin to them. The roasted duck with the plum sauce, the chicken paprika with sweet pimientos, the stuffed cabbage with that heart warming sauce.

If I could have my Lali over for Rosh Hashanah next week, I would treat her with the Chicken with Tamarind and Apricots I learned to make from Flora Cohen right before I got married. A cookbook writer and teacher from Syrian ancestry, who like my grandmother, was an immigrant who made Mexico her home bringing along exotic flavors from her birthplace. Flora was known to turn ignorant brides, who did not know how to boil an egg, into competent cooks who could bring bliss to the tummies of their new husbands (hey, at least my husband didn’t starve in those first years).

And just like many of my Lali’s dishes, from Austria, Flora’s Syrian meals took a joy ride with Mexico’s native ingredients.

People wonder about the existence of Jewish Mexican cuisine. This dish is but one example. After I was asked to teach a class on Jewish Mexican cooking, I realized it could have been an ongoing series. Just a small window into the fascinating twists and turns that foods take on as they travel through the world in unimaginable kinds of luggage and intermingle with their new homes…

But for now, I leave you with this chicken, which can become a staple in your home. That’s how good it is.

After you rinse and pat dry the chicken pieces, sprinkle with salt and fresh ground pepper.

Chicken with Tamarind 3
Don’t remove the skin! PLEASE!! It will turn crispy and it will also help the chicken be extra moist and flavorful.

Chicken with Tamarind 4
Heat the oil in a large and deep skillet over low heat. Place the chicken skin side down. You don’t want the chicken pieces to be cramped on top of each other, if they are, use two skillets.

The chicken is going to brown for an hour. I know this sounds like a lot of time, but you can make the rest of your dinner during that time, like your rice, pasta or salad.  Browning the chicken like this, flipping it once or twice in between, makes the skin crisp and the fat underneath the skin melt. Slowly, deliciously. It makes the chicken so juicy and soft, it practically comes off the bone!

After about an hour the chicken looks like this.

Chicken with Tamarind 5
It is already flavorful as it has basted in its own juices, now let’s take it a step further.

Pour the water over the chicken, raise the heat to medium-high, and bring it to a simmer.

Chicken with Tamarind 6
Pour the tamarind concentrate. You can easily make the concentrate at home, or buy it in most Latin or International stores. If you don’t find concentrate, but find tamarind paste, dilute 2 tablespoons of the paste and 1 tablespoon of sugar in 3/4 cup warm water. The tamarind brings a rich and tangy flavor to the dish.

Chicken with Tamarind 7
Add a couple generous tablespoons of apricot jam.

Chicken with Tamarind 8
Spoon the Chipotles in Adobo sauce, or if you want it more piquant, drop in a couple whole chiles in there too. Their smoky and sweet flavors complement the rest of the ingredients.

Chicken with Tamarind 9
Stir in the chopped dried apricots. I found some Turkish ones at the store, with a deeper brown color. They were so meaty!

Chicken with Tamarind 10
Stir it all and bring it to a steady medium simmer, for about 35 minutes more. The sauce will have thickened and become outrageously sticky (sticky in a really good way). I love the chunks of apricot in there.

Chicken with Tamarind 11
A Sephardic dish with a Mexican influence. Perfect for holidays, this chicken dish is a crowd pleaser. A bit spicy, a bit sweet, a bit tangy, crisp and moist. It can be one of those safe cards to play, just like that passed down brisket recipe.

Chicken with Tamarind 12
Now, I didn’t have to kill and pluck a chicken, but I think my Lali would be pleased. I learned my lesson well, and I am trying to learn to cook chicken, in more than a thousand tasty ways.

Print Recipe
4.80 from 5 votes

Chicken with Tamarind, Apricots and Chipotle Sauce

If I could have my Lali over for Rosh Hashanah next week, I would treat her with the Chicken with Tamarind and Apricots I learned to make from Flora Cohen right before I got married. A cookbook writer and teacher from Syrian ancestry, who like my grandmother, was an immigrant who made Mexico her home bringing along exotic flavors from her birthplace. 
Prep Time5 minutes
Cook Time1 hour 35 minutes
Course: Main Course
Cuisine: Mexican
Keyword: apricot, chicken, chile, chipotles in adobo, Recipe, Tamarind
Servings: 8 servings
Author: Pati Jinich

Ingredients

  • 1 whole chicken cut into pieces, plus two more pieces of your choice, with skin and bones
  • 1 teaspoon kosher or sea salt or more to taste
  • 1/2 teaspoon black pepper freshly ground, or to taste
  • 1/2 cup safflower or corn oil
  • 4 cups water
  • 1/2 pound dried apricots about 3/4 cup, roughly chopped
  • 2 tablespoons apricot preserves
  • 3/4 cup tamarind concentrate can be store bought or homemade (recipe follows), or substitute with 2 tablespoons tamarind paste mixed with 1 tablespoon sugar and 3/4water
  • 2 tablespoons Chipotles in adobo sauce or more to taste, add chiles if you please

Instructions

  • Thoroughly rinse chicken pieces with cold water and pat dry. Sprinkle with salt and pepper.
  • In a deep extended skillet, heat oil over medium heat until it is hot but not smoking. Add chicken pieces in one layer, bring heat to medium-low, and slowly brown the chicken pieces for one hour. Turn them over every once in a while, so they will brown evenly on all sides.
  • Pour water over the chicken, raise the heat to medium-high, and bring it to a simmer. Incorporate the apricots, apricot preserve, tamarind concentrate, chipotle sauce and salt and stir, and keep it at a medium simmer for 35 to 40 minutes more. You may need to bring down the heat to medium.
  • The sauce should have thickened considerably as to coat the back of a wooden spoon. Taste for salt and heat and add more salt or chipotle sauce to your liking.

Notes

Pollo con Salsa de Tamarindo, Chabacano y Chipotle

Tamarind

Tamarind, also called Indian date, is the pod of a tropical tree that is said to have originated in Asia and North Africa. It was brought to Mexico sometime in the 1500’s in the galleons that came from Asia, managed by the Spaniards, that landed in the gorgeous beaches of Acapulco. Now somewhat touristy…

Tamarind tastes a bit sour, acidic and sweet at the same time. Its flavor has a lot of depth and an earthy feel to it too. Through the years it grew strong roots in Mexican land, where the large trees are loved for their heavy shade, and the pods for their multiple uses in Mexico’s kitchens. From candies and snacks, to drinks and desserts, as well as moles, sauces of different kinds.

Picadillo Empanadas of the “Immaculate Conception”

With a soft, crumbly and almost sweet dough that embraces a moist, tasty and meaty filling, it is hard not to eat one after the other. These Empanadas do have a curious name though. Especially when you consider their addicting nature.

I didn’t choose their name. No. The nuns from the Mexican Convent of our Lady of the Immaculate Conception are to blame. It all began with Beatriz da Silva, the Portuguese woman who founded the order in Toledo, Spain.

Known to be shockingly beautiful, although destined to be the companion to Queen Isabel from Spain, she was locked up because of the Queen’s jealousy and alleged admiration from the King. Legend goes, that when Beatriz managed to flee, she was more beautiful and had a new found strength she used to establish a new Conceptionist order. The three Conceptionist nuns who arrived in Mexico City around the 1540’s, were also known to be strong. If not as pretty.

Aside from trying to evangelize the population, they combined Spanish and Mexican ingredients in their kitchens, as most Spanish nuns, with an intense passion and a ton of imagination. As most Spanish nuns as well, their cooking instincts were led by an insatiable sweet tooth. That may explain the sweet elements both in the dough and the filling of these Empanadas, that were served time and again to entertain guests in this convent.And now you know, where the name comes from.


The dough can be used both for sweet or savory Empanadas. As its sweetness is so mild, it enhances the flavors in savory fillings, such as the Meat Picadillo in this one, and it dances along sweet dessert ones.

It can be made in a snap by mixing cream cheese, butter, all purpose flour and a pinch of salt in the mixer. Or by hand.


It was originally made with Nata instead of Cream Cheese. Nata, which is a thin layer formed after boiling fresh raw milk, and found throughout Mexico in Haciendas and Ranchos, is sweet, extremely white and thick.

And oh so irresistible.

If you have access to Nata, use it instead of Cream Cheese, as those pioneer Conceptionist nuns did. But truth is, many nuns use Cream Cheese these days too.

The dough is malleable and soft. Juju made one batch with his hands. Proud monster.


It is easy to roll out as it is elastic, soft and not so sticky. But do sprinkle some flour as you roll.


To cut the rounds, you can use a pastry cutter. I found the size I wanted, a 4 inch round, in a Tupperware. Which was also easy for Juju to use.


As you separate the rounds…


…brush the edges with a lightly beaten egg.


Spoon the filling right down the center.

The Meat Picadillo is included in the recipe below. Picadillo, has many variations, but it typically has as a base of ground meat seasoned with garlic, onion, tomato puree, spices and sometimes nuts, olives and sweet ingredients like raisins or dried fruits. A complex version of Picadillo is used in the legendary Chiles en Nogada.


This is a simpler version, that can be made a couple days ahead of time. Just take it out of the refrigerator when you are ready to fill those Empanadas (If you have leftover Picadillo, you can make tacos, stuff chiles, tamales, or eat it with a side of rice or tortillas!)

Close up the bundle in the shape of a turnover.


Seal the edges pressing your fingers.


To really seal the deal, go around with a fork, gently, so as not to make many holes in the dough…


Give the Empanada a final egg wash.


Here we go, one after the other.


Sprinkle with sesame seeds. It makes them look beautiful. I think Beatriz da Silva would approve.

The sesame seeds also give the Empanadas a light nutty and toasty accent.


And in the oven they go. You can also make them ahead of time and place them in the refrigerator (for a couple of days) or freezer (for weeks!) before baking them.

Take them out as you need them and eat them freshly baked. As they should.

Pati Jinich picadillo empanadas
I think that you do taste all of the flavor, all of it, behind the history of these Empanadas, in each single bite.

picadillo empanadas
Print Recipe
4.04 from 25 votes

Picadillo Empanadas

Picadillo Empanadas recipe from Pati's Mexican Table Season 1, Episode 5 “Convent Food”
Prep Time45 minutes
Cook Time20 minutes
Total Time1 hour 5 minutes
Course: Antojos, Main Course
Cuisine: Mexican
Keyword: almonds, cinnamon, cloves, cream cheese, cumin, Empanadas, nata, olives, onion, pati’s mexican table, Picadillo, pork, raisins
Servings: 15 medium empanadas
Author: Pati Jinich

Ingredients

For the dough:

  • 1 cup unsalted butter at room temperature
  • 8 oz, about 185 g cream cheese or fresh nata at room temperature
  • 2 1/3 cups all-purpose flour
  • 1/2 tsp salt
  • 1 egg lightly beaten
  • 1/2 cup sesame seeds

For the picadillo (makes about 4 cups):

  • 3 tbsp olive oil
  • 1/4 cup white onion chopped
  • 1 garlic clove finely chopped
  • 1 lb pork shoulder or butt or combination of pork, beef and veal, ground
  • 3/4 tsp kosher or sea salt
  • 1 lb ripe tomatoes pureed, or about 2 cups tomato puree
  • 2 cups chicken broth or water
  • Pinch of cumin
  • Pinch of ground cloves
  • 1/2 tsp cinnamon ground
  • 1/4 cup slivered almonds lightly toasted
  • 1/4 cup raisins
  • 1/4 cup Manzilla olives chopped

Instructions

To make the dough:

  • Beat the cream cheese with the butter in a mixer at medium speed, until it is creamy. Gently add the flour and salt and continue mixing for a minute more. Turn dough onto a lightly floured surface and knead for a minute. Form the dough into a ball, wrap in plastic wrap and refrigerate from 15 minutes up to 24 hours.
  • After refrigerating, sprinkle flour over the countertop and roll out half the dough until its about 1/4 inch thick. For medium sized empanadas, cut out rounds of 4 to 5 inches in diameter. Continue until all of the dough is used.
  • Grease a baking sheet with butter. Preheat the oven to 375 degrees.
  • Spoon about 1 1/2 tablespoons of the picadillo filling into the center of each round. Brush the edges of the round with the beaten egg. Fold a side of the circle over the filling across the other side. Press with your fingers as you close. Without breaking the dough, press with a fork over the edges to seal and make a design.
  • Place the empanadas on the baking sheet. When you fill the baking sheet, lightly brush their tops with the lightly beaten egg and sprinkle with sesame seeds.
  • Bake the empanadas anywhere from 20 to 25 minutes, until the tops have a golden tan and dough is cooked through. Serve hot.

To make the picadillo:

  • Heat olive oil in a large saute pan set over medium-high heat. Add onion and saute for a couple of minutes, until it becomes translucent and soft. Incorporate chopped garlic and saute for about a minute until it becomes fragrant. Incorporate the meat and the salt and let it cook for about 8 minutes, until cooked and lightly browned.
  • Pour in tomato puree and let it season, stirring often, for 5 to 6 minutes, until it has deepened its color, thickened in consistency and lost the raw flavor. Pour in the chicken broth or water, cumin, cloves and cinnamon. Stir well and let it cook 15 minutes more.
  • Add the raisins, almond and olives, mix well and taste for seasoning. Cook for 5 more minutes. If needed, add more salt. The filling should be nice and moist.
  • Just remember, once it cools, it will dry a little more as it will absorb the juices. Turn off the heat. You can make the filling up to two days ahead of time, let it cool, cover and refrigerate.

Notes

Empanadas de Picadillo

Crazy for Tepache

I am crazy for Tepache. Gently sweet, with an innocent hint of home brewed alcohol, a deep freshness and a gorgeous amber color.

Tepache: A home made fermented drink that comes from the state of Jalisco – also breeding ground of other Mexican symbols like Tequila, Charros and Mariachis. Tepache has a base of fresh pineapple, true cinnamon, piloncillo and water and has been drank in Mexico since Pre-Colonial times.

I have made it many times throughout my life.

First, when Daniel and I moved to Texas, to celebrate our finding piloncillo at a U.S. grocery store. Later, when we moved to DC, to soothe the heat of that first long summer and to make our new home, feel like home. A couple years ago, I brewed liters to share with a large crowd for a class I taught on foods from Jalisco.

Then, I forgot about it. Until this summer, when we moved, the heat started pumping up and I unpacked my old clay pot from Tlaquepaque, Jalisco. A pot that is perfect for brewing Tepache, which is so simple to make. That is, if you can keep an eye on it.

You need to find a ripe pineapple. Almost entirely yellow and soft to the touch.

Tepache 1

After you rinse it, remove the top.

Tepache 2
Do away with the bottom too.

Tepache 3

Cut into thick slices, whichever way you want, horizontal or vertical, including the peel. The peel will help the drink ferment and give it an interesting depth of flavor.

Tepache 4

Cut the slices into thick chunks (yeah, I do love my knife…)

Tepache 5
There you go, the gorgeous work of a fine, loyal knife (I so, so, so, love my knife)

Tepache 6
Pour water into the pot. If you don’t have a clay pot, use any kind of large pot.

Tepache 7
Drop in a cinnamon stick, preferably true cinnamon, if handy.

Tepache 8

Drop in the piloncillo, which gives anything it touches that rustic small Pueblo flavor. Just throw it all in there. No need to chop. No need to shred. It will dilute in the water as you bring it to a simmer.

Tepache 9
Oh, and five or six whole cloves, for that touch of spice.

Tepache 10
Bring it to a boil and simmer for about 10 minutes. You know the liquid is ready when the piloncillo has diluted and you get this lovely light brown color.

Tepache 11
Light amber.

Here, you can see the color of the liquid better with my grandmother’s glass spoon. Light amber.

Gorgeous amber.

And it gets even better after you add the pineapple.

Tepache 12

Turn off the heat, and add the pineapple chunks.

Tepache 13
Cover the pot and let the mixture sit and rest, and begin to ferment, for two days, or about 48 hours. Any area of your kitchen is fine, preferably the warmest area, where you won’t have to move the pot around for that period of time.

Tepache 14
After two days, the liquid will begin to show some bubbles. That’s when its ready for you to pour in the beer to speed up the fermentation process. You can go the old fashioned way, and not add any beer and let it sit for another week, or more.

Tepache 15
Any lager that you like. Dos Equis works for me.

Tepache 16
Cover the mix, and let it sit for about 12 to 15 hours more.

Now, remember I just said Tepache is so simple to make, if you can keep an eye on it. Well, right after I poured the beer in this step above, I had to leave for New York. My husband was left in charge of keeping an eye on the Tepache, but he was too busy keeping an eye on our three monsters.

So the Tepache ended up tasting like vinegar.

The trick is, right after you pour the beer, don’t let it sit for more than 12 to 15 hours. After that time, strain it and either drink it or place it in a big pitcher in the refrigerator.

Tepache 17
So there I went again… and this time, we were all keeping an eye on the Tepache. It went so fast!

Now we are at it again, once more. But my lesson learned: you have to watch your own Tepache.

Print Recipe
4.41 from 5 votes

Tepache

Tepache: A home made fermented drink that comes from the state of Jalisco – also breeding ground of other Mexican symbols like Tequila, Charros and Mariachis. Tepache has a base of fresh pineapple, true cinnamon, piloncillo and water and has been drank in Mexico since Pre-Colonial times.
Prep Time5 minutes
Cook Time2 days 12 hours
Course: Drinks
Cuisine: Mexican
Keyword: beer, cinnamon, cloves, cocktail, piloncillo, pineapple, Recipe
Servings: 8 to 10 servings
Author: Pati Jinich

Ingredients

  • 1 ripe pineapple or about 3 cups
  • 4 liters water or 16 cups
  • 1 pound piloncillo or dark brown sugar
  • 1 cinnamon stick
  • 5 whole cloves
  • 1 cup lager beer

Instructions

  • Using the traditional big eathenware jug (or a large pot), bring to a boil the 16 cups water along with the piloncillo, cinnamon stick, and whole cloves. Simmer, stirring once in a while, for about 10 minutes or until the piloncillo has dissolved.
  • While the water is simmering, wash the pineapple thoroughly, and remove the stem and bottom. Cut it into 2 inch cubes, without taking off its rind.
  • Once the flavored water is ready, add in the pineapple chunks and cover. Let rest for 2 days, or 48 hours, in a warm area of you kitchen. The mixture will begin to ferment and bubble on the surface. Add a cup of lager beer, stir well, and let it sit for up to 12 hours more. Don't let it ferment much longer, or you may end up with vinegar instead!
  • Strain tepache through a fine strainer or cheesecloth, and serve very cold. You can either refrigerate it or serve over ice cubes.

Chicken Tinga for Today (Show) and Everyday!

What to cook for the Today Show?

With so many options being juggled in my head, I was growing restless as the date got closer.

As I started exchanging emails with one of the producers, I began to throw ideas: what about different kinds of Salsas, variations of that irresistible cold and wet Tres Leches cake, funky versions of Guacamole, or a sample of fresh Ceviches?

Or, wait. How about something easy, tasty and flashy like Tequila, Cream and Chipotle Shrimp? It’s so much fun to prepare, I told the producer. You ignite the pan, the flames come up right after the shrimp begin to brown, and then they wind down right before you pour the cream. Your guests feel special and impressed.

I had to agree that we were better off staying away from igniting anything on the set.

Oh, I got it! A chicken dish. Everyone wants a good chicken dish in their recipe box. And one of the tastiest ways to eat chicken in Mexican kitchens, no doubt about it, is Chicken Tinga.

Although it comes from the state of Puebla, it is so popular, that it is eaten throughout the country. So of course there are countless variations.

I have a favorite version. One that I have tweaked through the years until I found a balance of flavors that needs no more tweaking, if you ask me.

Chicken Tinga 4c-thumb-510x342-1318
A great thing about the Tinga, is that you only need a handful of ingredients. Some are familiar to everyone, like tomatoes, onion and garlic. The other needed Mexican ingredients are readily available throughout the US these days, and people should become familiar with them, as they are absolutely blissful.

Such is the case of the Tomatillos, pictured above next to their cousins, the tomatoes, and the Chipotle Chiles in Adobo Sauce.

Chicken Tinga 6-thumb-510x342-1324
Pump up the sweetness of the tomatoes, the tart notes of the tomatillos and the rich smoky, depth of the chipotles with some Marjoram, Oregano and Thyme, Salt and Pepper.

Chicken Tinga 5a-thumb-510x342-1320
Add some already cooked and shredded chicken, and you have a winner.

Catchy and irresistible, starting with the name, the Tinga is easy to prepare, packed with flavor, and once you make it, can be refashioned in a thousand ways. Plus it stores in the refrigerator well, and it’s one of those dishes that add on flavor as its reheated.

After talking with Bianca, the food stylist in charge at the Today Show, we decided to cook the Tinga, and show the viewers a couple choices of how to play with it: Tostadas and what can be called Tinga’Dillas.

Here is Bianca on the set, right before the segment. She rocks, friends.

Chicken Tinga 2-thumb-510x342-1306
This is Bianca’s hand, making a beauty out of the deliciously messy Tostada…

Chicken Tinga 1-thumb-510x342-1305
Here, that’s a zoom out.

OK. It is so crazy in that set, but oh so fun, fun, fun crazy. And the whole food styling team is amazing.

Chicken Tinga 7-thumb-510x342-1326
That is the front of the set. Allison (there in the corner of the photo below) and I chose some colorful pots and pans to do the demo.

And do you see that clock under the screen? It says 9:39. Segment was going to be shot at 9:46. Yes, I got dizzy and nauseated, and hyper and sleepy all at the same time.

Chicken Tinga 8-thumb-510x342-1328
So aside from the Chicken Tinga demo, there were the Tinga’Dillas paired with Guacamole and Grilled Corn.

Chicken Tinga 10-thumb-510x342-1334
And the Tostadas, set on that rustic piece of stone. We were going to do the Fresh Cheese and Mexican Cream last minute to take it over the top. Why not?

Chicken Tinga 11-thumb-510x342-1336
The 4 minutes flew by.

When all was said and done, we ate the Tostadas and the Tinga ‘Dillas. And after that, we hugged. I hugged them so tight, out of thankfulness, everyone there was so generous and warm.

From the lovely Roma, who fixed my hair (thank the heavens, I never know what to do with it and always pull it up), to the hilarious Gilberto, who did my make up (thank the seas,  because I can hardly curl my eye lashes properly), to the professional food styling team with Bianca and Allison and the rest, to the generous and kind producers Vivian and Alicia.

Chicken Tinga 12-thumb-510x342-1338
A
nd the gorgeous and warm hosts Natalie Morales and Ann Curry (who are even prettier in person, I swear!).

Chicken Tinga 9a-thumb-510x342-1330

Oh Boy. What a team! If you want to watch the segment click here.

The Tostadas and Tinga’Dillas are perfect for casual entertaining. They can be messy, but its a delicious kind of messy. And after all, its the middle of the summer. If you get too messy, just turn on the hose.

chicken tinga or tinga de pollo
Print Recipe
4.80 from 5 votes

Chicken Tinga

One of the tastiest ways to eat chicken in Mexican kitchens, no doubt about it, is Chicken Tinga. Although it comes from the state of Puebla, it is so popular, that it is eaten throughout the country. So of course there are countless variations. I have a favorite version. One that I have tweaked through the years until I found a balance of flavors that needs no more tweaking, if you ask me…
Prep Time1 hour 10 minutes
Cook Time30 minutes
Total Time1 hour 40 minutes
Course: Antojos, Main Course
Cuisine: Mexican
Keyword: chicken, chipotles in adobo, Pollo, Puebla, quesadillas, Recipe, tacos, tinga, tortas, tostadas
Servings: 4 servings (makes about 5 cups)
Author: Pati Jinich

Ingredients

  • 3 tablespoons safflower or corn oil
  • 1/2 white onion about 1/4 pound, slivered
  • 2 garlic cloves chopped
  • 8 roma tomatoes or about 2 pounds, rinsed
  • 2 tomatillos or about 1/4 pound, husks removed, rinsed
  • 1/2 teaspoon crumbled dried oregano
  • 1/4 teaspoon dried marjoram
  • 1/4 teaspoon dried thyme
  • 1 1/2 to 2 teaspoons kosher or sea salt or more to taste
  • 1/4 teaspoon black pepper freshly ground
  • 2 tablespoons sauce from chipotle chiles in adobo can add whole chiles if more heat is desired
  • 5 cups cooked shredded chicken

Instructions

  • Place the rinsed tomatoes and tomatillos in a medium saucepan and cover them with water. Set the saucepan over medium heat. Once it comes to a simmer, cook for 8 to 10 minutes, or until the tomatoes and tomatillos are soft, thoroughly cooked, and smooshy but not coming apart. Remove them with a slotted spoon. Place in the jar of a blender or food processor and blend until smooth.
  • Heat the oil in a large and deep pan over medium heat. Once it is hot but not smoking, stir in the onion and cook until soft and translucent, for about 5 to 6 minutes. Stir in the garlic and cook until it becomes fragrant and lightly browned, about 1 minute.
  • Pour the tomato/tomatillo sauce on top and sprinkle the oregano, marjoram, thyme, salt and black pepper. Spoon in the chipotle Chiles in Adobo sauce. If you want it spicy, you may drop a whole Chipotle Chile in Adobo in there as well. Let the sauce simmer, stirring now and then until it seasons and deepens its red color, about 10 to 12 minutes. You may want to partially cover the pan as the sauce may want to jump out over your burners.
  • Toss in the chicken and combine with the sauce. Let it cook, stirring casually, until the chicken has absorbed almost all of the juices and the mix is moist but not juicy.

Notes

Tinga de Pollo
chicken tinga or tinga de pollo
Print Recipe
4 from 3 votes

Chicken Tinga Tostadas

Catchy and irresistible, starting with the name, Chicken Tinga is easy to prepare, packed with flavor, and once you make it, can be refashioned in a thousand ways, such as on tostadas.
Prep Time10 minutes
Cook Time0 minutes
Total Time10 minutes
Course: Antojos, Appetizer, Main Course
Cuisine: Mexican
Keyword: chicken, Pollo, Recipe, tinga, tostadas
Servings: 12 tostadas
Author: Pati Jinich

Ingredients

  • 12 corn tostadas such as Guerrero or Mission
  • 1 1/2 cups refried beans warmed up (can be home made or store bought)
  • 3 cups chicken tinga recipe above
  • 1 cup iceberg or romaine lettuce thinly sliced
  • 1 ripe Mexican avocado pitted, peeled, and sliced
  • 1/2 cup queso fresco Cotija or farmers cheese, crumbled
  • 1/2 cup Mexican or Latin style cream
  • Salsa of your choice such as salsa verde, optional

Instructions

  • Place the tostadas on a large platter.
  • Layer a couple of tablespoons of refried beans on the tostada. Spread a couple tablespoons of chicken tinga on top and garnish with about 1 or 2 tablespoons lettuce, 1 or 2 slices of ripe avocado, 1 or 2 tablespoons of crumbled queso fresco and Mexican cream.
  • Serve the salsa on the side for people to drizzle as much as they want.

Notes

Tostadas de Tinga de Pollo
chicken tinga or tinga de pollo
Print Recipe
3.60 from 5 votes

Tinga Dillas

Catchy and irresistible, starting with the name, Chicken Tinga is easy to prepare, packed with flavor, and once you make it, can be refashioned in a thousand ways, such as a filling for quesadillas.
Prep Time0 minutes
Cook Time10 minutes
Total Time10 minutes
Course: Antojos, Appetizer, Main Course, Snack
Cuisine: Mexican
Keyword: Antojo, chicken, Pollo, Quesadilla, Recipe, tinga, tortilla
Servings: 4 servings
Author: Pati Jinich

Ingredients

  • 8 large flour tortillas
  • 4 slices Monterey jack cheese muenster cheese, or Mexican manchego
  • 2 cups chicken tinga recipe above
  • 2 cups guacamole home made or store bought, on the side

Instructions

  • Heat a non-stick skillet or comal over medium-low heat. You may also use the grill. Once hot, after 3 or 4 minutes, layer 2 flour tortillas, the cheese slices and the Chicken Tinga. Place 2 flour tortillas on top of the open ones, and let them cook until the tortilla on the bottom has begun to harden a bit. Flip to the other side with the help of a cooking spatula and let the quesdillas continue to warm up, until the cheese has completely melted and the tortillas have hardened on both sides.
  • Repeat with the rest.
  • Serve with guacamole for your guests to spoon on top.

Notes

Quesadillas de Tinga

Bossed Around at El Bají­o: Plantain Quesadillas

Each time I go back to Mexico City, even before the plane lands, I know there are some formal plans that can never, ever, be messed around with. They are all with my father and they all involve eating in the same places. Each single time.

One of the places is El Bají­o. If you know my father, you know he doesn’t let me order. You also know that he knows the Restaurant manager, waiters, bar servers and valet parking attendants by name. And they all know him too.

Continue reading “Bossed Around at El Bají­o: Plantain Quesadillas”

Oaxaca Cheese

Oaxaca cheese is a mild tasting, gently salty, stringy white cheese with a deliciously chewy, full and filling bite. It is made in the same way as Mozzarella cheese. In fact, they taste very similar! Once the curds are formed, they are heated in water, stirred, and heated in water again. Throughout the process, as they are heated and stirred, they are made into very long threads that are pulled once and then again, until the desired consistency is achieved.  Then the long threads are wrapped into balls.

In Mexico, and recently in some places abroad as well, you can find freshly made Oaxaca cheese, as it is usually found in small towns and open air markets. You can also find commercially processed Oaxaca cheese in grocery stores, but the flavor and consistency changes considerably from the fresh ones.

Oaxaca Cheese 1

The difference of fresh and non fresh, can be compared to the contrast between an excellent quality artisanal fresh Mozzarella cheese and a general brand, plant processed, grocery store Mozzarella.

Oaxaca cheese tends to be eaten, aside from on its own in chunks, in quesadillas and “queso fundido” or melted cheese. But it is very accommodating and can be used in many other ways: soups, casseroles, and salads, to name some.

Tequila, Mexican Cream and Chipotle Shrimp

Shrimp tend to be perceived as a treat. That fancy item on a menu.

Think about what happens at a shrimp station on a Sunday buffet. It gets crowded. Even if you didn’t feel like eating shrimp, if there’s a shrimp station, chances are you will eat them. Your mom, your dad, your husband or friends will look at your shrimp-less plate and push some shrimp onto your plate.

Growing up in Mexico City, family Sunday lunches with the dozens and dozens members of our immediate family included giant shrimp from the Mercado de la Viga.  There was so much anticipation as to when they would majestically appear on that huge platter carried by my grandmother. Before they got to the table, people started sneaking away some. So my grandmother decided to set a pre-lunch agreement on the number of shrimp per head, to avoid childish grown up wording snaps like “YOU always get the extra shrimp” or sudden door slams.

So when I was asked to develop a Mexican menu for the 2010 RAMMYS Awards I just had to include shrimp. I paired them with some signature Mexican ingredients: smoky and hot Chipotle Chiles in Adobo, tangy and salty Mexican Cream and the iconic Tequila Reposado.

And so, they were served to the 1600 attendees.

Tequila Shrimp 1
But before that day, the cooking staff under the expert guidance of the Marriott Wardman Park Hotel Executive Chef Horst Lummert, had to test the recipe.

That day of testing and tasting was incredibly fun. Here we were, as we watched how the tequila drunken shrimp were ignited…

Tequila Shrimp 2
And here we were, watching a crowded shrimp station serve hundreds of plates.

Tequila Shrimp 3
And here is how you can get a taste of those shrimp, right at home. Along with some igniting which is such a thrill.

First of all. Get some good shrimp. Though it is always  better to use fresh ingredients, truth is, it is hard to get fresh shrimp. Although sold thawed, they tend to traveled frozen. A wonderful thing about shrimp though, different from fresh fish, is that shrimp freeze well and can survive the thawing process in great shape, keeping their crispness and flavor.

Here is a suggestion: If you are using them today, buy them thawed, but ask your fishmonger how long they have been sitting there. It should be 1 or 2 days tops. They shouldn’t seem limp or sad and should have a light saltwater smell. Get them with the shrimp and tail on.

If you are using them tomorrow or further on, buy them frozen. Then you are on top of how long they have been thawed.To thaw, have them in the refrigerator a day before using and rinse them under cold running water.

Don’t thaw them at room temperature or in a microwave, or you will end up with shrimp ready for a Halloween party.

Tequila Shrimp 4
Once thawed, peel and season them with Kosher or sea salt and freshly ground pepper.

Tequila Shrimp 3

Heat a large pan over medium high heat, once your butter is sizzling, toss in some fresh minced garlic. Let it become fragrant, 10 seconds or so… and add the shrimp.

Cook the shrimp just 1 or 2 minutes per side, so they will be soft, crispy and sweet instead of chewy, rubbery and boring.

Then pour your Tequila. This is what I have at home… The Gran Centenario. Different from the Blanco or White tequila, the Reposado is darker in color because it is aged in wooden barrels. It has a bolder flavor. But feel free to use whatever you have handy. You can also use Mezcal.

Tequila Shrimp 4
Now: Watch it. Once you add the Tequila, slightly tilt the pan to the flames of your burners as you lightly step back. It will ignite fast and furiously, but only for less than half a minute. Igniting the Tequila gets rid of the alcohol presence and retains the bold flavors from the Tequila.

Continue to cook the shrimp until the flames disappear and add the Mexican cream

Tequila Shrimp 7
…and the Chipotle Chile in Adobo sauce. If you feel like it, drop in a Chile too.

Tequila Shrimp 8
Stir it and turn off the heat.

Tequila Shrimp 9
Plate the shrimp covered in the sauce, just like that, while they are hot, hot, hot! And toss some fresh chopped chives right on top.

Tequila Shrimp 10
The chives not only add a fresh flavor and color, but add a vibrant contrast to the creamy sauce.

Tequila Shrimp 11
Here is a close up of for you.

Tequila Shrimp 12
Crispy and sweet, smoky and tangy, and oh so bold with the presence of the Tequila. Plus they are, sooooooo much fun to prepare! Go on and impress someone.

Print Recipe
4.41 from 5 votes

Tequila, Mexican Cream and Chipotle Shrimp

So when I was asked to develop a Mexican menu for the 2010 RAMMYS Awards I just had to include shrimp. I paired them with some signature Mexican ingredients: smoky and hot Chipotle Chiles in Adobo, tangy and salty Mexican Cream and the iconic Tequila Reposado. And so, they were served to the 1600 attendees.
Prep Time5 minutes
Cook Time6 minutes
Course: Antojos, Main Course
Cuisine: Mexican
Keyword: chipotles in adobo, mexican crema, pati's mexican table, Recipe, seafood, Shrimp, tequila
Servings: 12 appetizer portions
Author: Pati Jinich

Ingredients

  • 1 pound large shrimp in shell thawed, peeled and deveined (about 25 shrimp)
  • 1/2 teaspoon kosher or sea salt or more to taste
  • 1/4 teaspoon freshly ground black pepper
  • 2 tablespoons unsalted butter
  • 1 garlic clove finely minced
  • 1/4 cup Tequila Reposado
  • 1/4 cup Mexican style cream such as Rio Grande
  • 1 teaspoon Chipotles in adobo sauce or add more to taste
  • 1 bunch chives chopped

Instructions

  • Peel and devein the shrimp. Place in a bowl and sprinkle with salt and pepper. In a large and heavy saute pan set over medium-high heat, let the butter melt. Once it starts to sizzle, add the garlic. Stir and cook for 10 to 15 seconds, until the garlic becomes fragrant. Incorporate the shrimp, making sure that the pan is not over crowded, and let them brown on one side and then the other, just for about 1 to 2 minutes per side. Don't let them over cook, they should brown on the outside, but barely cooked through.
  • Add the tequila, and slightly tilt the pan over the flame to ignite the tequila. Let it cook until the flames disappear. Stir in the cream and the chipotle sauce and turn off the heat. Serve immediately sprinkled with the chives on top.

Notes

Camarones al Tequila

Squash Blossoms

Squash blossoms are considered a true delicacy in Mexican cuisine. Available in rainy months, they fly out of the markets as soon as they are set on the floor mats and stands.

No wonder they are such a hot selling ingredient: They are gorgeous looking, with orange and green Fall colors, a velvety texture, a meaty and crunchy bite and a delicate and exuberant flavor.

Since they are also commonly used in Mediterranean cuisine, aside from finding them in the US in Latin markets, one can find them at Italian grocery stores. But one can also find them during the summer season in some grocery stores and Farmer’s markets.

Squash Blossoms 1

I was so excited to find them so fresh in Mexico last weekend, that I took many photos. I have to say, one can buy 10 pounds of flowers for the price of what one pays here, but oh well. Also, in Mexico they sell them already completely bloomed.

Though they taste much better when fresh, they have to be used quickly as they wilt fast even inside of the refrigerator. But they can also be found canned, and they do taste good as well.

To use them fresh, remove the lower part of the stem and rinse them thoroughly. I use all of the flower and upper stem, though some cooks do remove the green sepals. Squash blossoms tend to be paired with one or another fresh chile, typically the Poblanos, and many times corn.

Squash Blossoms 2

Quesadillas at the Mexico City Fair

The last time I was at the Mexico City Chapultepec Fair was 30 years ago, with my high school friends. Going back last weekend with my own growing monsters, confirmed that it is not an ordinary Fair experience, ever, regardless of one’s age.

Yes, you find the balloons, with a mix of Mexican and American characters, right at the main entrance.

Squash Blossom Quesadillas 1

You will always find Mrs. Bird Lady, somber as can be, with her clairvoyant birds. As soon as she looks you up and down, she knows which of her birds can tell your future more accurately. Maybe…

Squash Blossom Quesadillas 2

For 20 pesos, the cute little bird steps out of the wooden cage, fully concentrated, knowing you think it holds the surprises of your future in its beak.

Squash Blossom Quesadillas 3
It elegantly chooses the three cards that will reveal it to you.

Squash Blossom Quesadillas 4

After being completely clueless with the shocking differences from what the three cards said, you go in for the rides.

And wow man, does that Fair have rides. From beastly roller coasters…

Squash Blossom Quesadillas 5

…to the dizzying Nao de China. History tells us that the Naos were really Galleons from the Philippines, that traveled the Manila-Acapulco trade route since the XVI century, bringing so many ingredients into Mexico’s kitchens. But who knows why the name has been popularly changed, for centuries now, to the Nao from China. I guess it sounds more exotic.

Oh well, the monsters couldn’t care less about the accurate food history, all they wanted to do was ride that boat again and again.

Squash Blossom Quesadillas 6

As well as that crazy ride that goes up and down, which I refused to ride.

Squash Blossom Quesadillas 7

There’s my oldest monster, happy with two of his cousins, after dozens of  rides.

Squash Blossom Quesadillas 8

And there is absolutely no Mexican Fair without a Mexican clown. I took a FLIP video, so you can get into the mood.

I had to stop there. If you know Spanish, you heard the clown inviting kids to come up the stage. Some of mine wanted to try. Nope. They didn’t get a turn.

But what is most amazing about the Fair, is the amount and diversity of finger licking foods to be found.

Say, even before you walk in, there is Mr. Cotton Candy Man.

Squash Blossom Quesadillas 9

That was some light, fluffy, spongy and delicious cotton candy, we ate first, before anything else.

Squash Blossom Quesadillas 10

There are countless stands selling Mexican style hamburgers and hot dogs, which do drive me crazy. In such a good way.

Squash Blossom Quesadillas 11

Garnished with raw or cooked onion, tomatoes and jalapeños. Topped with ketchup and mustard until you say stop. As well as melted – until crisp – Cheddar cheese and crispy bacon, if you like.

Squash Blossom Quesadillas 12

There are exotically flavored popsicles: Jamaica flowers, Horchata, Tamarind, Mango with Chile, Pecans, Strawberries and Cream, Zapote, Mamey, Coconut, Tangerine, amongst some. And they can all be drizzled with a healthy dose of Chamoy on top.

Squash Blossom Quesadillas 13

There is a grand place to find all sorts of candies…

Squash Blossom Quesadillas 14

…that tend to be spiced up, with different levels of heat. Not for the faint-hearted.

Squash Blossom Quesadillas 15

As well as different kinds of crunchy snacks like potato chips and chicharrones, which MUST be squirted with Chile sauce, freshly squeezed lime juice and salt. Really, they MUST.

Squash Blossom Quesadillas 16

Popcorn freshly popped, MUST also be squirted with a chile sauce.

Squash Blossom Quesadillas 17

There are taco and torta stands.

Squash Blossom Quesadillas 18

The best torta, this time, was the Torta de Pastor.

Mr. Torta de Pastor was kindly showing me how he prepared the Torta that was about to be all mine. He takes a telera -Mexican style French baguette – and heats it on the grill. He places juicy thin layers of that carne in adobo he is slicing below, crunchy onion and savory cilantro.

Squash Blossom Quesadillas 19

Then you can add the salsa of your choice, from many that he lets you choose from.

You know you want to take a bite into it. I should have taken a FLIP video of that, but I was too eager to sink my teeth into it. Sorry.

Squash Blossom Quesadillas 20

There were also Tlayudas. 

Squash Blossom Quesadillas 21

Tlayudas are very large, thin, toasted and crisp corn tortillas. Here they were covered with refried beans, seasoned cactus paddles, shredded aged cheese, onion, cilantro and topped with both, a red and a green sauce.

Squash Blossom Quesadillas 22

You will also find Nachos. Always. But that is Always, a no thank you from me. Not Here, not There, no Nachos for me Anywhere.

Squash Blossom Quesadillas 23

But the best, by far, were the quesadillas. Freshly made.

Squash Blossom Quesadillas 24

There are countless fillings for you to choose from. Right there, on the spot: seasoned cactus paddles, huitlacoche or mushrooms, chicken Tinga, shredded beef, potato and chorizo.

Squash Blossom Quesadillas 25

But my favorites are quesadillas with Squash Blossoms, Poblano Chile and Oaxaca cheese.

I like them so, I featured them in last year’s session at the Mexican Cultural Institute focused on Mexican Street Foods.

There are many ways that you can make them. You can make the corn dough from scratch, which is simple these days. Flatten in a tortilla press, add the filling and fry. As below.

Squash Blossom Quesadillas 26

Or you can use pre-made corn tortillas, add the filling, heat on a comal or griddle until the cheese melts, and if you want until it crisps a little too.

Squash Blossom Quesadillas 27

Whichever way you decide to make them, with fresh corn masa or already cooked tortillas, the wholesome and tasty filling full of personality is bound to make you happy. I am sure the clairvoyant bird would agree.

squash blossom quesadillas
Print Recipe
4.50 from 4 votes

Squash Blossom Quesadillas

Squash Blossom Quesadillas recipe from Pati's Mexican Table Season 2, Episode 9 "Xochimilco: Cooking with Flowers"
Prep Time1 hour
Cook Time30 minutes
Total Time1 hour 30 minutes
Course: Antojos, Appetizer, Main Course
Cuisine: Mexican
Keyword: cheese, Chiles, Mexico City, Oaxaca, Poblano, Quesadilla, queso, squash blossom
Servings: 12 quesadillas
Author: Pati Jinich

Ingredients

  • 2 poblano chiles charred, peeled, seeded and diced
  • 1 tablespoon unsalted butter
  • 1 tablespoon safflower or corn oil
  • 1/4 cup white onion chopped
  • 1 teaspoon garlic finely chopped
  • 12 ounces fresh squash blossoms rinsed, dried and chopped (about 8 cups)
  • 1 teaspoon kosher or sea salt or to taste
  • 8 ounces Oaxaca or mozzarella cheese shredded
  • 2 cups instant Maseca corn masa flour if making fresh masa tortillas, or substitute 1 package store-bought corn tortillas
  • 1 3/4 cups water for the masa, if making fresh masa tortillas

Instructions

To Prepare Filling:

  • Place the poblano chiles on a tray under the broiler, directly on the grill, or directly on the open flame or on a comal or skillet set over medium heat. Turn them every 2 to 3 minutes for a total of 6 to 9 minutes, until they are charred and blistered all over. Transfer them to a plastic bag, close it tightly and let them sweat for 10 to 20 minutes. Working under a thin stream of cold water, peel off their skin; make a slit down the sides to remove and discard the seeds and veins, then remove and discard the stem. Cut them into 1/2-inch-wide strips or squares.
  • Add butter and oil in a medium sauté pan over medium heat. When the butter is bubbling, add the onion and garlic and cook until softened and fragrant, for about 3 to 4 minutes. Add the prepared poblano chiles, then the squash blossoms and salt. Cook for about 5 minutes, stirring often, until the blossoms exude their juices and the mixture begins to dry out. Remove from the heat.

If Using Fresh Corn Masa:

  • Mix Maseca or instant corn dough masa with the water and knead for a few minutes until soft. Make 1-inch balls and flatten between plastic rounds on a tortilla press.
  • Place 1 tablespoon of the cheese and 2 tablespoons of the filling at the center of the dough disk and, leaving it on the plastic round of the tortilla press, fold it over and press to seal the edges. Repeat to form the rest of the quesadillas, using all the dough and filling.
  • In a deep and large skillet, add enough oil so that it’s at least ¾-inch deep; heat over medium heat. Once the oil is hot, about 3 to 4 minutes later, add a few quesadillas at a time to the hot oil, making sure not to crowd the skillet. Cook for 2 to 4 minutes per side, or until golden brown and crisp. Transfer, with a slotted spoon, to a paper towel-lined platter to drain. Serve hot, with the salsa of your choice.

If Using Store-Bought Tortillas:

  • If using pre-made corn tortillas, add the cheese and filling to the center of the tortilla. Place on an already hot comal, griddle or skillet, and let them cook until the cheese has melted and the tortilla has begun to lightly crisp, about 2 to 3 minutes per side.

Notes

Quesadillas de Flor de Calabaza

Poblano Chile

The Poblano chile is a star in Mexican kitchens. It is used in a wide range of ways and in a wide range of dishes. Some well known examples are Chiles en Nogada, rajas, pickled, and stuffed with meat or cheese and bathed in a tomato sauce. But there are hundreds of other ways.

Aside from being absolutely gorgeous – chubby, curvy, large, sensuous and with a beautiful dark green color with a bit of a shine to it – it has a striking flavor that is rich, exuberant and fruity. It tends to be a bit capricious as well: it ranges from the very mild to the very hot. However, there are ways to tame its heat.

It is rarely used or cooked in its raw form.  Unlike other ingredients, the poblano has to go through a couple of steps to bring out the finest qualities of its flavor, color and texture. It may seem daunting at first, but once you prepare them a couple of times, the process becomes very simple.  It is just like preparing roasted red bell peppers.

Running to Catch the Fresh Fruit Cart!

Every year, just as summer peeks its warm face in Washington DC, I begin to crave fresh fruits and vegetables Mexican street cart style. One of the times when I have enjoyed it the most was in April around 15 years ago.  We were traveling through the Copper Canyon route, on a week long trip, from Chihuahua to Sinaloa. We had been waiting at the station in the town of Creel to catch the Chepe train to go to the next town.

As the station officer let out a scream that the train was approaching, out of the corner of my eye, I saw the fruit and vegetable cart. It was hot, we were tired and thirsty, and I saw Mr. Fruit Cart Man peeling some ripe and juicy mangoes. I grew weak in my knees.

Just that second, I saw Daniel’s face panic. He knew I was going to make a run for it.  Along with his camera.

Fresh Fruit Cart 1

Although I could hear him scream: “NO PATI!!! You are going to be left behind!” I ran for it.

Fresh Fruit Cart 2
The fruit cups had watermelon, jí­cama, cantaloupe and mangoes. Since Mr. Fruit Cart Man watched me run, he politely suggested I take one fruit cup just like that. But I was dying for one of those mangoes. Plus…, please! If you have tried a Mexican cart style fruit or vegetable, you must know, that without the salt, ground chile and freshly squeezed lime juice, there is no reason to run for it.

I filmed Mr. Fruit Cart Man with the FLIP (sorry friends, took me a year to learn how to upload it, and hopefully my videos will get better too) so you can see how beautifully he cuts and shapes the mango. As he was almost done, we heard the train come.

There are many ground chiles you can use. They all add that something that makes the flavor of the fruit come out and pop. There is the typical chile piquí­n. There are also some liquid chile sauces you can use, and are found in many Fruit Carts, such as La Valentina, Bufalo, or Cholula. These days, it is incredible, but one can find all of these chile mixes and sauces throughout the US.

That day Mr Fruit Cart Man added a ton of the chile, a bit of the salt and a giant squeeze of the fresh lime juice. By the time he was done, all the travelers had hopped on.

Fresh Fruit Cart 3

I am so lucky, because my monsters waited for me. It was a close call, but we made it.

See, Juju is licking his fingers from that last piece of mango.

Fresh Fruit Cart 4

And we did make it to our next stop.

Fresh Fruit Cart 5

Now that the summer is pumping up, you can make some too.

You will have made a wonder to run home for.

Fresh Fruit Cart main
Print Recipe
5 from 1 vote

Fresh Fruits and Vegetables from the Cart

Every year, just as summer peeks its warm face in Washington DC, I begin to crave fresh fruits and vegetables Mexican street cart style. One of the times when I have enjoyed it the most was last April.  We were traveling through the Copper Canyon route, on a week long trip, from Chihuahua to Sinaloa. We had been waiting at the station in the town of Creel to catch the Chepe train to go to the next town.
Prep Time10 minutes
Cook Time1 minute
Course: Antojos
Cuisine: Mexican
Keyword: Antojo, carrots, Chiles, cucumber, Dessert, Jicama, lime, mango, pineapple, Recipe, tajin, Vegetable, Vegetarian, watermelon
Author: Pati Jinich

Ingredients

  • Any fruits or vegetables that you are craving!
  • Pineapple watermelon, mango, jicama, cucumber, carrots or any of your choice, peeled and sliced or diced
  • Salt to sprinkle throughout
  • Ground spiced up chile such as Tajín, or a sauce like Valentina, Buffalo or Cholula
  • Fresh squeezed lime juice

Instructions

  • Peel and slice the fruits and vegetables. Sprinkle salt and chile to taste. Bathe with fresh squeezed lime juice. Eat up!

Notes

Frutas y Verduras de Carrito

Huauzontles

Huauzontles, also called Huazontles or Cuazontles, are a native plant to Mexico. Their scientific name is Chenopodium nuttalliae. Huauzontles have a very thick main stem, oval leaves -that are not edible- and thinner stems filled with edible green flowers that resemble broccoli or rapini, but are much more smaller and delicate.

They have a strong smell when you get close. Similarly as the Epazote, Huauzontles have a deep, clean and almost astringent smell. Some people say they taste similar to spinach or watercress. It seems to me, they have a welcoming and original, light bitter taste.

Huauzontles have been commonly eaten during Lent for centuries, but they are also eaten throughout the year. Since they have become increasingly popular in the US -where they used to be considered a weed- they are now being imported and also grown. They are now available in many Latino and international stores.

In Mexico, huauzontles are considered a nutritious, exotic, filling and delicate ingredient.

The most common way to eat them is what is called tortas de huauzontle, where they are boiled, drained, covered in cheese, battered and then bathed in one or another kind of sauce. The thick stem is not removed and people pull the edible part of the huauzontles with their teeth. It is fun! Yet, it is also messy.

I am fond of making croquettes out of them, which I shall post shortly.

Chef Solis’s Mexican Crab Cakes with Jalapeño Aioli

I was invited to design a Cinco de Mayo menu for Ceiba Restaurant along with their Chef de Cuisine, Alfredo Solis. The invitation included teaching a class covering that menu. As always, I was eager to teach whatever I know. But as always, I learn much more as I go. This time, I also learned, that you never know what foods you are going to like the best.

Solis and I were thrilled with the class menu. He was going to feature a tasty Shrimp Ceviche and some succulent Shredded Beef Tacos. I was going for a Red Snapper with a simple yet stylish Almond and Chipotle sauce, with a side of the ever exuberant Poblano Green Rice and a fresh Radish Salsita. I was also covering dessert: a textured and sweet coconut flan paired with fresh mangoes. And whipped cream. With a hint of Rum.

The whole experience was fun, from beginning to end. From meeting Solis for the first time -who shared his to die for mussels in a spicy tomato broth with chorizo, along with fascinating bits and pieces of his life story as he went from being a dishwasher to Chef de Cusine-  to designing the menu, to tasting and testing it a week before class for a full dinner run, to prepping for class and lunch the day of. Day which, with the excuse of needing sweetened condensed milk for the coconut flan, I kept splashing some in their good coffee and sipping it all along.

And there we were, laughing it out, as we set up the demo stations, before we even started the class.

DSC_0436.jpg
And there we were, ready and steady, a couple minutes before the guests were seated.

DSC_0493

But when all was said and done and the guests were gone -hopefully happy and with a full belly- I looked at Solis and said what my friends know me for: what are WE eating now?

Solis responded: Anything you want to try from our menu!

Having eyed the already shaped crab cakes in the refrigerator that morning, I asked him what was in their mix.  Just with the word Habaneros, I knew I was going for those.

So yes, I loved the menu we designed. And yes, I think it was a fun and yummy class. But I can tell you, those crab cakes are a pair of Rock Stars.

If you are not near DC or can’t go to Ceiba anytime soon, Solis graciously shared the recipe for you to sample at home. I just did as I posted those for you.

To make them, here we go: Lump crab meat, chopped Habanero -yes with seeds for me please-, cilantro, just a bit of bread crumbs and mayonnaise to bind the meat together, as well as the egg I am cracking there.

Crabcake 1-thumb-510x342-1041
Then I am adding the juice of that shinny and juicy lime, some salt and fresh ground pepper.

Crabcake 6-thumb-510x342-1051
That’s all that goes into the crab cakes.  Shape them up and you can keep them in the refrigerator for a couple of days, covered, until you are ready to cook them up.

When ready, prepare Solis’s tangy and light Jalapeño aioli, to drizzle over them.  Just place the ingredients into a blender or food processor: mayonnaise, lime juice, Jalapeños, cilantro, salt and pepper.

Crabcake Crabcake 10-thumb-510x342-1059
And there you go, Mexican style crab cakes fit for Emperor Montezuma. I bet you he would have liked them.

DSC_0606-thumb-510x342-1033
Just as I did.

Print Recipe
4.60 from 5 votes

Mexican Crab Cakes with Jalapeño Aioli

Having eyed the already shaped crab cakes in the refrigerator that morning, I asked him what was in their mix.  Just with the word Habaneros, I knew I was going for those. So yes, I loved the menu we designed. And yes, I think it was a fun and yummy class. But I can tell you, those crab cakes are a pair of Rock Stars. If you are not near DC or can’t go to Ceiba anytime soon, Solis graciously shared the recipe for you to sample at home. I just did as I posted those for you.
Prep Time15 minutes
Cook Time6 minutes
Course: Antojos, Main Course
Cuisine: Mexican
Keyword: aioli, cilantro, crab, habanero, jalapeno, lime, mayonnaise, pati's mexican table
Servings: 4 to 6 servings
Author: Pati Jinich

Ingredients

For the crab cakes:

  • 1 pound jumbo lump crab meat
  • 1 habanero chile seeded (optional), chopped
  • 2 teaspoons fresh squeezed lime juice
  • 2 teaspoons fresh cilantro chopped
  • 3 teaspoons bread crumbs
  • 1 egg
  • 2 teaspoons mayonnaise
  • 1/2 teaspoon kosher or sea salt more or less to taste
  • 1/4 teaspoon ground black pepper more or less to taste
  • 1 tablespoon butter
  • 1 tablespoon olive oil

For the jalapeño aioli:

  • 1 or 2 jalapeño chiles seeded if desired
  • 2 tablespoons fresh squeezed lime juice
  • 2 cups mayonnaise
  • 1/4 cup cilantro leaves
  • 1/4 teaspoon kosher or sea salt more or less to taste
  • 1/4 teaspoon black pepper ground

Instructions

  • Combine the crab meat, habanero chile, cilantro, breadcrumbs, mayonnaise, egg and lime juice in a large bowl. Season with salt and pepper. Form 4 to 6 crab cakes, depending on how chubby and big you want them. You can prepare them in advance and keep them refrigerated for up to 2 days.
  • Heat a large skillets set over medium-high heat, melt 1 tablespoon of butter into 1 tablespoon of oil. Once it starts to sizzle, add as many crab cakes as will fit without being crowded. Cook anywhere from 2 to 3 minutes per side.
  • To prepare the aioli, place all the ingredients in the blender and process until smooth. Drizzle over the crab cakes and if you want, sprinkle the top with freshly chopped cilantro.

Notes

Croquetas de Cangrejo con Aioli de Jalapeño, Adapted from Ceiba's Chef Alfredo Solis