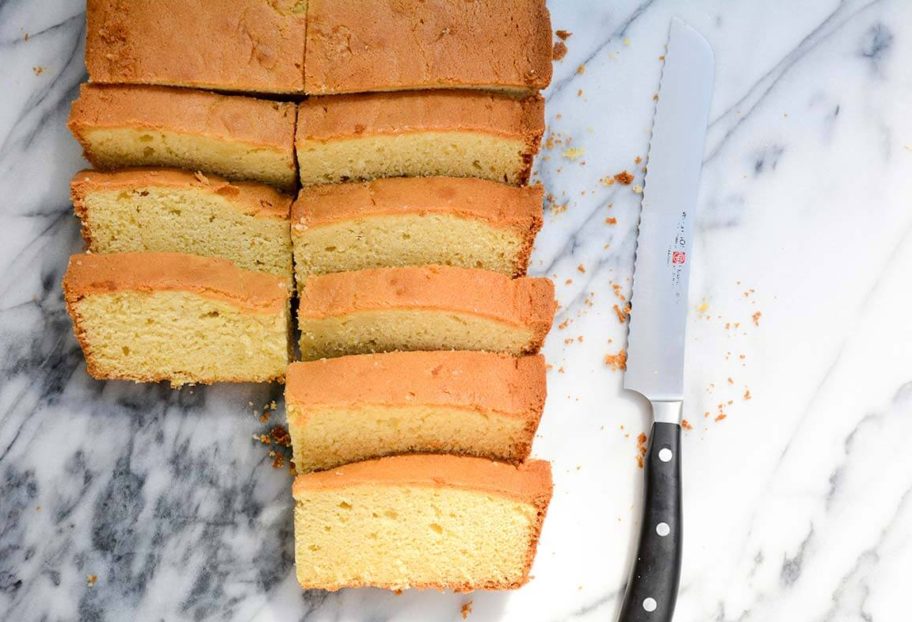
Tasajo Torta with Smoky Guacamole

Pati Jinich tasajo torta with smoky guacamole
Print Recipe
4.20 from 5 votes

Tasajo Torta with Smoky Guacamole

Tasajo Torta with Smoky Guacamole recipe from Pati's Mexican Table Season 6, Episode 1 "One Day in Oaxaca"
Prep Time5 minutes
Cook Time5 minutes
Total Time10 minutes
Course: Main Course
Cuisine: Mexican
Keyword: beef, guacamole, meat, pati's mexican table, refried beans, Sandwich, steak, tasajo, Torta
Servings: 6 Tortas
Author: Pati Jinich

Ingredients

Instructions

  • Slice the bread in half. Toast under the broiler, on the grill, or on a hot comal until warmed and slightly browned. Remove from heat.
  • Spread refried beans on each of the bottom half of each roll. On top of the refried beans, place the meat, shredded cheese, a tomato slice and a generous dollop of the guacamole. Top with the other toasted bread half and serve!

Notes

Torta de Tasajo con Guacamole Ahumado  

Grilled Corn Salad

Pati Jinich grilled corn salad
Print Recipe
4.72 from 7 votes

Grilled Corn Salad

Grilled Corn Salad recipe from Pati's Mexican Table Season 6, Episode 3 "A Queen in the Land of Gods"
Prep Time10 minutes
Cook Time30 minutes
Course: Salad
Cuisine: Mexican
Keyword: Corn, green onions, scallions, Tomatoes
Servings: 4 servings
Author: Pati Jinich

Ingredients

  • 6 ears of corn
  • 10 scallions
  • 5 tablespoons olive oil plus more for brushing grill
  • 1 1/2 pounds cherry tomatoes
  • 1 teaspoon kosher or coarse sea salt or more to taste
  • To taste freshly ground black pepper
  • 1/4 cup fresh mint chopped
  • 1/4 cup fresh chives chopped
  • 2 tablespoons red wine vinegar

Instructions

  • Pre-heat the grill to medium, or set a grill pan over medium heat. Once hot, brush with oil.
  • Cook the corn for about 20 minutes, flipping with tongs every once in a while. Also, cook the scallions for about 10 minutes, flipping occasionally as well. Remove both from the heat when charred, cooked and softened. Set aside.
  • Heat 5 tablespoons of olive oil in a skillet over high heat. Once the oil is hot, add the tomatoes, salt and pepper, and cook for 6 to 7 minutes until charred and softened. Remove from the heat, making sure to reserve the oil and tomato juices as well.
  • Shave the corn kernels off the cobs and place in salad bowl. Cut white and light green parts of the scallions into 1-inch pieces and add to the bowl. Add the mint, chives, vinegar, and the reserved oil and juices from the tomatoes. Mix well. Incorporate the tomatoes. Gently toss and serve.

Notes

Ensalada de Elote Asado

Nopalitos Salad with Pickled Chipotle

Pati Jinich nopalitos salad with pickled chipotle
Print Recipe
4.75 from 4 votes

Nopalitos Salad with Pickled Chipotle

Nopalitos Salad with Pickled Chipotle recipe from Pati's Mexican Table Season 6, Episode 1 "One Day in Oaxaca"
Prep Time10 minutes
Cook Time20 minutes
Total Time30 minutes
Course: Salad, Side Dish
Cuisine: Mexican
Keyword: cactus, carrots, Chipotle, Nopalitos, pati's mexican table, Zucchini
Servings: 4 Servings
Author: Pati Jinich

Ingredients

  • 3/4 cup olive oil
  • 1 cup white onion slivered
  • 5 cloves garlic
  • 2 dried chipotle peppers
  • 2 teaspoons dried Mexican oregano
  • 2 teaspoons kosher or coarse sea salt or to taste
  • 1 1/2 cups apple cider vinegar
  • 1/2 pound carrots peeled and cut into sticks
  • 1/2 pound zucchini cut into half moons
  • 1/2 pound cactus paddles cleaned and cut into sticks (1 1/2” to 2” long by 1/2” wide)

Instructions

  • Heat the oil in a large extended casserole over medium heat. Once hot, add the onion, garlic and dried chipotles, and cook for 2 to 3 minutes stirring occasionally until the onion begins to soften. Add the oregano and salt, and stir. Raise heat to high, add the vinegar, and let it simmer for 2 to 3 minutes, stirring a few times. Turn off heat and set aside to cool. (You can make this chipotle pickle ahead of time and store covered in the refrigerator for up to 2 months.)
  • Bring salted water to a boil in a large saucepan and take turns cooking the vegetables. First cook the carrots for 2 minutes, remove with a large spider or slotted spoon and place in a bowl. Then cook the zucchini for 30 to 40 seconds, remove with a slotted spoon and add to the bowl with the carrots. Lastly, add the nopales and cook for 10 minutes. Drain and rinse thoroughly with cold water, for at least one minute, until all viscous liquid is removed.
  • Incorporate the carrots, zucchini and nopales into the prepared chipotle pickle, toss well and scrape into a bowl or container. Let it sit and marinate for at least an hour before serving. You can also cover and refrigerate for up to 5 days. Mix well before eating.

Notes

Ensalada de Nopalitos con Chipotle en Escabeche

Burnt Milk Ice Cream with Animal Crackers

Pati Jinich burnt milk ice cream with animal crackers
Print Recipe
4.34 from 6 votes

Burnt Milk Ice Cream with Animal Crackers

Burnt Milk Ice Cream with Animal Crackers recipe from Pati's Mexican Table Season 6, Episode 3 "A Queen in the Land of Gods"
Prep Time15 minutes
Cook Time1 hour 15 minutes
Total Time1 hour 30 minutes
Course: Dessert
Cuisine: Mexican
Keyword: animal crackers, burnt milk, canela, ice cream, pati's mexican table
Servings: 1 generous quart
Author: Pati Jinich

Ingredients

  • 1 1/2 cups milk
  • 1/2 teaspoon vanilla extract
  • 1 stick ceylon cinnamon or canela
  • 3/4 cup sugar plus 2 tablespoons
  • 2 large eggs
  • 1 1/2 cups heavy cream
  • Animal crackers for garnish

Instructions

  • In a small saucepan set over medium heat, heat the milk, vanilla and cinnamon stick until a thin skin (called nata) forms on top and it barely begins to simmer, about 6 to 7 minutes. Don’t let it boil. Reduce to the lowest possible heat.
  • Meanwhile, in a medium saucepan, add 3/4 cups sugar and place over medium to medium-low heat. Let the sugar begin to dissolve, swirling around and moving the whole sauce pan occasionally, but not stirring, until the sugar melts into a caramel syrup, about 7 to 8 minutes. Remove from heat.
  • Immediately, remove the cinnamon stick from the milk mixture, and pour it in a very thin stream into the hot caramel, whisking as fast as you can to incorporate it. The caramel will react very aggressively, but you need to continue pouring the milk at a steady slow pace and whisking fast with determination until it is all well combined. If for any reason, any caramel hardened on the bottom of the pan, place back over medium heat and whisk until diluted. Remove from the heat.
  • In another bowl, whisk the eggs until thick and foamy. Add the remaining 2 tablespoons of sugar and continue to mix. In a very thin stream, and very slowly, alternate incorporating the caramel milk and the heavy cream into the eggs, whisking continuously until it is all incorporated.
  • Pour the mixture into your ice cream maker and follow the manufacturer’s instructions (in my ice cream maker, it takes about 1 hour 15 minutes). Eat right away or freeze until ready to serve.
  • Serve with whole or crumbled animal crackers.

Notes

Helado de Leche Quemada con Galletas de Animalitos

Natilla with Fresh Berries

Pati Jinich natilla with fresh berries
Print Recipe
4.50 from 10 votes

Natilla with Fresh Berries

Natilla with Fresh Berries recipe from Pati's Mexican Table Season 6, Episode 1 "One Day in Oaxaca" 
Prep Time5 minutes
Cook Time30 minutes
Total Time35 minutes
Course: Dessert
Cuisine: Mexican
Keyword: berries, canela, cinnamon, custard, natilla, pati's mexican table
Servings: 6 Servings
Author: Pati Jinich

Ingredients

  • 1 liter milk
  • 1 teaspoon vanilla extract
  • 5 egg yolks
  • 1 12-ounce can evaporated milk
  • 1/2 cup sugar
  • 2 tablespoons cornstarch
  • Ground ceylon cinnamon or canela optional for garnish
  • Berries of your choice for garnish

Instructions

  • In a large saucepan, combine the milk and vanilla. Place over medium heat and bring to a simmer.
  • Meanwhile, in a large bowl, beat the egg yolks with a whisk until thickened and the color has turned from bright yellow to pale yellow. Incorporate the evaporated milk, sugar and cornstarch, whisk until cornstarch has dissolved and the mixture is smooth and combined.
  • After about 15 minutes, the milk will begin to form a thin film on top (called nata) and start to come to a simmer. Remove from the heat at this point.
  • To temper the egg yolk mixture, constantly whisk the egg mixture while adding the hot milk into the bowl one ladle full at a time. Then return it all into the saucepan and set over medium heat. Continue to cook for about 10 to 12 minutes, stirring constantly with a spatula or whisk and making sure mixture doesn’t stick to sides or bottom of the pot, until it has thickened to the consistency of a very thin pudding.
  • Remove from the heat. Ladle into ramekins and sprinkle cinnamon on top. You can serve it at room temperature or let cool, cover with plastic wrap, place in the refrigerator and serve chilled. Garnish with fresh berries.

Notes

Natilla con Moras

Blackberry Cheesecake

During the summer months, which is the rainy season, gigantic blackberries take over the culinary stage in the town of Valle de Bravo, Mexico. They can be the size of a plum, bursting with wine colored juice that is at once sweet and tart and addicting. Literally every morning, women come down from the mountains and valleys to the town’s market with buckets of these fresh picked gems. Of course, they sell out in a matter of minutes.

What to do with them? Oh first of all, eat them by the handfuls straight from the buckets. Just like that. Or puree them raw, maybe with a bit of mint and pour them over vanilla ice cream or pound cake. Or you can eat it like a cold soup! But one of my favorite things is to use them as a topping for cheesecake.

Blackberry cheesecake is definitely a thing Mexican kitchens have been doing for a while. Yes, we have chocolate cheesecake, cajeta cheesecake, strawberry cheesecake… but what is considered the traditional topping in Valle de Bravo is a kind of blackberry jam.

Here I am trying to replicate my favorite ones from Valle de Bravo, as Juju and I just went blackberry picking a few days ago.

Blackberry picking with my youngest boy, Juju… He was showing me how to do Instagram Stories as he is much more tech-savvy than me. You can view our stories on my Instagram.

There are three parts to this dessert – all super simple to make. But each one needs to be just right, so here are my notes on that.

For the crust: After the crumbled crackers are mixed with the melted butter and dash of cinnamon, they need to be applied with pressure to the bottom of the mold creating a somewhat even bottom crust with a gentle rim going up the side. And it is absolutely necessary for the crust to set and chill before the cheesecake mixture is added. If not, the crust will not stand tall underneath it, and it will lose presence.

For the filling: I like it rich and super moist. For me, that means adding sour cream, which also gives it a refreshing tang, and cottage cheese, which adds a gentle saltiness. With this kind of mixture, it is important to not over bake. As your timer kicks the 55-minute mark, stand at the ready to take it out. It should look puffed up and gently browned on top and a toothpick inserted in the middle should come out just moist, but not with any of the filling covering it.

For the topping: I like to add unflavored gelatin to help it set. This creates a defined layer that will not run all over the place. After the blackberry mixture has boiled, and it has been mashed and the gelatin added, let it cool just to room temperature and then pour onto the cheesecake and chill. You don’t want the blackberry topping to begin to set in the saucepan.

Of course you can make the cheesecake with many other toppings, but before you consider that, give this one a try.

Pati Jinich blackberry cheesecake

Print Recipe
3.80 from 5 votes

Blackberry Cheesecake

One of my favorite things to do with blackberries is to use them as a topping for cheesecake. Blackberry cheesecake is definitely a thing Mexican kitchens have been doing for a while. Yes, we have chocolate cheesecake, cajeta cheesecake, strawberry cheesecake… but what is considered the traditional topping in Valle de Bravo is a kind of blackberry jam.
Prep Time15 minutes
Cook Time1 hour
Course: Dessert
Cuisine: American, Mexican
Keyword: blackberry, cheesecake, graham cracker
Servings: 10 to 12 servings
Author: Pati Jinich

Ingredients

Crust:

  • 6 tablespoons unsalted butter melted
  • 1 1/2 cups crumbled graham crackers
  • 1/2 teaspoon ground true cinnamon or canela

Filling:

  • 3 eggs
  • 1 1/2 cups (or 12 ounces) cottage cheese
  • 1 1/2 cups (or 12 ounces) sour cream
  • 1 1/2 cups (or 12 ounces) cream cheese
  • 3/4 cup granulated sugar
  • 2 teaspoons vanilla extract
  • 2 tablespoons cornstarch
  • Pinch of kosher or coarse sea salt

Blackberry Topping:

  • 4 cups ripe blackberries
  • Juice of a lime (about 3 tablespoons)
  • 1/2 cup granulated sugar
  • 1 envelope (about 1 tablespoon) of unflavored gelatin

Instructions

For the crust:

  • In a bowl, combine the melted butter with the graham cracker crumbs and cinnamon.
  • Scrape onto a ring mold pan. Press around with your hands or the back of a tablespoon to make the bottom crust as even as you can, and push on the sides, to give the crust a short gentle border of about 1/2-inch in height. Cover and place in the refrigerator to chill while you make the filling.
  • Preheat the oven to 350°F and set the rack in the middle.

For the filling:

  • In the jar of a blender, add the eggs, cottage cheese and sour cream. Process until smooth, Incorporate the cream cheese, sugar, vanilla extract, cornstarch and salt, and puree again until fully incorporated.
  • Remove the crust from the refrigerator, pour the mix from the blender on top, jiggle a few times for it to spread evenly. Place in the oven and bake anywhere from 55 minutes to an hour until set. A toothpick inserted in the middle should come out just moist, but not with any of the filling covering it.
  • Remove from the oven. The cheesecake will be very puffed up. As you take it out of the oven it will settle and deflate a little, and cracks may appear on its surface, which is totally normal. Set aside and let cool.

For the topping:

  • In a medium saucepan, combine the blackberries, lime juice and sugar and set over high heat. Once it comes to a full boil, stir and let it continue to cook for 2 to 3 minutes while mashing with a potato masher or mallet.
  • Remove from the heat, add the contents from one envelope of unflavored gelatin. Stir well until fully dissolved and let cool until lukewarm or at room temperature.

To assemble:

  • Pour the cooled blackberry mixture onto the cooled cheesecake. Cover with plastic wrap and place in the refrigerator for at least a couple of hours so that the cheesecake chills and the blackberry topping sets.
  • Remove cheesecake from the refrigerator. Have a cup with lukewarm water and wet a normal dinner or butter knife. Run it around the edge of the mold all the way around and going down to the bottom. Release the mold and serve. Leftovers can be stored covered in the refrigerator.

Notes

Pay de Queso con Zarzamora

Mango Pecan Tart

My favorite mango, by far, is the one called Ataulfo in Mexico. It also goes by the name of champagne or honey mango in other countries. When ripe, its meat is intensely golden yellow with a nice thick bite. It is juicy and has a lightly tart, yet intense, sweetness that is hard not to love. Different from other mangoes, it is not fibrous at all.

Being obsessed with words and names, I did a bit of research on the origin of the name Ataulfo, as it doesn’t mean or translate to anything. Well, it turns out that Ataulfo is a name. The Ataulfo mango was first discovered and historically recorded on a man named Ataulfo Morales’ property in the town of Tapachula in the southeastern tropical state of Chiapas.

The story goes that, in the late 1940s, he found a few of these fruits and became smitten with how sweet and succulent they are. Now, there were other mangoes in Mexico, brought by the Spanish through their trade with the East when Mexico was a colony of Spain. Yet, it seems that the Ataulfo came to be from a natural mutation or hybridization process.

A decade after it was found on Ataulfo Morales’ property, an agronomist named Hector Cano Flores helped popularize it by growing a large quantity of the Atauflo mango trees. And then, another decade later, the first commercial project took place.

By the 1970s, when yours truly was born, this mango had extended its reach well beyond the state of Chiapas and was being consumed in Mexico City, where I lived. Still, Chiapas remains the main producer and the biggest exporter of the fruit, and it also has a denomination of origin, just like champagne!

Oh how we loved Ataulfos. Me and my sisters used to eat them in so many ways. We’d have them in fruit salads, or we’d eat the sides sliced and covered in thick and creamy rompope – Mexican style eggnog – or garnished with lime, salt and ground chile. But, the most frequent way was just stuck on a special mango fork, peeled and gobbled up.

Did you know there is a special kind of fork just for mangoes? It is long and shaped like a trident. The two outer prongs are short and help hold the mango meat in place, while the middle prong is much longer and meant to go through the seed to hold the mango steady.

When I was a teenager, I became a fan of fruit tarts. I had found a recipe for a light and elegant fruit tart in one of my mom’s Austrian cookbooks – that she inherited from her mother – and made it my showpiece.

Whenever I needed to bring something to a dinner or a party, the fruit tart would come. I had mastered it! However, the recipe, of course, didn’t have mango. And I felt like the fruit that needed to be in there the most was the glorious Ataulfo mango. So, I started adding it in addition to the grapes, bananas and kiwis.

Slowly, but surely, the mango started taking over. Until finally, a few years ago, I decided to make a full-fledged mango tart. Why pretend that it was a fruit tart when the only fruit I wanted in there was mango? I could stop coveting the mango pieces from other people’s slices.

While I was at it, I also decided to make the crust entirely pecan. Of course, the traditional pastry cream stays right in the middle of the two.

Oh how I love this tart. It merely does justice to its crown, the Ataulfo mango from Chiapas.

chardonnay mango tart
Print Recipe
4.15 from 7 votes

Mango Pecan Tart

Mango Pecan Tart recipe from Pati's Mexican Table Season 4, Episode 2 "Adventures in San Miguel"
Prep Time25 minutes
Cook Time25 minutes
Total Time50 minutes
Course: Breakfast, Dessert
Cuisine: American, Latin American, Mexican
Keyword: apricot, champagne, jamaica, Kent, mango, pastry cream, Pecan, Pie, tart
Servings: 10 servings
Author: Pati Jinich

Ingredients

  • 3 large, ripe champagne or Kent mangoes

For the crust:

  • 1 1/2 cups pecans
  • 1 cup all-purpose flour
  • 1/4 cup dark brown sugar
  • Pinch kosher or coarse sea salt
  • 1 large egg
  • 4 tablespoons cold butter

For the Pastry Cream:

  • 1 cup milk
  • 1 tablespoon vanilla extract
  • 3 egg yolks
  • 1/4 cup sugar
  • 2 tablespoons cornstarch

For the glaze:

  • 1/4 cup apricot jam
  • 1/4 cup white wine from a bottle that you would like to drink

Instructions

For the crust:

  • Preheat the oven to 375°F. Place the pecans in the bowl of a food processor. Pulse a few times until finely ground. Add the flour, sugar and salt and pulse again a few times until combined. Add an egg and the butter, pulse again a few times until thoroughly mixed and the butter has broken into the smallest of pieces, making it hard to distinguish it from the mix. The mix should resemble a coarse meal; it will not appear to be a homogeneous dough, but it will be all crumbles. That’s what you want.
  • Turn all the pecan mix into a tart pan with a removable ring. Press into bottom of the pan with your hands, leveling it all around. As you press, the mix will start looking like dough. Press a bit to the sides to form a 1/4-inch border all around.
  • Bake for 15 minutes, until cooked through and appears to be lightly golden. Let it cool completely.

For the pastry cream:

  • In a medium saucepan, set over medium heat, pour in the milk and vanilla, stir well with a whisk and let it come to a simmer. Just until it begins bubbling around the edges. Remove from heat.
  • In a medium bowl, beat the egg yolks along with the sugar and the cornstarch. Slowly, in a thin stream and with the help of a ladle, pour the milk into the beaten eggs, whisking along to combine thoroughly until all the milk mixture has been poured. Transfer it all back into saucepan. Set over medium heat, stirring occasionally and keeping a good eye on it, let it come to a simmer. Simmer for about 1 to 2 minutes, until it thickens to thick cream consistency. You may stir with a spatula as it simmers so it doesn’t stick to the bottom. Remove from heat. Let it cool, wrap with plastic wrap and place in refrigerator until ready to use.

For the glaze:

  • In a small saucepan, combine the jam with the wine. Set it over medium heat. Stir or whisk a couple times, until it dissolves and it begins to simmer. Let it simmer 1 to 2 minutes. Set aside.

To assemble the tart:

  • When ready to assemble the tart, vertically slice the cheeks of the mangoes. With a small knife, cut around the cheeks to make it easy to remove from the skin, and scoop out with a spoon. Cut the cheeks into slices.
  • Pour the pastry cream onto the crust. Place the mango slices, going around the tart until you reach the center. With a pastry brush, brush the glaze all over the mangoes. If the glaze has cooled, heat for a few seconds until it becomes liquid again.
  • Place the tart in the refrigerator at least for an hour to set and chill.

Notes

Tarta de Nuez con Mango

Dulcería de Celaya

By Eduardo | @cazadordelomejor

Over 140 years ago, the Guizar family opened a small candy shop in the heart of Mexico City’s historic downtown. Dulcería de Celaya was located on Plateros Street, which is now Madero, a rarity in Mexico’s downtown core because it is only open to pedestrians. Today, the dulcería is located on Cinco de Mayo Street.

This dulcería is like a hidden jewelry store that sells some of the tastiest and most delicate candy in the city. The candies are showcased in hand-crafted wooden display windows and are handled like precious gems as you order.

handmade wooden case at dulceria de celaya

During the first few years of business, the different candies were sourced from various states across Mexico. After the shop’s reputation grew and gained popularity, the Guizar family decided to buy recipes from some of their most trusted suppliers and began also producing candy in the basement of the family home.

Strawberry, orange, guava, pineapple are all flavors you’ll taste, and the freshly grated coconut in their cocada dorada candy is a must. A few other, more traditional, Mexican flavors to try are marzipan and cajeta. As soon as you step foot in this tiny candy shop, you’ll find it hard to not walk out with a bag full of flavor.

dulceria de celaya

Dulcería de Celaya, Av. Cinco de Mayo 39, Centro Histórico, Cuauhtémoc, Ciudad de México

Family Circle: The Power of Cooking with Kids

“Pati Jinich laughs as she talks about the first time she prepared a meal for her family. The chef, cookbook author and star of PBS’s Pati’s Mexican Table was 9 years old and tasked with making Sunday morning eggs for her family. The cooking went well, but the seasoning did not. She was so overzealous with spices that the eggs changed color. “It taught me to tame my enthusiasm,” she says.

Bringing kids into the kitchen doesn’t always end on a perfect note. But given the tremendous benefits—ranging from sparking a passion, as it did for Jinich, to creating healthy eating habits—it’s worth the effort. That’s why the Partnership for a Healthier America devoted a panel to The Power of Cooking at their 2017 Summit including Jinich, Janie Wilson (the 2014 Uncle Ben’s “Ben’s Beginners” cooking competition winner) and Fatima de la O (a participant in the Cooking Matters program at Adelphi/Langley Family Support Center)….”

Read the entire article here.

Epicurious: The 100 Greatest Home Cooks of All Time

“There are a lot of folks out there spreading the gospel of Mexican food, but none with the charm, warmth and perspective of Pati. Born in Mexico City and based in DC, Jinich cooks in an inclusive style -her recipes are rooted in Mexico and influenced by the US, which means that when you catch her on PBS’s Pati’s Mexican Table, your are just as likely to see her cooking a classic pozole rojo as you are her Thanksgiving cinnamon rolls (filled with cajeta, of course). ‘You know how some dishes just have some inherent meaning?’ she asks when making carnitas. If you can’t answer that question in the affirmative, just keep watching- soon enough, you’ll know exactly what she means.”

Read the entire article here.

Bacon Cheese Dogs with Avocado Relish

By now it is common knowledge that Mexico and Mexicans love to taco anything and everything. So much so that a few years ago, when the hashtag #TacoTuesday became a thing, I would laugh when people asked me if I was doing taco night on Tuesdays at home.

“We practically taco every night,” I’d respond. It is a fact: I always have a comal handy to warm corn tortillas just in case we get the urge to tuck anything into them. But what many people may not know is how much we love our hot dogs.

Ok, yes, hot dogs are originally yours, America. But we have found a way to make them our very own, too, and we’d love for you to add them to your repertoire, if you are so inclined.

Take it as a compliment. We love hot dogs so much that they have also become part of our street food. This isn’t something new. Not even from a decade ago. Hot dogs have existed in Mexico for at least a century. So right next to a taco stand, you are likely to run into a hot dog stand. I have told you the story of the Galán hot dog my sisters and I used to eat that drew me to tears last time we were filming in Mexico.

Yet, there are so many more ways to Mex up your hot dogs. At home, our latest favorite is one we call Bacon Cheese Dogs with Avocado Relish. It has a hot dog wrapped in bacon. It is then browned until super crisp. Then sliced in half, stuffed with queso Oaxaca, put back in the pan with all that flavorful bacon fat, cheese side down, until the cheese completely melts and the corners crisp up. That hot link sits on a layer of horseradish mayo in a toasted bun and is garnished with a quick avocado relish: diced tart tomatillos, soft buttery avocado, grassy cilantro and the irresistible bite of pickled jalapeños.

Plating Bacon Cheese Hot Dogs with Avocado Pickle

Print Recipe
4.50 from 6 votes

Bacon Cheese Dogs with Avocado Relish

Bacon Cheese Dogs with Avocado Relish recipe from Pati's Mexican Table Season 6, Episode 12 "Cheesy"
Course: Main Course, Snack
Cuisine: American, Mexican
Keyword: Avocado, bacon, cheese, Hot Dog, Mexican, Oaxaca, Pickled Jalapeños, queso, relish
Servings: 2 hot dogs
Author: Pati Jinich

Ingredients

For the avocado relish:

  • 1 large (about 3 ounces) tomatillo husked, rinsed, cut into small dice
  • 4 scallions white and light green parts thinly sliced
  • 1/4 cup cilantro leaves and upper parts of stems chopped
  • 3 pickled whole jalapeños chopped, plus 2 sliced for garnish
  • 1 tablespoon brine from pickled jalapeños
  • 1 tablespoon freshly squeezed lime juice
  • 1 tablespoon olive oil
  • 1/2 teaspoon kosher or coarse sea salt or to taste
  • 1 ripe avocado halved, pitted, cut into small dice
  • 1/4 cup mayonnaise
  • 1 tablespoon prepared horseradish or more to taste

For the hot dogs:

  • 2 slices bacon
  • 2 hot dogs
  • 2 cups Oaxaca cheese shredded
  • 2 hot dog buns

Instructions

To make the avocado relish:

  • In a medium bowl, add the tomatillo, scallions, cilantro, chopped pickled jalapeños, pickled jalapeño brine, lime juice, olive oil, and salt. Mix well. Incorporate the avocado and toss gently with a spoon to combine. Set aside.
  • In a small bowl, combine the mayonnaise with the prepared horseradish. Set aside.
  • On a cutting board, roll one slice of bacon around each sausage link. Place the tip of the hot dog over one end of the bacon slice, then roll the sausage around on the diagonal so that the bacon wraps around it and covers it entirely.

To make the hot dogs:

  • Heat a large skillet or griddle over medium heat. Add the bacon-wrapped hot dogs and cook, turning every couple minutes, until crisped and browned on all sides. Remove from the heat. When cool enough to handle, cut a slit lengthwise down the middle of each, without cutting completely through.
  • Raise heat to medium-high. Add two piles of about 1 cup shredded cheese onto the skillet and top each with a hotdog, slit-side down. Cook for 2 to 3 minutes until the cheese has completely melted and browned creating a cheese crust.
  • Meanwhile, open the buns but try not to separate the tops from the bottoms. Lightly toast the buns in the toaster or griddle. Spread a generous tablespoon of the horseradish mayonnaise onto each bun.
  • When bacon cheese hot links are ready, using a spatula, flip onto the bun, cheese side up. Top with a generous amount of the avocado relish, garnish with the pickled jalapeño slices and serve.

Notes

Hot dogs con Tocino, Queso y Aderezo de Aguacate

Americas Quarterly: 5 People Who Bring Mexico and the U.S. Closer Together

“Whether in sports, politics, food or the arts, the U.S. and Mexico have enriched one another in countless ways.

That’s why AQ has selected its Top 5 Border Ambassadors to highlight those who excel in bringing the two countries closer together. Each honoree does this in their own way: U.S.-Mexico Foundation CEO Rebeca Vargas helps hundreds of DREAMers connect with their roots back in Mexico. Alfredo Corchado brings to life the reality of the border as a writer and reporter for the Dallas Morning News. Our list also includes chef and food writer Pati Jinich, El Paso congressman Beto O’Rourke, and Dodgers’ first-baseman Adrián González…”

Continue reading “Americas Quarterly: 5 People Who Bring Mexico and the U.S. Closer Together”

Pan de Arena

I am fascinated with a few things to the point that I obsess about them. Well, it may be more than a few things. One of them is words.

I become amazed with the beauty a word may have. With the way it sounds. With the way that pronouncing that word may change the way I breathe or make me pout my mouth. With how much power a word can hold. With the diverse meanings it can contain, depending on who you say it to, how you say it, or by which words it is accompanied by.

I absolutely adore words. I once started a “favorite words list” and just couldn’t keep up with how many I was adding. There were the words I had forgotten and had suddenly rediscovered. There were the words I had never ever heard of. I have a tendency to stop someone in the middle of a sentence to ask them about that word they just used. Where is it from, what exactly does it mean, how else can one use it? Always on the hunt for new words, when I find a great one, I fall in love with it. And once I do, I never fall out of love with it.

This may all have to do with my being a Spanish speaker until I moved to the US. Once here, I started noticing the beauty of words I was getting nostalgic about because I couldn’t find a good substitute in English. And once I started getting a bit more fluent in English, I would find the use of a certain English word so extraordinary that I couldn’t find the right substitute in Spanish. So I sort of blame it all on my move to the US because I certainly wasn’t obsessed with words when I lived in Mexico.

Anyway. This recipe has two words I adore in Spanish: pan and arena. Pan translates to bread and arena to sand. The funny thing is sometimes words and names play tricks on reality. This pan de arena is no bread and has no sandy texture.

More like a pound cake, pan de arena’s texture is really perfect. When you slice it, it feels like it came from a professional bakery. With just the right amount of moist and just the right amount of crumbly. It may be that because the texture is so evenly moist and crumbly throughout, it got named after sand. Its taste is also so well balanced. Just enough sweetness and a buttery taste that gets nuanced, but not over powered, by lime zest and lime juice. Yet it doesn’t taste citrusy at all.

This pan de arena comes from the state of Chiapas in Mexico. You can find it there from morning ‘til night. Sometimes it comes in individual sizes – that may be why it is also called bizcocho chiapaneco, as bizcocho refers to a sweet roll – but it is mostly cut from a bigger loaf into square or rectangular pieces.

Just like your favorite pound cake, it can be eaten on its own or topped with ice cream, fruit compote, fresh fruit coulis, or whipped cream. It is also ideal sliced and tucked away in your kid’s lunch box.

I am just as enamored with this poundcake’s charming taste and texture as I am with the beauty of its name. And for the life of me, I cannot find out why or who named it pan de arena.

Pati Jinich pan de arena or sand pound cake
Print Recipe
4.67 from 6 votes

Sand Pound Cake

More like a pound cake, pan de arena’s texture is really perfect. When you slice it, it feels like it came from a professional bakery. With just the right amount of moist and just the right amount of crumbly. It may be that because the texture is so evenly moist and crumbly throughout, it got named after sand. Its taste is also so well balanced. Just enough sweetness and a buttery taste that gets nuanced, but not over powered, by lime zest and lime juice. Yet it doesn’t taste citrusy at all.
Prep Time10 minutes
Cook Time50 minutes
Course: Dessert
Cuisine: Mexican
Keyword: cake, lime, pati's mexican table, pound cake
Servings: 16 servings
Author: Pati Jinich

Ingredients

  • 3 1/2 cups all-purpose flour plus more for dusting pan
  • 2 teaspoons baking powder
  • 2 teaspoons baking soda
  • Pinch of salt
  • 2 1/2 cups unsalted butter at room temperature, plus more for greasing pan
  • 1 1/2 cups granulated sugar
  • 6 large eggs
  • Grated zest of a large lime
  • 1/4 cup freshly squeezed lime juice
  • 1/4 cup whole milk

Instructions

  • Preheat oven to 350 degrees Fahrenheit. Butter the sides and bottom of a 9x13-inch baking pan and lightly coat with flour. Shake excess flour off.
  • In a medium bowl, combine your dry ingredients: the flour with the baking powder, baking soda and salt.
  • Beat the butter in a stand mixer with the paddle attachment over medium speed until very creamy and soft, at least 2 or 3 minutes. Incorporate the sugar, continue beating until well mixed. Add the eggs, one at a time, and continue beating until they are all incorporated.
  • Reduce speed to low, and add a cup of your dry ingredients, then add the lime zest and juice. Continue adding the rest of the flour, and finally add the milk. Scrape the sides of the bowl with a spatula if need be, and continue beating the mix until it is spongy, fluffy and very well mixed.
  • Pour the batter into the prepared pan and bake in the oven for 50 minutes, or until the pound cake is puffed up, golden brown on top, and a toothpick comes out clean and moist, but not wet.
  • Remove from the oven. Let cool and serve. It keeps very well covered for up to a week.

Notes

Pan de Arena

Pancracia

By Eduardo | @cazadordelomejor

Seven years ago, bread maker Hugo González opened up what is known to be one of the best bakeries in Mexico. As you walk along Chihuahua Street in Colonia Roma, a vibrant and historic neighborhood, the strong aroma of freshly baked bread will lure you over.

Hugo studied culinary arts at Universidad del Claustro de Sor Juana, a highly esteemed culinary school in the south of Mexico City and completed his thesis on bread fermentation. Soon after he was given the opportunity to stage at Ferran Adrià’s 3-Michelin star restaurant, El Bulli in Spain.

bread at pancracia

Everything at Pancracia is made with a sourdough starter that Hugo has been carefully nurturing for over 20 years. The thick & rustic crust and the soft & tangy crumb is a result of the fermentation-focused philosophy, different from classic bakeries in Mexico that stick to more traditional varieties using fresh yeast.

The bakery itself is a tiny ten by ten feet space divided into two different levels. On the first level is a large oven, racks of freshly baked bread and a small wooden working table. Up top is a fridge space where the rare sourdough starter is kept and shelving where dough is left to ferment. The temperature on the second floor is slightly higher and perfect to make the most of the fermentation process.

sourdough starter

If you arrive early in the morning, you’ll be able to take home anything from doughy yogurt-based chocolate and vanilla conchas to savor through breakfast or fresh-out-of-the-oven fennel loaves to eat with dinner. Come late morning, some of Mexico City’s most renowned restaurants will be stopping by to pick up their artisanal orders.

One of my favorite things are the vigilantes: oval shaped butter-based sweet bread bathed in lemongrass honey – native to South America. Once you eat one, it’s hard to not eat a whole tray.

pancracia

Over the years, Pancracia has made its mark on the neighborhood and has evolved into a strong reference for some of the best sourdough bread in the country.

bagettes at pancracia

Pancracia, Chihuahua, 181, Roma Norte, Ciudad de México

Caldo de Oso

There is no bear in this soup. Nor is the soup named after any bear. In fact, there are zero bears to be found in the state of Chihuahua, where this soup comes from. Yet, I admit Pepe was right, it is a spectacular soup, and it is called caldo de oso (or bear soup).

I met Pepe a few months ago at a Telemundo news interview, while on book tour in Denver. He was the producer. As he walked me out of the building, we got caught up in a long, detailed conversation about soup, even though I was in a hurry to catch a plane. I don’t know what hooked me more in wanting to know every little thing about this soup: its curious name, how much he seemed to adore it, or the fact that I’ve never tried it although I’ve been to Chihuahua many times.

Well, here we go again. Another story, out of hundreds and hundreds of incredible stories and recipes I have learned while traveling the US. It turns out, each and every single Mexican I have met here is as passionate as I am about the Mexican food we grew up with. We are all a bunch of nostalgic food fanatics.

Anyway, back to the soup.

It turns out caldo de oso is insanely popular in Chihuahua. The thing is, it is not to be found in restaurants, but in homes. One reason I may have missed it all the times I visited. And considering how dearly loved it is, it makes the origin of its name even funnier.

Here goes the true story:

Almost a century ago, workers building the La Boquilla Dam, on the Conchos River in Camargo, used to make a fish soup every day with catfish, which were bountiful in that river. After eating it so often, instead of calling it caldo de pescado (or fish soup), they started calling it caldo odioso, which translates to hateful soup.

From saying caldo odioso again and again, the soup got the nickname caldo de oso – from the shortened odi-oso to oso. It is a common Mexican practice to make words smaller and use them in their diminutives or cute nicknames. And the name stuck: caldo de oso! However, other than the workers at the dam who ate it everyday, people in Chihuahua absolutely adore this soup.

So, Pepe gave me some tips, and he told me in detail how his mom makes it. I thoroughly researched it and tested it in my kitchen. And let me tell you, caldo de oso is totally worth the heavy nostalgia for it that Pepe carries around.

Caldo de Oso or Bear Soup recipe by Pati Jinich
Print Recipe
4.70 from 10 votes

Bear Soup

There is no bear in this soup. Nor is the soup named after any bear. In fact, there are zero bears to be found in the state of Chihuahua, where this soup comes from. Yet, I admit Pepe was right, it is a spectacular soup, and it is called caldo de oso (or bear soup). It turns out caldo de oso is insanely popular in Chihuahua. The thing is, it is not to be found in restaurants, but in homes.
Prep Time15 minutes
Cook Time40 minutes
Course: Soup
Cuisine: Mexican
Keyword: ancho chiles, carrots, catfish, cilantro, fish broth, lime, onion, pati's mexican table, Pickled Jalapeños, potatoes, Tomatoes
Servings: 6 to 8 servings
Author: Pati Jinich

Ingredients

  • 2 dried ancho chiles stemmed and seeded
  • 3 tablespoons unsalted butter
  • 3 tablespoons vegetable oil
  • 2/3 cup white onion finely chopped
  • 3 cloves garlic finely chopped
  • 2 pounds ripe Roma tomatoes chopped
  • 3 tablespoons all-purpose flour
  • 8 cups seafood or fish broth or water
  • 1/2 teaspoon dried thyme
  • 1/2 teaspoon dried marjoram
  • 1/2 teaspoon dried oregano
  • 1/4 teaspoon ground cumin
  • 1 bay leaf
  • 1 teaspoon kosher or coarse sea salt or to taste
  • 1/2 teaspoon freshly ground black pepper
  • 1 whole pickled jalapeño diced
  • 2 tablespoons vinegary sauce from pickled jalapeños
  • 2 cups carrots peeled and diced
  • 2 cups potatoes peeled and diced
  • 2 pounds catfish fillets cut into 2" pieces
  • 2 limes cut into wedges, to serve
  • 1/4 cup cilantro roughly chopped, to serve

Instructions

  • Place the ancho chiles in a bowl, cover with 2 cups boiling water, and let them sit for 10 minutes until they plump up and rehydrate.
  • In a soup pot, heat the butter and oil over medium heat. Once the butter is melted and bubbly, add the onion and cook for 4 to 5 minutes, until softened and the edges begin to brown. Add the garlic, stir and cook for a minute until fragrant. Increase the heat to medium-high and incorporate the chopped tomato, cook for 6 to 7 minutes, until softened. Sprinkle the flour on top of the cooking vegetables, stir well, and let cook for another minute or so, stirring frequently, until the flour starts to brown and smell toasty. Pour in the broth or water and bring to a simmer.
  • Meanwhile, place the ancho chiles along with a cup of their soaking water into a blender, and puree until completely smooth. Add the chile puree, along with the thyme, marjoram, oregano, cumin, bay leaf, salt, pepper, pickled jalapeño and its vinegar to the soup, and mix well. Once it returns to a simmer, reduce the heat to medium, and let it cook for 15 minutes with the lid ajar.
  • Add the carrots, potatoes, and fish pieces and continue to cook for 10 more minutes, until vegetables and fish are completely cooked through.
  • Serve hot, along with lime wedges and chopped cilantro for people to add to their taste. I like it with crusty bread, such as a baguette, on the side.

Notes

Caldo de Oso

Pomegranate Short Rib Tacos

This meal makes for a beast of a taco. Well, quite a few beastly tacos.

Melt in your mouth chunks of short ribs, braised in wine and pomegranate and topped with a scoop of a one of a kind guacamole, get tucked into warm corn tortillas. The guacamole has a mashed ripe avocado base seasoned with fresh ginger, jalapeño, shallots and a dash of lime juice, then tossed with salty chunks of queso fresco and sweet and juicy pomegranate seeds. You can garnish the final thing with chopped fresh mint.

This can practically be your whole meal! It makes me really happy to make it on cold winter nights, when we want something filling, satisfying, luscious, packed with flavor, and fun.

I cooked up this recipe in an attempt to use pomegranate seeds in a different way than I was used to and out of a bit of frustration. See, in Mexico, pomegranate is the crown jewel of Chiles en Nogada. The signature dish of Mexico’s Independence Day celebrations in September. If you are a Mexican and you see a pomegranate, I bet the first thing you think of is that dish, which bears all the colors of the Mexican flag. The pomegranates must be there.

Funny how things are. I love making Chiles en Nogada here in the states. Yet, pomegranate season in Mexico is July to October and here in Washington, DC, I have struggle to find pomegranates in September. In DC, pomegranate is at its peak way past September, not until very into the early winter months. So, I feel a little ridiculous making Chiles en Nogada which most absolutely, definitely, without a doubt, NEED to be made in September.

But I absolutely adore pomegranates. Everything about them. Their shape. Their hard skin. How challenging it can be to get the seeds out. How your fingers and nails remain red long after you have eaten them. Mostly, their sharp and sparkly tart and sweet flavor. Hence… I came up with this recipe to expand my pomegranate horizons during the time that I can easily find them. It turns out, I expanded my taco, my guacamole and dinner horizons as well.

Here you go, if you are a meat eater, this taco is a must. If you are not, make the guacamole and eat it with chips.

pomegranate short ribs
Print Recipe
4.60 from 5 votes

Pomegranate Short Ribs and Queso Fresco Guacamole Tacos

This meal makes for a beast of a taco. Well, quite a few beastly tacos. Melt in your mouth chunks of short ribs, braised in wine and pomegranate and topped with a scoop of a one of a kind guacamole, get tucked into warm corn tortillas. The guacamole has a mashed ripe avocado base seasoned with fresh ginger, jalapeño, shallots and a dash of lime juice, then tossed with salty chunks of queso fresco and sweet and juicy pomegranate seeds. You can garnish the final thing with chopped fresh mint.
Prep Time15 minutes
Cook Time2 hours 15 minutes
Course: Main Course
Cuisine: Mexican
Keyword: beef, corn tortillas, ginger, jalapeno, lime, mint, onion, pati's mexican table, pomegranate, red wine, rosemary, short ribs, tacos
Servings: 6 servings
Author: Pati Jinich

Ingredients

  • 2 pounds country-style boneless beef short ribs
  • 1 teaspoon kosher or coarse sea salt divided, or to taste
  • Freshly ground pepper to taste
  • 4 tablespoons canola or safflower oil divided
  • 1 cup white onion finely chopped
  • 4 garlic cloves finely chopped
  • 2 cups pomegranate juice
  • 1 1/2 cups red wine
  • 1 teaspoon dried rosemary crushed
  • 1 tablespoon shallot finely chopped
  • 1 tablespoon fresh ginger finely chopped
  • 1 whole jalapeño or to taste, finely chopped, stemmed and seeded optional
  • 1 tablespoon freshly squeezed lime juice
  • 1 tablespoon olive oil
  • 3 large ripe avocados halved, pitted, meat scooped out and diced
  • 1/2 cup queso fresco crumbled or diced, divided
  • 1/2 cup pomegranate seeds divided
  • corn tortillas
  • 1 tablespoon fresh mint coarsely chopped, to garnish

Instructions

  • Preheat oven to 350 degrees Fahrenheit.
  • Season the short ribs with 1/2 teaspoon of the salt and pepper to taste.
  • Heat 3 tablespoons oil in an ovenproof casserole over medium heat. Once hot, add the meat and cook until browned on each side, about 7 to 8 minutes per side. If necessary, do it in batches. Remove the meat from the casserole and place in a bowl.
  • Add the remaining tablespoon of oil to the casserole and cook the onion, stirring occasionally, until completely softened, about 4 to 5 minutes. Add the garlic and cook for another minute, until fragrant and lightly browned. Pour in the pomegranate juice and wine, stir well, scraping the bottom of the pan to incorporate all the browned bits.
  • Return the meat to the casserole, add the crushed rosemary, and let it come to a simmer. Once it does, cover the casserole with its lid and place in the oven for 1 1/2 hours, until the meat is completely tender.
  • Remove the lid from the casserole, and leave in the oven for another 1/2 hour, or until the meat comes falls apart when pulled with a fork, and the liquid has thickened considerably. Remove from the oven. Using a couple forks, shred the meat finely into small bite size chunks and let it sit in the sauce.
  • In a medium bowl, combine the shallots, ginger and jalapeño with the lime juice, olive oil and remaining 1/2 teaspoon salt. Incorporate the avocado and gently mash with a fork until well combined. Add half of the cheese and pomegranate seeds and toss well. Reserve.
  • Heat the corn tortillas on a comal, griddle or skillet set over medium heat, until completely heated through and pliable.
  • Assemble tacos with the guacamole and the braised ribs, garnish with the remaining cheese, pomegranate seeds and chopped mint.

Notes

Tacos de Costillitas a la Granada y Guacamole con Queso Fresco

Fonda Margarita

By Eduardo | @cazadordelomejor

If you’re a very early morning person who will eat lots during breakfast – Fonda Margarita is for you. If you’re not – you still need to go. It’s a true Mexico City breakfast experience. Lots of plate-licking involved.

Fondas are small, simple and unpretentious restaurants serving real, delicious inexpensive Mexican food. You feel as if your grandma was cooking some of her best dishes for you. Well, only if your grandma was Mexican, and had the best sazón.

My grandpa was the first person to introduce me to this 50-year-old fonda. I’m not super keen on waking up at 5:00 in the morning, yet will wake up without a problem just thinking that I’ll soon be wrapping a fresh tortilla around all the different guisados. They open at 5:30AM and that’s when everything is the freshest. This early in the morning you’ll be bound to encounter people who sneak in a quick breakfast before work and crazy people like myself who simply have a strong craving. Closing time depends on how fast all the food they have prepared for the day is eaten, which is usually around 11:00AM.

some of the dishes at Fonda Margarita

Long communal tables, an open kitchen, large casseroles, stacks of crispy churros, fast moving waiters and a live guitarist make up the feel of this place. Alberto Castillo, one of the three siblings who inherited the fonda from his hard-working mother will always be at the front of the kitchen, welcoming people as they walk in and making sure everything’s running smoothly.

fonda margarita

Like most fondas, there’s new and different menu items every day of the week. There’s also the traditional dishes they’ve been preparing for years. Frijoles negros con huevo (black beans scrambled with eggs), chicharrón en salsa verde (crispy pork skins in tangy green salsa), bistec en pasilla (thin steak in pasilla chile salsa) are just a few of the classics. The communal seating allows you to take a peek at what everyone else is eating. The best way to make the most of the experience is to go with friends, order a variety and wrap everything you eat with a warm tortilla. Finish off your breakfast with a hot, sugary churro dipped in a steaming café de olla.

Churros at Fonda Margarita

Thank you, abue Miki, for introducing me to one of my favorite breakfasts in Mexico City about 10 years ago, and to one of my close friends, Eduardo García, for the recent repeated visits.

Fonda Margarita, Adolfo Prieto 1364, Tlacoquemecatl del Valle, Ciudad de México

Tamales Coloraditos

Tamales are practically required on so many December holidays. Take Posadas. And Christmas. Not to mention New Year’s. Wait, of course, that spills over to January with Día de Reyes. Then it continues in February for Día de la Candelaria

There’s also any morning after a big Mexican wedding… and all Mexican weddings are big! I could go on with every month of the year, but tamales are especially craved in December.

Of course, tamales are also everyday food for Mexicans. All sorts of tamales are found daily in lots of places, from markets, to food stands, to restaurants. Why then, if they can be eaten everyday, is there that crucial need for having tamales in December?

Well, I do not know. But what I can say is that I can eat tamales every day of the year and then feel the desperate need to have them for Christmas. To the point that it can be a pretty sad Christmas if tamales aren’t there.

Since the tamal love is spreading beyond Mexico, let me give you the recipe for a tamal I am pretty sure you haven’t tried. Unless you are Norteño, from the Mexican north.

The tamal coloradito, which translates to “infused with color,” takes its name from the filling of meat cooked in a mole sauce by the same name, coloradito. It has an intense color and a deep, rich, complex taste. It is made with ancho and guajillo chiles, tomatoes, onion, garlic, cinnamon, cumin and cloves. Then it coats the meat and simmers with olives, almonds and raisins, resulting in a teasingly sweet/spicy, savory and crunchy mix. The full-blown exotic flavors of the filling contrast beautifully with the mild, fluffy tamal dough.

It seems to me that this tamal is particularly festive because, aside from tamales screaming out for celebration on their own, even with no filling, this one is filled with quite a stunner of a mole sauce. And moles are cause for celebration, too! Pair the two into one bite, and you have a happy crowd.

tamales coloraditos
Print Recipe
4.41 from 5 votes

Tamales Coloraditos

The tamal coloradito, which translates to "infused with color," takes its name from the filling of meat cooked in a mole sauce by the same name, coloradito. It has an intense color and a deep, rich, complex taste. It is made with ancho and guajillo chiles, tomatoes, onion, garlic, cinnamon, cumin and cloves. Then it coats the meat and simmers with olives, almonds and raisins, resulting in a teasingly sweet/spicy, savory and crunchy mix. The full-blown exotic flavors of the filling contrast beautifully with the mild, fluffy tamal dough.
Prep Time1 hour
Cook Time50 minutes
Total Time1 hour 50 minutes
Course: Appetizer, Main Course
Cuisine: Mexican
Keyword: Ancho, Coloraditos, Guajillo, Mole, pork, Tamales, Tomato, Tomatoes
Servings: 25 tamales
Author: Pati Jinich

Ingredients

For the tamal dough or masa:

  • 1 cup lard vegetable shortening, or seasoned oil*
  • 1/2 teaspoon kosher or coarse sea salt or to taste
  • 3 1/2 cups homemade chicken broth or store bought, divided, more as needed
  • 1 1/2 teaspoons baking powder
  • 1 pound (about 3 1/4 cups) instant corn masa flour preferably for tamales

For the filling:

  • 3 guajillo chiles stemmed, halved and seeded
  • 3 ancho chiles stemmed, halved and seeded
  • 1 ripe Roma tomato
  • 1/2 teaspoon dried oregano preferably Mexican
  • 2 whole cloves
  • 1/2 teaspoon ground ceylon cinnamon or canela
  • Pinch cumin
  • 1 tablespoon white distilled vinegar
  • 2 tablespoons vegetable oil
  • 1/3 cup white onion chopped
  • 2 cloves garlic finely chopped
  • 1 pound pork tenderloin diced **
  • 3/4 teaspoon kosher or coarse sea salt or to taste
  • Freshly ground pepper to taste
  • 1 1/2 cups homemade chicken broth or store bought
  • 1/3 cup raisins
  • 1/3 cup slivered almonds
  • 1/3 cup manzanilla olives stuffed with pimientos chopped
  • 1/2 teaspoon brown sugar
  • 25 dried corn husks

Instructions

To make the tamal dough or masa:

  • Place the lard or vegetable shortening in a mixer and beat until very light, about 1 minute. Add 1/2 teaspoon salt and a tablespoon of the broth and continue to beat until it is white and fluffy, about 2 more minutes. Add the baking powder and beat in, then take turns adding the instant corn masa and the broth in 3 or 4 additions. Continue beating for about 10 minutes at medium speed, until the dough is homogeneous and very fluffy and aerated.
  • To test to see if the tamal masa is ready, drop 1/2 teaspoon into a cup of cold water. It should float. If it does not, beat for an additional 4 or 5 minutes and do the test again.

To make the filling:

  • Heat a comal or skillet over medium heat and toast the guajillo and ancho chiles for about 1 minute, flipping them over a few times, until they become more pliable, lightly toasted, fragrant and their inner skin turns opaque. Transfer to a medium saucepan. Add the tomato, cover with water and bring to a simmer over medium heat. Simmer for 10 to 12 minutes, or until the tomato is very soft and the chiles are fully hydrated, plumped up and soft.
  • Place the chiles, tomato and 1/2 cup of the chile simmering water in a blender jar. Add the oregano, whole cloves, cinnamon, cumin and vinegar, and puree until smooth.
  • Heat the oil over medium high heat in a large, deep skillet. Add the onion and cook, stirring occasionally, until tender and the edges begin to brown, about 3 to 4 minutes. Add the garlic and cook, stirring, until fragrant, about 1 minute. Add the meat, season with salt and pepper, and cook, stirring occasionally, until lightly browned, about 8 to 10 minutes.
  • Reduce heat to medium, pour the chile puree over the meat, and stir in the broth. Add the raisins, almonds, olives and brown sugar, stir together, reduce the heat to medium low, cover and cook for 12 to 15 minutes, stirring occasionally. The mixture should cook down and have the consistency of chile con carne.

To assemble the tamales:

  • Soak the dried corn husks in hot water for a couple minutes, or until they are pliable, and drain. Lay out a corn husk with the tapering end towards you. Spread about 3 tablespoons of masa into about a 2 to 3-inch square, the layer should be about 1/4-inch thick, leaving a border of at least 1/2-inch on the sides. Place 1 tablespoon of filling in the middle of the masa square.
  • Pick up the two long sides of the corn husk and bring them together (you will see how the masa starts to swaddle the filling) and fold the folded sides to one side, rolling them in the same direction around tamal. Fold up the empty section of the husk, with the tapering end, from the bottom up. This will form a closed bottom and the top will be left open.
  • Assemble all the tamales and place them as vertically as you can in a container.

To prepare the tamalera or steamer:

  • Place water in the bottom pan of a steamer (so that water is under the steamer) and bring it to a simmer. Line the steamer with one or two layers of soaked corn husks.

To cook the tamales:

  • When you have all tamales ready, place them, again as vertically as you can, into the prepared steamer with the open end on top. If there is space left in the steamer, tuck in some corn husks, so the tamales won’t dance around. Cover with more corn husks, and steam covered with a lid for 50 minutes to an hour. You know the tamales are ready when they come easily free from the husks. They will still be moist, and as they are released from the husks, you will see the moisture, like when you remove good moist muffins from their paper baking cups.
  • Finished tamales will stay warm for about 2 hours in the steamer. They can be made ahead several days before and stored in the refrigerator, well wrapped. They can also be frozen for months. In either case, reheat in a steamer. For refrigerated tamales, it will take about 20 minutes and about 45 minutes for frozen tamales.
  • * Note: To make seasoned oil, in a medium saucepan, heat 1 cup vegetable oil over medium heat, add a thick slice of onion and 4 garlic cloves. Cook for 15 minutes until completely browned. Remove onion and garlic before using the oil.
  • ** Note: You can substitute the pork for any other meat of your choice, you can also combine different kinds of meat, like ground beef and diced pork, like my mother does.

WAMU The Kojo Nnamdi Show: Incorporating New Flavors And Traditions Into Thanksgiving Celebrations

Had a wonderful discussion with my friends at the Kojo Show about incorporating Mexican flavor into the Thanksgiving tradition.

Continue reading “WAMU The Kojo Nnamdi Show: Incorporating New Flavors And Traditions Into Thanksgiving Celebrations”

Thanksgiving Turkey

Right after we got married, we moved from Mexico City to Dallas, Texas. It was in the middle of the very hot summer, oh how I remember that.

I had always been a great eater… but not a great cook. The youngest of four daughters, I had always been labeled the intellectual one, while each one of my older sisters jumped into the cooking and lifestyle field in one way or another.

Back then, I was focusing all my efforts on finishing my political science thesis to become an academic. But not knowing anyone, with my husband traveling all the time, and sort of locking myself in the duplex we lived in to write most of the time, I became insanely nostalgic for my family and the foods that we ate back home. So I jumped in the kitchen, and started to chat with anyone and everyone who seemed open to share recipes with me, in an attempt to recreate the soups, the stews, the dishes, and the nurturing flavors that I knew would help me feel at home.

Then came October. Like a sudden rain fall, I started seeing luscious Thanksgiving menu images everywhere: in stores, at the mall, on TV, on glossy books and cooking magazines in grocery stores. “A festive turkey meal in October,” I wondered. In Mexico, turkey is eaten for Christmas! “Oh boy,” I thought, “here they really do plan ahead of time.”

I had never heard of Thanksgiving before. Yet intrigued by the photos and recipes I was seeing, I made a full Thanksgiving meal for my husband and I. That was the very first one. Since then, we have sat down for a Thanksgiving meal every single year. Fast forward 19 years, and by now, I can tell you that Thanksgiving has become my favorite American holiday.

It is not only because of the food, but because of how friends and family come together around the table. How everyone seems to contribute in what is almost a communal effort. How the holiday is so timeless, with classic dishes that need to remain classics. But there is also an open window for flavors and ingredients that can enrich the meal.

Now, so many years later, I get the meaning of Thanksgiving more than ever. Here is my humble offer for your table: a turkey recipe packed with the sazón of some of my favorite flavor combinations and the tastiest Chorizo, Apple and Cornbread Stuffing.

Oh, by the way, for Season 5 of Pati’s Mexican Table, we made a Thanksgiving episode. I really do hope you catch it! Here is the episode.

Coco Fish

Coco Fish cocktail
Print Recipe
4.60 from 5 votes

Coco Fish

Coco Fish recipe from Pati's Mexican Table Season 5, Episode 13 "José Andrés Takes Over"
Prep Time5 minutes
Cook Time5 minutes
Total Time10 minutes
Course: Drinks
Cuisine: Mexican
Keyword: cocktail, coconut, coconut water, gin, pati's mexican table
Servings: 2 drinks
Author: Pati Jinich

Ingredients

  • 1/4 cup water
  • 1/4 cup sugar
  • About 10 leaves fresh mint coarsely chopped
  • 2 cups coconut water
  • 1/2 cup good quality gin
  • Ice cubes
  • Fresh coconut pulp sliced for garnish

Instructions

  • To make the simple syrup, combine the water and sugar in a small saucepan over low heat. Bring to a simmer and cook, stirring a few times, until sugar has dissolved. Remove from the heat and let cool. 
  • In a couple of glasses, muddle mint with the simple syrup and gin. Add ice, pour coconut water on top, stir, and garnish with the fresh and tender coconut pulp.  

Bacalao Navideño

Bacalao Navideno
Print Recipe
4.43 from 7 votes

Christmas Salted Cod

Christmas Salted Cod recipe from Pati's Mexican Table Season 5, Episode 13 “José Andrés Takes Over"
Prep Time2 days
Cook Time45 minutes
Total Time2 days 45 minutes
Course: Main Course
Cuisine: Mexican
Keyword: almonds, Bacalao, chiles güeros, Christmas dishes, olives, pati's mexican table, potatoes, salted cod fish
Servings: 6 servings
Author: Pati Jinich

Ingredients

  • 1 pound dried salted cod
  • 1/2 cup olive oil
  • 1 white onion peeled, halved, thinly sliced
  • 4 cloves garlic finely chopped or pressed
  • 1 1/2 pounds ripe tomatoes chopped, or a 28-ounce can crushed tomatoes
  • 2 red bell peppers roasted, sweated, peeled and diced
  • 1 pound baby potatoes peeled, halved if larger than 1-inch
  • 2 teaspoons white distilled vinegar
  • 1/4 cup fresh Italian parsley chopped
  • 1/3 cup slivered almonds
  • 1/4 cup manzanilla olives stuffed with pimientos thinly sliced
  • 8 to 10 pickled pepperoncini peppers or chiles güeros plus more for serving
  • French baguette to slice and toast

Instructions

  • 48 hours before you wish to make the dish, begin preparing your salt cod for cooking. Place in a bowl, cover with water and place in the refrigerator. The next day drain, rinse and cover with water again. Place it back in the refrigerator for 10 to 12 hours. Drain, rinse and cover with water again. Refrigerate for another 10 to 12 hours, drain and rinse. Shred the fish and it is ready to use.
  • Heat the olive oil in a large casserole over medium heat. Once hot, add the onion and cook for 5 minutes, stirring often, until softened and beginning to brown around the edges. Stir in the garlic and cook until fragrant, about a minute. Stir in the tomatoes and roasted red bell peppers, cover partially and cook, stirring from time to time, for 10 minutes, or until the mixture has thickened and darkened in color. It should look somewhat chunky.
  • Meanwhile, in a separate, medium saucepan, boil the potatoes in salted water for about 10 minutes, until just tender; when you insert the tip of a knife it should go all the way in, but the potatoes should not fall apart. Drain and set aside.
  • Stir the shredded cod into the tomato mixture. Add the vinegar, parsley, almonds and olives, stir together and continue to cook, partially covered for another 10 to 12 minutes, stirring occasionally and scraping the bottom of the pan, until the ingredients are well amalgamated and the sauce has thickened even more.
  • Reduce heat to low, stir in the cooked potatoes and the pickled pepperoncini peppers, cover the casserole and simmer for 5 more minutes. The mixture should be very moist and juicy, but not soupy. No need to add salt. Serve with additional pickled pepperoncini, and if you’d like, white rice on the side.

Notes

Bacalao Navideño

Snapper Ceviche “Veracruz”

ceviche veracruz
Print Recipe
4.84 from 6 votes

Snapper Ceviche "Veracruz"

Snapper Ceviche "Veracruz" recipe from Pati's Mexican Table Season 5, Episode 13 “José Andrés Takes Over"
Prep Time1 hour
Cook Time15 minutes
Total Time1 hour 15 minutes
Course: Main Course
Cuisine: Mexican
Keyword: capers, Ceviche, fish, jalapeno, José Andrés, olives, pati's mexican table, pickled red onions, red snapper, serrano chiles
Servings: 4 servings
Author: Pati Jinich

Ingredients

  • 1 cup kosher salt divided, plus more for seasoning
  • 3/4 pound red snapper filet
  • 4 white pearl onions peeled into petals
  • 2 Roma or plum tomatoes
  • 2/3 cup Spanish manzanilla olives
  • 1/3 cup freshly squeezed lime juice (about 3 large limes)

To garnish:

  • 4 Spanish manzanilla olives sliced into very thin round slivers
  • 28 Pickled Red Onion Slices
  • 28 fresh capers
  • 1 jalapeño or serrano chile sliced very thinly (optional)
  • 20 cilantro leaves
  • 12 nasturtium leaves
  • 12 sorrel leaves
  • 12 watercress leaves
  • Pinch edible flowers such as nasturtium blossom, mustard blossom, marigold petals
  • Pinch ground chile piquín
  • Extra-virgin olive oil and Maldon sea salt to finish

Instructions

  • Cover the bottom of a small rectangular pan with half of the salt. Place fish on top of the salt layer and cover with the remaining salt. Cover pan with plastic wrap and place in refrigerator for one hour.
  • To a pot of heavily salted boiling water, add the onion petals and cook for 20 seconds. Using a wire skimmer or spider, remove the onions, season with salt and submerge them in a bowl of ice water to halt the cooking process and set aside for garnish.
  • Using a sharp knife, slice off the top and bottom of each plum tomato. Locate the fleshy dividing wall of one segment inside the tomato. Slice alongside the dividing wall and open up the flesh of the tomato to expose the seeds. Remove the seeds and their pulp by slicing around the core of the tomato. Keep the seeds and their surrounding gel intact to create tomato seed “hearts” and set the "hearts" aside for garnish. Roughly chop the remaining outer tomato flesh.
  • Drain the 2/3 cup olives and remove pits. Add the chopped outer tomato flesh, the pitted olives, and lime juice to a blender and puree until smooth. Pass the mixture through a fine mesh strainer, then set aside.
  • Remove the fish from the refrigerator and rinse away the excess salt with water. Pat the fish dry with a paper towel. Holding a sharp knife at a 45-degree angle, cut the fish into thin slices.
  • Spoon the olive tomato puree onto serving dishes. With tongs, place snapper slices on top of the dressing. Add olive slivers, pickled onion slices, onion petals, capers, tomato hearts, and (if desired) jalapeño slices. Drizzle on more puree, then garnish with cilantro, nasturtium, sorrel, watercress, and edible blossoms. Finish with ground chile piquín, olive oil, and sea salt. Serve immediately.

Notes

Ceviche "Veracruz", recipe courtesy of José Andrés

Fried Egg Taco with Pine Nut Pipián

fried egg taco
Print Recipe
4.75 from 4 votes

Fried Egg Taco with Pine Nut Pipián

Fried Egg Taco with Pine Nut Pipián recipe from Pati's Mexican Table Season 5, Episode 13 “José Andrés Takes Over”
Prep Time10 minutes
Cook Time10 minutes
Total Time20 minutes
Course: Main Course
Cuisine: Mexican
Keyword: Chorizo, fried egg, pickled red onions, Pine Nut Pipián, radish, tacos
Servings: 4 tacos
Author: Pati Jinich

Ingredients

Instructions

  • Prepare the chorizo: With a knife cut the chorizo link on one side, allowing it to split open. Squeeze the meat from the casing. In a pot over medium heat, gently cook the chorizo for 4 to 5 minutes, until cooked through and lightly browned. Set aside.
  • Heat a non-stick pan over medium heat. Add a generous amount of olive oil. Once the pan is hot, gently crack open the egg into the middle of the oil, tilting the pan to allow the yolk to be centered. Cook on medium heat, using a slotted spoon to prevent egg from sticking to the pan. Cover if needed to allow the white to cook through, leaving the yolk runny, about 1 1/2 minutes. Using the slotted spoon, scoop egg out of the frying oil, dab on a towel to allow any excess oil to drain away, and place the fried egg on a plate. Repeat cooking process for each of the four eggs.
  • Cut off a 4-inch piece from the baguette. Slice off the crust and then slice the inner bread into 1/2-inch strips. Toast in a pan with oil.
  • Top each egg taco with slice of toasted bread, radish, cilantro, Pickled Red Onion Slices, Pine Nut Pipián, and chorizo. Serve immediately.

Notes

Tacos de Huevo con Pipián de Piñón, recipe courtesy of José Andrés

Pine Nut Pipián

Print Recipe
3.84 from 6 votes

Pine Nut Pipián

Pine Nut Pipián recipe from Pati's Mexican Table Season 5, Episode 13 “José Andrés Takes Over”
Prep Time5 minutes
Cook Time35 minutes
Course: Sauce
Cuisine: Mexican
Keyword: cilantro, José Andrés, pati's mexican table, Pine Nut Pipián, pine nuts, pumpkin seeds, serrano chiles, tomatillos
Servings: 2 cups
Author: Pati Jinich

Ingredients

  • 1 small clove garlic peeled
  • 1/4 bunch cilantro
  • 1/4 pound iceberg lettuce leaves roughly chopped
  • 1/4 cup white onion roughly chopped
  • 1/4 cup serrano chile roughly chopped
  • 1 radish top
  • 3 1/2 teaspoons kosher salt
  • 3 1/2 teaspoons hulled raw pumpkin seeds
  • 1/3 cup pine nuts
  • 2 cups tomatillos husked and chopped
  • 1 1/4 cups water divided
  • 1 tablespoon olive oil

Instructions

  • Combine garlic, cilantro, lettuce, onion, serrano, radish top, salt, pumpkin seeds, pine nuts, and tomatillos in a blender. Add 1/2 cup of the water and blend until as smooth as possible. There might still be some texture to the mixture. Leave contents in blender and set aside.
  • Heat the olive oil over high heat in a wide pan until it is smoking. Then add the contents of the blender and continue to cook over high heat, stirring constantly for five to seven minutes.
  • Add the remaining water to the pan, drop the flame to low, and allow to simmer for half an hour. Season with salt to taste.
  • Optional: If you prefer a very smooth texture, you can return the contents of the pan to the blender, working in batches, and blend until even more smooth.
  • The Pine Nut Pipián can be made ahead of time and keeps for five days in the refrigerator or freezer. After thawing, whisk or blend to restore consistency.

Notes

Recipe courtesy José Andrés

Pickled Red Onion Slices

Print Recipe
4.50 from 6 votes

Pickled Red Onion Slices

Pickled Red Onion Slices recipe from Pati's Mexican Table Season 5, Episode 13 “José Andrés Takes Over”
Prep Time5 minutes
Cook Time1 hour
Course: Side Dish
Cuisine: Mexican
Keyword: José Andrés, juniper berries, pati's mexican table, pickled red onions, red wine vinegar
Servings: 2 cups
Author: Pati Jinich

Ingredients

  • 1 red onion sliced into 1-inch matchstick strips
  • 1 cup red wine vinegar
  • 3/4 cup water
  • 1 tablespoon kosher salt
  • 1/2 teaspoon black peppercorns cracked
  • 3 juniper berries

Instructions

  • Place sliced onion strips into a heat-safe bowl and set aside. Mix the vinegar, water, salt, pepper, and juniper berries in a small pot and bring to a boil. Once boiling, pour hot liquid over the sliced onions. Cover the mixture and allow to marinate at room temperature for about one hour.
  • The pickled onions will stay fresh for about one month in the refrigerator and make an excellent topping for tacos or sandwiches.

Notes

Recipe courtesy José Andrés

Dry Rub Skirt Steak

Dry Rub Skirt Steak
Print Recipe
3.80 from 10 votes

Dry Rub Skirt Steak

Dry Rub Skirt Steak recipe from Pati's Mexican Table Season 5, Episode 12 “Alan Goes to College”
Prep Time15 minutes
Cook Time10 minutes
Total Time25 minutes
Course: Main Course
Cuisine: American, Mexican
Keyword: adobo, cumin, dry rub, oregano, paprika, pati's mexican table, skirt steak, steak
Servings: 2 servings
Author: Pati Jinich

Ingredients

  • 1 teaspoon dried oregano
  • 1 teaspoon sweet paprika
  • 1/4 teaspoon ground cumin
  • 1 teaspoon kosher or coarse sea salt or to taste
  • 1/4 teaspoon freshly ground black pepper
  • 2 7- to 8-ounce skirt steaks about 1/2-inch thick, at room temperature
  • 2 tablespoons unsalted butter

Instructions

  • In a small bowl, mix all the spices with salt and pepper.
  • Pat the steaks dry and apply the spice rub on both sides. Let steaks sit for a few minutes or up to 2 hours (if more than a half an hour place in the refrigerator).
  • Heat a skillet over high heat. Add the butter and as soon as it melts, add the steaks. Sear for about 4 minutes on one side, and between 2 to 3 minutes on the second side (for medium). Adjust timing to your liking.
  • Let it rest for 3 to 4 minutes before serving.

Notes

Falda de Res Asada

Overloaded Double Baked Mexican Potatoes

mexican overloaded double baked potatoes
Print Recipe
4 from 6 votes

Overloaded Double Baked Mexican Potatoes

Overloaded Double Baked Mexican Potatoes recipe from Pati's Mexican Table Season 5, Episode 12 “Alan Goes to College”
Cook Time1 hour
Total Time1 hour
Course: Side Dish
Cuisine: American, Mexican
Keyword: bacon, baked potato, chipotles in adobo, mexican crema, Oaxaca cheese, pati's mexican table
Servings: 2 servings
Author: Pati Jinich

Ingredients

  • 2 large russett potatoes rinsed and scrubbed
  • 2 teaspoons olive oil
  • 5 thick slices bacon coarsely chopped
  • 3/4 cup Mexican crema
  • 3 tablespoons adobo sauce from chipotles in adobo
  • 2 chipotle chiles in adobo sauce (optional)
  • 1/2 teaspoon kosher or coarse sea salt plus more to season potatoes
  • 1/2 cup Oaxaca cheese grated

Instructions

  • Preheat oven to 400 degrees Fahrenheit.
  • Using a fork, pierce potatoes all around, about 6 to 8 times. Rub potatoes with olive oil, season with salt, and place on a baking sheet. Bake for 1 hour until tender on the inside and crisp on the outside.
  • In a medium skillet set over medium heat, cook the bacon until crisp and lightly browned. Transfer to a paper-towel-lined plate and set aside.
  • In a small bowl, mix the crema with the sauce from chipotles in adobo and minced chiles, if using (I do!). Set aside.
  • Remove the potatoes from the oven. Using a knife, cut each one open lengthwise and carefully push the ends together, causing the center to open. Scoop out a couple spoonfuls of the cooked potato meat from each and transfer to a bowl. Sprinkle with salt and mix well.
  • Inside the scooped potatoes, layer a spoonful of the chipotle crema mixture, a spoonful of grated cheese and a spoonful of the seasoned potato meat. Repeat with the crema, cheese and potato meat. End with a bit of crema and cheese.
  • Raise the oven temperature to 500 degrees, or turn on the broiler. Place the stuffed potatoes back on the baking sheet. Return to the oven for 5 more minutes until the cheese has completely melted and has started to crisp. Remove from the oven, sprinkle with bacon and serve immediately.

Notes

Papas al Horno con Crema al Chipotle y Queso Derretido

Quick Charred Green Beans

Quick Charred Green Beans
Print Recipe
4.50 from 6 votes

Quick Charred Green Beans

Quick Charred Green Beans recipe from Pati's Mexican Table Season 5, Episode 12 “Alan Goes to College”
Prep Time5 minutes
Cook Time7 minutes
Total Time12 minutes
Course: Side Dish
Cuisine: American, Mexican
Keyword: chile piquín, green beans, lemon, pati's mexican table
Servings: 2 servings
Author: Pati Jinich

Ingredients

  • 8 ounces green beans ends trimmed
  • 2 lemons one thinly sliced, one halved
  • 2 to 3 tablespoons olive oil
  • 1/2 teaspoon kosher or coarse sea salt or to taste
  • Pinch crushed red pepper flakes or ground chile piquín

Instructions

  • Preheat the broiler. Place oven rack 4 to 5 inches from the heat source.
  • Spread the green beans evenly on a baking sheet. Add lemon slices, drizzle with olive oil and salt, and toss well.
  • Broil green beans for 6 to 7 minutes, tossing and flipping once in between. Transfer to a plate, season with the red pepper flakes or chile piquín, and let each guest squeeze on as much of the remaining lemon as they would like.

Notes

Ejotes Asados con Limón

No Bake Chocolate Pie

No Bake Chocolate Pie
Print Recipe
4.69 from 19 votes

No Bake Chocolate Pie

No Bake Chocolate Pie recipe from Pati's Mexican Table Season 5, Episode 12 “Alan Goes to College”
Prep Time15 minutes
Cook Time20 minutes
Total Time35 minutes
Course: Dessert
Cuisine: American, Mexican
Keyword: Chocolate, no bake pie, pati's mexican table, Pie, ricotta
Servings: 8 to 10 slices
Author: Pati Jinich

Ingredients

  • 7 ounces chocolate wafer cookies
  • 6 tablespoons unsalted butter
  • Pinch kosher or coarse sea salt
  • 8 ounces semi-sweet chocolate chips
  • 2 cups ricotta cheese
  • 1/4 cup heavy whipping cream

Instructions

  • In a food processor, (or mashing inside a plastic bag with a rolling pin or mug) pulse the chocolate wafers until finely ground, transfer to a mixing bowl.
  • In a small saucepan, melt the butter, then pour it over the ground wafers. Add a pinch of salt and mix with a rubber spatula or wooden spoon. Turn the mixture into to a 9-inch glass pie or baking dish. Press with your hands or a mug, to create a crust that covers the bottom and goes up the sides of the dish. Refrigerate for 20 minutes, or pop it in the freezer for 5 minutes, to form a firm crust.
  • Melt the chocolate in a double boiler. Set aside.
  • In a food processor, pulse the ricotta for a few seconds until fluffed up. Add the melted chocolate and puree for about 45 seconds more, until creamy and thoroughly mixed.
  • Using a whisk or fork, whip 1/4 cup of whipping cream in a large bowl until it thickens. Add the ricotta chocolate mixture to the whipped cream, stir it well to combine.
  • Remove the crust from refrigerator and spread the filling inside. Place it back in the refrigerator for a couple of hours before serving.

Notes

Pay de Chocolate

Thanksgiving Turkey

Achiote Adobo Thanksgiving Turkey
Print Recipe
3.34 from 6 votes

Thanksgiving Turkey

Thanksgiving Turkey recipe from Pati's Mexican Table Season 5, Episode 11 “Turkey Day”
Prep Time12 hours
Cook Time5 hours
Total Time17 hours
Course: Main Course
Cuisine: American, Mexican
Keyword: achiote paste, allspice, banana leaves, bitter orange juice, cumin, oregano, pati's mexican table, Thanksgiving, turkey
Servings: 10 servings
Author: Pati Jinich

Ingredients

For the marinade:

  • 6 tablespoons achiote paste from a bar
  • 6 cups bitter orange juice or its substitute
  • 6 cups homemade chicken broth or store bought
  • 12 cloves garlic charred, broiled or toasted with the skin on, and then peeled
  • 1 tablespoon dried oregano
  • 1 teaspoon ground cumin
  • 1 teaspoon ground allspice
  • 2 teaspoons kosher or coarse sea salt or to taste
  • 2 teaspoons freshly ground black pepper

For the turkey:

  • 1 16- to 18-pound turkey rinsed and patted dry
  • 4 whole red onions peeled and sliced
  • 8 ripe tomatoes roughly chopped
  • 2 to 3 banana leaves (optional)
  • 1 brining bag large enough for a turkey (or an extra-large plastic bag)
  • Chorizo, Apple and Corn Bread Stuffing

Instructions

To make the marinade:

  • In a blender or food processor, working in 2 batches, add the achiote paste, bitter orange juice or its substitute, chicken broth, garlic, oregano, cumin, allspice, salt, and pepper and puree until smooth.
  • Slide the turkey, with the breast side down, into the brining bag. Pour the marinade into the bag and massage it into the bird, working it into the cavity and all the crevasses. Place the bag in a mixing bowl or roasting pan and refrigerate for 12 to 48 hours, turning the turkey a couple of times to redistribute the marinade.

To make the turkey:

  • Set the oven rack at the lowest position and preheat the oven to 450 degrees Fahrenheit.
  • Spread the onions and tomatoes in a large roasting pan. Sit the turkey on the vegetables breast side up. Stuff the main cavity with as much stuffing as it can hold and place the rest in a buttered baking dish. Close the cavity by crossing and tying the legs with butcher’s twine. Tuck the wing tips under the turkey. Pour as much of the remaining marinade over the turkey as will fit halfway up the pan.
  • Roast the turkey for 30 minutes. Cover the turkey with layers of banana leaves, if you are using them, and then cover the entire pan with aluminum foil, sealing it as best as you can. The less steam that is able to escape the better.
  • Reduce the oven to 350 degrees Fahrenheit. Place turkey back in the oven and roast for 3 1/2 hours, or for at least 12 minutes per pound. Remove from the oven and carefully remove the leaves and/or the foil, being careful as the steam is hot. Return to the oven and roast for 20 more minutes. The turkey should be completely cooked through and nearly falling off the bone.
  • Remove turkey from the oven and let it rest for at least 15 to 20 minutes, loosely covered with the aluminum foil.
  • Strain all the cooked vegetables and juice into a medium 3-quart saucepan, pressing with the back of the spoon to get as much liquid as possible. Set aside 1 cup for the stuffing. Simmer the remaining sauce for 15 to 20 minutes, until it has reduced by half.
  • While the turkey rests, pour the reserved marinade over the stuffing in the baking dish and place it in the oven for 20 minutes, or until it is hot and the top is crisped.
  • Carve the turkey and serve with the stuffing.

Notes

Pavo de Acción de Gracias

Chorizo, Apple and Corn Bread Stuffing

chorizo apple and corn bread stuffing
Print Recipe
4.75 from 8 votes

Chorizo, Apple and Cornbread Stuffing

Chorizo, Apple and Cornbread Stuffing recipe from Pati's Mexican Table Season 5, Episode 11 “Turkey Day”
Prep Time10 minutes
Cook Time35 minutes
Total Time45 minutes
Course: Side Dish
Cuisine: American, Mexican
Keyword: apple, Chorizo, corn bread, Pan de Elote, pati's mexican table, stuffing, Thanksgiving
Servings: 10 to 12 servings
Author: Pati Jinich

Ingredients

  • 1 pound Mexican chorizo casings removed, coarsely chopped
  • 1 1/2 whole white onions peeled and chopped
  • 4 cloves garlic peeled, coarsely chopped
  • 4 stalks celery rinsed and sliced
  • 2 Granny Smith apples cored and chopped
  • 1 cup slivered almonds or chopped pecans
  • 1/2 teaspoon dried thyme
  • 1/2 teaspoon dried marjoram
  • 1/2 teaspoon kosher or coarse sea salt
  • 1 1/2 pounds corn bread cubed (about 8 cups)
  • 1 1/2 cups homemade chicken broth or store bought
  • 1 cup cooking juices from the Thanksgiving Turkey (or substitute 1 additional cup chicken broth)

Instructions

  • Heat a large 12-inch skillet over medium heat. Once it is hot, add chorizo, and cook, crumbling as it cooks with a wooden spoon or spatula, until it has browned and crisped, about 5 minutes.
  • Stir in the onion and sauté for 2 to 3 minutes, until it softens. Stir in the garlic and cook until fragrant, less than 1 minute. Add the celery, apples, pecans, thyme, marjoram, and salt and continue cooking for 5 to 6 more minutes, until the celery and apples have softened.
  • Scrape the mixture into a big bowl. Toss in the corn bread, pour in the chicken broth, and mix gently with a spatula or large wooden spoon until well combined.
  • Transfer the stuffing to a baking dish. Pour the reserved 1 cup cooking juices from the turkey over the stuffing and bake at 350 degrees Fahrenheit for 20 minutes, or until it is hot throughout and the top is crisped.

Notes

Relleno de Chorizo, Manzana y Pan de Elote