Anytime Antojos

My Favorite Queso Fundido paired with Gran Centenario Añejo Tequila

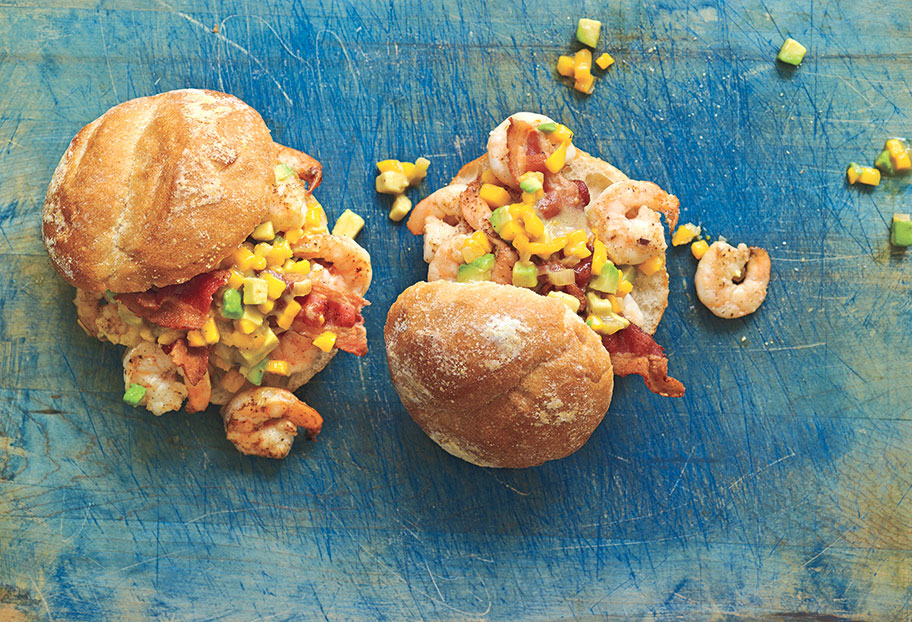
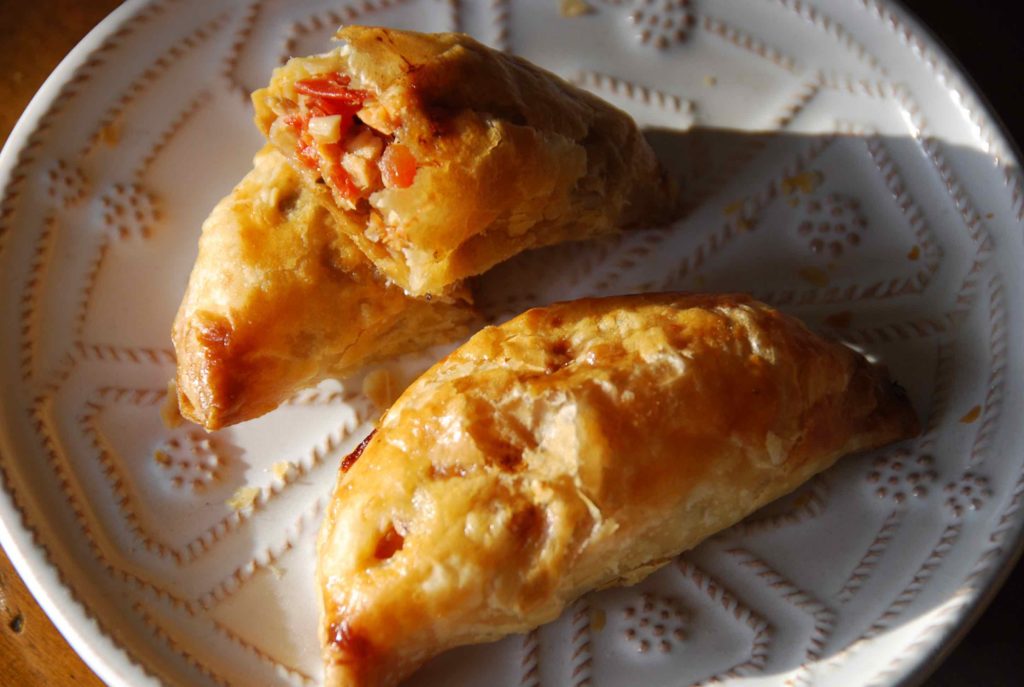
Jaw-dropping. As soon as you set it on a table it will fly off. Guaranteed. Especially if I am around!

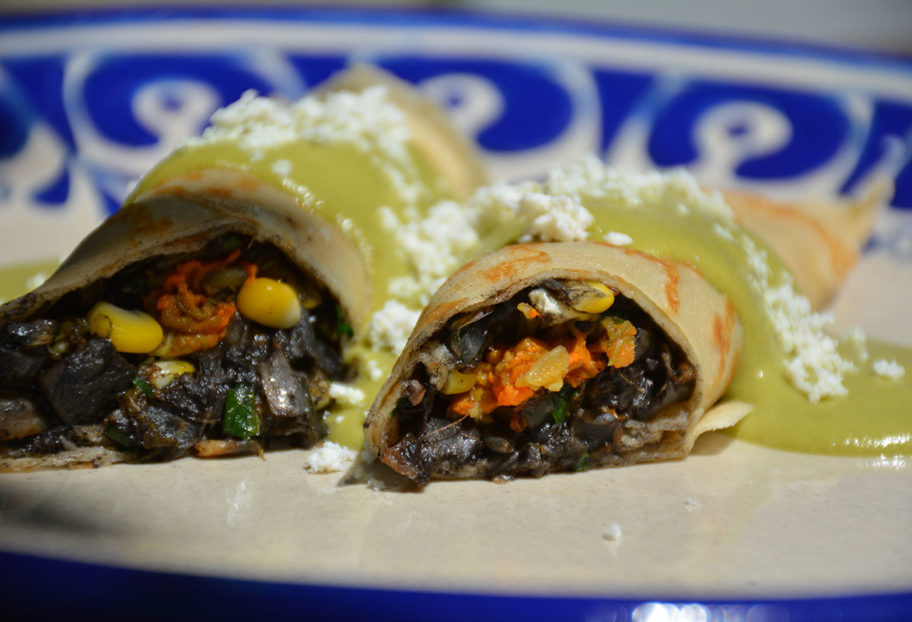
Queso fundido is the epitome of an antojo. What we Mexicans call a food craving that can be eaten anytime of day as a quick snack, or a full meal if eaten in a big enough amount. Antojo literally translates to craving, and I don’t know a single Mexican that doesn’t drool over the thought of a queso fundido.

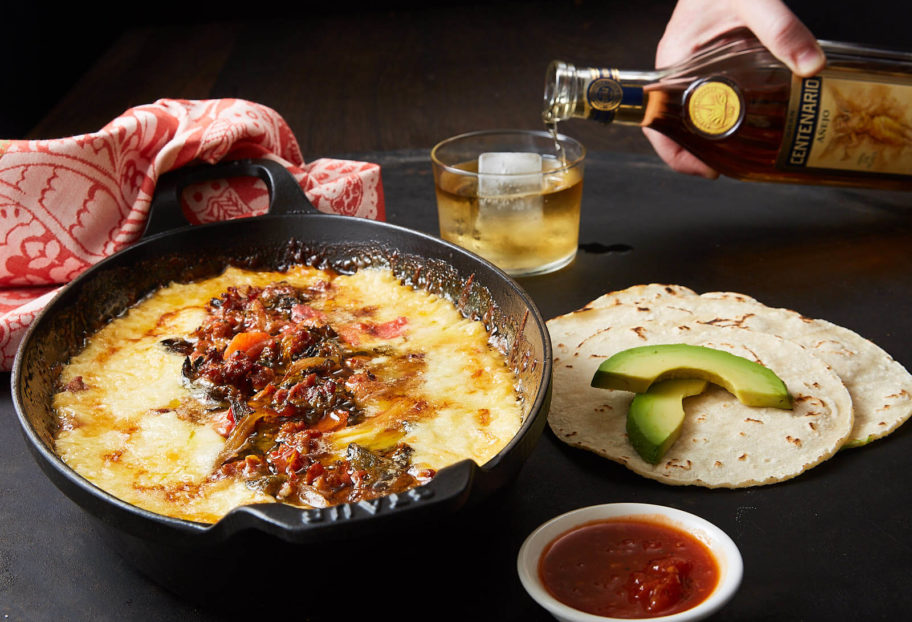
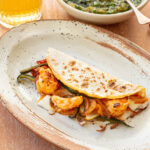
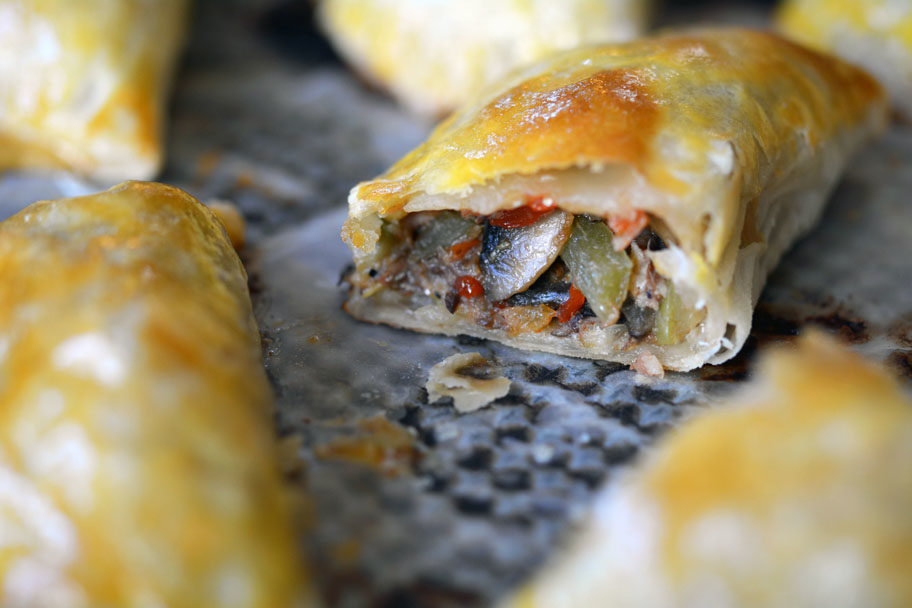
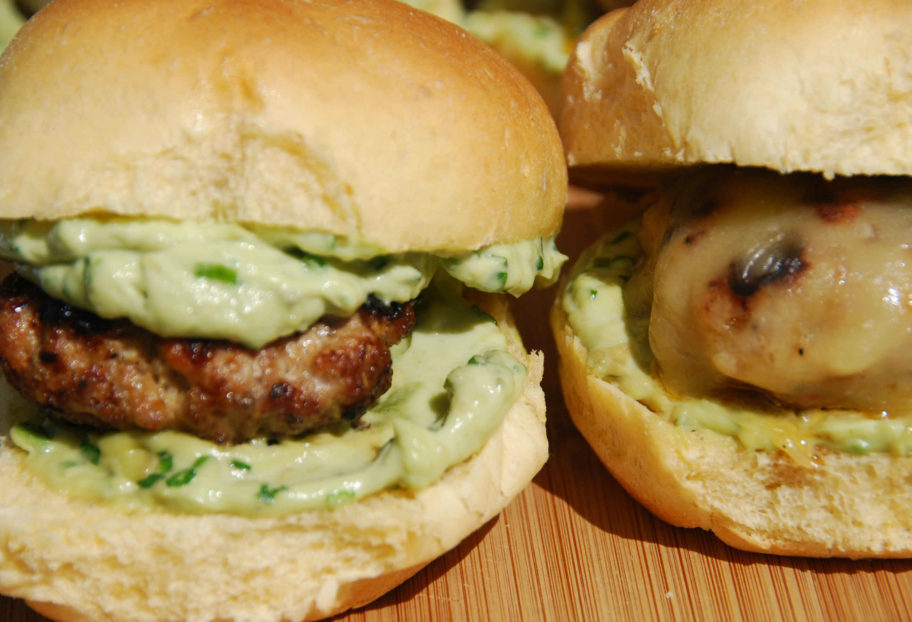
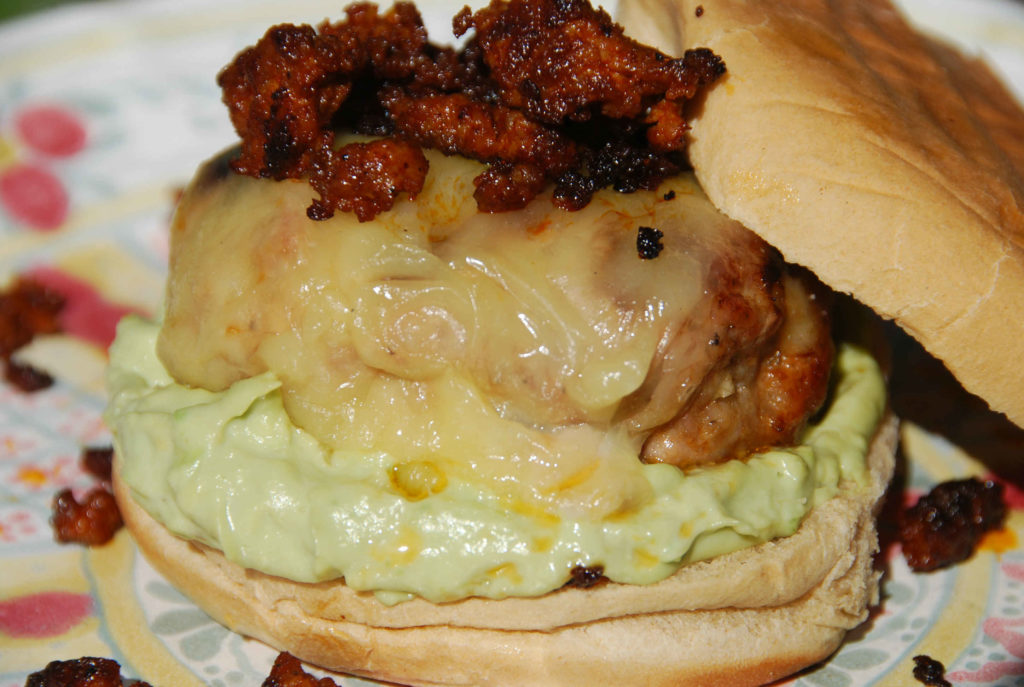
Queso fundido is not a cheese dip. Queso fundido is not a cheese sauce. Queso fundido is the real deal. It is real cheese. Tons of it. You throw a combination of deliciously flavorful melty cheeses onto a baking dish or a traditional earthenware cazuela. Then place it on a heat source — it can be on a burner, in the oven, under the broiler — until the cheese not only melts, but becomes super bubbly on top and starts making a crust all around the edges.

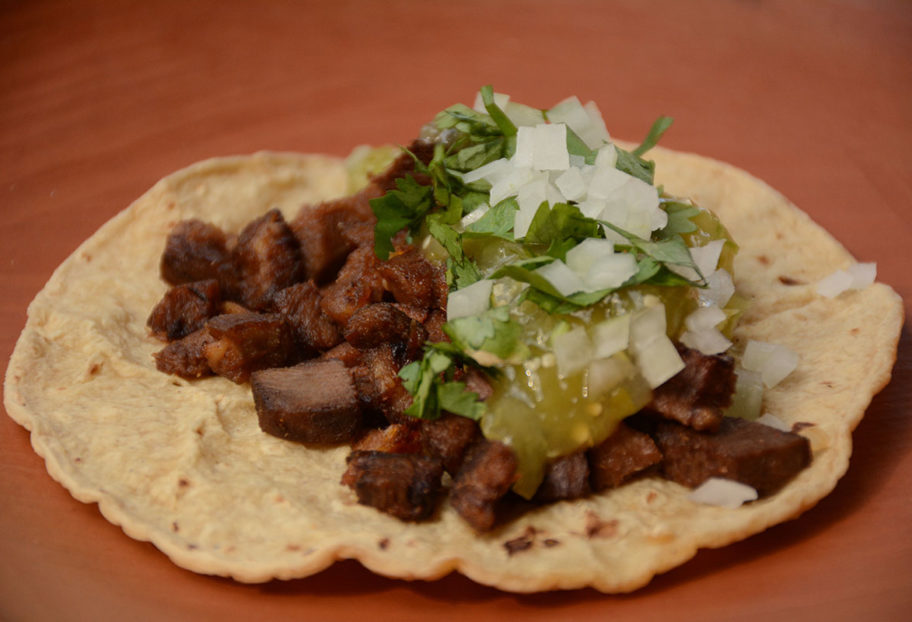
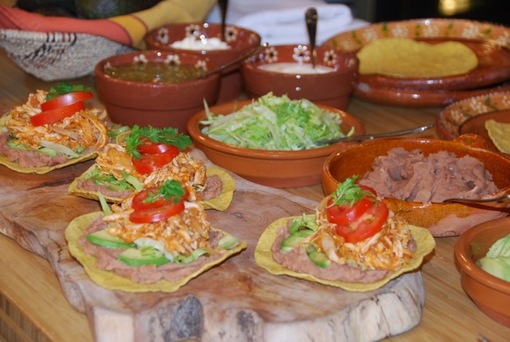
Wait. Then come the toppings. The most typical and popular toppings in restaurants in Mexico City, where I grew up, are poblano rajas, chorizo and mushrooms. They are separate offerings, so you choose if you want your queso with chorizo or with rajas or mushrooms. Different restaurants have their variations, for example, it can be rajas with caramelized onions, different kinds of chorizo, cultivated or wild mushrooms cooked with epazote or dried chiles, to name some.

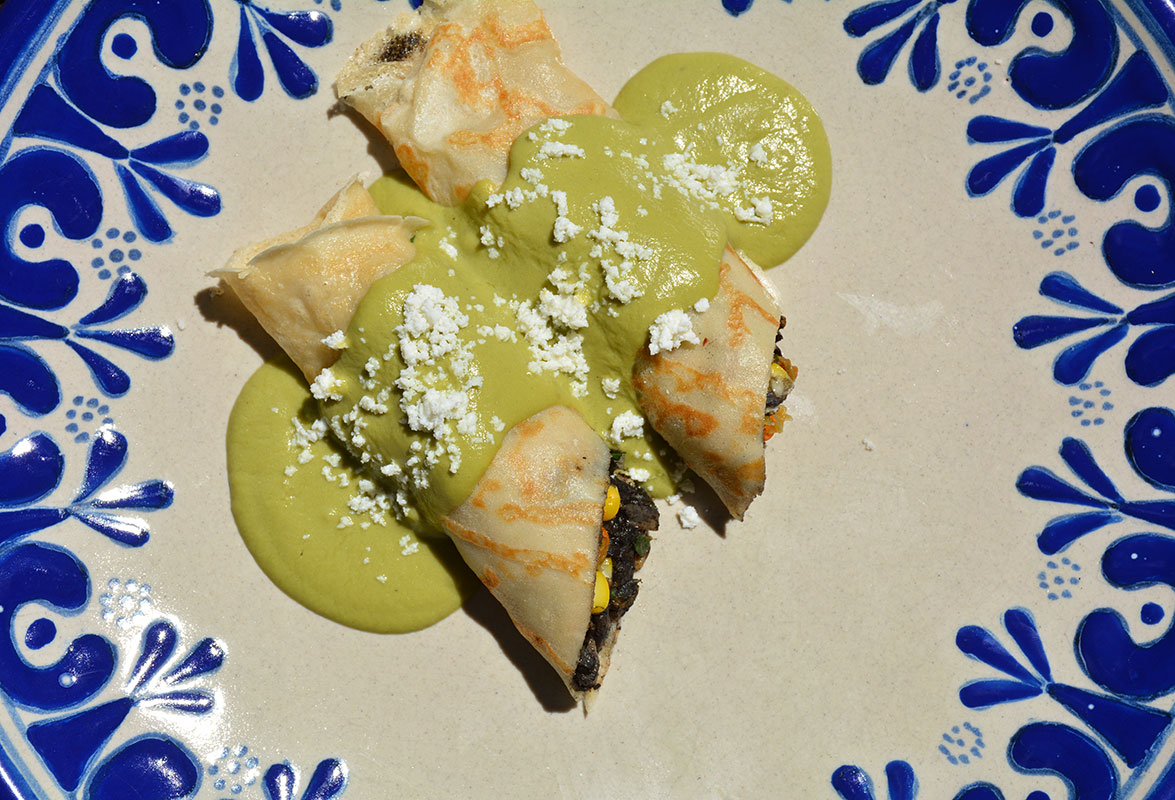
When I make queso at home, I like to make a combo of my favorite toppings. No one can stop me and no one should stop you! My take combines caramelized onions and poblano chiles, throws in a bit of seeded and diced tomato for an added juicy bite and tons of crisp chunks of flavorful chorizo.

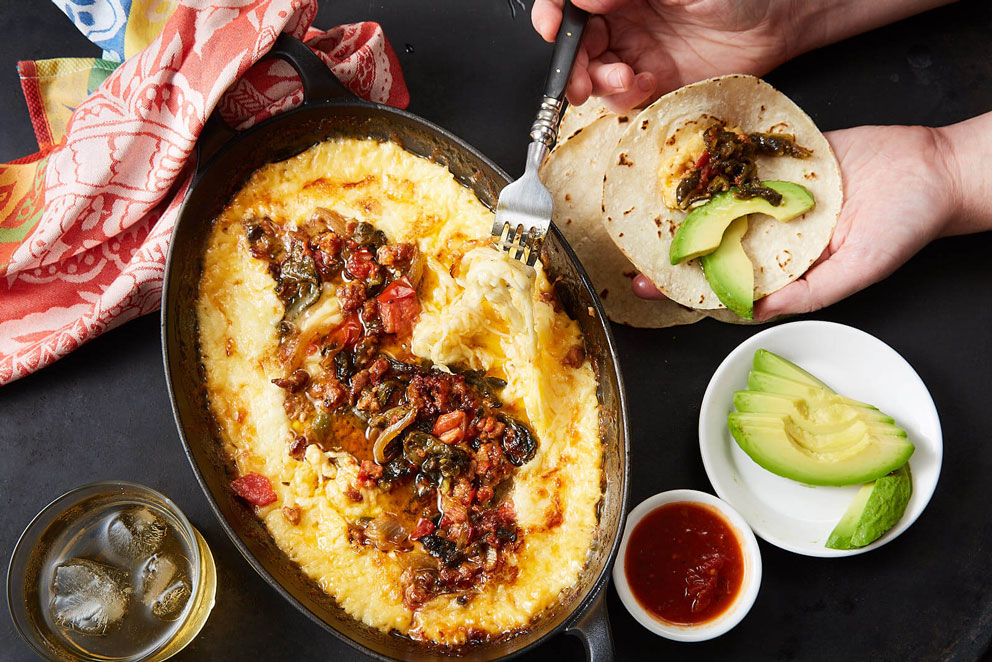
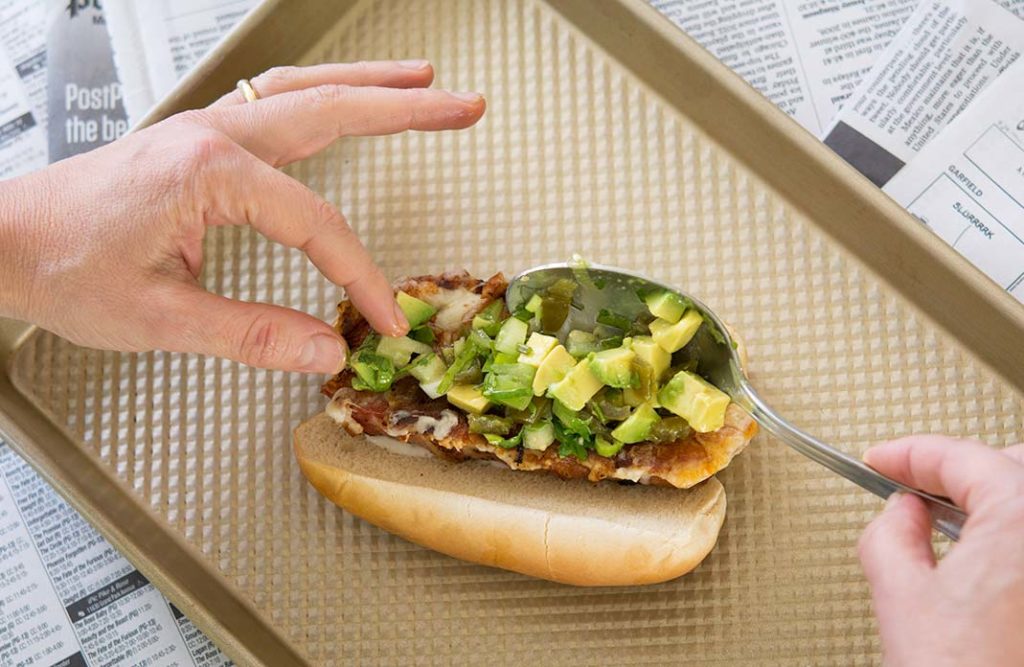
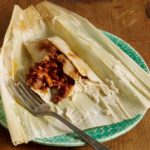
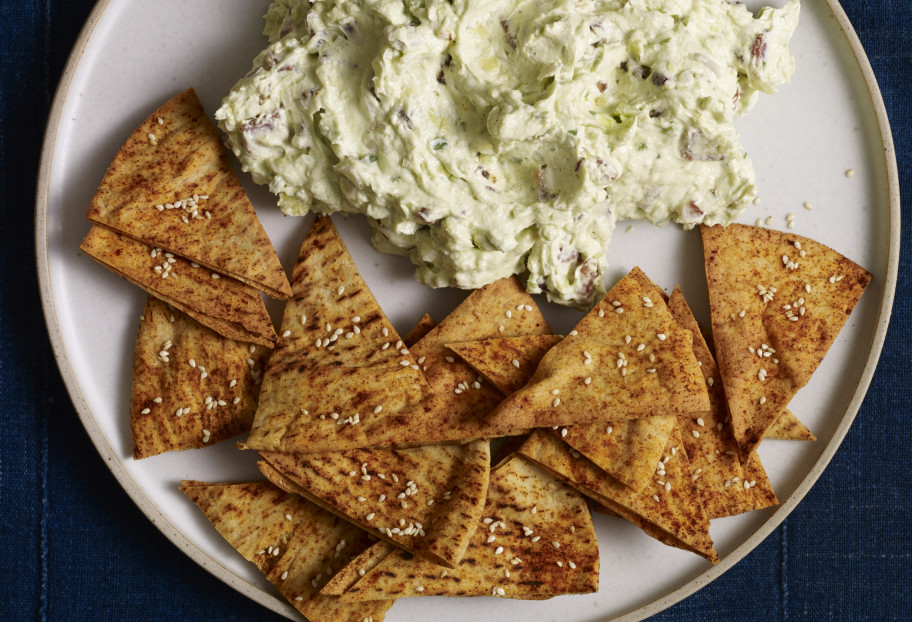
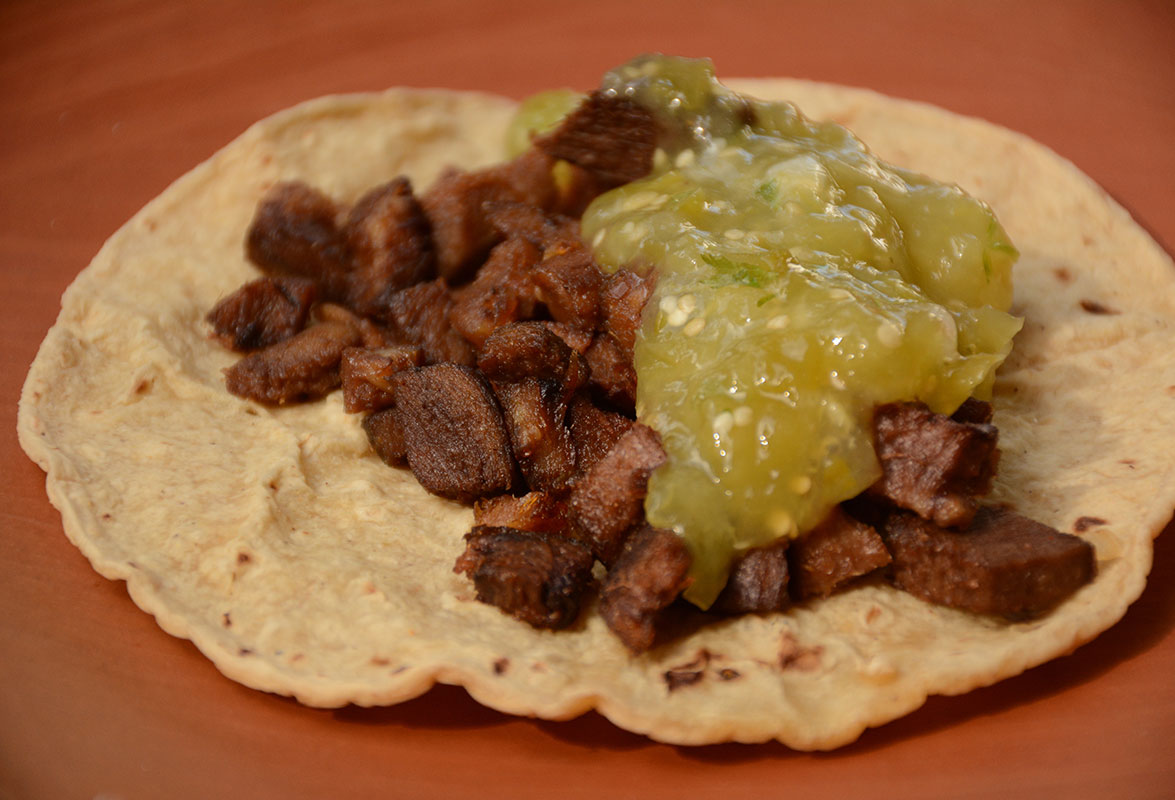
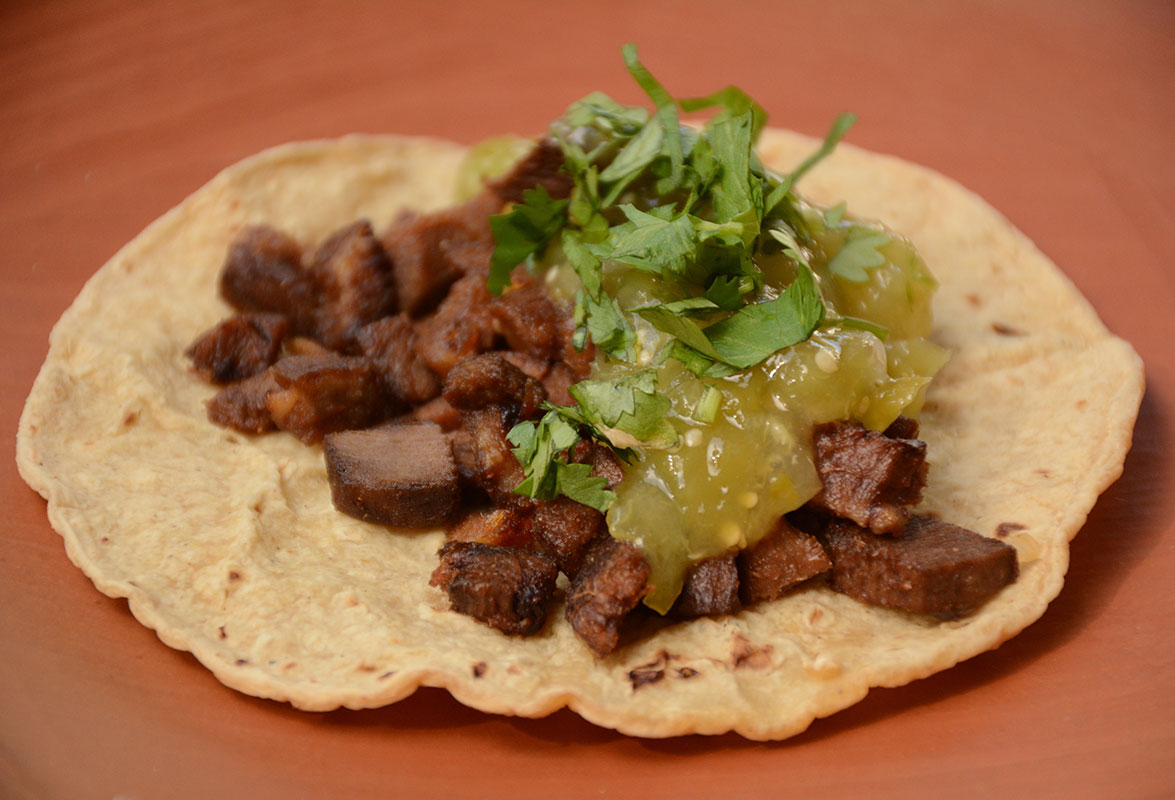
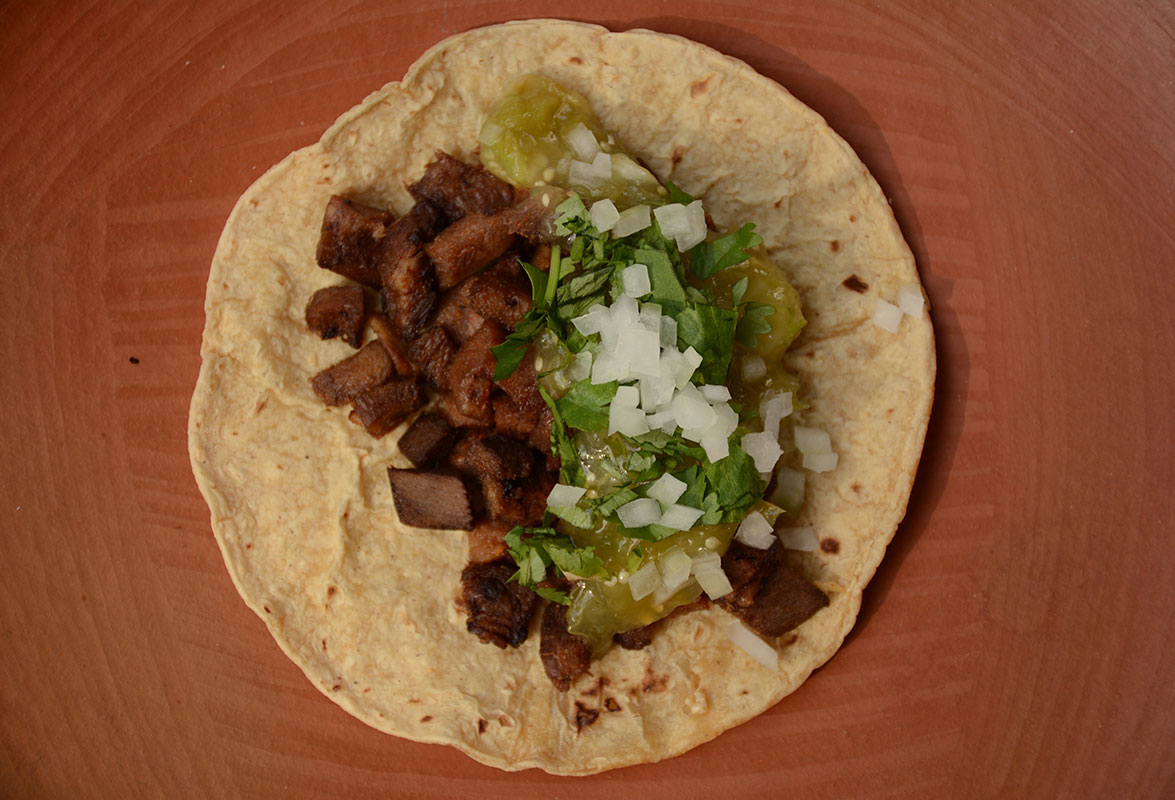
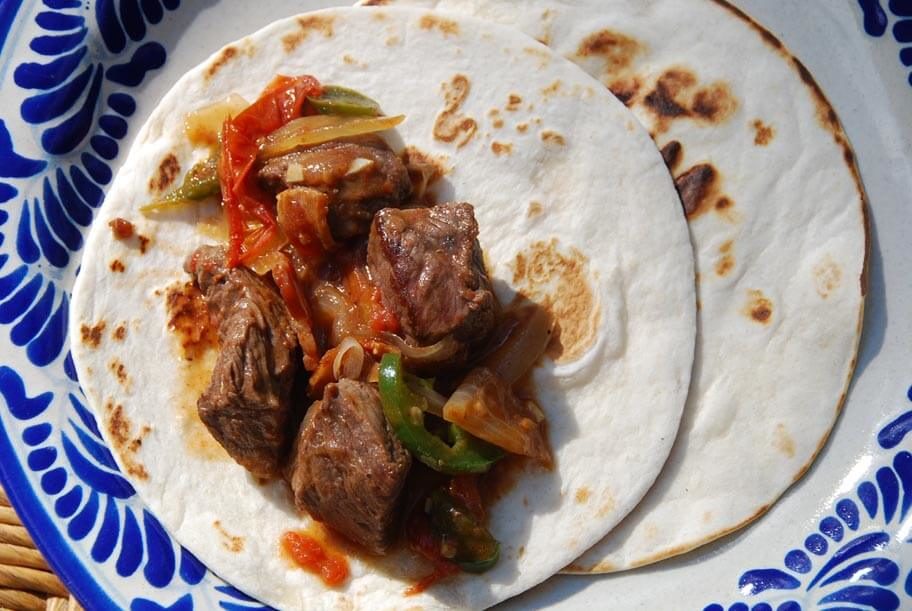
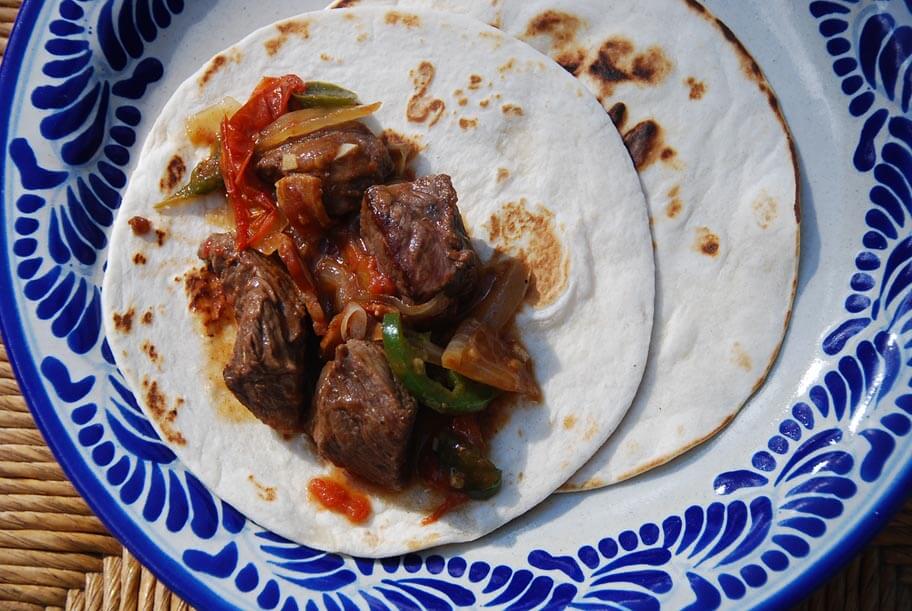
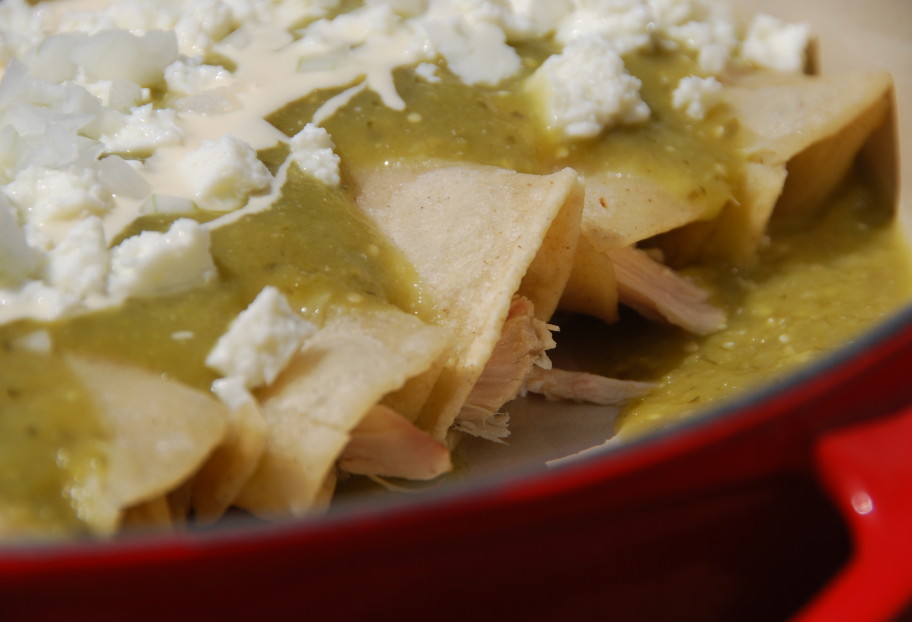
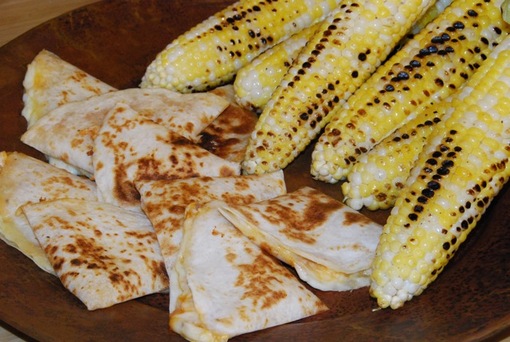
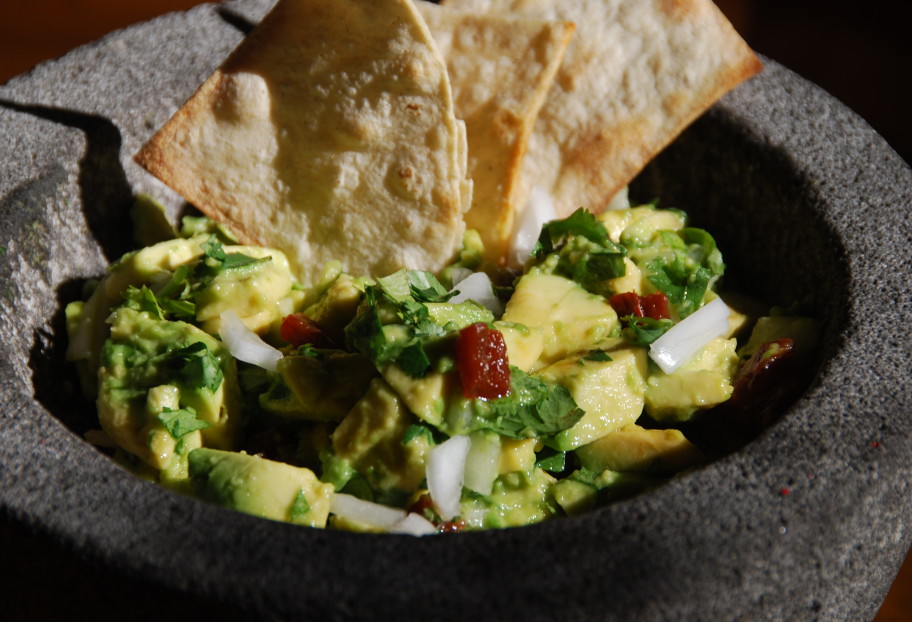
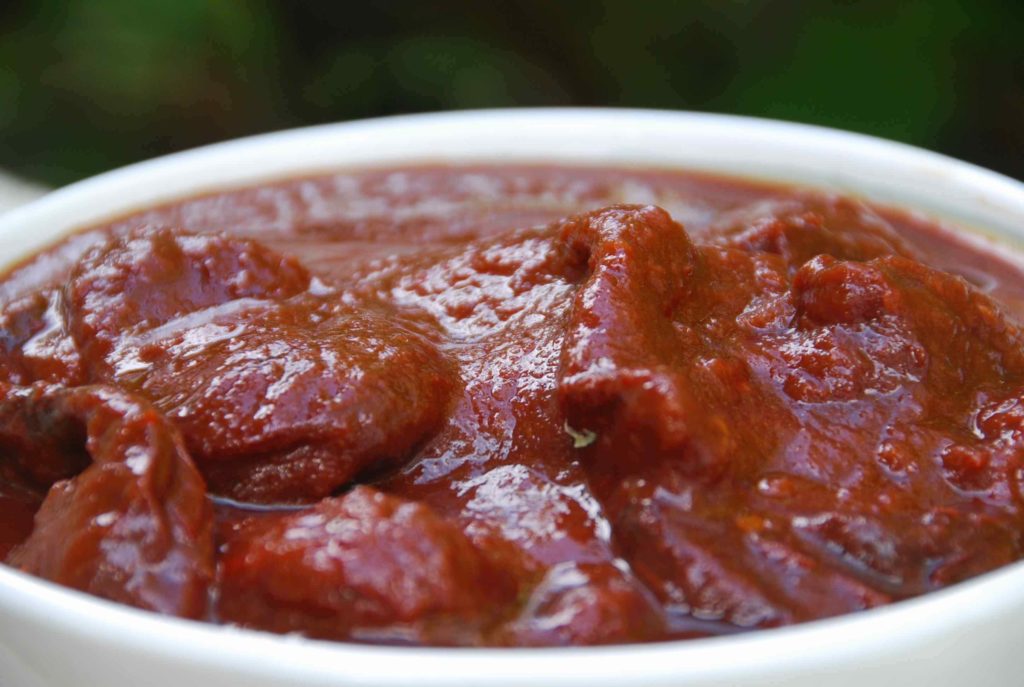
Most people I know like their queso fundido on flour tortillas. But it is you and your guests’ choice if they want corn tortillas, too. If you have some some salsas and guacamole, place them on the table for optional add ons.

Whichever way, have your Gran Centenario Añejo Tequila out to chase your queso fundido tacos and to wash down that queso fundido. I like to serve it neat or on the rocks as it has such a smooth taste.

Once everything is on the table, all bets are off. Run for it, if you want a chance to make a queso fundido taco before it disappears.

Poblano Rajas Chorizo Queso Fundido

poblano rajas chorizo queso fundido
Print Recipe
3.86 from 7 votes

Poblano Rajas and Chorizo Queso Fundido

The popular Mexican antojo, or craving, Queso Fundido topped with chorizo, onion, poblano rajas, and tomato. 
Prep Time15 minutes
Cook Time35 minutes
Total Time50 minutes
Course: Appetizer, Side Dish, Snack
Cuisine: Mexican
Keyword: Antojo, Chorizo, Queso Fundido
Servings: 4 servings
Author: Pati Jinich

Ingredients

  • 1 tablespoon vegetable oil plus more to grease the baking dish
  • 1/3 pound Mexican chorizo casings removed, coarsely chopped
  • 1 tablespoon unsalted butter
  • 1/4 white onion halved and thinly sliced (about 1 cup)
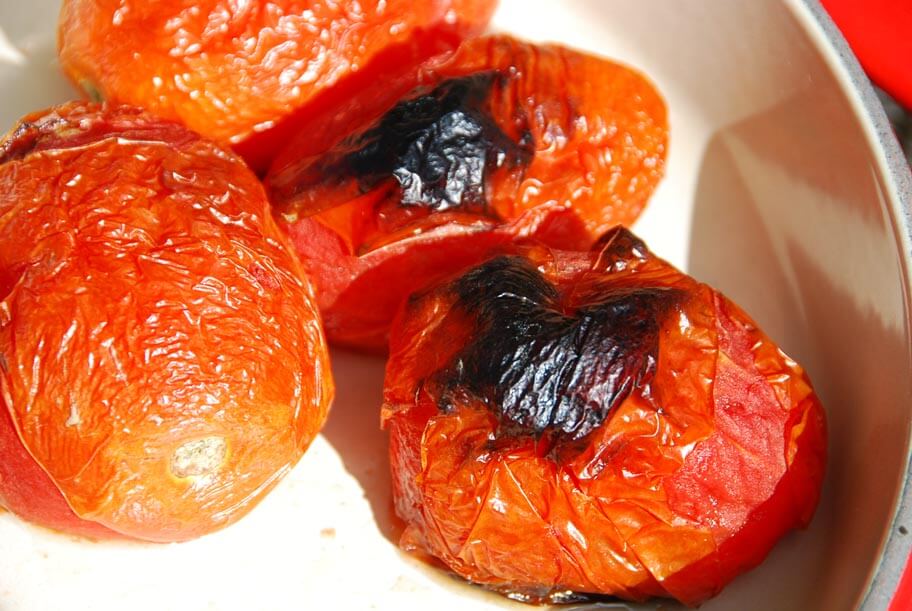
  • 1 poblano chile roasted, sweated, peeled, cut into strips
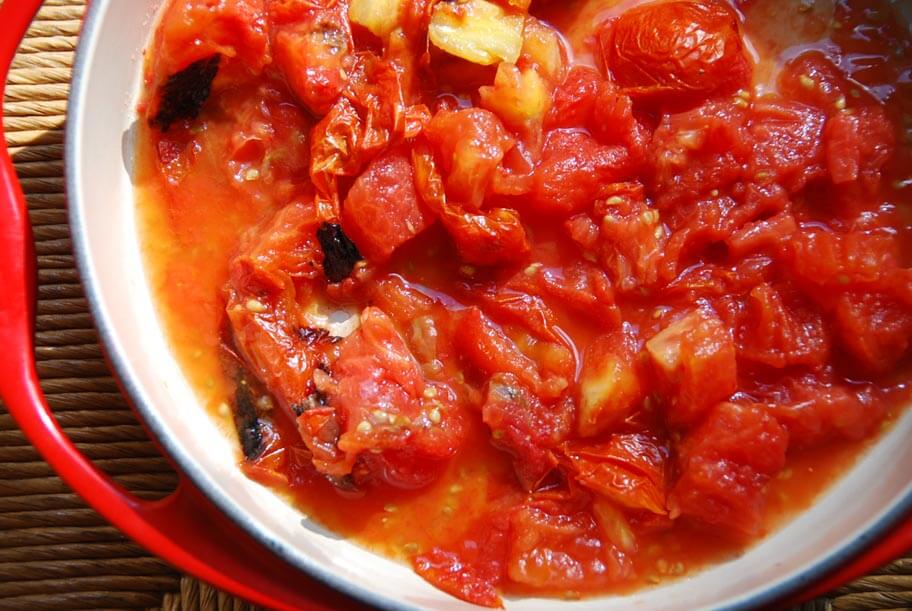
  • 1 ripe Roma tomato cored, seeded, cut into small dice
  • 1/4 teaspoon kosher or sea salt or to taste
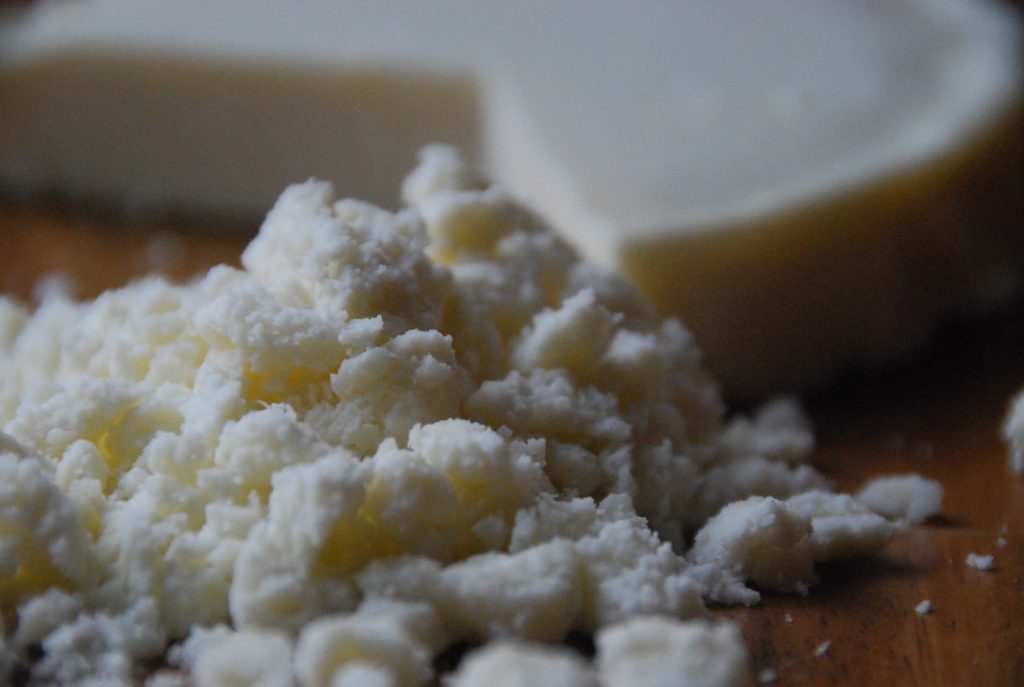
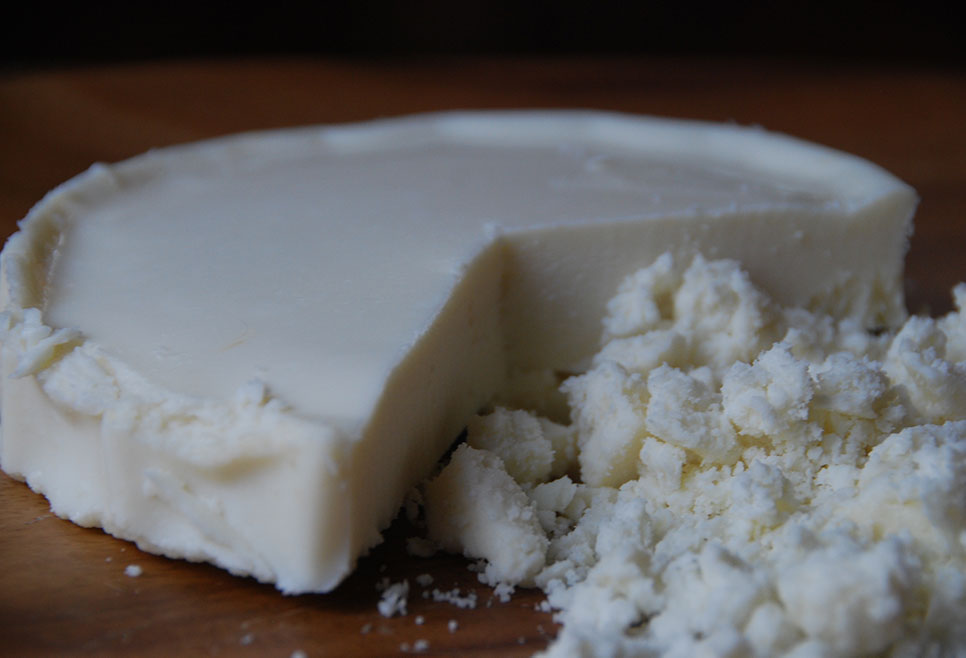
  • 1 pound (or 4 cups) combination of shredded Mexican-style melty cheeses such as Asadero, quesadilla and Oaxaca (can sub with mozzarella, Muenster and Monterey Jack)
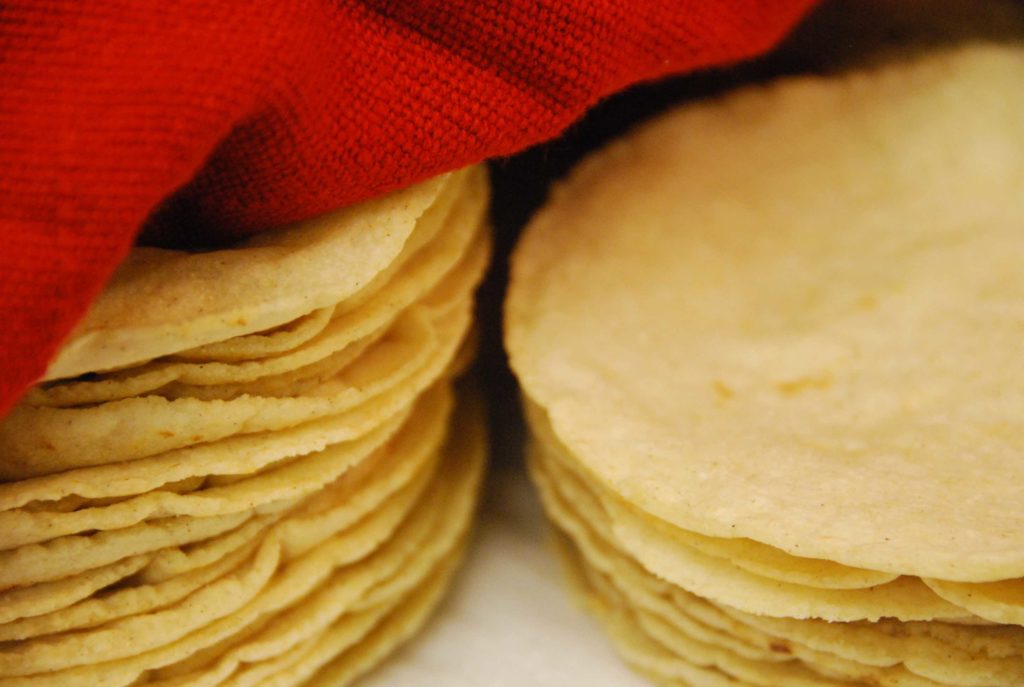
  • 8 to 10 flour or corn tortillas
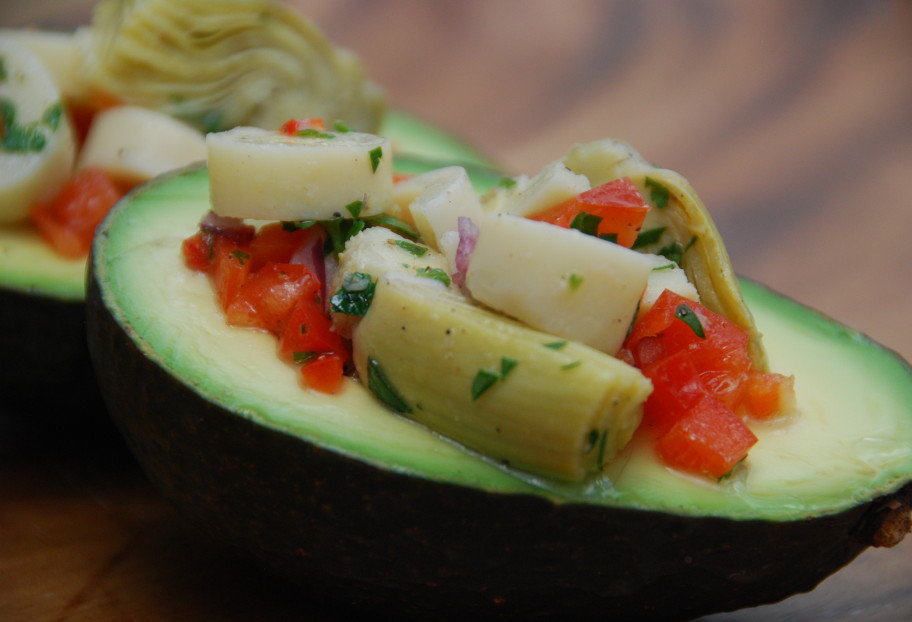
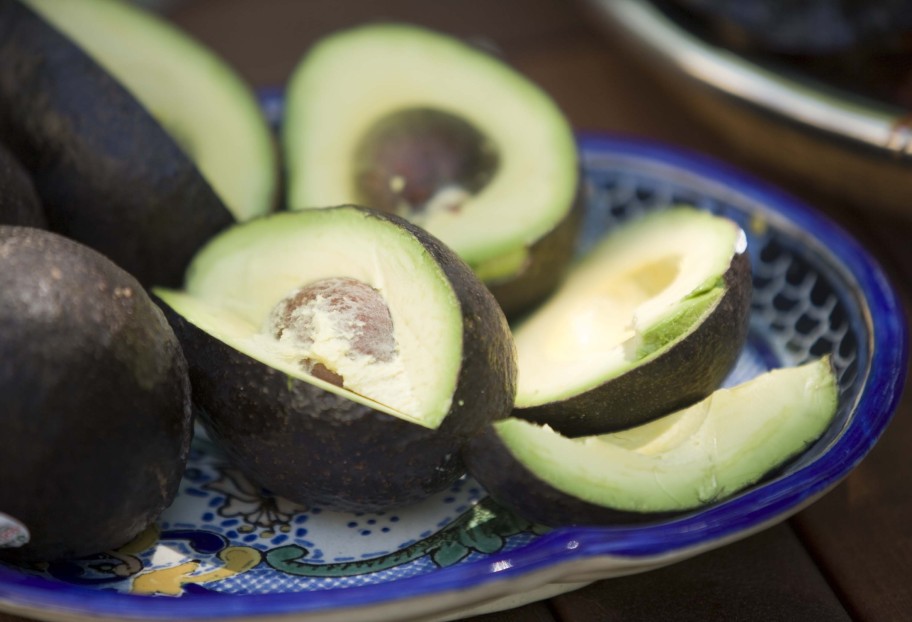
  • 1 ripe avocado sliced
  • Serve with salsa of your choice optional
  • Pair with Gran Centenario Añejo Tequila neat or on the rocks

Instructions

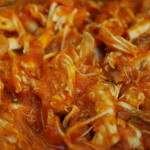
  • Heat the oil in a medium skillet over medium-high heat. Once hot, add the chorizo, cook for 4 to 5 minutes, breaking it into smaller pieces with a couple of spatulas or wooden spoons until crisp and brown. Remove from the heat and scrape into a bowl.
  • Set a rack on upper third tier of the oven and preheat to 450 degrees Fahrenheit.
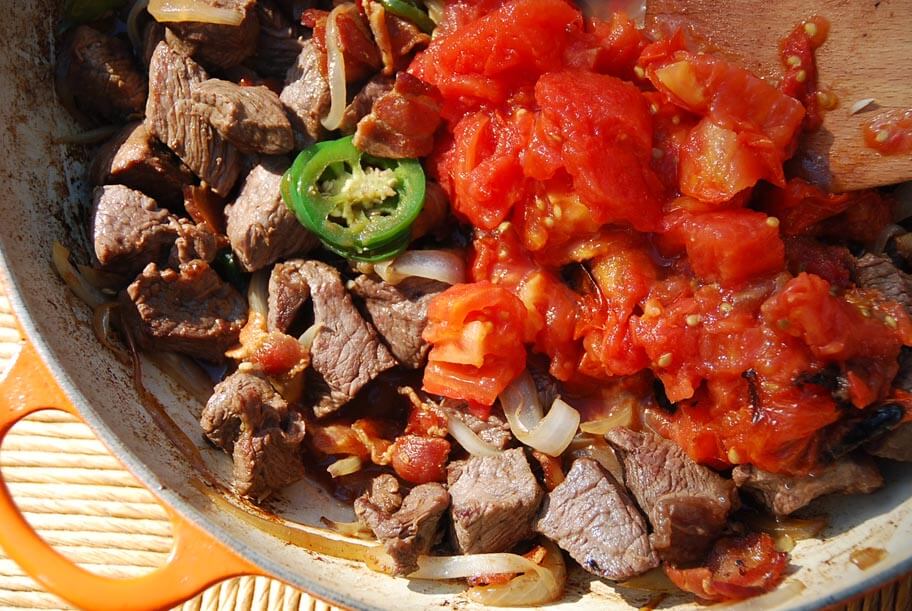
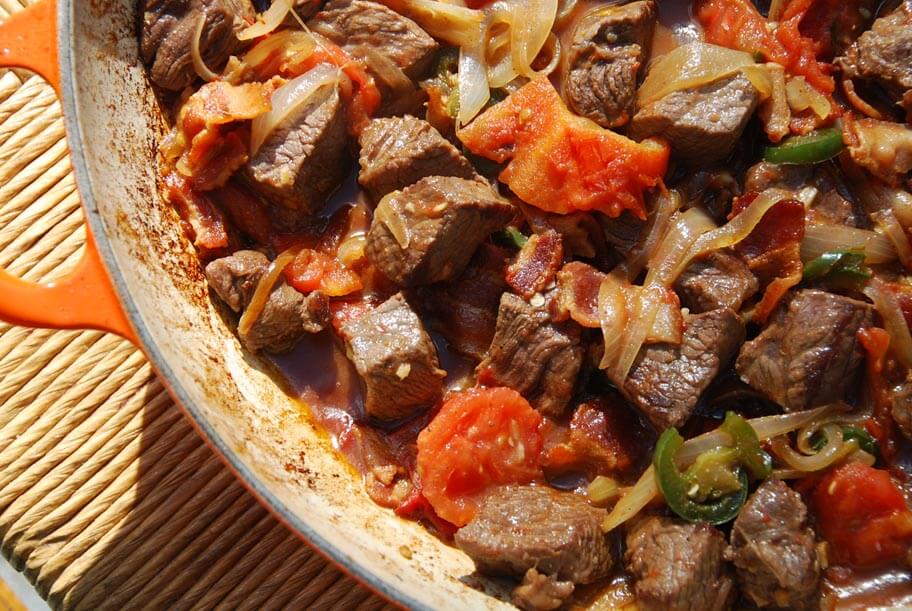
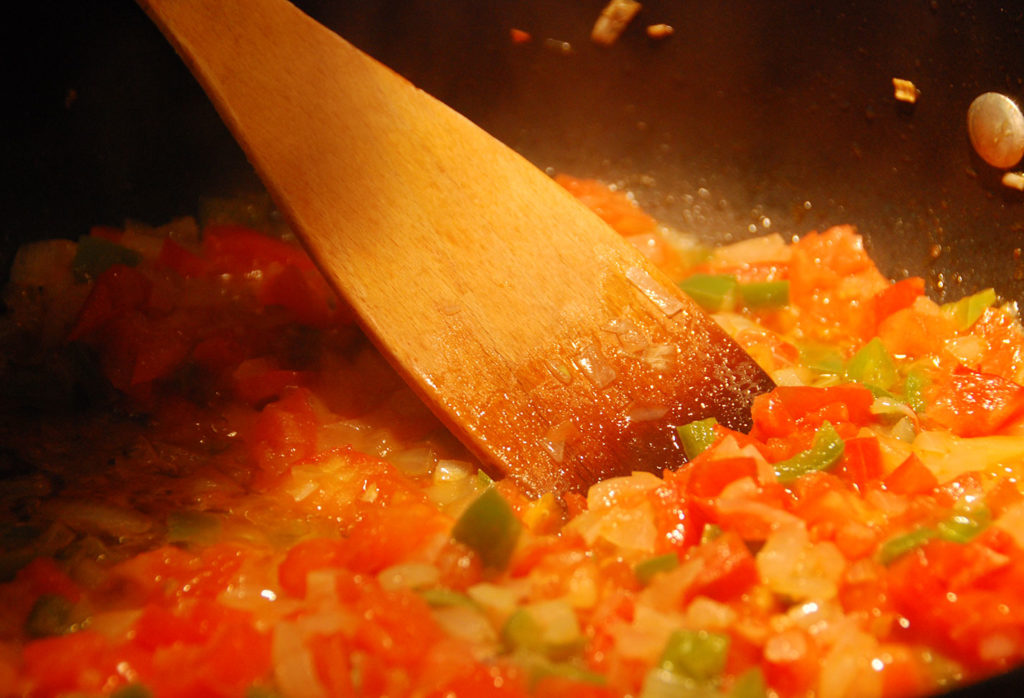
  • Return the skillet to medium heat, add the butter and once it melts, add the onions. Cook, stirring occasionally and scraping the bottom of the pan, for 6 to 7 minutes, until they have wilted and begun to brown around the edges. Add the poblano pepper strips, tomato, and salt, and cook for another 3 to 4 minutes. Remove from the heat and transfer to a bowl.
  • Place shredded cheese in a gently oiled shallow baking dish that can comfortably hold it. Bake for 12 to 15 minutes, or until completely melted. Remove from the oven. Top with the crispy chorizo and poblano rajas mixture. Place back in the oven and bake for another 7 to 8 minutes, until cheese is oozing and browned along the edges and part of the top.
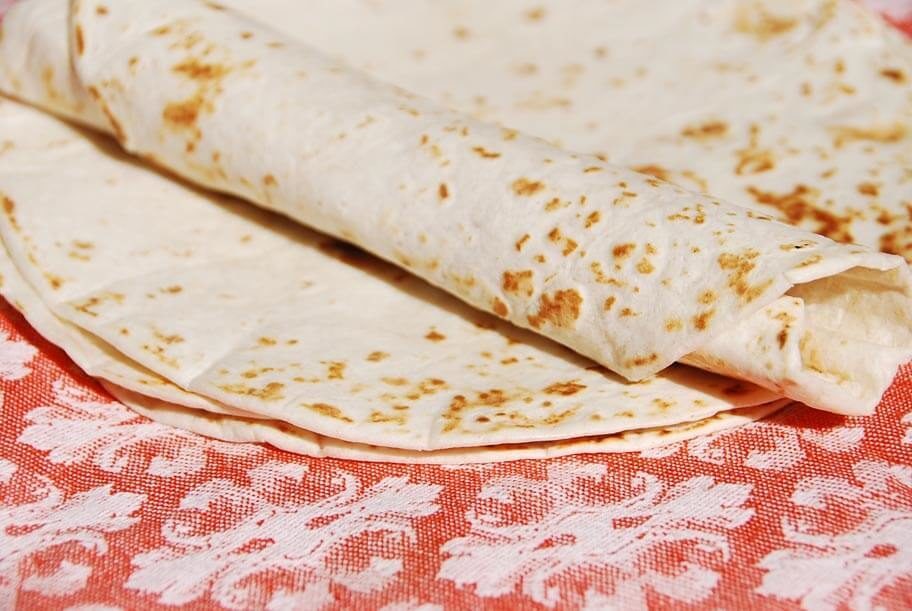
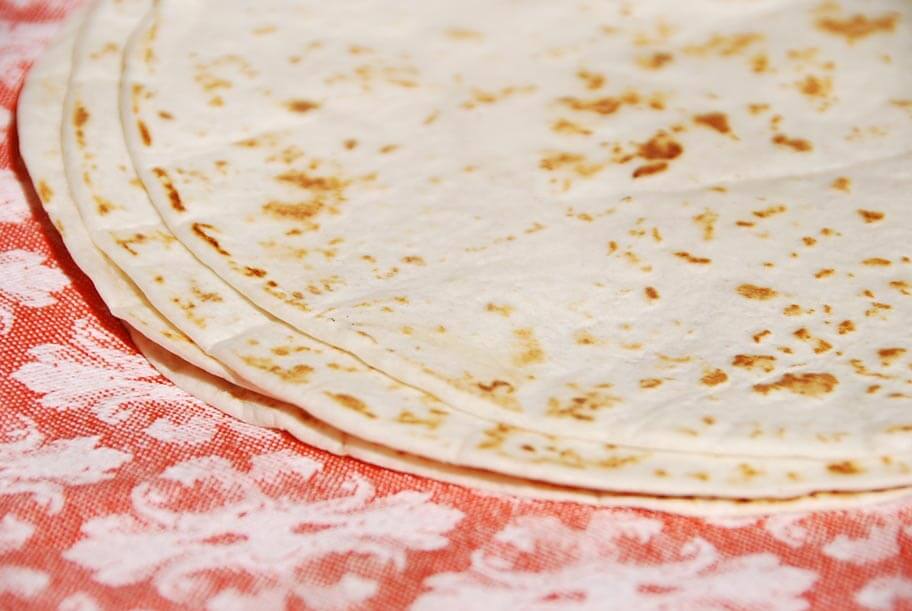
  • Meanwhile, preheat a comal or large skillet over medium-low heat. Heat the tortillas, making sure they are not on top of each other, until completely warmed, puffed and slightly browned. Place in a tortilla warmer or wrap in a clean cloth or kitchen towel.
  • Remove the queso from the oven and place on the table along with the warm tortillas, ripe avocado slices, and salsa of choice, if desired. Let everyone assemble their tacos!

Notes

Queso Fundido

Story Goes… Governor Shrimp Tacos

The story goes, governor shrimp tacos, or tacos gobernador de camarón, were created in the state of Sinaloa in the early 1990s to surprise governor Francisco Labastida Ochoa, after he told a few friends how much he loved his wife’s shrimp tacos. That bit of information was passed on to the owners of Los Arcos in Mazatlán restaurant, before he headed there to visit.

The chef was given the quest not only try to match the governor’s wife’s tacos, which no one besides the governor had tried, but to beat them. So quite a few taco recipes were developed and tested. When the governor showed up to eat, he liked them so much he named them “tacos gobernador.”

Now, I do not know if that story is entirely true. But, what I do know is, these tacos became so popular you no longer only find them at Los Arcos in Mazatlán. They are all over Sinaloa and beyond. I had them as far away as Los Angeles and Miami.  Yet, I saw the most renditions on the 800 mile drive throughout the entire Baja Peninsula.

I felt more than obliged to offer my take on tacos gobernador, since my travels in Baja are featured on “Pati’s Mexican Table” in my new season premiering in a few weeks (you can watch the trailer here). And I am thrilled to share my recipe with you, as we all love these tacos in my home!

So what’s in tacos gobernador? First, a combination of shrimp and cheese makes them a cross between a taco and a quesadilla. A ton of cheese is really essential.

Second, cooked onion that is often accompanied by other vegetables, typically bell peppers and sometimes poblano chiles. If you ask me what I prefer, hands down, not even a second of hesitation, poblano chiles. I absolutely adore them. I feel lukewarm about green bell peppers to put it mildly. So my take has a combination of slivered onions and poblanos with just a bit of tomato.

Third, the seasonings. Some renditions have no sauce, only salt and pepper. Some have a simple to a more seasoned tomato sauce. I go for a seasoned, very thick sauce that is almost a paste, really. It combines tomato paste, La Costeña chipotles in adobo and the W sauce — Worcestershire — or as we call it in Mexico “salsa inglesa.”

Lastly, you can opt for corn or flour tortillas. There are no strict guidelines here, different from other kinds of tacos.

There are so many reasons why I like these tacos so much. They end up being a complete meal, they are so easy to prepare, they are irresistibly delicious and messy, the cheese creates an inviting crust as it melts… and they have a great story behind them. I do love a good story.

Governor Shrimp Tacos
Print Recipe
3.34 from 6 votes

Governor Shrimp Tacos

Governor Shrimp Tacos recipe from Pati's Mexican Table Season 7, Episode 1 "Tijuana’s Culinary Revolution" 
Prep Time15 minutes
Cook Time20 minutes
Total Time35 minutes
Course: Appetizer, Main Course
Cuisine: Mexican
Keyword: Antojo, Mexican, pati’s mexican table, Shrimp, Sinaloa, Taco
Servings: 6 Tacos
Author: Pati Jinich

Ingredients

  • 4 tablespoons unsalted butter
  • 1 1/2 white onion slivered
  • 2 poblano chiles stemmed, seeded, slivered
  • 5 garlic cloves finely chopped
  • 2 ripe Roma tomatoes cored, seeded, slivered
  • 3 tablespoons sauce from chipotles in adobo
  • 2 tablespoons tomato paste
  • 2 teaspoons Worcestershire sauce
  • 1/2 teaspoon kosher or sea salt or to taste
  • 1/4 teaspoon freshly ground black pepper or to taste
  • 1 1/2 pounds (about 11-15) shelled large shrimp cut into large chunks
  • 3 cups shredded Oaxaca, mozzarella, asadero or Muenster cheese
  • 6 to 8 flour or corn tortillas
  • Sliced avocado for garnish
  • 1 Chile Manzano sliced and mixed with the juice of a lime, 1/4 red onion and salt to taste

Instructions

  • Heat the butter in a large nonstick skillet set over medium-high heat. Once it melts and begins to bubble, add the onion and poblano and cook until wilted, about 3 minutes. Add the garlic, stir, and cook until fragrant, about 1 minute. Incorporate the tomatoes, cook for a minute, and as they begin to soften, add the sauce from the chipotles in adobo, tomato paste, Worcestershire sauce, salt and pepper. Stir well, cook for another minute, then add the shrimp and cook just until they change color, about 1 to 2 minutes. Turn off heat and scrape into a bowl to prevent the shrimp from overcooking.
  • On a preheated comal set over low heat, heat the tortillas on both sides for a minute. Add about 1/2 cup of shredded cheese onto each one. Once the cheese begins to melt, add a generous amount of the shrimp mixture, fold in half and continue heating until cheese has completely melted and the tortillas have begun to lightly brown and create a crust.
  • Serve with sliced avocado and Manzano chiles and onion.

Video

Notes

Tacos Gobernador de Camarón

Sopes

The very first class I taught at the Mexican Cultural Institute, after I switched from being a policy analyst at the Inter American Dialogue, was October 18, 2007.

I remember the date exactly, because it was a day after Sami’s 6th birthday. For months, I had been teaching him and his two brothers, Alan who was then 8 and Juju who was just 1, how to make sopes every night for at least 3 months.

I had been so nervous about teaching in front of a live audience that, instead of telling them our usual bed time story about an imaginary and mischievous monkey called Waba-Waba, I had switched to a nightly cooking demo. They were as loving and kind and patient as they are with me to this day, did not complain, and pretended to be making sopes along with me.

I started the classes at the Institute in an attempt to share my love for Mexican cuisine and culture and to try to open a much wider window into its richness, diversity and surprising accessibility. I wanted to help break misconceptions about our food and our people and invite people north of the border to make use of our ingredients, techniques and recipes to enrich their own kitchens.

The very first dish that I shared was sopes. I even found a photo of that day… and you can see Rosa and I showing how to make sopes many ways, with our hands, using a rolling pin, with a tortilla press…

Pati and Rosa making sopes at the Mexican Cultural Institute

Why did I choose sopes? To begin with, because they are one of my favorite things to eat! But also, because sopes helped me shine a light on so many crucial elements of Mexican cuisine…

Sopes are part of a category of dishes we Mexicans call antojos, or antojitos, which translates to little cravings. An antojo is something you can eat anytime of day and can either be a quick bite or make a full meal, depending on what you top them with… and how many you eat.

Sopes are made of corn masa, which is a cornerstone of Mexican cuisine that has existed for thousands of years. Made of nixtamalized corn, corn masa renders corn nutritious and versatile. You don’t need to nixtamalize corn yourself, you can buy masa harina, which simply mixed with water makes masa!

Sopes show how playful and versatile masa can be. They are similar to a tortilla, but they are much thicker, and the rim around it that helps contain its garnishes. They are like little edible plates.

Sopes are easy to make. Different from a corn tortilla, someone who is making sopes for the first time, doesn’t need to worry about knowing how to use a tortilla press, the correct thickness, or the technique for making them puff up. They are much more forgiving.

Sopes are also accessible: you can make them ahead of time, vary the toppings, assemble in a few minutes, dress them up or dress them down. I always, always, add a layer of refried beans, a tasty salsa and either tangy, salty and crumbly queso cotija or queso fresco, crumbled on top.

To boot, sopes are super fun to make by yourself or with friends or with your kids.

So as you can see, sopes helped me achieve many things: they helped me show how accessible, forgiving, fun, filling, nutritious, versatile, rich and delicious Mexican food is.

You can follow along with this video too…

To this day, I am still proudly teaching at the Institute where I am the resident chef 11 years after I started. I am also serving sopes any chance I get.

Pati Jinich sopes
Print Recipe
4.41 from 5 votes

Sopes

Sopes recipe from Pati's Mexican Table Season 6, Episode 10 "How I Got to Now"
Prep Time10 minutes
Cook Time8 minutes
Total Time18 minutes
Course: Appetizer, Main Course
Cuisine: Mexican
Keyword: cotija, queso fresco, refried beans, sopes, Tomatillo Salsita
Servings: 12 sopes
Author: Pati Jinich

Ingredients

To make the Sopes:

  • 2 cups masa harina or corn tortilla flour such as Maseca
  • 2 cups water more if needed
  • Pinch kosher or coarse sea salt

To serve:

Instructions

  • Heat a comal or skillet over medium heat until very hot.

To make the sopes:

  • Combine the masa harina, water and salt, kneading in a revolving motion with your hands. Knead for a couple of minutes, until dough is smooth and has no lumps. If it feels too dry, add a bit more water.
  • Divide the dough into 12 balls, each about 2-inches in diameter. Line the bottom of a tortilla press with circles cut from a thin plastic bag (like the ones from the produce section of your grocery store). One at a time, place a ball of dough onto the plastic lining the bottom of the tortilla press, and top with another layer of plastic. Press down to make a flat disk as thick as a pancake, about 1/4-inch thick (much thicker than a tortilla). You can also flatten and form them by hand. Repeat with all 12 balls.
  • As you make them, place each sope on the hot comal or skillet. Let them cook about one to two minutes on each side, until opaque and speckled, and they can be flipped without sticking.
  • Take them off the comal and place them on a chopping board. Using a kitchen towel to protect your fingers, make a rim around each sope by pressing and pinching with your fingers along the edges. Return them to the comal or skillet, and let them cook for one or two more minutes per side, until thoroughly cooked.
  • If eaten the same day, they may be kept wrapped in a clean kitchen towel. If not, wrap them in a kitchen towel or paper towel, and store inside a closed plastic bag in the refrigerator. They will keep for up to 3 days, afterwards they will turn too hard. Reheat on hot comal or skillet for a couple minutes before eating. They can also be frozen and kept for months.

To serve:

  • Once the sopes have been thoroughly cooked and warmed, place on a platter and add a generous tablespoon of refried beans, shredded lettuce, crumbled cheese, chopped onion and Quick Roasted Salsita. Salsa may be left on the side for people to add as much as they like.

Scallop Aguachile at the James Beard House

Mexican cuisine is riding such a high wave these days.

Compared to when I first moved to the US, 20 years ago, you can now find all the ingredients you need to prepare Mexican food. People are not only eating Mexican food out, but are bringing it into their home kitchens. There’s the #tacotuesday and the #taconight. Wherever you travel to in the US, there’s Mexican food to be found in airports, restaurants, hotels, fast food chains, and the offerings continue to increase and get better. It seems like the more people get to know Mexican cuisine, the more they want to taste it, to cook it, to explore its depth.

It is such a thrill to be part of this movement. I particularly enjoy traveling through the US to cook whenever I get an invitation. And I was beyond ecstatic when I got the request from the James Beard House in New York City to whip up their Cinco de Mayo dinner. What an honor! But of course, the pressure was on. What theme, which menu, what drinks? So much to share!

To be sure, Cinco de Mayo is not a big celebration in Mexico. It is a somber occasion honored in the state of Puebla, where the Cinco de Mayo Battle took place in 1862. It was a battle between a small Mexican militia against a big French army, and while the Mexicans won, with the odds stacked against them, the French won right back. Yet, move the clock forward a few years and Mexico regained its Independence.

Now, for whatever reason, which many have unsuccessfully tried to explain, Cinco has become the biggest Mexican-themed party abroad. I was bewildered at first when I started getting invites to Cinco de Mayo parties from our American friends. But then, of course, happily joined the excitement of the Cinco train. Listen, if there is an open door to celebrate anything and everything that we love and are proud of about Mexico, and share our food, cuisine and culture: count me in!

menu from the dinner at the James Beard House

Photo courtesy Clay Williams (@ultraclay)

As a Mexican immigrant, to be invited to the James Beard House, such a prestigious place and institution, made me feel proud and like my food is worth it. But, it also made me feel like Mexican food has really started to earn its rightful place in the eyes of the culinary world of the US.

You can see the menu above. Because I really couldn’t choose a Mexican region to focus on, I opted for what I called a Mexican culinary compass: different foods from different places from Mexico, a few childhood favorites, and a couple new dishes from my kitchen. Carnitas from Michoacán, caldo de camarón from Acapulco, gorditas from Oaxaca…

The first course of the formal sit-down dinner menu, after the cocktail hour, was a scallop aguachile inspired by the coastal region of the Sea of Cortez.

The team from the James Beard House is a joy to work with. We prepped the day before, as it was a long menu! Then my production team and I got so excited with the occasion that we decided to make it part of an episode of the next season of Pati’s Mexican Table, which will premiere in September 2018.

Pati Jinich plating her classic scallop aguachile at the James Beard House

Photo courtesy Clay Williams (@ultraclay)

But meanwhile, I leave you with the scallop aguachile recipe. It is SO GOOD. And it could not be simpler. It helps break so many myths about Mexican food. Not all Mexican food is fried, or laborious, or covered in cheese, or severely spiced up, or takes forever to prepare. In fact, most Mexican food is healthy, soulful, delicious, nutritious. It gives beautiful ingredients, like the plump, silky and sweet fresh sea scallops a chance to shine by just dressing them beautifully, lightly and kindly.

scallop aguachile

Photo courtesy Clay Williams (@ultraclay)

Mexican cuisine is indeed riding such a high wave today. And I can see the high tide ahead, with the wave getting even bigger and higher. So excited and honored to have the possibility to continue to ride it and bring the fruits of this journey to your shore.

Print Recipe
4.80 from 5 votes

Scallop Aguachile

The first course from Pati's Cinco de Mayo dinner at the James Beard House in New York was a scallop aguachile inspired by the Mexican coastal region of the Sea of Cortez.
Prep Time15 minutes
Resting Time15 minutes
Course: Appetizer
Cuisine: Mexican
Keyword: Aguachile, Ceviche, jalapeno, lime, Scallops
Servings: 4 servings
Author: Pati Jinich

Ingredients

  • 1 pound large fresh scallops
  • 1/4 cup lime juice freshly squeezed
  • 2 tablespoons extra virgin olive oil
  • 1/4 cup red onion slivered
  • 1 serrano or jalapeño chile thinly sliced
  • 1/2 teaspoon kosher or sea salt or more to taste

Instructions

  • In a bowl, combine the lime juice, olive oil, onion, serrano and salt. Whisk and let sit for at least 15 minutes, or cover and refrigerate up to 12 hours.
  • When ready to serve, remove lime juice mix from the refrigerator. Slice the fresh scallops thinly and horizontally, up to 1/8” width. Spread on a platter. Whisk the lime juice sauce and pour in its entirety over the scallops, arranging so that the onion and chile are spread evenly throughout. Serve immediately.

Notes

Aguachile de Callo de Hacha

Sardine Empanadas

What to do with a couple cans of sardines? Do what the people from landlocked Aguascalientes do: make the tastiest empanadas.

Over the past dozen years, I have been amazed by so many things, as I’ve ventured into a deep exploration of Mexico’s cuisine to share it with the world – or whoever will listen. Its richness, its diversity, its depth, its accessibility, its generosity… One thing that has also stood out, everywhere, is the resourcefulness of its people.

You know the saying, if all you have are lemons, make lemonade. That exponentially applies to the Mexican spirit.

Take the state of Nuevo Leon that is so rich in oranges. You will find everything from orange cake, orange cookies, orange drinks, orange chicken, orange candy, to amazing orange preserves.

Aguascalientes is a place deeply inland, with no water outside its borders and no water within its borders – no lakes, no rivers. Bien tierra adentro, as we say. Historically, the only fish and seafood that has been available there, for the most part, is that which can be preserved: salted, dried, pickled, or canned. Hence, these sardine empanadas, a dish that truly embellishes the sardines.

I was intrigued when I stumbled upon this recipe as a specialty of the region. It jumped out at me like a jack-in-the-box screaming: test me please! See, I inherited a deep taste for sardines. A funny ingredient to dig, I know. Pretty basic and not much glamour about them…

Oh, but it’s the lightly salty, oily, peculiar rich taste and kind of pasty consistency to them that I grew to appreciate from two men I love. My father, whose favorite torta – and he is a heck of a torta maker – has sardines, avocado, onion and pickled jalapeños. And my grandfather, my father’s father, who was an angel that happened to land on earth – ok, fine, he was a Polish man fleeing persecution, who found refuge in Mexico when he was merely a teen – loved eating sardines on saltine crackers smeared with butter.

Pati with her Grandpa
With my grandfather, like 25 years ago…

Turns out, you really only need basic ingredients to make these empanadas. And they end up gorgeous, inside and out.

Here is a bird’s eye view of the empanadas.

sardine empanadas

You know why they have such deep and shimmering golden brown color on the top? Because in Aguascalientes, they brush the empanadas with only the egg yolks. No worries, you won’t waste the egg whites. You can use them to help seal the inner seam of the empanada.

As far as the filling: Sardines are combined with mushrooms that are seasoned and browned over softened onions and mixed with mushy cooked tomatoes, olives and pickled jalapeños. The sardine flavor is nuanced by the combination, yet not hidden. It is embellished in a way.

The mushrooms are a non-competing companion that makes the filling more substantial and adds a nice soft bite. The puff pastry becomes the perfect wrapping to envelop the savory, lightly spicy, teasingly rich mixture.

Ok, here is an inside photo, so you can see the chunky and moist filling too.

sardine empanadas

You can make them for lunch or dinner and eat them with a green salad on the side. You can also make them mini and have them as appetizers. You can eat them hot, right out of the oven. Or you can eat them at room temperature. And you know I am going to say this: they are actually also delicious cold.

The best thing is, if you have leftovers, everyone will have a delicious to-go lunch for school or work.

Sardine Empanadas
Print Recipe
4.34 from 12 votes

Sardine Empanadas

Sardine Empanadas from Pati's Mexican Table, Season 7, Episode 7 "La Paz: The Heart of Baja Sur"
Prep Time30 minutes
Cook Time30 minutes
Total Time1 hour
Course: Snack
Cuisine: Mexican
Keyword: Empanadas, fish, pati’s mexican table, sardines
Servings: 20 Empanadas
Author: Pati Jinich

Ingredients

  • 1 pound frozen puff pastry
  • 2 tablespoons vegetable oil
  • 1/2 cup white onion chopped
  • 2 cups white button mushrooms cleaned and diced 8 ounces
  • 1/2 teaspoon kosher or sea salt
  • 1/4 teaspoon ground black pepper
  • 1 cup ripe Roma tomatoes chopped about 1/2 pound
  • 1/2 cup manzanilla olives stuffed with pimientos chopped
  • 1/4 cup pickled jalapeños chopped
  • 2 cans (3-4 ounces) of sardines in oil broken into chunks
  • 2 eggs separated
  • All-purpose flour for rolling out puff pastry

Instructions

  • Remove the puff pastry from the freezer and let it thaw on your countertop.
  • Heat the oil in a medium casserole or a sauté pan set over medium heat. Once hot, cook the onion for 3 to 4 minutes until it softens. Incorporate the mushrooms, sprinkle in the salt and pepper, and cook for another 5 to 6 minutes, until the juices come out and they begin to dry out, and the mushrooms start browning a bit. Add the tomatoes and cook for 6 to 7 minutes, until they start breaking down and becoming mushy and soft. Add the olives and jalapeños, mix well, and cook for another minute.
  • Remove from the heat, add the sardines, combine well and set aside.
  • Separate the egg whites from the egg yolks in two small bowls. Use a fork or a whisk to beat them separately.
  • Place the racks in the lower and upper thirds of the oven. Preheat the oven to 400 degrees Fahrenheit. Line a couple of baking sheets with parchment paper.
  • Lightly sprinkle flour on the countertop and rub some on the rolling pin. Roll out the puff pastry to thinner than 1/4-inch and use a 4-to-5-inch round mold to cut circles. Add a generous tablespoon of the sardine filling in the middle of each round. Brush a bit of the beaten egg white around the edges each round. Fold each one into a half moon shape and press the sides.
  • Using a fork, press the side of the empanada to help seal and decorate it. Brush the egg yolk on top of the empanadas and place them on the prepared baking sheets. Place the empanadas in the oven. Bake anywhere from 20 to 22 minutes, until the tops of the empanadas have puffed and are a shiny golden brown.

Notes

Empanadas de Sardina 

Twice Spiced Deviled Eggs

I don’t know if I have shared this with you before, but I am obsessed with eggs. I just love them. In fact, many of my favorite childhood memories have eggs in them.

Like sitting next to my mom before she left for work, so many mornings, as she ate her usual scrambled eggs with ham, always cooked until tender, along with a piece of black toast with a thin spread of honey.

Like when my dad taught me how to crack a soft boiled egg, using a coffee spoon in such a way as to impeccably remove the top, revealing the still runny yolk that seemed to be waiting for soft butter and a sprinkle of salt to be mixed in. Then, he rushed to dip a piece of toast in the hot yolk and gave me the first bite.

Like the very first time my mom obliged my plea to let me cook and commissioned me to make the Sunday brunch scrambled eggs. She gave me the eggs. The bowl. The pan. The butter. The salt that she took from the spice cupboard and left it open. Temptation was too hard to resist, and I added more than a dash of every bottle in it. Bright red paprika, beautiful star anise, deep yellow cumin, fragrant crumbled cinnamon, and on and on… You know how those eggs turned out. Since then, I have tried to tame my enthusiasm when cooking.

I find eggs to be one of the most fascinating ingredients. They are affordable. They are beautiful. They are accessible. They are versatile, too, and can be eaten for any meal of the day, any time of day, taken for a sweet or savory spin, taking center stage or as a crucial ingredient. To boot, they are, along with milk and seeds, amongst the most nutritious foods on earth. Oh, and if that wasn’t enough, they can be used for so many purposes aside from being eaten as eggs: they can act as a binding ingredient (think meatballs), as a thickener (such as in chocolate mousse), as a volume booster (like in a soufflé!) or as the medium that makes other ingredients shine (like in a frittata or omelet).

It is no surprise then that I have a hard time starting my day without eggs. My most common quick breakfast is, like my mom, scrambled eggs with ham. Followed by Huevos a la Mexicana, sometimes straight and sometimes adding crunchy green beans, slightly sweet diced zucchini or thinly sliced woody mushrooms. I can’t resist huevos ahogados or drunken in one or another salsa, like salsa verde, martajada or in a chunky tomato and poblano rajas salsa. Enchiladas stuffed with one or another kind of scrambled eggs for a sumptuous brunch are king for when you have guests. Any form eggs can take for a morning concoction, such as breakfast crepes, tortas, sandwiches or tacos, I will eat them up.

OK: getting to the point of this post. I love eggs so very much that the fact that there is something such as deviled eggs makes me beyond ecstatic. One of the best ways to honor the egg that can be eaten post breakfast and is so pretty, tasty and a classic finger food.

If there are deviled eggs on a menu, you know I am ordering some. If there is a tray being passed around at a cocktail hour or party, you know who that crazy woman is trailing the deviled egg tray.

Here is my version: I called them Twice Spiced, as they benefit from two of my favorite spicy Mexican condiments: Chipotles in adobo sauce and pickled jalapeños. You know you have nowhere else to go than to the kitchen to whip some up.

Print Recipe
4.15 from 7 votes

Twice Spiced Deviled Eggs

My version of deviled eggs: I called them Twice Spiced, as they benefit from two of my favorite spicy Mexican condiments - Chipotles in adobo sauce and pickled jalapeños.
Prep Time15 minutes
Cook Time10 minutes
Course: Appetizer, Hors d'oeuvre, Snack
Cuisine: American, Mexican
Keyword: bacon, Chipotle, Deviled, Eggs, jalapeno
Servings: 16 halves
Author: Pati Jinich

Ingredients

  • 8 eggs
  • 2 tablespoons mayonnaise
  • 2 tablespoons Mexican crema
  • 1/2 teaspoon dijon mustard
  • 2 teaspoons sauce from chipotles in adobo sauce
  • 2 teaspoons pickling vinegar from pickled jalapeños
  • 2 teaspoons white vinegar
  • 1 tablespoon unsalted butter
  • 1 scallion white and light green parts sliced
  • 1/2 teaspoon sugar
  • 3 bacon slices cooked until crisp and finely minced
  • Pickled jalapeños sliced or diced, for garnish

Instructions

  • Place the eggs in a saucepan and cover them with water by a couple inches. Bring to a boil over medium high heat. Let the water boil for a minute, turn off the heat, cover and let the eggs steep for 9 to 10 minutes. Remove the eggs from the water and let cool. Once they are cool enough to handle, peel and place on a chopping board. Using a sharp knife, slice each egg in half vertically.
  • With a spoon, remove the yolks and place them in a food processor. Along with the yolks, add the mayonnaise, crema, mustard, chipotles in adobo sauce, pickling vinegar from pickled jalapeños, white vinegar, unsalted butter, scallion and sugar. Process until completely smooth and fluffy. Give it a full minute of your time.
  • Place the egg yolk mixture in a pastry tube or use a plastic or piping bag. I like to use the star tip, but you can use a tip with whichever shape you like - you can also use a teaspoon. Add some of the minced bacon at the bottom of each white half. Pipe or spoon the egg yolk mixture on top. Garnish with the jalapeños and serve.

Notes

Huevos Rellenos Doblemente Sazonados

Sweet Potato and Black Bean Tamales

Just when you think you completely understand something, life proves you wrong. Does that happen to you? It happens to me all the time, especially when it comes to food.

A cuisine as rich and diverse as Mexico’s needs for us to make an effort to preserve what has been passed on. But, you also have to keep an open mind to new ideas that may in turn become classics.

In that sense, I find the kitchen to be one of the most humbling places because food is always growing and evolving and taking you along, if you let it. You get to constantly learn, apply what you learn, share it, and then start all over again.

Take tamales for example. I have made countless kinds from all regions of Mexico and from different historical times. I have wrapped them in dried and fresh corn husks, banana leaves, hoja santa leaves…practically any and every edible leaf I know of in Mexico. I have learned to make them with raw masa, with masa colada, with rice flour masa, with normal wheat flour masa and even with no masa! I have done savory and sweet, with fillings that range from picadillo to marzipan and beyond. You name it, I have probably tried it.

I thought I had the tamales from the city of Oaxaca nailed down. Then, a few months ago, as we were filming Season 6 of Pati’s Mexican Table there, I was amazed to try a new tamal at Criollo, Chef Luis Arellano’s new restaurant. Its masa was made with pumpkin and filled with sweet refried beans laced with piloncillo. The only way to describe it is brilliant!

Back in my kitchen, I was inspired by the possibility of not only flavoring the masa, but enriching it with a starchy vegetable to lend taste, consistency and color. I came up with this sweet potato tamal filled with savory refried beans.

When the time came to test and play around with it, I was reminded of how important it is to appreciate the lessons that have stood the test of time. In the case of tamales: to review our technique for steaming, for assembling, for achieving a good masa. So we can still call our new creation something worthy of the name TAMAL.

Given the addition of the starchy sweet potatoes, I ended up having to test the idea quite a few times to achieve a very fluffy, yet tasty masa.

In the end, I am very happy with this one! The masa is puffy and moist, and its barely sweet flavor contrasts nicely with the savory, earthy taste of the refried beans. I also took the liberty of drizzling them with crema and topping with salty queso fresco.

Pati Jinich sweet potato black bean tamales
Print Recipe
4.41 from 5 votes

Sweet Potato and Black Bean Tamales

I thought I had the tamales from the city of Oaxaca nailed down. Then, a few months ago, as we were filming Season 6 of Pati’s Mexican Table there, I was amazed to try a new tamal at Criollo, Chef Luis Arellano’s new restaurant. Its masa was made with pumpkin and filled with sweet refried beans laced with piloncillo. The only way to describe it is brilliant! Back in my kitchen, I was inspired by the possibility of not only flavoring the masa, but enriching it with a starchy vegetable to lend taste, consistency and color. I came up with this sweet potato tamal filled with savory refried beans.
Prep Time1 hour 30 minutes
Cook Time55 minutes
Total Time2 hours 25 minutes
Course: Main Course
Cuisine: Mexican
Keyword: black beans, pati's mexican table, queso fresco, sweet potato, Tamales
Servings: 12 tamales
Author: Pati Jinich

Ingredients

  • 2 pounds sweet potatoes
  • 1 cup lard or vegetable shortening
  • 1/2 teaspoon kosher or coarse sea salt
  • 1 teaspoon baking powder
  • 1 tablespoon brown sugar
  • 1 2/3 cups corn masa flour or masa harina (such as Maseca)
  • 1/2 cup chicken or vegetable broth
  • 24 dried corn husks
  • 2 cups refried beans
  • 1 cup Mexican crema
  • 1 cup queso fresco crumbled

Instructions

  • Preheat oven to 450 degrees Fahrenheit.
  • Wrap the sweet potatoes in aluminum foil. Bake for 45 to 50 minutes or until completely cooked and soft. Remove from the oven. When cool enough to handle, cut open and scoop out the cooked pulp into a bowl. Set aside to cool.

To make the tamal masa:

  • Place the lard or vegetable shortening and 1/2 teaspoon of salt into a mixer, and beat over medium speed until very light, about 1 minute. Reduce speed to low, add baking powder and sugar, and take turns adding the corn masa flour and the broth. Raise speed back to medium and continue beating another 6 to 7 minutes, until the dough is homogeneous. In batches, add the cooled sweet potato pulp and continue beating for another 5 to 6 minutes, until the masa looks fluffed up.

To assemble the tamales:

  • Soak the dried corn husks in hot water for a couple minutes, or until they are pliable, and drain. Lay out a corn husk with the tapering end towards you. Spread about 1/3 cup masa into about a 2” to 3” square, the layer should be about 1/4” thick, leaving a border of at least 1/2” on the sides. Place about 2 teaspoons of refried beans in the middle of the masa square.
  • Pick up the two long sides of the corn husk and bring them together (you will see how the masa starts to swaddle the filling) and fold them to one side, rolling them in same direction around tamal. Fold up the empty section of the husk with the tapering end, from the bottom up. This will form a closed bottom and the top will be left open. Gently squeeze from the bottom to the top to even the filling out without pressing to hard. As you assemble all the tamales, place them as upright as you can in a container.

To prepare the tamalera or steamer:

  • Place water in the bottom pan of a steamer, so that water is under the steamer basket or rack, and bring it to a simmer. Line the steamer with one or two layers of soaked corn husks.

To cook the tamales:

  • When you have all tamales ready, place them as vertically as you can, into the prepared steamer with the open end on top. If there is space left in the steamer, tuck in some corn husks, so the tamales won’t dance around. Cover with more corn husks, and steam covered with a lid for 55 minutes to an hour. You know the tamales are ready when they come easily free from the husks. They will still be moist, and as they are released from the husks – you will see the moisture, like when you remove good moist muffins from their paper baking cups.
  • Finished tamales will stay warm for about 2 hours in the steamer. They can be made ahead several days before and stored in refrigerator, well wrapped. They can also be frozen for months. In either case, reheat in a steamer. For refrigerated tamales, it will take about 20 minutes and about 45 minutes for frozen tamales.
  • You can serve with a spoonful of Mexican crema and crumbled queso fresco on top.

Notes

Tamales de Camote con Frijol

Bacon Cheese Dogs with Avocado Relish

By now it is common knowledge that Mexico and Mexicans love to taco anything and everything. So much so that a few years ago, when the hashtag #TacoTuesday became a thing, I would laugh when people asked me if I was doing taco night on Tuesdays at home.

“We practically taco every night,” I’d respond. It is a fact: I always have a comal handy to warm corn tortillas just in case we get the urge to tuck anything into them. But what many people may not know is how much we love our hot dogs.

Ok, yes, hot dogs are originally yours, America. But we have found a way to make them our very own, too, and we’d love for you to add them to your repertoire, if you are so inclined.

Take it as a compliment. We love hot dogs so much that they have also become part of our street food. This isn’t something new. Not even from a decade ago. Hot dogs have existed in Mexico for at least a century. So right next to a taco stand, you are likely to run into a hot dog stand. I have told you the story of the Galán hot dog my sisters and I used to eat that drew me to tears last time we were filming in Mexico.

Yet, there are so many more ways to Mex up your hot dogs. At home, our latest favorite is one we call Bacon Cheese Dogs with Avocado Relish. It has a hot dog wrapped in bacon. It is then browned until super crisp. Then sliced in half, stuffed with queso Oaxaca, put back in the pan with all that flavorful bacon fat, cheese side down, until the cheese completely melts and the corners crisp up. That hot link sits on a layer of horseradish mayo in a toasted bun and is garnished with a quick avocado relish: diced tart tomatillos, soft buttery avocado, grassy cilantro and the irresistible bite of pickled jalapeños.

Plating Bacon Cheese Hot Dogs with Avocado Pickle

Print Recipe
4 from 6 votes

Bacon Cheese Dogs with Avocado Relish

Bacon Cheese Dogs with Avocado Relish recipe from Pati's Mexican Table Season 6, Episode 12 "Cheesy"
Course: Main Course, Snack
Cuisine: American, Mexican
Keyword: Avocado, bacon, cheese, Hot Dog, Mexican, Oaxaca, Pickled Jalapeños, queso, relish
Servings: 2 hot dogs
Author: Pati Jinich

Ingredients

For the avocado relish:

  • 1 large (about 3 ounces) tomatillo husked, rinsed, cut into small dice
  • 4 scallions white and light green parts thinly sliced
  • 1/4 cup cilantro leaves and upper parts of stems chopped
  • 3 pickled whole jalapeños chopped, plus 2 sliced for garnish
  • 1 tablespoon brine from pickled jalapeños
  • 1 tablespoon freshly squeezed lime juice
  • 1 tablespoon olive oil
  • 1/2 teaspoon kosher or coarse sea salt or to taste
  • 1 ripe avocado halved, pitted, cut into small dice
  • 1/4 cup mayonnaise
  • 1 tablespoon prepared horseradish or more to taste

For the hot dogs:

  • 2 slices bacon
  • 2 hot dogs
  • 2 cups Oaxaca cheese shredded
  • 2 hot dog buns

Instructions

To make the avocado relish:

  • In a medium bowl, add the tomatillo, scallions, cilantro, chopped pickled jalapeños, pickled jalapeño brine, lime juice, olive oil, and salt. Mix well. Incorporate the avocado and toss gently with a spoon to combine. Set aside.
  • In a small bowl, combine the mayonnaise with the prepared horseradish. Set aside.
  • On a cutting board, roll one slice of bacon around each sausage link. Place the tip of the hot dog over one end of the bacon slice, then roll the sausage around on the diagonal so that the bacon wraps around it and covers it entirely.

To make the hot dogs:

  • Heat a large skillet or griddle over medium heat. Add the bacon-wrapped hot dogs and cook, turning every couple minutes, until crisped and browned on all sides. Remove from the heat. When cool enough to handle, cut a slit lengthwise down the middle of each, without cutting completely through.
  • Raise heat to medium-high. Add two piles of about 1 cup shredded cheese onto the skillet and top each with a hotdog, slit-side down. Cook for 2 to 3 minutes until the cheese has completely melted and browned creating a cheese crust.
  • Meanwhile, open the buns but try not to separate the tops from the bottoms. Lightly toast the buns in the toaster or griddle. Spread a generous tablespoon of the horseradish mayonnaise onto each bun.
  • When bacon cheese hot links are ready, using a spatula, flip onto the bun, cheese side up. Top with a generous amount of the avocado relish, garnish with the pickled jalapeño slices and serve.

Notes

Hot dogs con Tocino, Queso y Aderezo de Aguacate

Pomegranate Short Rib Tacos

This meal makes for a beast of a taco. Well, quite a few beastly tacos.

Melt in your mouth chunks of short ribs, braised in wine and pomegranate and topped with a scoop of a one of a kind guacamole, get tucked into warm corn tortillas. The guacamole has a mashed ripe avocado base seasoned with fresh ginger, jalapeño, shallots and a dash of lime juice, then tossed with salty chunks of queso fresco and sweet and juicy pomegranate seeds. You can garnish the final thing with chopped fresh mint.

This can practically be your whole meal! It makes me really happy to make it on cold winter nights, when we want something filling, satisfying, luscious, packed with flavor, and fun.

I cooked up this recipe in an attempt to use pomegranate seeds in a different way than I was used to and out of a bit of frustration. See, in Mexico, pomegranate is the crown jewel of Chiles en Nogada. The signature dish of Mexico’s Independence Day celebrations in September. If you are a Mexican and you see a pomegranate, I bet the first thing you think of is that dish, which bears all the colors of the Mexican flag. The pomegranates must be there.

Funny how things are. I love making Chiles en Nogada here in the states. Yet, pomegranate season in Mexico is July to October and here in Washington, DC, I have struggle to find pomegranates in September. In DC, pomegranate is at its peak way past September, not until very into the early winter months. So, I feel a little ridiculous making Chiles en Nogada which most absolutely, definitely, without a doubt, NEED to be made in September.

But I absolutely adore pomegranates. Everything about them. Their shape. Their hard skin. How challenging it can be to get the seeds out. How your fingers and nails remain red long after you have eaten them. Mostly, their sharp and sparkly tart and sweet flavor. Hence… I came up with this recipe to expand my pomegranate horizons during the time that I can easily find them. It turns out, I expanded my taco, my guacamole and dinner horizons as well.

Here you go, if you are a meat eater, this taco is a must. If you are not, make the guacamole and eat it with chips.

pomegranate short ribs
Print Recipe
5 from 5 votes

Pomegranate Short Ribs and Queso Fresco Guacamole Tacos

This meal makes for a beast of a taco. Well, quite a few beastly tacos. Melt in your mouth chunks of short ribs, braised in wine and pomegranate and topped with a scoop of a one of a kind guacamole, get tucked into warm corn tortillas. The guacamole has a mashed ripe avocado base seasoned with fresh ginger, jalapeño, shallots and a dash of lime juice, then tossed with salty chunks of queso fresco and sweet and juicy pomegranate seeds. You can garnish the final thing with chopped fresh mint.
Prep Time15 minutes
Cook Time2 hours 15 minutes
Course: Main Course
Cuisine: Mexican
Keyword: beef, corn tortillas, ginger, jalapeno, lime, mint, onion, pati's mexican table, pomegranate, red wine, rosemary, short ribs, tacos
Servings: 6 servings
Author: Pati Jinich

Ingredients

  • 2 pounds country-style boneless beef short ribs
  • 1 teaspoon kosher or coarse sea salt divided, or to taste
  • Freshly ground pepper to taste
  • 4 tablespoons canola or safflower oil divided
  • 1 cup white onion finely chopped
  • 4 garlic cloves finely chopped
  • 2 cups pomegranate juice
  • 1 1/2 cups red wine
  • 1 teaspoon dried rosemary crushed
  • 1 tablespoon shallot finely chopped
  • 1 tablespoon fresh ginger finely chopped
  • 1 whole jalapeño or to taste, finely chopped, stemmed and seeded optional
  • 1 tablespoon freshly squeezed lime juice
  • 1 tablespoon olive oil
  • 3 large ripe avocados halved, pitted, meat scooped out and diced
  • 1/2 cup queso fresco crumbled or diced, divided
  • 1/2 cup pomegranate seeds divided
  • corn tortillas
  • 1 tablespoon fresh mint coarsely chopped, to garnish

Instructions

  • Preheat oven to 350 degrees Fahrenheit.
  • Season the short ribs with 1/2 teaspoon of the salt and pepper to taste.
  • Heat 3 tablespoons oil in an ovenproof casserole over medium heat. Once hot, add the meat and cook until browned on each side, about 7 to 8 minutes per side. If necessary, do it in batches. Remove the meat from the casserole and place in a bowl.
  • Add the remaining tablespoon of oil to the casserole and cook the onion, stirring occasionally, until completely softened, about 4 to 5 minutes. Add the garlic and cook for another minute, until fragrant and lightly browned. Pour in the pomegranate juice and wine, stir well, scraping the bottom of the pan to incorporate all the browned bits.
  • Return the meat to the casserole, add the crushed rosemary, and let it come to a simmer. Once it does, cover the casserole with its lid and place in the oven for 1 1/2 hours, until the meat is completely tender.
  • Remove the lid from the casserole, and leave in the oven for another 1/2 hour, or until the meat comes falls apart when pulled with a fork, and the liquid has thickened considerably. Remove from the oven. Using a couple forks, shred the meat finely into small bite size chunks and let it sit in the sauce.
  • In a medium bowl, combine the shallots, ginger and jalapeño with the lime juice, olive oil and remaining 1/2 teaspoon salt. Incorporate the avocado and gently mash with a fork until well combined. Add half of the cheese and pomegranate seeds and toss well. Reserve.
  • Heat the corn tortillas on a comal, griddle or skillet set over medium heat, until completely heated through and pliable.
  • Assemble tacos with the guacamole and the braised ribs, garnish with the remaining cheese, pomegranate seeds and chopped mint.

Notes

Tacos de Costillitas a la Granada y Guacamole con Queso Fresco

Tamales Coloraditos

Tamales are practically required on so many December holidays. Take Posadas. And Christmas. Not to mention New Year’s. Wait, of course, that spills over to January with Día de Reyes. Then it continues in February for Día de la Candelaria

There’s also any morning after a big Mexican wedding… and all Mexican weddings are big! I could go on with every month of the year, but tamales are especially craved in December.

Of course, tamales are also everyday food for Mexicans. All sorts of tamales are found daily in lots of places, from markets, to food stands, to restaurants. Why then, if they can be eaten everyday, is there that crucial need for having tamales in December?

Well, I do not know. But what I can say is that I can eat tamales every day of the year and then feel the desperate need to have them for Christmas. To the point that it can be a pretty sad Christmas if tamales aren’t there.

Since the tamal love is spreading beyond Mexico, let me give you the recipe for a tamal I am pretty sure you haven’t tried. Unless you are Norteño, from the Mexican north.

The tamal coloradito, which translates to “infused with color,” takes its name from the filling of meat cooked in a mole sauce by the same name, coloradito. It has an intense color and a deep, rich, complex taste. It is made with ancho and guajillo chiles, tomatoes, onion, garlic, cinnamon, cumin and cloves. Then it coats the meat and simmers with olives, almonds and raisins, resulting in a teasingly sweet/spicy, savory and crunchy mix. The full-blown exotic flavors of the filling contrast beautifully with the mild, fluffy tamal dough.

It seems to me that this tamal is particularly festive because, aside from tamales screaming out for celebration on their own, even with no filling, this one is filled with quite a stunner of a mole sauce. And moles are cause for celebration, too! Pair the two into one bite, and you have a happy crowd.

tamales coloraditos
Print Recipe
4.60 from 5 votes

Tamales Coloraditos

The tamal coloradito, which translates to "infused with color," takes its name from the filling of meat cooked in a mole sauce by the same name, coloradito. It has an intense color and a deep, rich, complex taste. It is made with ancho and guajillo chiles, tomatoes, onion, garlic, cinnamon, cumin and cloves. Then it coats the meat and simmers with olives, almonds and raisins, resulting in a teasingly sweet/spicy, savory and crunchy mix. The full-blown exotic flavors of the filling contrast beautifully with the mild, fluffy tamal dough.
Prep Time1 hour
Cook Time50 minutes
Total Time1 hour 50 minutes
Course: Appetizer, Main Course
Cuisine: Mexican
Keyword: Ancho, Coloraditos, Guajillo, Mole, pork, Tamales, Tomato, Tomatoes
Servings: 25 tamales
Author: Pati Jinich

Ingredients

For the tamal dough or masa:

  • 1 cup lard vegetable shortening, or seasoned oil*
  • 1/2 teaspoon kosher or coarse sea salt or to taste
  • 3 1/2 cups homemade chicken broth or store bought, divided, more as needed
  • 1 1/2 teaspoons baking powder
  • 1 pound (about 3 1/4 cups) instant corn masa flour preferably for tamales

For the filling:

  • 3 guajillo chiles stemmed, halved and seeded
  • 3 ancho chiles stemmed, halved and seeded
  • 1 ripe Roma tomato
  • 1/2 teaspoon dried oregano preferably Mexican
  • 2 whole cloves
  • 1/2 teaspoon ground ceylon cinnamon or canela
  • Pinch cumin
  • 1 tablespoon white distilled vinegar
  • 2 tablespoons vegetable oil
  • 1/3 cup white onion chopped
  • 2 cloves garlic finely chopped
  • 1 pound pork tenderloin diced **
  • 3/4 teaspoon kosher or coarse sea salt or to taste
  • Freshly ground pepper to taste
  • 1 1/2 cups homemade chicken broth or store bought
  • 1/3 cup raisins
  • 1/3 cup slivered almonds
  • 1/3 cup manzanilla olives stuffed with pimientos chopped
  • 1/2 teaspoon brown sugar
  • 25 dried corn husks

Instructions

To make the tamal dough or masa:

  • Place the lard or vegetable shortening in a mixer and beat until very light, about 1 minute. Add 1/2 teaspoon salt and a tablespoon of the broth and continue to beat until it is white and fluffy, about 2 more minutes. Add the baking powder and beat in, then take turns adding the instant corn masa and the broth in 3 or 4 additions. Continue beating for about 10 minutes at medium speed, until the dough is homogeneous and very fluffy and aerated.
  • To test to see if the tamal masa is ready, drop 1/2 teaspoon into a cup of cold water. It should float. If it does not, beat for an additional 4 or 5 minutes and do the test again.

To make the filling:

  • Heat a comal or skillet over medium heat and toast the guajillo and ancho chiles for about 1 minute, flipping them over a few times, until they become more pliable, lightly toasted, fragrant and their inner skin turns opaque. Transfer to a medium saucepan. Add the tomato, cover with water and bring to a simmer over medium heat. Simmer for 10 to 12 minutes, or until the tomato is very soft and the chiles are fully hydrated, plumped up and soft.
  • Place the chiles, tomato and 1/2 cup of the chile simmering water in a blender jar. Add the oregano, whole cloves, cinnamon, cumin and vinegar, and puree until smooth.
  • Heat the oil over medium high heat in a large, deep skillet. Add the onion and cook, stirring occasionally, until tender and the edges begin to brown, about 3 to 4 minutes. Add the garlic and cook, stirring, until fragrant, about 1 minute. Add the meat, season with salt and pepper, and cook, stirring occasionally, until lightly browned, about 8 to 10 minutes.
  • Reduce heat to medium, pour the chile puree over the meat, and stir in the broth. Add the raisins, almonds, olives and brown sugar, stir together, reduce the heat to medium low, cover and cook for 12 to 15 minutes, stirring occasionally. The mixture should cook down and have the consistency of chile con carne.

To assemble the tamales:

  • Soak the dried corn husks in hot water for a couple minutes, or until they are pliable, and drain. Lay out a corn husk with the tapering end towards you. Spread about 3 tablespoons of masa into about a 2 to 3-inch square, the layer should be about 1/4-inch thick, leaving a border of at least 1/2-inch on the sides. Place 1 tablespoon of filling in the middle of the masa square.
  • Pick up the two long sides of the corn husk and bring them together (you will see how the masa starts to swaddle the filling) and fold the folded sides to one side, rolling them in the same direction around tamal. Fold up the empty section of the husk, with the tapering end, from the bottom up. This will form a closed bottom and the top will be left open.
  • Assemble all the tamales and place them as vertically as you can in a container.

To prepare the tamalera or steamer:

  • Place water in the bottom pan of a steamer (so that water is under the steamer) and bring it to a simmer. Line the steamer with one or two layers of soaked corn husks.

To cook the tamales:

  • When you have all tamales ready, place them, again as vertically as you can, into the prepared steamer with the open end on top. If there is space left in the steamer, tuck in some corn husks, so the tamales won’t dance around. Cover with more corn husks, and steam covered with a lid for 50 minutes to an hour. You know the tamales are ready when they come easily free from the husks. They will still be moist, and as they are released from the husks, you will see the moisture, like when you remove good moist muffins from their paper baking cups.
  • Finished tamales will stay warm for about 2 hours in the steamer. They can be made ahead several days before and stored in the refrigerator, well wrapped. They can also be frozen for months. In either case, reheat in a steamer. For refrigerated tamales, it will take about 20 minutes and about 45 minutes for frozen tamales.
  • * Note: To make seasoned oil, in a medium saucepan, heat 1 cup vegetable oil over medium heat, add a thick slice of onion and 4 garlic cloves. Cook for 15 minutes until completely browned. Remove onion and garlic before using the oil.
  • ** Note: You can substitute the pork for any other meat of your choice, you can also combine different kinds of meat, like ground beef and diced pork, like my mother does.

Mexican Dreamboat Hot Dogs

The first time (there’s been two…) my PBS TV series director saw me cry, it was over a Mexican hot dog.

We were filming for Season 3 in Morelia, the capital of the state of Michoacán. We had heard from many locals that the best Mexican-style hot dogs in the city were the ones at Richard’s.

You shouldn’t be surprised about Mexican-style hot dogs in the Mexican culinary repertoire. We love our hot dogs! In every city or town in Mexico, no matter how small or big, a few feet away from the top-selling taco stand, you are likely to find a top-selling hot dog stand. And once you try one, I bet that’s how you will want to prepare them in the future.

So anyway, we headed to Richard’s to meet him, film how he makes his hot dogs and try them. When we travel, I can’t help but share the food I love with my production team. I ask the sound guy, Dave, to take a bite, hoping he understands why I moan so much… I ask the camera guy, James, to take a bite too, so he can see why I keep on insisting that things are this or that good… The same goes for the director, Dan, the producer, Allie, and, well, pretty much everyone on board. If I taste something magnificent, I really want to share it with my team, mostly because I want them to experience it along with me. But this time it was different.

We got to Richard’s, he was super friendly, and he made an insane hot dog. Different from usual, I was not sharing a single bite with anyone and was very quiet. Not my normal self for sure. To the point that the director started asking, “Hey Pati, are you ok…?” And “why aren’t you showing it to camera,” and “…do you want to give James or Dave a bite?” I was zoned out. I was just shaking my head and eating the hot dog, so very slowly.

See, Mexican hot dogs and I go a long way back, as most Mexicans I guess. But in my case, rewind like 30 years ago. I was a girl, and my oldest sister started driving my sisters and me to school. Enjoying our newly found freedom, we started stopping at El Galán hot dog stand on our way back home. Though our intention was to have just one, it ended up being at least two or three. And, con todo, with all the trimmings.

El Galán translates to dreamboat or a hunk, which he was not, but his hot dogs were to die for. He would drizzle some oil on his hot plancha, or griddle, and throw on some chopped white onions, pickled jalapeños, and tomatoes. Then, as they sizzled, he’d squirt on some yellow mustard and ketchup with a secret sweet ingredient (we later found out it was orange soda!) and mix everything up. Onto that delicious mess, he threw a slice of American cheese and, once it melted, he piled everything onto a soft bun and topped it with a steaming turkey hot dog wrapped in crisp bacon. If you wanted your hot dog extra especial, a couple more crispy bacon slices would also show up at the party.

Then we would head home. Once there, we weren’t that hungry anymore. Once my dad figured out our shenanigans, he took out a $100 MN pesos bill, gave it to my oldest sister and announced that since we weren’t eating my mom’s planned home made meals, we were to eat at El Galán every day for that month. We were delighted to hear that, though we really tried not to show it… Now, I know what it feels like to be a parent that takes a disciplining measure that does nothing but fail, and then doesn’t know how to take it back.

In any case, we soon stopped going every day and left that hot dog rendez vous for Fridays, not to make my mom sad. It was a truly special time in our lives. And I am telling you those hot dogs were INSANE.

Then life happened. Then our parents divorced. Then we grew up.

Fast forward 30 years and I am eating Richard’s hot dog in Morelia. After a few minutes later, I snapped out of it, and we started filming again. I showed my hot dog to camera and ate some and shared most.  As we wrapped the day up, I asked Richard for an extra hot dog. I walked to the van, sat in the back, closed the door, and ate it by myself. A few minutes later, the director opened the door to find me weeping. When I saw his concerned look, I just said, “it is nothing really, it was just the hot dog.”

Here is the recipe as good as I remember it, minus the orange soda which I find to be really not necessary. Do try it at home!

p.s. Oh… pictured to the left of the dreamboat hot dog is a hot dog del mercado or market style hot dog, which is also phenomenal, and it is included in my new cookbook Mexican Today.

Mexican Dreamboat Hot Dog with bacon and cheddar by Pati Jinich
Print Recipe
4.50 from 4 votes

Mexican Dreamboat Hot Dogs

You shouldn’t be surprised about Mexican-style hot dogs in the Mexican culinary repertoire. We love our hot dogs! In every city or town in Mexico, no matter how small or big, a few feet away from the top-selling taco stand, you are likely to find a top-selling hot dog stand. And once you try one, I bet that’s how you will want to prepare them in the future.
Prep Time15 minutes
Cook Time15 minutes
Course: Main Course, Snack
Cuisine: American, Mexican
Keyword: bacon, cheddar, cheese, Hot Dog, Pickled Jalapeños, Turkey Hot Dog
Servings: 6 to 8 hot dogs
Author: Pati Jinich

Ingredients

  • 6 to 8 slices bacon
  • 6 to 8 turkey hot dogs
  • 2 tablespoons canola or safflower oil
  • 1 white onion chopped
  • 1 tomato seeded and chopped
  • 1/4 cup chopped pickled jalapeños or to taste
  • 1 cup ketchup
  • 1/4 cup yellow mustard
  • 6 to 8 hot dog buns
  • 6 to 8 thick slices cheddar cheese

Instructions

  • On a cutting board, roll one slice of bacon around each hot dog. Place the tip of the hot dog over one end of the bacon slice, then roll the sausage around and around on the diagonal so that the bacon wraps around it and covers it entirely. If you get to the end of the hot dog and there is still some bacon left, roll back in the other direction until the whole strip of bacon is rolled around the hot dog.
  • Heat a large skillet over medium heat. Add the bacon-wrapped hot dogs and cook, turning every 2 to 3 minutes, until crisped and browned on all sides. Remove from the heat.
  • To make the salsa especial, heat the oil in a medium skillet over medi-um heat. Add the onion and cook, stirring occasionally, until it is tender and the edges are beginning to brown, 5 to 6 minutes. Stir in the tomato and cook for another minute or so, until the tomato has softened a bit. Stir in the jalapeños, ketchup, and mustard and cook just until heated through, about 1 minute. Remove from the heat.
  • Preheat the oven or a toaster oven to 350°F.
  • Open the buns but try not to separate the tops from the bottoms. Top the bottom or both halves (to taste) with cheese (break up the cheese if desired) and place on a baking sheet. Bake for 2 to 3 minutes, until the cheese has melted and the buns are lightly toasted.
  • Place a bacon-wrapped hot dog on the bottom half of each bun and top with a generous amount of salsa especial. Cover with the top halves and serve right away.

Notes

Hot Dogs del Galán

To Die For Ceviche

My present career began with ceviche.

After years as an academic, with two degrees and many policy research papers under my belt, with a husband, two kids and one on the way, I resigned from a prestigious think tank to walk a completely uncharted path.

I had been professionally frustrated for over a year and just continued to get involved in more projects in the office thinking I just had to work harder.

What triggered my career change was this: I had been asked to write a research paper comparing the democratic transitions of Mexico and Peru. Yet something was really off with me. Instead of doing my research on the political processes and crisis resolution tactics, I felt myself pulled to research the differences between Mexican and Peruvian ceviche.

Both countries boast to have the best ceviches, and both countries insist that they came up with the dish. I wondered about the true origins of ceviche in both countries. It has been recorded that the people of both countries had been eating raw fish since pre-Hispanic times…

But who got citrus first? How did their people come to use citrus to “cook” the fish, since citrus is native to neither country? What about chiles? Why is the spelling “ceviche” in one country and “cebiche” in the other, and what is the meaning and origin of the word? Why do Mexicans marinate their fish for a while, whereas Peruvians serve the citrus-dressed fish right away?

All I wanted to do was research, write about, and cook Mexican food – the food I missed so much. I knew it was time to pursue my passion in a more serious way.

My dad was perplexed about this change of direction. “After so many years of study, Pati, you are going into a kitchen to rinse pots and pans?”

Now I give him a hard time and respond, “…and to make the best ever ceviches.”

I have made many a ceviche over the course of the more than a decade since I switched careers. And I’ve liked each and every one.

But this one is truly special. And it is my very favorite one.

Red Snapper Ceviche with Mango, Avocado and Tomatillo
Print Recipe
4.50 from 6 votes

To Die For Ceviche

I have made many a ceviche over the course of the more than a decade since I switched careers. And I’ve liked each and every one. But this one is truly special. And it is my very favorite one.
Prep Time10 minutes
Cook Time25 minutes
Course: Main Course
Cuisine: Mexican
Keyword: Avocado, cacao nibs, Ceviche, flounder, grouper, jalapeno, mango, pati's mexican table, red snapper, rock fish, sole, tomatillos, tortilla chips, trout
Servings: 2 to 4 servings
Author: Pati Jinich

Ingredients

  • 1 pound red snapper filet (or another mild flavored fish like grouper, trout, flounder, sole or rock fish), cut in small (about 1/2 inch) dice
  • 3/4 cup freshly squeezed lime juice
  • 3/4 cup freshly squeezed orange juice
  • 1/4 cup olive oil
  • 1 jalapeno chile stemmed and coarsely chopped, or to taste, seeding optional
  • 1/2 cup celery sliced
  • 1/2 cup red onion halved and thinly sliced
  • 1/2 cup cilantro leaves and upper part of stems, chopped
  • 1 cup (about 1 large) ripe mango diced
  • 1 cup (about 1 large) ripe avocado diced
  • 1/3 cup (about 2) tomatillos husked and scrubbed, and diced
  • 2 tablespoons cacao nibs optional
  • 1 teaspoon kosher or coarse salt or to taste
  • Tortilla chips or tostadas

Instructions

  • Combine the lime juice, orange juice, olive oil, jalapeño, celery, 1/4 cup of the sliced red onion, 1/4 cup of the chopped cilantro, and the salt in a blender and puree until completely smooth.
  • Place the fish in a bowl, add the pureed mixture, and toss well. Cover and let marinate for 20 to 25 minutes outside the refrigerator before serving, stirring from time to time. If marinating for more than 25 minutes, cover and refrigerate.
  • When ready to serve, add the rest of the onion and cilantro, the mango, avocado, tomatillo and cacao nibs if using. Toss well, taste for salt and add more as needed. Serve with tortilla chips (totopos) or tostadas.

Notes

Ceviche Que Te Mueres

Shrimp, Mango, and Avocado Rolls in Mexican Today!

This recipe and its accompanying photo make me so very happy, and I think that they will make you so very happy, too. Here’s why in case you are in need of a list of reasons to make such a beautiful looking and yummy thing.

  1. These shrimp rolls are gorgeous! And if I may say, this is a gorgeous photo too, isn’t it? It is bright and bold and colorful, and it has so much life and texture. Of course, I did not take the photo. Credit goes to Ellen Silverman, who I was lucky to work with on my upcoming cookbook Mexican Today which is out April 12th, that is: in a matter of hours!
  2. These rolls are so delicious it is almost ridiculous! Wait until you bite into one! Tender shrimp gets quickly seared in the rendered fat from bacon, until browned outside yet still plump and juicy inside. Then, that crisp and meaty bacon is broken into pieces and mixed with diced smooth avocados and tangy mangoes in a super tasty vinaigrette. Grab a soft bun or a hard roll, open it up, add the shrimp, generously spoon on some of that bacon, avocado, mango mix and you are set for one after another bite of bold flavors. Plus, brunch, lunch or dinner is ready in 15 minutes.
  3. These rolls help break misconceptions about what Mexican food is. They showcase the evolution of Mexican cuisine north and south of the border and the beautiful place where we stand today. Mexican cuisine has such strong pillars to stand on that it welcomes playful uses of its ingredients.
  4. I am taking these rolls on book tour! I will be making these rolls, and many other new recipes from my new book, and giving you all a taste in some of the 20+ cities I am headed to for the tour!  I hope you will be able to come meet me at some of these events! There are still some cities and events in the works, so please check back to see what cities have been added.

Mexican Today is a book three years in the making that I am so proud to share with you. It is a book that I am dying for you to see, to read and to cook from. I was so excited about it as I was working on it that I over delivered the number of recipes to my editor! I cannot wait to hear what you think of the tacos, enchiladas, tortas, soups, stews, salads, casseroles, sides, desserts and drinks. There are many traditional recipes and many new takes that are part of this new collection, which is fun and super accessible too.

Every single one of the recipes is a favorite at home, and I can’t wait for them to be part of yours. Please do tag #MexicanToday on social media, so I can connect with you and see what you are whipping up in your kitchen either from my book or from your own Mexican cooking inspiration.

Warmest, always,

Pati

shrimp mango and avocado rolls
Print Recipe
4.67 from 3 votes

Shrimp, Mango, and Avocado Rolls

Tender shrimp gets quickly seared in the rendered fat from bacon, until browned outside yet still plump and juicy inside. Then, that crisp and meaty bacon is broken into pieces and mixed with diced smooth avocados and tangy mangoes in a super tasty vinaigrette. Grab a soft bun or a hard roll, open it up, add the shrimp, generously spoon on some of that bacon, avocado, mango mix and you are set for one after another bite of bold flavors.
Prep Time20 minutes
Cook Time15 minutes
Course: Main Course, Snack
Cuisine: Mexican
Keyword: Avocado, bacon, mango, Roll, Sandwich, Shrimp, Torta
Servings: 6 rolls
Author: Pati Jinich

Ingredients

  • 12 bacon slices
  • 1/4 cup finely chopped shallot
  • 2 garlic cloves finely chopped
  • 1 tablespoon, plus 1 teaspoon, sherry vinegar
  • 1/2 teaspoon honey
  • 1/2 teaspoon dijon mustard
  • Kosher or sea salt to taste
  • Freshly ground black pepper to taste
  • 2 large ripe Mexican avocados halved, pitted, flesh scooped out and diced
  • 2 ripe Champagne or Kent mangoes peeled, sliced off the pits, and diced
  • 1 tablespoon olive oil
  • 1 tablespoon unsalted butter
  • 1 1/2 pounds fresh or thawed frozen medium shrimp shells and tails removed
  • 6 hot dog buns or soft rolls

Instructions

  • Heat a large skillet over medium heat. Add the bacon and cook for 3 to 4 minutes per side, until browned and crisp. Transfer the bacon to a paper towel–lined plate, leaving the fat in the skillet, and set aside.
  • Return the pan with the fat to medium heat, add the shallot and garlic and cook for about 2 minutes, until fragrant, tender, and just beginning to brown. Scrape the garlic and shallot into a medium heatproof bowl, along with the fat. Don’t wash the pan; just set it aside.
  • To prepare the vinaigrette: Add the vinegar, honey, mustard, ½ tea-spoon salt, and pepper to taste to the bowl with the garlic and shallot. Whisk or mix with a fork until well emulsified. Add the avocados and mangoes, gently toss together, and set aside.
  • Heat the oil and butter over high heat in the skillet you used for the bacon until the oil is hot but not smoking and the butter has begun to foam. Add the shrimp, without crowding the pan (cook them in two batches if necessary). Season with ½ teaspoon salt and pepper to taste, and cook, flipping them over once, until seared and browned, no more than 2 minutes. Transfer to a bowl.
  • Open the buns or rolls, trying not to separate the tops from the bot-toms, and arrange a layer of cooked shrimp on the bottom of each one. Top the shrimp with the avocado and mango mix and crown each with a couple of slices of bacon. Close the sandwiches and serve.

Notes

Rollos de Camarones al Ajillo, Mango, y Aguacate

A Crazy Good Dip

It comes in handy to have a couple of lick-your-bowl-clean dips under your sleeve. That way when you know you are going to entertain a large crowd, or a small crowd of big eaters like the ones who live under my roof, you can whip up one of them fast while you figure out the rest of the meal.

This one has become a big hit at home. It combines ripe and mashed smooth avocado with a creamy and very tangy base of goat cheese. It is then beefed up with a generous amount of tasty crisp bacon bites and a judicious amount of jalapeño and shallots. On top of the dip you can drizzle a bit of rich sesame oil and sesame seeds. Continue reading “A Crazy Good Dip”

Eat your Tacos de Lengua, or else I will

When it comes to eating meat, Mexico goes from nose to tail. From menudo to pancita, and from tostadas de pata to tacos de cabeza, not only do we know how to cook each part well, we go on to dress and celebrate it on the plate.

As for me, the only part I haven’t warmed up to is sesos. My dad tricked me into eating some, when I was Juju’s age, in a quesadilla from a street stand that he said was filled with potatoes (…caught you on the first bite, papi!).

No doubt, one of the most popular and tastiest parts is the tongue.

Not a fan? Then you just haven’t given it a real try. With abandon and an open mind.

Oh, what’s that? You tried it and haven’t been converted yet? Then I assure you, what you have tried wasn’t cooked right.

If you are not a meat eater…go ahead, skip this post. Or by the time you are done, you will have witnessed an ode to the tongue.

Take one of the simplest ways we prepare it: cooked in a gently simmering broth, seasoned with a subtle combination of herbs and spices, until utterly tender. Then it is peeled, diced, and given a quick sear along with chopped onions and a sprinkle of salt. It ends up a perfectly browned, melt in your mouth, crazy good tasting filling for tacos when generously spooned on warm corn tortillas

tacos de lengua

Having a gamey taste and that ridiculously tender texture, the best salsa to pair it with is a tangy and punchy cooked salsa verde

tacos de lengua with salsa

And a must: garnish with fresh, bright cilantro.

tacos de lengua with salsa and cilantro

Also a must: top it off with crunchy, sweet white onion.

finished tacos de lengua

That is your basic, most exquisite tongue taco.

After tacos de lengua, my favorite way of eating tongue is in a stew, either with salsa verde and potatoes or a la veracruzana. But we have to leave something for a next time…

tacos de lengua
Print Recipe
4.67 from 6 votes

Tongue Tacos

If you are not a meat eater…go ahead, skip this post. Or by the time you are done, you will have witnessed an ode to the tongue. Take one of the simplest ways we prepare it: cooked in a gently simmering broth, seasoned with a subtle combination of herbs and spices, until utterly tender. Then it is peeled, diced, and given a quick sear along with chopped onions and a sprinkle of salt. It ends up a perfectly browned, melt in your mouth, crazy good tasting filling for tacos when generously spooned on warm corn tortillas…
Prep Time10 minutes
Cook Time2 hours 10 minutes
Course: Main Course
Cuisine: Mexican
Keyword: beef, cilantro, corn tortillas, garlic, lime, onion, salsa verde, tongue
Servings: 5 to 6 tacos
Author: Pati Jinich

Ingredients

  • 1 whole beef tongue, about 3 to 4 pounds cut into 2 to 3 pieces(ask the butcher or do it yourself)
  • 1 head of garlic outer dry peel removed split in half horizontally
  • 1 white onion outer peel removed, split in half horizontally
  • 5 whole dried bay leaves
  • 15 black peppercorns
  • 1 teaspoon dried marjoram
  • 1 teaspoon dried thyme
  • 1 teaspoon dried oregano
  • 1 tablespoon kosher or coarse sea salt plus more for seasoning
  • To taste freshly ground black pepper
  • 2 teaspoons vegetable oil
  • 1/2 cup finely chopped white onion, divided (1/4 for cooking with the meat and 1/4 to reserve for garnish)
  • 1/4 cup fresh cilantro leaves and upper part of stems coarsely chopped
  • 1 batch of Cooked Salsa Verde
  • 1 lime cut in quarters, optional garnish
  • 10 to 12 corn tortillas

Instructions

  • Place tongue, garlic, onion, bay leaves, peppercorns, marjoram, thyme, oregano and 1 tablespoon salt in a casserole or soup pot. Cover with water up to 2 inches above the tongue.
  • Bring to a rolling boil over high heat, then reduce to a gentle medium simmer, cover with a tight fitting lid and cook for 3 hours, or until the tongue is completely tender and soft. Check the water halfway through and add more hot water if need be to keep the tongue mostly covered.
  • Turn off the heat. Let cool slightly in the liquid until you are ready to eat.
  • Remove the tongue from the broth and place on a chopping board. Using a small sharp knife and your hands, remove the outer layer of skin, as well as the bottom part of the tongue, which would attach it to the mouth, as it tends to be harder and greasy. The tongue is easier to peel if it is still warm or hot.
  • Slice into 1/4-inch slices and cut into about a 1/4-inch dice.
  • Heat oil in a medium-sized skillet over medium-high heat. Add 1/4 cup of the chopped onion and cook for a couple minutes, until softened. Incorporate diced tongue, season with salt and pepper to taste, and cook for about 4 to 5 minutes, stirring occasionally, until lightly browned and the onion has completely softened. Turn off the heat.
  • Heat corn tortillas on an already heated comal over medium heat. Make sure the tortillas are thoroughly heated and lightly browned on both sides. Place in a clean kitchen towel and wrap to keep warm, or keep in a tortilla warmer.
  • Place the tongue in a bowl and start assembling the tacos: spoon a generous amount of tongue in the middle of the tortilla, spoon a generous amount of salsa verde on top, and garnish with fresh chopped onion and cilantro. If desired, add a gentle squeeze of fresh lime juice.

Notes

Tacos de Lengua

Huitlacoche, Corn & Squash Blossom Crepes with Poblano Sauce

Funny that one of the most classic Mexico City dishes is a crepe dish. It is such a favorite for Chilango (a.k.a. people who live in Mexico City) weddings that, if my memory doesn’t fail me, one out of every two weddings I’ve been to has served this dish. It is considered special, delicate and celebratory.

Though it might sound strange at first, when you turn back the pages of Mexico’s history, you find that the love affair between Mexican kitchens and French cuisine goes way back.

Here’s how the story – the shortest version ever – goes: Napoleon III had wild world expansion ambitions. He sent Maximilian and Carlota to install a European monarchy in Mexico with the support of the Mexican conservative faction. They even built a grand castle for their residence: The Castillo de Chapultepec.

Chapultepec Castle
Source: Wikimedia Commons

The experiment lasted from 1864 to 1867 with rather tragic results. “Emperor” Maximilian was captured and executed by the liberals, and his wife Carlota set off on a road that led nowhere but to her losing her mind.

maximilian and carlota
Source: Wikimedia Commons

There was, however, no tragedy for Mexico’s culinary legacy. A large part of the entourage that Maximilian and Carlota brought from Europe included chefs, cooks, cheese-mongers, bakers and butchers. Many of them didn’t go back to Europe. Some opened up shop, while others trained locals in their trade.

So it is no surprise that what we know as the French baguette came to be adapted in Mexico as the telera or bolillo, which is Mexico’s daily bread. Crepes have also received signature Mexican tones. When they have a sweet rendition, their most popular take bathes them in a silky cajeta sauce. Crepas con Cajeta adorn dessert sections of menus in a large number of traditional Mexican restaurants.

Now, when crepes are taken on a savory ride, the results are just as extraordinary. The most famous is the one I am sharing here. Crepes filled with ingredients considered to be deeply Mexican and true delicacies: huitlacoche and squash blossoms. That’s just the beginning, the filled crepes are then covered with an exuberant poblano chile sauce made richer by yet another French technique: roux, to thicken the sauce.

pati and her husband daniel at their wedding

When my husband and I got married, we served Red Pozole at the end of the night – it’s either pozole or chilaquiles that are usually served to close the party. But for the main wedding meal, we served these crepes – like they do at 50% of Mexico City weddings, I guess, if my calculations are right. At least in my time…

You know how many people say they didn’t even think about eating during their weddings? That was definitely not my case: I cleaned my plate.

Though I love the dish, I had never made it at home. The idea of them being only for celebrations, for special occasions, and well, my wedding dish, sort of stopped me. But, it was about time I made them. We loved eating them so much at home I had to put the recipe up on my blog in the hopes that you will give it a go.

I have learned, as the years go by, that one should celebrate any day. Every single day is worthy of a celebration.

huitlacoche, corn and squash blossom crepes

huitlacoche corn and squash blossom crepes
Print Recipe
4.34 from 3 votes

Huitlacoche, Corn & Squash Blossom Crepes with Poblano Sauce

Funny that one of the most classic Mexico City dishes is a crepe dish. It is such a favorite for Chilango (a.k.a. people who live in Mexico City) weddings that, if my memory doesn’t fail me, one out of every two weddings I’ve been to has served this dish. It is considered special, delicate and celebratory. Though it might sound strange at first, when you turn back the pages of Mexico’s history, you find that the love affair between Mexican kitchens and French cuisine goes way back.
Prep Time10 minutes
Cook Time30 minutes
Course: Main Course
Cuisine: Mexican
Keyword: Corn, Crepes, huitlacoche, mexican crema, pati's mexican table, Poblano, queso fresco, squash blossom
Servings: 8 to 10 crepes
Author: Pati Jinich

Ingredients

For the sauce:

  • 4 poblano chiles roasted or charred sweated, stemmed and seeded
  • 1 1/2 cups milk
  • 2 tablespoons unsalted butter divided
  • 1 tablespoon, plus 1 teaspoon, all-purpose flour
  • 1 cup Mexican cream Latin-style cream, crème fraîche or heavy cream
  • 3/4 teaspoon kosher or coarse sea salt or to taste, divided
  • 1/2 teaspoon ground nutmeg

For the filling:

  • 1 tablespoon vegetable oil
  • 1 cup chopped white onion
  • 1 garlic clove finely chopped or pressed
  • 3 cups fresh huitlacoche shaved off the cob, thawed from frozen, or 2 7-ounce cans
  • 6 cups rinsed drained and coarsely chopped squash blossoms, or 1 1-pound jar squash blossoms, rinsed and drained
  • 1 cup corn kernels shaved from cob, or thawed from frozen

To assemble:

  • 1 batch of homemade crepes
  • 1/2 cup crumbled queso fresco or mild feta cheese for garnish

Instructions

To make the sauce:

  • Coarsely chop the prepared poblano chiles. Place them in the blender along with the milk and purée until completely smooth.
  • In a saucepan over medium heat, melt 1 tablespoon of the butter. Once bubbly, add the flour to make a roux: stir it often until the paste smells toasty, its color turns a pale golden brown, and it appears to be a bit foamy, about 2 to 3 minutes.
  • Pour the chile purée over the roux paste, reduce heat to medium low and stir well, so that it is fully combined and has no lumps. Stir in the Mexican cream, 1/2 teaspoon of the salt and nutmeg. Continue to cook over medium-low heat, stirring occasionally and making sure it doesn’t stick to the bottom of the pan, until it thickens, about 8 to 10 minutes.

To prepare the filling:

  • Heat a skillet over medium heat. Add remaining tablespoon of butter along with the oil. Once it is melted and bubbly, add the onion. Cook for 8 to 10 minutes until completely wilted and the edges are barely beginning to brown. Add the garlic, stir and cook for another minute. Stir in the huitlacoche, the squash blossoms and the corn and sprinkle with the remaining 1/4 teaspoon salt. Let it all cook, stirring often, until it is completely heated through and the squash blossoms have wilted entirely, about 3 minutes.

To assemble the crepes:

  • Heat the crepes one by one over an already hot non-stick skillet set over medium-low heat, about 10 seconds per side. Place on a plate, add 3 tablespoons of filling and roll as if it were a chubby taco. Place seam side down on a platter. Continue with all remaining crepes. Pour the heated poblano sauce all over the top and sprinkle with the queso fresco. Serve while hot.
  • NOTE: You can also place the filled crepes in a buttered baking dish, cover with the sauce, and instead of queso fresco use grated melty cheese to cover. Place in a 400 degree oven for 10 minutes and serve.

Notes

Crepas de Huitlacoche, Elote y Flor de Calabaza con Salsa Poblana

Big Brunch Enchiladas

An intrinsically Mexican dish, enchiladas are not one but a multitude of possibilities that can dress up a corn tortilla. Simply the sound of the word enchilada makes any Mexican’s mouth water in less than a millisecond and is cause for celebration.

One of the dearest antojos or antojitos (translate to whims or little whims), enchiladas are corn tortillas that may be heated up or lightly fried, either folded or rolled, with or without a variety of fillings, always bathed in a salsa or sauce, and garnished with a a few from a long list of possible toppings. From crumbled queso fresco and a drizzle of crema, to raw or pickled onion, chiles or other vegetables, Mexican avocado, chorizo, shredded lettuces and cabbage, just to name some.

Considering the variations of fillings, salsas, and toppings, enchiladas not only embody different regional cuisine’s identities, but also the whims of different cooks…

Here is my latest one; I call it the Big Brunch Enchilada.


Before filling the corn tortillas with soft scrambled eggs, seasoned with sautéed scallions, I opted to quickly fry the tortillas. As we Mexicans say, pasamos las tortillas por aceite caliente: we dip the tortillas in very hot oil for a couple seconds to make them malleable and even more resilient to withhold the sauce and garnishes. If the oil is very hot, the tortilla will not absorb the oil, but will be transformed. You can opt to not fry and instead heat the tortillas on a hot comal, skillet, or griddle, for a minute per side until thoroughly hot and barely crisp.

However, please: for the love of anyone or anything you love the most, don’t use flour tortillas to make enchiladas.

Just, please, don’t? I am begging here.

Flour tortillas are sweeter than corn tortillas, they are less resilient to withhold sauce, fillings, and garnishes and become a mushy mess of the worst sorts if given the enchilada treatment.

Please, please, please, proudly stick to corn tortillas.

big brunch enchiladas
As for the salsa or sauce, the most well known enchiladas are verdes soaked in a salsa verde, enchiladas rojas soaked in a red salsa, and enchiladas de mole. All, of course, with their multiple variations.

For my Big Brunch ones, I am bathing them with a rich, thick and earthy black bean sauce, common in the Mexican Gulf Coast. I tend to have trouble deciding whether to eat my black beans with chipotles in adobo sauce or pickled jalapeños. Truth is, if I use one, I usually end up adding the other one too and mixing them up. So here, I am adding and combining both. The homemade black beans, or store bought ones if you don’t have time to cook them, are seasoned with the smoky, sweet and spicy adobo sauce from chipotles in adobo, as well as the vinegary pickling sauce from the pickled jalapeños. I couldn’t be happier with the result.

Forget about a light garnish, add tons of meaty and crisp bites of Mexican chorizo.

big brunch enchiladas
Fresh, tart and slightly salty crumbled queso fresco.

big brunch enchiladas

Bright fresh scallions (I love scallions…) that contrast with the cooked scallions scrambled with the eggs.

big brunch enchiladas
To finish off, punchy chopped pickled jalapeños go on top.

big brunch enchiladas
I liked these enchiladas so much, I couldn’t even decide on an ending photo for the blog post. So I am showing you the view from the top and from the side.

big brunch enchiladas
These enchiladas ended up being not an antojito but an antojote, a huge antojo of mine. Made to be eaten for a big brunch, they passed the critical approval of all my boys to the point that they were fighting for each piece on this plate. This is the one time when I don’t complain about them fighting.

Since this is a sign of success in my kitchen, the recipe is now yours!

I hope you give it a try for your Cinco de Mayo fiesta, your Mother or Father’s day brunch, or anytime you may want to indulge. As complex as they may sound, they are super easy and fast to make. Here’s how.

big brunch enchiladas
Print Recipe
4.60 from 5 votes

Enchiladas with Chipotle Black Bean Sauce, Chorizo and Queso Fresco

An intrinsically Mexican dish, enchiladas are not one but a multitude of possibilities that can dress up a corn tortilla. Simply the sound of the word enchilada makes any Mexican’s mouth water in less than a millisecond and is cause for celebration. One of the dearest antojos or antojitos (translate to whims or little whims), enchiladas are corn tortillas that may be heated up or lightly fried, either folded or rolled, with or without a variety of fillings, always bathed in a salsa or sauce, and garnished with a a few from a long list of possible toppings. 
Prep Time10 minutes
Cook Time30 minutes
Course: Antojos, Breakfast
Cuisine: Mexican
Keyword: Avocado, black beans, chipotles in adobo, Chorizo, corn tortillas, Eggs, Enchilada, pati's mexican table, Pickled Jalapeños, queso fresco
Servings: 12 enchiladas
Author: Pati Jinich

Ingredients

  • 3 cups cooked beans and 1cup of their cooking broth or 2 drained cans black beans plus 1 cup water
  • 2 tablespoons adobo sauce from chipotle chiles in adobo sauce
  • 2 tablespoons vinegary sauce from pickled jalapeños in vinegar or escabeche
  • 1 pound Mexican chorizo casings removed, roughly chopped
  • 3 tablespoons vegetable oil plus more oil if frying the tortillas
  • 1/3 cup chopped scallions plus extra for garnish
  • 9 large eggs beaten with a fork or whisk until foamy
  • 1/2 teaspoon kosher or coarse sea salt or to taste
  • 12 corn tortillas
  • 1 cup crumbled queso fresco cotija, farmer’s cheese, or goat cheese
  • 6 to 8 pickled jalapeños seeded and chopped, for garnish
  • Ripe Mexican avocado slices optional

Instructions

  • Place the cooked black beans and cooking broth (or water if using canned) in a blender, along with the sauce from the chipotles in adobo and the vinegary sauce from the pickled jalapeños, and puree until smooth. Place in a medium saucepan, heat over medium-low heat, stirring occasionally, until very hot. Reduce the heat to the lowest possible setting and keep warm. The puree should have the consistency of heavy cream.
  • Heat a large skillet over medium heat. Once it is hot, add the chopped chorizo and cook, crumbling as it cooks with a wooden spoon or spatula into small bite sized pieces, until it has browned and crisped, about 5 to 6 minutes. Scrape into a bowl, cover and set aside.
  • Pre-heat a comal or cast iron skillet over medium heat.
  • Heat the oil in a medium 10-inch nonstick skillet over medium heat until hot but not smoking. Add the scallions and cook until soft and translucent and the edges begin to brown lightly, about 4 minutes. Reduce the heat to medium-low, pour in the beaten eggs, sprinkle with the salt, and cook, stirring often and gently, until desired doneness. I like to stop the cooking when the eggs are still soft and tender, not dry, which takes about 4 to 5 minutes. Remove from the heat.
  • Heat the corn tortillas, a pair at a time, in the pre-heated comal or skillet, about 1 minute per side, until completely heated through and even slightly toasted. Alternatively, you can heat enough oil to have 1/2" in a medium skillet set over medium heat, once very hot but not smoking, quickly pass each tortilla through the oil (4 to 5 seconds) and place on a plate or drying rack covered with paper towels. You know the oil is ready if when you dip a tortilla, the oil bubbles actively all around the edges and the tortillas begin to puff up after a few seconds.
  • One by one, place on a plate and spoon about 2 generous tablespoons of the scrambled eggs onto the center of tortilla. Roll it into a soft taco and place in a platter, seam side down.
  • When all the tortillas are stuffed and rolled on the platter, pour the bean puree on top. Cover with the cooked chorizo, crumbled queso and extra scallions. Add as many chopped pickled jalapeños as you like. Decorate with ripe avocado slices if you want to take those enchiladas way over the top.

Notes

Enchiladas de Huevo con Salsa de Frijol con Chipotle, Chorizo y Queso Fresco

My Favorite Tamal of All Time: Chicken in Green Salsa

Tamales are it. If you’ve eaten one, you know it.

Simple. When ready and steaming hot, unwrap the edible bundle and eat swiftly, no fork, no knife, bite by bite.  So good.

Yet as simple as it may sound to write a post about tamales, I could dedicate an entire series of cookbooks to their endless possibilities, and in the end, not have covered them all.

Ancestral, iconic, yet humble, is each single tamal. And the tamal universe, immense, imagine: tamal refers to anything wrapped and cooked in a husk or leave. Usually made with masa, typically corn masa, either mixed with or swaddling ingredients, or both! As you move through Mexico, and increasingly outside, you find them in different shapes (round, square, flat, puffed up, even triangular like Michoacán corundas); with different wraps (corn husks, either fresh or dried, banana leaves and even fresh edible leafy greens like chaya in Chiapas); with an infinity of ingredients, from savory, like chicken, meat, seafood, vegetables, beans, all sort of grains, salsas and cheese…to sweet ingredients, like fresh and dried fruits, nuts, chocolate, cajeta

The consistency and texture vary greatly, too, from thin and dense like tamales found in Oaxaca; to sticky and gelatinous from Yucatán; to spongy and cakey like the ones from northern and central Mexico, where I grew up.

Tamales are so big in our kitchens that entire meals are devoted to them: the famous Tamaladas! Festive get-togethers we all get very excited about, where all you eat are different kinds of tamales, from beginning to end. Trust me, where there is a variety of tamales, you want to eat them all.

Aside from Tamaladas, tamales are present in all sorts of celebrations and holidays including Quinceañeras, Posadas, Christmas Eve and New Years parties: they have been fiesta food since pre-Hispanic times, when they were considered gifts from the Gods.

But tamales are also everyday food, for an entire country, an entire culture. Accessible to everyone and anyone who can get to the corner stand and has 10 pesos (less than a dollar) in their pocket for a quick breakfast, a filling lunch or an easy merienda (light dinner).

See photo below…. I was with my school friends eating tamales at the tamal stand on the street right outside our middle school. I used to day dream about those tamales; they were so alluring we used to sneak out of school to eat them…

Pati eating tamales with her school friends

Tamales are as fascinating and varied as the stars above. So to land this philosophical rambling about tamales somewhere practical and edible, for you, I will focus on my favorite tamal of all time. The Tamal de Pollo con Salsa Verde.

The easiest way to make tamales is to prepare your filling(s) first. In fact you can make it a day or two in advance. For the ones I feature here, make your cooked salsa verde, pictured in the molcajete below. Combine it with cooked shredded chicken to make a wet mix. No, you don’t want it dry! The tamal masa will soak up some of that salsa. After the tamales cook for almost an hour, you want to bite into a tamal that has a saucy, moist filling.

salsa verde

Then get your hands on dried corn husks, pictured below. You can get them in the Latin aisles of your supermarket, at many a Latin or international store, or online. No excuse. Soak those husks in warm water, so they will become malleable and pliable. You don’t want them to crack as you use them to wrap the dough and roll the tamal. You will also need to place some of the leaves in the tamalera or steamer.

Get the tamalera ready. Pour water and drop a coin in there. That’s a passed down trick from endless generations. It works as an alarm for when the tamales may be running out of water, so you won’t need to open up the pot and let all that precious steam come out: if the water is running out, the coin will start jumping up and down and make loud clinking noises.

dried corn husks

Then you work to make your masa. Or let the mixer help you out! I have the complete recipe below, but let me just highlight a few things…

In Mexico, you can go into the tortillería and buy fresh masa, made from scratch. And wouldn’t it be heavenly if there were tortillerías in all towns and cities in the US, so we could all indulge? But the truth is many, if not most, people in Mexican kitchens make their own masa at home from the instant corn masa flour, and you can get fabulous results.

Traditionally, tamal masa is made with lard. If top quality and fresh, it adds a delicious taste and texture and doesn’t have as much cholesterol as people think. If you ask me, I think it is a matter of moderation. Yet, many people prefer vegetable shortening and you can use it too. Now, vegetable shortening has, as of late, been questioned even more than lard.

If you don’t want to use either, I have a wonderful solution: use vegetable oil, substitute exact amounts, but to maintain depth of flavor and dimension, season the oil by heating it over medium heat and cooking a slice of onion and a couple garlic cloves in it for 15 minutes. Then remove the onion and garlic before using. Great trick for vegetarians as well. In fact, before the Spanish arrived to Mexico, and there was no pork, oils extracted from fruits, vegetables and seeds, were used to moisten and season tamales, so feel free to play around with oils you like!

The most important thing about the masa, aside from being well seasoned, is that it needs to be as fluffy as fluffy can get. It has to be so airy that, if you take a cup of cold water and drop half a teaspoon of the masa in it, it floats!  You can only achieve this by beating it for a long time at a good speed. That’s why I recommend a mixer in the recipe below, but of course, you are welcome to get a good work out from the masa mixing by hand or with a sturdy spatula.

Then, follow my detailed instructions below on how to fill and wrap the tamales, place them in the tamalera and hold your horses for 50 minutes until they are ready.

Hopefully, you make more than what you need. I can think of few foods that have as much warmth, sustenance and meaning than tamales. They are food that is meant to be shared. So I suggest you try a Tamalada gathering! Tamaladas don’t only happen on February 2nd (when according to tradition you must host a Tamalada and invite EVERYBODY, if you got the baby hidden in the Rosca de Reyes eaten on January 6th), they can happen anytime (but I am writing this post before February 2nd, just in case!).

Make many fillings ahead of time. Make your masa. Invite friends over and have a tamal-making party before the Tamalada. Everyone will have gifts to open and eat, as that is what tamales are, indeed. And the best gift of them all will be any leftover tamales that a lucky guest gets to take along. Or be a bit greedy, keep them at home.

Note: I’ve been asked for a quick casserole version in a few emails… All you need to do, is spread half the masa in the recipe below in a large baking dish, then add a layer of the chicken in salsa verde, top with remaining half masa dough. Cover well with aluminum foil, and bake in a 400 degree oven for 1 hour. Remove from the oven and if you want, drizzle with some Mexican crema and crumbled queso fresco. Serve in squares.

Print Recipe
4.86 from 7 votes

Chicken in Salsa Verde Tamales

Tamales are it. If you’ve eaten one, you know it. Simple. When ready and steaming hot, unwrap the edible bundle and eat swiftly, no fork, no knife, bite by bite.  So good. Yet as simple as it may sound to write a post about tamales, I could dedicate an entire series of cookbooks to their endless possibilities, and in the end, not have covered them all.
Prep Time45 minutes
Cook Time50 minutes
Course: Main Course
Cuisine: Mexican
Keyword: chicken, masa, pati's mexican table, salsa verde, Tamales, tomatillos
Servings: 18 tamales
Author: Pati Jinich

Ingredients

For the tamales:

  • 25 dried corn husks soaking in warm water
  • 3/4 cup lard, vegetable shortening or seasoned vegetable oil (to make seasoned oil, heat oil over medium heat and cook a slice of onion and 3 to 4 garlic cloves for 15 minutes, strain before using)
  • 1/2 teaspoon kosher or coarse sea salt or to taste
  • 1 teaspoon cold water
  • 1 teaspoon baking powder
  • 1 pound (about 3 1/4 cups) instant corn masa for tortillas or tamales
  • 3 1/2 cups chicken stock add more if needed

For the filling:

  • 1 recipe for cooked salsa verde
  • 2 cups shredded cooked chicken

Instructions

To make the filling:

  • Make the salsa verde, combine it with the shredded chicken, and set aside or refrigerate, if made ahead of time.

To make masa for the tamales:

  • Place lard, vegetable shortening or seasoned oil in a mixer and beat, until very light, about 1 minute. Add salt and 1 teaspoon cold water, and continue beating until it is white and spongy, a couple more minutes. Add baking powder, and then take turns adding the instant corn masa and the chicken stock. Continue beating until dough is homogeneous and as fluffy as can get.
  • You know the tamal masa is ready if, when you drop 1/2 teaspoon of the masa in a cup of cold water, it floats.

To prepare the tamalera or steamer:

  • Place hot water in the bottom pan of a steamer (only enough so the water is just under the basket with the tamales and not touching them) and bring it to a simmer. Line the steamer basket with one or two layers of soaked corn husks. Use dough to form about 18 cornhusk wrapped tamales.

To make the tamales:

  • Soak dried corn husks in hot water for a couple minutes, or until they are pliable, and drain. Lay out a corn husk with the tapering end towards you. Spread about 3 tablespoons of masa into about a 2- to 3-inch square, the layer should be about 1/4-inch thick, leaving a border of at least 1/2-inch on the sides. Place 1 tablespoon of filling in the middle of the masa square.
  • Pick up the two long sides of the corn husk and bring them together (you will see how the masa starts to swaddle the filling) and fold the folded sides to one side, rolling them on same direction around tamal. Fold up the empty section of the husk with the tapering end, from the bottom up. This will form a closed bottom and the top will be left open.
  • Prepare all the tamales and place them as vertically as you can in a container. When you have them all ready, place them again, as vertically as you can on the prepared steamer, with the open end on top. If there is space left in the steamer, tuck in some corn husks, so the tamales won’t dance around. Cover with more corn husks, and steam covered for 50 minutes to an hour. You know the tamales are ready when they come easily free from the husks. They will still be moist, and as they are released from the husks, you will see the moistness, like when you remove good moist muffins from their paper baking cups.
  • Finished tamales will stay warm for about 1 to 2 hours in the steamer. They can be made ahead several days before and stored in refrigerator, well wrapped. They can also be frozen for months. In either case, reheat in a steamer. For refrigerated tamales, it will take about 15 minutes, and for frozen tamales about 45 minutes.

Notes

Tamales de Pollo con Salsa Verde

Bricklayer Tacos

A taco is a beautiful thing.

One of the most satisfying, versatile, exciting, and downright honest foods I can think of.

Plus, there is no need or mood a taco can’t tackle.

You are hungry and have but one peso in your pocket? Eat a Taco de Nada. You pass a tortillería on your way home? A Taco de Sal will hold you off until you get there. A deep hangover ails you? Go for Tacos de Barbacoa with Salsa Borracha. Did you say you have a broken heart? A pair of fully stocked Tacos al Pastor will be your most effective rebound. You are home with a cold? Soft chicken tacos dipped in fresh crema will make you all better, no doubt about that. Need to feed your teen kid and his buddies before they head out? Crispy Potato and Chorizo Tacos dressed with shredded lettuce, crumbled queso fresco and Salsa Verde will make them happy and fill them up. It’s lunchtime and you are on the road? If you are in Mexico (or somewhere with a large Mexican community), you will find someone with a huge basket selling Tacos Sudados to go. Planning a backyard party? Tacos de Carnitas will kick it off, without you even saying a word.

I could write an endless post on all sorts of tacos and all they can do for you… But, if you want to feed your family a generous, satiating, and super tasty weeknight meal, make them bricklayer tacos. Step by step instructions follow below. But as I cook, let me quickly reflect on The Taco.

bacon for bricklayer tacos
Start with a large casserole or skillet and fry some bacon. Until crisp.

Whenever I teach Mexican cooking, I never fail to say that the food of a country resembles its people. The taco, the most emblematic of Mexican foods, fully embodies Mexico and its people. Through the gazillion different kinds of tacos that have existed, we can explore the evolution of Mexico and the identity of Mexicans. The stories told by each taco, linked to one another, holds us Mexicans (and Mexican food lovers) together.  I am getting a tad too philosophical about tacos, I know… but just think about the possibilities.

meat cooking in the bacon
You don’t need to add any other fat. You will add tender pieces of tenderloin or sirloin straight into the bacon fat. Sprinkle with salt and pepper, and let the meat brown without fully cooking.

There is no exact date on when the taco came to be. It existed before the Spaniards arrived in Mexico, in pre-Hispanic times, for sure. There is anthropological evidence that it was thousands, not hundreds of years, before the Spanish conquest that people in Mexico were eating tacos (even if they weren’t called that). Indigenous people had domesticated corn and found a way to make it fully nutritious by way of the nixtamalization process (where corn is shucked, dried, cooked in slaked lime or ashes, hulled and ground) and turned into a malleable dough to be used in a thousand different ways, including tamales, drinks, all sorts of patties and that flat bread we call tortilla.

adding onion and jalapenos to the bricklayer taco filling
Add onion and jalapeños.

Now, how long since has the tortilla been used as an edible plate, or torn into pieces to scoop up food as an edible spoon, or held in hand to wrap a filling to munch on? I am guessing more years than you probably are. The filling could have been cactus paddle or iguana, who knows.

adding garlic to the bricklayer taco filling
Add garlic and cook for less than a minute, until garlic is fragrant.

The first documented tacos appeared in the “Truthful History of the Conquest of New Spain” (1520), by Bernal Diaz del Castillo, a conquistador. He reported a taco feast, enjoyed by Hernán Cortes and many of his commanders, where many kinds of fillings were eaten wrapped in tortillas. Friar Bernardino de Sahagún, a Spanish ethnographer, also wrote about many different kinds of tortillas based on corn (different colors including yellow, blue and white; small and large; thin and thick) during the time of the conquest, in his “General History of the Things in new Spain.” It wasn’t until the Spanish arrived that the flour tortilla came to be, as they are the ones who introduced wheat.

charred tomatoes
Add chopped roasted tomatoes. This is how they need to look, charred, juicy and mushy.

According to Jeffrey M. Pilcher, Mexican silver miners invented the taco, but he is most likely referring to the word… The word taco also refers to any small piece of material that can fit into a hole or gap, such as the pieces of paper wrapped around gun powder that were used to extract precious metals from ore, in that same shape. Workers in Mexican silver mines in the 18th century called their meals Tacos Mineros. Though there may be a link to the shape of the other kind of “tacos,” we know for a fact that edible tacos have existed for thousands of years before those…

chopped charred tomatoes
Did I say chop up the tomatoes?

So yes, indeed, there are Tacos Mineros, but there are also tacos for and of absolutely EVERYTHING else, including the Tacos de Albañíl, or Bricklayer-style Tacos, that I am here showing you how to make. They’ve been baptized as such, for they are quick to prepare, very filling and need nothing else to be added on the side or on top.

They can also be prepared on site in a comal and  can use any kind of available meat, as long as it is cut in small bite size pieces. Tacos de albañíl sellers an also be  found near construction sites. Just walk around Mexico City, or come over on a weeknight: It is also one of my family’s favorite fast meals. And you get to pick what kind of tortilla you want, flour or corn.

adding charred tomatoes to the bricklayer taco filling
Add to the mix and cook for a few more minutes.

Soft taco, crispy taco, hard shell taco (wish I didn’t have to say Taco Bell taco but we can’t ignore they have in a way helped to spread the word), puffy taco… I hope you add these Bricklayer-style Tacos to your collection of taco recipes.

finished bricklayer taco filling
You are done. Set it on the table.

Wait, you don’t have a taco recipe collection? Make this your first one!

bricklayer tacos
Warm up your choice of tortillas, corn or flour. And let everyone have a go!
bricklayer tacos
Print Recipe
4.60 from 5 votes

Bricklayer Tacos

I could write an endless post on all sorts of tacos and all they can do for you… But, if you want to feed your family a generous, satiating, and super tasty weeknight meal, make them bricklayer tacos. Step by step instructions follow below. But as I cook, let me quickly reflect on The Taco.
Prep Time10 minutes
Cook Time30 minutes
Course: Main Course
Cuisine: Mexican
Keyword: bacon, beef, corn tortillas, flour tortillas, garlic, jalapeno, onion, Recipe, Taco, Tomatoes
Servings: 6 to 8 servings
Author: Pati Jinich

Ingredients

  • 8 ounces bacon sliced
  • 2 pounds beef sirloin or tenderloin cut into 1-inch pieces
  • To taste kosher or sea salt
  • To taste freshly ground black pepper
  • 2 cups white onion slivered or sliced
  • 2 garlic cloves chopped
  • 1 jalapeno chile sliced, seeding optional, or to taste
  • 1 pound ripe Roma tomatoes
  • Flour or corn tortillas

Instructions

  • Place tomatoes in a baking dish and under the broiler for 6 to 9 minutes, until charred, mushy and juices have begun to run. Once cool, roughly chop, but don’t discard the juices.
  • Heat the skillet, add the bacon and cook until it is crisp and browned, about 5 minutes. Add the meat and season with salt and pepper and sear for about 2 minutes per side.
  • Add in the onion and jalapeño and let them soften for 2 to 3 minutes. Add the garlic and before it browns, in less than a minute, add the chopped tomatoes. Stir here and there and let it all season for about 4 to 5 minutes.
  • In a skillet or comal, set over medium-low heat, heat the tortillas. It will take about 1 minute per side. Place the tortillas in a tortilla warmer or wrap them in a clean kitchen towel or cloth napkin.
  • Serve along with the tenderloin tips; guests can fill the tortillas with the amount of filling they desire.

Notes

Tacos al Albañil

Tortillas: Make Flour Tortillas at Home

There are so many ways that you can have and enjoy tortillas de harina at home. You can make them the traditional way, the fast-track-modern way (if you have an electric tortilla maker such as the REVEL…), or buy them ready made at the store. Different from corn tortillas, which rule Mexico’s south and are made with a base of nixtamalized corn, flour tortillas rule Mexico’s north and are wheat flour based. The latter also have an element of fat (either lard, vegetable shortening or oil) and are milder, sweeter and softer.

Sometimes both kinds of tortillas, flour and corn, work interchangeably for a dish, say cheese quesadillas or chicken tacos, and may depend on the preference of the eater. However, beware, there are other times when either the flour or corn tortilla should be the prime choice. Take Chilorio, it needs to be tucked in a flour tortilla. Yet any kind of enchiladas, enfrijoladas, or casserole must, REALLY MUST, be made with corn tortillas because they withhold the sauce much better than wheat flour ones, and sweetness may be uncalled for.

I have been surprised with how many requests I’ve received from people on how to make “good tasting,” “authentic homemade,” “white flour” tortillas, being both, that one can find them already made at the stores practically all over the US, and that it is time consuming. That, being said, the feel and taste of a homemade tortilla de harina does happen to be a galaxy away from a store bought one. So, if you can spare the time, and you like playing with your hands, give them a try.

As you will see, the trick is not only in the right amounts of ingredients, it’s also in the kneading and mostly in the cooking: don’t over cook them or they will lose ALL their appeal.

Of course, once you master the technique, you can flavor them with ingredients like fresh or dried chiles, tomatoes and even nopales. You can also experiment with making them using whole wheat flour. Though, I do prefer the plain, original taste.

homemade flour tortillas

homemade flour tortillas
Print Recipe
4.43 from 7 votes

Homemade Flour Tortillas

There are so many ways that you can have and enjoy tortillas de harina at home. You can make them the traditional way, the fast-track-modern way (if you have an electric tortilla maker such as the REVEL…), or buy them ready made at the store. Different from corn tortillas, which rule Mexico’s south and are made with a base of nixtamalized corn, flour tortillas rule Mexico’s north and are wheat flour based. The latter also have an element of fat (either lard, vegetable shortening or oil) and are milder, sweeter and softer.
Prep Time40 minutes
Cook Time2 minutes
Course: Antojos, Side Dish
Cuisine: Mexican
Keyword: flour tortillas, Recipe, tortilla
Servings: 18 to 20 tortillas
Author: Pati Jinich

Ingredients

  • 1 pound all-purpose flour or about 4 cups
  • 1 teaspoon kosher or sea salt
  • 2/3 cup vegetable shortening or lard
  • 1 cup lukewarm water

Instructions

Traditional Version:

  • In a mixing bowl, combine flour, salt and vegetable shortening with your hands until incorporated. Slowly incorporate water to the dough, until it can come together into a ball. Transfer to the counter and knead for about 2 to 4 minutes, until it is smooth like play dough. (You may do the same process in a food processor, pulsing until dough is incorporated!)
  • Divide into 18-20 ball shaped portions. Set them on a floured board or plate, cover them with plastic wrap or a clean kitchen towel and let them rest for 25 to 35 minutes.
  • Heat your comal, or ungreased cast iron or non-stick skillet over medium heat. On a floured surface roll out one of the balls with a rolling pin, rotating 5 or 6 times until you get a 6 to 7 inch circle. Lay tortilla on the already hot comal or skillet. You will hear a faint sizzle. After 30 to 40 seconds, when there are brown freckles on the bottom side and there is some puffing up in some areas of the tortilla, flip over. Cook for 30 to 40 seconds, until the other side is freckled and the tortilla puffs up, again, like pita bread. Don’t overcook, or they will become crisp and stiff (and lose all their appeal).
  • As they are ready, place in a tortilla warmer or clean kitchen towel. If you will not eat them within the hour, wrap them in a plastic bag and refrigerate. Reheat in a hot comal or skillet.

Fast-Track-Modern Version:

  • If you have an electric tortilla maker, such as the REVEL, instead of rolling them out with a rolling pin, place your flour dough balls in the tortilla maker, press for 1 to 2 seconds. This will roll and precook them; you will hear the hiss. Finish them off for about 30 seconds on each side on the comal or skillet, where they should also puff.

Easiest version:

  • Buy them already made at the store!

Notes

Tortillas de Harina

Sean’s Cheesy Chipotle Pork Sliders with Avocado Spread

It was my friend Tamara´s birthday party. Her husband, Sean, an American who speaks and acts like a Mexico City native (says a Mexico City native), made the dinner for the 40+ guests. The guests were drinking, eating and laughing until their stomachs were hurting, usual for their home. Sean came up to me when he saw me walk in, gave me a plate, placed two of these sliders on and said, “You are going to like these.”

I ate one. YUM.
I said, “There’s chipotle in them!”
I ate two. OMG.
I said, “I can take that platter”, and ate the remaining four. Of course, he was grilling some more.

No, I didn’t even try his Asian tuna sliders. No, I didn’t try his regular cheeseburger sliders. No, of course, I didn’t try his vegetarian sliders. All I wanted were these Chipotle Pork Sliders. I was hooked.

After I had my fill, I told Sean I had to post his recipe on my blog, as I was sure you all would love them just like I did. He obliged, and I tested his recipe many times giving it a few tweaks (hey, you know, I can’t help myself). I added a bit of onion, garlic and oregano to the meat mix and more chipotle (come on Sean, you talk like a Mexican!). I took some of the mayo out of the avocado spread and added the refreshing chives.

It’s what happens when you share recipes: they’re not yours anymore. They’re under the domain of the recipients who can do whatever they want with them. You killed yourself to make the best-ever sandwich and you hate mustard? Well, the next person printing your recipe may think all the sandwich needs is a little, or a lot of, mustard. I know this to be true, for I’ve heard from many of you wonderful personal touches and spins on my recipes through the comments on this blog. That’s the beauty of passing down recipes!

If you don’t go head over heels over these sliders, tweak them, and go ahead, make them your very own. The underlying notes for these sliders, for me, are: meat, especially pork, and chipotle are heavenly together; the melted cheese adds a rich welcome layer (all of my boys thought so too), and the avocado spread brings in a creaminess and freshness to everything inside that soft bun, it brightens it up (one of my beastly beasts skipped the avocado part, see? oh well..).

Sean uses brioche buns, which have a light sweetness and a soft and fluffy bite. If you find them, great! If you don’t, any mini hamburger buns work just fine. And then again, you may decide to turn these sliders into jumbo size burgers.

Want to go crazy? Top with crumbles of chorizo!

Sean's Cheesy Chipotle Chorizo Sliders

Sean's Cheesy Chipotle Sliders
Print Recipe
5 from 4 votes

Sean’s Cheesy Chipotle Pork Sliders with Avocado Spread

If you don’t go head over heels over these sliders, tweak them, and go ahead, make them your very own. The underlying notes for these sliders, for me, are: meat, especially pork, and chipotle are heavenly together; the melted cheese adds a rich welcome layer (all of my boys thought so too), and the avocado spread brings in a creaminess and freshness to everything inside that soft bun, it brightens it up (one of my beastly beasts skipped the avocado part, see? oh well..).
Prep Time10 minutes
Cook Time7 minutes
Course: Main Course
Cuisine: Mexican
Keyword: Avocado, burger, chipotles in adobo, lime, mayonnaise, Monterrey Jack cheese, Muenster cheese, pati's mexican table, pork
Servings: 16 sliders
Author: Pati Jinich

Ingredients

  • 2 pounds ground pork
  • 2 tablespoons finely chopped white onion
  • 3 garlic cloves finely chopped or pressed in garlic press
  • 3 tablespoons sauce from chipotles in adobo sauce
  • 1 chipotle chile in adobo sauce seeded and finely chopped, more to taste
  • 1 teaspoon dried Mexican oregano
  • 1 teaspoon kosher or sea salt or to taste
  • 1/4 teaspoon freshly ground black pepper
  • olive oil to grease the grill
  • 1 large Mexican avocado halved, pit removed
  • 2 tablespoons mayonnaise
  • 2 tablespoons fresh squeezed lime juice
  • 2 tablespoons chopped chives
  • 1/4 teaspoon kosher salt or to taste
  • 8 slices Monterey Jack or Muenster cheese
  • 16 mini brioche or mini hamburger buns

Instructions

  • Prepare your grill or grill pan over medium heat. While it heats, in a large mixing bowl mix the pork with the onion, garlic, adobo sauce, chipotle chile in adobo sauce, oregano, salt and pepper until well combined. With your hands (I find it helpful if hands are wet), make 16 round patties, about 3/4-inch thick, and place them on a baking sheet or platter.
  • In a medium-mixing bowl, place the avocado pulp and mash with a fork until smooth. Combine with the mayonnaise, lime juice, chives and salt, blend well. Set aside.
  • Once the grill or grill pan is hot, brush generously with olive oil. Place the patties on the grill and flip after 3 to 4 minutes. If adding cheese, place a thin slice of cheese on the already grilled side of the patties. Cook for another 4 minutes.
  • A couple minutes before the patties are ready, place the opened hamburger buns on the upper part of the grill (or after you remove the patties, will be fine too!), and let them warm up.
  • Slather a generous tablespoon or so of the avocado spread on the bottom bun, place a patty on top, and put on the top part of the bun. Eat them while hot!

Notes

Hamburguesitas de Cerdo con Chipotle, Queso y Crema de Aguacate

Tuna Minilla Empanadas

Insanely practical, that’s what these empanadas are. Perfect to make ahead for gatherings, as you can eat them hot or not. And they are oh, so, comforting: think of a tuna casserole in the good old style, but revamped with great Mexican flair and then flipped and turned into individual size. They withstand hours of travel and will remain delicious until you are ready to take a bite.

With that in mind, I made a full batch last Saturday to bring to a friend’s house. So thrilled were the boys, and I, with the packets as they came out of the oven (crispy on top, soft layers of barely sweet dough as you get close to the middle and a rich tasting filling) that by the time we put our jackets on, and I went back to the kitchen to transfer the empanadas from the baking sheet to a platter, I gasped at the sight of the only two remaining…

Tuna Minilla Empanadas 1

Lessons learned:

1. Make a double batch.

2. If you don’t, refrain from telling your friends about the fabulous thing you prepared but couldn’t bring because you finished it before hopping in the car. They won’t like it.

A simple way to describe an empanada is a turnover-looking packet stuffed with one or another kind of filling. The story goes that they’ve existed since the Spanish Crusades as they were perfect travel food. It was the Spaniards who brought them to Mexico.

From the Spanish word “empanar,” which can translate as “the act of covering something with bread or bread dough,” aside from practical, they are also versatile. They can go from mini to giant, from savory to sweet, from a tasty appetizer or funky main meal to a sweet bite, depending on the fillings.

Tuna Minilla Empanadas 2

I can think of three things that distinguish empanadas from quesadillas. First, whereas quesadillas are made with flour or corn dough (or flour or corn tortillas) empanadas are made with flour dough. That doesn’t make empanada variations limited. Oh no. There are as many fillings and as many flour doughs as one can think of. One of the fluffiest ones are made with puff pastry, called hojaldre in Spanish.

Delightful, because as it bakes, the seemingly flat dough develops its multilayered structure: paper-thin layers of dough puff up with air, and delicious butter, in between them.

You can make your own puff pastry or simply buy it at the frozen section at the store. Just be sure to thaw before you roll out.

Then make rounds. You can make them as big or as little as you like. Here I am cutting 5” rounds. Brush with egg wash (just a beaten mix of egg and water) around the edges. Then add the filling.

Tuna Minilla Empanadas 3

A second difference between empanadas and quesadillas is that it is pretty hard to find a quesadilla that is sweet, for a good reason. Whereas not only are there plenty of sweet empanadas but even when they are savory, they have a sweet element to them, like the Tuna Minilla that is going in here….

Tuna Minilla Empanadas 4

Minilla is a very popular way of cooking fresh fish and also canned tuna along the Mexican Gulf Coast, especially in Veracruz.

It is so tasty and its flavor shows the impact that kitchens in Veracruz received from it being a port of entry to the Spaniards. It has a base of cooked onion, garlic, plenty of tomatoes, pickled jalapeños, along with the capers, olives, raisins and herbs the Spaniards brought. Pretty much like the Fish a la Veracruzana style. The sauce gets cooked until moist and the flavors have been completely absorbed and combined.

You can eat Minilla as a main dish on top of rice. You can use it to make sandwiches or tortas. But my favorite way to use it is inside of empanadas. And I like to add generous amounts…

Tuna Minilla Empanadas 5

Then seal the empanadas by folding the circle over the filling. Then use a fork to not only decorate the edges but to seal them even better. In Mexico, many cooks know a fancy technique of decorating and sealing the edges of the empanadas so they look like encaje or embroidery. I go with the good old fork….

Tuna Minilla Empanadas 6

The third thing that distinguishes empanadas from quesadillas, is that empanadas are mostly baked. Not fried or cooked over the stovetop on a comal or skillet.

Once in the oven, the puff pastry layers do what they must… puff and puff and puff, the top crisps, the middle gets moist, and the filling bonds with the packet.

Tuna Minilla Empanadas 7

Off you go!

Tuna Minilla Empanadas main
Print Recipe
4.67 from 6 votes

Tuna Minilla Empanadas

Minilla is a very popular way of cooking fresh fish and also canned tuna along the Mexican Gulf Coast, especially in Veracruz. It is so tasty and its flavor shows the impact that kitchens in Veracruz received from it being a port of entry to the Spaniards. It has a base of cooked onion, garlic, plenty of tomatoes, pickled jalapeños, along with the capers, olives, raisins and herbs the Spaniards brought. Pretty much like the Fish a la Veracruzana style. The sauce gets cooked until moist and the flavors have been completely absorbed and combined.
Prep Time10 minutes
Cook Time1 hour
Course: Antojos
Cuisine: Mexican
Keyword: capers, Empanadas, olives, onion, pati's mexican table, Pickled Jalapeños, puff pastry, raisins, Tomatoes, tuna
Servings: 16 empanadas
Author: Pati Jinich

Ingredients

For the filling:

  • 1/4 cup vegetable oil
  • 3/4 cup chopped white onion
  • 1 clove garlic finely chopped
  • 1 1/2 pounds chopped ripe tomatoes or about 6 roma tomatoes
  • 2 7-ounce cans tuna drained and shredded
  • 2 bay leaves
  • 1 teaspoon brown sugar
  • 1/2 teaspoon dried oregano
  • 1/2 teaspoon dried thyme
  • 1/2 teaspoon kosher or sea salt or to taste
  • 1/4 cup roughly chopped raisins
  • 1/4 cup roughly chopped manzanilla olives stuffed with pimientos
  • 1/4 cup seeded and roughly chopped pickled jalapeño chiles store bought or make your own, more to taste
  • 1 tablespoon capers
  • 3 tablespoons chopped Italian or flat-leaf parsley

To form the empanadas:

  • 1 egg
  • 2 tablespoons water
  • 1 1.2 pound package frozen puff pastry thawed, or homemade puff pastry

Instructions

  • In a large skillet, heat the oil over medium heat. Once hot, but not smoking, stir in the onion and cook until it is soft and translucent, about 5 minutes. Add the garlic, stir, and cook until fragrant, about 1 minute. Stir in the chopped tomatoes and cook, stirring often, until completely cooked, softened and mashed up and pasty looking, about 15 minutes.
  • Toss in the tuna and with a spatula or fork, mix it well with the tomato mix, making sure there are no big chunks. Add the bay leaves, sugar, oregano, thyme, salt and mix well. Add the raisins, olives, pickled jalapenos, capers, fresh parsley and mix well. Cover the skillet and reduce the heat to medium-low. Cook for about 10 minutes, the mixture should be very moist but not too watery. Taste for salt and add more if needed. Remove the bay leaves and set aside.
  • Line two baking sheets with parchment paper. Preheat oven to 350. In a small mixing bowl beat the egg along with the water.
  • Gently flour your countertop and rolling pin and roll out one thawed sheet of pastry to about 1/8” thick. Cut out 5” to 6” rounds with a cookie cutter or anything that can act as a mold. With a pastry brush, brush the edges of the rounds with the egg wash. Spoon about 2 tablespoons of tuna in the center of each round, fold as a turnover or quesadilla to make a half moon, pushing the tuna inside of the empanada at the same time as you press the edges of the dough to seal it. Gently press the edge with the tip of a fork, this will act as decoration but also help seal the edges. Place the empanada on a lined baking sheet and repeat with the rest of the rounds and the second sheet of puff pastry. When all empanadas are formed, brush their tops with the remaining egg wash.
  • Place them in the oven and bake for about 30 minutes, until crisp, puffed up and golden brown.

Notes

Empanadas de Minilla de Atún

Go Wild, Munch On Your Crazy Corn!

The Mexican way to wildly dress simply cooked corn drives me wild:

Crunchy sweet corn on a stick, brushed with butter and mayo, coated in tangy and salty crumbled queso fresco, sprinkled with chile powder, typically chile piquí­n, coarse salt and a liberal squeeze of lime juice…

It doesn’t matter if I am hungry. The mere site of a street food corn stand makes me stop dead in my tracks and zoom over for one. Like a wild woman. I need one. Well, the truth is one is not enough, ever.

In Mexico you find corn stands all over, in little towns and big cities. Locals know what day of the week and at what times they show up. If you are not from there, it takes a while to figure it out.

Crazy Corn 1
Last time we went to Chihuahua, after asking around for a while, we found the 3 Hermanos cart with Mauro in charge.

And does that man know how to dress that corn! He spoiled me and added an extra squeeze of lime juice.

Crazy Corn 2
Corn can be simmered in water, many times with fresh Epazote. Or it can be grilled on a griddle or comal. If the kernels are shaved off, then the dish is called Esquites. But the traditional trimmings are the same for all.

Yet, some people can get even wilder… You won’t believe this, when Mauro was dressing our corn, a pregnant lady asked for her Esquites with all the trimmings to be poured inside a bag of Doritos. Yes she did. But if you ask me, about to have a baby, she was entitled to whatever kind of craving she felt like…


Crazy Corn 3

Last week, thinking of the many things to do with summer corn for an appearance on the Today Show, I included Crazy Corn. But I opted for the grilled take, because as the corn chars, its natural sugar comes out and caramelizes, giving it an extra layer of rustic and sweet flavor.

Crazy Corn 4
Thanks to the most professional, talented and fabulous food prep styling team, that of the Today Show, the Mexican street style corn that Mexicans love so much, looked so beautiful on the set.

Crazy Corn 5
They had all the trimmings with alternatives and options. Different kinds of dried ground chiles: Ancho, Chipotle and a smoky mix. They also had the queso fresco and its seamless substitutes: Queso Cotija and its Mediterranean cousin, the Mild Feta.

Crazy Corn 6
Crazy Corn is Mexican street food at its best, and it happens to be perfect for summer barbecues.

Crazy Corn 7
Here goes one for you! Messy goodness, conveniently placed on a stick ready for you to munch on.


Print Recipe
5 from 2 votes

Crazy Corn

The Mexican way to wildly dress simply cooked corn drives me wild: Crunchy sweet corn on a stick, brushed with butter and mayo, coated in tangy and salty crumbled queso fresco, sprinkled with chile powder, typically chile piquí­n, coarse salt and a liberal squeeze of lime juice…
Prep Time1 minute
Cook Time9 minutes
Course: Antojos, Side Dish
Cuisine: Mexican
Keyword: Antojo, chile piquín, Corn, cotija, elotes, lime, mayonnaise, queso fresco, Recipe
Servings: 6 servings
Author: Pati Jinich

Ingredients

  • 6 ears of fresh corn husked and rinsed
  • 1 tablespoon vegetable oil
  • unsalted butter
  • mayonnaise
  • 1 cup crumbled cotija or queso fresco farmers cheese or a mild Feta
  • 3 limes halved to squeeze on top
  • Salt to taste
  • Dried ground chile piquin or a Mexican mix or to taste

Instructions

  • Brush the ears of corn with a bit of oil. Place over a grill or grill pan, set over medium heat, and let the corn cook and char slightly, turning them every 3 minutes or until the corn is down, anywhere from 9 to 12 minutes. Remove from the heat. Alternatively, you can simmer the corn in water until tender.
  • Let everyone decide what they want on their crazy corn. You can stick the corn on corn holders or a wooden stick.
  • The traditional way is to spread butter and a layer of mayonnaise. Then the corn is thoroughly "breaded" with the crumbled cheese, sprinkled with salt and ground chile and finally, drizzled with freshly squeezed lime juice.

Notes

Elotes

Enchiladas Verdes: in a Tomatillo Sauce

Now that Cinco de Mayo is right around the corner, friends are asking me what we will be eating to celebrate…and what I am craving most are Enchiladas Verdes. The perfect yummy family food that stays messy on the casserole.

Even though most native Mexicans know that Cinco de Mayo isn’t a big celebration in Mexico (as a matter of fact, it is mostly celebrated in Puebla), we embrace it outside of Mexico with all our hearts without really knowing why. I guess it is a great excuse to celebrate what we love and miss about Mexico- like the tomatillo. A native Mexican ingredient that is the corner stone of so many dishes.

Enchiladas Verdes 1
The tomatillo, like Cinco de Mayo, has been adopted in the U.S. It can now be found in most supermarkets and it seems to me it will grow big time in American kitchens as it is such a spectacular ingredient.

While on the outside it isn’t the most appealing ingredient because of the papery and dusty husk, once you peel it, rinse it and try it, you will see what a gorgeous jewel it is,
both in looks and in flavor!  Most people know it from it being used to make salsa verde, which is exactly what these enchiladas are covered in. You can also find cans and jars of ready made salsa, but it is so easy to  make at home, that you should give it a try. It’s tastier too.

To make the salsa, simmer the tomatillos in water with the garlic, until they are soft and pale green.  Then transfer the tomatillos and garlic to the blender and puree with the jalapeño or serrano chiles, cilantro leaves, onion and salt.

Enchiladas Verdes 2

Then to make your enchiladas the best they can be, one at a time, pass each corn tortilla through already hot oil until they change color and soften.  This will prevent them from breaking as you roll them.  The oil also makes the tortillas resilient, so they will hold on to that yummy tomatillo sauce.

Enchiladas Verdes 3

Place some of the shredded chicken into each of the corn tortillas and roll them up.  I like them chunky. You can cook the chicken at home or use a store-bought rotisserie chicken, they both work great here!

Place the rolled tortillas seam side down in a casserole dish.  Pour the tomatillo sauce, generously, over the top. Then bake them for 10 to 15 minutes.

Enchiladas Verdes 4

When they are out of the oven, drizzle Mexican cream over the top. Mexican cream has a tangy flavor, and when it hits the warm enchiladas, it will warm up, become melty, and become even more creamy, and at the same time it will add some fresh notes to the dish.

Enchiladas Verdes 5

Crumble up some queso fresco on top too. It will keep on crumbling right in your mouth as you eat it.  Add some onion for a nice crunch…   Then they are ready to go!

Enchiladas can be made with many different sauces and fillings.  This take has the traditional salsa verde or green tomatillo sauce and chicken, but you can play with the fillings.

Enchiladas Verdes 6

If you have extra tomatillo salsa left over…  Try serving it over tilapia filets, baked in the oven; or served on top of sunny side up eggs in the morning.  This tomatillo sauce is truly limitless.

You can eat Enchiladas Verdes like me, to celebrate Cinco de Mayo. But you can also eat them everyday. After all, everyday is worthy of being celebrated, with a Mexican excuse or not.

Print Recipe
4.50 from 8 votes

Enchiladas Verdes in a Tomatillo Sauce

Enchiladas can be made with many different sauces and fillings. This take has the traditional salsa verde or green tomatillo sauce and chicken, but you can play with the fillings.
Prep Time20 minutes
Cook Time30 minutes
Course: Antojos, Main Course
Cuisine: Mexican
Keyword: Antojo, chicken, Enchilada, Recipe, salsa verde
Servings: 6 to 8 servings
Author: Pati Jinich

Ingredients

For the sauce:

  • 2 pounds green tomatillos husks removed and rinsed
  • 2 cloves garlic
  • 2 serrano chiles or to taste
  • 1 cup cilantro leaves
  • 1/4 cup white onion roughly chopped
  • 1 teaspoon kosher or sea salt more or less to taste
  • 1 tablespoon safflower or corn oil

For the enchiladas:

  • 2 cups shredded cooked chicken home cooked or rotisserie works great!
  • Oil for frying the tortillas
  • 12 corn tortillas
  • 1/2 cup Mexican style cream can substitute for heavy cream
  • 1/2 cup crumbled queso fresco farmers cheese, cotija or mild feta
  • 1/3 cup white onion chopped, for garnish

Instructions

To make the sauce:

  • Place the tomatillos and garlic cloves in a pot and cover with water. Place over medium-high heat until it comes to a boil. Simmer on medium heat for about 10 minutes, or until tomatillos change their color from bright to pale green, are cooked through, and are soft but not coming apart.
  • Place the tomatillos, garlic and 1/2 cup of the cooking liquid in the blender and puree. Add the chiles serranos, cilantro leaves, onion and salt, and puree again until smooth. Heat a tablespoon of oil in a pot over medium-high heat. Once it is hot, but not smoking, pour in the sauce and bring to a simmer. Let it simmer over medium heat for about 6 minutes, until it thickens and deepens in color. Taste for salt and add more if need be.

To make the enchiladas:

  • In a large saute pan over medium heat, add enough oil to have about 1/2 inch depth. Let it heat about 3 minutes. Gently "pass each tortilla through the oil," one by one, for about 15 seconds on each side, they will soften and become resilient. You should be able to fold them without breaking them. Transfer them to a paper towel covered plate.
  • Preheat the oven to 375°F.
  • Place about 2 to 3 tablespoons chicken inside of each tortilla and roll them up. Place them, seam side down on a baking dish. Cover, generously, with the green sauce. Place them in the oven for 10 to 15 minutes. Remove them from the oven, sprinkle with the crumbled cheese, the cream, and the chopped onion. They are very satisfying with a side of rice and/or beans, as well as with a light green salad.
  • Eat the enchiladas while they are hot!

Notes

Enchiladas Verdes

Molletes with Pico: No Way not to Fall in Love

It takes three ingredients, plus any extra topping that you fancy, 8 minutes in the toaster or oven and you get one of the most comforting foods I have eaten since I can remember: Molletes.

One of the most popular Mexican anytime antojitos or cravings, that can be eaten for breakfast, brunch, lunch, a hearty afternoon snack or dinner.  It used to be a standard option for breakfast or dinner at my house growing up in Mexico City, just as quesadillas were. But I also used to crave Molletes from my school cafeteria.

So yes, even if I had some at home in the morning, I would have more for lunch at school…

First, you need the earthy and filling refried beans. You can make your own at home -I make a weekly double batch of beans and use it all week long- or buy ready made at the store. I usually go for Pintos, from photo below, or Black beans.

molletes 1

Secondly, you need crispy bread. In Mexico it is always a bolillo or telera, the Mexican adaptation of the baguette (since times of Maximilian in the 1860’s…). But you can use petite baguettes or cut individual portions from a large baguette. Portuguese buns are similar too.

Slice the breads in half lengthwise and slather 2 to 4 tablespoons of refried beans on each half.

Molletes 2

Lastly, add a generous amount of shredded, melting cheese. Something flavorful, but not too overpowering, like Oaxaca, Mozzarella (but not the fresh wet one), Monterey Jack, Light Cheddar or Muenster. In Mexico I would also go for the Chihuahua or Mexican Manchego, but those are hard to come by in the US.

Then in the toaster or oven they go, for about 8 minutes. Until the bread crisps on the outside even more, the earthy beans have heated up and the cheese is oozing on top of it all.

Molletes 3
As with most antojitos, they can be messed around with. You can add extra toppings like crumbled bacon, chorizo, turkey or ham.

My boys love to have those choices! It makes them feel empowered in the kitchen, different from one another and like they are fully enforcing their free will on my territory. Which honestly, is more and more theirs, as the years go by. And I just love that, I can’t begin to tell you how much.

In restaurants and coffee shops Molletes are usually served with a side of Pico de Gallo.

Molletes 4

Talk about a way to make them even more wholesome and colorful. A healthy mix of ripe tomatoes, a bit of onion, cilantro and fresh chile, all mixed with fresh squeezed lime juice. But sometimes I will serve them along a Salsa Verde or Chipotles in Adobo. Delicious as well.

There is no way not to fall in love with this quick, fun and tasty meal. There’s just… none.

Enjoy!

Print Recipe
5 from 4 votes

Grilled Bean and Cheese Heros

It takes three ingredients, plus any extra topping that you fancy, 8 minutes in the toaster or oven and you get one of the most comforting foods I have eaten since I can remember: Molletes.
Prep Time5 minutes
Cook Time8 minutes
Course: Antojos
Cuisine: Mexican
Keyword: Antojo, beans, Monterrey Jack cheese, mozzarella, Oaxaca cheese, pati's mexican table, Pico de Gallo, Recipe, refried beans, telera
Servings: 4 to 6 servings
Author: Pati Jinich

Ingredients

  • 4 teleras bolillos, petite baguettes or large baguettes cut into 6" portions
  • 2 cups refried beans homemade or store bought
  • 2 cups Oaxaca cheese mozzarella or Monterrey jack, grated (any melting cheese of your liking will do)
  • Serve with pico de gallo salsa or another salsa of your choice

Instructions

  • Preheat the oven to 350 degrees.
  • Slice the bread in half lengthwise to have 8 pieces. Spread each piece with 3 to 4 tablespoons of refried beans and add 3 to 4 tablespoons of grated cheese on top. Arrange Molletes on a baking sheet as you make them. If you want, add additional toppings like ham, turkey, bacon or chorizo. Sprinkle them on top of the cheese. When they are all assembled, place the baking sheet into the oven.
  • Bake for 8 to 10 minutes, or until the cheese has melted and the bread has a nice toasted crust around the edges. Serve with Pico de Gallo salsa, or a salsa of your choice, on the side or on top.

Notes

Molletes

Empanadas of the “Immaculate Conception”

With a soft, crumbly and almost sweet dough that embraces a moist, tasty and meaty filling, it is hard not to eat one after the other. These Empanadas do have a curious name though. Especially when you consider their addicting nature.

I didn’t choose their name. No.The nuns from the Mexican Convent of our Lady of the Immaculate Conception are to blame.It all began with Beatriz da Silva, the Portuguese woman who founded the order in Toledo, Spain.

Known to be shockingly beautiful, although destined to be the companion to Queen Isabel from Spain, she was locked up because of the Queen’s jealousy and alleged admiration from the King. Legend goes, that when Beatriz managed to flee, she was more beautiful and had a new found strength she used to establish a new Conceptionist order.The three Conceptionist nuns who arrived in Mexico City around the 1540’s, were also known to be strong. If not as pretty.

Aside from trying to evangelize the population, they combined Spanish and Mexican ingredients in their kitchens, as most Spanish nuns, with an intense passion and a ton of imagination. As most Spanish nuns, as well, their cooking instincts were led by an insatiable sweet tooth. That may explain the sweet elements both in the dough and the filling of these Empanadas, that were served time and again to entertain guests in this convent.And now you know, where the name comes from…


The dough can be used both for sweet or savory Empanadas. As its sweetness is so mild, it enhances the flavors in savory fillings, such as the Meat Picadillo in this one, and it dances along sweet dessert ones.

It can be made in a snap by mixing cream cheese, butter, all purpose flour and a pinch of salt in the mixer. Or by hand.


It was originally made with Nata instead of Cream Cheese. Nata, which is a thin layer formed after boiling fresh raw milk, and found throughout Mexico in Haciendas and Ranchos, is sweet, extremely white and thick.

And oh so irresistible.

If you have access to Nata, use it instead of Cream Cheese, as those pioneer Conceptionist nuns did. But truth is, many nuns use Cream Cheese these days too…

The dough is malleable and soft. Juju made one batch with his hands. Proud monster.


It is easy to roll out as it is elastic, soft and not so sticky. But do sprinkle some flour as you roll…


To cut the rounds, you can use a pastry cutter. I found the size I wanted, a 4 inch round, in a Tupperware. Which was also easy for Juju to use.


As you separate the rounds…


…brush the edges with a lightly beaten egg.


Spoon the filling right down the center.

The Meat Picadillo is included in the recipe below. Picadillo, has many variations, but it typically has as a base of ground meat seasoned with garlic, onion, tomato puree, spices and sometimes nuts, olives and sweet ingredients like raisins or dried fruits. A complex version of Picadillo is used in the legendary Chiles en Nogada.


This is a simpler version, that can be made a couple days ahead of time. Just take it out of the refrigerator when you are ready to fill those Empanadas (If you have leftover Picadillo, you can make tacos, stuff chiles, tamales… or eat it with a side of rice or tortillas!)

Close up the bundle in the shape of a turnover.


Seal the edges pressing your fingers.


To really seal the deal, go around with a fork, gently, so as not to make many holes in the dough…


Give the Empanada a final egg wash.


Here we go, one after the other…


Sprinkle with sesame seeds. It makes them look beautiful. I think Beatriz da Silva would approve.

The sesame seeds also give the Empanadas a light nutty and toasty accent.


And in the oven they go. You can also make them ahead of time and place them in the refrigerator (for a couple of days) or freezer (for weeks!) before baking them.

Take them out as you need them and eat them freshly baked. As they should.

Pati Jinich picadillo empanadas
I think that you do taste all of the flavor, all of it, behind the history of these Empanadas, in each single bite.

picadillo empanadas
Print Recipe
3.92 from 25 votes

Picadillo Empanadas of the Immaculate Conception

Picadillo Empanadas of the Immaculate Conception recipe from Pati's Mexican Table Season 1, Episode 5 “Convent Food”
Prep Time45 minutes
Cook Time20 minutes
Total Time1 hour 5 minutes
Course: Antojos, Main Course
Cuisine: Mexican
Keyword: almonds, cinnamon, cloves, cream cheese, cumin, Empanadas, nata, olives, onion, pati’s mexican table, Picadillo, pork, raisins
Servings: 15 medium empanadas
Author: Pati Jinich

Ingredients

For the dough:

  • 1 cup unsalted butter at room temperature
  • 8 oz, about 185 g cream cheese or fresh nata at room temperature
  • 2 1/3 cups all-purpose flour
  • 1/2 tsp salt
  • 1 egg lightly beaten
  • 1/2 cup sesame seeds

For the picadillo (makes about 4 cups):

  • 3 tbsp olive oil
  • 1/4 cup white onion chopped
  • 1 garlic clove finely chopped
  • 1 lb pork shoulder or butt or combination of pork, beef and veal, ground
  • 3/4 tsp kosher or sea salt
  • 1 lb ripe tomatoes pureed, or about 2 cups tomato puree
  • 2 cups chicken broth or water
  • Pinch of cumin
  • Pinch of ground cloves
  • 1/2 tsp cinnamon ground
  • 1/4 cup slivered almonds lightly toasted
  • 1/4 cup raisins
  • 1/4 cup Manzilla olives chopped

Instructions

To make the dough:

  • Beat the cream cheese with the butter in a mixer at medium speed, until it is creamy. Gently add the flour and salt and continue mixing for a minute more. Turn dough onto a lightly floured surface and knead for a minute. Form the dough into a ball, wrap in plastic wrap and refrigerate from 15 minutes up to 24 hours.
  • After refrigerating, sprinkle flour over the countertop and roll out half the dough until its about 1/4 inch thick. For medium sized empanadas, cut out rounds of 4 to 5 inches in diameter. Continue until all of the dough is used.
  • Grease a baking sheet with butter. Preheat the oven to 375 degrees.
  • Spoon about 1 1/2 tablespoons of the picadillo filling into the center of each round. Brush the edges of the round with the beaten egg. Fold a side of the circle over the filling across the other side. Press with your fingers as you close. Without breaking the dough, press with a fork over the edges to seal and make a design.
  • Place the empanadas on the baking sheet. When you fill the baking sheet, lightly brush their tops with the lightly beaten egg and sprinkle with sesame seeds.
  • Bake the empanadas anywhere from 20 to 25 minutes, until the tops have a golden tan and dough is cooked through. Serve hot.

To make the picadillo:

  • Heat olive oil in a large saute pan set over medium-high heat. Add onion and saute for a couple of minutes, until it becomes translucent and soft. Incorporate chopped garlic and saute for about a minute until it becomes fragrant. Incorporate the meat and the salt and let it cook for about 8 minutes, until cooked and lightly browned.
  • Pour in tomato puree and let it season, stirring often, for 5 to 6 minutes, until it has deepened its color, thickened in consistency and lost the raw flavor. Pour in the chicken broth or water, cumin, cloves and cinnamon. Stir well and let it cook 15 minutes more.
  • Add the raisins, almond and olives, mix well and taste for seasoning. Cook for 5 more minutes. If needed, add more salt. The filling should be nice and moist.
  • Just remember, once it cools, it will dry a little more as it will absorb the juices. Turn off the heat. You can make the filling up to two days ahead of time, let it cool, cover and refrigerate.

Notes

Empanadas de Picadillo de la Inmaculada Concepción

Chicken Tinga for Today (Show) and Everyday!

What to cook for the Today Show?

With so many options being juggled in my head, I was growing restless as the date got closer.

As I started exchanging emails with one of the producers, I began to throw ideas: what about different kinds of Salsas, variations of that irresistible cold and wet Tres Leches cake, funky versions of Guacamole, or a sample of fresh Ceviches…?

Or, wait. How about something easy, tasty and flashy like Tequila, Cream and Chipotle Shrimp? It’s so much fun to prepare, I told the producer. You ignite the pan, the flames come up right after the shrimp begin to brown, and then they wind down right before you pour the cream. Your guests feel special and impressed…

I had to agree that we were better off staying away from igniting anything on the set.

Oh, I got it! A chicken dish. Everyone wants a good chicken dish in their recipe box. And one of the tastiest ways to eat chicken in Mexican kitchens, no doubt about it, is Chicken Tinga.

Although it comes from the state of Puebla, it is so popular, that it is eaten throughout the country. So of course there are countless variations.

I have a favorite version. One that I have tweaked through the years until I found a balance of flavors that needs no more tweaking, if you ask me…

Chicken Tinga 4c-thumb-510x342-1318
A great thing about the Tinga, is that you only need a handful of ingredients. Some are familiar to everyone, like tomatoes, onion and garlic. The other needed Mexican
ingredients are readily available throughout the US these days, and people should become familiar with them, as they are absolutely blissful.

Such is the case of the Tomatillos, pictured above next to their cousins, the tomatoes… and the Chipotle Chiles in Adobo Sauce.

Chicken Tinga 6-thumb-510x342-1324
Pump up the sweetness of the tomatoes, the tart notes of the Tomatillos and the rich smoky, depth of the Chipotles with some Marjoram, Oregano and Thyme, Salt and Pepper….

Chicken Tinga 5a-thumb-510x342-1320
Add some already cooked and shredded chicken, and you have a winner.

Catchy and irresistible, starting with the name, the Tinga is easy to prepare, packed with flavor, and once you make it, can be refashioned in a thousand ways. Plus it stores in the refrigerator well, and it’s one of those dishes that add on flavor as its reheated.

After talking with Bianca, the food stylist in charge at the Today Show, we decided to cook the Tinga, and show the viewers a couple choices of how to play with it: Tostadas and what can be called Tinga’Dillas.

Here is Bianca on the set, right before the segment. She rocks, friends.

Chicken Tinga 2-thumb-510x342-1306
This is Bianca’s hand, making a beauty out of the deliciously messy Tostada…

Chicken Tinga 1-thumb-510x342-1305
Here, that’s a zoom out.

OK. It is so crazy in that set, but oh so fun, fun, fun crazy… And the whole food styling team is amazing.

Chicken Tinga 7-thumb-510x342-1326
That is the front of the set. Allison (there in the corner of the photo below) and I chose some colorful pots and pans to do the demo.

And you see that clock under the screen? It says 9:39. Segment was going to be shot at 9:46. Yes, I got dizzy and nauseated, and hyper and sleepy all at the same time…

Chicken Tinga 8-thumb-510x342-1328
So aside from the Chicken Tinga demo, there were the Tinga’Dillas paired with Guacamole and Grilled Corn…

Chicken Tinga 10-thumb-510x342-1334
And the Tostadas, set on that rustic piece of stone. We were going to do the Fresh Cheese and Mexican Cream, last minute…. to take it over the top. Why not?

Chicken Tinga 11-thumb-510x342-1336
The 4 minutes flew by.

When all was said and done, we ate the Tostadas and the Tinga ‘Dillas. And after that, we hugged. I hugged them so tight, out of thankfulness, everyone there was so generous and warm.

From the lovely woman Roma, who fixed my hair (Thank the Heavens, I never know what to do with it and always pull it up), to the hilarious Gilberto, who did my make up (Thank the Seas,  because I can hardly curl my eye lashes properly), to the professional Food styling team with Bianca and Allison and the rest, to the generous and kind producers Vivian and Alicia…

Chicken Tinga 12-thumb-510x342-1338
… and the gorgeous and warm hosts Natalie Morales and Ann Curry (who are even prettier in person, I swear!).

Chicken Tinga 9a-thumb-510x342-1330

Oh Boy. What a team! If you want to watch the segment click here.

The Tostadas and Tinga’Dillas are perfect for casual entertaining. They can be messy, but its a delicious kind of messy. And after all, its the middle of the summer. If you get too messy, just turn on the hose.

chicken tinga or tinga de pollo
Print Recipe
4.80 from 5 votes

Chicken Tinga

One of the tastiest ways to eat chicken in Mexican kitchens, no doubt about it, is Chicken Tinga. Although it comes from the state of Puebla, it is so popular, that it is eaten throughout the country. So of course there are countless variations. I have a favorite version. One that I have tweaked through the years until I found a balance of flavors that needs no more tweaking, if you ask me…
Prep Time1 hour 10 minutes
Cook Time30 minutes
Total Time1 hour 40 minutes
Course: Antojos, Main Course
Cuisine: Mexican
Keyword: chicken, chipotles in adobo, Pollo, Puebla, quesadillas, Recipe, tacos, tinga, tortas, tostadas
Servings: 4 servings (makes about 5 cups)
Author: Pati Jinich

Ingredients

  • 3 tablespoons safflower or corn oil
  • 1/2 white onion about 1/4 pound, slivered
  • 2 garlic cloves chopped
  • 8 roma tomatoes or about 2 pounds, rinsed
  • 2 tomatillos or about 1/4 pound, husks removed, rinsed
  • 1/2 teaspoon crumbled dried oregano
  • 1/4 teaspoon dried marjoram
  • 1/4 teaspoon dried thyme
  • 1 1/2 to 2 teaspoons kosher or sea salt or more to taste
  • 1/4 teaspoon black pepper freshly ground
  • 2 tablespoons sauce from chipotle chiles in adobo can add whole chiles if more heat is desired
  • 5 cups cooked shredded chicken

Instructions

  • Place the rinsed tomatoes and tomatillos in a medium saucepan and cover them with water. Set the saucepan over medium heat. Once it comes to a simmer, cook for 8 to 10 minutes, or until the tomatoes and tomatillos are soft, thoroughly cooked, and smooshy but not coming apart. Remove them with a slotted spoon. Place in the jar of a blender or food processor and blend until smooth.
  • Heat the oil in a large and deep pan over medium heat. Once it is hot but not smoking, stir in the onion and cook until soft and translucent, for about 5 to 6 minutes. Stir in the garlic and cook until it becomes fragrant and lightly browned, about 1 minute.
  • Pour the tomato/tomatillo sauce on top and sprinkle the oregano, marjoram, thyme, salt and black pepper. Spoon in the chipotle Chiles in Adobo sauce. If you want it spicy, you may drop a whole Chipotle Chile in Adobo in there as well. Let the sauce simmer, stirring now and then until it seasons and deepens its red color, about 10 to 12 minutes. You may want to partially cover the pan as the sauce may want to jump out over your burners.
  • Toss in the chicken and combine with the sauce. Let it cook, stirring casually, until the chicken has absorbed almost all of the juices and the mix is moist but not juicy.

Notes

Tinga de Pollo
chicken tinga or tinga de pollo
Print Recipe
4 from 3 votes

Chicken Tinga Tostadas

Catchy and irresistible, starting with the name, Chicken Tinga is easy to prepare, packed with flavor, and once you make it, can be refashioned in a thousand ways, such as on tostadas.
Prep Time10 minutes
Cook Time0 minutes
Total Time10 minutes
Course: Antojos, Appetizer, Main Course
Cuisine: Mexican
Keyword: chicken, Pollo, Recipe, tinga, tostadas
Servings: 12 tostadas
Author: Pati Jinich

Ingredients

  • 12 corn tostadas such as Guerrero or Mission
  • 1 1/2 cups refried beans warmed up (can be home made or store bought)
  • 3 cups chicken tinga recipe above
  • 1 cup iceberg or romaine lettuce thinly sliced
  • 1 ripe Mexican avocado pitted, peeled, and sliced
  • 1/2 cup queso fresco Cotija or farmers cheese, crumbled
  • 1/2 cup Mexican or Latin style cream
  • Salsa of your choice such as salsa verde, optional

Instructions

  • Place the tostadas on a large platter.
  • Layer a couple of tablespoons of refried beans on the tostada. Spread a couple tablespoons of chicken tinga on top and garnish with about 1 or 2 tablespoons lettuce, 1 or 2 slices of ripe avocado, 1 or 2 tablespoons of crumbled queso fresco and Mexican cream.
  • Serve the salsa on the side for people to drizzle as much as they want.

Notes

Tostadas de Tinga de Pollo
chicken tinga or tinga de pollo
Print Recipe
4 from 4 votes

Tinga Dillas

Catchy and irresistible, starting with the name, Chicken Tinga is easy to prepare, packed with flavor, and once you make it, can be refashioned in a thousand ways, such as a filling for quesadillas.
Prep Time0 minutes
Cook Time10 minutes
Total Time10 minutes
Course: Antojos, Appetizer, Main Course, Snack
Cuisine: Mexican
Keyword: Antojo, chicken, Pollo, Quesadilla, Recipe, tinga, tortilla
Servings: 4 servings
Author: Pati Jinich

Ingredients

  • 8 large flour tortillas
  • 4 slices Monterey jack cheese muenster cheese, or Mexican manchego
  • 2 cups chicken tinga recipe above
  • 2 cups guacamole home made or store bought, on the side

Instructions

  • Heat a non-stick skillet or comal over medium-low heat. You may also use the grill. Once hot, after 3 or 4 minutes, layer 2 flour tortillas, the cheese slices and the Chicken Tinga. Place 2 flour tortillas on top of the open ones, and let them cook until the tortilla on the bottom has begun to harden a bit. Flip to the other side with the help of a cooking spatula and let the quesdillas continue to warm up, until the cheese has completely melted and the tortillas have hardened on both sides.
  • Repeat with the rest.
  • Serve with guacamole for your guests to spoon on top.

Notes

Quesadillas de Tinga

Bossed Around at El Bají­o: Plantain Quesadillas

Each time I go back to Mexico City, even before the plane lands, I know there are some formal plans that can never, ever, be messed around with. They are all with my father and they all involve eating in the same places. Each single time.

One of the places is El Bají­o. If you know my father, you know he doesn’t let me order. You also know that he knows the Restaurant manager, waiters, bar servers and valet parking attendants by name. And they all know him too.

Continue reading “Bossed Around at El Bají­o: Plantain Quesadillas”

Quesadillas at the Mexico City Fair

The last time I was at the Mexico City Chapultepec Fair was 20 years ago, with my high school friends. Going back last weekend with my own growing monsters, confirmed that it is not an ordinary Fair experience, ever, regardless of one’s age.

Yes, you find the balloons, with a mix of Mexican and American characters, right at the main entrance.

Squash Blossom Quesadillas 1

You will always find Mrs. Bird Lady, somber as can be, with her clairvoyant birds. As soon as she looks you up and down, she knows which of her birds can tell your future more accurately. Maybe…

Squash Blossom Quesadillas 2

For 20 pesos, the cute little bird steps out of the wooden cage, fully concentrated, knowing you think it holds the surprises of your future in its beak.

Squash Blossom Quesadillas 3
It elegantly chooses the three cards that will reveal it to you.

Squash Blossom Quesadillas 4

After being completely clueless with the shocking differences from what the three cards said, you go in for the rides.

And wow man, does that Fair have rides. From beastly roller coasters…

Squash Blossom Quesadillas 5

To the dizzying Nao de China. History tells us that the Naos were really Galleons from the Philippines, that traveled the Manila-Acapulco trade route since the XVI century, bringing so many ingredients into Mexico’s kitchens. But who knows why the name has been popularly changed, for centuries now, to the Nao from China. I guess it sounds more exotic.

Oh well, the monsters couldn’t care less about the accurate food history, all they wanted to do was ride that boat again and again.

Squash Blossom Quesadillas 6

As well as that crazy ride that goes up and down, which I refused to ride.

Squash Blossom Quesadillas 7

There’s my oldest monster, happy with two of his cousins, after dozens of  rides.

Squash Blossom Quesadillas 8

And there is absolutely no Mexican Fair without a Mexican clown. I took a FLIP video, so you can get into the mood.

I had to stop there. If you know Spanish, you heard the clown inviting kids to come up the stage. Some of mine wanted to try. Nope. They didn’t get a turn.

But what is most amazing about the Fair, is the amount and diversity of finger licking foods to be found.

Say, even before you walk in, there is Mr. Cotton Candy Man.

Squash Blossom Quesadillas 9

That was some light, fluffy, spongy and delicious cotton candy, we ate first, before anything else.

Squash Blossom Quesadillas 10

There are countless stands selling Mexican style hamburgers and hot dogs, which do drive me crazy. In such a good way.

Squash Blossom Quesadillas 11

Garnished with raw or cooked onion, tomatoes and Jalapeños. Topped with ketchup and mustard until you say stop. As well as melted – until crisp – Cheddar cheese and crispy bacon, if you like.

Squash Blossom Quesadillas 12

There are exotically flavored popsicles: Jamaica flowers, Horchata, Tamarind, Mango with Chile, Pecans, Strawberries and Cream, Zapote, Mamey, Coconut, Tangerine, amongst some… And they can all be drizzled with a healthy dose of Chamoy on top.

Squash Blossom Quesadillas 13

There is a grand place to find all sorts of candies…

Squash Blossom Quesadillas 14

…that tend to be spiced up, with different levels of heat. Not for the faint-hearted.

Squash Blossom Quesadillas 15

As well as different kinds of crunchy snacks like potato chips and chicharrones, which MUST be squirted with Chile sauce, freshly squeezed lime juice and salt. Really, they MUST.

Squash Blossom Quesadillas 16

Popcorn freshly popped, MUST also be squirted with a chile sauce.

Squash Blossom Quesadillas 17

There are taco and torta stands.

Squash Blossom Quesadillas 18

The best torta, this time, was the Torta de Pastor.

Mr. Torta de Pastor was kindly showing me how he prepared the Torta that was about to be all mine. He takes a telera -Mexican style French baguette – and heats it on the grill. He places juicy thin layers of that carne in adobo he is slicing below, crunchy onion and savory cilantro.

Squash Blossom Quesadillas 19

Then you can add the salsa of your choice, from many that he lets you choose from.

You know you want to take a bite into it. I should have taken a FLIP video of that, but I was too eager to sink my teeth into it. Sorry.

Squash Blossom Quesadillas 20

There were also Tlayudas. 

Squash Blossom Quesadillas 21

Tlayudas are very large, thin, toasted and crisp corn tortillas. Here they were covered with refried beans, seasoned cactus paddles, shredded aged cheese, onion, cilantro and topped with both, a red and a green sauce.

Squash Blossom Quesadillas 22

You will also find Nachos. Always. But that is Always, a no thank you from me. Not Here, not There, no Nachos for me Anywhere.

Squash Blossom Quesadillas 23

But the best, by far, were the quesadillas. Freshly made.

Squash Blossom Quesadillas 24

There are countless fillings for you to choose from. Right there, on the spot: seasoned cactus paddles, huitlacoche or mushrooms, chicken Tinga, shredded beef, potato and chorizo

Squash Blossom Quesadillas 25

But my favorites are quesadillas with Squash Blossoms, Poblano Chile and Oaxaca cheese.

I like them so, I featured them in last year’s session at the Mexican Cultural Institute focused on Mexican Street Foods.

There are many ways that you can make them. You can make the corn dough from scratch, which is simple these days. Flatten in a tortilla press, add the filling and fry. As below.

Squash Blossom Quesadillas 26

Or you can use pre-made corn tortillas, add the filling, heat on a comal or griddle until the cheese melts, and if you want until it crisps a little too.

Squash Blossom Quesadillas 27

Whichever way you decide to make them, with fresh corn masa or already cooked tortillas, the wholesome and tasty filling full of personality is bound to make you happy. I am sure the clairvoyant bird would agree…

squash blossom quesadillas
Print Recipe
4.50 from 4 votes

Squash Blossom Quesadillas

Squash Blossom Quesadillas recipe from Pati's Mexican Table Season 2, Episode 9 "Xochimilco: Cooking with Flowers"
Prep Time1 hour
Cook Time30 minutes
Total Time1 hour 30 minutes
Course: Antojos, Appetizer, Main Course
Cuisine: Mexican
Keyword: cheese, Chiles, Mexico City, Oaxaca, Poblano, Quesadilla, queso, squash blossom
Servings: 12 quesadillas
Author: Pati Jinich

Ingredients

  • 2 poblano chiles charred, peeled, seeded and diced
  • 1 tablespoon unsalted butter
  • 1 tablespoon safflower or corn oil
  • 1/4 cup white onion chopped
  • 1 teaspoon garlic finely chopped
  • 12 ounces fresh squash blossoms rinsed, dried and chopped (about 8 cups)
  • 1 teaspoon kosher or sea salt or to taste
  • 8 ounces Oaxaca or mozzarella cheese shredded
  • 2 cups instant Maseca corn masa flour if making fresh masa tortillas, or substitute 1 package store-bought corn tortillas
  • 1 3/4 cups water for the masa, if making fresh masa tortillas

Instructions

To Prepare Filling:

  • Place the poblano chiles on a tray under the broiler, directly on the grill, or directly on the open flame or on a comal or skillet set over medium heat. Turn them every 2 to 3 minutes for a total of 6 to 9 minutes, until they are charred and blistered all over. Transfer them to a plastic bag, close it tightly and let them sweat for 10 to 20 minutes. Working under a thin stream of cold water, peel off their skin; make a slit down the sides to remove and discard the seeds and veins, then remove and discard the stem. Cut them into 1/2-inch-wide strips or squares.
  • Add butter and oil in a medium sauté pan over medium heat. When the butter is bubbling, add the onion and garlic and cook until softened and fragrant, for about 3 to 4 minutes. Add the prepared poblano chiles, then the squash blossoms and salt. Cook for about 5 minutes, stirring often, until the blossoms exude their juices and the mixture begins to dry out. Remove from the heat.

If Using Fresh Corn Masa:

  • Mix Maseca or instant corn dough masa with the water and knead for a few minutes until soft. Make 1-inch balls and flatten between plastic rounds on a tortilla press.
  • Place 1 tablespoon of the cheese and 2 tablespoons of the filling at the center of the dough disk and, leaving it on the plastic round of the tortilla press, fold it over and press to seal the edges. Repeat to form the rest of the quesadillas, using all the dough and filling.
  • In a deep and large skillet, add enough oil so that it’s at least ¾-inch deep; heat over medium heat. Once the oil is hot, about 3 to 4 minutes later, add a few quesadillas at a time to the hot oil, making sure not to crowd the skillet. Cook for 2 to 4 minutes per side, or until golden brown and crisp. Transfer, with a slotted spoon, to a paper towel-lined platter to drain. Serve hot, with the salsa of your choice.

If Using Store-Bought Tortillas:

  • If using pre-made corn tortillas, add the cheese and filling to the center of the tortilla. Place on an already hot comal, griddle or skillet, and let them cook until the cheese has melted and the tortilla has begun to lightly crisp, about 2 to 3 minutes per side.

Notes

Quesadillas de Flor de Calabaza

Running to Catch the Fresh Fruit Cart!

Every year, just as summer peeks its warm face in Washington DC, I begin to crave fresh fruits and vegetables Mexican street cart style. One of the times when I have enjoyed it the most was last April.  We were traveling through the Copper Canyon route, on a week long trip, from Chihuahua to Sinaloa. We had been waiting at the station in the town of Creel to catch the Chepe train to go to the next town.

As the station officer let out a scream that the train was approaching, out of the corner of my eye, I saw the fruit and vegetable cart. It was hot, we were tired and thirsty, and I saw Mr. Fruit Cart Man peeling some ripe and juicy mangoes. I grew weak in my knees.

Just that second, I saw Daniel’s face panic. He knew I was going to make a run for it.  Along with his camera.

Fresh Fruit Cart 1

Although I could hear him scream: “NO PATI!!! You are going to be left behind!” I ran for it.

Fresh Fruit Cart 2
The fruit cups had watermelon, jí­cama, canteloupe and mangoes. Since Mr. Fruit Cart Man watched me run, he politely suggested I take one fruit cup just like that. But I was dying for one of those mangoes. Plus…, please! If you have tried a Mexican cart style fruit or vegetable, you must know, that without the salt, ground chile and freshly squeezed lime juice, there is no reason to run for it.

I filmed Mr. Fruit Cart Man with the FLIP (sorry friends, took me a year to learn how to upload it, and hopefully my videos will get better too… ) so you can see how beautifully he cuts and shapes the mango… As he was almost done, we heard the train come…

There are many ground chiles you can use. They all add that something that makes the flavor of the fruit come out and pop. There is the typical chile piquí­n.

There are also some liquid chile sauces you can use, and are found in many Fruit Carts. Such as La Valentina, Bufalo, or Cholula. These days, it is incredible, but one can find all of these chile mixes and sauces throughout the US.

That day Mr Fruit Cart Man added a ton of the chile, a bit of the salt and a giant squeeze of the fresh lime juice. By the time he was done, all the travelers had hopped on…

Fresh Fruit Cart 3

I am so lucky, because my monsters waited for me. It was a close call, but we made it.

See, Juju is licking his fingers from that last piece of mango…

Fresh Fruit Cart 4

And we did make it to our next stop…

Fresh Fruit Cart 5

Now that the summer is pumping up, you can make some too…

You will have made a wonder to run home for.

Fresh Fruit Cart main
Print Recipe
5 from 1 vote

Fresh Fruits and Vegetables from the Cart

Every year, just as summer peeks its warm face in Washington DC, I begin to crave fresh fruits and vegetables Mexican street cart style. One of the times when I have enjoyed it the most was last April.  We were traveling through the Copper Canyon route, on a week long trip, from Chihuahua to Sinaloa. We had been waiting at the station in the town of Creel to catch the Chepe train to go to the next town.
Prep Time10 minutes
Cook Time1 minute
Course: Antojos
Cuisine: Mexican
Keyword: Antojo, carrots, Chiles, cucumber, Dessert, Jicama, lime, mango, pineapple, Recipe, tajin, Vegetable, Vegetarian, watermelon
Author: Pati Jinich

Ingredients

  • Any fruits or vegetables that you are craving!
  • Pineapple watermelon, mango, jicama, cucumber, carrots or any of your choice, peeled and sliced or diced
  • Salt to sprinkle throughout
  • Ground spiced up chile such as Tajín, or a sauce like Valentina, Buffalo or Cholula
  • Fresh squeezed lime juice

Instructions

  • Peel and slice the fruits and vegetables. Sprinkle salt and chile to taste. Bathe with fresh squeezed lime juice. Eat up!

Notes

Frutas y Verduras de Carrito

Enfrijoladas

We came back home exhausted, after being away for a couple weeks in Canada for a big family reunion. Though we had delicious meals, trying all sorts of Canadian fare, as soon as we walked in I was ready to make some comforting, home tasting food.

Few things taste more like home to me, than beans. In Mexico there is always, always, a simmering pot of beans cooking at some point during the week in any kitchen. As beans need to be cooked for a long time, they infuse the kitchen with a moist, earthy and cozy aroma, that remains even after the beans are ready.

Of course one can make more than a thousand things with a batch of Frijoles de Olla, or Beans from the Pot. But one of the things that are the most simple, yet comforting, asides from scooping them with corn tortillas, are Enfrijoladas.

Filling and tasty, Enfrijoladas wrap some of the main flavors and textures from Mexico’s cuisine in their fold.

The soft corn tortillas, that you can make or buy ready made at the stores (if you buy them, go for the unrefrigerated ones). The rich, straightforward and creamy seasoned bean puree, which also goes by frijoles colados, in which they are dipped in and smothered everywhere…

dipping corn tortilla in bean puree
The thick, tangy and fresh taste of the Crema Fresca, or Mexican cream, that you drizzle on them after you fold them on a plate…

mexican crema
The salty, crumbly, Ranchero take of the Queso Fresco (Remember I was going to tell you many things that you can make with Queso Fresco?)…

queso fresco
And of course, to top that off, you can slice some ripe luscious Mexican avocado on top. And if you feel like it, have a serving of any salsa, or Chipotles in Adobo on the side to drizzle along.

enfrijoladas
Enfrijoladas, as are most Mexican antojos or cravings, are truly versatile.  They can be eaten for breakfast, lunch or dinner and can be a main dish or a yummy side to grilled chicken or meat.

They are so, so, comforting, the I was once asked what I would serve the Mexican President in times of distress if I had the opportunity: It has to be Enfrijoladas, I said.

enfrijoladas
Print Recipe
5 from 4 votes

Enfrijoladas

Few things taste more like home to me, than beans. In Mexico there is always, always, a simmering pot of beans cooking at some point during the week in any kitchen.O f course one can make more than a thousand things with a batch of Frijoles de Olla, or Beans from the Pot. But one of the things that are the most simple, yet comforting, asides from scooping them with corn tortillas, are Enfrijoladas.
Prep Time5 minutes
Cook Time10 minutes
Course: Main Course
Cuisine: Mexican
Keyword: Avocado, chipotles in adobo, corn tortillas, mexican crema, queso fresco, refried beans
Servings: 8 servings
Author: Pati Jinich

Ingredients

  • 4 cups frijoles colados or seasoned and pureed beans
  • 16 corn tortillas
  • 1 cup Mexican cream or heavy cream
  • 1 cup queso fresco or fresh cheese, or farmers cheese, or a mild feta
  • Mexican avocado slices optional
  • Chipotles in adobo sauce optional

Instructions

  • Heat a comal or dry skillet over medium heat.
  • Heat the pureed beans in a medium cooking pot to a gentle simmer.
  • Taking one tortilla at a time, heat on the comal or skillet for about 30 seconds per side. Take the tortilla with a pair of tongs and immerse it in the bean puree. Place it on a plate, fold it as if it were a quesadilla or a turnover. Drizzle on as much cream and sprinkle on as much cheese as you like.
  • You can also top it with some avocado slices and a bit of chipotles in adobo sauce.

Romancing The Avocado

Avocados are, to me, amongst the most sensuous, luscious and luxurious of ingredients. Add how delicious, soft and subtly flavored they are, and you get a clear winner for Valentine’s Day. Despite the many pounds of avocados we go through at home each week, regardless of the infinite number of cases I use for events at Washington, DC’s Mexican Cultural Institute, and  notwithstanding that my sisters and I used them for hair and face treatments as we were growing up (all those nurturing natural oils and vitamins), I still find avocados to be wow-inducing.

If there’s an avocado dish on a restaurant menu, it lands on my table.

So if I am planning a menu, especially with a hint of romance, avocados will be there…

I am not unique thinking that avocados are something special. To the Aztecs, who ate avocados in Mexico for centuries before the Spaniards arrived, they were revered fruit considered to have strong fertility and aphrodisiac powers. Indeed, the Spanish word aguacate comes from the Nahuatl ahuacatl, or “testicles,” presumbly in reference to their shape. The avocado was warmly welcomed in the countries where it was introduced. And thanks in part to its accomodating nature – its meat can be smashed, diced, pureed, stuffed or sliced, or it can be part of a filling or a centerpiece – it has been creatively adopted in many cuisines.

It is true that many people think of guacamole when they hear “avocado.” And there must be more than a thousand reasons to love guacamole. Fast and easy to make, and so fun to eat, it screams out fiesta with each bite. My favorite way to make guacamole is to mix diced avocado with chopped onion and cilantro, squeeze fresh lime juice on top, sprinkle with sea salt and top it off with chopped chipotle chilis in adobo.

Guacamole, though, is just the tip of the avocado iceberg, both inside and outside Mexican cuisine.

Think about eel-and-avocado sushi, a French salad with layers of avocado sprinkled with Roquefort cheese, or an Italian salad with layers of ripe avocado and ash-coated goat cheese, olive oil, coarse salt and basil leaves. It’s hard to imagine a vegetarian sandwich without avocados.

I have tried eight varieties of avocados, and though I like most of them, the one I prefer is the Hass variety. It is available year-round, and is creamy and rich rather than fibrous like other kinds, such as El Fuerte.

Avocados are a fruit that ripen off the tree, so they are often sold unripe. If you are in a hurry to use an avocado, you can hasten the ripening process by wrapping it in newspapers or keeping it in a paper bag in a warm area of the kitchen. If you can wait, it will ripen at a nice pace uncovered in the kitchen.

When ripe, the Hass, with the pebbly skin completely blackened, will give a bit with a gentle squeeze of your hand. If it doesn’t, then it needs a bit more time to mature. You can keep a ripe avocado in the refrigerator for up to a week. It is apparently a myth that keeping the seed in a cut avocado keeps it from darkening. What does seem to help is to squeeze fresh lime juice on top.Here are four of my favorite takes on avocado: an elegant-looking appetizer, a retro mousse, an exotic-sounding soup and a hearty sandwich. Regardless of which way you use it, including avocado in your romantic dinner – as long as it’s not in a hair or skin treatment –  will show your Valentine that you really care.

Article written for and published by National Public Radio’s Kitchen Window.
stuffed avocados
Print Recipe
5 from 3 votes

Stuffed Avocados with Hearts of Palm and Artichoke Salad

When I was growing up, my mother often served stuffed avocados for an elegant dinner. They were such a statement of a well-planned menu. There were many variations: stuffed with sauteed shrimp with chilies, crab salad or red snapper ceviche (a seafood cocktail "cooked" in citrus juice and other spices). The version I make most often, though, mixes artichoke hearts and hearts of palm. I think these ingredients just love to be together and make a smashing combination with the smooth avocado.
Prep Time20 minutes
Cook Time0 minutes
Total Time20 minutes
Course: Appetizer
Cuisine: Mexican
Keyword: agucate, Alcachofa, artichoke, Avocado, hearts of palm, Palmitos, rellenos, stuffed
Servings: 6 servings
Author: Pati Jinich

Ingredients

  • 14 ounces (1 1/3 cups) hearts of palm drained, rinsed and sliced
  • 14 ounces (1 1/2 cups) artichoke hearts drained, rinsed and sliced
  • 2 tablespoons chopped red onion
  • 4 tablespoons chopped red bell pepper
  • 2 tablespoons chopped parsley
  • 1 tablespoon tarragon vinegar
  • 3/4 teaspoon kosher or sea salt or more to taste
  • 1/4 teaspoon sugar or more to taste
  • 1/4 teaspoon ground black pepper or more to taste
  • 2 tablespoons olive oil
  • 2 tablespoons safflower or vegetable oil
  • 3 ripe Mexican avocados halved and seeded just before stuffing

Instructions

  • In a bowl, mix the hearts of palm, artichoke hearts, red onion, red bell pepper and parsley.
  • To prepare the vinaigrette, pour the tarragon vinegar in a small bowl and mix it with the salt, sugar and black pepper. Pour the oils in a slow stream, whisking with a whisk or fork to emulsify. Pour it over the vegetables. Toss well to cover.
  • You may prepare the hearts of palm and artichoke salad ahead of time, cover and refrigerate for up to 2 days.
  • When ready to eat, halve and seed the avocados. Scoop the hearts of palm and artichoke salad on top and serve.

Notes

Aguacates Rellenos de Palmitos y Corazón de Alcachofa
stuffed avocados
Print Recipe
5 from 1 vote

Avocado, Pistachio and Watercress Mousse

As I was describing this dish to a dear friend, she explained that the word I was looking for to describe it was "retro." Though I have tasted many avocado mousses, this one seems to be whimsical and addicting. Make this mousse ahead of time for a party or brunch and serve it with pieces of toast, crackers, smoked salmon or shrimp, and you will have an ongoing conversation piece as it disappears.
Prep Time30 minutes
Chilling Time3 hours
Total Time3 hours 30 minutes
Course: Appetizer, Dip, Spread
Cuisine: Mexican
Keyword: aguacate, Avocado, Berros, gelatin, Pistache, pistachios, watercress
Servings: 14 servings
Author: Pati Jinich

Ingredients

  • 3 (about 2 1/4 pounds) ripe Mexican avocados halved and seeded
  • 2 tablespoons freshly squeezed lime juice
  • 8 ounces cream cheese
  • 1 bunch (about 1 cup) watercress leaves and top parts of stems chopped
  • 2 tablespoons (about 6) sliced scallions white and light green parts only
  • 1 8-ounce can (2/3 cup) water chestnuts drained and roughly chopped
  • 2/3 cup pistachios shelled and roughly chopped
  • 1/4 teaspoon cayenne pepper or more to taste
  • 1/4 teaspoon ground black pepper or more to taste
  • 1/2 teaspoon Worcestershire sauce
  • 1 1/4 teaspoons kosher or sea salt or more to taste
  • 2/3 cup cold water
  • 3 1/4 ounces (1 envelope) unflavored gelatin
  • 1/3 cup boiling water
  • Olive oil to grease the mold
  • Toasted bread or crackers optional
  • Smoked salmon optional

Instructions

  • Scoop out meat from avocados and mash it in a bowl with a fork. Pour in lime juice and combine well with a spatula. Incorporate the cream cheese, mixing it thoroughly with the avocados. Add the watercress, scallions, water chestnuts, pistachios, cayenne, black pepper, Worcestershire sauce and salt. Mix well.
  • Measure 2/3 cup cold water in a cup. Stir in the gelatin, mix and let it rehydrate for a minute or two. Add 1/3 cup boiling water and stir until it dissolves. Pour gelatin into the avocado mix, incorporating it with a spatula.
  • Lightly grease a ring mold with olive oil. Pour the avocado mix into the mold. Shake the mold softly a couple of times to level the mix. Cover it well and place it in the refrigerator until it is set, for at least 3 hours. You can leave it overnight or until you are ready to unmold. The avocado mousse will last beautifully in the refrigerator for 2 days. When ready to unmold, remove from the refrigerator, run the tip of a knife along the edges and flip onto a plate. You may need to shake the mold a couple of times, holding onto the plate as you do so.
  • You may serve it on a platter, retro style, with some watercress leaves in the center of the ring or on top. Or serve it already sliced with a side of smoked salmon and pieces of toast.

Notes

Mousse de Aguacate, Pistache y Berros
Print Recipe
4.25 from 4 votes

Avocado Soup

Though there are many kinds of avocado soups, this is my favorite. I tried it at the Mexican Ambassador’s residence a couple months ago. As Doña Rosita, the cook,  heard me mmm, and mmm, and mmmmmmm all over again, she came out of the kitchen with a pen and a piece of paper ready to dictate her recipe. What a surprise for such a tasty soup: just a handful of ingredients! Seems that what matters, again, is how you use them.
Prep Time5 minutes
Cook Time15 minutes
Course: Soup
Cuisine: Mexican
Keyword: Avocado, chicken broth, cilantro, feta, jalapeno, lime, onion, queso fresco, tortilla chips
Servings: 4 to 6 servings
Author: Pati Jinich

Ingredients

  • 1 tablespoon corn or safflower oil
  • 1 tablespoon unsalted butter
  • 1 1/2 cup white onion roughly chopped
  • 1 cup cilantro leaves rinsed and loosely packed
  • 1 jalapeno chile sliced in half, seeding optional if less heat is desired
  • 3 large ripe Mexican avocados cut in half, seed removed, flesh spooned out, about 3 cups ripe avocado flesh
  • 6 cups chicken broth can substitute vegetable broth
  • 1 tablespoon fresh lime juice
  • 3/4 teaspoon kosher or sea salt more or less to taste
  • 1 1/2 cups tortilla crisps
  • 1 cup queso fresco crumbled, may substitute farmers cheese or a mild feta

Instructions

  • In a medium skillet, set over medium-low heat and add the butter and oil. Once the butter dissolves, stir in the onion and jalapeno. Let them cook, stirring occasionally, until the onion has softened. Its color will become translucent and the edges will begin to turn light brown, about 12 to 15 minutes. Incorporate the cilantro leaves and mix them in with the onions and jalapeno. Once the cilantro has wilted, 30 seconds to a minute later, turn off the heat.
  • Place the peeled and seeded avocados in the blender or food processor along with the cooked onion, jalapeno, cilantro, chicken broth, lime or lima juice and salt. Puree until smooth, taste for salt and add more if need be.
  • You may serve bowls garnished with tortilla crisps and cheese, or let your guests garnish to their liking.

Notes

Sopa de Aguacate
stuffed avocados
Print Recipe
4.60 from 5 votes

Tortilla Crisps

How to make homemade tortilla crisps, either by frying or baking.
Prep Time5 minutes
Cook Time20 minutes
Total Time25 minutes
Course: Garnish
Cuisine: Mexican
Keyword: Baked, corn tortillas, crisps, crunchy, fried, tortilla chips, traditional
Author: Pati Jinich

Ingredients

  • 5 corn tortillas (5- to 6-inches wide)
  • Safflower or corn oil
  • 1/2 teaspoon salt more or less to taste

Instructions

  • On a chopping board, slice tortillas in half and then vertically in half again. Then slice across in strips of 1/4 to 1/2 inch, depending on how thick you like them.

Traditional (fried):

  • In a medium skillet, add 1/4 inch oil and place over medium-high heat. Once it is hot, anywhere from 4 to 6 minutes, add tortilla pieces. When you add a tortilla to the oil, it should immediately start to bubble. Fry, stirring and flipping occasionally, until they achieve a golden tan and slightly brown color and are hard and crispy. Remove with a slotted spoon and place on a plate covered with paper towel. Sprinkle with salt to taste.

Baked:

  • Preheat oven to 350°F. Spray or gently brush a baking sheet with corn or safflower oil. Place tortilla pieces on top and spray or gently brush a light layer of oil. Judiciously sprinkle with salt to taste. Place in oven and bake for about 20 minutes, stirring and flipping once or twice until they achieve a golden tan and slightly brown color and appear hard and crisp.Remove from oven, let them cool and place in a bowl or container.

Notes

Tiritas de Tortilla
stuffed avocados
Print Recipe
5 from 1 vote

Chopped Egg and Avocado Sandwich

My grandmother, who came from Poland but was raised in Mexico, used to make chopped egg salad and chopped seasoned avocados as table starters for special occasions. Then one day she decided to mix up the two, altered the spices a bit, and created a family hit. I have adapted her recipe by adding the Dijon and dill, and scooping a ton of it into a sandwich. The cheese is a caprice that I couldn't help adding, and I love how it tastes, but feel free to try it without it.
Prep Time20 minutes
Cook Time0 minutes
Course: Antojos, Main Course
Cuisine: Mexican
Keyword: aguacate, Avocado, egg salad, Eggs, huevo, Recipe, salad, Sandwich
Servings: 3 to 4 servings
Author: Pati Jinich

Ingredients

  • 3 large hard-boiled eggs peeled and chopped
  • 3 tablespoons chopped white onion
  • 2 tablespoons chopped parsley leaves
  • 1 teaspoon chopped fresh dill or 1/4 teaspoon dry dill
  • 1/2 teaspoon dijon mustard
  • 2 teaspoons mayonnaise
  • 1 (about 3/4 pound) large ripe Mexican avocado halved, seeded, meat scooped out and diced
  • 1/4 teaspoon kosher or coarse salt or to taste
  • Ground black pepper to taste
  • 6 to 8 slices brioche or challah or any bread of your choice, lightly toasted
  • 4 slices Muenster Mexican manchego, or chihuahua, or Monetery Jack cheese (optional)

Instructions

  • In a bowl, mix the eggs, onion, parsley, dill, Dijon and mayonnaise together. Toss in the avocado, sprinkle with salt and pepper and gently mix well.
  • Lightly toast the bread slices. Scoop a generous amount of the chopped egg and avocado on a slice of bread, add a slice of cheese and top with another slice of bread.

Notes

Sandwich de Huevo y Aguacate

Chipotle Guacamole for any Party (or Disaster)

I am not one to prepare for disasters.

People can tell me a thousand times that severe thunderstorms are approaching, that a dry spell is forcasted or that a shortage of something essential like water (or coffee) will happen, and no, I will not be among the first to run for shelter nor stock up on provisions. I don’t know if it is my continuous belief that despite humps and downs eventually things turn out OK or if I am lacking an alarm button…I just don’t panic.

When I took it as a serious matter to go to the grocery store in the middle of my work day, at a rather inconvenient time, it wasn’t because there is a strong snowstorm coming (though my boys did give me an absurdly long grocery list to prepare for it), it was because we ran out of Mexican avocados.

The grocery store was wild: an insane crowd was moving around the isles, lines like I have never seen at the cashiers and empty shelves throughout. But oh!…there they were: some beautiful ripe Mexican Hass avocados waiting for me to bring them home.

Although we use avocados at home for an infinity of things… we also love guacamole. It just never gets old around here, nor I think, anywhere. Yet, one of the versions I like the most uses Chipotle Chilies in Adobo instead of fresh Jalapeños or Serranos.

Chipotle Guacamole 1

The creamy, silky and mild nature of the avocados takes a jump into the sky when paired with the smoky, spicy, rich and complexly flavored Chipotles in Adobo.

It may be that avocados work so well with chiles, because avocados are one of their natural soothing counterpart: the spicy element in chiles called capsaicin which is an oily substance, dissolves best in other oily elements, alcohol or milk products. Avocados, being oily in such a wholesome way are the remedy to the heat in the same bowl. This being said, if you feel like pumping up the heat and flavor by adding more chipotle chiles, you may want to pair this guacamole with a nice cold beer. And while you are at it, why not scoop some Mexican style cream or sour cream on top of the guacamole too. YUM.

Needless to say, this recipe takes less than 5 minutes to prepare. But most importantly given the date, this is my loved contribution for your Super Bowl gathering… whether it turns out to be a disaster or a party (!).

Make extra portions as it flies as soon as you mix it all up. And since no guacamole is complete without corn tortilla totopos or chips, here is a link to help you make some at home.

Print Recipe
5 from 1 vote

Chipotle Guacamole

Although we use avocados at home for an infinity of things… we also love guacamole. It just never gets old around here, nor I think, anywhere. Yet, one of the versions I like the most uses Chipotle Chilies in Adobo instead of fresh Jalapeños or Serranos.
Prep Time5 minutes
Course: Antojos, Side Dish
Cuisine: Mexican
Keyword: Antojo, Avocado, chile, chipotles in adobo, cilantro, guacamole, lime, onion, Recipe, Salsa, tortilla chips, Vegetarian
Servings: 6 servings
Author: Pati Jinich

Ingredients

  • 2 large ripe Mexican avocados about 1 1/2 lb, halved, seeded, meat scooped out and diced
  • 1/3 cup white onion chopped
  • 1/3 cup roughly chopped cilantro
  • 2 tablespoons lime juice freshly squeezed
  • 1 teaspoon kosher or sea salt
  • 2 tablespoons Chipotles in adobo sauce seeded and chopped, more if desired
  • Tortilla chips toast squares, pita chips, crackers or vegetable sticks, optional

Instructions

  • Gently mix ingredients in a bowl and serve.
  • Guacamole can be prepared up to 12 hours in advance if covered and stored in the refrigerator. Eat on its own, as a side, as a topping, or scooped with tortilla chips, toast squares, pita chips, crackers or vegetable sticks.

Notes

Guacamole al Chipotle

More Chorizo to Love

Right off the bat, you must understand: I heart chorizo. Especially the kind I grew up eating in Mexico. It comes in deep-burnt-reddish links of fresh, moist, exotically seasoned ground meat that, once fried, becomes crisp and filling bites with bold flavors and a thousand uses. My oldest son’s quick choice for breakfast is chorizo fried until it browns and crisps, with a side of white toast.  Add some lightly beaten eggs as the chorizo is starting to brown and some ripe and creamy avocado slices on the side, and that’s my kind of rich-tasting brunch dish. Of course chorizo is delicious in sandwiches, in tacos and quesadillas, on top of enchiladas, in mashed potatoes, as a topping for heartier salads, in some of the tastiest bean dishes I have tried, in pastas with a ton of personality and on pizzas with pickled jalapeño peppers on top.

I am really trying to stop myself here…

When I moved to the United States, more than a dozen years ago, I was thrilled to find chorizo in international grocery stores. Lately, I have been intrigued and surprised to see that my Mexican chorizo is now accompanied by many other kinds in the refrigerated sections of bigger, more mainstream stores: Argentine, Colombian, Guatemala, Salvadoran and Honduran chorizos have arrived. Like the Mexican kind, some of those varieties are being made with chicken, turkey or beef in addition to pork. There is even kosher chorizo, made with beef, at Koshermart in Rockville and vegan chorizo at Trader Joe’s (which I haven’t felt the urge to try). Many come in spicy, spicier, spiciest and hotter than hot.

Through Sunday afternoon asados, or grilling parties, at friends’ houses and trips to Argentina, I had become familiar with the garlicky chorizo Argentinians are so proud of. But I was clueless about the other kinds. So I shocked my regular grocer by buying a variety of links, then cooked them at home to sample the differences, filling my kitchen with chorizo-tinged smoke. Later, on a cold and rainy day in November, I set out to explore the chorizo universe, including local manufacturers, in this part of the Americas.

It was clear from the start that Latin chorizos share a common difference from Spanish ones. Most Latin chorizos are made with heavily spiced, freshly ground meat, and the must be cooked. Spanish chorizos typically are dried and smoked cured links of chopped meat, seasoned mainly with garlic and paprika; they tend to be ready-to-eat and have a salami-like soft and chewy bite.

Although Spaniards introduced the pid and the techniques of making chorizo to most of Latin America, through the centuries chorizos were adapted with local flavors and ingredients. (The Spaniards, for their part, borrowed paprika from those new lads and made it one of their signature chorizo seasonings.) Interestingly, the version that took root in Latin soil was raw and uncured, which is the least-common kind in Spain.

Latin chorizos differ greatly from one another in flavor. Mexican is the spiciest of the lot. It also has the most complex layering of flavors, and I won’t deny that it’s my favorite. Mexican chorizos can have variations as well, but they generally contain dried chili peppers such as ancho, pasilla, guajillo and/or chipotle; a mix of spices that might include oregano, cumin, thyme, marjoram, bay leaf, cinnamon, coriander seed, allspice, paprika, achiote and cloves; most times garlic and sometimes onion; and always vinegar, which makes the meat flake or crumble as it browns and gives it a welcome hint of acidity.

If you like really spicy sausage, Chorizo Cabal of Fairfax produces a Mexican one called Perrón, which translates from Mexican-Spanish slang as brave or aggressive. It’s clear as soon as you see the label: A fierce dog looks ready to give you the bite of your life.

For a chorizo that isn’t spicy but has a colorful pungency, the way to go is Salvadoran. That happens to be the favorite of Clifford Logan Jr., vice president of the Logan Sausage Co. in Alexandria. His company sold 50,000 to 60,000 pounds of its Latin-style fresh chorizos in the Washington area last month. Logan is so passionate about chorizos that when asked to describe them, he seemed to be poetically describing bottles of wine: “The Salvadoran,” he began, with a deep romantic sigh and a sudden distant gaze, “has a robust flavor and a subtle finish.”

It seems that around Washington, Mexican and Salvadoran chorizos have been wrestling for bragging rights for a long time. Chorizo Cabal sells more Salvadoran chorizo than Mexican (except in grilling season, when the Argentine chorizo is most popular); Logan Sausage sells twice as much Mexican chorizo as Salvadoran. But the choice has as much to do with flavor and recipes as with the local immigrant population and the popularity of each cuisine. Companies often start to produce chorizos based on where the owner or employees come from; immigrants nostalgic for the flavors of home find a way to replicate their native recipes.

The companies’ Mexican, Honduran and Salvadoran chorizos are made with vinegar, yet the Honduran kind is much more sedate. The Guatemalan, Logan says, is somewhere in between the Salvadoran and Honduran, flavor-wise. Betty Guerrero, who runs Chorizo Cabal, agrees, and revealed to me that a bit of spearmint is added to Cabal’s Guatemalan spice mix. Colombian chorizo is plain and quite salty. The Argentine kind has white wine and a heavy dose of garlic in its mix, as well as oregano, nutmeg and a bit of cayenne or crushed red pepper flakes. It seems to me that Argentine-style chorizo really lets the flavor of the meat shine through. (See “Use this for that,” above.)

Of course, different brands and regions have different variations, which some purists question, especially when borders are crossed. Guerrero says, “My mother tells me that this is not the way chorizo is made in Mexico, that I am changing the ingredients, that I am changing its ways.” But Guerrero, an experienced chorizo maker, says her company sells about 50,000 pounds of chorizo per month.

One thing I have noticed is that chorizos made in the United States have less fat than those I knew and ate in Latin America. Logan and Guerrero confirmed that, saying their chorizos are made with no more than 20 percent fat. Typically, Mexican chorizo contains at least 30 percent fat. Whole Foods Market makes its own chorizo with no more than 15 percent fat, according to company spokeswoman Katie Hunsberger.

Another thing purists might question is why parts of the chorizo-making process are simplified here. For example, chorizo shops in Mexico soak and puree whole dried chili peppers and add fresh garlic and onion. Chorizo makers here, including Cabal and Logan, generally use custom-made prepared spice mixes that come with already-ground chili peppers and dehydrated garlic.

According to these producers, the mixes not only are convenient but also help ensure quality: “Dried garlic imparts flavor and doesn’t turn black as quickly as fresh garlic does,” Clifford Logan says. They also promote consistency. Hunsberger says that Whole Foods works with Barron’s spices to create a spice mix for its house brand.

No wonder chorizo makers are hesitant to share ingredient information. Their recipes are treated as highly classified state secrets that outsourced spice companies are legally forbidden to share. Dealing with such sacred formulas also may explain why many chorizo companies have longstanding and loyal employees.

Or maybe they just heart chorizo, like me.

Article written for and published by The Washington Post click here. 

Cowboy Charro Beans
Print Recipe
4.75 from 8 votes

Cowboy Charro Beans

Cowboy Charro Beans recipe from Pati's Mexican Table Season 1, Episode 2 “Foods of the Mexican Revolution”
Prep Time5 minutes
Cook Time25 minutes
Total Time30 minutes
Course: Side Dish
Cuisine: Mexican
Keyword: bacon, beans, black beans, Chorizo, jalapeno, pati’s mexican table, Peruvian beans, pinto beans, Tomatoes
Servings: 6 servings
Author: Pati Jinich

Ingredients

  • 6 oz sliced uncooked bacon chopped
  • 8 oz fresh uncooked Mexican chorizo casings removed, chopped
  • 1/2 cup white onion chopped
  • 1 jalapeño pepper finely chopped more or less to taste, seeded if desired
  • 1/2 lb roma tomatoes about 2 to 3 tomatoes, chopped
  • 1 tsp kosher or sea salt plus more as needed
  • 5 cups cooked pinto beans and their cooking liquid or substitute with black or Peruvian beans

Instructions

  • Cook the bacon in a large, deep skillet over medium-high heat for 3 to 4 minutes, until it is lightly browned and starting to crisp. Add the chopped chorizo; cook for 4 to 5 minutes, until it starts to brown and crisp. As it cooks, use a wooden spoon or spatula to break it into smaller pieces.
  • Add the chopped onion and jalapeño; mix well and cook for 1 or 2 more minutes, letting them soften a bit. Add the tomatoes and mix well; cook for 3 to 4 minutes, stirring, until the tomatoes soften and appear mushy.
  • Add the cooked beans and their cooking liquid; mix well and reduce the heat to medium. Cook for 8 to 10 minutes, until the beans are moist but not soupy. Add a bit more water if needed. Taste, and add more salt to your taste. Serve hot.

Notes

Frijoles Charros con Tocino y Chorizo
Mexican style pasta
Print Recipe
5 from 4 votes

Mexican Style Pasta with Tomato Sauce, Chorizo & Fresh Cream

Mexican Style Pasta with Tomato Sauce, Chorizo & Fresh Cream recipe from Pati's Mexican Table Season 1, Episode 9 “Chorizo”
Prep Time5 minutes
Cook Time35 minutes
Total Time40 minutes
Course: Main Course
Cuisine: Mexican
Keyword: Avocado, chipotles in adobo, Chorizo, mexican crema, pasta, pati’s mexican table, queso fresco, Tomatoes
Servings: 6 servings
Author: Pati Jinich

Ingredients

  • 1 1/2 lbs ripe Roma tomatoes about 6 to 8 tomatoes
  • 1 medium clove garlic
  • 1/2 cup tomato cooking liquid
  • 1/2 medium white onion coarsely chopped (about 1/2 cup)
  • 3/4 tsp kosher or sea salt
  • 1/4 tsp freshly ground black pepper
  • 8 oz fresh uncooked Mexican chorizo casings removed and coarsely chopped
  • 1 tbsp safflower or corn oil
  • 8 oz dried spaghetti, angel hair or fettuccine broken into smaller pieces
  • 2 cups chicken broth
  • 2 bay leaves
  • 1 to 2 tbsp sauce from canned chipotles in adobo plus 1 whole canned chipotle chile for more heat (optional)
  • 6 oz queso fresco, farmer’s cheese, or a mild feta crumbled
  • Mexican or Latin cream as much as needed (!) or substitute for creme fraiche or sour cream
  • 1 ripe Mexican avocado halved, peeled, cut into slices

Instructions

  • Place tomatoes and garlic in a medium saucepan. Add water to cover and bring to a boil over medium-high heat. Simmer for about 10 minutes, until the tomatoes are thoroughly cooked, they look mushy and the skins have started to come off.
  • Transfer the tomatoes, 1/2 cup of the cooking liquid and garlic to a blender along with the onion, salt and pepper. Let cool slightly and puree until smooth.
  • Cook the chorizo in a large, deep skillet over medium-high heat for 5 to 6 minutes, until it has browned and crisped; use a wooden spoon or spatula to break it into smaller pieces as it cooks. Use a slotted spoon to transfer the cooked chorizo to a bowl.
  • Add oil to the same skillet used to cook the chorizo, over medium-high heat. Add the spaghetti or fettuccine pieces and cook for a few minutes, stirring often, until the pasta changes color and starts to brown. Do not let it burn!!
  • Pour the tomato puree on the pasta. Cook for about 5 minutes, stirring often, until the sauce thickens and the color darkens to a deeper red. Add the chicken broth, bay leaves and adobo sauce, plus a whole chipotle chile in adobo, if desired.
  • Mix well, cook uncovered for 10 to 12 minutes, stirring often to keep the pasta from sticking, until the pasta is cooked through and the tomato sauce has thickened considerably. Discard the bay leaves.
  • Add the chorizo and stir to incorporate. Divide among individual plates; serve hot, topped with crumbled cheese, fresh cream and avocado slices.

Notes

Pasta Seca con Jitomate, Chorizo y Crema
Print Recipe
4.86 from 7 votes

Potato, Scallion & Chorizo Crispy Tacos

Potato, Scallion & Chorizo Crispy Tacos recipe from Pati's Mexican Table Season 1, Episode 9 “Chorizo”
Prep Time5 minutes
Cook Time20 minutes
Total Time25 minutes
Course: Main Course
Cuisine: Mexican
Keyword: Chorizo, corn tortillas, pati’s mexican table, potatoes, salsa verde, scallions, Taco
Servings: 5 to 6 servings
Author: Pati Jinich

Ingredients

  • 1 lb red bliss potatoes peeled and cut into 1-inch pieces
  • 8 oz fresh uncooked Mexican chorizo sausage casings removed, coarsely chopped
  • 8 scallions white and light green parts thinly sliced (1/2 cup)
  • 1 tsp kosher or sea salt or more to taste
  • 10-12 Corn tortillas
  • safflower oil for frying
  • Salsa verde or any salsa of your choice

Instructions

  • Bring a medium pot of water to a boil over medium-high heat. Add the potato pieces, once the water returns to a boil, cook for 10 to 12 minutes or until the potatoes are tender. Drain.
  • Place the chorizo in a large skillet over medium-high heat. As it cooks, use a wooden spoon or spatula to crumble it into smaller pieces. Once it browns and crisps, 5 to 6 minutes, add the scallions and stir to combine; cook for about 1 minute or until the scallions begin to soften.
  • Add the cooked potatoes and salt, mashing them into the chorizo mixture with a potato masher or a wooden spoon, for about 1 minute until well combined. Remove from the heat. Taste, add salt as needed.
  • Heat a dry, medium skillet over medium heat. Warm the tortillas in the skillet one at a time for 15 to 30 seconds on each side, to soften them for rolling and so they will not crack as you assemble tacos.
  • Place a few tablespoons of the filling on the center of each heated tortilla, and roll, as tightly as you can, into a taco. Insert a wooden toothpick through taco pairs, through the seams to help them retain their roll shape as they cook. When they have all been rolled, finish the tacos by either frying or toasting them.

To fry the tacos:

  • Pour enough oil into a large skillet to a depth of about 1 inch, place over medium heat. Once the oil is hot, 4 to 6 minutes, fry the tacos in batches, placing them in the skillet, without crowding them. They oil should be bubbling as they cook. Cook for about 2 to 3 minutes on the first side, until the bottom and sides have crisped and turned golden. Use tongs to turn over the tacos, cook for another 2 to 3 minutes. Transfer them to a plate lined with paper towels. Continue until all the tacos have been fried.

To toast the tacos:

  • Heat a large, dry skillet or comal over medium heat. Working in batches, place the tacos in the skillet. Let them toast and heat for about 3 to 4 minutes or until the tacos are browned and crisped, then flip to the other side and toast until evenly browned and crisp.
  • Remove all toothpicks; serve warm.

Notes

Tacos Crujientes de Papa, Cebollita y Chorizo
sweet potato salad
Print Recipe
4.60 from 5 votes

Warm Sweet Potato Salad with Chorizo

Warm Sweet Potato Salad with Chorizo recipe from Pati's Mexican Table Season 1, Episode 9 "Chorizo"
Prep Time15 minutes
Cook Time30 minutes
Total Time45 minutes
Course: Main Course, Salad
Cuisine: Mexican
Keyword: Chorizo, cilantro, jalapeno, orange juice, pati’s mexican table, sweet potato
Servings: 4 to 6 servings
Author: Pati Jinich

Ingredients

  • 3 lbs sweet potatoes peeled and cut into bite-size chunks, about 3 large sweet potatoes
  • 3 tbsp olive oil
  • 1 cup orange juice preferably freshly squeezed
  • 1/2 tsp brown sugar
  • 3/4 tsp kosher or sea salt
  • 1/4 tsp freshly ground black pepper
  • 8 oz fresh uncooked Mexican chorizo, casings removed and coarsely chopped
  • 1 jalapeño pepper stemmed and seeded if less heat is desired
  • 1/3 cup red onion chopped
  • 1/3 cup cilantro chopped

Instructions

  • Bring a large pot of salted water to a boil over high heat. Add the sweet potato pieces, once it comes back to a boil, reduce the heat to medium; simmer for about 10 minutes, until almost tender and a knife can go through without breaking a piece. Drain, and transfer to a baking dish large enough to hold the pieces almost in a single layer.
  • Preheat oven to 400 degrees.
  • Whisk together orange juice, oil, sugar, salt and pepper in a medium bowl. Pour the mixture over the sweet potatoes and toss to coat evenly. Roast for about 20 minutes, turning them after about 10 minutes, until the potato pieces have started to brown and the sauce has thickened. Remove from the oven.
  • Meanwhile, cook the chorizo in a medium skillet over medium-high heat; use a wooden spoon of spatula to break it into smaller pieces as it cooks. After 5 to 6 minutes, when it has nicely browned and crisped, use a slotted spoon to top the hot sweet potatoes.
  • Sprinkle the jalapeño, red onion and cilantro on top, and toss gently to combine. Serve warm.

Notes

Ensalada Calientita de Camote y Chorizo

Micheladas and Spiced Up Pepitas: You Are Invited!

For Labor Day, our friends Jeannie and Bill invited us to their farm on the Eastern shore. Jeannie said snacks and grown up drinks are welcome. We can’t wait! Since we are going to be a large crowd, meals there are so leisurely and her family likes to try new things, I want to bring an interesting and friendly snack. Since I’ve been experimenting with pumpkin seeds, spiced up pumpkin seeds came to mind. Micheladas are a great pairing for them, especially since this may be one of the last weekends with enough heat for such drink.

Pumpkin seeds, Pepitas in Spanish, are one of the things I used to stuff in my suitcase when visiting Mexico. That’s because they have a mellow, somewhat nutty, almost sweet, barely chewy and nutritious nature, but also because of its multiple uses in Mexican cooking. They are used hulled and un-hulled, toasted or fried, to make salsas, moles, soups and drinks. There is more to Pepitas than being used for an unnoticeable role as a salad topping. So you can imagine my happiness when I began noticing their appearance in not just one, but many grocery stores here in the US.

pepitas 1
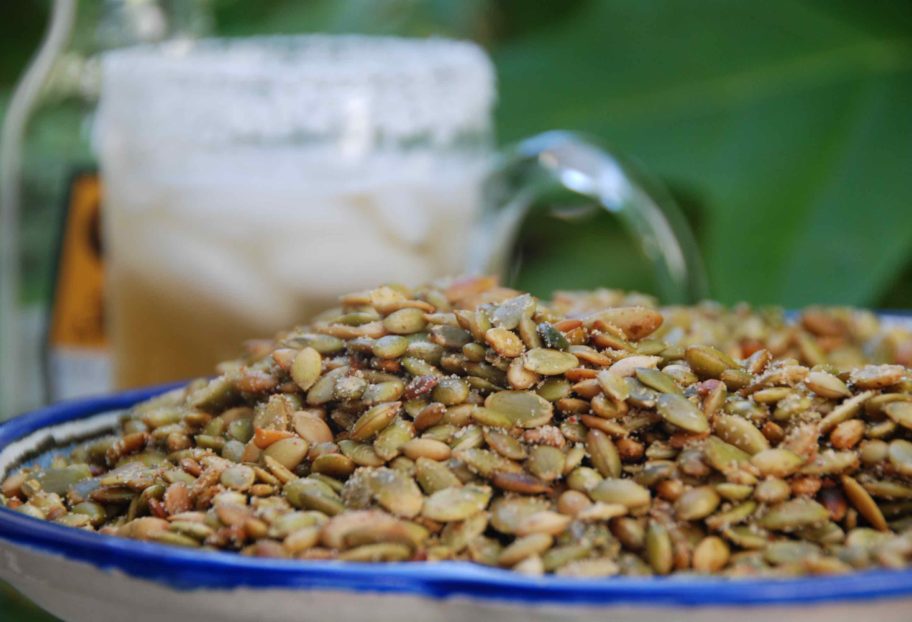
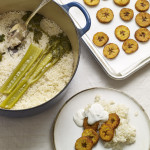
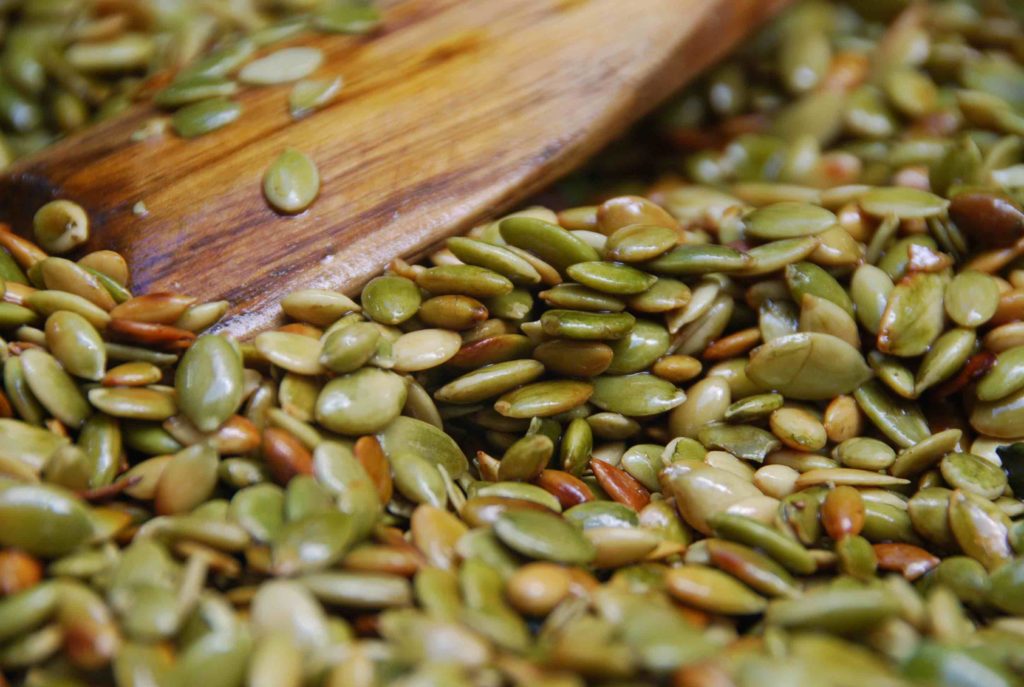
(Pepitas gently frying in my pan, popping and changing from an olive green to a light brown toasted color)

Pepitas are also a craved for snack for many Mexicans, including myself, when going to the movies. Un-hulled, soaked in salted water, dried and toasted, they are sold in little packages in street stands and bring long-lasting entertainment. It takes a couple hours to go through a small bag, as you place one by one between your teeth to crack the salted shell open and then triumphantly pop the hidden and gentle tasting Pepita into your mouth. You get the pleasure of repeating that again and again throughout the ups and downs of the film.

However, one of my favorite ways to eat Pepitas is hulled, toasted or lightly fried and tossed with ground dried Chile Piquí­n (which can be bought ready to use), salt and sugar. It takes five minutes to make this tasty crunchy nibble. If you make plenty, there is extra to use, not for an unnoticeable role but for a stellar one, on top of salads or fish. The mix of chile, salt and sugar makes them come alive in your mouth.

As for the Michelada, it is the ultimate Mexican way to drink beer. Beer purists: do not fear, you will like what you try. Non-beer drinkers: You will love beer this way.

Classic Michelada is made by pouring beer onto a cold or frozen glass mug with a salted rim (previously rubbed with lime) and freshly squeezed lime juice at the bottom. Some people add ice, some people don’t. For the more playful Michelada, a combination of salty ingredients (such as Maggi and Worcestershire sauces) and spicy ones (Tabasco, Valentina, Cholula, or any spicy sauce) are added before pouring the beer.

There is no agreement as to how to pour the beer. I make mine with lime juice, some dashes of Maggi, Worcestershire and Valentina, and pour the beer up to the salted rim. That way I can taste a bit of the salt around the rim with each sip. Some people pour the beer quickly so it goes over the rim and bubbles up with the salt so that the volcano explodes over their hands, and then they drink the top of the delicious disaster and everything is already mixed up (!)

Here are the super easy recipes for the Pepitas and the Micheladas… why work hard on Labor Day?

Spiced Up Pumpkin Seeds
Print Recipe
4.75 from 4 votes

Spiced Up Pumpkin Seeds

One of my favorite ways to eat Pepitas is hulled, toasted or lightly fried and tossed with ground dried chile piquín, salt and sugar. It takes five minutes to make this tasty crunchy nibble.
Prep Time0 minutes
Cook Time5 minutes
Total Time5 minutes
Course: Appetizer, Snack
Cuisine: Mexican
Keyword: chile piquín, pepitas, pumpkin seeds, snack, spiced
Servings: 1 1/2 cups of pepitas
Author: Pati Jinich

Ingredients

  • 1 1/2 cup hulled raw pumpkin seeds
  • 1 tablespoon corn, safflower or vegetable oil
  • 1 teaspoon ground chile piquín or ground Mexican chile, more or less to taste
  • 1 1/2 teaspoon kosher or coarse sea salt more or less to taste
  • 1 1/2 teaspoon sugar more or less to taste

Instructions

  • Heat the oil in a saute pan over medium heat. Once it is hot but not smoking add the pumpkin seeds. Saute, stirring often, for about 4 to 5 minutes, they will have begun making popping sounds and some of them will begin gaining a nice tanned brown color.
  • Transfer to a mixing bowl with a slotted spoon, leaving the remains of the oil behind in the pan. Sprinkle with the ground chile, salt and sugar and toss to coat. As they cool down, they will dry up and become crunchier. Eat or store covered with a lid. They will keep for about a week, if you don’t finish them before then.

Notes

Pepitas
dressed up Mexican beer or michelada
Print Recipe
5 from 4 votes

Dressed Up Mexican Beer

Dressed Up Mexican Beer recipe from Pati's Mexican Table Season 3, Episode 9 “Pot Luck Party”
Prep Time1 minute
Cook Time2 minutes
Total Time3 minutes
Course: Drinks
Cuisine: Mexican
Keyword: beer, hot sauce, lime, Maggi sauce, pati’s mexican table, soy sauce, Worcestershire sauce
Servings: 1 beer
Author: Pati Jinich

Ingredients

  • 1 beer mug chilled
  • Kosher or sea salt for coating the rim
  • 1 lime wedge
  • Ice cubes (optional)
  • 2 to 3 tablespoons freshly squeezed lime juice
  • 1 beer preferably Mexican, chilled
  • Dash of hot sauce like Tabasco Cholula or Valentina (optional)
  • Dash of a salty sauce like soy sauce Worcestershire or Maggi Sauce (optional)
  • Pinch of freshly ground black pepper (optional)
  • Pinch of kosher or coarse sea salt (optional)

Instructions

  • Pour a layer of salt onto a small plate. Rub the rim of a chilled beer mug with the lime wedge and dip the rim gently into the salt to coat. Place the ice cubes, if using, into the mug. If making a basic michelada, add the lime juice on top of the ice, then pour in the beer.
  • If making a michelada especial, salt the rim of a chilled beer mug as directed above, then place the optional ingredients, to taste, into the mug. Stir the mixture lightly then pour in the beer.

Notes

Michelada

Mexican Style Eggs: A la Papi

“All I want is a hamburger, a hot dog, a Pizza, a nice big steak, some Texas style bar-b-q and a big plate of pancakes… no tacos or anything Mexican ok?” My dad said, after devouring the welcoming meal I prepared for him, which happened to be Tacos de Guisado.

Guisados are Mexican style stews, which can be ladled into warm corn tortillas. There are plenty of Fondas or small restaurants that specialize in them throughout Mexico. Since my dad loves them, I received him with three of his favorites: Chicken Tinga heavy on the chipotle, beef cooked in a green salsa with cubed potatoes and nopalitos, cactus paddles, sauteed with onion, Guajillo Chilies and corn. There were also refried beans and white rice, as they are such friendly sides to tacos.

After he made it clear that he didn’t want anything Mexican for the next three days, making me laugh so hard along the way, we set off to satisfy his cravings.

The next morning we were at the pancake place in front of a double stack of buttermilk pancakes with butter, extra maple syrup and bacon. And some grits. It was hard to make him wait for lunch.  When he lost all patience he dragged me to the Pizza place and then had a Hot Fudge Sundae from across the street. Dinner came around soon enough along with steaks, baked potatoes and a Mexican Chayote salad I sneaked in there.

The next morning, after lox and bagels at home, we went for a late Texas style bar-b-q lunch. Dinner was a Reuben with lots of dill pickles and a potato salad. But the last morning he couldn’t help it.

mexican style eggs
Onion, Jalapeño chiles and tomatoes, getting ready to welcome some beaten eggs.

As he tied one of my aprons around his waist, he announced, I am making the best Huevos a la Mexicana that you have ever tried in your life. So we chopped just enough onion, less tomatoes than I would have wanted and a lot of Jalapeños. As he cooked, he used strange and probably non-existing terms to describe what made his eggs so tasty… See how I am un-rawing the onion and mushing the tomato?

There are countless egg dishes in Mexican cooking, one better than the other. But these are the ones I prepare the most at home. They are easy to make, super tasty and dress up a breakfast in a wink. What’s more, I always have oil, eggs, tomatoes, onion and either Jalapeño or Serrano chiles handy.

Although the ingredients are always the same, versions can vary. That is mostly because some people like my dad cook the tomatoes slightly, while others like me cook the tomatoes until they are pasty and smooshy looking (I see where I get my funny use of terms now). The ratio of ingredients also varies. I use more tomatoes than my dad, but we both like it spicy. Whereas I like to eat them with hot corn tortillas, my dad likes to eat them with toasted sandwich bread (some people love these eggs with a side of toast smothered in cream cheese and that is pretty tasty too…).

This just makes me think of how accommodating Mexican food is. You can learn a basic idea and how to make it, and then tweak it to your preference.

Though while we were making breakfast I was craving for more tomatoes in those eggs, and wishing we could cook them a bit more, I have to admit that his version that morning topped off any that I have tried. Maybe it was because of the way he explained why his version was the most incredible in the world, maybe it was because of how much he enjoyed eating them and scooping some into corn tortillas to make some tacos for me (he had said no more tacos but one can only go so many days without tacos, you know?), or maybe it was because I was sad to see him go.

We didn’t get to the hot dogs or the hamburgers. I had thought of the places to take him so he could eat them all, but we ran out of time. But as it’s been said, you have to leave something for the next time if you want that next time to happen. I have until then to recover from all that eating.

Meanwhile, I leave you with a recipe for Huevos a la Mexicana, my father’s style, with some notes on my variations. But you can come up with yours!

Pati's dad looking out the window
My dad looking out the window, almost time for the airport.
Mexican Style Eggs
Print Recipe
5 from 6 votes

Eggs a la Mexicana

There are countless egg dishes in Mexican cooking, one better than the other. But these are the ones I prepare the most at home. They are easy to make, super tasty and dress up a breakfast in a wink. What’s more, I always have oil, eggs, tomatoes, onion and either Jalapeño or Serrano chiles handy.
Prep Time5 minutes
Cook Time15 minutes
Course: Breakfast
Cuisine: Mexican
Keyword: corn tortillas, Eggs, jalapeno, onion, pati's mexican table, serrano chiles, Tomatoes
Servings: 4 people
Author: Pati Jinich

Ingredients

  • 4 tablespoons corn, safflower or vegetable oil
  • 1/2 cup white onion chopped
  • 1 jalapeño or serrano chile seeded if less heat desired and finely chopped, or more to taste ( we went for 3)
  • 3/4 pound ripe tomatoes about 2 cups chopped (I add an extra cup)
  • 8 eggs lightly beaten
  • 1/2 teaspoon kosher or sea salt more or less to taste
  • Hot corn tortillas or pieces of toast

Instructions

  • Heat oil in a skillet over medium heat. Add onions, and cook stirring often for about 4 minutes, until they have softened but not browned. Stir in the chiles, cook for another minute. Incorporate the chopped tomatoes and let the mix cook and season, stirring often, for about 5 minutes (I let them cook about 4 to 5 minutes more until tomatoes are thoroughly cooked, mushy and their red color has deepened).
  • Meanwhile, crack the eggs in a bowl, add some salt, and beat them with a whisk or fork. Lower the heat to medium-low and pour eggs over the tomato mix. Stir as the eggs cook until desired donenness, but don't let them dry up. Serve with a side of refried beans, hot tortillas or a piece of toast.

Notes

Huevos a la Mexicana

Three tasty ways to eat ripe plantains

Ay, ay, ay! Patita, espérate mamacita! My nanny repeated, as she snatched the hot plantain tightly wrapped in aluminum foil, from my hands. Her hands were more resistant, she insisted, as they were older and had cooked so much. She would hold my chosen package with an open hand, so the camotero (sweet potato street cart man, who also sold plantains) could tear up the foil. As the steam flew up to the skies, he poured a more-than-any-child-could-wish-for amount sweetened condensed milk… and so it fell, sweet ounce, by thick ounce, onto that moist, rich, filling and immensely satisfying treat. Sheer joy, that was.

I devoured it in what seemed a couple bites, just to lick the last but yummiest remains from the crumbled foil. There we were, standing on the street corner where my family lived, mischievously laughing: it was already getting dark, almost dinnertime, and no, no, no, I wasn’t supposed to be having any. Oh dear, how I miss that woman! Now every time I eat a plantain, I get a sparkle of that sheer joy.

So I understand my boys when they rush out to the street, their heartbeats pumping so loud I can clap their rhythms, as I scream out wait, wait, wait!, as that annoying ice cream truck song approaches. Yes, right before dinner, thank you Mr. Ice Cream Man. I once felt that too, with an even more shrilling whistle coming out from the camotero street cart.

We used to eat cooked ripe plantains throughout the year, and ironically, they seemed to taste even better during the hot and rainy summer months.  As some people say, sometimes hot, beats the heat…

White Rice and Fried Plantains 1
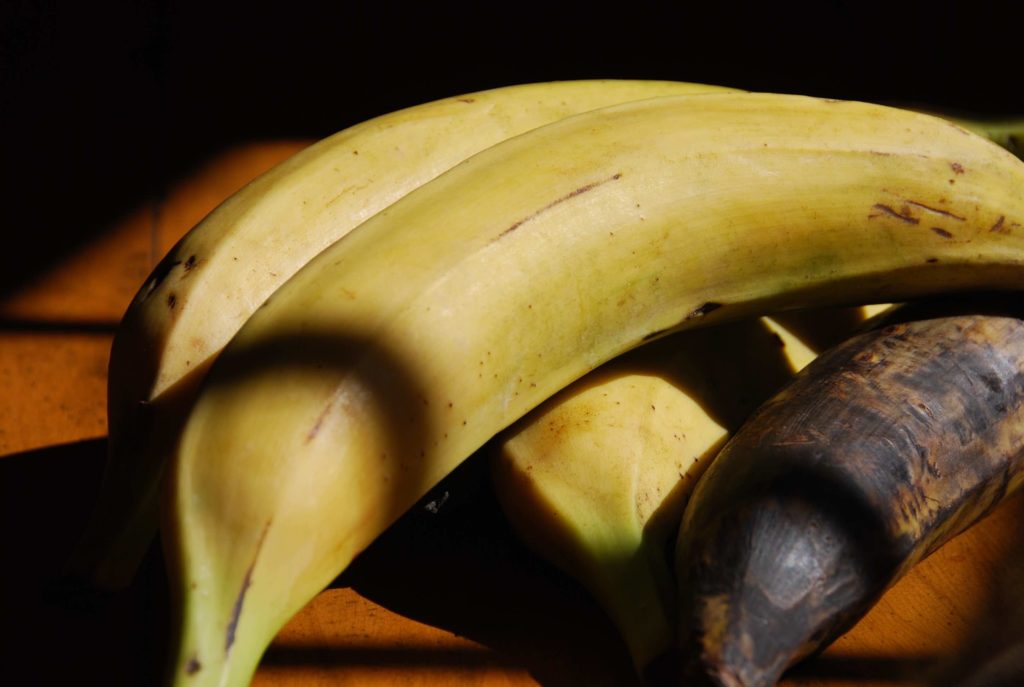
(Plantains on my dining room table, the one covered in black spots is ripe and ready to be cooked)
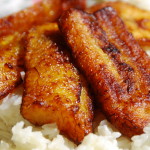
Plantains, called macho bananas, plátano macho, in many areas of Mexico, can just change gears and move from one course to another. Eaten as described above, they make an original dessert or an anytime sweet treat. Covered in foil and thrown on the grill, and along some grilled meat or chicken with a spicy kick, they make an incredible side. All you need is a simple salad and you have a wholesome tasty meal. If you forgot to eat them and you are already moving to dessert, just drizzle some sweet condensed milk, honey, sugar, Rompope, or ice cream on top! I don’t think one can say this about many other ingredients… maybe sweet potatoes or grilled pineapples…

Another option to eat ripe plantains, which is extremely popular, is to fry them, plátanos fritos. They are peeled, thickly and diagonally sliced (to make them pretty, why not?) and as they brown in the hot oil, their sugar caramelizes. So when you start to bite in, you get a sweet crunch, and when you are deep into the bite, you get a gently mushy and soft finish.

In Mexican cooking, fried plantains are famously eaten on top of white rice, as in the main post photo. This brings a nice contrast of sweet and soft with savory and coarse. If you want to go over the top, drizzle some Mexican or Latin style cream or sour cream as a finishing touch. Try that… and you will have a piece of sheer bliss too.

NOTE: Click here to read about plantains, how to buy them and how to recognize when they are ripe. Of course, there are other ways to eat them when they are not ripe, as they do in the Gulf Coast, but that is a topic for a future post… meanwhile enjoy one of these three ways to eat them ripe, or try them all!

fried plantains
Print Recipe
5 from 3 votes

Baked Plantains for Dessert

Plantains, called macho bananas, plátano macho, in many areas of Mexico, can just change gears and move from one course to another. They make an original dessert or an anytime sweet treat. Just drizzle some sweet condensed milk, honey, sugar, Rompope, or ice cream on top! 
Cook Time25 minutes
Course: Dessert, Snack
Cuisine: Latin American, Mexican
Keyword: Baked, Dessert, Plantains, Sweet, Sweetened Condensed Milk
Servings: 2 to 4 servings
Author: Pati Jinich

Ingredients

  • 2 ripe plantains
  • Sweetened condensed milk to your liking or honey, sugar, ice cream or rompope

Instructions

  • Preheat oven to 400°F. Individually wrap the plantains, with their skin on, in aluminum foil and place in a baking sheet in the oven (some people bake them without the aluminum foil, you can try it both ways).
  • Bake for about 25 minutes, until plantains are completely cooked through, very soft and sugar has begun to caramelize. Carefully open up the foil making a slit down the middle, open it up, and pour the condensed milk on top.

Notes

Platano Macho al Horno
fried plantains
Print Recipe
5 from 1 vote

Grilled Plantains

Plantains, called macho bananas, plátano macho, in many areas of Mexico, can just change gears and move from one course to another. Covered in foil and thrown on the grill, and along some grilled meat or chicken with a spicy kick, they make an incredible side. All you need is a simple salad and you have a wholesome tasty meal.
Prep Time0 minutes
Cook Time20 minutes
Total Time20 minutes
Course: Side Dish
Cuisine: Mexican
Keyword: Plantains, Platanos
Servings: 2 servings
Author: Pati Jinich

Ingredients

  • 2 ripe plantains

Instructions

  • Preheat grill to medium heat. Individually wrap the unpeeled plantains in aluminum foil and place on the grill.
  • Let them cook for about 20 to 25 minutes, until they are soft and cooked through. You may also cook them on the upper rack of the grill at a different temperature, but it may take more or less time.
  • You know they are ready when they feel extremely soft to the touch and the sugar has begin to caramelize.

Notes

Platanitos Fritos
Print Recipe
5 from 4 votes

White Rice and Fried Plantains

White Rice and Fried Plantains recipe from Pati's Mexican Table Season 2, Episode 6 “Fonda Favorites”
Prep Time15 minutes
Cook Time30 minutes
Total Time45 minutes
Course: Side Dish
Cuisine: Mexican
Keyword: celery, chicken broth, onion, pati’s mexican table, Plantains, rice, serrano chiles, sour cream
Author: Pati Jinich

Ingredients

  • 2 cups white rice
  • 3 tablespoons vegetable oil plus more for frying plantains
  • 1/2 cup white onion finely chopped
  • 4 cups chicken stock prepared or homemade
  • 1 celery stalk cut in half
  • 1 fresh parsley sprig
  • 1 tablespoon lime juice or to taste
  • 1 1/2 teaspoons kosher salt or to taste
  • 2 ripe plantains peeled and sliced
  • 1 serrano chile
  • sour cream to garnish, optional

Instructions

To prepare the rice:

  • Place the rice in a large bowl and cover with very hot water; let it soak anywhere from 5 to 10 minutes. Drain, rinse with cold water and drain again.
  • Heat the oil in a saucepan over medium-high heat. Add the rice and cook, stirring softly for 2 to 3 minutes. Incorporate the onion and stir, from time to time, until the rice begins to change to a milky-white color and feels and sounds heavier, as if it were grains of sand; about 3 to 4 more minutes.Pour in the chicken stock, along with the celery, parsley, lime juice, salt and whole chile.
  • When it comes to a rolling boil, cover the pot, reduce the heat to the lowest setting and cook until the rice is cooked through and the liquid has been absorbed, about 15 to 20 minutes. If the rice grains don’t seem soft and cooked through, add a bit more chicken broth or water and let it cook for another 5 more minutes or so.
  • Remove the pan from the heat and let it sit, covered, for 5 to 10 minutes. Fluff with a fork when ready to serve. Place the cooked plantains (below) on top. Place sour cream on the side for people to add to their rice and plantains if they like.

To prepare the plantains:

  • Note: The skin of the plantain should be almost entirely black when it is mature and ready to use in this recipe.
  • Peel the plantains and slice them diagonally into 1/4-inch thick slices.
  • In a sauté pan, over medium heat, add about 1/4-inch of oil. Heat the oil until hot but not smoking. Add the plantain slices and fry until browned but not blackened, about 2 minutes per side, the oil should be bubbling around their edges of the plantain slices as they cook.
  • Remove the plantains from the oil and drain them on a plate covered with paper towels.

Notes

Arroz blanco con plátanos fritos

I am packing my own Torta…

Some people get motion sickness when they travel. Some people get hungry. I am among the latter.

The minute I step on whatever will transport me from one place to another, my mind swims through related food memories… and I just have to eat. So since I know I will have a craving for something other than a moist, soggy, chewy and never-ever crunchy baguette from the Amtrak train, and after being so spoiled with the food from El Chepe Train, I am packing my own Torta.

Torta (according to me…): A satisfying and delicious, self contained, easy to transport, edible package filled with tasty ingredients that just love to schmooze together.

I guess we owe a big part of the Torta to the French, since the bolillo or telera bread used to make them, is the Mexican adaptation of the French Baguette. Brought to Mexico City in the 1860s by Emperor Maximilian’s troupe of cooks, its use quickly spread out throughout the country. Maximilian ruled over Mexico’s very own, very last and very short-lived European Monarchy. Although it was unfortunate politically (he ended up executed for one thing…), it was blissful in a culinary sense.

When it comes to Tortas, I have eaten a fair share of variations. There are outstanding long established Torta stands and shops where I grew up, each with a peculiar signature twist. Moreover, my father is famous in our food-centered family for making blow-your-mind-away ones (his favorite has sardines, Mexican avocado, white onion and pickled Jalapeños).

But I think the best Torta I ever had (sorry Papi…) was in the state of Michoacán at the home of Diana Kennedy. Aside from an outstanding Torta maker, she is also one of the most respected authorities in Mexican cooking, and a woman whose books I have happily swallowed whole.

I ate Diana’s Torta almost ten years ago, when I was a production assistant for a PBS cooking series based in Texas. I traveled with the production team to different locations in Mexico, as each show focused on the foods of a specific region. There was of course one show about Diana and the food from Michoacán, her beloved and adopted home. She prepared many dishes to feature on the show and by the time lunch came, she assembled a Torta for each of the by then desperately famished members of the crew.

It tasted like a little piece of Michoacano heaven.

The bread, if freshly baked that day, doesn’t need to be toasted. Most of the ingredients Diana used were brought from the nearby Pueblo that morning, including the fresh cheese and the farm style ham. She had homemade refried beans and pickled Jalapeños which I think were the biggest treat of it all.

Pack my own torta 1

Here is how I assembled mine for today, in memory of Diana’s:

I sliced the bolillos in half, but since I bought them yesterday I toasted them slightly. On one side I spread home made pinto refried beans (I had leftover from sopes I made last night). On the other side, some fork smashed slices of avocado. Then went a layer of queso fresco or fresh cheese and one of smoked turkey (what could be found in my refrigerator), slices of tomato, onion, a very generous spoonful of Mexican style cream and a layer of homemade pickled Jalapeños, so packed, it seemed like a Torta wallpaper.

Right before adding the top half, I sprinkled a bit of salt, a habit I got from my father. It seems to help the flavors from all the ingredients shine through.

NOTE: For the bread you can use bolillo, telera, Portuguese rolls or small baguettes. the refried beans as well as the pickled Jalapeños can be homemade or there are excellent brands of already made ones at the stores.

Pack my own torta main
Print Recipe
4.34 from 3 votes

TORTA

Some people get motion sickness when they travel. Some people get hungry. I am among the latter. The minute I step on whatever will transport me from one place to another, my mind swims through related food memories… and I just have to eat. So since I know I will have a craving for something other than a moist, soggy, chewy and never-ever crunchy baguette from the Amtrak train, and after being so spoiled with the food from El Chepe Train, I am packing my own Torta.
Prep Time5 minutes
Cook Time5 minutes
Course: Main Course
Cuisine: Mexican
Keyword: Antojo, Avocado, bolillo, cheese, chicken, ham, mexican crema, mozzarella, Oaxaca cheese, onion, Pickled Jalapeños, queso fresco, Recipe, refried beans, Sandwich, telera, Tomatoes, Torta, turkey
Servings: 1 hungry traveler
Author: Pati Jinich

Ingredients

  • 2 bolillos teleras, Portuguese rolls or small baguettes
  • 2 tablespoons refried beans
  • 1/2 ripe Mexican avocado peeled and sliced
  • 4 slices of queso fresco or fresh cheese farmers cheese, Oaxaca or Mozzarella
  • 4 cups to 6 slices of turkey ham or 1/2 cooked shredded chicken
  • 1 sliced and seeded tomato
  • 2 to 4 thin slices of white onion
  • 2 generous tablespoons of Mexican or any Latin style cream
  • Pickled Jalapeños homemade or storebought to taste ( Jalapeños en Escabeche/Vinagre)
  • Salt to taste optional

Instructions

  • Slice the bolillos in half lengthwise. If not fresh, toast them slightly for a couple minutes. On one side spread a tablespoon of refried beans and on the other mash 1/4 of an avocado with a fork. Top the base half with a couple slices of cheese, 2 or 3 slices of turkey, a couple slices of tomato and onion.
  • Drizzle a tablespoon of Mexican style cream and crown your package with as many pickled Jalapeños as your heart desires. Sprinkle a bit of salt if you want. Place the top half and slice the Torta horizontally.
  • Eat it or wrap it up so it may travel along with you.

Corn: In a bowl or on a stick

In Mexican cooking, corn is eaten and drank, in just about every possible way… Esquites, freshly shaved corn usually cooked in a buttery broth with epazote leaves and Serrano chile, is one of the most popular takes. So much so, that my boys counted eight Esquite street carts in the small down town square of Chihuahua, when we were there last month.

It is very common to walk through the streets in a Mexican city or village, no matter how tiny it may be, and find a wide array of street food stands boasting the dishes that Mexicans abroad hanker for the most: Antojitos, or little cravings. Each one being a Universe compounded with layers of flavors, in its own right.

Corn in a bowl or on a stick 2a-thumb-510x342-2014
Esquites, as most of the Antojitos, is a very versatile dish. You may eat the whole cooked corn on a stick, or shaved off the cob, cooked and seasoned and served in a cup. Then, you can dress it up or dress it down according to your mood, with the traditional and complementing garnishes of mayonnaise or Mexican cream, crumbled salty Cotija or aged cheese, lime juice, salt and ground dried piquí­n chile.

I just shared it last week with the Fox midday news team.

My boys, of course, prefer the more hands on way of eating it, on a stick. They each have their personal spins. My middle one likes it with just butter, mayo and crumbled salty cheese. On top of that, my little one adds salt and some drops of limejuice. My oldest one proudly eats it, “with a lot of absolutely everything”… Which just means adding ground chile piquin to the later mix… but heavily loaded on all fronts.

It is a good time to try it now that we start to see the beautiful fresh corn in the markets. It is up to you to decide if you want it nice and neat in a cup or deliciously messy on a stick.

Print Recipe
4.34 from 3 votes

Cooked and Seasoned Corn

In Mexican cooking, corn is eaten and drank, in just about every possible way… Esquites, freshly shaved corn usually cooked in a buttery broth with epazote leaves and Serrano chile, is one of the most popular takes. So much so, that my boys counted eight Esquite street carts in the small down town square of Chihuahua, when we were there last month.
Prep Time5 minutes
Cook Time13 minutes
Course: Antojos, Side Dish
Cuisine: Mexican
Keyword: Antojo, chile, Corn, cotija, epazote, lime, mayonnaise, mexican crema, piquí­n chiles, queso anejo, Recipe, serrano chiles, Vegetarian
Author: Pati Jinich

Ingredients

  • 2 tablespoons unsalted butter
  • 1 tablespoon safflower or corn oil
  • 1 serrano chile or more to taste, chopped (seeding optional for less heat)
  • 8 cups fresh corn kernels from about 12 ears of corn
  • 2 cups water
  • 2 tablespoons fresh epazote leaves chopped, or 1 whole leave dried, optional
  • 1 teaspoon kosher or sea salt or more to taste
  • 2 limes or about 4 tablespoons of fresh lime juice
  • 1/4 cup mayonnaise or Mexican cream
  • 1/2 cup crumbled Cotija fresco or añejo cheese
  • Dried ground Piquí­n chile to taste

Instructions

  • Melt the butter together with the oil on a cooking pot over medium-high heat. Add the chopped chiles and let them cook for about 20 to 30 seconds, moving them around.
  • Incorporate the corn, chopped fresh epazote leaves or dried epazote leaf, water and salt. Stir it all up and bring to a simmer. Cover with a lid, bring heat to medium-low and cook for 12 to 14 minutes, until the corn is cooked but still tender. Turn off the heat. You may leave the corn in the pot for a couple hours.
  • Serve corn in cups or small bowls. Let your guests add to their liking the fresh limejuice, mayonnaise or Mexican cream, crumbled cheese, powdered chile piquí­n and salt.
  • You may also cook the whole corn in salted water with the epazote leaves. Once it is cooked and ready, garnish with the same ingredients.

Notes

Esquites

The double life of an avocado

My friend Vered walked into my house carrying a pound of French feta cheese and some freshly baked pitas she found at a Middle Eastern store. It was the kind she used to cook with in her Israeli home. Just a taste made us realize how hungry we were, though we were not near any mealtime. Nonetheless, we had 20 minutes before we had to run, so that’s a great excuse for a snack.

The last beautifully ripe Mexican avocado I had in the basket was staring at me. So I offered to make a Mexican Farolada out of her pita, of course to top with some fresh Guacamole.

The Farolada, named after the Farolito chain of taco restaurants, consists of pita bread stuffed with Mexican Manchego cheese (similar to Monterey Jack), thrown on the grill until the cheese oozes out. If let to sit there per your request, it will become crispy too.

I turned around to start chopping some Serrano chile for the guacamole when Vered said she had another plan for my avocado and her pita: the Israeli way. Which, she said in a challenging fashion, was incredibly tasty.

Now, you can’t just walk into my kitchen and tempt me with something I have never eaten before.

We split that creamy, perfect avocado in half.

She mixed hers with feta cheese, green olives, lime juice (much to her dismay since she never uses limes, but it is very strange to find a lemon in my kitchen) olive oil and salt. She didn’t fill her pita with anything, just heated it up.

While the Farolada was getting nice and crunchy, I prepared my favorite guacamole version: smashed avocado with rivers of lime juice, generous amounts of serrano chile and cilantro and a healthy sprinkling of salt. No chopped tomatoes in there, thank you.

She ate my Mexican version and nodded in approval; I ate her Mediterranean one and loved it. In fact, I think I liked hers more. It seemed more exotic, plus I really enjoy the tangy taste of French feta.

Nonetheless, I finished with a piece of mine, if only because it tasted like home.

Here, you can try them both! See what you think.

Avocados main
Print Recipe
5 from 1 vote

Vered’s Avocado Salad with Toasted Pita Bread

My friend Vered's avocado salad the Israeli way. She mixes the avocado with feta cheese, green olives, lemon juice, olive oil and salt.
Prep Time15 minutes
Cook Time0 minutes
Total Time15 minutes
Course: Appetizer, Snack
Cuisine: Israeli, Mexican
Keyword: Avocado, cheese, Eggs, feta, lemon, olives, pita, Recipe
Servings: 6 servings
Author: Pati Jinich

Ingredients

  • 2 ripe Mexican avocados halved, pitted and peeled
  • 1/2 cup pitted green olives chopped (preferably the cracked bitter ones)
  • 3 scallions chopped
  • 2 to 3 tablespoons fresh lemon juice (she asked me to point out that she meant lemon and never lime)
  • Salt to taste
  • Ground black pepper to taste
  • 2 hard boiled eggs peeled and chopped (optional)
  • 1/2 cup Israeli or French feta cheese crumbled (optional)
  • Hot or toasted pita breads

Instructions

  • In a mixing bowl, mash the avocados with a fork to a chunky paste. Add the olives, scallions, lemon juice, salt and pepper and mix well. Add chopped egg and/or crumbled feta if you are going to use.
  • Spread the avocado salad over toasted pita bread or a slice of bread. For the perfect Israeli dinner – eat with a side of an Israeli salad and scrambled eggs (she pointed out I should add that too…)

Notes

Ensalada de Aguacate con Pita Arabe
avocado
Print Recipe
5 from 1 vote

Pati’s Guacamole Ranchero with Faroladas

The Farolada, named after the Farolito chain of taco restaurants, consists of pita bread stuffed with Mexican Manchego cheese (similar to Monterey Jack), thrown on the grill until the cheese oozes out. If let to sit there per your request, it will become crispy too.
Prep Time15 minutes
Cook Time5 minutes
Total Time20 minutes
Course: Antojos, Appetizer, Main Course, Snack
Cuisine: Mexican
Keyword: Avocado, cheese, Farolada, guacamole, Mexican Manchego, pita, Ranchero, Recipe, serrano chiles
Servings: 4 servings
Author: Pati Jinich

Ingredients

Guacamole:

  • 2 ripe Mexican avocados halved, pitted, peeled and diced
  • 1 tablespoon chopped white onion
  • 1 serrano chile or to taste, minced (seeding is optional and may substitute with jalapeño)
  • 1 tablespoon roughly chopped cilantro leaves
  • 3 tablespoons fresh lime juice
  • 1 teaspoon kosher salt or to taste

Faroladas:

  • 4 whole pita breads
  • 1 cup shredded Mexican Manchego cheese or Monterey Jack

Instructions

To make the guacamole:

  • Gently mix ingredients in a bowl and serve. It can be prepared a couple of hours in advance if covered and stored in the refrigerator.

To make the faroladas:

  • Heat a comal or heavy dry skillet over medium-low heat for about 5 minutes. Gently heat the pita breads over the comal or skillet for about 15 seconds per side. Remove and make a horizontal slice halfway through, making a long and wide pocket.
  • Stuff each pita with about 1/4 cup shredded cheese. Place them back on the hot comal or skillet and heat for about 3 to 4 minutes on each side, to your liking, until cheese is melted and depending how crunchy or soft you want the pita bread. For crunchier, leave longer. Remove from heat, cut into 4 pieces and eat with the guacamole.

Notes

Guacamole Ranchero con Faroladas