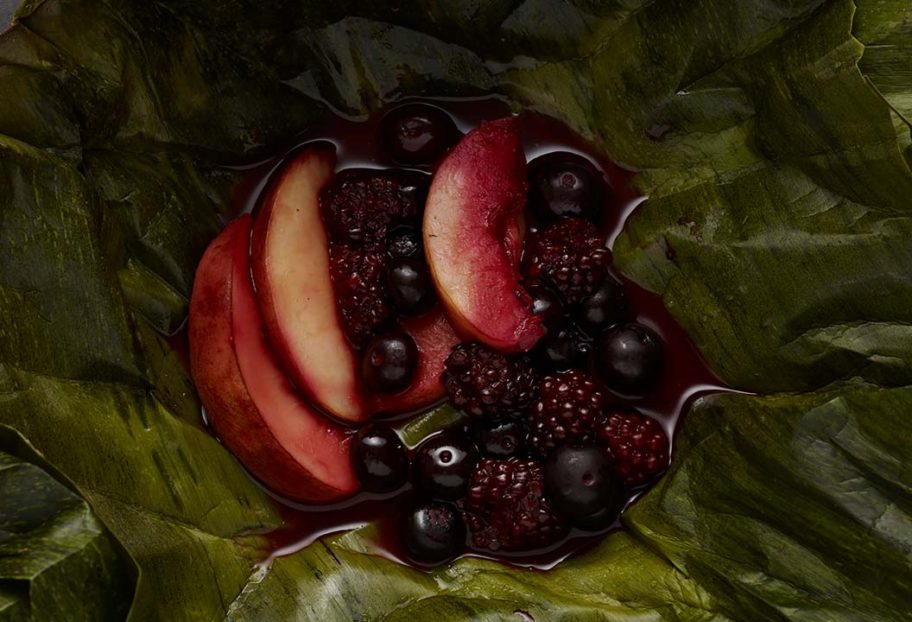
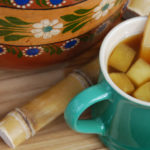
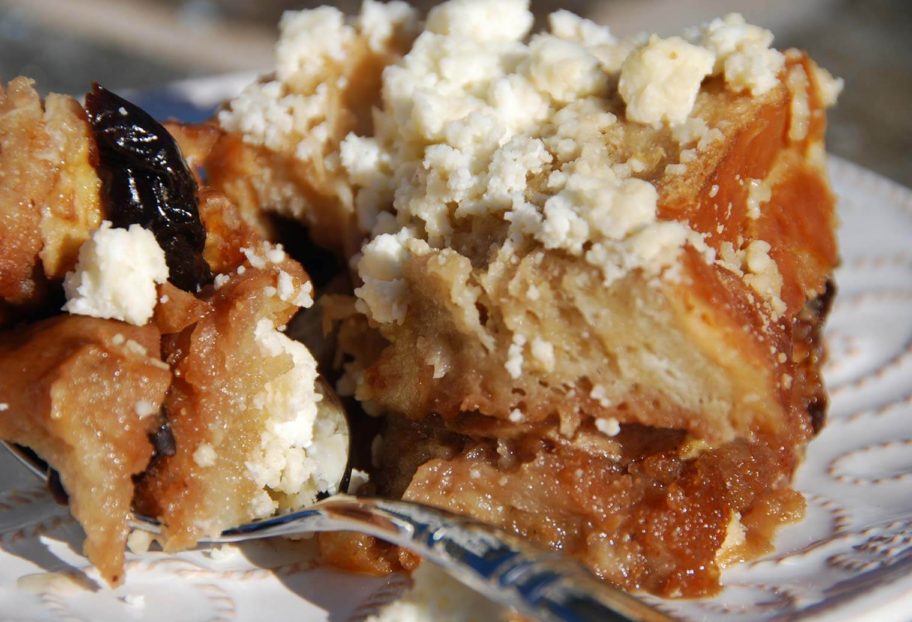
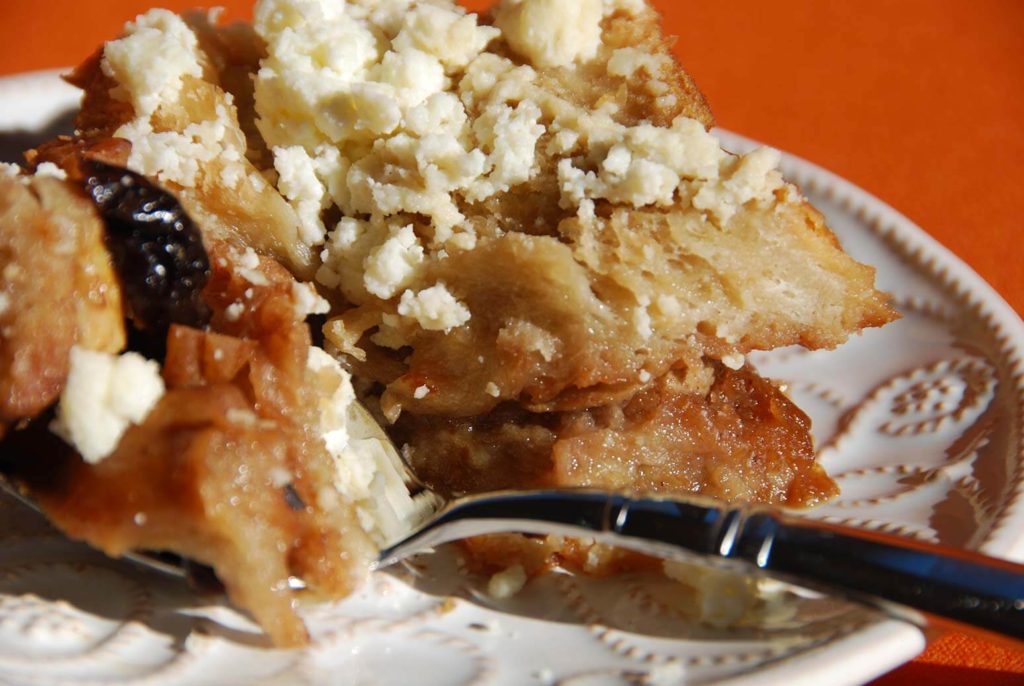
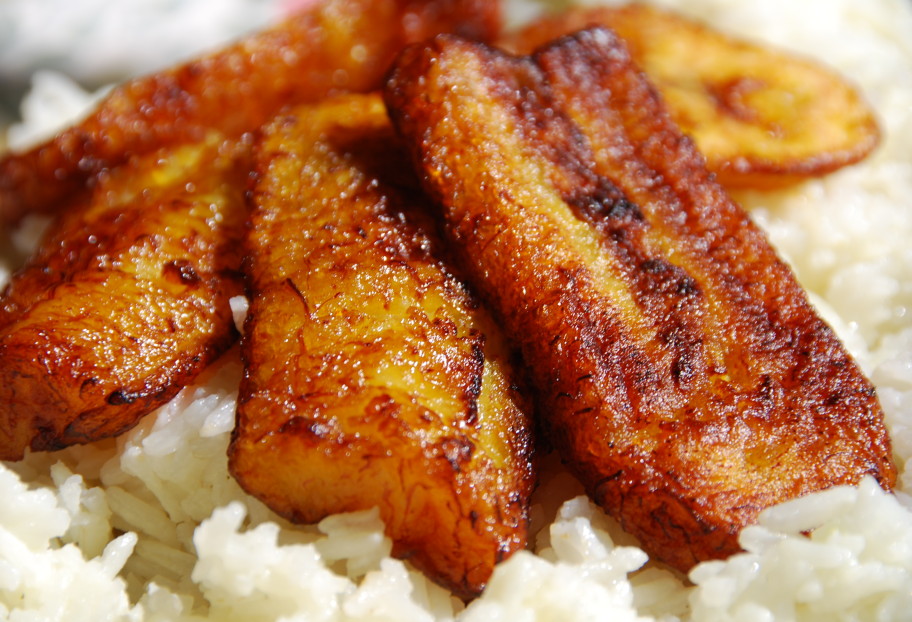
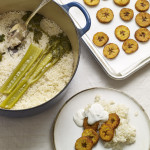
Fruits & Berries

Baked Plantains

Print Recipe
4.34 from 6 votes

Baked Plantains

Baked Plantains recipe from Pati's Mexican Table Season 1, Episode 13 “Wrapped Treats”
Prep Time2 minutes
Cook Time45 minutes
Total Time47 minutes
Course: Dessert, Side Dish
Cuisine: Mexican
Keyword: Dessert, fruit, pati's mexican table, Plantains
Servings: 2 to 4 servings
Author: Pati Jinich

Ingredients

  • 2 ripe plantains
  • Salt or sugar to taste

Instructions

  • Preheat the grill to medium heat or the oven to 400 degrees.
  • Cut a few small slits into the sides of the unpeeled, ripe plantains with a knife, since the plantains will expand as they cook. Individually wrap each plantain in aluminum foil and place them on the grill or in the oven. Let them cook for about 45 to 50 minutes, until they are soft and cooked through.
  • You know they are ready when they feel extremely soft to the touch and the sugar of the plantain has begun to caramelize. Open the aluminum foil, make a slit in the plantains, sprinkle with salt and sugar and eat them up!

Notes

Plátanos Macho al Horno

Grilled Shrimp and Pineapple Salad with Vanilla and Chile de Arbol Vinaigrette

Print Recipe
5 from 3 votes

Grilled Shrimp and Pineapple Salad with Vanilla and Chile de Arbol Vinaigrette

Grilled Shrimp and Pineapple Salad with Vanilla and Chile de Arbol Vinaigrette recipe from Pati's Mexican Table Season 1, Episode 12 “Vanilla”
Prep Time15 minutes
Cook Time10 minutes
Total Time25 minutes
Course: Salad
Cuisine: Mexican
Keyword: allspice, chiles de arbol, mexican vanilla, pati's mexican table, pineapple, red onion, red wine vinegar, Shrimp
Servings: 8 servings
Author: Pati Jinich

Ingredients

For the vinaigrette:

  • 1/2 cup olive oil
  • 1 garlic clove peeled
  • 1/2 vanilla bean chopped, or about a 2″ piece
  • 1 to 2 chiles de arbol stemmed and chopped
  • 1/4 cup safflower or corn oil
  • 1/4 cup red wine vinegar
  • 1/8 tsp ground allspice
  • 1 tsp kosher or sea salt or more to taste
  • ground black pepper optional
  • 1/4 tsp sugar or more to taste

For the salad:

  • 4 fresh pineapple slices peeled, about 1/2″ thick
  • Safflower or corn oil to brush the pan or grill
  • 1 lb large or extra large shrimp, fresh or thawed from frozen, rinsed, peeled, deveined
  • 1 tbsp butter
  • 1 tbsp safflower or corn oil
  • Kosher or sea salt to taste
  • Ground black pepper to taste
  • 12 oz mixed spring salad or your choice of mixed baby lettuces
  • 1/2 cup red onion slivered

Instructions

To make the vinaigrette:

  • Heat the olive oil in a saucepan set over medium heat, until hot but not smoking. Add garlic clove, vanilla bean and chiles, and cook about 15 seconds, stirring constantly. Be careful not to let them burn, remove the pan from the heat and pour its contents into a mixing bowl to cool.
  • Combine the safflower oil, red wine vinegar, salt pepper, allspice and sugar into the same bowl. Pour all the mix in the blender, puree until smooth, and reserve. The vinaigrette will be textured as the vanilla bean will not let itself be entirely pureed. But that makes it even more delicious! If you will not use the vinaigrette in the next couple of hours, cover it and refrigerate. It will keep for a week, but re-emulsify or thoroughly mix, before using.

To grill the pineapple:

  • Heat a grill pan, a grill or nonstick skillet over medium heat until hot and lightly coat with safflower or corn oil. Place the pineapple slices and cook for about 4 minutes per side until they are slightly charred. Remove from heat. Once they are cool enough to handle, cut in half, remove the core and cut into strips along the grain. Reserve.

To make the shrimp:

  • Sprinkle the shrimp with salt and pepper. Heat the butter and oil in a saute pan over high heat. Once the butter sizzles, add the shrimp, you may need to do it in batches so they they don’t overlap, and cook for 1 to 2 minutes per side. They should have plumped up and changed color on both sides, but be careful not to overcook them. Remove and reserve.

To assemble the salad:

  • Place the greens in a salad bowl. Drizzle some of the vinaigrette and toss, so that they are lightly coated but not soaked. Assemble on individual salad plates. Divide the shrimp, pineapple and red onion on top of each plate. You may drizzle a bit more of the vinaigrette on top and serve.

Notes

Ensalada de Camarón y Piña a la Parrilla con Vinagreta de Chile de Arbol y Vainilla 
 

Chicken with Tamarind, Apricots and Chipotle Sauce

Print Recipe
3.34 from 6 votes

Chicken with Tamarind, Apricots and Chipotle Sauce

Chicken with Tamarind, Apricots and Chipotle Sauce recipe from Pati's Mexican Table Season 1, Episode 11 “Middle Eastern Influences”
Prep Time10 minutes
Cook Time1 hour 15 minutes
Total Time1 hour 25 minutes
Course: Main Course
Cuisine: Mexican
Keyword: apricot, chicken, chipotles in adobo, Tamarind
Servings: 8 servings
Author: Pati Jinich

Ingredients

  • 4 chicken quarters or 8 chicken pieces of your choice with skin and bones
  • 1/2 cup vegetable oil
  • 1 teaspoon kosher or coarse sea salt or to taste, plus more to season chicken
  • Freshly ground pepper to taste to season chicken
  • 4 cups water
  • 1/2 pound dried apricots roughly chopped (about 3/4 cup)
  • 2 tablespoons apricot preserves
  • 3/4 cup homemade Latin-style tamarind syrup or store bought
  • 2 tablespoons sauce from chipotles in adobo or more to taste

Instructions

  • Thoroughly rinse chicken pieces with cold water and pat dry. Sprinkle with salt and pepper.
  • In a large skillet, heat the oil over medium-low heat. Add the chicken pieces skin side down in one layer, and slowly brown the chicken pieces for 40 minutes. Flip them over, once they have crisped and created a crust, halfway through. This is not a quick sear or browning, this is low heat cooking for a good 40 minutes.
  • Pour water over the chicken, raise the heat to medium-high to bring to a simmer. Incorporate apricots, apricot preserve, Latin-style tamarind syrup, chipotle sauce, and 1 teaspoon salt, stir, and keep it at a medium simmer for 35 minutes until the sauce has thickened to a thick syrup consistency and can coat the back of a wooden spoon. You may need to reduce the heat.
  • Taste for salt and heat and adjust to your liking.

Notes

Pollo con Salsa de Tamarindo, Chabacano y Chipotle

Spinach Salad with Jamaica Vinaigrette and Caramelized Pecans

Print Recipe
4.80 from 5 votes

Spinach Salad with Jamaica Vinaigrette and Caramelized Pecans

Spinach Salad with Jamaica Vinaigrette and Caramelized Pecans from Pati's Mexican Table, Season 1, Episode 6 "Hibiscus Flowers"
Prep Time15 minutes
Cook Time2 hours
Total Time2 hours 15 minutes
Course: Salad
Cuisine: Mexican
Keyword: flowers, hibiscus, jamaica, pati's mexican table, pecans, salad, Spinach
Servings: 8 to 10 servings
Author: Pati Jinich

Ingredients

For the salad:

  • 18 oz fresh spinach leaves rinsed, drained and thickly sliced
  • 1 bunch watercress rinsed and stems removed
  • 6-8 scallions white and light green parts, thinly sliced
  • 5 garlic cloves
  • Jamaica Vinaigrette (see below)
  • 1 cup caramelized pecans roughly chopped or whole pieces, to your liking

For the Jamaica Vinaigrette:

  • 3/4 cup dried jamaica flowers
  • 1 cup safflower oil
  • 1/4 cup olive oil
  • 2 tbsp red wine vinegar
  • 1 tbsp kosher or sea salt
  • 2 tsp sugar or to taste
  • 1/2 tsp freshly ground black pepper

Instructions

  • Place the jamiaca flowers in a bowl along with the garlic, oils, vinegar, salt, sugar and pepper. Let them sit for a few minutes, for the flowers to soften up a bit. Then pour everything into a blender and puree. The flowers will not be pureed until smooth. The mix will have a textured consistency with chewy flower chunks: that’s what you want!
  • Let the mix stand for at least two hours. If it will not be used then, it can be kept in the refrigerator, covered, for up to a week.
  • Place the spinach and watercress in a large bowl. Pour some of the vinaigrette on top and toss. Top with the chopped caramelized pecans and sprinkle the scallions over the top. Drizzle some more vinaigrette on top. If you have leftover vinaigrette, you can eat it with a spoon!

Notes

Ensalada de Espinaca con Vinagreta de Jamaica y Nueces Garapiñadas

Steak Tacos with Jamaica and Jalapeño Syrup

steak tacos with jamaica
Print Recipe
5 from 5 votes

Steak Tacos with Jamaica and Jalapeño Syrup

Steak Tacos with Jamaica and Jalapeño Syrup recipe from Pati's Mexican Table Season 1, Episode 6 “Hibiscus Flowers”
Prep Time1 hour 30 minutes
Cook Time15 minutes
Total Time1 hour 45 minutes
Course: Main Course
Cuisine: Mexican
Keyword: corn tortillas, flowers, hibiscus, jalapeno, jamaica, pati's mexican table, queso fresco, serrano chiles, steak, tacos
Servings: 8 generous servings
Author: Pati Jinich

Ingredients

For the Jamaica Concentrate (makes about 5 cups):

  • 8 cups water
  • 6 oz, about 2 cups, dried hibiscus flowers
  • 1 1/2 cups sugar or to taste
  • 2 tbsp fresh lime juice or to taste

For the tacos:

  • 1 lb flank steak
  • 2 cups jamaica/hibiscus flower concentrate
  • 2 bay leaves
  • 3 whole cloves
  • A pinch black pepper freshly ground
  • 3/4 tsp kosher salt or to taste
  • safflower or corn oil
  • Salt to taste
  • 1 serrano or jalapeño chile halved and seeded
  • 1 ripe Mexican avocado halved, pitted and sliced
  • 1/2 cup queso fresco crumbled
  • 16 corn tortillas

Instructions

To make the concentrate:

  • In a saucepan, pour 8 cups of water and place over high heat. Once it comes to a boil, add the jamaica flowers, simmer at medium heat for 10 minutes and turn off the heat. Let it cool down and strain into a heat proof glass or plastic water jar. Add the sugar and lime juice, mix well, cover and refrigerate.

To make the tacos:

  • Pour the jamaica concentrate, bay leaves, whole cloves, black pepper and salt into a medium saucepan set over medium-high heat. Bring to a boil and simmer for about 15 minutes, or until it reduces to half the original amount.
  • Let the marinade cool and pour over the flank steak in a baking dish or container. Cover and let it marinade anywhere from 1 to 24 hours.
  • Set grill pan, grill or saute pan over medium-high heat. Brush with a light coat of oil. Sprinkle meat with a bit more salt. Grill meat anywhere from 4 to 6 minutes per side, depending on how cooked you want it.
  • Meanwhile, pour the marinade into a saucepan set over medium heat and drop in the halved serrano or jalapeño chile. Let the sauce reduce for 15 minutes, or until it coats the back of a wooden spoon. The syrup will thicken considerably as it cools. Remove from heat and let cool.
  • When the meat is ready, slice it thin and if you want, cut it into chunks. Heat corn tortillas over a comal or skillet over medium heat, it will take about a minute per side. For each taco, add a couple tablespoons or slices of meat in the center of each tortillas, a slice of avocado, some crumbled queso fresco and drizzle some of the jamaica and syrup on top. Enjoy your tacos!

Notes

Tacos de Carne con Jarabe de Jamaica y Jalapeño

Jamaica Popsicles

jamaica popsicles
Print Recipe
5 from 7 votes

Jamaica Popsicles

Jamaica Popsicles recipe from Pati's Mexican Table Season 1, Episode 6 “Hibiscus Flowers”
Prep Time15 minutes
Cook Time4 hours
Total Time4 hours 15 minutes
Course: Dessert
Cuisine: Mexican
Keyword: Chocolate, coconut, flowers, hibiscus, jamaica, mango, Paleta, Popsicle, rum
Servings: 8 popsicles
Author: Pati Jinich

Ingredients

To make Jamaica Concentrate (makes about 5 cups):

  • 8 cups water
  • 2 cups, about 2-3 ounces, dried hibiscus flowers depending on how tightly you pack the cups
  • 1 1/2 cups sugar or to taste
  • 2 tbsp fresh lime juice or to taste

To make Jamaica Popsicles:

  • 2 cups hibiscus flower/jamaica concentrate
  • 3/4 cup mango peeled, pitted diced
  • Chocolate morsels to taste optional
  • Shredded coconut to taste optional
  • For adult fun you can make them grown up and add some Rum!

Instructions

To make the concentrate:

  • In a saucepan, pour 8 cups of water and place over high heat. Once it comes to a boil, add the jamaica flowers, simmer at medium heat for 10 minutes and turn off the heat. When cool, strain into a heat proof glass or plastic water jar. Add the sugar and lime juice, mix well, cover and refrigerate.

To make the popsicles:

  • Pour 2 cups of jamaica concentrate into 8, 4 ounce molds. Add pieces of mango, chocolate and coconut. Place in freezer until set and frozen, about 4 to 5 hours. Enjoy!

Notes

Paletas de Jamaica

Jamaica Water

jamaica water
Print Recipe
4.58 from 7 votes

Jamaica Water

Jamaica Water recipe from Pati's Mexican Table Season 1, Episode 6 "Hibiscus Flowers"
Cook Time10 minutes
Total Time10 minutes
Course: Drinks
Cuisine: Mexican
Keyword: agua fresca, beverage, coconut water, drink, hibiscus, jamaica, Mexican, non-alcoholic, refreshing, water
Servings: 4 to 5 cups
Author: Pati Jinich

Ingredients

Jamaica Concentrate (makes about 5 cups):

  • 8 cups water
  • 2 cups dried hibiscus or jamaica flowers about 2-3 ounces, depending on how tightly you pack the cups
  • 1 1/2 cups sugar or to taste
  • 2 tablespoons fresh lime juice or to taste

Jamaica Water:

  • 1 cup of the Jamaica Concentrate
  • 3 to 4 cups water

Instructions

To make the concentrate:

  • In a saucepan, pour 8 cups of water and place over high heat. Once it comes to a boil, add the jamaica flowers, simmer at medium heat for 10 to 12 minutes and turn off the heat. Let it cool down and strain into a heat proof glass or plastic water jar. Add the sugar and lime juice, mix well, cover and refrigerate.
  • It will keep in the refrigerator for at least 3 months.

To make the jamaica water:

  • When ready to serve, dilute 1 cup concentrate with 3 to 4 cups water, or to your liking, and some ice cubes.

Notes

Agua de Jamaica

Plantain and Refried Bean Quesadillas

Pati Jinich Plantain and Refried Bean Quesadillas
Print Recipe
4.20 from 5 votes

Plantain and Refried Bean Quesadillas

Plantain and Refried Bean Quesadillas recipe from Pati's Mexican Table Season 1, Episode 1 “Quesadillas”
Prep Time5 minutes
Cook Time45 minutes
Total Time50 minutes
Course: Antojos, Main Course
Cuisine: Mexican
Keyword: pati's mexican table, Plantains, Quesadilla, refried beans
Servings: 6 to 8 quesadillas
Author: Pati Jinich

Ingredients

  • 1 pound yellow mature plantains
  • 3 1/2 teaspoons sugar
  • 2/3 cup refried beans store bought or home-made
  • Safflower or corn oil to fry

Instructions

  • Place the whole plantains in a large pot filled with boiling water. Simmer, partially covered, for 20 to 30 minutes, until they are thoroughly cooked. Remove from the water and let cool. Peel the plantains, slice, and place in a food processor along with the sugar. Process until smooth. If the dough seems to soft and runny, you may add some all purpose flour to thicken it a bit. You may also let it sit in the refrigerator, covered, for a half an hour so it will harden too.
  • Make round balls of about 1 to 2″. Press in between plastic rounds in a tortilla press or roll with a roller until you get a flat disk of about ¼”. Place about a tablespoon of refried beans right in the center and fold like a turnover. Press down along the edges so they will be tightly sealed.
  • In a large deep skillet set over medium heat, heat enough oil to have about an inch high. About 3 to 4 minutes later, when it is hot but not smoking, insert the quesadillas a few at a time. The oil should be bubbling around the quesadillas as you do. Let them fry, about 2 minutes on each side until nicely tanned and lightly crisped. Don’t let them brown too much. Remove them and place on a paper towel to drain excess of oil.
  • Serve with your favorite salsa.

Notes

Quesadillas de Plátano Macho con Frijolitos Refritos

Fresh Jí­cama and Orange Pico de Gallo

jicama and orange pico
Print Recipe
4 from 4 votes

Fresh Jicama and Orange Pico de Gallo

Fresh Jicama and Orange Pico de Gallo recipe from Pati's Mexican Table Season 2, Episode 8 “Tequila!”
Prep Time10 minutes
Cook Time10 minutes
Total Time20 minutes
Course: Side Dish
Cuisine: Mexican
Keyword: Jicama, lime, orange, Peanuts, Pico de Gallo, piquí­n chiles, tajin
Servings: 8 servings
Author: Pati Jinich

Ingredients

  • 1 large or 2 small jí­camas 1 1/2 pounds, peeled and cut into sticks
  • 3 oranges peeled and separated into segments or sliced
  • 3 tablespoons freshly squeezed lime juice
  • 3 tablspoons olive oil
  • 1 teaspoon kosher or sea salt or more taste
  • 1 tablespoon dried ground chile Piquí­n or Tají­n or to taste
  • 1/2 cup shelled roasted peanuts chopped and toasted, not salted

Instructions

  • In a mixing bowl, whisk together the lime juice, olive oil, salt and pepper to create a vinaigrette.
  • Place the jí­camas and oranges in a salad bowl. Toss with the vinaigrette. Let it all marinate for about 10 minutes, either inside or outside of the refrigerator. Sprinkle with the peanuts and serve.

Notes

Pico de Jí­cama y Naranja

Street Style Cut-up Fruits and Vegetables

Print Recipe
4.41 from 5 votes

Street Style Cut-up Fruits and Vegetables

Street Style Cut-up Fruits and Vegetables recipe from Pati's Mexican Table Season 2, Episode 2 “School Lunch with a Mexican Twist”
Prep Time10 minutes
Cook Time1 minute
Total Time11 minutes
Course: Antojos, Side Dish
Cuisine: Mexican
Keyword: carrots, cucumber, Jicama, mango, pineapple, piquí­n chiles, Vegetable, Vegetarian, watermelon
Author: Pati Jinich

Ingredients

  • 1 to 2 large mangoes
  • 1/2 pineapple
  • 1/4 watermelon
  • 1 cucumber
  • 4 large carrots
  • 1 jicama
  • Dried ground chile such as piquí­n
  • 3 limes or more to taste
  • Kosher or sea salt to taste

Instructions

  • Peel and slice the fruits and vegetables, you may do this ahead of time and store covered in the refrigerator. Sprinkle salt and chile to taste. Squeeze fresh lime juice on top. Mix and enjoy.

Notes

Frutas y verduras de Carrito

Coco-Lime Margarita: Let’s Toast to Cinco (and a New Cookbook…)!

It is almost time for Cinco.

If you are a Mexican living in the US and you want to get attention, if you want to make some noise, if you feel that you have something good to share or say: Cinco de Mayo is your day!

My first cooking demo: Foods from Puebla during Cinco.

The first time I got invited to cook on TV: Chicken Tinga for Cinco.

My first radio interview: Do Mexicans celebrate Cinco?

The biggest sales day for my first cookbook: Cinco.

The day I was honored to be invited as guest chef to cook at the White House: You guessed it, Cinco!

Heck: you aren’t Mexican and hoping for an opportunity? Wait for Cinco anyway.

The funny thing is, in Mexico, Cinco de Mayo is a local celebration mainly in the city of Puebla, where a small Mexican militia beat a large French army in 1862. The French won right back and it took a few years for Mexico to shake itself off from an imposed European Monarchy.

Cinco is not a national holiday. There aren’t fiestas throughout the country that day. There isn’t Mariachi music on every corner. No margaritas generously poured in the middle afternoon specifically on that day. We don’t dress Mexican, partly because we are Mexicans every single day of the year, but mostly, because when we dress ourselves in the color of the Mexican flag it is either for Mexican Independence Day -September 16- or when Mexico is playing an international soccer match. And then, we dress the entire country as well.

But in the US, for whatever reason, Cinco de Mayo has become a day to celebrate anything and everything we love about Mexico, Mexicans and Mexican food. And thus, there are Mexican fiestas everywhere, Mariachi music playing on street corners, slushy margaritas of all kinds being poured in the middle of the afternoon, and people – be them Mexicans or not– dressing as Mexicans.

And for that: we need to toast and celebrate!

Any occasion to celebrate the beauty, the warmth, the richness of Mexican food and culture, the resilience of our people, is welcome by Mexicans everywhere.

To help celebrate, here is my gift for you this Cinco: A crazy good Coco-Lime Margarita. One that transports you to the beach where you can taste the salty sea breeze in the rim and munch on toasted sweetened coconut with a sprinkle of lime zest as you sip along a creamy and luscious Margarita.

It is a very special one for me, too, because I developed it for my next cookbook, which I am working on. It is called “Mexican Today” and will be published by Houghton Mifflin Harcourt. I am thrilled to be working with my same editor, Rux Martin, and so very thankful she considered publishing my second cookbook.

Please do look out for it! I am having so much fun with it and I know you will too. I am going wild in those pages… It will come out in 2016. Guess when? A month before Cinco!

From this Mexican to you, with all my gratitude and love, I hope you enjoy this Margarita.

Print Recipe
4.41 from 5 votes

Coco-Lime Margarita

Any occasion to celebrate the beauty, the warmth, the richness of Mexican food and culture, the resilience of our people, is welcome by Mexicans everywhere. To help celebrate, here is my gift for you this Cinco: A crazy good Coco-Lime Margarita. One that transports you to the beach where you can taste the salty sea breeze in the rim and munch on toasted sweetened coconut with a sprinkle of lime zest as you sip along a creamy and luscious Margarita.
Prep Time10 minutes
Cook Time2 minutes
Course: Drinks
Cuisine: Mexican
Keyword: cocktail, coconut, lime, pati's mexican table, tequila
Servings: 4 servings
Author: Pati Jinich

Ingredients

  • 1/2 cup sweetened shredded coconut such as Bakers’ Coconut Angel Flakes
  • Pinch of kosher or coarse sea salt plus more for the glasses
  • 1 lime zested then quartered for the glasses
  • 1 1/2 cups cream of coconut
  • 1 cup white or silver tequila
  • 2/3 cup Triple Sec Cointreau or another orange liqueur
  • 1/3 cup freshly squeezed lime juice
  • 2 cups Ice cubes for pouring on the rocks or making slushy style

Instructions

  • Preheat the oven to 325 degrees. Spread the angel flakes on a small baking sheet, sprinkle with a pinch of salt and the lime zest, mix and spread again. Place in the oven and bake for 6 to 7 minutes, or until the coconut is just barely beginning to color. It should not brown. Remove from the oven and immediately transfer to a small bowl. Reserve.
  • Pour some salt onto a small plate. Rub the rims of the glasses with the quartered lime, squeezing some of the juice over them. Then gently dip in the salt, coating all around the rims. Set aside.
  • Combine the cream of coconut, tequila, orange liqueur and lime juice in a blender and puree until completely mixed and smooth. If making slushy style, add the 2 cups of ice and puree until almost smooth. Serve with the toasted flakes on top.
  • If serving on the rocks, fill each glass with about 1/2 cup ice cubes and pour in the margarita mixture. Top with the coconut flakes.

Notes

Margarita de Coco con Limón

Mango Puff

Print Recipe
5 from 7 votes

Mango Puff

Mango Puff recipe from Pati's Mexican Table Season 4, Episode 13 “Backyard Picnic”
Prep Time10 minutes
Cook Time1 hour 10 minutes
Total Time1 hour 20 minutes
Course: Dessert
Cuisine: Mexican
Keyword: gelatin, lime, mango, pati's mexican table, Sweetened Condensed Milk
Servings: 12 individual gelatins
Author: Pati Jinich

Ingredients

  • 1 cup lukewarm water
  • 2 envelopes unflavored gelatin about 2 tablespoons
  • 1 14-ounce can sweetened condensed milk
  • 4 cups cubed mango fresh or thawed from frozen
  • 1 tablespoon fresh squeezed lime juice
  • 2 cups heavy whipping cream
  • 1 cup diced fresh mango or berries (optional for garnish)

Instructions

  • Pour 1 cup lukewarm water into a medium heatproof bowl and add 2 envelopes of unflavored gelatin. Stir and let rest until mixture puffs up, it will increase slightly in volume, about 3 minutes. Meanwhile, fill a small saucepan (that can hold the heatproof bowl) with 2 to 3 inches of water and bring to a simmer over medium-low heat. Place bowl with the gelatin mixture on top the saucepan, creating a water bath or double boiler. Let the bowl rest there, stirring occasionally, until gelatin completely dissolves, approximately 2 to 3 minutes. Remove from heat.
  • Pour the sweetened condensed milk into a blender along with the mango chunks and lime juice, puree until completely smooth. Add the diluted gelatin and blend on low speed for a few seconds to combine. Pour into a large mixing bowl. Let it begin to set as you whip up the cream.
  • In a stand mixer fitted with the whisk attachment, beat the heavy whipping cream until it holds soft peaks. Fold the whipped cream with the mango gelatin until fully combined.
  • Pour into individual gelatin molds or ramekins, cover tightly with plastic wrap, and refrigerate until completely chilled and set, at least an hour. Alternatively you can pour it onto a container, and let it chill and spoon onto bowls later.
  • When ready to serve, remove from the refrigerator and decorate with diced fresh mango or berries of your choice, if desired. Or if chilled in a large bowl, spoon onto individual bowls.

Notes

Gelatina de Mango

Guava Spritzer

guava spritzer pati jinich
Print Recipe
4.20 from 5 votes

Guava Spritzer

Guava Spritzer recipe from Pati's Mexican Table Season 4, Episode 13 “Backyard Picnic”
Cook Time5 minutes
Total Time5 minutes
Course: Drinks
Cuisine: Mexican
Keyword: agave syrup, cocktail, grapefruit, guava, jalapeno, lime, pati's mexican table, tequila
Servings: 8 servings
Author: Pati Jinich

Ingredients

  • 2 cups freshly squeezed grapefruit juice chilled
  • 4 cups guava nectar chilled
  • 1/4 cup light agave syrup or to taste
  • 1 liter citrus sparkling mineral water chilled
  • 16 ounces tequila blanco optional for grown ups, 2 ounces per drink
  • Ice cubes for serving
  • Grapefruit supremes or slices for serving
  • Lime wedges for serving
  • Fresh jalapeño slices (optional for garnish)

Instructions

  • In a large pitcher, combine the grapefruit juice, guava nectar and agave syrup. Stir well to combine. Taste for sweetness and add more agave as necessary. Pour the juice mixture over ice into glasses for serving, top with a splash of mineral water and serve with a grapefruit supreme and lime wedge.
  • For the adults, pour the juice into an ice filled glass, add 2 ounces of tequila and a splash of mineral water. Garnish with a grapefruit or lime wedge and a fresh jalapeño slice and serve.

Notes

Bebida de Guayaba

Baked Fruit Mixiote

baked fruit mixiote
Print Recipe
5 from 4 votes

Baked Fruit Mixiote

Baked Fruit Mixiote recipe from Pati's Mexican Table Season 4, Episode 12 “Baked!”
Prep Time10 minutes
Cook Time30 minutes
Total Time40 minutes
Course: Side Dish
Cuisine: Mexican
Keyword: baked fruit, banana leaves, blackberry, blueberries, fruit, mint, orange juice, pati's mexican table, peaches, vanilla, Vegetarian
Servings: 6 servings
Author: Pati Jinich

Ingredients

  • 1 1/2 cups freshly squeezed orange juice
  • 1 tablespoon vanilla extract
  • 1 tablespoon agave or maple syrup or honey
  • 2 large peaches pitted and cut into 6 wedges each
  • 1 cup blueberries
  • 1 cup blackberries
  • Banana leaves thawed from frozen
  • 12 fresh mint leaves
  • kosher or coarse sea salt
  • Kitchen twine

Instructions

  • In a small saucepan set over medium heat, bring the orange juice, vanilla and agave syrup to a simmer. Leave it at a steady simmer for 15 minutes or until it has reduced by half (to about 3/4 cup). Remove from the heat.
  • In a bowl, place all the fruit. Pour in the orange juice syrup and gently toss.
  • Pass the banana leaves over the open flame, steadily, without toasting them. Pass them slowly, just until you see them shine and they become fragrant. It’s steady and slow and should only take a few seconds.
  • Preheat the oven to 375 degrees.
  • Place one banana leaf in the bottom of a large baking dish.
  • Cut 12 pieces of about 14-inches in length. They should be between 8 and 10-inches wide. Arrange two cut pieces on top of each other, crossing one another. Place about 1/6 of the fruit mixture right in the middle, place a couple mint leaves on top and add a pinch of salt. Close as in a bundle, making a package and tying a piece of twine around it to close the package. Repeat with each bundle and place them in the baking dish.
  • Bake in the oven for about 20 to 25 minutes. Remove from the oven. Serve the bundles by themselves, or alongside ice cream, pound cake or cinnamon rolls.

Notes

Mixiote de Frutas 

Meringue Cake

strawberry meringue cake
Print Recipe
4.46 from 11 votes

Meringue Cake

Meringue Cake recipe from Pati's Mexican Table Season 4, Episode 11 “Family Favorites”
Prep Time15 minutes
Cook Time1 hour
Total Time1 hour 15 minutes
Course: Dessert
Cuisine: Mexican
Keyword: cake, egg whites, lime, mascarpone, Meringue, mexican vanilla, pati's mexican table, requesón, strawberries, whipped cream
Servings: 10 to 12 servings
Author: Pati Jinich

Ingredients

For the meringues:

  • 7 large egg whites
  • 1 teaspoon freshly squeezed lime juice
  • 1 1/4 cup granulated sugar
  • 2 tablespoons cornstarch sifted

For the whipped cream filling:

  • 1 1/2 cups heavy cream
  • 8 ounces (1 cup) mascarpone or requeson cheese chilled
  • 1 teaspoon Mexican vanilla extract
  • 2 cups sliced strawberries plus more for garnish

Instructions

  • Preheat oven to 200 degrees.
  • Line two baking sheets with parchment paper and trace two circles, 8-inches in diameter, on each piece of parchment paper, four circles altogether between the two pans.
  • In the bowl of a standing mixer with the whisk attachment, beat the egg whites and lime juice on medium speed until frothy, about 3 to 4 minutes. Continue beating and start adding the granulated sugar slowly, about 2 tablespoons at a time, until completely combined and the mixture holds stiff peaks, about 2 to 3 more minutes. The meringue should appear white and glossy.
  • Remove the bowl from the stand, sift the cornstarch into the meringue, and use a rubber spatula to gently fold and completely incorporate the cornstarch. Transfer the meringue to the prepared baking sheets, dividing evenly between the 4 8-inch measured circles. Use the spatula to spread it into even circles; you will be able to make some nice wavy shapes.
  • Bake for 1 hour, then reduce the temperature to 175 degrees. Let the meringue dry in the oven for another 4 to 6 hours. The outside should be crisp, and they should be easy to remove from the parchment. Set aside to cool completely.
  • In the bowl of a standing mixer with the whisk attachment, whip the heavy cream and mascarpone cheese until soft peaks form. Add the vanilla and continue to beat until stiff peaks form.
  • Transfer 1 1/4 cups of the whipped mascarpone cream to a medium bowl and fold in the sliced strawberries. Set aside.
  • To assemble the cake, place a round of meringue on platter and spoon about 1 1/4 cup whipped cream onto the center, then spread to cover. Top with the second meringue and spread on the strawberry and whipped cream mixture. Top with the third meringue and another 1 1/4 cup whipped cream. Top with the final meringue. Serve in slices with more fresh strawberries.

Notes

Pastel de Merengue

Mango Pecan Tart

chardonnay mango tart
Print Recipe
4.43 from 7 votes

Mango Pecan Tart

Mango Pecan Tart recipe from Pati's Mexican Table Season 4, Episode 2 "Adventures in San Miguel"
Prep Time25 minutes
Cook Time25 minutes
Total Time50 minutes
Course: Breakfast, Dessert
Cuisine: American, Latin American, Mexican
Keyword: apricot, champagne, jamaica, Kent, mango, pastry cream, Pecan, Pie, tart
Servings: 10 servings
Author: Pati Jinich

Ingredients

  • 3 large, ripe champagne or Kent mangoes

For the crust:

  • 1 1/2 cups pecans
  • 1 cup all-purpose flour
  • 1/4 cup dark brown sugar
  • Pinch kosher or coarse sea salt
  • 1 large egg
  • 4 tablespoons cold butter

For the Pastry Cream:

  • 1 cup milk
  • 1 tablespoon vanilla extract
  • 3 egg yolks
  • 1/4 cup sugar
  • 2 tablespoons cornstarch

For the glaze:

  • 1/4 cup apricot jam
  • 1/4 cup white wine from a bottle that you would like to drink

Instructions

For the crust:

  • Preheat the oven to 375°F. Place the pecans in the bowl of a food processor. Pulse a few times until finely ground. Add the flour, sugar and salt and pulse again a few times until combined. Add an egg and the butter, pulse again a few times until thoroughly mixed and the butter has broken into the smallest of pieces, making it hard to distinguish it from the mix. The mix should resemble a coarse meal; it will not appear to be a homogeneous dough, but it will be all crumbles. That’s what you want.
  • Turn all the pecan mix into a tart pan with a removable ring. Press into bottom of the pan with your hands, leveling it all around. As you press, the mix will start looking like dough. Press a bit to the sides to form a 1/4-inch border all around.
  • Bake for 15 minutes, until cooked through and appears to be lightly golden. Let it cool completely.

For the pastry cream:

  • In a medium saucepan, set over medium heat, pour in the milk and vanilla, stir well with a whisk and let it come to a simmer. Just until it begins bubbling around the edges. Remove from heat.
  • In a medium bowl, beat the egg yolks along with the sugar and the cornstarch. Slowly, in a thin stream and with the help of a ladle, pour the milk into the beaten eggs, whisking along to combine thoroughly until all the milk mixture has been poured. Transfer it all back into saucepan. Set over medium heat, stirring occasionally and keeping a good eye on it, let it come to a simmer. Simmer for about 1 to 2 minutes, until it thickens to thick cream consistency. You may stir with a spatula as it simmers so it doesn’t stick to the bottom. Remove from heat. Let it cool, wrap with plastic wrap and place in refrigerator until ready to use.

For the glaze:

  • In a small saucepan, combine the jam with the wine. Set it over medium heat. Stir or whisk a couple times, until it dissolves and it begins to simmer. Let it simmer 1 to 2 minutes. Set aside.

To assemble the tart:

  • When ready to assemble the tart, vertically slice the cheeks of the mangoes. With a small knife, cut around the cheeks to make it easy to remove from the skin, and scoop out with a spoon. Cut the cheeks into slices.
  • Pour the pastry cream onto the crust. Place the mango slices, going around the tart until you reach the center. With a pastry brush, brush the glaze all over the mangoes. If the glaze has cooled, heat for a few seconds until it becomes liquid again.
  • Place the tart in the refrigerator at least for an hour to set and chill.

Notes

Tarta de Nuez con Mango

Juju’s Mango Smoothie

Print Recipe
4.84 from 6 votes

Juju’s Mango Smoothie

Juju’s Mango Smoothie recipe from Pati's Mexican Table Season 4, Episode 1 "Good Morning, Mexico!"
Prep Time5 minutes
Cook Time3 minutes
Total Time8 minutes
Course: Drinks
Cuisine: Mexican
Keyword: banana, breakfast, mango, orange juice, pati's mexican table, smoothie, vanilla
Servings: 3 cups
Author: Pati Jinich

Ingredients

  • 2 cups diced fresh mango or thawed from frozen
  • 1 teaspoon Mexican vanilla extract
  • 2 cups orange juice preferably fresh squeezed
  • 1 ripe banana sliced

Instructions

  • Combine the mango, vanilla, orange juice, and banana in a blender and puree until smooth. Add a couple handfuls of ice cubes and puree until well blended.

Notes

Licuado de Mango de Juju

Ponche: Or My Mom’s New Year’s Warm Fruit Punch

My mom is the best cook I know.

Growing up in Mexico City, she used to make the most incredible ponche, or warm fruit punch, every New Year’s Eve. Just once a year.

My sisters and I used to pace up and down the kitchen as she peeled, diced and threw the ingredients – many of which were only available at this time of year in the markets – into a gigantic pot. To tame our impatience she would peel a few pieces of the fresh sugar cane meant to go into that pot, and cut it into smaller sticks, so we could chew and suck its sweetly tangy juice, ever so slowly, as we waited for the ponche to be served.

Coincidentally, the ponche was always ready as guests were about to walk in the door. Then, she would start ladling the ponche into big mugs as we each called out our requests. I asked for extra sugar cane and tejocotes, or crabapples, one of my sisters asked to have hers without raisins, another with no fruit but just the punch liquid, and another with extra fruit and no prunes.

After the kids were served, she would grab the bottle of rum and spike the ponche for the grown ups. Everyone held their cups with both hands, trying to sip as steam covered their faces with each attempt, as it used to be served so very hot.

As life sometimes goes, my parents divorced. A long time ago, actually. I must have been fourteen or so. Since then, my mom has only made ponche once for New Years Eve, at my in-laws in the small town of Valle de Bravo, after my oldest son was born. It was as crazy good a ponche, as ever.

ponche ingredients

I am very lucky though. Although my parents are divorced, and I don’t get to spend New Year’s with all my sisters and their families and my parents, as if they were a couple still, we get together as often as we can. We are all growing old, of course, but everyone is still here, tagging along.

Most years, I get to spend New Year’s with my in-laws and my husband’s entire family. Although they don’t make ponche, my mother-in-law makes one mean tamal casserole, and all her grandchildren (they are so many!) have a blast. This year, I am planning on making for them my mom’s New Year’s punch. Maybe my mom will come visit, one never knows.

I am even more lucky, and you are too, because I called my mom yesterday morning to get some extra details on the recipe.

So… I am sharing the recipe with you to say gracias. Thank you for allowing me to come into your homes with my recipes and stories. Thank you for taking the time to write and say hi. Thank you for sharing with me your stories; for telling me what you have tried or hope to try in your kitchen. Also for telling me what you don’t want to try.

Because food connects us all. And because the ponche tasted almost as sweet yesterday when I made it for my boys, as when my mom used to make it for her girls. I hope it tastes even sweeter to you, for whomever and whenever you decide to make it.

With my best wishes for the new year and with all my gratitude,

Pati

ponche

P.S. This recipe is to start you off. You can also use any other fruits you fancy. Pears are great, so is pineapple. Other fresh and dried fruits, and even nuts, work their wonders when being simmered all together in a warm drink with a base of piloncillo and the cinnamon.

ponche
Print Recipe
5 from 3 votes

New Year’s Warm Fruit Punch

My mom is the best cook I know. Growing up in Mexico City, she used to make the most incredible ponche, or warm fruit punch, every New Year’s Eve. Just once a year. My sisters and I used to pace up and down the kitchen as she peeled, diced and threw the ingredients – many of which were only available at this time of year in the markets – into a gigantic pot.
Prep Time5 minutes
Cook Time35 minutes
Total Time40 minutes
Course: Drinks
Cuisine: Mexican
Keyword: apple, apricot, ceylon, cinnamon, cocktail, crabapples, guava, orange, piloncillo, prunes, Recipe, rum, sugarcane, tejocotes
Servings: 10 servings
Author: Pati Jinich

Ingredients

  • 8 ounces tejocotes or crabapples fresh or preserved
  • 3 quarts (12 cups) water
  • 2 true or ceylon cinnamon sticks
  • 8 ounces piloncillo about 1 cup packed if grated, or dark brown sugar
  • 1 pound sugarcane peeled and cut into pieces of 4" to 5” in height and ½" width, or thawed from frozen
  • 8 ounces yellow Mexican guavas cut into bite-sized chunks, or thawed frozen
  • 2 apples of your choice peeled, cored, cut into bite-sized chunks
  • 1/2 cup pitted prunes roughly chopped
  • 1/2 cup dried apricots roughly chopped
  • 1/2 cup raisins or to taste
  • Rind of an orange
  • 1/2 cup rum sugar cane liquor, brandy or tequila, optional

Instructions

  • In a medium saucepan, bring a couple cups water to a boil. Add the tejocotes, remove from heat and let them sit for 5 minutes, drain. If using the preserved tejocotes, just drain. Once cool enough to handle, peel them, cut them in half and discard their seeds.
  • In a large pot or clay pot, pour 12 cups water with the cinnamon and piloncillo, set over medium-high heat. Once it comes to a simmer, reduce heat to medium and add the sugar cane, along with the guavas, apples, prunes, apricots, raisins and tejocotes. Simmer for 20 to 30 minutes, stirring every once in a while. Add the orange rind and simmer for another 10 minutes.
  • If you will take your ponche spiked, this is when you add the rum. Stir and cover until ready to serve.
  • Discard the cinnamon and orange rind before serving. Serve in mugs, trying to add a bit of each fruit.

Notes

Ponche de Año Nuevo

Tres Leches and Strawberry Mexican Gelatin

tres leches and strawberry gelatin
Print Recipe
4.50 from 6 votes

Tres Leches and Strawberry Mexican Gelatin

Tres Leches and Strawberry Mexican Gelatin recipe from Pati's Mexican Table Season 3, Episode 13 “My Piñata Party”
Prep Time20 minutes
Cook Time2 hours 20 minutes
Total Time2 hours 40 minutes
Course: Dessert
Cuisine: Mexican
Keyword: cranberry juice, evaporated milk, gelatin, jello, pati's mexican table, pomegranate juice, strawberries, Sweetened Condensed Milk, tres leches, vanilla
Servings: 8 servings
Author: Pati Jinich

Ingredients

For the tres leches gelatin:

  • 1 cup whole or 2-percent milk
  • 1 14-ounce can sweetened condensed milk
  • 1 12-ounce can evaporated milk
  • 2 teaspoons vanilla extract
  • 2 envelopes unflavored gelatin powder or about 2 tablespoons
  • 1/2 cup lukewarm water

For the strawberry gelatin:

  • 2 cups cranberry or pomegranate juice
  • 2 envelopes unflavored gelatin powder or about 2 tablespoons
  • 1/2 cup lukewarm water
  • 1/2 pound strawberries stemmed, rinsed and quartered

Instructions

To prepare the tres leches gelatin:

  • Bring 1 cup of milk to a boil in a medium saucepan. Reduce heat to medium-low and allow the milk to simmer for 5 minutes. Add the sweetened condensed milk, evaporated milk and vanilla extract, and stir to combine. Increase the heat to medium-high to return to a simmer, then reduce to medium-low and let simmer for 5 more minutes. Remove from heat and pour into a large mixing bowl.
  • Pour 1/2 cup of lukewarm water into a medium bowl and add 2 envelopes of unflavored gelatin. Stir until well combined, then let it rest until the mixture puffs up (it will increase slightly in volume and appear as if it’s solidifying) – approximately 4 to 5 minutes. Meanwhile, fill a small saucepan with 2 to 3 inches of water and bring to a simmer over medium-low heat. Place the bowl with the puffed-up gelatin mixture on top of the saucepan with the simmering water. Let it rest there, stirring occasionally, until the gelatin has completely dissolved and the mixture has a barely amber color – approximately 3 to 4 minutes. Remove from heat.
  • Pour the dissolved gelatin into the bowl with the tres leches mixture and stir to combine.

To prepare the Strawberry Gelatin:

  • Pour the juice into a large mixing bowl. Repeat the same process to mix and dissolve the gelatin as outlined in the second paragraph above. Pour the dissolved gelatin into the juice and stir to combine.
  • To layer your tres leches and strawberry gelatin: In plastic cups or single-portion gelatin molds, use a liquid measuring cup or small pitcher to fill about 1/3 of each cup with the tres leches mixture. Place the cups into the refrigerator until the gelatin sets (appears solid and does not slosh when moved), about 20 to 30 minutes. Do not put the bowls with your remaining tres leches mixture and juice mix in the refrigerator.
  • Remove the cups from the refrigerator and pour the juice mixture on top of the tres leches, filling about another 1/3 of the cup, and add some strawberry pieces. Cover the cups with plastic wrap, return them to the refrigerator, and let chill for at least 2 hours before serving.
  • (You are at free will to play with your combinations! You can decide how many layers - one or ten! - and how thick or thin you want to make them. You can choose which flavor you want to start with, or if you want to alternate. Continue until you are done using all of the flavored mixes.)
  • If you want to use a large 8- to 10-inch serving mold, fill it halfway with tres leches mix and refrigerate until set, about 20 to 30 minutes. Then pour the juice mixture on top and carefully add the strawberry pieces. Refrigerate for at least 2 hours before unmolding. It should be firm and not feel sticky or sag, and it should slide easily out of the mold with a few gentle shakes.
  • Hint: If your gelatin mixtures start to solidify while you are waiting for layers to set in the refrigerator, not to worry! Adding a little at a time, stir water into the mixture until it becomes liquid, again.

Notes

Gelatina de Tres Leches con Fresas

Mixed Melon, Lime and Coconut Agua Fresca

Mixed Melon Lime Coconut Agua Fresca
Print Recipe
4.41 from 5 votes

Mixed Melon, Lime and Coconut Agua Fresca

Mixed Melon, Lime and Coconut Agua Fresca recipe from Pati's Mexican Table Season 3, Episode 13 “My Piñata Party”
Prep Time15 minutes
Cook Time2 hours
Total Time2 hours 15 minutes
Course: Drinks
Cuisine: Mexican
Keyword: cantaloupe, coconut water, honey, lime, mint, pati's mexican table, watermelon
Servings: 16 servings
Author: Pati Jinich

Ingredients

  • 12 cups (about 1 8-pound watermelon) seeded watermelon cubed
  • 4 cups cantaloupe cubed
  • 2 cups coconut water
  • 1/3 cup honey
  • 1/2 cup freshly squeezed lime juice (about 6 limes juiced)
  • 1 liter seltzer water
  • Lime slices to garnish
  • mint leaves to garnish

Instructions

  • Working in batches, combine the watermelon, cantaloupe, coconut water, honey and lime juice in a blender. Pulse until well pureed. If desired, pass the mixture through a fine-mesh strainer. Refrigerate in a large punch bowl until well chilled, about 2 hours.
  • Serve with a splash of seltzer and garnish with lime slices and mint leaves.

Notes

Agua Fresca de Sandía, Melón, Limón y Coco

Watermelon, Tomatillo and Mozzarella Skewers with Lime-Honey Vinaigrette

watermelon tomatillo mozzarella skewers
Print Recipe
5 from 4 votes

Watermelon, Tomatillo and Mozzarella Skewers with Lime-Honey Vinaigrette

Watermelon, Tomatillo and Mozzarella Skewers with Lime-Honey Vinaigrette recipe from Pati's Mexican Table Season 3, Episode 13 “My Piñata Party”
Prep Time15 minutes
Cook Time5 minutes
Total Time20 minutes
Course: Antojos, Side Dish
Cuisine: Mexican
Keyword: ginger, honey, lime, Maggi sauce, mozzarella, pati's mexican table, tomatillos, vinaigrette, watermelon
Servings: 6 servings
Author: Pati Jinich

Ingredients

For the vinaigrette:

  • 2 tablespoons chopped cilantro
  • 1 teaspoon grated ginger
  • 1/2 cup honey
  • Zest of 2 limes
  • 5 tablespoons freshly squeezed lime juice
  • 1 tablespoon Maggi sauce

For the skewers:

  • 6 cups seeded and cubed ripe watermelon
  • About 12 ounces tomatillos husks removed, rinsed, and thinly sliced (about 3 cups)
  • 1 large package of small fresh mozzarella balls (about 8 ounces)

Instructions

To make the vinaigrette:

  • Place the cilantro, ginger, honey, lime zest and juice, and Maggi sauce into a large mason jar and shake vigorously to emulsify. Alternatively, place all of the ingredients in a bowl and whisk to emulsify.

To make the skewers:

  • Slide the watermelon cubes, tomatillo slices and mozzarella balls onto wooden toothpicks or small plastic skewers, alternating between each ingredient. Serve with the lime-honey vinaigrette as a dipping sauce.

Notes

Brochetas de Sandía, Tomate Verde y Mozzarella con Vinagreta de Miel y Limón

Five Spice Pecan Plum Empanadas

five spice plum empanadas
Print Recipe
4.67 from 6 votes

Five Spice Pecan Plum Empanadas

Five Spice Pecan Plum Empanadas recipe from Pati's Mexican Table Season 3, Episode 8 “Asian Influences in Mexican Cooking”
Prep Time30 minutes
Cook Time20 minutes
Total Time50 minutes
Course: Antojos, Main Course
Cuisine: Mexican
Keyword: apricot, Cajeta, dough, Dulce de Leche, Empanadas, five spice, lime, pati's mexican table, pecans, piloncillo, plums, sour cream
Servings: 10 empanadas
Author: Pati Jinich

Ingredients

  • 2 cups all-purpose flour plus more for dusting
  • 1/2 cup granulated sugar
  • Pinch of kosher or coarse sea salt
  • 12 tablespoons (1 1/2 stick) unsalted butter diced
  • 1 egg
  • 3 tablespoons sour cream
  • 1/2 pound plums pitted and diced (about 1 1/2 cups)
  • 1/4 pound apricots pitted and diced (about 3/4 cup)
  • 1/2 cup pecans finely chopped
  • 1/4 cup dark brown sugar or shredded piloncillo
  • 1 1/2 teaspoons cornstarch
  • 1 1/2 teaspoons freshly squeezed lime juice
  • 1/8 teaspoon five spice powder
  • 1 egg beaten for brushing
  • Granulated sugar for dusting or you may use turbinado or dark brown sugar
  • Dulce de leche or cajeta to drizzle on top or on the side for dipping (optional)

Instructions

  • In a large mixing bowl, combine the flour, sugar and salt. In a small bowl, beat together the egg and sour cream.
  • With your fingers, combine the butter into the dry ingredients until it resembles a coarse meal (it should be crumbly). Rinse your hands and pour the beaten egg and sour cream into the large bowl with the crumbly butter mixture. Mix with a spatula until it comes together into smooth malleable dough. Wrap in plastic wrap and refrigerate for at least an hour.
  • In a large bowl, combine the plums, apricots, pecans, brown sugar, cornstarch, lime juice and five spice powder and mix well.
  • Preheat the oven to 350°F.
  • Generously flour your kitchen counter and rolling pin. Roll out the dough about a to 1/4- to 1/8-inch thickness. Cut the dough into rounds about 4-inches in diameter. Repeat the rolling and cutting process with any leftover dough scraps until you have used up all your dough. Place a heaping tablespoon of the plum filling in the middle of each circle to make chubby empanadas, brush around the edges with the beaten egg and fold to make a half moon, gently pressing with your fingers to close the edges. Finally, use the back of a fork to seal the dough without breaking it.
  • Line a couple baking sheets with parchment paper and arrange the empanadas on them, as you may need to bake 2 batches or use 2 baking sheets. Brush the tops of the empanadas with the beaten egg and sprinkle with sugar.
  • Bake the empanadas for 20 minutes or until they are golden brown. Serve warm or cooled and, if desired, drizzle with dulce de leche or cajeta.

Notes

Empanadas de Ciruela y Nuez

Grilled Pineapple Margarita

grilled pineapple margarita pati jinich
Print Recipe
4 from 6 votes

Grilled Pineapple Margarita

Grilled Pineapple Margarita recipe from Pati's Mexican Table Season 3, Episode 5 “Family Fiesta”
Prep Time10 minutes
Cook Time10 minutes
Total Time20 minutes
Course: Drinks
Cuisine: Mexican
Keyword: agave syrup, cilantro, cocktail, grill recipes, jalapeno, lime, pati's mexican table, pineapple, piquí­n chiles, tequila
Servings: 6 to 8 servings
Author: Pati Jinich

Ingredients

  • Vegetable oil for greasing the grill
  • 1 pineapple peeled, cored, and cut into 1/2-inch rings, crosswise
  • 1 jalapeño chopped, or more to taste
  • 1/4 cup chopped cilantro leaves and upper stems
  • 3 cups pineapple juice
  • 1 cup white or silver tequila
  • 3/4 cup freshly squeezed lime juice
  • 1/2 cup agave syrup or simple syrup
  • 2 tablespoons kosher or coarse sea salt
  • 2 tablespoons ground piquín chile or Mexican dried ground chile
  • 1/2 cup turbinado or dark brown sugar

Instructions

  • Preheat a grill to medium-high heat. Brush the grill with oil and place the pineapple rings flat on the grill, and cook, flipping once, until charred on both sides, about 3 minutes. Set aside to cool while you mix the cocktail.
  • In a large pitcher, add the jalapeño, cilantro and 2 tablespoons of the brown sugar. Using a muddler or the handle of a wooden spoon, begin to muddle or crush the ingredients together. Chop all but 2 pieces of the pineapple (will be used for garnish) into 1-inch pieces and muddle those with the jalapeño mixture. Add the tequila, pineapple juice, lime juice and syrup and stir well to combine. Let sit for at least 10 minutes or place in the refrigerator until ready to serve.
  • In a small saucer, combine the remaining sugar, salt and chile powder. Dip the rims of the margarita glasses into another saucer with water to wet the rims, alternately rub rims with half a lime, then dip into the sugar, salt and chile mixture. Fill each glass with the chunky margarita (making sure you are adding the chunks of muddled fruits and vegetables) and garnish with a wedge of pineapple.

Notes

Margarita de Piña Asada

Morelia-Style Fruit Salad

morelia style fruit salad or gazpacho pati jinich
Print Recipe
4.72 from 7 votes

Morelia-Style Fruit Salad

Morelia-Style Fruit Salad recipe from Pati's Mexican Table Season 3, Episode 5 “Family Fiesta”
Prep Time15 minutes
Cook Time10 minutes
Total Time25 minutes
Course: Antojos
Cuisine: Mexican
Keyword: cotija, fruit, Jicama, lime, mango, onion, orange juice, pati's mexican table, pineapple, piquí­n chiles
Servings: 6 servings
Author: Pati Jinich

Ingredients

  • 2 cups peeled and diced ripe mango
  • 2 cups peeled and diced pineapple
  • 2 cups peeled and diced jícama
  • 3 cups freshly squeezed orange juice
  • 6 tablespoons freshly squeezed lime juice
  • 6 tablespoons finely chopped white onion
  • 3/4 cup finely crumbled queso Cotija or substitute queso fresco, mild feta, dried ricotta or Romano cheese
  • To taste kosher or coarse sea salt
  • To taste dried ground piquín chile or Mexican dried ground chile

Instructions

To make individual gazpachos:

  • In a cup, add a layer of mango, pineapple, jícama, a tablespoon of onion, a tablespoon of queso; then another layer of mango, pineapple, jícama, and another tablespoon of queso. Pour in 1/2 cup orange juice, a tablespoon of lime juice, and sprinkle salt and ground chile to taste. Repeat to make 6 individual cups.

To make for all:

  • Mix all the ingredients in a large mixing bowl to your taste!

Notes

Gazpacho Moreliano

Papaya Fruit Cocktail

Print Recipe
5 from 2 votes

Papaya Fruit Cocktail

Papaya Fruit Cocktail recipe from Pati's Mexican Table Season 3, Episode 4 “Meals in a Minute”
Prep Time10 minutes
Total Time10 minutes
Course: Dessert, Sauce
Cuisine: Mexican
Keyword: agave syrup, honey, lime, mint, papaya, pati's mexican table
Servings: 4 servings as cocktail, 10 as relish
Author: Pati Jinich

Ingredients

  • 6 cups ripe papaya diced peeled and seeded
  • Zest of 1 lime
  • 6 tablespoons freshly squeezed lime juice
  • 1 to 2 tablespoons agave syrup or honey maple syrup, or sugar, or to taste
  • 2 tablespoons finely chopped fresh mint leaves

Instructions

  • In a large mixing bowl, combine diced papaya, lime zest, lime juice, and agave syrup, or other sweetener, and toss well. Sprinkle on finely chopped fresh mint to garnish. Serve with the pound cake or on its own.

Notes

Coctel de Papaya

Dream Big: Tres Leches and Strawberry Jello

Red, green, orange, blue… and all the colors you can dream up! Vanilla, cajeta, jamaica, chocolate, coffee, fruits, nuts… and just about any flavor you may crave. Smooth or chunky, creamy or foamy, heavy or light… choose any texture you like. Wait! We haven’t even gotten into shapes. Did you say your son likes Spiderman, your mom likes flowers or you want to go for a simple 2 layer design?

If you haven’t fallen for Jello, then you haven’t tried those in the Mexican repertoire. Forget about the 1950s-style-jello salads. Forget about the Jello you’ve seen people eat, or you may have eaten, in hospitals, too.

Mexican Jello is something to celebrate, to showcase, to boast about.

Gelatinas, in Spanish, many times come in individual servings with different flavors stacked in bright and colorful layers. Sold by street vendors who carry them in see through 2 to 3 tier covered stands, they are a common site in gas stations where cars wait for their turn and passersby can’t help but be tempted. Now you know why I always tagged along with my dad to fill up the tank!

It’s hard to show up at a kids party in Mexico and not see them. You will run into more sophisticated versions of them, standing tall, firm and proud at grown up parties, maybe with generous splashes of rum, tequila or rompope in their mix. There are simpler Jello creations brightening shelves at bakeries and grocery stores, too. In fact, Jello is such a big thing, that some cooks have elevated it to a complex art form with floral and abstract designs.

Most importantly, home-made Jello is a staple dessert in people’s homes. It is simple, easy to make and healthy: it can be tailored to use fresh seasonal ingredients.

The secret to this infinitum of possibilities with Jello is unflavored gelatin, which can be found in just about any grocery store: here and in China. Pick any ingredient, any flavor, and you can turn it into Jello.

Since I am going all out here, plus it is almost my son Juju’s birthday, I decided to translate one of our favorite cakes into Jello. Yup!

Remember Tres Leches Cake? Well, the first layer of my Spring-Time and Almost-Juju’s-Birthday-Jello is a Tres Leches Jello. Whole milk, evaporated milk and sweetened condensed milk turned into Jello (just follow my super simple recipe below!). The milks are quickly simmered to thicken, the result: rich, almost custardy like and so creamy.

I love serving Tres Leches Cake with strawberries, and Juju happens to be wild about strawberries, so my next layer has them. It is a Tres Leches Cake with strawberries in Jello form. Fully. And decadently.

strawberry jello mixture in cups

I have the berries swimming in a a Jello mix made with cranberry juice. It gives that layer a bright punch, a kick of refreshing tartness and more shine, which counterbalances the creamy Tres Leches layer.

I didn’t add any sugar to that fruit layer, because the Tres Leches layer has all the sweetness I think it needs. Plus, you are eating them together, one on top of the other.

Since you can do almost anything you want (no joke!) with Jello, I played and alternated. Some Jellos started with the Tres Leeches layer and others with the fruity one.

I chose plastic cups, because they are practical, you can see through, making it more colorful and irresistible. As a bonus, the servings are already pre measured. But you can choose many kinds of molds, individual or not.

Tres leches and Strawberry Jello on Tray

It’s a good idea to place all your cups in a baking tray or sheet pan, so that when you move them in and out of the refrigerator they won’t shake much. You don’t have to take so many trips either.

So you prepare your mixes, in a snap. Pour your first layer and refrigerate until it firms up, then pour the second layer and let it firm up again.  You can go crazy and make thick layers, thin layers, 2 layers or 10 layers!

Tres Leches and Strawberry Jello side view on tray

Sometimes experiments in the kitchen are a total failure and you just have to pick up the pieces and move on. But sometimes, it takes a few tries to get it right (this one took three tries!) and when you nail it, they become a treasure to share. If you feel you are onto something, don’t give up on the first try. Go for it, find a treasure and share it.

Here, this is a treasure I sought and found, and now it is yours too.

Print Recipe
4.60 from 5 votes

Tres Leches and Strawberry Jello

If you haven’t fallen for Jello, then you haven’t tried those in the Mexican repertoire. Forget about the 1950s-style-jello salads. Forget about the Jello you’ve seen people eat, or you may have eaten, in hospitals, too. Mexican Jello is something to celebrate, to showcase, to boast about.
Prep Time20 minutes
Cook Time2 hours 20 minutes
Course: Dessert
Cuisine: Mexican
Keyword: evaporated milk, gelatin, jello, pati's mexican table, strawberries, Sweetened Condensed Milk, tres leches
Servings: 8 servings
Author: Pati Jinich

Ingredients

For the tres leches jello:

  • 1 cup whole milk or 2 percent
  • 1 14-ounce can sweetened condensed milk
  • 1 12-ounce can evaporated milk
  • 2 teaspoons vanilla extract
  • 2 envelopes unflavored gelatin or about 2 tablespoons
  • 1/2 cup lukewarm water

For the strawberry jello:

  • 2 cups cranberry or pomegranate juice
  • 2 envelopes unflavored gelatin or 2 about tablespoons
  • 1/2 cup lukewarm water
  • 1/2 pound strawberries stemmed, rinsed and quartered

Instructions

To prepare the tres leches jello:

  • Bring 1 cup whole milk to a boil in a medium saucepan. Reduce heat to medium low and allow milk to simmer for 5 minutes. Add the sweetened condensed milk, evaporated milk, and vanilla extract and stir to combine. Increase heat to medium high to return to a simmer, then reduce to medium low and let simmer for 5 more minutes. Remove from heat and pour into a large mixing bowl.
  • *Pour 1/2 cup lukewarm water into a medium bowl and add 2 envelopes of unflavored gelatin. Stir until well combined, then let rest until the mixture puffs up (it will increase slightly in volume and appear as if it’s solidifying) – approximately 4 to 5 minutes. Fill a small saucepan with up to 2-3 inches of water, and bring to a simmer over medium low heat. Place the bowl with the puffed-up gelatin mixture onto the saucepan with the simmering water. Let it rest there, stirring occasionally, until the gelatin is completely dissolved and the mixture has a barely amber color – approximately 3 to 4 minutes. Remove from heat.
  • Pour the dissolved gelatin into the tres leches mixture and stir to combine.

To prepare the strawberry jello:

  • Pour the juice on to a large mixing bowl. Repeat step with * above. Pour the dissolved gelatin into the juice and stir to combine.

To layer your tres leches and strawberry jello:

  • In 6-8oz plastic cups or single-portion gelatin molds, use a liquid measuring cup or small pitcher to fill about 1/3 of the cup with tres leches mixture. Place the cups into the refrigerator until it solidifies (appears solid and does not slosh when moved), about 20 to 30 minutes. Do not put your remaining Tres Leches mix and juice mix in the refrigerator.
  • Remove from the refrigerator and pour juice mixture on top to fill about another 1/3 of the cup and add some strawberry pieces. Return to the refrigerator and let it set for about 20 to 30 minutes.
  • You are at free will to play with your combinations! You can decide how many layers (one or ten!) and how thick or thin you want to make them. You can choose which flavor you want to start with or if you want to alternate. Continue until you are done using all of the flavored mixes. When done, return to the refrigerator, cover with plastic wrap and let chill for at least 2 hours before serving.
  • If you want to use a large 8 to 10 serving mold, fill with Tres Leches mix and refrigerate until set. Then pour strawberry mixture on top along with the fruit. Refrigerate for at least 2 hours before unmolding. It should be firm and not feel sticky or sag and should slide easily out of the mold with a few gentle shakes.
  • Hint: If your Jello mixtures start to solidify while you are waiting for layers to set in the refrigerator, not to worry! Adding a little at a time, stir water into the mixture until it becomes more liquid.

Notes

Gelatina de Tres Leches con Fresas

Pomegranate or Granada

The pomegranate is such a vivid, vibrant and enticing fruit, that I consider it to be one of the most sensuous ingredients. It has a thick and tough pink-to-reddish skin that comes off as impenetrable. But, break into it, and you will find an overabundance of shiny, ruby red seeds that resemble jewels and have the juiciest crunch.

The taste is sweet, bright and slightly tart and the bursting juice seems primed to make wine. Be mindful when you peel them, as the stains from the juice can be hard to clean off. I cut the fruit in half and then use my fingers to open up the clusters covered in a white membrane. As I remove the membrane I loosen the seeds. Some people like to do this in a bowl with water to avoid the stains. I do it without the bowl of water but use an apron for sure.

Pomegranate season in Mexico starts in early August and goes through October. No coincidence, as one of the most famous dishes it is used for, the Chiles in Nogada proudly boasting the three colors of the flag (green, white and red) are made mainly in the month of September to celebrate the month of Independence. In the US the prime season is a bit later: from (sometimes end of September) October through January/February, which makes it a bit of a challenge for those of us craving that peculiar dish on that specific month…

Although pomegranates are used in such a traditional Mexican dish, they are not native to Mexico. However, since their arrival to Mexico early on in the Spanish Conquest, they have grown deep roots and are grown and eaten with much enthusiasm. During pomegranate season, you will see market stands with mountains of pomegranates with the most beautiful one of the bunch opened up on top, to show customers just how red, plump and shinny the seeds are.

pomegranate 1

The pomegranate is one of the world’s oldest fruits and has such a long history that it has been suggested a pomegranate, not an apple, tempted Eve in the Garden of Eden. I’m not one to know, but it originated in Persia and the Himalayas; it has been traced back as early as 3,000 B.C. And these days, it is getting to be considered a super food. Some people consider that to be because of good marketing… but it is, in fact, proven to be very nutritious with it’s generous share of Vitamin C, antioxidants, potassium, folic acid and iron.

In ancient times, the pomegranate’s most noted use was extracting the juice to be used as a thirst-quencher for warriors in battle. You can still find it being juiced right next to oranges in the Middle East. So the juice is still popular for drinking, but it is also sold ready to reduce into sauces, syrups, flavoring desserts, and even making into wine. The seeds are just as widely used and are most often used raw to garnish dishes, in salads, and in desserts; if not, eaten directly out of the fruit!

Many modern Mexican cooks are starting to play with it in more savory main dishes. I, like many cooks, like to sprinkle it on top of guacamole! But it would be delightful in a Pico de Gallo, right?

The pomegranate may be a little intimidating to use for new comers, but it’s easy. It is not worth (if you ask me) to pay the extra bucks to buy the seeds already set free. Just put on an apron and dig in for quick gold.

And if you are not in a hurry and you already brought the chubby pomegranates home, just keep them in a shaded and ventilated area of the kitchen. They last for months.

Apple, Radish, Watercress Salad with Pistachio and Chile de Arbol

A couple weeks ago, right as I was setting up for one of my classes, “A Culinary Compass of Mexico,” at the Mexican Cultural Institute, Alberto Roblest came over and asked me a great question.

“Pati, do you cook traditional Mexican recipes OR do you create your own?”

Alberto is doing a project with the support of The Office on Latino Affairs. It is called Hola Cultura and explores the contributions of Latinos to DC life and culture, from art to language to sports to cooking.

I think he meant for me to respond with an either or. He really did. Come on Pati, “traditional” OR “new,” he insisted. But I kept answering “BOTH!” As I kept trying to explain why, I realized so wholeheartedly that both traditional and new not only describe my cooking style but also one of the many wonders of Mexican cuisine.

See… I thrive on exploring, traveling, tasting, testing, recreating and passing on traditional Mexican cuisine and recipes. If I get to live to be 120 years old, I won’t have enough time to taste and share all the rich and vibrant regional cuisines and dishes that exist across Mexico.

Mexican cooking has such sturdy pillars and is so strong, partly because generation after generation, tried and true recipes are passed on, sometimes written and sometimes not. When a dish and its traditions somehow get lost in a family, neighborhood, or community… once it is found and recreated again, a lifeline that holds us together suddenly appears! Even if its on the other side of the globe.

When I receive a request for that “much needed but can’t be found” recipe, I jump for joy! I am sent on a serious mission, and I don’t stop until it is completed.

Apple Radish Watercress Salad 1

At the same time, Mexican cuisine is so strong because it has a treasure trove of fabulous ingredients that are so accommodating in their use. As long as one understands the ingredient and its genuine nature, there are so many ways to experiment with it. That is also how a cuisine expands, by creating new combinations and testing the limits, sometimes failing and sometimes succeeding. Surely, many of the traditional takes were once new too.

While I dedicate so much of my time researching and passing on what has existed for generations and centuries, I can’t resist creating new dishes. Funny, that it happens many times with salads, like the Watermelon and Tomatillo Salad.

For the one on this post, which I have been obsessively repeating, I use watercress, called “berros” in Mexico (I happen to love that word). They are used tremendously in Mexican kitchens for salads. They are delightful: a bit bitter, made up on thin leaves but packed with flavor and such a nice delicate bite.

On top goes a combination of thinly sliced tart green apples and pungent radishes. One ingredient snapped from a tree and another pulled from the ground! Both ingredients have a bright colorful outer skin, yet, inside are crisp white. I use them both raw, and get the most of their watery crunch and contrasting taste.

Then it is all covered in a light vinaigrette with a bit of mustard and a bit of honey. Then a stellar topping tries to steal away the show.

Apple Radish Watercress Salad 2

Toasted chile de árbol and pistachios, chopped together. A smoky, lightly spicy, crunchy, nutty and ironically sweet combination.

You won’t believe how sweet the pistachios taste on each bite.

Apple Radish Watercress Salad 3

Give it a try!!

Its fresh, its crunchy, lightly tart, with a nice kick and a combination of unexpected flavors that I hope will have you making it time and again as the seasons move on…

p.s. All that said: send along more requests for any more Mexican recipes you are craving at any time.

apple, watercress, radish and chile de arbol salad
Print Recipe
5 from 3 votes

Apple, Radish, Watercress Salad with Pistachio and Chile de Arbol

For the one on this post, which I have been obsessively repeating, I use watercress, called “berros” in Mexico (I happen to love that word). They are used tremendously in Mexican kitchens for salads. They are delightful: a bit bitter, made up on thin leaves but packed with flavor and such a nice delicate bite. On top goes a combination of thinly sliced tart green apples and pungent radishes. One ingredient snapped from a tree and another pulled from the ground! 
Prep Time10 minutes
Cook Time5 minutes
Course: Salad
Cuisine: Mexican
Keyword: chiles de arbol, green apple, honey, lime, mustard, pistachios, radish, Recipe, salad, vinegar, watercress
Servings: 4 servings
Author: Pati Jinich

Ingredients

  • 2 bunches watercress rinsed, dried and the tougher ends of stems removed
  • 1 green apple rinsed, and cut into thin wedges
  • 1 bunch radishes (or about 4 ounces or 1 cup already sliced), rinsed, stems and roots removed, halved and thinly sliced
  • 1/4 cup pistachios lightly toasted and chopped
  • 2 chiles de arbol toasted, chopped (seeding optional)
  • 1/4 teaspoon dijon mustard
  • 1/2 teaspoon honey
  • 1/2 teaspoon kosher or sea salt or to taste
  • freshly ground black pepper to taste
  • 1 tablespoon rice vinegar (natural unseasoned)
  • 2 tablespoons freshly squeezed lime juice
  • 3 tablespoons olive oil
  • 2 tablespoons vegetable oil

Instructions

  • Place the apple and the radishes in a bowl. Place the watercress in another bowl.
  • Heat a a small 6 inch skillet set over medium low heat, add the pistachios and toast anywhere form 3 to 5 minutes, stirring often, until they are nicely toasted, but don't let them burn. Remove form heat. In the same skillet, toast the chiles de arbol anywhere from 3 to 5 minutes, flipping sides, 1 or 2 times along the way, remove from the heat.
  • Remove the stems from the chiles de arbol. In a chopping board, chop the chiles de arbol. You may remove the seeds once they are chopped or keep them. Add the pistachios and chop them along with the chile de arbol creating a pistachio chile de arbol mixture.
  • In a small bowl, combine the mustard, honey, salt, pepper, rice vinegar and lime juice with a whisk or fork. Slowly, pour in the oils and whisk or mix very well until thoroughly combined. Pour half onto the apple-radish mix and half onto the watercress.
  • To serve, on small appetizer plates, add watercress, top with the apple-radish mixture and sprinkle some of the pistachio-chile de arbol mix on top.

Notes

Ensalada de Berros con Manzana y Rábanos

Limes

It’s hard to think of Mexico and not think of limes. In Mexico, limes are everywhere and served with everything from peanuts, to fruit, to tacos, to a steak dinner. So, it’s hard to believe that limes did not originate in Mexico and were brought over by the Europeans from the Indo-Malaysian region. Yet, the fruit was eagerly embraced and incorporated into Mexican cuisine, so much so, that it has become a necessity in the Mexican kitchen.

In my mind, no other citrus packs the punch that a Mexican lime does. Called limón in Spanish, it is also known as true lime, West Indian Lime, or sometimes key lime.

While on the smaller side regarding size and thin skin, this round and light green colored lime is extremely plump and juicy. As it ripens, it becomes softer, even more plump and its skin color turns lighter and yellow-y. Much more acidic than other limes and of course more than a lemon. It has a fresh, clean and lovely citrusy aroma.

There are other varieties of limes. The large fruited Bearss or Persian lime is what is more commonly seen in the grocery stores in the US. It is thicker skinned, shaped more like a lemon, a hybrid of a true lime and citron (the father of the lemon) and tends to be less juicy. But given increasing demand, true limes are appearing more and more.

Going Nuts and Bananas for Capirotada

Sliced bread brushed with melted butter, toasted until golden, layered with handfuls of nuts and dried fruits, drenched in piloncillo syrup, topped with crumbled salty cheese and baked until it all comes together…. Once out of the oven, it tastes like a cross between French toast and bread pudding. Crisp-on-the-top and moist-in-the-center, every spoonful a delightful mess.

That is Mexico’s most well known version of Capirotada. Being a lover of delicious Mexican style food messes, I am one big fan of it. But some newcomers to the dish are taken aback by the salty cheese on top. What – you may ask like many do – is the need for the cheese on top? Well, that salty tease makes the thick feel and sweet taste of the dish come out in bold strokes in your mouth.

It reminds me of how my father loves to slice sweet bananas over his savory lentil soup; or how my family goes crazy over piling ates (fruit pastes) with Manchego cheese, as so many Mexicans do; or how I used to love eating a handful of chocolate covered raisins right after a handful salty pop corn, and then repeat it again and again at the movies growing up, as long as the movie lasted. Capirotada has that same wild mix.

Once you finish your piece, I bet you will beg for a bit more of that addicting combination. That’s probably why I have received so many requests for a recipe.

That is also why, although capirotada is traditionally made for Lent and we are no way near Easter, I’ve had such a big craving for it in this cold weather. No. I am not waiting until Spring. And I am making it again this Thanksgiving to share with friends.

As it is baked casserole style and it has such a sweet warmness to it, it is perfect for the holidays and for making ahead and just popping in the oven.

pati jinich capirotada brush bread with butter

There are, as all popular dishes, many versions of capirotada.

All capirotadas call for sliced and toasted bread. Some versions fry the bread in oil or lard to make it crisp and some brush it with melted butter and bake it. I go for the baked.

Also, some versions call for a crusty bread, like a baguette, bolillo or telera, while others call for pan de huevo, an egg and yeast based bread similar to the brioche or challah. Again, I go for the later….

pati jinich capirotada ingredient piloncillo

Aside from which kind of bread and how to make it crisp, there seem to be two main camps where capirotada has fallen in the last couple centuries. The capirotada de agua (water based) and the capirotada de leche (milk based). De agua is baked in a piloncillo syrup while de leche goes in a custardy style sauce, with sweetened milk and yolks. Yet, the most traditional is the agua.

Yet the most common, and the one I’ve been asked for the most is de agua. The syrup tends to have the rich tasting piloncillo, true cinnamon and many times whole cloves.

pati jinich capirotada top the bread with banana

There are many variations as to the additions. Most versions call for peanuts and raisins. So if you are looking for the most traditional capirotada, no need to add anything else. But there are many versions that add other kinds of nuts, fresh fruits like oranges, bananas, plantains, guavas, and grapes and dried fruits like candied figs and acitrón (the oldest recipes I researched about from a couple centuries ago even call for cooked onions, tomatoes and ground meat…)

pati jinich capirotada top bread and banana with prunes

After trying one too many versions, what I like to combine the most, are pecans and prunes. And I can’t resist adding a full blown layer of bananas, like many cooks in Central Mexico. I am very fond of these three ingredients, and they seem to mingle so happily together, especially tugged between pieces of buttered and toasted slices of bread drenched in syrup…

pati jinich capirotada drizzle piloncillo syrup on top

After the first layer of bread, in go the bananas, prunes, pecans and a bath of syrup.

pati jinich capirotada add another layer of buttered bread

Then goes another layer of the bread…. with the rest of the syrup poured on top.

pati jinich capirotada drizzle more pilconcillo syrup on top

As for the question of the cheese…. de leche camp of the capirotadas don’t have cheese, while de agua ones do.

And again…there are many options. While in Michoacán, they tend to sprinkle a dried and crumbly cotija cheese or a queso fresco, in other regions they use melty stronger cheeses like a Mexican Manchego. So you could go for a cheddar, a Monterey Jack or a muenster. You have the chance to play with your taste buds. But as funny as it may sound if it is the first time you try it, don’t skip the cheese…

pati jinich capirotada top with queso fresco

Capirotada is filling, satisfying and sweet. And that cheese…. really does it’s thing…

pati jinich finished capirotada

Pati Jinich capirotada or bread pudding recipe
Print Recipe
4.84 from 6 votes

Capirotada with Bananas, Pecans and Prunes

Sliced bread brushed with melted butter, toasted until golden, layered with handfuls of nuts and dried fruits, drenched in piloncillo syrup, topped with crumbled salty cheese and baked until it all comes together…. Once out of the oven, it tastes like a cross between French toast and bread pudding. Crisp-on-the-top and moist-in-the-center, every spoonful a delightful mess. That is Mexico’s most well known version of Capirotada. 
Prep Time10 minutes
Cook Time1 hour 25 minutes
Course: Breakfast, Dessert
Cuisine: Mexican
Keyword: banana, bread, ceylon, cinnamon, cloves, cotija cheese, pecans, piloncillo, prunes, queso fresco
Servings: 10 servings
Author: Pati Jinich

Ingredients

  • 8 cups water
  • 1 pound grated piloncillo or about 2 cups packed dark brown sugar
  • 1 ceylon or true cinammon stick
  • 3 whole cloves
  • 1 loaf challah or brioche bread cut into 1/2-inch slices (preferably a couple days old)
  • 1/4 cup melted unsalted butter to brush bread, plus more to grease baking dish
  • 2 ripe bananas peeled and sliced
  • 2/3 cup pitted prunes chopped
  • 1 cup pecans roughly chopped and toasted
  • 4 ounces (about 1 cup) crumbled queso fresco or añejo or cotija
  • Pinch ground cinnamon to sprinkle on top (optional)

Instructions

  • In a medium sauce pan, pour the water and set it over medium high heat. Once it comes to a simmer, add the grated piloncillo, cinnamon and cloves, reduce heat to medium and simmer for about 25 minutes, until it has all dissolved and has a light syrup consistency. Turn off the heat and remove the cinnamon and cloves.
  • Preheat the oven to 350 degrees Fahrenheit. Brush the bread slices with unsalted butter. Place in a baking sheet and into the oven. Bake for 12 to 15 minutes or until golden.
  • Butter a 9x13 casserole or baking dish. Place a layer of bread in the bottom covering the entire surface. Cover with the banana slices, prunes and pecans. Pour half the syrup on top. Add another layer of bread, pour the remaining syrup on top and sprinkle the crumbled cheese. Sprinkle with cinnamon if desired.
  • Cover with aluminum foil and place in the oven for 45 to 50 minutes, or until the syrup has been absorbed. Remove from the oven. Let it sit for at least 20 minutes for the Capirotada to settle and for the entire syrup to be soaked up, then serve. You can also serve it lukewarm or cold. It can also be reheated.

Notes

Capirotada con Plátano, Nuez y Ciruela Pasa

Summertime Watermelon & Tomatillo Salad: Beat the Heat!

This year I promised my boys we would plant goodies in the backyard to harvest ourselves. At the nursery, jumping up and down as in a candy shop, they dragged so many plants to the counter, I had to give an absolute NO to half of them.

We ended up with thyme, oregano, bay leaves, rosemary, mint, parsley, and cilantro.  Ok, and tomatoes, cherry and roma. Fine… corn too, don’t know what I was thinking. And wait! We couldn’t leave without jalapeños, which led me to run for some tomatillos. And scallions. I stopped there. I did.

Then Sami came back with a little watermelon plant.  That was the wildest idea, oh, that monster of mine. We’ve no room to grow watermelon. I told him about the big wide fields in Northern Mexico, in states like Sonora, Chihuahua, Jalisco and Sinaloa where watermelon is grown extensively. Our backyard is… not so big.

Beats me.

We brought home Sami’s watermelon plant.

chopped up watermelon
As the weeks went by, we saw many of the plants thrive, except the watermelon which seemed to take an awful long time to  grow. Then one day the editors from Babble asked me for a custom recipe. By then, I was eagerly thinking about what would make the sweet, watery crunch from that soon to grow watermelon shine the most.

This is what I came up with…

tomatillos
Thinly sliced, raw, punchy and tart tomatillos. Much firmer than the watermelon, and just look at the color contrast. Not to say about the flavor combination.

To coat this unconventional pairing, I wanted a vinaigrette with some some gentle heat. I got it from the jalapeños, which you will never have trouble finding in our backyard as Juju made markers for each plant… I am proud to say, the boy knows his Ñ’s.

jalapenos in the garden
I coarsely chopped the chiles, as I like to feel their friendly bite. But you can give them a finer chop and even remove the seeds.

jalapeno

With the already unusual watermelon and tomatillo pairing, I went unusual again, and added some chopped fresh mint.

Mint  has been growing wild here, as all mint tends to… Although we planted ours in the ground while still in their protective pots, to keep them in check. It doesn’t seem to give a hoot. Its wild.

mint
Soaked the jalapeño and the mint with fresh squeezed lime juice, a bit of straight forward white distilled vinegar which makes everything it coats more crisp, the oils and salt… Gave it a bit of time, 5 to 10 minutes, to sit and get acquainted.

limes
Poured the vinaigrette over the red and green. Yet not only was the salad screaming for some white (partly to round the colors of the Mexican flag, for one thing…) but also for some salty taste with some heartiness to it. Hence the Feta Cheese. Now you can go for anything tangy, salty and crumbly: queso fresco or farmers’ cheese works well too.

feta cheese
While we had the chance to harvest and eat the jalapeño, mint and tomatillos from our backyard, that watermelon never came to be… some bunnies got to it before we did.

But just day dreaming about it made me come up with one of my favorite recipes. It is so bright, so alive, so peppy and so summery!

Luckily there are plenty of amazing watermelons at the stores… we will have to give it another go next summer to harvest our own.

watermelon and tomatillo salad
Meanwhile I can’t help but repeat this salad that hits all the taste buds!  Sweet from the watermelon, salty from the cheese, spicy from the chile, tart from the lime and tomatillos and refreshing from the mint. Oh, you just have to give it a try…

watermelon and tomatillo salad with feta cheese
Print Recipe
4.34 from 6 votes

Summertime Watermelon & Tomatillo Salad

I can’t help but repeat this salad that hits all the taste buds!  Sweet from the watermelon, salty from the cheese, spicy from the chile, tart from the lime and tomatillos and refreshing from the mint. Oh, you just have to give it a try…
Prep Time15 minutes
Cook Time5 minutes
Course: Salad
Cuisine: Mexican
Keyword: feta, jalapeno, lime, mint, pati's mexican table, queso fresco, tomatillos, vinaigrette, vinegar, watermelon
Servings: 4 servings
Author: Pati Jinich

Ingredients

For the salad:

  • 4 cups watermelon cut into bite size chunks or cubes
  • 2 cups, about 1/2 pound tomatillos husks removed, thoroughly rinsed, quartered and thinly sliced
  • 2/3 cup, about 3 ounces mild feta or queso fresco crumbled or cut into small dice

For the vinaigrette:

  • 1 tablespoon fresh mint leaves about 5 to 6, chopped
  • 1 tablespoon jalapeño or serrano chile or to taste (seeding optional)
  • 2 tablespoons fresh squeezed lime juice
  • 1 teaspoon white distilled vinegar
  • 1 teaspoon salt
  • 2 tablespoons olive oil
  • 2 tablespoons vegetable oil

Instructions

  • Place the watermelon cubes and tomatillo slices in a large bowl.
  • In a small bowl, add the chopped mint and jalapeno. Squeeze the fresh lime juice on top, stir in the vinegar, sprinkle the salt and mix. Pour the olive oil and vegetable oil, and mix with a whisk or fork until well emulsified.
  • Pour the vinaigrette on top of the watermelon and tomatillos, toss well and sprinkle the cheese on top.

Notes

Ensalada de Sandía y Tomate Verde

Tamarind Concentrate: Basic Recipe

Tamarind concentrate can be purchased from the grocery already made, or you can easily make it yourself. The concentrate is great because of its flavor and uses, and also, because it will keep in the refrigerator for a months.

This is what the tamarind seed pod looks like.

Tamarind Concentrate 1

Begin by shelling the pods with your hands, its very easy to do.

Tamarind Concentrate 2

Remove all the shells and add them to a bowl. After shelling, cover the fruit in boiling water and let it sit for several minutes. After soaking it is easy to remove the strings and seeds from the fruit.

Tamarind Concentrate 3

Tamarind need sugar to counter its strong sour taste. Add some lime for an extra flavor.

Tamarind Concentrate 4

Now just simmer for about 45 minutes and its ready.

Tamarind Concentrate 5

This concentrate is commonly used to make flavored water, all you have to do is strain it, and dilute it with water.  Best of all it keeps in the refrigerator for months and months…

Tamarind Concentrate 6

Tamarind Concentrate Main
Print Recipe
3.34 from 3 votes

Homemade Tamarind Concentrate

Tamarind concentrate can be purchased from the grocery already made, or you can easily make it yourself. The concentrate is great because of its flavor and uses, and also, because it will keep in the refrigerator for a months.
Prep Time8 hours
Cook Time45 minutes
Course: Sauce
Cuisine: Mexican
Keyword: lime, pati's mexican table, sugar, Tamarind
Servings: 1 cup
Author: Pati Jinich

Ingredients

  • 1/2 pound dried tamarind with their peel
  • 2 cups boiling water
  • 3/4 cup sugar
  • 1 tablespoon fresh lime juice

Instructions

  • Peel tamarinds of the peel, large seeds and strains. Soak overnight. Strain in a colander and press with your hands or a spoon. Place tamarind juice in a saucepan. Bring to a boil, add sugar, and simmer over medium heat for 40-45 minutes. Juice should have thickened considerably. Squeeze in the fresh lime juice, let it simmer for a couple more minutes and let it cool.
  • Store in a container with a tight lid in the refrigerator. It will keep for months.

Tamarind

Tamarind, also called Indian date, is the pod of a tropical tree that is said to have originated in Asia and North Africa. It was brought to Mexico sometime in the 1500’s in the galleons that came from Asia, managed by the Spaniards, that landed in the gorgeous beaches of Acapulco. Now somewhat touristy…

Tamarind tastes a bit sour, acidic and sweet at the same time. Its flavor has a lot of depth and an earthy feel to it too. Through the years it grew strong roots in Mexican land, where the large trees are loved for their heavy shade, and the pods for their multiple uses in Mexico’s kitchens. From candies and snacks, to drinks and desserts, as well as moles, sauces of different kinds.

Crazy for Tepache

I am crazy for Tepache. Gently sweet, with an innocent hint of home brewed alcohol, a deep freshness and a gorgeous amber color.

Tepache: A home made fermented drink that comes from the state of Jalisco – also breeding ground of other Mexican symbols like Tequila, Charros and Mariachis. Tepache has a base of fresh pineapple, true cinnamon, piloncillo and water and has been drank in Mexico since Pre-Colonial times.

I have made it many times throughout my life.

First, when Daniel and I moved to Texas, to celebrate our finding piloncillo at a U.S. grocery store. Later, when we moved to DC, to soothe the heat of that first long summer and to make our new home, feel like home. A couple years ago, I brewed liters to share with a large crowd for a class I taught on foods from Jalisco.

Then, I forgot about it. Until this summer, when we moved, the heat started pumping up and I unpacked my old clay pot from Tlaquepaque, Jalisco. A pot that is perfect for brewing Tepache, which is so simple to make. That is, if you can keep an eye on it.

You need to find a ripe pineapple. Almost entirely yellow and soft to the touch.

Tepache 1

After you rinse it, remove the top.

Tepache 2
Do away with the bottom too…

Tepache 3


Cut into thick slices, whichever way you want, horizontal or vertical, including the peel. The peel will help the drink ferment and give it an interesting depth of flavor.

Tepache 4


Cut the slices into thick chunks (yeah, I do love my knife…)

Tepache 5
There you go, the gorgeous work of a fine, loyal knife…(I so, so, so, love my knife)

Tepache 6
Pour water into the pot. If you don’t have a clay pot, use any kind of large pot…

Tepache 7
Drop in a cinnamon stick, preferably true cinnamon, if handy…

Tepache 8


Drop in the piloncillo, which gives anything it touches that rustic small Pueblo flavor. Just throw it all in there. No need to chop. No need to shred. It will dilute in the water as you bring it to a simmer.

Tepache 9
Oh…, and five or six whole cloves, for that touch of spice.

Tepache 10
Bring it to a boil and simmer for about 10 minutes. You know the liquid is ready when the piloncillo has diluted and you get this lovely light brown color…

Tepache 11
Light amber.

Here, you can see the color of the liquid better with my grandmother’s glass spoon. Light amber.

Gorgeous amber.

And it gets even better after you add the pineapple…

Tepache 12


Turn off the heat, and add the pineapple chunks.

Tepache 13
Cover the pot and let the mixture sit and rest, and begin to ferment, for two days, or about 48 hours. Any area of your kitchen is fine, preferably the warmest area, where you won’t have to move the pot around for that period of time.

Tepache 14
After two days, the liquid will begin to show some bubbles. That’s when its ready for you to pour in the beer to speed up the fermentation process. You can go the old fashioned way, and not add any beer and let it sit for another week, or more…

Tepache 15
Any lager that you like. Dos Equis works for me.

Tepache 16
Cover the mix, and let it sit for about 12 to 15 hours more.

Now, remember I just said Tepache is so simple to make, if you can keep an eye on it? Well, right after I poured the beer in this step above, I had to leave for New York. My husband was left in charge of keeping an eye on the Tepache, but he was too busy keeping an eye on our three monsters.

So the Tepache ended up tasting like vinegar.

The trick is, right after you pour the beer, don’t let it sit for more than 12 to 15 hours. After that time, strain it and either drink it or place it in a big pitcher in the refrigerator.

Tepache 17
So there I went again… and this time, we were all keeping an eye on the Tepache. It went so fast!

Now we are at it again, once more… But my lesson learned: you have to watch your own Tepache.

Print Recipe
4 from 5 votes

Tepache

Tepache: A home made fermented drink that comes from the state of Jalisco – also breeding ground of other Mexican symbols like Tequila, Charros and Mariachis. Tepache has a base of fresh pineapple, true cinnamon, piloncillo and water and has been drank in Mexico since Pre-Colonial times.
Prep Time5 minutes
Cook Time2 days 12 hours
Course: Drinks
Cuisine: Mexican
Keyword: beer, cinnamon, cloves, cocktail, piloncillo, pineapple, Recipe
Servings: 8 to 10 servings
Author: Pati Jinich

Ingredients

  • 1 ripe pineapple or about 3 cups
  • 4 liters water or 16 cups
  • 1 pound piloncillo or dark brown sugar
  • 1 cinnamon stick
  • 5 whole cloves
  • 1 cup lager beer

Instructions

  • Using the traditional big eathenware jug (or a large pot), bring to a boil the 16 cups water along with the piloncillo, cinnamon stick, and whole cloves. Simmer, stirring once in a while, for about 10 minutes or until the piloncillo has dissolved.
  • While the water is simmering, wash the pineapple thoroughly, and remove the stem and bottom. Cut it into 2 inch cubes, without taking off its rind.
  • Once the flavored water is ready, add in the pineapple chunks and cover. Let rest for 2 days, or 48 hours, in a warm area of you kitchen. The mixture will begin to ferment and bubble on the surface. Add a cup of lager beer, stir well, and let it sit for up to 12 hours more. Don't let it ferment much longer, or you may end up with vinegar instead!
  • Strain tepache through a fine strainer or cheesecloth, and serve very cold. You can either refrigerate it or serve over ice cubes.

Running to Catch the Fresh Fruit Cart!

Every year, just as summer peeks its warm face in Washington DC, I begin to crave fresh fruits and vegetables Mexican street cart style. One of the times when I have enjoyed it the most was last April.  We were traveling through the Copper Canyon route, on a week long trip, from Chihuahua to Sinaloa. We had been waiting at the station in the town of Creel to catch the Chepe train to go to the next town.

As the station officer let out a scream that the train was approaching, out of the corner of my eye, I saw the fruit and vegetable cart. It was hot, we were tired and thirsty, and I saw Mr. Fruit Cart Man peeling some ripe and juicy mangoes. I grew weak in my knees.

Just that second, I saw Daniel’s face panic. He knew I was going to make a run for it.  Along with his camera.

Fresh Fruit Cart 1

Although I could hear him scream: “NO PATI!!! You are going to be left behind!” I ran for it.

Fresh Fruit Cart 2
The fruit cups had watermelon, jí­cama, canteloupe and mangoes. Since Mr. Fruit Cart Man watched me run, he politely suggested I take one fruit cup just like that. But I was dying for one of those mangoes. Plus…, please! If you have tried a Mexican cart style fruit or vegetable, you must know, that without the salt, ground chile and freshly squeezed lime juice, there is no reason to run for it.

I filmed Mr. Fruit Cart Man with the FLIP (sorry friends, took me a year to learn how to upload it, and hopefully my videos will get better too… ) so you can see how beautifully he cuts and shapes the mango… As he was almost done, we heard the train come…

There are many ground chiles you can use. They all add that something that makes the flavor of the fruit come out and pop. There is the typical chile piquí­n.

There are also some liquid chile sauces you can use, and are found in many Fruit Carts. Such as La Valentina, Bufalo, or Cholula. These days, it is incredible, but one can find all of these chile mixes and sauces throughout the US.

That day Mr Fruit Cart Man added a ton of the chile, a bit of the salt and a giant squeeze of the fresh lime juice. By the time he was done, all the travelers had hopped on…

Fresh Fruit Cart 3

I am so lucky, because my monsters waited for me. It was a close call, but we made it.

See, Juju is licking his fingers from that last piece of mango…

Fresh Fruit Cart 4

And we did make it to our next stop…

Fresh Fruit Cart 5

Now that the summer is pumping up, you can make some too…

You will have made a wonder to run home for.

Fresh Fruit Cart main
Print Recipe
5 from 1 vote

Fresh Fruits and Vegetables from the Cart

Every year, just as summer peeks its warm face in Washington DC, I begin to crave fresh fruits and vegetables Mexican street cart style. One of the times when I have enjoyed it the most was last April.  We were traveling through the Copper Canyon route, on a week long trip, from Chihuahua to Sinaloa. We had been waiting at the station in the town of Creel to catch the Chepe train to go to the next town.
Prep Time10 minutes
Cook Time1 minute
Course: Antojos
Cuisine: Mexican
Keyword: Antojo, carrots, Chiles, cucumber, Dessert, Jicama, lime, mango, pineapple, Recipe, tajin, Vegetable, Vegetarian, watermelon
Author: Pati Jinich

Ingredients

  • Any fruits or vegetables that you are craving!
  • Pineapple watermelon, mango, jicama, cucumber, carrots or any of your choice, peeled and sliced or diced
  • Salt to sprinkle throughout
  • Ground spiced up chile such as Tajín, or a sauce like Valentina, Buffalo or Cholula
  • Fresh squeezed lime juice

Instructions

  • Peel and slice the fruits and vegetables. Sprinkle salt and chile to taste. Bathe with fresh squeezed lime juice. Eat up!

Notes

Frutas y Verduras de Carrito

Bitter Orange

The bitter orange or naranja agria is a citrus fruit that has a peculiar bitter flavor and a very high acidity that works very well for marinades and to tenderize meats and seafood. It also has a distinct look. It is not very pretty; it’s small, with a pale, somewhat dull colored pebbly textured skin that appears to be speckled with sand or dust. However, slice it down the middle, and you will find a shinny, juicy, deep orange and wonderfully flavored pulp.

It found its way to Mexico through the Spaniards, who got them from the Arabs, who got them from the Persians. In any case, bitter oranges found a wonderful reception in Mexican soil,  especially in some regions such as the Yucatan Peninsula and Veracruz. It is used in many ways: to prepare ceviches, sauces, soups, marinades, salsas, pickles… to name some.

So much for ingredients traveling from one place to another around the globe, bitter oranges are very hard to find in many places -and one big reason why I am considering planting a tree in my backyard. That’s also why many cooks have come up with different substitutes such as part orange juice and part vinegar or different percentages of different citrus fruits.

The substitute that I like the most, is equal parts grapefruit, orange, lime juice and white distilled vinegar. I find that the substitutes that only use citrus juices tend to faint quickly and don’t reach the high acidic content of the bitter orange.


Foods of Michoacan are Forever

You know how some people become attached to a certain dish? They try it somewhere once and then want to go back to eat it again and again, or they make it at home repeatedly in an until-death-do-us-part kind of vow? Well, I am one of those people, and I have made that vow with quite a few dishes from the Mexican state of Michoacan.It surprises me how Michoacan’s cuisine has remained such a well-kept secret. It has a defined personality and a complex layering of delicious flavors like the more popular cuisines from Oaxaca and Puebla, but its dishes seem to be a bit more comforting and use fewer ingredients.

What’s more, some of Michoacan’s basic ingredients, such as pasilla chiles, tomatillos, cotija cheese and fruit pastes, have become readily available in stores outside of Mexico.

My love for Michoacan is inevitably tied to its food, but it goes well beyond its kitchens. The first time I went to Michoacan as a little girl, it had such an impact on me that whenever our family planned a trip, I begged my parents to return there. It wasn’t only the enchanting cobbled streets, the immense wooden doors framed in cantera stone, the aromas of freshly made breads and ground mountain coffee, or the town squares filled with dozens of home-style ice cream carts and sweets stands, all surrounded with colorful balloons and birdseed sellers. There was something more.

I returned a couple of decades later, as a production assistant for a traveling cooking show. It was breathtaking. As we researched for and filmed foods prepared for Day of the Dead — a Mexican holiday celebrated this week — we traveled from town to town, sampling delicate and simple dishes in the markets filled with fresh ingredients and goodies that women brought in baskets and set down on mats on the floor.

In the cities surrounding the Patzcuaro Lake area, we saw the famous fishermen using their immense nets, which seemed to fly off into the sky, before sunrise. We tasted to-die-for fish soups, meat stews, tamales and sweets that cooks prepared for this occasion.

Day of the Dead is one of Mexico’s most meaningful celebrations, and Michoacan is a spectacular place to experience it, partly because of its beauty and cuisine, but also because of the richness and depth of its centuries-old traditions.

The Purepechas, also called Tarascos, who remain the predominant indigenous group of the region, believed since pre-Hispanic times that the dead return once a year to visit those they miss. Centuries of intermarriage between Purepecha, Spanish and Catholic Church traditions and ingredients resulted in an eclectic mix of rituals and exquisite foods.

Last year, a decade after my second trip, I returned to Michoacan to do further research for the culinary program I teach at the Mexican Cultural Institute in Washington, D.C. We brought our three young sons, and I was eager to share with them the things and foods I had been fascinated with on previous trips. Yet as soon as we unpacked, it became clear that there was so much more to taste and learn. I experienced new things along with my boys.

After a stay in Morelia, the colonial capital where we tasted traditional and modern spins of Michoacan cuisine, we spent a sweet time in the small town of Santa Fe de la Laguna among a Purepecha community. Some of the women fed us their traditional foods and invited us into their kitchens to teach us how to make those dishes. They also taught our boys, with so much patience and tranquility, how to work with their traditional black and green clay.

Upon our return, I finally realized what makes the cuisine of Michoacan distinctive: its people. Michoacanos are generous, warm, hospitable and caring. No wonder the state is known as “the soul of Mexico.” And it is a beautiful soul for Mexico to have. The more I cook, the more I am convinced that the food of a place resembles the characteristics of its people. If asked to define in one word the cuisine from Michoacan, I would say “soulful.”

In my until-death-do-us-part vow with the food of Michoacan, I shall keep sharing and cooking what I have learned from its cuisine until I am able to go back to explore and eat some more. What’s more, if I’m given a license to come back from another world for Day of the Dead, I will happily feast on this menu with the people I love.

Article written for and published by National Public Radio’s Kitchen Window.

tarascan soup
Print Recipe
4.56 from 9 votes

Tarascan Pinto Bean and Tomato Soup

Tarascan Soup Pinto Bean and Tomato Soup, from Pati’s Mexican Table Season 7, Episode 12 "Photographic Food Memories"
Prep Time5 minutes
Cook Time30 minutes
Total Time35 minutes
Course: Soup
Cuisine: Mexican
Keyword: beans, pati’s mexican table, pinto beans, Recipe, soup, Vegetarian
Servings: 6 to 8 Servings
Author: Pati Jinich

Ingredients

For soup:

  • 1 pound ripe plum or roma tomatoes
  • 1 clove garlic
  • 1 (about 1 ounce) ancho chile, stem and seeds removed
  • 1/2 cup white onion, coarsely chopped
  • 1 1/2 teaspoons kosher or sea salt divided, or more to taste
  • 3 tablespoons safflower or corn oil
  • 1 pound cooked pinto beans plus 2 cups of their cooking liquid or 2 14-ounce cans cooked pinto beans plus 2 cups water
  • 3 cups chicken broth vegetable broth or water

For garnishes:

  • 1/2 cup Mexican style cream
  • 1 cup crumbled Cotija cheese
  • 1 1/2 cups crumbled tortilla chips or tortilla strips
  • 1 ancho chile stemmed, seeded, diced, deep fried for a few seconds
  • 1 avocado, peeled seeded, meat scooped out and diced, optional

Instructions

  • Place the tomatoes, garlic, and ancho chile in a saucepan. Cover with water, and simmer over medium-high heat for 10 to 12 minutes, until the tomatoes are completely cooked through and ancho chile is rehydrated.
  • Transfer the tomatoes, garlic, and ancho chile to a blender or food processor, along with 1 cup of the cooking liquid, the white onion, and 1 teaspoon of the salt. Puree until smooth.
  • Heat the oil in a large soup pot over medium-high heat. Add the pureed tomato mixture and cook for 6 to 8 minutes, stirring occasionally, until it darkens in color and thickens in consistency.
  • Meanwhile, rinse your blender or food processor, then add the pinto beans and 2 cups of their cooking liquid (or water, if using canned beans) and puree until smooth.
  • Reduce the heat to medium and stir the bean puree, broth and the remaining ½ teaspoon of salt into the thickened tomato mixture. Simmer for 10 to 15 minutes, or until the soup has seasoned and has a creamy consistency. Taste for salt and add more if needed. Turn off the heat, as it thickens quickly.
  • Ladle the soup into bowls, drizzle with a tablespoon of the cream and top with some cheese, a handful of crumbled tortilla chips or tortilla strips, a few fried ancho chile crisps and some diced avocado. You can also place the garnishes in bowls on the table to let your guests decide how much of each garnish they want to add to their bowls.
  • The soup itself may be cooled and stored in a tightly sealed container in the refrigerator for up to 4 days. Because this soup thickens a bit as it cools, you may need to add some chicken broth or water to thin it out when you reheat it.

Notes

Sopa Tarasca
Print Recipe
4.41 from 5 votes

Brisket in Pasilla Chile and Tomatillo Sauce

This is by far, the best brisket I’ve ever had. The meat chunks gain a nutty brown crust as they cook, yet as you take a bite they fall apart in your mouth. And the sauce, thick, a bit tart, a bit spicy and wholeheartedly rich, enhances the flavor of the meat. It is a dish with a flavor hard to forget: it has loads of personality.
Prep Time10 minutes
Cook Time4 hours 15 minutes
Course: Main Course
Cuisine: Jewish, Mexican
Keyword: beef, chile, garlic, Jewish Mexican, pasilla, pati’s mexican table, piloncillo, Recipe, tomatillos
Servings: 6 to 8 servings
Author: Pati Jinich

Ingredients

  • 3 pounds trimmed brisket of beef rinsed and cut into about 2-inch chunks (leave some fat on!)
  • 5 garlic cloves peeled
  • 5 peppercorns
  • 2 teaspoons kosher or sea salt divided (plus more to taste)
  • 1 pound tomatillos husks removed and rinsed
  • 3 ounces black or pasilla chiles (may sub for New Mexico chiles) stems and seeds removed
  • 3 tablespoons corn or safflower oil
  • 1/2 cup white onion chopped
  • 1 cup boiling water
  • 2 cups meat cooking liquid
  • 2 to 3 tablespoons grated piloncillo or dark brown sugar
  • Chopped white onion and cilantro leaves optional garnish

Instructions

  • Place meat chunks in a large cooking pot along with 5 garlic cloves, peppercorns and salt. Cover with water, bring to a boil, cover partially and simmer over medium heat for 3 hours, or until meat is very soft. Drain and reserve 2 cups of its cooking liquid.
  • Meanwhile, char or roast the tomatillos on a baking sheet under the broiler, or directly on the comal or dry skillet or grill over medium heat, for about 10 minutes, turning 2 or 3 times. Tomatillos are ready when their skin is blistered and lightly charred, and their flesh is soft, mushy and juicy.
  • Toast chiles on a hot comal or dry skillet over-medium heat for 5 to 10 seconds per side. Chiles will release their aroma and become more pliable, and their inner skin will become a bit opaque. Don’t let them burn.
  • Place toasted chiles and roasted or charred tomatillos in a bowl and cover with 1 cup boiling water and 2 cups of reserved meat cooking liquid (if you don’t have 2 cups, add more water). Let this mixture soak for at least a half-hour and up to 4 hours. Pour the mixture into the blender or food processor, puree until smooth and reserve.
  • Add 3 tablespoons of corn or safflower oil to the same pot in which meat was cooked, and heat over high heat until hot but not smoking. Add cooked meat chunks and brown them, 2 to 3 minutes. Reduce heat to medium, add the chopped onion, and stir as you continue to brown the meat for another 2 to 3 minutes.
  • Incorporate pureed chile mixture, a teaspoon of salt and the piloncillo or brown sugar. Stir and simmer over medium heat for about 10 more minutes. The meat should be completely tender, yet still in chunks. The sauce should be thick enough to coat the back of a wooden spoon, but not pasty. Taste for salt and add more if need be. To serve, you can garnish with some raw chopped onion and cilantro leaves.
  • If there is any meat left over, you can cool, store and refrigerate it in a closed contained and then reheat, covered over a low simmer.

Notes

Carne Enchilada
tarascan bean and tomato soup
Print Recipe
5 from 4 votes

Cheesecake with Guava

In Mexico, a favorite dessert is to pair sweet slices of guava or other fruit pastes called ates with savory slices of cheese. Cheesecake with guava paste is a modern take on this combination. We tried it for the first time in the Museo del Dulce — the sweets museum — in Morelia. My adaptation has a thinner layer of guava paste than the museum's, and it is placed between the crunchy bottom and the smooth cream cheese batter, rather than on top. Also, the sweetened sour cream topping reflects a craving of mine, but it seems to make the combination even more irresistible. You can use this recipe as a guideline and see if you want to take the cheesecake in other directions: more guava, less guava, more sour cream or no sour cream.
Prep Time30 minutes
Cook Time35 minutes
Chilling Time4 hours
Course: Dessert
Cuisine: Mexican
Keyword: Ate De Guayaba, cheesecake, Dessert, guava, guava paste, Guayaba, pay de queso, Recipe
Servings: 10 servings
Author: Pati Jinich

Ingredients

Crust:

  • 1 1/2 cups (6 ounces ground) Maria cookies or vanilla wafers, or graham crackers
  • 1 teaspoon sugar
  • 3 ounces (or 3/4 stick) butter melted

Guava Spread:

  • 11 ounces guava paste or ate de guayaba
  • 5 tablespoons water

Cheese Filling:

  • 1 pound cream cheese
  • 1/3 cup sugar
  • 1 teaspoon vanilla extract
  • 3 large eggs
  • 1/4 cup heavy cream

Sour Cream topping:

  • 1 1/2 cups sour cream
  • 1/4 cup sugar

Instructions

Crust:

  • In a big bowl, stir the ground cookies, sugar and melted butter until thoroughly mixed. Butter a 9- to 10-inch springform pan. Turn the cookie mixture into the pan. With your fingers or a small spatula, spread it evenly along the pan. Press gently, making a side rim of 1/2 to 1 inch on the sides. Refrigerate while you make the guava spread, cheese filling and sour cream topping.

Guava Spread:

  • Place guava paste and water in the blender jar or food processor. Process until smooth, and reserve.

Cheese Filling:

  • Place the cream cheese in the bowl of an electric mixer, and beat at medium speed until smooth and foamy, 3 to 4 minutes. Add sugar and vanilla, and continue beating until well mixed. Add eggs, one at a time. You may need to stop the mixer to scrape down the sides and bottom of the bowl, as the batter may stick to it. Add the heavy cream, and beat until the mixture is all incorporated and smooth. Reserve.

Sour Cream Topping:

  • In a bowl, mix the sour cream and the sugar together.

Assemble Together:

  • Adjust rack of the oven one-third up from the bottom and preheat to 350°F.
  • Remove the pan with the crust from the refrigerator. With a spatula, spread the guava mixture evenly over the crust. Turn out the cheese filling onto the guava layer, and spread gently and evenly.
  • Place the cheesecake in the oven and bake for 35 minutes, or until it is cooked and has a lightly tanned top. Remove from oven and let cool for at least 10 minutes. Then spoon the sweetened sour cream over the cheese filling and place it back in the oven for 10 more minutes.
  • Remove from the oven and let it cool to room temperature. Cover and refrigerate for at least 4 hours before serving. It tastes even better if it chills overnight.
  • Before serving, release the sides of the springform pan. Place the cheesecake onto a plate (keeping it on the bottom of the pan), slice and serve.

Notes

Pay De Queso Con Ate De Guayaba

A Cake Worthy of its own Celebration

It seems that when it comes to birthdays and cakes, most of us grown ups are like little kids too. So this year, I planned my husbands’ cake with a little help from my three young boys.

The night before, as I tucked them in bed, we talked about making an irresistible I-want-to-jump-into-that-cake kind of cake. It had to be something that could WOW him away and could also feel yummy and soft when they dipped his face in it (yep! that was their plan).

This talk led me, once again, to tell the boys stories about cakes from my childhood. Most of those cakes came from Sanborns’, a chain of stores that sells almost anything you can imagine: books, DVD’s, make-up, electronics, luggage, candies, the best ever chocolate covered raisins, marshmallows and toys. It also has great coffee-shop style restaurants with some of my favorite molletes and enchiladas. Not to forget its perfumeries and pharmacies. It is a serious knock out one-stop-shop. But most importantly, it was, and may still be, one of the most popular places to get a birthday cake.

One of the cakes that left me with a permanent impression went something like this: A couple layers of fluffy and moist vanilla cake, a foamy and soft meringue filling paired with old fashioned strawberry jam and pecans, the same soft meringue layered all over the top, some more pecans and whatever decorations you fancied.

That cake, by itself, made a party happen. It was a creation worthy of its own celebration.

The next morning, we rolled up our sleeves, and jumped in the kitchen ready to make it. The great thing, is that it turned out to be easy and fun for the boys.

First, you make a quick batter in the mixer with butter, sugar, egg yolks, flour, baking powder and a bit of milk. Pour this cake batter, and spread it, over 2 buttered ring form pans layered with a parchment paper base.

Cake with Meringue and Strawberry Jam 1

Rinse the mixer and make a large helping of soft and airy meringue. This just takes two ingredients and less than 5 minutes. Beat the egg whites until they make peaks that can hold their own shape, add sugar and beat one more minute.

Cake with Meringue and Strawberry Jam 2

Layer that soft meringue on top of the 2 pans that already have the uncooked cake batter. It is hard, really hard, not to eat that meringue as you are pouring it onto the pan.

Spread the meringue in whichever shape you want.

Cake with Meringue and Strawberry Jam 3

Chop some pecans and sprinkle them on top of the meringue layer.

Now, both pans, into the oven they go! Bake for 25 minutes at 375 degrees.

Cake with Meringue and Strawberry Jam 4

At this point, the cake is cooked yet moist and the meringue has developed a chewy top, and thick and soft interior.

Add strawberry jam, either homemade or store bought, on top of one of the cakes. You can also add diced strawberries or any kind of berries.

And happy birthday Papi!

A Cake Worthy of Its Own Celebration 8-thumb-510x342-748
Beware: All of these layers make a perfect combination once in your mouth and most people will ask for more than one helping. Though we celebrated my husband’s birthday last week, the cake was so good, that it is worthy of its own celebration.So we are making it again today.

Cake with Meringue and Strawberry Jam 6

Let’s eat!!!

NOTE: We based our take on a recipe from Carmen Titita, one of the leading ladies of the Mexican culinary scene, who herself adapted a recipe from Rosita Murillo from Veracruz, where this cake is just as popular as in Sanborns’. It seems absolutely fascinating to consider how recipes travel from families, to friends, to different countries and receive twists and spins along the way as they move through generations. This is our adapted version.

Print Recipe
5 from 2 votes

Birthday Cake with Meringue and Strawberry Jam

One of the cakes that left me with a permanent impression went something like this: A couple layers of fluffy and moist vanilla cake, a foamy and soft meringue filling paired with old fashioned strawberry jam and pecans, the same soft meringue layered all over the top, some more pecans and whatever decorations you fancied. That cake, by itself, made a party happen. It was a creation worthy of its own celebration.
Prep Time10 minutes
Cook Time25 minutes
Course: Dessert
Cuisine: Mexican
Keyword: cake, Dessert, jam, Meringue, pecans, Recipe
Servings: 12 to 14 slices
Author: Pati Jinich

Ingredients

  • 2 1/2 sticks 1 1/4 cup unsalted butter at room temperature
  • 2/3 cup sugar
  • 10 egg yolks
  • 2 1/2 cups all-purpose flour
  • 1 tablespoon baking powder
  • 2/3 cup milk
  • 10 egg whites
  • 1 1/4 cup sugar
  • 1 cup pecans roughly chopped
  • 1 cup strawberry jam

Instructions

  • Preheat the oven to 375 degrees. Butter 2 round spring form pans (size from 9 1/2 to 11"). Place parchment paper on the bottom of each pan.
  • In the bowl of a mixer, beat the butter at medium speed, until soft and creamy. Incorporate sugar and beat until well mixed. Add egg yolks, one by one, beating well after each addition. Reduce the speed to low, add the flour combined with the baking powder in batches, alternating with the milk. Pour half of this batter onto each pan.
  • Rinse the mixer. Beat the egg whites until the peaks can hold their own shape, but aren't stiff. Incorporate sugar, and beat until it is well mixed, for a minute or so. Pour this meringue on top of the cake batter on each pan, and gently smooth it out with a spatula. Sprinkle half of the chopped pecans on top of the meringue. Place the pans in the oven.
  • Bake for 25 minutes, or until the cake is cooked but moist and the meringue has developed a nice tanned crust. Remove from the oven and let them cool.
  • Remove one of the cakes from the pan, discarding the parchment paper, and place on a platter. Spoon the strawberry jam on top. Remove the other cake from the pan, discarding that parchment paper as well, and place on top of the first cake. Enjoy!

Notes

Pastel de Cumpleaños con Merengue y Mermelada de Fresa, Adapted from Carmen Titita, adapted from Rosita Murillo

Jamaica Flowers Charm the Kitchen

Growing up in Mexico City, my sisters and I used to prepare exotic meals, perfumes and potions for the inhabitants of our enchanted forest. That was our dog, the bluebird, snails, butterflies and ladybugs that happened to peek into our backyard and witness our extravagant mess. It also included any family friend who happened to stop by and become a willing victim. We sometimes offered cooking classes too.

My mother set us up in the backyard on a big blanket with random pots and pans, while she cooked laborious weekend meals. There was a fig tree, an apple tree, a peach tree, a couple of what we called Chinese orange trees and tons of azaleas and herbs that offered an immense array of witch-crafting material. But among our most prized ingredients were dried jamaica flowers, known here as hibiscus flowers, stored in a big jar in the kitchen.

Although not native to Mexico, with a contested origin between Africa and India, jamaica flowers arrived in colonial times and are now deeply integrated into Mexican cuisine. Mainly used to prepare agua de jamaica, one of the freshly flavored waters (aguas frescas), they are enjoyed daily throughout Mexico. Agua de jamaica is extremely popular because its tart flavor, also refreshing and light, complements Mexican food so well.

As a treat, and to make our wait more bearable, my mother would bring us a big pitcher of agua de jamaica. We would drink it, of course, but we would also pour it into ice cube molds with wooden sticks to make mini popsicles, or mix it with gelatin to make happy-looking jello, both of which are common in Mexico.

It was more fun, however, to sneak into the kitchen to get the dried flowers and experiment firsthand. Oh, how fascinating it was to see how they slowly infused the liquid in which they were soaking with an intensely deep and vivid red color. Their flowery and fragrant smell seemed to help with our magic spells, too.

After my husband and I moved to the U.S. in the 1990s, I would stuff them in my suitcase or ask someone to bring some when they visited from Mexico. My craving intensified while I was pregnant, since aside from their tangy taste (more welcome when carrying extra weight), their diuretic and digestive properties and richness in vitamin C and minerals are common knowledge in Mexico.

Luckily, I don’t have to stuff them in my suitcase anymore. As with most ingredients used to cook Mexican food, they can be found in a store close by or with the click of a button, which is wonderful because I use plenty of them. The traditional jamaica water is a staple on my table, but most of all, I am still playing with them in my own enchanted forest or busy kitchen.

Like other adventurous Mexican cooks, I have been experimenting with and expanding their culinary uses. For example, the easy-to-make concentrate used to flavor water makes a rich and sophisticated base for a thick and syrupy sauce to drizzle over gamey meats such as duck, venison or lamb.

An even more daring approach, which I find irresistible, is to munch on these wholesome flowers. However, they are hard and rather tasteless as they are. They have to macerate for at least a couple of hours before they become deliciously chewy and release their tart and cranberrylike flavor. Thus, they are perfect for making exotic vinaigrettes.

The concentrate has also been splashed into margaritas for some time now, and I was recently surprised to find hibiscus-infused tequila at a restaurant in downtown Washington, D.C. While I am no tequila connoisseur, it tasted heavenly.

These days when my mother visits, she tries to set up my three boys on a big blanket with pots and pans in our backyard. Within 10 minutes, the potion-making ends in a wrestling match. However, since one of their favorite things is to have brownies outside, maybe next time we bake some I can drizzle sweetened jamaica syrup and whipped cream on top. That is a recipe I still haven’t tried.

Article written and photos taken for and published by NPR’s Kitchen Window on July 22, 2009.

jamaica water
Print Recipe
4.34 from 6 votes

Hibiscus Flower Concentrate

Although not native to Mexico, with a contested origin between Africa and India, jamaica flowers arrived in colonial times and are now deeply integrated into Mexican cuisine. Mainly used to prepare agua de jamaica, one of the freshly flavored waters (aguas frescas), they are enjoyed daily throughout Mexico.
Prep Time0 minutes
Cook Time10 minutes
Total Time10 minutes
Course: Drinks
Cuisine: Mexican
Keyword: Concentrado, concentrate, flowers, hibiscus, jamaica, water
Servings: 5 cups
Author: Pati Jinich

Ingredients

  • 8 cups water
  • 2 cups (about 2-3 ounces) dried hibiscus or jamaica flowers
  • 1 1/2 cups sugar or to taste
  • 2 tablespoons fresh lime juice

Instructions

  • In a 6- or 8-quart saucepan, bring water to a boil. Add flowers, stir and simmer over medium heat for 10 to 12 minutes. Turn off the heat and let the mixture cool a bit.
  • Strain mixture into a large container (with a lid to cover later), and add the sugar and lime juice. Stir until well-dissolved.
  • Once the concentrate has cooled, cover well and refrigerate. It will keep in the refrigerator for months.

Notes

Concentrado de Jamaica
jamaica water
Print Recipe
4.58 from 7 votes

Jamaica Water

Jamaica Water recipe from Pati's Mexican Table Season 1, Episode 6 "Hibiscus Flowers"
Cook Time10 minutes
Total Time10 minutes
Course: Drinks
Cuisine: Mexican
Keyword: agua fresca, beverage, coconut water, drink, hibiscus, jamaica, Mexican, non-alcoholic, refreshing, water
Servings: 4 to 5 cups
Author: Pati Jinich

Ingredients

Jamaica Concentrate (makes about 5 cups):

  • 8 cups water
  • 2 cups dried hibiscus or jamaica flowers about 2-3 ounces, depending on how tightly you pack the cups
  • 1 1/2 cups sugar or to taste
  • 2 tablespoons fresh lime juice or to taste

Jamaica Water:

  • 1 cup of the Jamaica Concentrate
  • 3 to 4 cups water

Instructions

To make the concentrate:

  • In a saucepan, pour 8 cups of water and place over high heat. Once it comes to a boil, add the jamaica flowers, simmer at medium heat for 10 to 12 minutes and turn off the heat. Let it cool down and strain into a heat proof glass or plastic water jar. Add the sugar and lime juice, mix well, cover and refrigerate.
  • It will keep in the refrigerator for at least 3 months.

To make the jamaica water:

  • When ready to serve, dilute 1 cup concentrate with 3 to 4 cups water, or to your liking, and some ice cubes.

Notes

Agua de Jamaica
Print Recipe
4.15 from 7 votes

Hibiscus Flowers and Hibiscus Tea

Hibiscus Flowers and Hibiscus Tea recipe from Pati's Mexican Table Season 4, Episode 10 "Modern Mexico"
Cook Time15 minutes
Total Time15 minutes
Course: Drinks
Cuisine: Mexican
Keyword: drink, hibiscus, honey, jamaica, tea
Servings: 6 cups tea
Author: Pati Jinich

Ingredients

  • 6 cups water
  • 1/2 cup honey
  • 2 ounces dried hibiscus flowers

Instructions

  • In a medium saucepan, bring water and honey to a boil. Stir in dried hibiscus flowers, stir and cook at a simmer for about 15 minutes, until flowers are completely rehydrated and soft.
  • Strain flowers, reserving liquid for tea, and finely chop. Set aside.
jamaica popsicles
Print Recipe
5 from 7 votes

Jamaica Popsicles

Jamaica Popsicles recipe from Pati's Mexican Table Season 1, Episode 6 “Hibiscus Flowers”
Prep Time15 minutes
Cook Time4 hours
Total Time4 hours 15 minutes
Course: Dessert
Cuisine: Mexican
Keyword: Chocolate, coconut, flowers, hibiscus, jamaica, mango, Paleta, Popsicle, rum
Servings: 8 popsicles
Author: Pati Jinich

Ingredients

To make Jamaica Concentrate (makes about 5 cups):

  • 8 cups water
  • 2 cups, about 2-3 ounces, dried hibiscus flowers depending on how tightly you pack the cups
  • 1 1/2 cups sugar or to taste
  • 2 tbsp fresh lime juice or to taste

To make Jamaica Popsicles:

  • 2 cups hibiscus flower/jamaica concentrate
  • 3/4 cup mango peeled, pitted diced
  • Chocolate morsels to taste optional
  • Shredded coconut to taste optional
  • For adult fun you can make them grown up and add some Rum!

Instructions

To make the concentrate:

  • In a saucepan, pour 8 cups of water and place over high heat. Once it comes to a boil, add the jamaica flowers, simmer at medium heat for 10 minutes and turn off the heat. When cool, strain into a heat proof glass or plastic water jar. Add the sugar and lime juice, mix well, cover and refrigerate.

To make the popsicles:

  • Pour 2 cups of jamaica concentrate into 8, 4 ounce molds. Add pieces of mango, chocolate and coconut. Place in freezer until set and frozen, about 4 to 5 hours. Enjoy!

Notes

Paletas de Jamaica
Jamaica Water Main
Print Recipe
5 from 3 votes

Seared Duck Breast with Hibiscus Flower and Orange Sauce

Easy-to-make hibiscus flower concentrate is used to make a rich and sophisticated base for a thick and syrupy sauce to drizzle over gamey meat, such as duck.
Prep Time5 minutes
Cook Time1 hour
Total Time1 hour 5 minutes
Course: Main Course
Cuisine: Mexican
Keyword: duck, duck breast, edible, flowers, hibiscus, jamaica, meat, Naranja, orange, pato, Pechuga, Recipe
Servings: 6 servings
Author: Pati Jinich

Ingredients

Sauce:

  • 4 cups jamaica or hibiscus flower concentrate
  • 2 cups chicken broth homemade or store-bought
  • Rind of an orange
  • 1 bay leaf
  • 3 whole cloves
  • 5 black peppercorns
  • 1 cinnamon stick about 2 inches long (use Ceylon or true cinnamon if you can)
  • 1 tablespoon balsamic vinegar
  • 1/2 teaspoon kosher or sea salt or more to taste

Duck Breasts:

  • 6 duck breasts with skin about 6 to 8 ounces each
  • 1 teaspoon kosher or sea salt or more to taste
  • 1/2 teaspoon black pepper freshly ground, or to taste

Instructions

Sauce:

  • Pour concentrate and broth into a medium-sized heavy saucepan over medium high heat. Bring to a boil and add the orange rind, bay leaf, cloves, peppercorns, cinnamon stick, vinegar and salt. Simmer at medium-high heat for about 35 minutes.
  • Bring heat down to medium-low, as the sauce will have reduced considerably and will be simmering too strongly. Keep on a low simmer until the sauce achieves a thick, syrupy consistency, about 10 more minutes. Don’t let it thicken too much, as the sauce will continue to thicken as it cools. Remove the spices using a slotted spoon or strainer, and reserve in a container.
  • If you are not going to use it in the next couple of hours, or you made more than you need, let it cool, cover and refrigerate. Reheat before using.

Duck breasts:

  • Thoroughly rinse the duck breasts under a thin stream of cold water and pat dry. Make 6 to 8 diagonal cuts through the skin of each breast, being careful not to cut through the meat. Season with kosher salt and pepper to taste.
  • Preheat the oven to 400°F.
  • Heat a heavy skillet over medium-high heat. Once it is hot but not smoking, place the duck breasts skin-side down and sear for 6 to 7 minutes, until the skin is brown and crisp, and most of the fat melts and turns into liquid.
  • Move the breasts, skin-side up, to an ovenproof dish or pan. Place in the oven for 5 to 9 minutes, depending on how rare you like your meat: about 5 minutes for quite rare and about 8 to have a nice pink center.
  • Remove the breasts from the oven and let them sit for a couple of minutes before slicing. Slice diagonally along already marked skin. Drizzle jamaica and orange sauce on top.

Notes

Pechuga De Pato Con Salsa De Jamaica Y Naranja
Jamaica Water Main
Print Recipe
5 from 1 vote

Watercress, Goat Cheese and Pecan Salad with Hibiscus Flower Vinaigrette

Hibiscus flowers are hard and rather tasteless as they are. They have to macerate for at least a couple of hours before they become deliciously chewy and release their tart and cranberry-like flavor. Thus, they are perfect for making exotic vinaigrettes.
Prep Time15 minutes
Cook Time0 minutes
Resting Time4 hours
Total Time4 hours 15 minutes
Course: Appetizer, Side Dish
Cuisine: Mexican
Keyword: Berros, Ensalada, flowers, goat cheese, hibiscus, jamaica, Nueces, pecans, Queso De Cabra, Recipe, salad, vinaigrette, watercress
Servings: 6 servings
Author: Pati Jinich

Ingredients

  • 1/4 cup champagne vinegar
  • 1/4 cup olive oil
  • 1/2 cup safflower or corn oil
  • 1 garlic clove finely minced
  • 2 teaspoons kosher or sea salt or to taste
  • 1/4 teaspoon freshly ground pepper or to taste
  • 1 cup hibiscus flowers
  • 12 ounces watercress rinsed and drained
  • 8 ounces fresh goat cheese cut into 12 slices (can be crumbled, too)
  • 1/2 cup pecans or pine nuts lightly toasted

Instructions

  • Pour the champagne vinegar into a 3- to 4-quart mixing bowl. Slowly add both the olive oil and the safflower oil as you whisk them into the vinegar with a fork or whisk. Mix in the minced garlic, sugar, salt and pepper. Add the flowers and toss them well. Let them macerate from 4 to 6 hours.
  • Remove the flowers with a slotted spoon, reserving the vinaigrette. Chop the flowers and return them to the vinaigrette. You may use then, or cover and refrigerate up to a week. Mix very well before using and taste for seasoning as it may have become a bit more tart as the days go by and need more salt and sugar.
  • Place the watercress in a salad bowl. Toss with some vinaigrette and top with goat cheese slices and toasted pecans or pine nuts.

Notes

Ensalada De Berros, Queso De Cabra Y Nueces Con Vinagreta De Jamaica

Three tasty ways to eat ripe plantains

Ay, ay, ay! Patita, espérate mamacita! My nanny repeated, as she snatched the hot plantain tightly wrapped in aluminum foil, from my hands. Her hands were more resistant, she insisted, as they were older and had cooked so much. She would hold my chosen package with an open hand, so the camotero (sweet potato street cart man, who also sold plantains) could tear up the foil. As the steam flew up to the skies, he poured a more-than-any-child-could-wish-for amount sweetened condensed milk… and so it fell, sweet ounce, by thick ounce, onto that moist, rich, filling and immensely satisfying treat. Sheer joy, that was.

I devoured it in what seemed a couple bites, just to lick the last but yummiest remains from the crumbled foil. There we were, standing on the street corner where my family lived, mischievously laughing: it was already getting dark, almost dinnertime, and no, no, no, I wasn’t supposed to be having any. Oh dear, how I miss that woman! Now every time I eat a plantain, I get a sparkle of that sheer joy.

So I understand my boys when they rush out to the street, their heartbeats pumping so loud I can clap their rhythms, as I scream out wait, wait, wait!, as that annoying ice cream truck song approaches. Yes, right before dinner, thank you Mr. Ice Cream Man. I once felt that too, with an even more shrilling whistle coming out from the camotero street cart.

We used to eat cooked ripe plantains throughout the year, and ironically, they seemed to taste even better during the hot and rainy summer months.  As some people say, sometimes hot, beats the heat…

White Rice and Fried Plantains 1
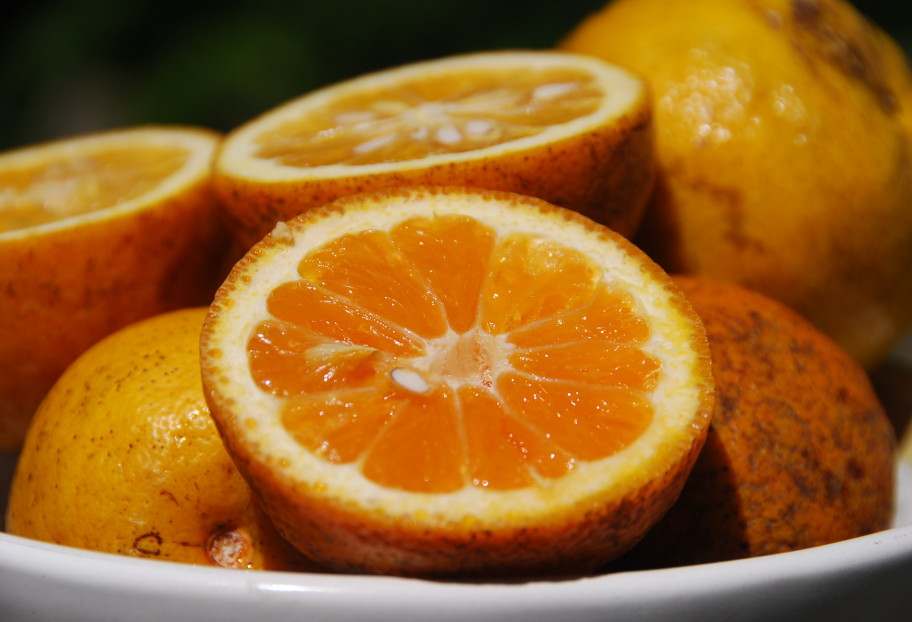
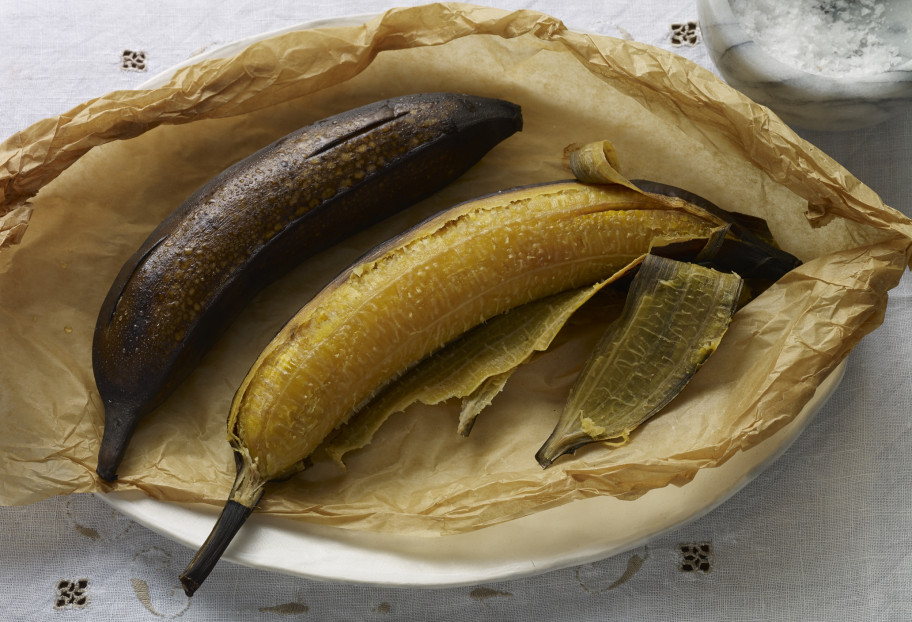
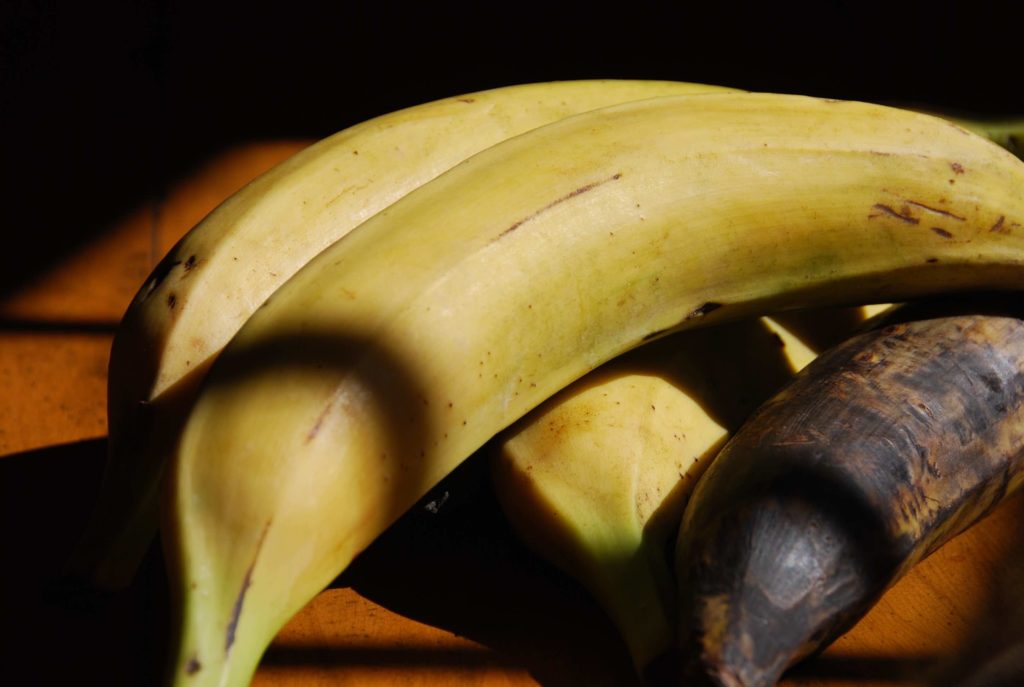
(Plantains on my dining room table, the one covered in black spots is ripe and ready to be cooked)

Plantains, called macho bananas, plátano macho, in many areas of Mexico, can just change gears and move from one course to another. Eaten as described above, they make an original dessert or an anytime sweet treat. Covered in foil and thrown on the grill, and along some grilled meat or chicken with a spicy kick, they make an incredible side. All you need is a simple salad and you have a wholesome tasty meal. If you forgot to eat them and you are already moving to dessert, just drizzle some sweet condensed milk, honey, sugar, Rompope, or ice cream on top! I don’t think one can say this about many other ingredients… maybe sweet potatoes or grilled pineapples…

Another option to eat ripe plantains, which is extremely popular, is to fry them, plátanos fritos. They are peeled, thickly and diagonally sliced (to make them pretty, why not?) and as they brown in the hot oil, their sugar caramelizes. So when you start to bite in, you get a sweet crunch, and when you are deep into the bite, you get a gently mushy and soft finish.

In Mexican cooking, fried plantains are famously eaten on top of white rice, as in the main post photo. This brings a nice contrast of sweet and soft with savory and coarse. If you want to go over the top, drizzle some Mexican or Latin style cream or sour cream as a finishing touch. Try that… and you will have a piece of sheer bliss too.

NOTE: Click here to read about plantains, how to buy them and how to recognize when they are ripe. Of course, there are other ways to eat them when they are not ripe, as they do in the Gulf Coast, but that is a topic for a future post… meanwhile enjoy one of these three ways to eat them ripe, or try them all!

fried plantains
Print Recipe
5 from 3 votes

Baked Plantains for Dessert

Plantains, called macho bananas, plátano macho, in many areas of Mexico, can just change gears and move from one course to another. They make an original dessert or an anytime sweet treat. Just drizzle some sweet condensed milk, honey, sugar, Rompope, or ice cream on top! 
Cook Time25 minutes
Course: Dessert, Snack
Cuisine: Latin American, Mexican
Keyword: Baked, Dessert, Plantains, Sweet, Sweetened Condensed Milk
Servings: 2 to 4 servings
Author: Pati Jinich

Ingredients

  • 2 ripe plantains
  • Sweetened condensed milk to your liking or honey, sugar, ice cream or rompope

Instructions

  • Preheat oven to 400°F. Individually wrap the plantains, with their skin on, in aluminum foil and place in a baking sheet in the oven (some people bake them without the aluminum foil, you can try it both ways).
  • Bake for about 25 minutes, until plantains are completely cooked through, very soft and sugar has begun to caramelize. Carefully open up the foil making a slit down the middle, open it up, and pour the condensed milk on top.

Notes

Platano Macho al Horno
fried plantains
Print Recipe
5 from 1 vote

Grilled Plantains

Plantains, called macho bananas, plátano macho, in many areas of Mexico, can just change gears and move from one course to another. Covered in foil and thrown on the grill, and along some grilled meat or chicken with a spicy kick, they make an incredible side. All you need is a simple salad and you have a wholesome tasty meal.
Prep Time0 minutes
Cook Time20 minutes
Total Time20 minutes
Course: Side Dish
Cuisine: Mexican
Keyword: Plantains, Platanos
Servings: 2 servings
Author: Pati Jinich

Ingredients

  • 2 ripe plantains

Instructions

  • Preheat grill to medium heat. Individually wrap the unpeeled plantains in aluminum foil and place on the grill.
  • Let them cook for about 20 to 25 minutes, until they are soft and cooked through. You may also cook them on the upper rack of the grill at a different temperature, but it may take more or less time.
  • You know they are ready when they feel extremely soft to the touch and the sugar has begin to caramelize.

Notes

Platanitos Fritos
Print Recipe
5 from 4 votes

White Rice and Fried Plantains

White Rice and Fried Plantains recipe from Pati's Mexican Table Season 2, Episode 6 “Fonda Favorites”
Prep Time15 minutes
Cook Time30 minutes
Total Time45 minutes
Course: Side Dish
Cuisine: Mexican
Keyword: celery, chicken broth, onion, pati’s mexican table, Plantains, rice, serrano chiles, sour cream
Author: Pati Jinich

Ingredients

  • 2 cups white rice
  • 3 tablespoons vegetable oil plus more for frying plantains
  • 1/2 cup white onion finely chopped
  • 4 cups chicken stock prepared or homemade
  • 1 celery stalk cut in half
  • 1 fresh parsley sprig
  • 1 tablespoon lime juice or to taste
  • 1 1/2 teaspoons kosher salt or to taste
  • 2 ripe plantains peeled and sliced
  • 1 serrano chile
  • sour cream to garnish, optional

Instructions

To prepare the rice:

  • Place the rice in a large bowl and cover with very hot water; let it soak anywhere from 5 to 10 minutes. Drain, rinse with cold water and drain again.
  • Heat the oil in a saucepan over medium-high heat. Add the rice and cook, stirring softly for 2 to 3 minutes. Incorporate the onion and stir, from time to time, until the rice begins to change to a milky-white color and feels and sounds heavier, as if it were grains of sand; about 3 to 4 more minutes.Pour in the chicken stock, along with the celery, parsley, lime juice, salt and whole chile.
  • When it comes to a rolling boil, cover the pot, reduce the heat to the lowest setting and cook until the rice is cooked through and the liquid has been absorbed, about 15 to 20 minutes. If the rice grains don’t seem soft and cooked through, add a bit more chicken broth or water and let it cook for another 5 more minutes or so.
  • Remove the pan from the heat and let it sit, covered, for 5 to 10 minutes. Fluff with a fork when ready to serve. Place the cooked plantains (below) on top. Place sour cream on the side for people to add to their rice and plantains if they like.

To prepare the plantains:

  • Note: The skin of the plantain should be almost entirely black when it is mature and ready to use in this recipe.
  • Peel the plantains and slice them diagonally into 1/4-inch thick slices.
  • In a sauté pan, over medium heat, add about 1/4-inch of oil. Heat the oil until hot but not smoking. Add the plantain slices and fry until browned but not blackened, about 2 minutes per side, the oil should be bubbling around their edges of the plantain slices as they cook.
  • Remove the plantains from the oil and drain them on a plate covered with paper towels.

Notes

Arroz Blanco con Plátanos Fritos