Under 15 Min

Sandwich Rollups

sandwich rollups pati jinich
Print Recipe
4 from 6 votes

Sandwich Rollups

Sandwich Rollups recipe from Pati's Mexican Table Season 4, Episode 13 “Backyard Picnic”
Prep Time10 minutes
Cook Time3 minutes
Total Time13 minutes
Course: Antojos, Main Course
Cuisine: Mexican
Keyword: Avocado, bread, chipotles in adobo, ham, Monterrey Jack cheese, Muenster cheese, pati's mexican table, Sandwich, turkey
Servings: 4 whole rollups, 8 halves
Author: Pati Jinich

Ingredients

  • 1 ripe Mexican avocado halved, pitted, meat scooped out, diced and mashed in a bowl
  • 1 teaspoon mayonnaise
  • 2 teaspoons yellow mustard
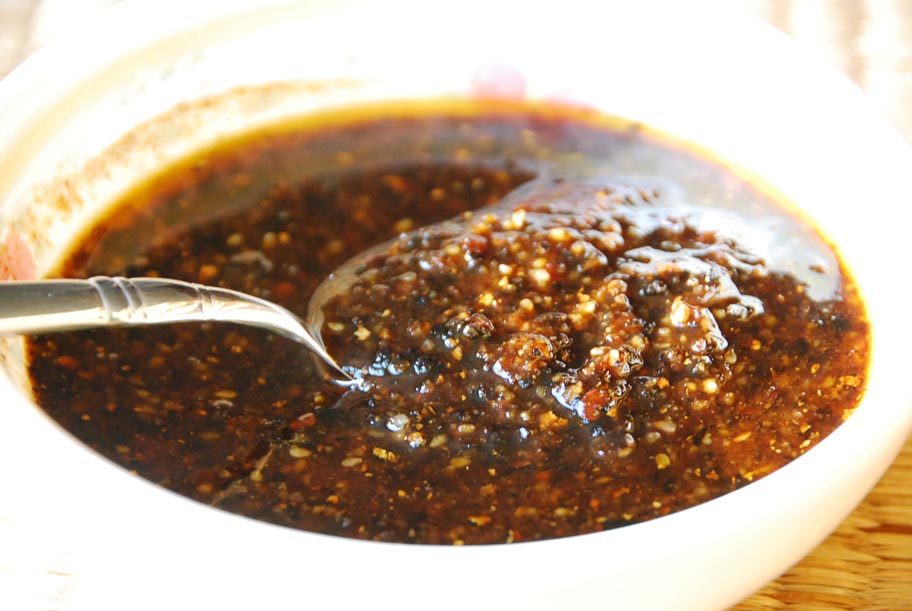
  • 1 teaspoon adobo sauce from chipotles in adobo sauce optional, or more to taste
  • 4 sandwich bread slices whole wheat or white
  • 4 thin slices ham or turkey
  • 4 slices Muenster or Monterey Jack cheese

Instructions

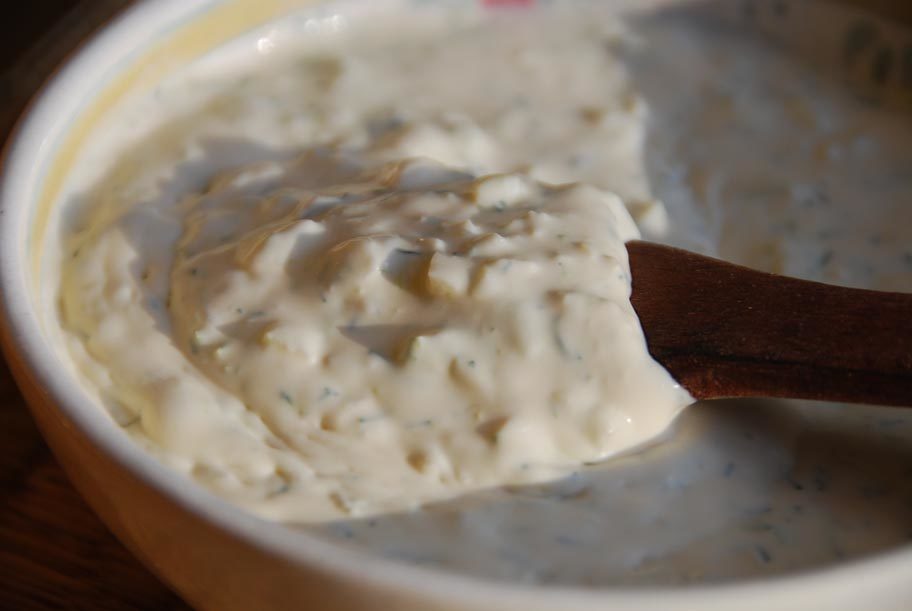
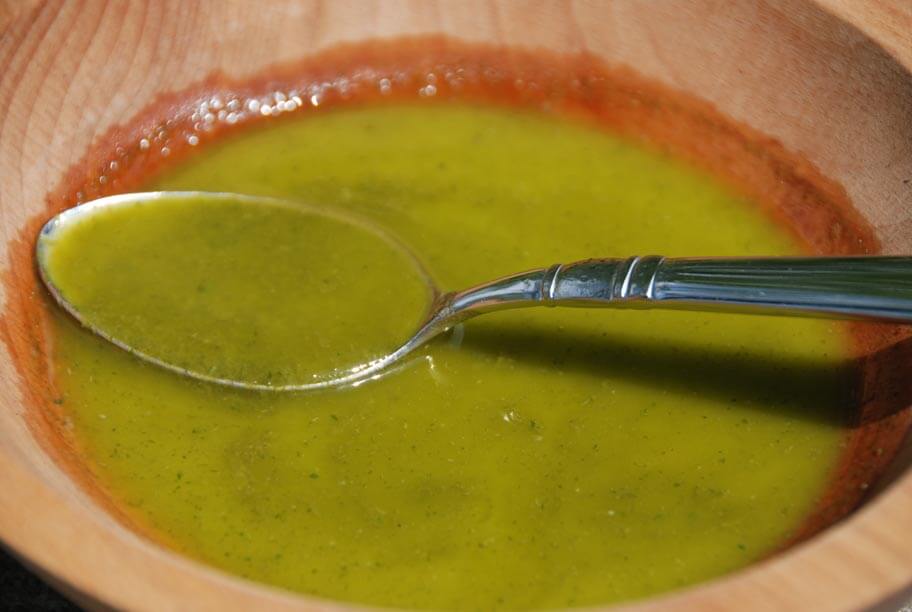
  • In a bowl, mash the avocado and mix with the mayonnaise, mustard and adobo sauce until completely smooth and combined.
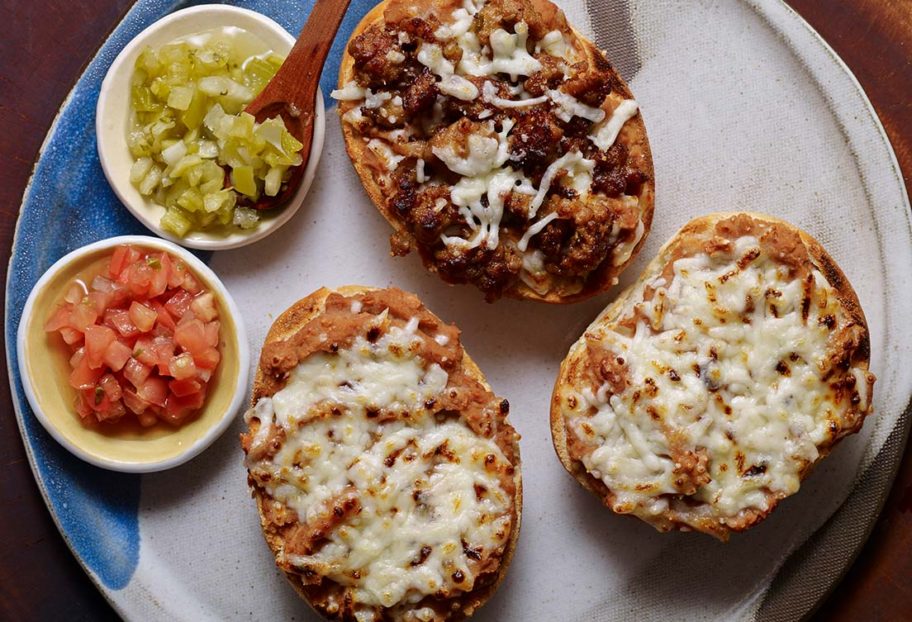
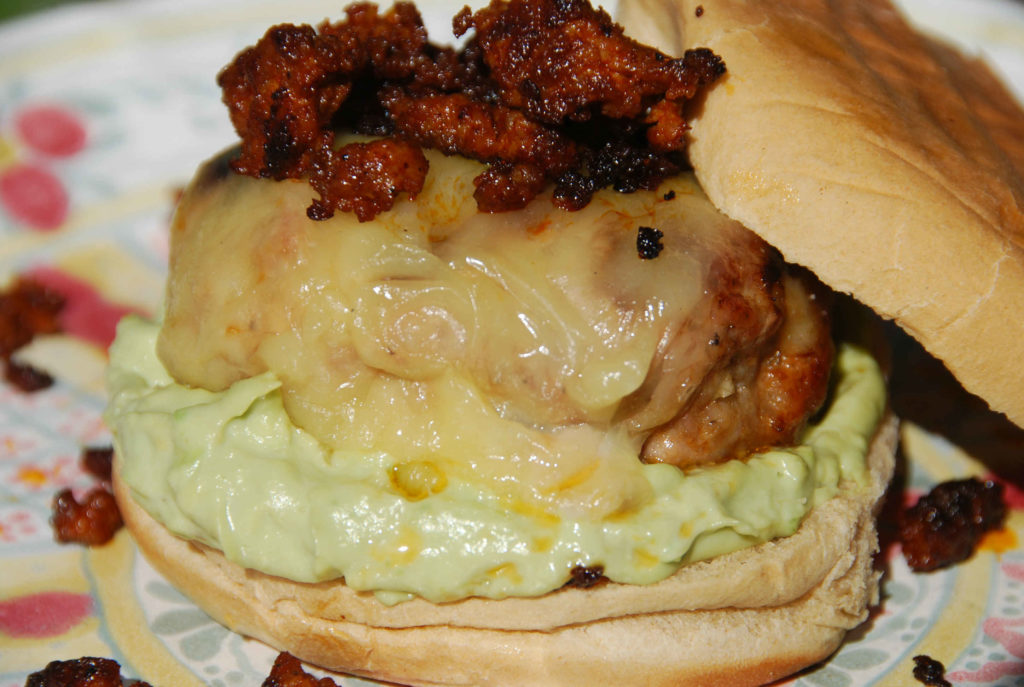
  • To assemble the sandwich rolls: With a rolling pin, roll out each sandwich bread slice until completely flattened. Leaving at least 1 inch around the edges of the bread, spread on a generous tablespoon of the avocado mixture and top with a slice of ham and cheese. Roll up the sandwich and pat to flatten a bit with your hand once you are done. With a sharp knife, cut off the ends of the sandwich roll (less than 1/4-inch) and cut the sandwich roll in half, diagonally.
  • If sending them to school, pack as is and lay flat on their side.
  • If you are eating them at home, you can place them in the toaster oven for 2 to 3 minutes and stand them up on the cut flat side.

Notes

Rollitos de Sandwich

Guava Spritzer

guava spritzer pati jinich
Print Recipe
4.20 from 5 votes

Guava Spritzer

Guava Spritzer recipe from Pati's Mexican Table Season 4, Episode 13 “Backyard Picnic”
Cook Time5 minutes
Total Time5 minutes
Course: Drinks
Cuisine: Mexican
Keyword: agave syrup, cocktail, grapefruit, guava, jalapeno, lime, pati's mexican table, tequila
Servings: 8 servings
Author: Pati Jinich

Ingredients

  • 2 cups freshly squeezed grapefruit juice chilled
  • 4 cups guava nectar chilled
  • 1/4 cup light agave syrup or to taste
  • 1 liter citrus sparkling mineral water chilled
  • 16 ounces tequila blanco optional for grown ups, 2 ounces per drink
  • Ice cubes for serving
  • Grapefruit supremes or slices for serving
  • Lime wedges for serving
  • Fresh jalapeño slices (optional for garnish)

Instructions

  • In a large pitcher, combine the grapefruit juice, guava nectar and agave syrup. Stir well to combine. Taste for sweetness and add more agave as necessary. Pour the juice mixture over ice into glasses for serving, top with a splash of mineral water and serve with a grapefruit supreme and lime wedge.
  • For the adults, pour the juice into an ice filled glass, add 2 ounces of tequila and a splash of mineral water. Garnish with a grapefruit or lime wedge and a fresh jalapeño slice and serve.

Notes

Bebida de Guayaba

Chocolate Cookies with Hibiscus Flowers

Print Recipe
4.72 from 7 votes

Chocolate Cookies with Hibiscus Flowers

Prep Time40 minutes
Cook Time12 minutes
Course: Dessert
Cuisine: Mexican
Keyword: Chocolate, cookies, flowers, hibiscus, jamaica, mexican vanilla, pati’s mexican table
Servings: 18 to 20 cookies
Author: Pati Jinich

Ingredients

  • 1/2 cup all-purpose flour
  • 1/2 teaspoon baking powder
  • 1/4 teaspoon baking soda
  • 1 tablespoon cocoa powder
  • 1/2 teaspoon kosher or course sea salt
  • 12 ounces roughly chopped semi-sweet chocolate or chocolate chips
  • 4 tablespoons unsalted butter
  • 3 large eggs
  • 1 large egg white
  • 1 1/4 cup granulated sugar
  • 2 teaspoons Mexican vanilla extract
  • 2 ounces rehydrated hibiscus flowers from Hibicus Flower Concentrate finely chopped

Instructions

  • Make the Hibiscus Flower Concentrate (recipe linked in ingredients list).
  • Preheat oven to 350℉ and place racks in the top and bottom third of the oven. Line 2 baking sheets with parchment paper and set aside.
  • In a medium bowl, combine the flour, baking powder, baking soda, cocoa powder and salt. Set aside.
  • In a bain marie, or in a heat-proof bowl set on a pot with simmering water over medium-low heat, melt the chocolate along with the butter, until completely melted and smooth. Stir with a spatula a few times as it melts. Make sure not to overheat it, and stop once it is all melted. Set aside.
  • In the bowl of a standing mixer, using the whisk attachment, whisk the whole eggs and egg white along with the sugar on medium high speed until frothy, about 2 to 3 minutes. Incorporate the melted chocolate and butter mixture as well as the vanilla extract and whisk until completely combined.
  • Remove the bowl from the stand and add the flour mixture. Use a rubber spatula to stir and fold until completely combined. Fold in the chopped rehydrated hibiscus flowers. Cover the bowl with plastic wrap and chill the batter in the refrigerator for 20 to 30 minutes.
  • Using a tablespoon or 2-inch scoop, place the batter in heaping tablespoons onto prepared baking sheets, about 2 inches apart. Bake for 12 to 14 minutes, cool on sheet pans for about 5 minutes and then transfer to cooling racks.

Notes

Galletas de Chocolate con Flores de Jamaica

Boston Lettuce Salad with Avocado Dressing

Print Recipe
4.34 from 6 votes

Boston Lettuce Salad with Avocado Dressing

Boston Lettuce Salad with Avocado Dressing recipe from Pati's Mexican Table Season 4, Episode 10 “Modern Mexico"
Prep Time10 minutes
Cook Time5 minutes
Total Time15 minutes
Course: Salad
Cuisine: Mexican
Keyword: Avocado, boston lettuce, garlic, lime, mexican crema, pati’s mexican table, pineapple, pumpkin seeds
Servings: 6 servings
Author: Pati Jinich

Ingredients

  • 2 ripe Mexican avocados halved, pitted and meat scooped out
  • 1/2 cup milk
  • 1/2 cup Mexican crema Latin-style cream, crème fraîche, or sour cream
  • 1 garlic clove
  • 3 tablespoons freshly squeezed lime juice
  • 1/2 teaspoon kosher or coarse sea salt or more to taste
  • 2 heads boston lettuce leaves separated, washed, dried, and torn into pieces
  • 1/2 cup chopped candied pineapple or other candied fruits like papaya or mango
  • 1/2 cup spicy pumpkin seeds

Instructions

  • Combine the avocado, milk, cream, garlic, lime juice and salt in a blender or food processor and puree until smooth.
  • Place the lettuce in a generous-sized serving bowl, and toss with the dressing until the leaves are lightly coated. Sprinkle with the pineapple and pumpkin seeds and serve.

Notes

Ensalada con Aderezo de Aguacate

Homemade Cookies

Print Recipe
4.63 from 8 votes

Homemade Cookies

Homemade Cookies recipe from Pati's Mexican Table Season 4, Episode 9 “Sami’s Big Day”
Prep Time15 minutes
Cook Time10 minutes
Total Time25 minutes
Course: Dessert
Cuisine: Mexican
Keyword: Cajeta, Chocolate, cookies, Dulce de Leche, pati's mexican table, peanut butter, pretzels, Sweetened Condensed Milk
Servings: 34 cookies
Author: Pati Jinich

Ingredients

  • 2 3/4 cups all-purpose flour
  • 1 teaspoon baking powder
  • 1 teaspoon baking soda
  • 1/2 teaspoon kosher or coarse sea salt
  • 1 3/4 cups (3 1/2 sticks) butter at room temperature, cut into pieces
  • 1 14-ounce can sweetened condensed milk
  • 1 cup dark chocolate chips
  • 1/2 cup peanut butter chips
  • 1 cup pretzels broken into about 1/2-inch pieces
  • Cajeta or dulce de leche to drizzle on top optional

Instructions

  • Preheat oven to 350 degrees.
  • Whisk together the flour, baking powder, baking soda, and salt in a medium bowl. Set aside.
  • In a stand mixer fitted with the paddle attachment, beat the butter over medium speed. Add sweetened condensed milk and beat until fully combined and fluffy. Reduce mixer speed to low and slowly add the flour mixture, 1/2 cup at a time, stopping to scrape down the sides of the bowl if need be. Continue to mix until it is all incorporated and the dough is smooth, about 1 minute. Fold in the chocolate chips, peanut butter chips, and pretzel pieces by hand with a rubber spatula.
  • Line a baking sheet with parchment paper. Form 1-inch balls and place them at least 1-inch apart on the baking sheet. Bake for 10 to 12 minutes until the bottoms of the cookies are lightly browned. Remove from the oven and let cool.
  • For an extra treat, you may drizzle cajeta or dulce de leche on top.

Notes

Galletas Caseras

Pico de Guac

pico de guacamole pati jinich
Print Recipe
4.25 from 8 votes

Pico de Guac

Pico de Guac recipe from Pati's Mexican Table Season 4, Episode 7 “Cooking with the Fans”
Prep Time10 minutes
Cook Time5 minutes
Total Time15 minutes
Course: Sauce, Side Dish
Cuisine: Mexican
Keyword: Avocado, celery, cilantro, cucumber, green apple, guacamole, jalapeno, lime, onion, Pico de Gallo, serrano chiles, tomatillos
Servings: 6 to 8 servings
Author: Pati Jinich

Ingredients

  • 1 cucumber peeled, seeded and diced (about 1 pound)
  • 4 tomatillos husked, thoroughly rinsed, diced (about 1/2 pound)
  • 1 tart green apple, such as Granny Smith rinsed, diced (about 1/2 pound)
  • 2 celery sticks thoroughly rinsed, cleaned off strings, thinly sliced
  • 1/2 cup diced red onion
  • 1 to 2 jalapeño or serrano chiles or to taste, seeding optional, minced
  • 1/2 cup chopped cilantro leaves and upper part of stems
  • 1/2 cup freshly squeezed lime juice
  • 3 tablespoons olive oil
  • 2 teaspoons kosher or coarse sea salt or to taste
  • 3 ripe Mexican avocados halved, pitted, meat scooped out and diced

Instructions

  • In a large mixing bowl, combine all ingredients except the avocados and mix well. When it is all thoroughly combined, incorporate the avocados and gently mix. Serve immediately or you may cover and chill until ready to serve.

Notes

Pico de Guacamole

Chocolate Atole

Print Recipe
4.72 from 7 votes

Chocolate Atole

Chocolate Atole recipe from Pati's Mexican Table Season 4, Episode 5 “Tamaliza!”
Prep Time5 minutes
Cook Time10 minutes
Total Time15 minutes
Course: Drinks
Cuisine: Mexican
Keyword: atole, Chocolate, cinnamon, masa, mexican chocolate, pati's mexican table, piloncillo
Servings: 8 servings
Author: Pati Jinich

Ingredients

  • 1 cup corn masa flour
  • 4 cups warm water
  • 4 cups milk
  • 8 ounces Mexican chocolate for drinking such as Abuelita, grated or cut into chunks (about 1 cup)
  • 2 ounces grated piloncillo or brown sugar (about 1/4 cup)
  • 1 cinnamon stick about 3-inches long

Instructions

  • Stir the corn masa flour into the warm water. Let it sit for a couple minutes and strain it onto a saucepan set over medium heat. Incorporate the milk and let it simmer for 3 to 4 minutes, so it will begin to thicken. Incorporate the piloncillo or brown sugar, the chocolate and the cinnamon stick. Simmer for about 5 minutes, stirring here and there, until the chocolate and the piloncillo dissolve. Serve hot.

Notes

Champurrado

Chef Rod’s Chorizo Burger

Print Recipe
5 from 5 votes

Chef Rod’s Chorizo Burger

Chef Rod’s Chorizo Burger recipe from Pati's Mexican Table Season 4, Episode 6 “Mexamericana”
Prep Time10 minutes
Cook Time10 minutes
Total Time20 minutes
Course: Main Course
Cuisine: American, Mexican
Keyword: bacon, beef, burger, chipotle mayo, Chorizo, ground beef, pati's mexican table, pepper jack cheese
Servings: 5 burgers
Author: Pati Jinich

Ingredients

For the burger:

  • 1 1/4 pounds ground beef
  • 3/4 pounds Mexican chorizo
  • 1/2 onion chopped
  • 1/4 tablespoon black pepper
  • 1/4 tablespoon kosher salt
  • 1/4 teaspoon cumin
  • 2 cloves of garlic whole and peeled
  • 1/4 cup water

To Serve:

  • 5 slices bacon cooked
  • 5 slices pepper jack cheese
  • Tomato slices to garnish
  • Red onion slices to garnish
  • Green leaf lettuce to garnish
  • Hamburger buns

For the Chipotle Mayo:

  • 1 chipotle pepper from chipotle chiles in adobo sauce
  • 1 cup of heavy mayonnaise

Instructions

To make the burger:

  • Pre-heat the oven to 350 degrees Fahrenheit.
  • In a large mixing bowl, combine the ground beef and the chorizo.
  • In a blender, add the onions, black pepper, salt, cumin, and garlic and mix at medium speed adding water. Pour the blender mixture into the beef mixture, mix well, and form into burger patties by hand.
  • Cook burger on a skillet, grill pan, or grill to desired temperature. Butter the buns and heat in the oven for 5 minutes.

To make the chipotle mayo:

  • Using a blender, mix the mayonnaise and chipotle pepper on low speed.
  • Spread chipotle mayo on both halves of the buns.

To assemble burger:

  • To assemble burger, start with the base of the bun and layer on the lettuce, a slice of tomato, sliced onions, the cooked burger patty, pepper jack cheese, cooked bacon, and the top of half of the bun.

Notes

Hamburguesa de Chorizo del Chef Rod, recipe courtesy of Chef Rodrigo Albarrán-Torres, Mission Restaurant

Bell Peppers, Cucumber and Chickpea Salad

Print Recipe
4.84 from 6 votes

Bell Peppers, Cucumber and Chickpea Salad

Bell Peppers, Cucumber and Chickpea Salad recipe from Pati's Mexican Table Season 4, Episode 4 “Summer Evening Party”
Prep Time15 minutes
Cook Time10 minutes
Total Time25 minutes
Course: Salad, Side Dish
Cuisine: Mexican
Keyword: bell peppers, chickpeas, cucumber, garbanzo beans, jalapeno, mint, peppers, red onion, red wine vinegar, vinaigrette
Servings: 6 to 8 servings
Author: Pati Jinich

Ingredients

  • 1/4 cup fresh squeezed lime juice
  • 1 tablespoon red wine vinegar
  • 1/4 cup olive oil
  • 1/4 cup vegetable oil
  • 2 tablespoons chopped fresh oregano
  • 2 tablespoons chopped fresh mint
  • 2 tablespoons chopped red onion
  • 1 jalapeno chile stemmed, seeded and finely chopped, or to taste
  • 1 teaspoon kosher or coarse sea salt or to taste
  • freshly ground black pepper to taste
  • 1 15.5-ounce can chickpeas rinsed and drained (or about 2 cups home-cooked chickpeas)
  • 1 red bell pepper stemmed, seeded, cut into “matchstick” slices (2-inches by 1/4 to 1/2-inch)
  • 1 yellow bell pepper stemmed, seeded, cut into “matchstick” slices (2-inches by 1/4 to 1/2-inch)
  • 1 orange bell pepper stemmed, seeded, cut into “matchstick” slices (2-inches by 1/4 to 1/2-inch)
  • 1 green bell pepper stemmed, seeded, cut into “matchstick” slices (2-inches by 1/4 to 1/2-inch)
  • 1 cucumber peeled, seeded, halved and sliced into 1/4- to 1/2-inch pieces

Instructions

  • In a large bowl, beat the lime juice, red wine vinegar and oils with a fork or whisk until emulsified. Toss in the oregano, mint, red onion, jalapeño, and salt and pepper and whisk again until fully incorporated. Add the chickpeas, and let it all marinate while you prepare the rest of the vegetables. You can also cover and refrigerate the marinating chickpeas for up to one day.
  • When ready to serve, add the bell peppers and cucumbers, mix well, and set on the table.

Notes

Ensalada de Pepino, Pimiento y Garbanzo

Corn Tortillas

homemade corn tortillas
Print Recipe
4.78 from 9 votes

Corn Tortillas

Corn Tortillas recipe from Pati's Mexican Table Season 4, Episode 3 “Taco Night”
Prep Time15 minutes
Cook Time10 minutes
Total Time25 minutes
Course: Antojos, Main Course, Side Dish
Cuisine: Mexican
Keyword: corn tortillas, masa, pati's mexican table
Servings: 12 tortillas
Author: Pati Jinich

Ingredients

  • 2 cups corn tortilla flour
  • Pinch kosher or coarse sea salt
  • 1 3/4 cups water or enough for a Play Doh consistency may vary with climate

Instructions

  • Set a comal, griddle or ungreased dry skillet over medium heat for at least 8 to 10 minutes, until very hot.
  • Meanwhile, cut 2 circles about the size of the tortilla press plates out of thin plastic bags, such as produce bags from the grocery store.
  • In a large mixing bowl, mix together the corn tortilla flour, salt and the water and knead in a circular motion. It should feel smooth and without lumps, like Play Doh. Though, it shouldn’t be too wet or sticky. If it doesn’t feel smooth and feels coarse when you attempt to make the masa balls, add a bit more water. Masa dries out fast, so if you leave it unattended, cover it with a clean moist kitchen towel or cloth.
  • To make the tortillas, one by one, make dough balls of about 1 1/2-inch in diameter. Place one plastic circle on the bottom of the tortilla press and place the masa ball on top. Place the other plastic circle on top of the ball and clamp down the press to make a flat disk. As you clamp down the press, jiggle it a little as you are getting to the bottom, this makes for a rounder tortilla. It should be about 5-inches in diameter and about 1/8-inch in height.
  • If the edges of the tortilla seem cracked and jagged, the dough needs a bit more water. Once you have a tortilla with smoother edges, you are set. (Alternatively, you can place a ball of dough between two plastic pieces and roll the tortillas out with a rolling pin).
  • Open the press, take the top plastic off, lift the bottom plastic with the tortilla in one hand and peel the tortilla from the plastic with the other hand. I peel it with my right hand, as I am right handed. Lay it on the griddle, skillet or comal softly, but swiftly.
  • Once the tortilla is on the hot surface, don’t touch it for the next 30 seconds! Even if it didn’t lay completely straight, resist the temptation to fiddle with it. Let it cook until it can be flipped without sticking to the comal, just like pancakes, or until a spatula can easily lift it. Another sign that it is ready to be flipped, is it becomes opaque on the side that it was cooking on.
  • Turn over, and cook for a minute, until opaque and starting to get brown freckles on the side that is now on the hot surface. If it is opaque but it has white-ish areas, you need to leave it a bit longer until it becomes freckled with brown spots.
  • Turn over once more, and now after 10 to 15 seconds, the tortilla should puff up like pita bread, if not all over tortilla, at least in an area of it. If it is not puffing, gently tease it by poking with your finger softly in an area of the tortilla around the center. Once it puffs, let the tortilla cook for another 15 to 20 seconds, so that it cooks internally in the puffed up area. That is the difference between ok tortillas, and to die for, malleable, fully cooked, soft tortillas.
  • Transfer each cooked tortilla to a clean kitchen towel or a cloth-lined tortillero.
  • If eaten that same day, tortillas may be kept wrapped in a clean kitchen towel or cloth. If not, wrap in a kitchen towel, place inside a closed plastic bag, and store in the refrigerator. They will keep for up to 3 days, afterwards they will turn too hard. Reheat on hot comal for 30 seconds or so on each side before eating. They can also be frozen and kept for months.

Notes

Tortillas de Maiz

Juju’s Mango Smoothie

Print Recipe
4.84 from 6 votes

Juju’s Mango Smoothie

Juju’s Mango Smoothie recipe from Pati's Mexican Table Season 4, Episode 1 "Good Morning, Mexico!"
Prep Time5 minutes
Cook Time3 minutes
Total Time8 minutes
Course: Drinks
Cuisine: Mexican
Keyword: banana, breakfast, mango, orange juice, pati's mexican table, smoothie, vanilla
Servings: 3 cups
Author: Pati Jinich

Ingredients

  • 2 cups diced fresh mango or thawed from frozen
  • 1 teaspoon Mexican vanilla extract
  • 2 cups orange juice preferably fresh squeezed
  • 1 ripe banana sliced

Instructions

  • Combine the mango, vanilla, orange juice, and banana in a blender and puree until smooth. Add a couple handfuls of ice cubes and puree until well blended.

Notes

Licuado de Mango de Juju

Warm Nopalitos with Sauteed Corn and Guajillo

Print Recipe
4.58 from 7 votes

Warm Nopalitos with Sauteed Corn and Guajillo

Warm Nopalitos with Sauteed Corn and Guajillo recipe from Pati's Mexican Table Season 4, Episode 1 "Good Morning, Mexico!"
Prep Time20 minutes
Cook Time25 minutes
Total Time45 minutes
Course: Side Dish
Cuisine: Mexican
Keyword: Aguachile, cactus, cactus paddles, Corn, grill recipes, Guajillo, Mexican, Nopalitos, noplales
Servings: 8 servings
Author: Pati Jinich

Ingredients

  • 3 tablespoons safflower or corn oil separated
  • 3 pounds fresh nopales rinsed, cleaned and diced
  • 1 teaspoon kosher or coarse sea salt or to taste
  • 2 garlic cloves peeled and finely chopped
  • 1/2 cup chopped white onion
  • 2 ounces (about 7 or 8 chiles) guajillo chiles cleaned, seeded and chopped
  • 2 cups fresh corn kernels from about 3 cobs, or thawed from frozen
  • 1 tablespoon fresh squeezed lime juice

Instructions

  • Heat two tablespoons of the oil in a large heavy skillet (that has a lid) over medium-high heat. Add the diced nopales, sprinkle the salt and stir for a minute or two. Place the lid on, reduce the heat to medium and let the nopales cook and sweat for about 20 minutes, stirring once or twice. They will have exuded a gelatinous liquid that will begin to dry out. Take off the lid, stir and make sure most of the liquid has dried up; if it hasn’t, let them cook for a couple more minutes until it does.
  • Pour in the third tablespoon of oil, mix with the nopales and incorporate the garlic, chopped onion, guajillo chiles and corn. Mix well and let it cook for about 3 to 4 minutes. Squeeze in a tablespoon of fresh lime juice, mix and place the lid back on. Let the nopales cook for another 3 to 4 minutes and turn off the heat. Taste for salt and add more if need be.
  • If you have any leftovers, they make a wonderful filling for quesadillas.

Notes

Nopales con Elote y Guajillo Salteado

Campechanas

Just four ingredients that you may already have at home make for one of the tastiest treats in the Mexican pan dulce repertoire: campechanas.

Not all panaderías in Mexico have campechanas though. And not all the panaderías that do carry them have fabulous campechanas. In fact, I have found that campechanas sold on the streets tend to be the very best ones.

Campechanas are one of the things I look for the moment I touch Valle de Bravo, a small town about a 2-hour drive from Mexico City. I grew up vacationing there with my family, and I still go as often as I can. It is a town whose campechanas are of the finest sort. Very puffy and dry with the perfectly crisp caramelized top, they are sold in thin plastic bags by the dozen in so many street corners.

It is practically impossible to keep them whole once you hold one up, or even as you try to take one out of the bag. The moment you take a bite, forget about it: it has crumbled all over the place into pieces that make for delirious bites. Once you have one, you can’t stop until there are no more.

Campechanas

When we visit Valle de Bravo, aside from eating them right there on the spot, I always bring extra back home. I place them all in a platter and start by breaking one and passing the plate around. A minute later, someone else broke the next one, and then another and another. A few minutes later, they are all gone. I laugh just remembering how we pass that plate around. My father-in-law, I think, is the one who can’t resist them the most.

Although it is called campechana, as if from the state of Campeche, as far as I have researched, that is not where its name comes from. Though pan dulce in this style can be found throughout the entire Yucatán Peninsula, which includes the state of Campeche. Ironically, they don’t seem to go by that name there.

This is how easy it is to make them: thaw puff pastry, roll it out, sprinkle it generously with sugar, and roll it again for the sugar to settle into the dough. Bake on a buttered baking sheet until they puff up and then raise the heat to caramelize the sugar. In less than 15 minutes, you are done.

My only warning is: watch out for the sugar not to burn. It’s not too much to ask with as simple a recipe as this one, no?

p.s. You can buy your frozen puff pastry in just about any super market. They are typically of phenomenal quality. If you insist on making your own puff, see how by clicking here.

campechanas
Print Recipe
4 from 4 votes

Crisp Caramelized Puff

Just four ingredients that you may already have at home make for one of the tastiest treats in the Mexican pan dulce repertoire: campechanas. Not all panaderías in Mexico have campechanas though. And not all the panaderías that do carry them have fabulous campechanas. In fact, I have found that campechanas sold on the streets tend to be the very best ones.
Cook Time11 minutes
Course: Dessert
Cuisine: Mexican
Keyword: pati's mexican table, puff pastry
Servings: 12 large campechanas
Author: Pati Jinich

Ingredients

  • 1 pound puff pastry store bought or homemade
  • 1/2 cup granulated sugar
  • Unsalted butter for greasing baking sheets
  • All-purpose flour to dust countertop and rolling pin

Instructions

  • If using frozen puff pastry, thaw for 20 to 30 minutes before rolling it out.
  • When ready to roll out, preheat oven to 400°F. Generously butter two baking sheets.
  • Flour your counter, as well as the rolling pin. Roll out both puff pastry sheets gently to about 9- or 10-inches by 11-inches. Cover them entirely with the sugar, as evenly as you can. Then, roll again with the rolling pin, with the purpose of not making the sheets larger or bigger but setting the sugar in the puff pastry.
  • Cut the sheets into rectangles of about 3- by 5-inches with a knife. You should have 12 chubby rectangles.
  • Place the campechanas on the baking sheets. Position rack in the upper third of the oven. One batch at a time, bake for 7 to 8 minutes at 400°F, then raise the oven temperature to 500°F and bake for an additional 4 to 5 minutes. Just until all sugar has melted and caramelized. Don’t let any extra minutes go by, or the caramel will burn and turn bitter.
  • Repeat with the other batch. Once cooled completely, cover so they will stay crisp.

Notes

Campechanas 

Yucatán Style French Toast: Ultra Decadent

It’s ironic. The farthest away from Mexico I’ve been, the closest I’ve felt to my home country and the more I’ve gotten to know it.

Namely, there are 2,419 miles between my home in the DC area and the home I was born and raised in, in Mexico City (I’ve seen it in Google maps a thousand times with my boys), it’s a 44-hour drive if you go non-stop and a 5-hour flight with no connections.

Distance matters. It weighs, in tons of pounds of nostalgia that can be soothed in the kitchen. Distance has made my time in Mexico intense and adventurous, and the foods I am able to replicate in my American kitchen that much more precious.

It has been 15 years since we packed our bags to move from Mexico City to Texas. Since then, I’ve taken every opportunity to go back to visit. There is always something new to learn and something to rediscover. And there is always a dish that sticks with me in such a way that it has me running back home to make it for my boys. If they request it, time and again, it becomes a home staple that I hope to pass on.

That’s the case with the ultra decadent Yucatán style French toast, also known as caballeros pobres. I even included it on an episode called Brunch at the Jinich Home, from Season 3 of my TV series. It is very similar to a dish called Capirotada, in fact, some consider it Yucatan’s version of it.

Pati's Mexican Table shoot
Here’s Dan, our amazing director, showing me how the food looked on camera on the set at home.

We love eating it on Sundays for a late and lazy brunch.  It marks the weekend for us, when we can linger at the table. When I don’t mind making things that may have a few more steps, or may be messier to prepare, all of which the boys love to take on.

Dany and I tasted it for the first time in Yucatán 5 years ago. As we sat down at Los Almendros, a classic restaurant in Mérida, I did what I always do – which drives Dany crazy – and asked the waiter 3 questions:

1. What’s your favorite thing to eat from the menu? I can hear Dany saying “what do you care what he likes to eat Pati, what if he has a completely different taste preference than you, or what if he is pushing things out of the kitchen that aren’t selling?”

2. What is the most traditional food on the menu? I can hear Dany saying “some dishes may be included to show the restaurant’s authenticity regardless of how good they may be…”

3. What is, by far, the best seller here? I can practically see Dany rolling his eyes…

For #1, waiter said “caballeros pobres!” The poetic and contrasting name of the dish hooked me: translates to “poor gentlemen”. For #2, he said “caballeros pobres, it has been on the menu since the restaurant opened in 1962, it’s a dessert that’s existed since anyone in Merida can remember.” By that point I was ready to run to the kitchen to get one. For #3, he said “everybody orders caballeros pobres.” Ok. Done deal.

I am a fan of the French toast food category. The Yucatán style, however, is in a  league of it’s own.

french bread slices

It uses what is known in Mexico as pan francés or French bread, which is like a baguette but a bit thicker. Some versions use bolillos or teleras (just smaller in size). You are safe to use any crusty bread of your choice.

Then the thick slices are entirely soaked, drenched, in a mix of milk, vanilla and sweetened condensed milk. You heard that right: sweetened condensed milk.

pouring sweetened condensed milk

You know you want it.

I made it for a class on Yucatecan food at the Mexican Cultural Institute.  The 120 attendees were all oohs and ahs when I demoed the dipping of the bread in the sweetened condensed milk mix. Practically every one, wanted seconds, which I didn’t plan for.

coating bread slices

There’s more. Instead of dunking the bread in beaten whole eggs, the eggs are separated. The egg whites are beaten until stiff peaks are formed, as in a meringue, then the yolks are gently added to form a thick coating: a capeado.

dipping bread into egg mix

Hence, there may lay the gentlemen status of an everyday bread that is first soaked in a sweetened condensed milk bath, to be then fully dressed in a fluffy cape.

coating bread in egg mixture

Once luxuriously dressed, it is crisped and browned to golden status.

frying the french toast

That is not all: though at home we can happily eat it like that with a bit of honey, maple syrup or confectioner’s sugar.

fried french toast without syrup

The caballeros pobres are then sauced with a simple syrup flavored with true cinnamon, a few whole cloves and raisins.

syrup

You can make the syrup ahead of time and reheat it. You can also make it while you are dressing and browning the bread.

Wait: I am still missing the last garnish: chopped, crunchy, nutty almonds.

finished french toast with syrup and garnishes

Ok, wait, again: Some people add sherry to the syrup. That takes it to adult territory, which would pair well for a grown up brunch.

Of all the versions of Yucatán style french toast this recipe below is my favorite. Crispy, chewy, moist. I prefer to eat it hot and with the warm syrup on top as a main dish for a weekend breakfast or brunch. However, in Yucatán it is traditionally served very cold and for dessert. Then again, I have to admit that I always make extra to have leftovers in the refrigerator, so I can sneak into the kitchen at just about anytime, to eat them cold.

yucatan style french toast
Print Recipe
5 from 2 votes

Yucatán-Style French Toast

Of all the versions of Yucatán style french toast this recipe below is my favorite. Crispy, chewy, moist. I prefer to eat it hot and with the warm syrup on top as a main dish for a weekend breakfast or brunch. However, in Yucatán it is traditionally served very cold and for dessert. Then again, I have to admit that I always make extra to have leftovers in the refrigerator, so I can sneak into the kitchen at just about anytime, to eat them cold.
Prep Time35 minutes
Cook Time10 minutes
Course: Breakfast
Cuisine: Mexican
Keyword: almonds, bread, ceylon, cinnamon, raisins, Sherry, Sweetened Condensed Milk, vanilla
Servings: 6 to 8 servings
Author: Pati Jinich

Ingredients

For the syrup:

  • 4 cups water
  • 1 1/2 cups granulated sugar
  • 1/4 cup raisins or to taste
  • 1 ceylon or true cinnamon stick
  • 3 whole cloves
  • 2 tablespoons Dry Sherry optional

For the toast:

  • 6 eggs separated
  • 1 cup milk
  • 1 14-ounce can sweetened condensed milk
  • 1 tablespoon vanilla extract
  • Vegetable oil for frying
  • 1 large French baguette or thick baguette of your choice cut into 3/4-inch slices
  • 1/2 cup chopped almonds

Instructions

  • Place a medium saucepan with the water, sugar, raisins, cinnamon and cloves over medium heat. Bring to a simmer and let it cook until it achieves the consistency of a light syrup and the flavors from the spices have infused the liquid, about 35 minutes. Turn off the heat. If you like a hint of alcohol in your dessert, add the sherry. Remove the cinnamon stick and cloves. Cover to keep warm.
  • Meanwhile, beat the egg whites in the bowl of an electric mixer or with a hand mixer over medium-high speed until they hold stiff peaks. Reduce the speed to low, add the yolks one by one and continue beating just until incorporated, so the volume will not decrease much.
  • In a large bowl, combine the milk, sweetened condensed milk and vanilla, stir until incorporated.
  • Set the bowl with the milk mixture beside the bowl with the beaten egg whites and yolks.
  • Fill a large sauté pan with about 1/4-inch of oil and heat over medium heat until hot, but not smoking, and you see ripples in the oil when you tilt the pan.
  • One at a time, dunk each piece of bread in the milk mixture until soaked, immediately dip into the egg mixture to completely cover, and place the coated slice in the hot oil. Fry for about a minute on one side, until golden brown, flip to the other side and do the same. Add as many bread pieces as will fit into the pan without over-crowding. When finished frying, place the bread pieces on a baking dish covered with paper towels to drain.
  • Traditionally, the “poor gentleman” pieces are placed on a platter, covered with the syrup and refrigerated. But I think they are a thousand times tastier served hot! Cover the pieces with warm syrup, sprinkle chopped almonds on top and serve.
  • If you have leftovers, cover the battered and fried bread pieces with the remaining syrup and almonds, and store covered in the refrigerator. I admit they are also fabulous cold.

Notes

Caballeros Pobres

Watermelon, Tomatillo and Mozzarella Skewers with Lime-Honey Vinaigrette

watermelon tomatillo mozzarella skewers
Print Recipe
4.75 from 4 votes

Watermelon, Tomatillo and Mozzarella Skewers with Lime-Honey Vinaigrette

Watermelon, Tomatillo and Mozzarella Skewers with Lime-Honey Vinaigrette recipe from Pati's Mexican Table Season 3, Episode 13 “My Piñata Party”
Prep Time15 minutes
Cook Time5 minutes
Total Time20 minutes
Course: Antojos, Side Dish
Cuisine: Mexican
Keyword: ginger, honey, lime, Maggi sauce, mozzarella, pati's mexican table, tomatillos, vinaigrette, watermelon
Servings: 6 servings
Author: Pati Jinich

Ingredients

For the vinaigrette:

  • 2 tablespoons chopped cilantro
  • 1 teaspoon grated ginger
  • 1/2 cup honey
  • Zest of 2 limes
  • 5 tablespoons freshly squeezed lime juice
  • 1 tablespoon Maggi sauce

For the skewers:

  • 6 cups seeded and cubed ripe watermelon
  • About 12 ounces tomatillos husks removed, rinsed, and thinly sliced (about 3 cups)
  • 1 large package of small fresh mozzarella balls (about 8 ounces)

Instructions

To make the vinaigrette:

  • Place the cilantro, ginger, honey, lime zest and juice, and Maggi sauce into a large mason jar and shake vigorously to emulsify. Alternatively, place all of the ingredients in a bowl and whisk to emulsify.

To make the skewers:

  • Slide the watermelon cubes, tomatillo slices and mozzarella balls onto wooden toothpicks or small plastic skewers, alternating between each ingredient. Serve with the lime-honey vinaigrette as a dipping sauce.

Notes

Brochetas de Sandía, Tomate Verde y Mozzarella con Vinagreta de Miel y Limón

Spinning Top Cocktail

SPINNING TOP COCKTAIL
Trompo Zacatecano

Serves: 1

INGREDIENTS
For rimming the glass:
1 lime wedge (about 1/4 of a fresh lime)
3 tablespoons granulated sugar
2 tablespoons ground chile powder, such as chile piquín, ancho, chipotle or a Mexican mix, or to taste
2 tablespoons kosher or coarse sea salt

For the drink:
1 1/2 cups ice cubes
4 tablespoons (2 ounces) mezcal or tequila
3/4 cup grapefruit soda
1/4 cup pineapple juice
1 to 2 fresh mint leaves

TO PREPARE
Run the lime wedge around the rim of a glass. Place the sugar, chile powder and salt on a small plate and dip the rim of the glass in the salt to coat.

Add the ice cubes to the glass, then pour in the mezcal, grapefruit soda and pineapple juice, stir gently. Tear the mint leaves into several pieces and drop them into the glass, stirring gently so they release their flavor into the drink.

© 2010-2014 MEXICAN TABLE, LLC. ALL RIGHTS RESERVED

Mango Guacamole with Grilled Tortilla Wedges

mango guacamole
Print Recipe
5 from 5 votes

Mango Guacamole with Grilled Tortilla Wedges

Mango Guacamole with Grilled Tortilla Wedges recipe from Pati's Mexican Table Season 3, Episode 12 “Girls Just Wanna Have Fun”
Prep Time10 minutes
Cook Time2 minutes
Total Time12 minutes
Course: Side Dish
Cuisine: Mexican
Keyword: Avocado, cilantro, corn tortillas, flour tortillas, guacamole, jalapeno, lime, mango, onion, serrano chiles, tortilla chips
Servings: 6 servings
Author: Pati Jinich

Ingredients

  • 2 ripe Mexican avocados halved, pitted, meat scooped out and roughly mashed or diced
  • 1 cup fresh ripe mango peeled and diced
  • 3 tablespoons chopped white onion
  • 2 tablespoons coarsely chopped cilantro leaves
  • 2 tablespoons finely chopped jalapeño or serrano chile seeded optional, or to taste
  • 2 tablespoons freshly squeezed lime juice
  • 1 teaspoon kosher or coarse sea salt or to taste
  • Corn or flour tortillas cut into wedges and grilled

Instructions

  • Gently mix the avocado, mango, onion, cilantro, chile, lime juice and salt in a bowl, or mash in a molcajete. Serve with grilled tortilla wedges.

Notes

Guacamole de Mango

Cucumber Martini

cucumber martini
Print Recipe
4 from 5 votes

Cucumber Martini

Cucumber Martini recipe from Pati's Mexican Table Season 3, Episode 11 "Mex-Italian!"
Prep Time5 minutes
Cook Time1 minute
Total Time6 minutes
Course: Drinks
Cuisine: Mexican
Keyword: cocktail, cucumber, gin, lemon, Limoncello, pati's mexican table, simple syrup
Servings: 1 serving
Author: Pati Jinich

Ingredients

  • 1 1/2 ounce gin
  • 1 ounce Limoncello
  • 1 slice of lemon to macerate
  • 1 slice of cucumber to macerate
  • 1/2 ounce simple syrup
  • 1 tablespoon diced cucumber

Instructions

  • In an empty shaker or martini mixer, combine the gin, limoncello, lemon and cucumber slices, and the syrup. Mix and macerate all the ingredients for about 5 minutes. If making a large quantity, let it sit in the refrigerator in a pitcher for up to 12 hours.
  • Fill the shaker with ice and shake vigorously for 1 minute. Strain and pour the liquid into a chilled martini glass. Decorate the martini with the small pieces of cucumber and a spiral of cucumber skin.

Notes

Martini de Pepino 

Guajillo and Garlic Pasta

guajillo garlic pasta
Print Recipe
5 from 5 votes

Guajillo and Garlic Pasta

Pasta con Guajillo y Ajo recipe from Pati's Mexican Table Season 3, Episode 11 “Mex-Italian!”
Prep Time5 minutes
Cook Time10 minutes
Total Time15 minutes
Course: Main Course
Cuisine: Mexican
Keyword: cotija, garlic, guajillo chiles, pasta, pati's mexican table, rosemary, spaghetti
Servings: 6 servings
Author: Pati Jinich

Ingredients

  • 1 pound thin spaghetti or vermicelli
  • 1/2 cup olive oil
  • 5 garlic cloves finely chopped
  • 1 tablespoon finely chopped fresh rosemary or 1 teaspoon dried and crumbled
  • 1 tablespoon finely chopped fresh oregano or 1 teaspoon dried and crumbled
  • 1 1/2 teaspoons finely chopped fresh thyme or 1/2 teaspoon dried
  • 1 1/2 teaspoons finely chopped fresh marjoram or 1/2 teaspoon dried
  • 5 guajillo chiles stemmed, seeded and finely chopped
  • kosher or coarse sea salt to taste
  • freshly ground black pepper to taste
  • 1/2 cup freshly grated queso Cotija Parmigiano-Reggiano, Romano, ricotta salata, or Pecorino Romano
  • 2 tablespoons coarsely chopped fresh parsley optional for garnish

Instructions

  • Bring salted water to a rolling boil. Add the pasta and let it come to a boil again. Boil, uncovered, until pasta is al dente, about 7 to 8 minutes. Scoop out 1 cup of the pasta cooking water and set aside. Drain the pasta.
  • In a large skillet or casserole, heat the olive oil over medium heat. Once it is hot, but not smoking, add the garlic and cook just until fragrant, 20 to 30 seconds, stirring continuously. Stir in the rosemary, oregano, thyme and marjoram, and cook for 30 to 40 seconds. Add the guajillo chiles and cook, continuing to stir, for another 20 to 30 seconds. You want them to gently brown, but not burn.
  • Add the pasta to the skillet and toss well. Pour in the reserved pasta water, toss and cook for another couple minutes. Remove from the heat. Taste and season with salt and pepper as needed. Serve garnished with freshly grated cheese and chopped parsley.

Notes

Pasta con Guajillo y Ajo

Fish over Fennel Salad with Jalapeño and Olive Salsa

fish over fennel salad with olive salsa
Print Recipe
4.72 from 7 votes

Fish over Fennel Salad with Jalapeño and Olive Salsa

Fish over Fennel Salad with Jalapeño and Olive Salsa recipe from Pati's Mexican Table Season 3, Episode 11 “Mex-Italian!”
Prep Time20 minutes
Cook Time7 minutes
Total Time27 minutes
Course: Main Course
Cuisine: Mexican
Keyword: fennel, fish, grouper, olives, oranges, pati's mexican table, pepitas, pumpkin seeds, raisins, red onion, red snapper, rockfish, tequila, Tilapia
Servings: 4 servings
Author: Pati Jinich

Ingredients

For the salad:

  • 2 tablespoons pumpkin seeds
  • 1 fennel bulb thinly sliced
  • 1/4 cup thinly sliced red onion about 1/4 of a red onion
  • 2 oranges peeled and thinly sliced or cut into segments, plus juice
  • 2 tablespoons olive oil
  • 2 tablespoons balsamic vinegar
  • kosher or coarse sea salt to taste
  • freshly ground black pepper to taste

For the salsa:

  • 1/4 cup golden raisins
  • 1 tablespoon tequila
  • 1/4 cup pitted black Italian olives in brine, chopped
  • 1 jalapeno chile thinly sliced
  • 1/4 cup fresh cilantro leaves and upper stems, chopped
  • 1/4 cup fresh parsley leaves and upper stems, chopped
  • Freshly squeezed juice of 2 limes
  • 2 tablespoons olive oil
  • kosher or coarse sea salt to taste
  • freshly ground black pepper to taste

For the fish:

  • 1/2 cup all-purpose flour
  • kosher or coarse sea salt to taste
  • freshly ground black pepper to taste
  • 4 6-ounce red snapper fillets or any mild fish of your choice, such as tilapia, rockfish or grouper
  • 3 tablespoons olive oil

Instructions

To prepare the salad:

  • To toast the pumpkin seeds, place them in an already hot, small sauté pan set over low heat. Stir often, being careful that they don’t burn, until you start to hear popping sounds (similar to popcorn), and they begin to turn from green to a toasty brown, about 4 to 5 minutes. Remove from the heat and place in a bowl.
  • Combine fennel, red onion, orange segments and juice in a mixing bowl. Add the olive oil, balsamic vinegar, salt and pepper. Toss to combine. Add the toasted pumpkin seeds. Toss once more and wait to serve with the fish.

To prepare the salsa:

  • Place the golden raisins in a medium mixing bowl and pour the tequila over the raisins. Allow the raisins to plump up in the tequila for a few minutes while prepping the remaining ingredients. Then add the olives, jalapeño, cilantro, parsley, lime juice, olive oil, salt and pepper to the bowl with the raisins and tequila. Combine well and serve with the fish.

To prepare the fish:

  • Combine the flour, a pinch salt and a pinch pepper on a flat plate and spread. Using a small knife, score each fish filet, cutting 3 shallow horizontal lines into the skin of each fillet – do not cut through the fillets. Dust the fillets on each side with a thin layer of the flour mixture.
  • Heat the oil in a skillet over medium heat. When oil is hot and ready (test by dipping a piece of the fish to see if it happily bubbles), place the fillets in the pan skin-side down. Cook until the skin is crisped and lightly browned, about 3 minutes. If at any point the fish begins to curl, use a spatula to press the fish firmly down in the pan. Flip with a spatula or tongs and cook on the other side until done, about another 4 minutes. Transfer the fish to a plate covered in paper towels to drain. Serve on top of the fennel salad and with the salsa on the side.

Notes

Pescado con Ensalada de Eneldo y Salsa de Jalapeño y Aceitunas

Yucatán-Style French Toast

Yucatan style french toast
Print Recipe
4.17 from 6 votes

Yucatán-Style French Toast

Yucatán-Style French Toast recipe from Pati's Mexican Table Season 3, Episode 10 “Brunch at the Jinich House”
Prep Time35 minutes
Cook Time10 minutes
Total Time45 minutes
Course: Breakfast
Cuisine: Mexican
Keyword: almonds, bread, ceylon, cinnamon, cloves, pati's mexican table, raisins, Sherry, Sweetened Condensed Milk
Servings: 6 to 8 servings
Author: Pati Jinich

Ingredients

  • 4 cups water
  • 1 1/2 cups granulated sugar
  • 1/4 cup raisins or to taste
  • 1 ceylon or true cinnamon stick
  • 3 whole cloves
  • 2 tablespoons Dry Sherry optional
  • 6 eggs separated
  • 1 cup milk
  • 1 14-ounce can sweetened condensed milk
  • 1 tablespoon vanilla extract
  • Vegetable oil for frying
  • 1 large French baguette or thick baguette of your choice cut into 3/4-inch slices
  • 1/2 cup chopped almonds

Instructions

  • Place a medium saucepan with the water, sugar, raisins, cinnamon and cloves over medium heat. Bring to a simmer and let it cook until it achieves the consistency of a light syrup and the flavors from the spices have infused the liquid, about 35 minutes. Turn off the heat. If you like a hint of alcohol in your dessert, add the sherry. Remove the cinnamon stick and cloves. Cover to keep warm.
  • Meanwhile, beat the egg whites in the bowl of an electric mixer or with a hand mixer over medium-high speed until they hold stiff peaks. Reduce the speed to low, add the yolks one by one and continue beating just until incorporated, so the volume will not decrease much.
  • In a large bowl, combine the milk, sweetened condensed milk and vanilla, stir until incorporated.
  • Set the bowl with the milk mixture beside the bowl with the beaten egg whites and yolks.
  • Fill a large sauté pan with about 1/4-inch of oil and heat over medium heat until hot, but not smoking, and you see ripples in the oil when you tilt the pan.
  • One at a time, dunk each piece of bread in the milk mixture until soaked, immediately dip into the egg mixture to completely cover, and place the coated slice in the hot oil. Fry for about a minute on one side, until golden brown, flip to the other side and do the same. Add as many bread pieces as will fit into the pan without over-crowding. When finished frying, place the bread pieces on a baking dish covered with paper towels to drain.
  • Traditionally, the “poor gentleman” pieces are placed on a platter, covered with the syrup and refrigerated. But I think they are a thousand times tastier served hot! Cover the pieces with warm syrup, sprinkle chopped almonds on top and serve.
  • If you have leftovers, cover the battered and fried bread pieces with the remaining syrup and almonds, and store covered in the refrigerator. I admit they are also fabulous cold.

Notes

Caballeros Pobres

Crab, Cucumber and Jícama Salad

crab, cucumber and jicama salad
Print Recipe
4.60 from 5 votes

Crab, Cucumber and Jícama Salad

Crab, Cucumber and Jícama Salad recipe from Pati's Mexican Table Season 3, Episode 9 “Pot Luck Party”
Prep Time10 minutes
Cook Time5 minutes
Total Time15 minutes
Course: Salad, Side Dish
Cuisine: Mexican
Keyword: cayenne pepper, cilantro, crab, cucumber, honey, Jicama, lime, Peanuts, tostadas, vinegar
Servings: 4 servings
Author: Pati Jinich

Ingredients

  • 6 tablespoons freshly squeezed lime juice
  • Zest of 2 limes
  • 1/4 teaspoon cayenne pepper or to taste
  • 3 tablespoons rice wine vinegar
  • 1 tablespoon honey
  • 3 tablespoons extra virgin olive oil
  • kosher or coarse sea salt to taste
  • freshly ground black pepper to taste
  • 1 small jícama peeled and julienned
  • 1 large English cucumber peeled, seeded and julienned
  • 3 scallions thinly sliced
  • 1/4 cup roasted peanuts crushed , or more to taste
  • 2 tablespoons chopped cilantro
  • 1 pint jumbo lump crab meat picked through thoroughly for cartilage and shells
  • Romain lettuce to accompany (optional)
  • Tostadas homemade or store-bought, or crackers, to accompany (optional)

Instructions

  • In a large bowl, combine the lime juice and zest, cayenne pepper, rice wine vinegar and honey. Whisk in the olive oil and season with salt and pepper to taste.
  • Add the jícama, cucumber, scallions, peanuts and cilantro and toss well to combine. Then, add the crab and gently toss, taking care not to break up the crab meat. Serve over lettuce or in individual cups accompanied by tostadas or crackers.

Notes

Ensalada de Cangrejo, Pepino y Jícama

Dressed Up Mexican Beer

dressed up Mexican beer or michelada
Print Recipe
5 from 4 votes

Dressed Up Mexican Beer

Dressed Up Mexican Beer recipe from Pati's Mexican Table Season 3, Episode 9 “Pot Luck Party”
Prep Time1 minute
Cook Time2 minutes
Total Time3 minutes
Course: Drinks
Cuisine: Mexican
Keyword: beer, hot sauce, lime, Maggi sauce, pati's mexican table, soy sauce, Worcestershire sauce
Servings: 1 beer
Author: Pati Jinich

Ingredients

  • 1 beer mug chilled
  • Kosher or sea salt for coating the rim
  • 1 lime wedge
  • Ice cubes (optional)
  • 2 to 3 tablespoons freshly squeezed lime juice
  • 1 beer preferably Mexican, chilled
  • Dash of hot sauce like Tabasco Cholula or Valentina (optional)
  • Dash of a salty sauce like soy sauce Worcestershire or Maggi Sauce (optional)
  • Pinch of freshly ground black pepper (optional)
  • Pinch of kosher or coarse sea salt (optional)

Instructions

  • Pour a layer of salt onto a small plate. Rub the rim of a chilled beer mug with the lime wedge and dip the rim gently into the salt to coat. Place the ice cubes, if using, into the mug. If making a basic michelada, add the lime juice on top of the ice, then pour in the beer.
  • If making a michelada especial, salt the rim of a chilled beer mug as directed above, then place the optional ingredients, to taste, into the mug. Stir the mixture lightly then pour in the beer.

Notes

Michelada

Sriracha Mezcal Cocktail

Sriracha Mezcal Cocktail
Print Recipe
4.84 from 6 votes

Sriracha Mezcal Cocktail

Sriracha Mezcal Cocktail recipe from Pati's Mexican Table Season 3, Episode 8 “Asian Influences in Mexican Cooking”
Prep Time2 minutes
Cook Time3 minutes
Total Time5 minutes
Course: Drinks
Cuisine: Mexican
Keyword: cocktail, hot suace, lime, mezcal, pati's mexican table, Sriracha sauce
Servings: 6 servings
Author: Pati Jinich

Ingredients

  • 1 1/2 cup mezcal joven (young mezcal)
  • 1/2 cup freshly squeezed lime juice plus more for coating the glass rims
  • 1 liter lime- or lemon-flavored sparkling soda
  • 1/4 cup Sriracha sauce
  • kosher or coarse sea salt for coating the glass rims

Instructions

  • Mix the mezcal, lime juice, soda and Sriracha sauce in a large pitcher. Stir well and add a few ice cubes.
  • Pour a layer of salt onto a small plate. Onto another small plate, squeeze enough lime juice to wet the top rims of the serving glasses. And, one by one, gently dip the top rims of the glasses first into the lime juice, then into the salt to coat. Add a few ice cubes to each glass and pour the cocktail.

Notes

Coctel de Mezcal con Sriracha

Green Beans with Peanuts and Chile de Arbol

green beans with peanuts and chile de arbol
Print Recipe
5 from 4 votes

Green Beans with Peanuts and Chile de Arbol

Green Beans with Peanuts and Chile de Arbol recipe from Pati's Mexican Table Season 3, Episode 8 “Asian Influences in Mexican Cooking”
Prep Time5 minutes
Cook Time6 minutes
Total Time11 minutes
Course: Side Dish
Cuisine: Mexican
Keyword: chicken broth, chiles de arbol, garlic, green beans, pati's mexican table, Peanuts, scallions, soy sauce, Vegetable, Vegetarian
Servings: 4 to 6 servings
Author: Pati Jinich

Ingredients

  • 1 pound green beans or Chinese long beans ends removed and diagonally cut into about 2-inch pieces
  • 1 tablespoon soy sauce
  • 1/4 cup chicken broth
  • 1/2 teaspoon brown sugar
  • 1/2 teaspoon kosher or coarse sea salt
  • 2 tablespoons peanut oil
  • 1/2 cup roasted unsalted peanuts
  • 4 garlic cloves minced or pressed
  • 3 Chiles de Arbol stemmed and thinly sliced
  • 4 to 6 scallions thinly sliced, light green and white parts only

Instructions

  • Bring salted water to a boil, then add the sliced green beans and cook uncovered for 2 to 3 minutes until al dente. Strain beans and set aside.
  • Combine the soy sauce, chicken broth, sugar and salt and mix well.
  • Heat the peanut oil over high heat in a large heavy skillet until hot but not smoking. Add the peanuts and fry, stirring constantly, for about 20 seconds (careful, they brown faster than it seems!). Add the garlic, stir, add the chiles de árbol, stir, add the scallions and stir.
  • Add the green beans to skillet and mix to combine all the ingredients, and finally pour in soy sauce mixture. Let it all cook for 3 to 4 minutes. Serve immediately or turn off the heat and cover to keep warm.

Notes

Ejotes con Cacahuate y Chile de Árbol

Amaranth and Panko Crispy Chicken with a Sweet and Spicy Crema Dipping Sauce

Amaranth Panko Crispy Chicken
Print Recipe
5 from 3 votes

Amaranth and Panko Crispy Chicken with a Sweet and Spicy Crema Dipping Sauce

Amaranth and Panko Crispy Chicken with a Sweet and Spicy Crema Dipping Sauce recipe from Pati's Mexican Table Season 3, Episode 8 “Asian Influences in Mexican Cooking”
Prep Time15 minutes
Cook Time6 minutes
Total Time21 minutes
Course: Main Course
Cuisine: Mexican
Keyword: amaranth seeds, chicken, fried, Maggi sauce, mexican crema, panko, pati's mexican table, Sriracha sauce, Sweetened Condensed Milk
Servings: 6 servings
Author: Pati Jinich

Ingredients

For the chicken:

  • 2 large eggs
  • 1/4 cup milk
  • 1 cup panko breadcrumbs
  • 1 cup amaranth seeds (if not using amaranth, add another cup of panko)
  • 1/2 teaspoon kosher or coarse sea salt or to taste
  • 6 boneless skinless chicken breasts pounded thin
  • vegetable oil for cooking the chicken

For the dipping sauce:

  • 1/4 cup Sriracha sauce
  • 1 cup Mexican crema or Latin-style cream or substitute sour cream
  • 1 teaspoon Maggi sauce
  • 1 tablespoon sweetened condensed milk

Instructions

To make the dipping sauce:

  • In a mixing bowl, combine the Sriracha sauce with the Mexican crema, the Maggi sauce and the sweetened condensed milk until fully mixed.

To make the chicken:

  • Place 1 chicken breast at a time in between 2 sheets of parchment paper or plastic wrap and pound with a meat mallet or skillet, or roll with rolling pin, to flatten. In a medium-to-large bowl, beat together the eggs and milk. In another bowl or on a plate, combine the panko breadcrumbs, amaranth seeds and salt.
  • Submerge each chicken breast in the egg mixture, then coat it on both sides, pressing slightly, with the panko-amaranth mixture so the whole breast is covered. Set aside on a cutting board or baking sheet. If making ahead, layer sheets of plastic wrap or parchment paper between the prepared breasts, wrap tightly, and refrigerate or freeze.
  • Pour enough oil into a large skillet to reach 1/4-inch up the sides. Heat the oil over medium heat for about 2 to 3 minutes until it is hot but not smoking, then place as many chicken breasts as will fit in a single layer without crowding the pan. If the edges aren’t bubbling in the oil, raise the heat to medium-high. Resist the urge to move the breasts around in the pan, as this my cause the amaranth coating to fall off. Cook for 2 to 3 minutes on one side until golden brown, then gently flip and repeat on the other side. When the second side has crisped, remove the breasts from the pan and set them on a paper-towel-covered plate or wire rack. Repeat with remaining chicken pieces, adding more oil if needed.
  • If you’re not eating immediately, place the fried chicken breasts in a baking dish and keep them warm in a 250°F oven. Serve with the dipping sauce.

Notes

Pollo Empanizado con Panko y Amaranto con Crema Picante

Rodrigo-Style Fish

Print Recipe
4.50 from 8 votes

Rodrigo-Style Fish

Rodrigo-Style Fish recipe from Pati's Mexican Table Season 3, Episode 7 "Sugar for Hubby"
Prep Time10 minutes
Cook Time10 minutes
Total Time20 minutes
Course: Main Course
Cuisine: Mexican
Keyword: cilantro, fish, jalapeno, Maggi sauce, Mexican, Mexico City, Pescado, Rodrigo, seafood, Tilapia
Servings: 6 servings
Author: Pati Jinich

Ingredients

For the sauce:

  • 1/2 cup scallions thinly sliced, white and light green parts only
  • 1/2 cup cilantro leaves and upper stems chopped
  • 1/4 cup freshly squeezed lime juice
  • 1/4 cup olive oil
  • 2 tablespoons chopped jalapeño or serrano chile or to taste
  • 1 tablespoon Maggi sauce or soy sauce
  • Kosher or sea salt to taste

For the fish:

  • 6 tilapia fillets about 6 ounces each, or other mild white fish fillets (sea bass, grouper, red snapper or rockfish), rinse and pat dry
  • 1/4 teaspoon kosher or sea salt or to taste
  • Pinch of freshly ground black pepper or to taste
  • All-purpose flour to coat fish fillets
  • Vegetable oil
  • 12 corn tortillas store-bought or homemade

Instructions

To make the sauce:

  • In a small bowl, combine the scallions, cilantro, lime juice, olive oil, chile, and Maggi sauce, and stir to mix well. Set aside for at least 15 minutes. Season with salt to taste, if need be.

For the fish:

  • Sprinkle the fish fillets with the salt and pepper. Spread flour on a large plate and coat each fillet thoroughly on both sides.
  • Heat 1/4-inch of vegetable oil in a large skillet over medium-high heat until hot but not smoking. Add the fish, in batches to avoid crowding, and sear for about 3 minutes, until crisped and browned on the bottom. Don’t fiddle with the fillets, let them brown so they don’t stick to the bottom and can be released. Turn and brown for about 3 minutes on the second side. The fish is ready when the thickest part is cooked through and it flakes easily with a fork. Put the fish on a paper towel-lined baking sheet. Keep warm in a low (250°F) oven, if you won’t eat it in the next 10 minutes.
  • Transfer the fish to a platter and pour the sauce on top. Or, you can do as I do, flake the fish and serve drizzled with the sauce, ready to make tacos. Serve with corn tortillas.

Notes

Pescado Rodrigo

Grilled Pineapple Margarita

grilled pineapple margarita pati jinich
Print Recipe
4 from 7 votes

Grilled Pineapple Margarita

Grilled Pineapple Margarita recipe from Pati's Mexican Table Season 3, Episode 5 “Family Fiesta”
Prep Time10 minutes
Cook Time10 minutes
Total Time20 minutes
Course: Drinks
Cuisine: Mexican
Keyword: agave syrup, cilantro, cocktail, grill recipes, jalapeno, lime, pati's mexican table, pineapple, piquí­n chiles, tequila
Servings: 6 to 8 servings
Author: Pati Jinich

Ingredients

  • Vegetable oil for greasing the grill
  • 1 pineapple peeled, cored, and cut into 1/2-inch rings, crosswise
  • 1 jalapeño chopped, or more to taste
  • 1/4 cup chopped cilantro leaves and upper stems
  • 3 cups pineapple juice
  • 1 cup white or silver tequila
  • 3/4 cup freshly squeezed lime juice
  • 1/2 cup agave syrup or simple syrup
  • 2 tablespoons kosher or coarse sea salt
  • 2 tablespoons ground piquín chile or Mexican dried ground chile
  • 1/2 cup turbinado or dark brown sugar

Instructions

  • Preheat a grill to medium-high heat. Brush the grill with oil and place the pineapple rings flat on the grill, and cook, flipping once, until charred on both sides, about 3 minutes. Set aside to cool while you mix the cocktail.
  • In a large pitcher, add the jalapeño, cilantro and 2 tablespoons of the brown sugar. Using a muddler or the handle of a wooden spoon, begin to muddle or crush the ingredients together. Chop all but 2 pieces of the pineapple (will be used for garnish) into 1-inch pieces and muddle those with the jalapeño mixture. Add the tequila, pineapple juice, lime juice and syrup and stir well to combine. Let sit for at least 10 minutes or place in the refrigerator until ready to serve.
  • In a small saucer, combine the remaining sugar, salt and chile powder. Dip the rims of the margarita glasses into another saucer with water to wet the rims, alternately rub rims with half a lime, then dip into the sugar, salt and chile mixture. Fill each glass with the chunky margarita (making sure you are adding the chunks of muddled fruits and vegetables) and garnish with a wedge of pineapple.

Notes

Margarita de Piña Asada

Morelia-Style Fruit Salad

morelia style fruit salad or gazpacho pati jinich
Print Recipe
4.15 from 7 votes

Morelia-Style Fruit Salad

Morelia-Style Fruit Salad recipe from Pati's Mexican Table Season 3, Episode 5 “Family Fiesta”
Prep Time15 minutes
Cook Time10 minutes
Total Time25 minutes
Course: Antojos
Cuisine: Mexican
Keyword: cotija, fruit, Jicama, lime, mango, onion, orange juice, pati's mexican table, pineapple, piquí­n chiles
Servings: 6 servings
Author: Pati Jinich

Ingredients

  • 2 cups peeled and diced ripe mango
  • 2 cups peeled and diced pineapple
  • 2 cups peeled and diced jícama
  • 3 cups freshly squeezed orange juice
  • 6 tablespoons freshly squeezed lime juice
  • 6 tablespoons finely chopped white onion
  • 3/4 cup finely crumbled queso Cotija or substitute queso fresco, mild feta, dried ricotta or Romano cheese
  • To taste kosher or coarse sea salt
  • To taste dried ground piquín chile or Mexican dried ground chile

Instructions

To make individual gazpachos:

  • In a cup, add a layer of mango, pineapple, jícama, a tablespoon of onion, a tablespoon of queso; then another layer of mango, pineapple, jícama, and another tablespoon of queso. Pour in 1/2 cup orange juice, a tablespoon of lime juice, and sprinkle salt and ground chile to taste. Repeat to make 6 individual cups.

To make for all:

  • Mix all the ingredients in a large mixing bowl to your taste!

Notes

Gazpacho Moreliano

Raw Salsa Verde with Avocado

salsa verde or tomatillo salsa
Print Recipe
4.86 from 7 votes

Raw Salsa Verde with Avocado

Raw Salsa Verde with Avocado recipe from Pati's Mexican Table Season 3, Episode 5 “Family Fiesta”
Prep Time5 minutes
Cook Time5 minutes
Total Time10 minutes
Course: Sauce
Cuisine: Mexican
Keyword: Avocado, cilantro, jalapeno, onion, pati's mexican table, Salsa, serrano chiles, tomatillos
Servings: 2 cups
Author: Pati Jinich

Ingredients

  • 1 pound tomatillos husks removed, rinsed and halved
  • 1 ripe Mexican avocado halved, pitted, meat scooped out
  • 2 tablespoons coarsely chopped white onion
  • 1/4 cup coarsely chopped cilantro leaves and top part of stems
  • 1 jalapeño or serrano chile
  • 3/4 teaspoon kosher or coarse sea salt or to taste

Instructions

  • Combine the tomatillos, avocado, onion, cilantro, chile (you can add half of the chile first, and add more if you want more heat…) and salt in a blender or food processor. Puree until smooth.

Notes

Salsa Verde Cruda con Aguacate

Papaya Fruit Cocktail

Print Recipe
5 from 2 votes

Papaya Fruit Cocktail

Papaya Fruit Cocktail recipe from Pati's Mexican Table Season 3, Episode 4 “Meals in a Minute”
Prep Time10 minutes
Total Time10 minutes
Course: Dessert, Sauce
Cuisine: Mexican
Keyword: agave syrup, honey, lime, mint, papaya, pati's mexican table
Servings: 4 servings as cocktail, 10 as relish
Author: Pati Jinich

Ingredients

  • 6 cups ripe papaya diced peeled and seeded
  • Zest of 1 lime
  • 6 tablespoons freshly squeezed lime juice
  • 1 to 2 tablespoons agave syrup or honey maple syrup, or sugar, or to taste
  • 2 tablespoons finely chopped fresh mint leaves

Instructions

  • In a large mixing bowl, combine diced papaya, lime zest, lime juice, and agave syrup, or other sweetener, and toss well. Sprinkle on finely chopped fresh mint to garnish. Serve with the pound cake or on its own.

Notes

Coctel de Papaya

Pico de Gallo Salsa

pico de gallo pati jinich
Print Recipe
4.34 from 6 votes

Pico de Gallo Salsa

Pico de Gallo Salsa recipe from Pati's Mexican Table Season 3, Episode 3 “My Three Favorite Boys”
Prep Time10 minutes
Cook Time5 minutes
Total Time15 minutes
Course: Sauce
Cuisine: Mexican
Keyword: cilantro, jalapeno, lime, onion, Pico de Gallo, serrano chiles, Tomatoes
Servings: 4 cups
Author: Pati Jinich

Ingredients

  • 1 pound ripe tomatoes cored and chopped (about 3 cups)
  • 1/2 cup finely chopped white onion
  • 1 jalapeño or serrano chile finely chopped, or to taste
  • 1/2 cup coarsely chopped cilantro leaves and top part of stems or to taste
  • 2 to 3 tablespoons freshly squeezed lime juice or to taste
  • 2 tablespoons olive oil optional
  • 1 teaspoon kosher or coarse sea salt or to taste

Instructions

  • Place the tomatoes, onion, chile, cilantro, lime juice, olive oil (if using) and salt in a bowl and toss well. Let it sit for at least 5 minutes before serving. Store any leftovers, covered, in the refrigerator.

Notes

Pico de Gallo

Grilled Cheese and Bean Heroes

molletes pati jinich
Print Recipe
4.80 from 5 votes

Grilled Cheese and Bean Heroes

Grilled Cheese and Bean Heroes recipe from Pati's Mexican Table Season 3, Episode 3 “My Three Favorite Boys”
Prep Time5 minutes
Cook Time8 minutes
Total Time13 minutes
Course: Antojos, Main Course
Cuisine: Mexican
Keyword: Avocado, bacon, bolillo, bread, Chorizo, ham, Monterrey Jack cheese, mozzarella, Mushroom, Oaxaca cheese, Pico de Gallo, refried beans, telera, turkey
Servings: 4 to 6 servings
Author: Pati Jinich

Ingredients

  • 4 teleras, bolillos, Portuguese buns, or baguettes cut into 5- to 6-inch pieces
  • 2 cups refried beans homemade or store-bought
  • 2 cups (about 8 ounces) shredded Oaxaca cheese, mozzarella, Monterrey Jack or mild cheddar
  • Traditional pico de gallo or other salsa of your choice

Optional extra toppings:

  • Mexican-style chorizo crumbled and fried
  • Crisped bacon
  • Turkey or ham
  • Sautéed mushrooms
  • Sliced avocado

Instructions

  • Preheat the oven to 350°F. Slice the bread in half lengthwise. Spread each piece with 3 to 4 tablespoons of refried beans and top with 3 to 4 tablespoons of grated cheese. Arrange the molletes on a baking sheet as you make them. If you want to add more toppings like ham, turkey, bacon or chorizo, sprinkle them on top of the cheese.
  • When they are all assembled, bake until the cheese has melted and the bread has a nice toasted crust on the bottom and around the edges, 8 to 10 minutes. Eat while hot. Serve with pico de gallo, or your favorite salsa, on the side.

Notes

Molletes

Mexican Chocolate Donuts

Print Recipe
4 from 7 votes

Mexican Chocolate Donuts

Mexican Chocolate Donuts recipe from Pati's Mexican Table Season 3, Episode 2 “Pati’s Texican”
Prep Time15 minutes
Cook Time7 minutes
Total Time22 minutes
Course: Breakfast, Dessert
Cuisine: Mexican
Keyword: Cajeta, Chocolate, Doughnuts, Dulce de Leche, jam, mexican chocolate, pati's mexican table
Servings: 12 mini donuts or pancakes
Author: Pati Jinich

Ingredients

  • 1 cup milk
  • 2 Mexican chocolate bars, 3 ounces each cut into large chunks
  • 1 1/4 cup all-purpose flour
  • 2 tablespoons sugar
  • 2 teaspoons baking powder
  • 1 teaspoon baking soda
  • Pinch of kosher or coarse sea salt
  • 3 tablespoons melted unsalted butter plus more for greasing the pan
  • 1 large egg
  • Special equipment optional – Ebleskiver filled pancake pan
  • Fillings dulce de leche or cajeta, chocolate and hazelnut spread, jams or preserves
  • Confectioners' sugar optional for dusting

Instructions

  • In a medium saucepan, heat milk over medium-low heat. Add chocolate chunks and stir occasionally until it has dissolved, a few minutes. Remove from heat and using a molinillo or whisk, emulsify or foam as much as you can. Set aside.
  • In a mixing bowl, combine the flour with the sugar, baking powder, baking soda and salt. Add the melted butter to the dry ingredients as well as the beaten egg and start to mix with a spatula. Slowly, pour the Mexican chocolate milk, mixing fast so the egg will not cook (!) if the milk is still hot. Continue to combine until you get an even and homogeneous batter, just a minute or so. You should have a shiny and a bit runny batter. Taste it: it’s so good! Let it sit for a few minutes, it will fluff up a bit, which is what you want.
  • Meanwhile, heat your special pan or skillet over low to medium-low heat until very hot, about 4 or 5 minutes. Butter the pan and spoon batter into each hole, about 3/4 of the way up each cup. Once you can move the balloons around (like when pancakes are ready to flip), but the batter in the center can still be runny, you can add a half a teaspoon of a filling of your choice. Cover with a bit more batter to fill the cups just a tad beyond the rim. Using two spoons or two wooden skewers, flip the donuts to the other side. Give them a minute or two and remove from the pan. Dust with confectioners' sugar, if desired, (I always do!) and eat while hot.
  • If making normal pancakes, cook as regular pancakes. Heat the skillet over medium-low heat until very hot. Grease with unsalted butter and ladle batter into the pan. Flip once the top shows bubbles and the bottom is cooked enough to be released from the pan. Cook on the other side for a minute or two and serve. Add the fillings as toppings instead of as a filling.

Notes

Donas de Chocolate Mexicano

Salsa Macha

Salsa Macha is a very thick and unusual salsa that comes from the state of Veracruz. Located along the coast of the Gulf of Mexico, it has been for centuries, a gateway for waves of immigrants from all over the world into Mexico (like my paternal grandparents).

Veracruz, being such an important channel for exchange and always immersed in flux, has seen some of the most interesting combinations of ingredients, cooking techniques and traditions. Salsa Macha is an example.

It is made by frying dried chipotle chiles (mainly the morita kind) in a generous amount of olive oil, along with garlic cloves. The last two ingredients courtesy of the Spanish conquest, for sure. Then it is seasoned with salt. Some versions add fresh chiles such as serranos or jalapeños into the mix. Many times peanuts are added and sesame seeds too.

This one here, is my preferred version, and I take the liberty of adding a joyous amount of vinegar and some brown sugar or piloncillo to balance it off. This combination pleases me so much, that I spoon it on crusty bread with much joy.

Since it has a lot of olive oil, the chile paste will sink to the bottom after it rests for a few minutes. You can choose to stir it up and eat it well combined, or you can let it settle, and use the flavored oil.

salsa macha
p.s. The name is a funny one, because macha, is the femenine of the word macho. So it can translate as being a masculine female salsa. Macha can also translate as brave, so you can take your pick!

salsa macha
Print Recipe
4.78 from 9 votes

Salsa Macha

Salsa Macha is a very thick and unusual salsa that comes from the state of Veracruz. Located along the coast of the Gulf of Mexico, it has been for centuries, a gateway for waves of immigrants from all over the world into Mexico (like my paternal grandparents).
Prep Time5 minutes
Cook Time5 minutes
Course: Sauce
Cuisine: Mexican
Keyword: brown sugar, Chipotle, garlic, Peanuts, Sesame Seed, vinegar
Servings: 3 cups
Author: Pati Jinich

Ingredients

  • 2 ounces dried chipotle chiles stemmed, seeded torn into pieces, about 1½ to 2 cups
  • 2 1/2 cups olive oil
  • 1/3 cup raw unsalted peanuts or unsalted other nuts you may prefer such as pecans or pine nuts
  • 4 cloves garlic
  • 2 tablespoons sesame seeds
  • 1 teaspoon kosher or sea salt or to taste
  • 2 tablespoons brown sugar
  • 3 tablespoons white distilled vinegar

Instructions

  • Set a large heavy skillet over medium heat and add the oil. Once the oil is hot, but not smoking, add the garlic cloves. Stir and fry for about one minute, until they start to gain color. Add the chipotle chiles and peanuts, stir and fry for about two minutes. Add the sesame seeds, stir and continue to fry for about a minute. Remove from heat. Carefully transfer all the contents from the skillet into the jar of a blender. Let cool for about 10 minutes.
  • Add the salt, sugar and vinegar. Process until smooth, starting with low speed and building up to high speed. Pour into a container, let cool and refrigerate if the salsa will not be used that day.

Fennel and Lime Crema

This is one of the quickest recipes that I have come up with.

It was just as quick to come up with it, as it was quick to make it.

It was sheer craving: I imagined it to accompany the Potato, Sweet Potato and Granny Smith Latkes, but you can use it to complement so many other things.

fennel and lime crema

It just mixes the already salty and tangy Mexican Cream with the crunchy chopped fennel bulb, fragrant fennel fronds, fresh-squeezed lime juice and salt.

Hey: You may also use it as a vegetable dip, why not?

fennel and lime crema
Print Recipe
4.34 from 3 votes

Fennel and Lime Crema

This is one of the quickest recipes that I have come up with. It was just as quick to come up with it, as it was quick to make it. It just mixes the already salty and tangy Mexican Cream with the crunchy chopped fennel bulb, fragrant fennel fronds, fresh-squeezed lime juice and salt.
Prep Time5 minutes
Cook Time2 minutes
Course: Sauce
Cuisine: Mexican
Keyword: fennel, lime, mexican crema, pati's mexican table
Servings: 1 cups
Author: Pati Jinich

Ingredients

  • 1 cup Mexican style cream
  • 1/2 cup finely diced fennel bulb
  • 1 tablespoon fennel fronds chopped
  • Zest of 1 lime
  • 2 tablespoons fresh squeezed lime juice
  • 1/4 teaspoon kosher or sea salt or to taste

Instructions

  • In a small mixing bowl, combine all the ingredients. Done!

Notes

Crema de Eneldo y Limón 

A Taste of Barrio Chino: Green Beans with Peanuts and Chile de Arbol

Before she died, my maternal grandmother, whom we called Lali (remember I’ve told you about her before?) gave me Gloria Miller’s Thousand Recipe Chinese Cookbook. She was fascinated with Chinese cookery. She was also very good at it. What she loved the most were the stir-fry dishes: fast, tasty and healthy.

So, she bought herself a wok.

I couldn’t begin to count how many wok-made dishes I ate at her house during those long summers I visited her and my grandfather, after they moved to the Californian desert.

After she passed away, that wok found its way into my kitchen. I’ve cherished it. I’ve prized it. I haven’t used it! I’ve dragged it through so many house moves that I’ve also managed to lose its cord. It’s an electric wok. It’s real pretty, too. It’s hers. And in my mind, it is inseparable from her Miller’s cookbook, so I didn’t try to cook “her” Chinese dishes for years. And here and there, I’ve looked for that cord…

Fast-forward many, many years. You know I am on a continuous mission to find fascinating topics to teach for my culinary program at the Mexican Cultural Institute in Washington, DC. As we planned this year’s classes, the topic came up: Asian Influence in Mexican cooking.

Map of Manila-Galeon trading route
{Photo courtesy, Wikimedia Commons}

As a former Mexican policy analyst, I am very familiar with the history of the 250 year-long Acapulco-Manila trading route, which connected China and Mexico early on. How tasty would it be to build a menu that showcased the influence of Asian populations in Mexico, and the beautiful fusions of their cuisines and ours?

The Chinese and the Filipinos were the first ones to come to Mexico, through that Acapulco-Manila trading route, which was the result of the Spaniards’ thirst for more than gold, for more than silver; it was their thirst to find what they called the “Spice Islands.” Find them, they did, in Manila.

For 250 years, huge Spanish-built Manila Galleon ships (known in Mexico as Naos de China) were the means of an incredibly rich exchange that forever changed the culture and cooking of Mexico and Asia. Through trips that lasted for more than six months and carried more than 600 people, in came silk, porcelain, exotic fruits and herbs, huge amounts of spices and new ways of preserving ingredients and cooking techniques; out went tomatoes, zucchini, corn, chiles, avocados, beans, Mexican herbs and many culinary traditions.

Spanish Galeon ship
{Photo courtesy, Wikimedia Commons}

Like many in the Chinese populations in Mexico, my grandmother was an immigrant. She moved to Mexico City from her native Austria, by boat as well, and in her kitchen, became fluent in bridging Austrian and Mexican food. Much in the same way that Chinese immigrants, have built bridges between their cuisine and Mexican food – adapting dishes to use ingredients from the nearest market (jícama instead of watercress, anyone?) and to please the tastes of their Mexican neighbors (chile peppers, please…). It seems to me that it was an understanding and solidarity amongst immigrants that inspired my grandmother’s great appreciation for Chinese cooking.

Well, not only was my grandmother fascinated with Chinese cooking, but a gazillion other Mexicans are, too. We visit Chinese restaurants and cafes, which are proliferated in Mexico City’s Barrio Chino (Chinatown) but even more in the state of Baja California. They tend to have the red lamps and paper dragons and optional chopsticks (thankfully, because as to this day, I haven’t learned to use them…embarrassing, I know) and they have coffee, if you would rather drink it, instead of tea.

This recipe for Green Beans with Cacahautes and Chile de Arbol is one of its highlights. Thanks to Miller’s basics, I could brush up on my stir-frying technique, so the dish turns out just like my grandmother liked her stir fries: tender, crunchy, fresh and full of flavor.

stir fried green beans with peanuts and chile de arbol

I added a double peanut layer, by using peanut oil, that becomes very nutty as the beans cook, as well as a healthy dose of garlic and chile de árbol. It’s become a staple at home.

And you know what? It turns out you don’t need a wok to make stir fries. You just need a thick pot that can withstand high heat and has a large surface: a la Mexican. I found out because, NO, I have not found that electric cord, and NO, I will not buy another wok. In my kitchen, it is only my grandmother’s wok that will remain king: If only in theory, until I find that electric cord…

stir fried green beans with peanuts and chile de arbol
Print Recipe
4.60 from 5 votes

Green Beans with Peanuts and Chile de Arbol

The topic of Asian influence in Mexican cooking turned out to be so fascinating to research, in and out of my kitchen, that I devoted an entire episode of my upcoming Third Season of Pati’s Mexican Table, on Public TV, to this menu. (Yey! It’s in production now. I will be able to share the sizzle reel soon, and it will air in January!) This recipe for Green Beans with Cacahautes and Chile de Arbol is one of its highlights. Thanks to Miller’s basics, I could brush up on my stir-frying technique, so the dish turns out just like my grandmother liked her stir fries: tender, crunchy, fresh and full of flavor.
Prep Time5 minutes
Cook Time6 minutes
Course: Side Dish
Cuisine: Chinese, Mexican
Keyword: chiles de arbol, green bean, Peanuts, Recipe, scallions, soy sauce, stir fry
Servings: 4 servings
Author: Pati Jinich

Ingredients

  • 1 pound green beans ends cut and diagonally sliced in about 2” pieces, or Chinese long beans
  • 1 tablespoon soy sauce
  • 1/4 cup chicken broth
  • 1/2 teaspoon brown sugar
  • 1/2 teaspoon kosher or sea salt
  • 2 tablespoons peanut oil
  • 1/2 cup roasted peanuts
  • 4 garlic cloves minced or pressed
  • 3 to 4 chiles de arbol stemmed and thinly sliced
  • 4 to 6 scallions thinly sliced, light green and white parts only

Instructions

  • Bring salted water to a boil in a large pot, add the sliced green beans and cook, uncovered for 2 to 3 minutes until al dente, drain and set aside.
  • Combine the soy sauce, chicken broth, sugar and salt in a small bowl and mix well.
  • Heat the peanut oil over high heat in a large heavy skillet until hot but not smoking. Add the peanuts, stirring constantly, as they begin to fry for about 20 seconds. Beware, peanuts burn faster than you would think... so don't wait until they look browned. Add the garlic and the chiles de arbol, stir for about 10 seconds, and add the scallions and stir for another 10 to 15 seconds. Add the green beans, stir to combine all the ingredients and finally pour soy sauce mixture, let it all cook for 3 to 4 minutes. Serve immediately.

Notes

Ejotes con Cacahuates y Chile de Arbol

Hearty Bean & Corn Salad with Cilantro Vinaigrette

One of the things that I’m most enthusiastic about in what I do is breaking down myths about Mexican food and also about Mexicans. One of the biggest misconceptions is that Mexican food is greasy, fatty, cheesy and overloaded in heavy amounts of condiments. Some of the dishes that crossed the Mexican border and have become popular in the US, have been re-interpreted and promoted by the US fast food industry. Yet, mega burrito bombs, nachos smothered in cheese, and sizzling fajitas with scoops of sour cream on top are things you will have a really hard time finding in Mexico.

One thing that surprises people who delve a bit more into the Mexican culinary world is how crazy we are about salads. Not taco salads, no, no, no… Wholesome salads that use vegetables and beans and grains and flowers and all kinds of dried chiles and herbs…

It may be that the Mexican use of the word salad “ensalada” doesn’t help much to spread this good information because we usually call “ensalada” when there is lettuce or leafy greens in it. This leaves out chayote en vinagre, calabacitas en escacheche (pickled zucchini salad), nopalitos, and a gazillion other salads named simply by their main ingredient.

Mexican salads are so fascinating that I dedicated an entire chapter to them in my cookbook. They tend to be easy to make, and there always tends to be something exotic or interesting going on. A hibiscus flower vinaigrette, crunchy and watery jícama, or quickly pickled ancho chiles, super crispy and sweet garnishes like caramelized pecans or peanuts, spiced pepitas, or toasted sunflower seeds, just to name some.

Salads are usually dressed up in an oil and vinegar treatment, and Mexican cooks get very creative with them. We whip up vinaigrettes quickly, either in the blender or simply shaking them up in a jar. After they are made they can be refrigerated and re-used, with just a re-shake to emulsify. Every Mexican home that I know, has their home staple vinaigrettes of choice.

Pick a flavor of your choice: say, cilantro! Fresh, grassy, strong.

cilantro

Don’t like cilantro? Pick another one, such as chives, tarragon, mint, parsley… a combination of many.

But stick with me on cilantro for this one. This is one of my regular vinaigrettes. All you do is add the ingredients in a blender, puree, done. Don’t be deterred. In less time than it takes to run to the store for a bottle, you have a tastier one made at home.

cilantro vinaigrette

You can use it in a regular green salad, over tomato and mozzarella, soaking up other cooked vegetables like green beans or asparagus and sprinkled with fresh cheese. I tried it with this combination of corn, hearts of palm and black and garbanzo beans, and we all went wild over it. So many textures, so many flavors, so many colors, so very playful.

It can be your main dish, anytime of the year, with some crusty bread on the side. It can also be a great side salad for your barbecues and picnics in the summertime.

bean and corn salad

bean and corn salad
Print Recipe
4.80 from 5 votes

Hearty Bean & Corn Salad with Cilantro Vinaigrette

Salads are usually dressed up in an oil and vinegar treatment, and Mexican cooks get very creative with them. We whip up vinaigrettes quickly, either in the blender or simply shaking them up in a jar. After they are made they can be refrigerated and re-used, with just a re-shake to emulsify. Every Mexican home that I know, has their home staple vinaigrettes of choice. Pick a flavor of your choice: say, cilantro! Fresh, grassy, strong.
Prep Time5 minutes
Cook Time5 minutes
Course: Salad
Cuisine: Mexican
Keyword: bell peppers, black beans, chickpeas, cilantro, Corn, garbanzo beans, hearts of palm, Recipe, red onion, red wine vinegar, salad, vinaigrette
Servings: 6 to 8 servings
Author: Pati Jinich

Ingredients

For the salad:

  • 1 15.5oz can black beans drained and rinsed, or 1 ¾ cups black beans from the pot , drained
  • 1 15.5oz can garbanzo beans or chickpeas drained and rinsed, or 1 ¾ cups cooked garbanzo beans, drained
  • 1 15.2oz can corn drain and rinsed, or 1 ¾ cup fresh or frozen corn kernels cooked
  • 1 14oz can hearts of palm rinsed and cut into 1/4-inch rounds
  • 1 cup chopped red bell pepper
  • 2 tablespoons finely chopped red onion

For the vinaigrette:

  • 1/2 cup cilantro leaves and upper stems, roughly chopped
  • 1/4 cup olive oil
  • 1/4 cup vegetable oil
  • 1/4 cup red wine vinegar
  • 1 garlic clove peeled
  • 1 teaspoon granulated sugar
  • 1/2 teaspoon kosher or sea salt or more to taste

Instructions

  • Place all the ingredients for the vinaigrette in a blender and puree until smooth. You may make the vinaigrette up to a week ahead and store covered in the refrigerator. If made ahead, whisk with a fork or whisk to re-emulsify prior to using. You may also shake it in the covered container.
  • In a large mixing bowl, combine black beans, garbanzo beans, corn, red bell pepper and red onion. Pour vinaigrette and combine well. Add hearts of palm, gently toss and serve.

Notes

Ensalada de Frijol, Garbanzo y Elote con Vinagreta de Cilantro

Sean’s Cheesy Chipotle Pork Sliders with Avocado Spread

It was my friend Tamara´s birthday party. Her husband, Sean, an American who speaks and acts like a Mexico City native (says a Mexico City native), made the dinner for the 40+ guests. The guests were drinking, eating and laughing until their stomachs were hurting, usual for their home. Sean came up to me when he saw me walk in, gave me a plate, placed two of these sliders on and said, “You are going to like these.”

I ate one. YUM.
I said, “There’s chipotle in them!”
I ate two. OMG.
I said, “I can take that platter”, and ate the remaining four. Of course, he was grilling some more.

No, I didn’t even try his Asian tuna sliders. No, I didn’t try his regular cheeseburger sliders. No, of course, I didn’t try his vegetarian sliders. All I wanted were these Chipotle Pork Sliders. I was hooked.

After I had my fill, I told Sean I had to post his recipe on my blog, as I was sure you all would love them just like I did. He obliged, and I tested his recipe many times giving it a few tweaks (hey, you know, I can’t help myself). I added a bit of onion, garlic and oregano to the meat mix and more chipotle (come on Sean, you talk like a Mexican!). I took some of the mayo out of the avocado spread and added the refreshing chives.

It’s what happens when you share recipes: they’re not yours anymore. They’re under the domain of the recipients who can do whatever they want with them. You killed yourself to make the best-ever sandwich and you hate mustard? Well, the next person printing your recipe may think all the sandwich needs is a little, or a lot of, mustard. I know this to be true, for I’ve heard from many of you wonderful personal touches and spins on my recipes through the comments on this blog. That’s the beauty of passing down recipes!

If you don’t go head over heels over these sliders, tweak them, and go ahead, make them your very own. The underlying notes for these sliders, for me, are: meat, especially pork, and chipotle are heavenly together; the melted cheese adds a rich welcome layer (all of my boys thought so too), and the avocado spread brings in a creaminess and freshness to everything inside that soft bun, it brightens it up (one of my beastly beasts skipped the avocado part, see? oh well..).

Sean uses brioche buns, which have a light sweetness and a soft and fluffy bite. If you find them, great! If you don’t, any mini hamburger buns work just fine. And then again, you may decide to turn these sliders into jumbo size burgers.

Want to go crazy? Top with crumbles of chorizo!

Sean's Cheesy Chipotle Chorizo Sliders

Sean's Cheesy Chipotle Sliders
Print Recipe
5 from 4 votes

Sean’s Cheesy Chipotle Pork Sliders with Avocado Spread

If you don’t go head over heels over these sliders, tweak them, and go ahead, make them your very own. The underlying notes for these sliders, for me, are: meat, especially pork, and chipotle are heavenly together; the melted cheese adds a rich welcome layer (all of my boys thought so too), and the avocado spread brings in a creaminess and freshness to everything inside that soft bun, it brightens it up (one of my beastly beasts skipped the avocado part, see? oh well..).
Prep Time10 minutes
Cook Time7 minutes
Course: Main Course
Cuisine: Mexican
Keyword: Avocado, burger, chipotles in adobo, lime, mayonnaise, Monterrey Jack cheese, Muenster cheese, pati's mexican table, pork
Servings: 16 sliders
Author: Pati Jinich

Ingredients

  • 2 pounds ground pork
  • 2 tablespoons finely chopped white onion
  • 3 garlic cloves finely chopped or pressed in garlic press
  • 3 tablespoons sauce from chipotles in adobo sauce
  • 1 chipotle chile in adobo sauce seeded and finely chopped, more to taste
  • 1 teaspoon dried Mexican oregano
  • 1 teaspoon kosher or sea salt or to taste
  • 1/4 teaspoon freshly ground black pepper
  • olive oil to grease the grill
  • 1 large Mexican avocado halved, pit removed
  • 2 tablespoons mayonnaise
  • 2 tablespoons fresh squeezed lime juice
  • 2 tablespoons chopped chives
  • 1/4 teaspoon kosher salt or to taste
  • 8 slices Monterey Jack or Muenster cheese
  • 16 mini brioche or mini hamburger buns

Instructions

  • Prepare your grill or grill pan over medium heat. While it heats, in a large mixing bowl mix the pork with the onion, garlic, adobo sauce, chipotle chile in adobo sauce, oregano, salt and pepper until well combined. With your hands (I find it helpful if hands are wet), make 16 round patties, about 3/4-inch thick, and place them on a baking sheet or platter.
  • In a medium-mixing bowl, place the avocado pulp and mash with a fork until smooth. Combine with the mayonnaise, lime juice, chives and salt, blend well. Set aside.
  • Once the grill or grill pan is hot, brush generously with olive oil. Place the patties on the grill and flip after 3 to 4 minutes. If adding cheese, place a thin slice of cheese on the already grilled side of the patties. Cook for another 4 minutes.
  • A couple minutes before the patties are ready, place the opened hamburger buns on the upper part of the grill (or after you remove the patties, will be fine too!), and let them warm up.
  • Slather a generous tablespoon or so of the avocado spread on the bottom bun, place a patty on top, and put on the top part of the bun. Eat them while hot!

Notes

Hamburguesitas de Cerdo con Chipotle, Queso y Crema de Aguacate

Santa Clara Cookies

You know what happens when you eat a Santa Clara Cookie?

When you first bite into it, you go through a soft layer with grainy texture that tastes like a moist version of marzipan. But as your teeth sink in they hit the hard crust of a buttery cookie that breaks into the crunchiest of chunks in your mouth. It makes for such tasty contrast that you have to take more bites to understand their beauty. Since one cookie doesn’t explain it, you will reach for another one…

There you go! Another sweet concoction from the nuns of the Santa Clara convent in Puebla whose recipe has been passed down for over a dozen generations. Together with the nuns from Santa Rosa Convent (where Mole Poblano is believed to have been invented) and Santa Monica Convent (where many say Chiles en Nogada come from) they are much to blame for the baroque foods, which mixed European and Mexican ingredients with much passion and devotion, that shaped the cuisine of this city – and has made it an epicenter of gastronomy in Mexico.

Yet it was the nuns from Santa Clara who were most famous for their sweets. You can read what the plaque says outside of the standing convent which shut its doors long ago but left behind a strong legacy and a trail of sweets.

Santa Clara Cookies 1

You can eat most of these sweets in the two block-stretch that makes La Calle de los Dulces “The Sweets Street” where the convent stands. There are sweets shops lined one after another selling truckloads of them.

We went down there this spring to film the Puebla Episode for Season Two. I stood on the street in awe and a bit confused (and hurried by the production company too) not knowing which store to choose from and wanting to sample every kind of sweet from them all.

Santa Clara Cookies 2

The cookies are sold individually wrapped so the base won’t crack and the thick nutty glaze won’t spread. They come in three sizes: gigantic, normal and small. And yes, I ate the cookies that are missing from this beautiful Talavera platter below, while standing right in the middle of the street, telling the producer that I really needed to eat a few before being able to talk about them in front of the camera.

If you saw the episode, you saw me eating them!

Santa Clara Cookies 3

So unique are these cookies, that there are special Santa Clara cookie molds to make them in that exact shape in one swift press. There is also a laborious technique for making the glaze. However, I have tested versions galore in my kitchen and I have a genuine and true short cut that makes any round cookie mold work and an easy way to get the same glaze.

Let’s begin with the glaze.

Traditionally, it is made with Pumpkin Seeds (some companies have gotten away with making the glaze with confectioners sugar, but connoisseurs know not to be tricked!). The thing is, since the Colonial era, the Spanish nuns were keen on making the sweets they knew from back home but with Mexican ingredients. So the pumpkin seeds took their turn in marzipan instead of almonds, hence the Dulce de Pepita. It was a success. The next step was to use this sweet to coat a cookie.

Yet, the laborious part of making the glaze is that pumpkin seeds once hulled are green. Be it for their spiritual beliefs, obsession with purity, or wanting to use same technique as blanching and peeling the almonds for marzipan, the nuns found a way to remove the super thin skins that are completely stuck to the seeds until the seeds reach a shinny ivory white.

To begin with, hulling the seeds out of the outer thick shell is time consuming, we are lucky they are sold already hulled. This thing of removing the thin green skin just complicates it much further…

Santa Clara Cookies 4

To make the glaze like the nuns, you have to soak the seeds overnight either with slaked lime, ashes or baking powder. Then you have to rub them with your hands to peel away the thin skin. But since that won’t remove the skin all the way, you have to rinse and rub them between clean kitchen towels, many times, until they are completely ivory white.

I am one to have patience in the kitchen, but I don’t think I have the patience of Santa Clara nuns…

Santa Clara Cookies 5

I don’t know if the nuns knew then just how healthy and nutritious the pumpkin seed skin is. But if you leave it on, you have a glaze that is just as fabulous but with a light green color. Of course you can test your patience and try the technique for making them ivory white, but if you insist on making a white glaze and don’t want to spend the hours rubbing the seeds, you can substitute the green pumpkin seeds for white slivered almonds!

Whichever nut or seed you decide to use, peeled or not, you need to grind them in a food processor or blender. That is easy enough if you don’t have to peel them… The rest also goes easy as pie.

Make a syrup by mixing water and sugar in a medium sauce pan.

Santa Clara Cookies 6

Once the sugar dissolves, let it thicken to a light syrup, about 10 minutes. See below, just until the syrup drops begin taking their time letting go of the wooden spoon.

Santa Clara Cookies 7

Add the ground seeds or nuts and mix with the syrup and cook for about 3 to 4 minutes. Lastly, add a splash of milk. It makes the glaze be shinny and beautiful, almost like a mirror where you can reflect your soul in: just like the nuns liked it!

Santa Clara Cookies 8

Then you make the cookies.

If you go to Puebla and find a special Santa Clara Cookie mold that’s great! If you don’t, fear not. Spread the dough and grab a round cookie cutter.

I like a 3″ round.

Cut the circles.

Santa Clara Cookies 9

Then use the cookie cutter next size down… Press inside each circle, but don’t go all the way down. That will give you a border to decorate but also a boundary for the glaze to be contained.

Santa Clara Cookies 10

Decorate around the border with a fork.

Santa Clara Cookies 11

Bake the cookies.

Let them cool completely and add the thick glaze on top. Wait until both the cookies and the glaze have cooled down or the glaze will run all over the cookies. You can make both things ahead of time…

Santa Clara Cookies 12

Which cookie tastes better, the one made with thoroughly peeled pumpkin seeds or the one with the un-peeled pumpkin seeds? Both! They are just as good. And the one made with almonds, too.

Which one looks prettier?

As it is well said: Beauty is in the eyes of the beholder. You choose. In any case, don’t wait to get to Puebla, until you do, give these a try.

Print Recipe
4.20 from 5 votes

Santa Clara Cookies

You know what happens when you eat a Santa Clara Cookie? When you first bite into it, you go through a soft layer with grainy texture that tastes like a moist version of marzipan. But as your teeth sink in they hit the hard crust of a buttery cookie that breaks into the crunchiest of chunks in your mouth. It makes for such tasty contrast that you have to take more bites to understand their beauty. Since one cookie doesn’t explain it, you will reach for another one…
Prep Time50 minutes
Cook Time10 minutes
Course: Dessert
Cuisine: Mexican
Keyword: almonds, cookies, Dessert, pepitas, pumpkin seeds, Recipe
Servings: 24 cookies
Author: Pati Jinich

Ingredients

For the dough:

  • 1 4-ounce stick unsalted butter at room temperature, sliced
  • 1 cup confectioners' sugar
  • 1/4 teaspoon baking powder
  • 3 cups flour plus more for rolling out the dough
  • 3 egg yolks
  • 1/2 cup lukewarm water

For the glaze:

  • 2 cups sugar
  • 1/2 cup water
  • 3 cups hulled and unsalted pumpkin seeds may substitute with blanched and slivered almonds
  • 1/2 cup milk

To blanch the pumpkin seeds:

  • 1/2 teaspoon baking powder or baking soda

Instructions

To prepare the dough:

  • In the bowl of a mixer, beat the butter over medium speed until creamy. Reduce speed to lowest setting and gently add the confectioners' sugar and baking powder. Continue mixing until everything is incorporated. Add the flour, one cup at a time, and then the egg yolks one at a time; continue beating for a minute. Pour in the water and continue mixing until the dough is smooth and can form a ball (it will take less than a minute). Wrap the dough in plastic wrap and place it in the refrigerator. Let it cool until it hardens enough to be manageable, at least 1/2 hour (the dough can be kept in the refrigerator for up to a couple days).
  • When ready to bake, preheat the oven to 375 degrees and cover a baking sheet with parchment paper. Place half of the dough on a piece of lightly floured parchment paper, sprinkle some flour over it and then place another piece of parchment paper on top. Use a rolling pin to gently roll out the dough, spreading it evenly about 1/4" thick. Remove the top piece of parchment paper and cut out circles with a round, 3" cookie cutter. With a smaller cookie cutter, make a circular indention in the middle of each cookie, without cutting all the way through the dough (there should be about a 1/4" space between the indentation and the edge). Press the edges of each cookie with a fork as if marking the edges of a pie. Repeat the process with the remaining dough and roll it out again making as many cookies as possible.
  • Space the cookies at least 1/4" apart on a cookie sheet and bake for about 10 minutes, until they are fully cooked and the bottoms are lightly browned. Remove from the oven and let cool; repeat with the remaining cookies.

To prepare the glaze:

  • Like the nuns - Bring water to a boil in a small saucepan, add pumpkin seeds, simmer about 5 minutes and turn off the heat. Let it cool, stir in baking soda or powder and let it sit over night. With your hands, rub the pumpkin seeds between your fingers and thumbs to try to release their skins. The skins will float in the water. Carefully pour out the water, cover again with clean water and drain again. With a slotted spatula, place the pumpkin seeds on a clean kitchen towel, rubbing them so the remaining skins come entirely off. Place the seeds in a bowl, cover them with water, rinse and place them on a towel to dry.
  • Like me - You can skip this part and use normal hulled pumpkin seeds or blanched almonds.
  • In a medium saucepan, place the sugar and 1/2 cup of water over medium low heat. Cook, keeping a close eye on it, until the sugar has completely melted into the water and appears to be a happily bubbling syrup (which should take anywhere from 8 to 10 minutes). Add the ground pumpkin seeds or almonds and stir well, creating a thick paste. Let the mixture cook for another 3 to 4 minutes --it will thicken and become even more pasty. Turn off the heat, pour the milk and stir well. It should be thick yet shiny and liquid. Remove the mixture from the heat and let it cool slightly. Use it to top the cookies but before it hardens. If it does harden, just heat the mixture over low heat with a tablespoon of water until it becomes runny again.
  • Once the cookies are no longer warm to the touch, add the cooled candied pumpkin seed or almond glaze on top with a spoon. 1 to 1 1/2 teaspoons of glaze is more than enough, it spreads as it settles.

Notes

Tortitas de Santa Clara